low beam LINCOLN NAVIGATOR 2019 Owners Manual
[x] Cancel search | Manufacturer: LINCOLN, Model Year: 2019, Model line: NAVIGATOR, Model: LINCOLN NAVIGATOR 2019Pages: 645, PDF Size: 5.02 MB
Page 100 of 645
GENERAL INFORMATION
Condensation in the Exterior FrontLamps and Rear Lamps
Exterior front lamps and rear lamps havevents to accommodate normal changes inair pressure.
Condensation can be a natural by-productof this design. When moist air enters thelamp assembly through the vents, there is apossibility that condensation can occur whenthe temperature is cold. When normalcondensation occurs, a fine mist can form onthe interior of the lens. The fine misteventually clears and exits through the ventsduring normal operation.
Clearing time may take as long as 48 hoursunder dry weather conditions.
Examples of acceptable condensation are:
•The presence of a fine mist (no streaks,drip marks or large droplets).
•A fine mist covers less than 50% of thelens.
Examples of unacceptable condensation are:
•A water puddle inside the lamp.
•Streaks, drip marks or large dropletspresent on the interior of the lens.
If you see any unacceptable condensation,have your vehicle checked by an authorizeddealer.
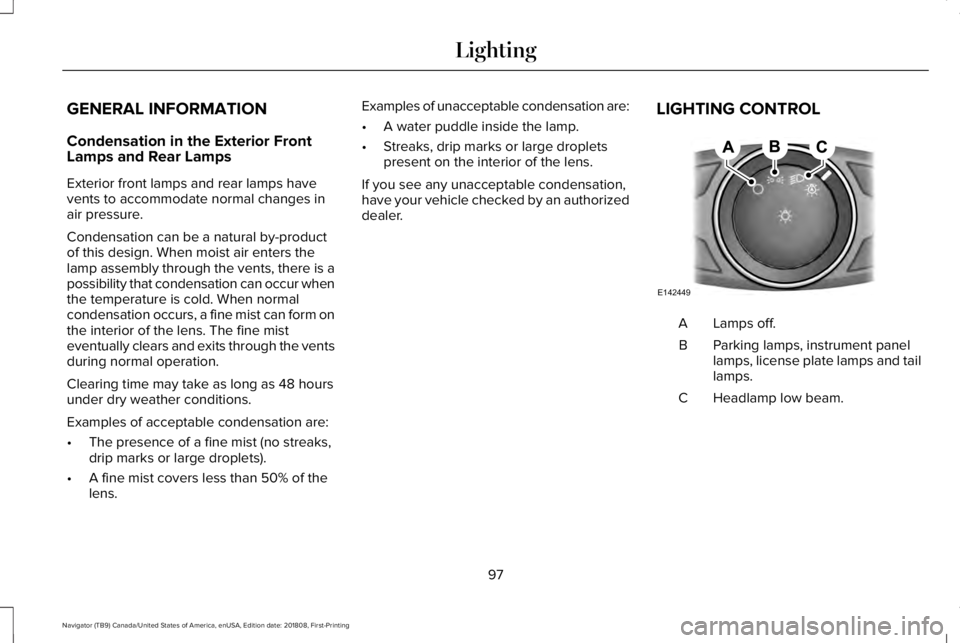
LIGHTING CONTROL
Lamps off.A
Parking lamps, instrument panellamps, license plate lamps and taillamps.
B
Headlamp low beam.C
97
Navigator (TB9) Canada/United States of America, enUSA, Edition date: 201808, First-Printing
LightingE142449
Page 101 of 645
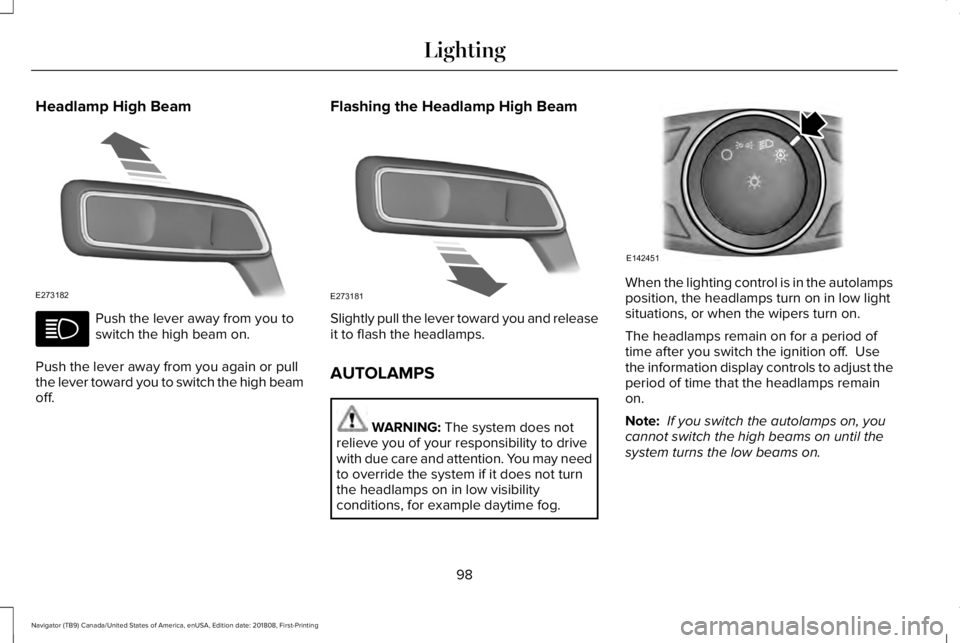
Headlamp High Beam
Push the lever away from you toswitch the high beam on.
Push the lever away from you again or pullthe lever toward you to switch the high beamoff.
Flashing the Headlamp High Beam
Slightly pull the lever toward you and releaseit to flash the headlamps.
AUTOLAMPS
WARNING: The system does notrelieve you of your responsibility to drivewith due care and attention. You may needto override the system if it does not turnthe headlamps on in low visibilityconditions, for example daytime fog.
When the lighting control is in the autolampsposition, the headlamps turn on in low lightsituations, or when the wipers turn on.
The headlamps remain on for a period oftime after you switch the ignition off. Usethe information display controls to adjust theperiod of time that the headlamps remainon.
Note: If you switch the autolamps on, youcannot switch the high beams on until thesystem turns the low beams on.
98
Navigator (TB9) Canada/United States of America, enUSA, Edition date: 201808, First-Printing
LightingE273182 E273181 E142451
Page 103 of 645
Type Two - Configurable
Switch the daytime running lamps on or offusing the information display. SeeInformation Displays (page 120).
The daytime running lamps turn on when:
1. The lamps are on in the informationdisplay.
2. Switching the ignition on.
3. The transmission is not in park (P) forvehicles with automatic transmissions, orreleasing the parking brake for vehicleswith manual transmissions.
4. The lighting control is in the autolampsposition.
5. The headlamps are off.
The other lighting control switch positionsdo not turn on the daytime running lamps.
If the daytime running lamps are off in theinformation display, the lamps stay off in allswitch positions.
AUTOMATIC HIGH BEAM
CONTROL (IF EQUIPPED)
WARNING: The system does notrelieve you of your responsibility to drivewith due care and attention. You may needto override the system if it does not turnthe high beams on or off.
The system turns on high beams if it is darkenough and no other traffic is present. If itdetects an approaching vehicle’s headlampsor tail lamps, or street lighting ahead, thesystem turns off high beams before they candistract other road users. Low beams remainon.
Note:The system may not operate properlyif the sensor is blocked. Keep the windshieldfree from obstruction or damage.
Note:The system may not operate properlyin cold or inclement conditions. You canswitch on the high beams by overriding thesystem.
Note:If the system detects a blockage, forexample bird droppings, bug splatter, snowor ice, the system goes into low beam modeuntil you clear the blockage. A message mayappear in the information display if thecamera is blocked.
Note:Using much larger tires or equippingvehicle accessories such as snowplows canmodify your vehicle's ride height anddegrade automatic high beam controlperformance.
A camera sensor, centrally mounted behindthe windshield of your vehicle, continuouslymonitors conditions to turn the high beamson and off.
Once the system is active, the high beamsturn on if:
•The ambient light level is low enough.
•There is no traffic in front of your vehicle.
•The vehicle speed is greater thanapproximately 32 mph (51 km/h).
100
Navigator (TB9) Canada/United States of America, enUSA, Edition date: 201808, First-Printing
Lighting
Page 104 of 645
The system turns the high beams off if:
•The ambient light level is high enoughthat high beams are not required.
•The system detects an approachingvehicle's headlamps or tail lamps.
•The vehicle speed falls belowapproximately 27 mph (44 km/h).
•The system detects severe rain, snow orfog.
•The camera is blocked.
Switching the System On and Off
Switch the system on using the informationdisplay. See Information Displays (page120).
Switch the lighting control to the autolampsposition. See Autolamps (page 98).
Overriding the System
Push the lever away from you to switchbetween high beam and low beam.
Automatic High Beam Indicator
The indicator illuminates to confirmwhen the system is ready to assist.
FRONT FOG LAMPS
Press to switch the fog lamps on or off.
You can switch the fog lamps on when thelighting control is in any position except offand the high beams are not on.
HEADLAMP LEVELING
This vehicle is equipped with a dynamicautomatic leveling system. The headlampsdo not require additional aim adjustment.
ADAPTIVE HEADLAMPS
Speed Dependent Lamps
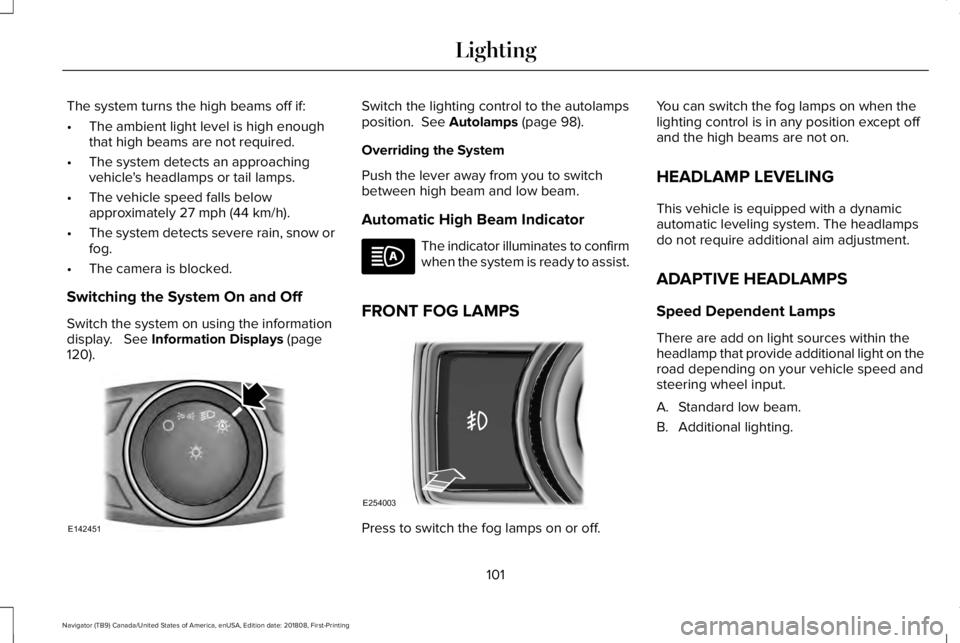
There are add on light sources within theheadlamp that provide additional light on theroad depending on your vehicle speed andsteering wheel input.
A. Standard low beam.
B. Additional lighting.
101
Navigator (TB9) Canada/United States of America, enUSA, Edition date: 201808, First-Printing
LightingE142451 E254003
Page 120 of 645
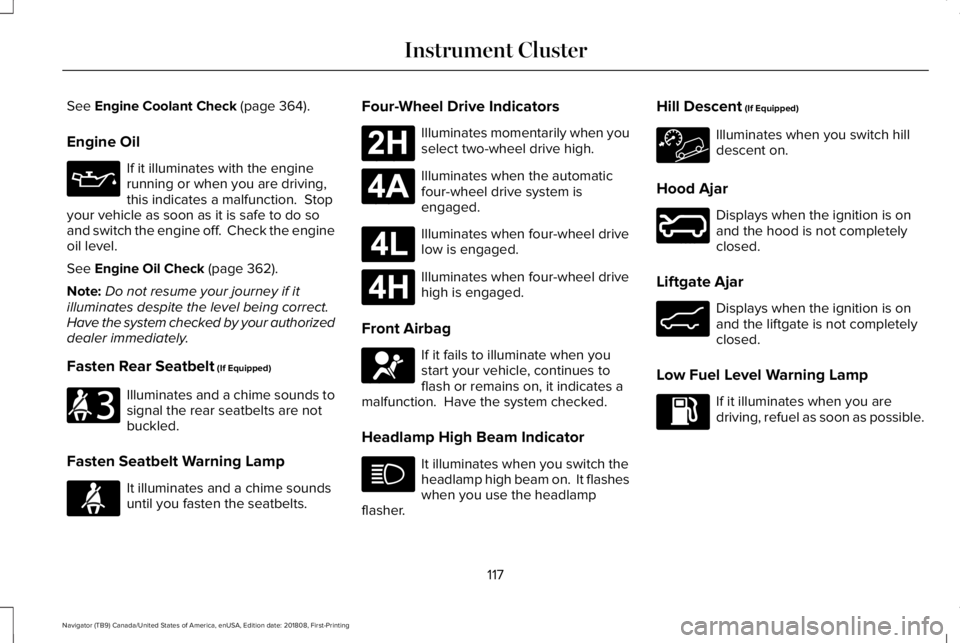
See Engine Coolant Check (page 364).
Engine Oil
If it illuminates with the enginerunning or when you are driving,this indicates a malfunction. Stopyour vehicle as soon as it is safe to do soand switch the engine off. Check the engineoil level.
See Engine Oil Check (page 362).
Note:Do not resume your journey if itilluminates despite the level being correct.Have the system checked by your authorizeddealer immediately.
Fasten Rear Seatbelt (If Equipped)
Illuminates and a chime sounds tosignal the rear seatbelts are notbuckled.
Fasten Seatbelt Warning Lamp
It illuminates and a chime soundsuntil you fasten the seatbelts.
Four-Wheel Drive Indicators
Illuminates momentarily when youselect two-wheel drive high.
Illuminates when the automaticfour-wheel drive system isengaged.
Illuminates when four-wheel drivelow is engaged.
Illuminates when four-wheel drivehigh is engaged.
Front Airbag
If it fails to illuminate when youstart your vehicle, continues toflash or remains on, it indicates amalfunction. Have the system checked.
Headlamp High Beam Indicator
It illuminates when you switch theheadlamp high beam on. It flasheswhen you use the headlampflasher.
Hill Descent (If Equipped)
Illuminates when you switch hilldescent on.
Hood Ajar
Displays when the ignition is onand the hood is not completelyclosed.
Liftgate Ajar
Displays when the ignition is onand the liftgate is not completelyclosed.
Low Fuel Level Warning Lamp
If it illuminates when you aredriving, refuel as soon as possible.
117
Navigator (TB9) Canada/United States of America, enUSA, Edition date: 201808, First-Printing
Instrument Cluster E206718 E71880 E181778 E181781 E181780 E181779 E67017 E246598 E162453
Page 121 of 645
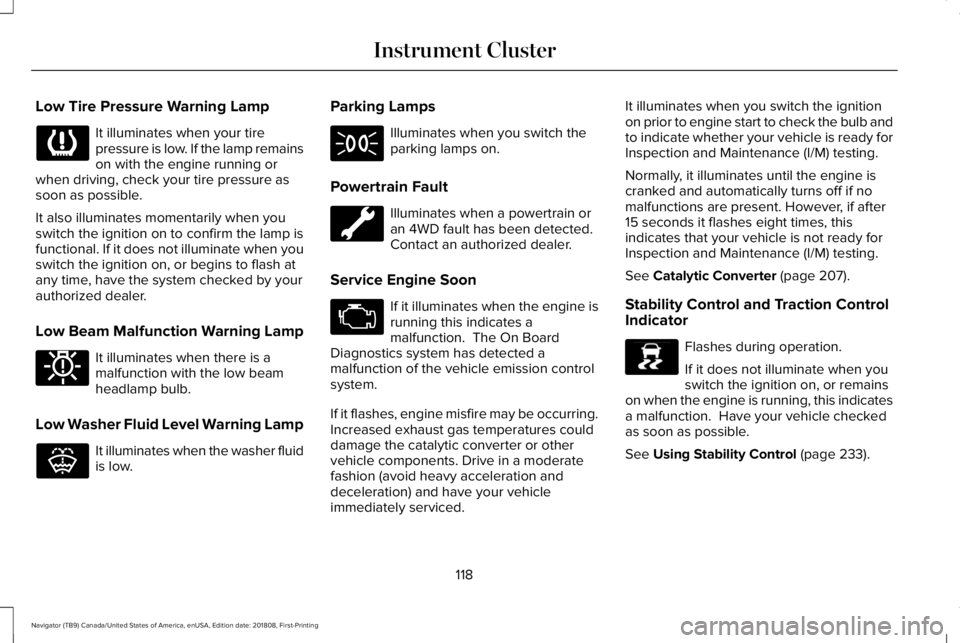
Low Tire Pressure Warning Lamp
It illuminates when your tirepressure is low. If the lamp remainson with the engine running orwhen driving, check your tire pressure assoon as possible.
It also illuminates momentarily when youswitch the ignition on to confirm the lamp isfunctional. If it does not illuminate when youswitch the ignition on, or begins to flash atany time, have the system checked by yourauthorized dealer.
Low Beam Malfunction Warning Lamp
It illuminates when there is amalfunction with the low beamheadlamp bulb.
Low Washer Fluid Level Warning Lamp
It illuminates when the washer fluidis low.
Parking Lamps
Illuminates when you switch theparking lamps on.
Powertrain Fault
Illuminates when a powertrain oran 4WD fault has been detected. Contact an authorized dealer.
Service Engine Soon
If it illuminates when the engine isrunning this indicates amalfunction. The On BoardDiagnostics system has detected amalfunction of the vehicle emission controlsystem.
If it flashes, engine misfire may be occurring.Increased exhaust gas temperatures coulddamage the catalytic converter or othervehicle components. Drive in a moderatefashion (avoid heavy acceleration anddeceleration) and have your vehicleimmediately serviced.
It illuminates when you switch the ignitionon prior to engine start to check the bulb andto indicate whether your vehicle is ready forInspection and Maintenance (I/M) testing.
Normally, it illuminates until the engine iscranked and automatically turns off if nomalfunctions are present. However, if after15 seconds it flashes eight times, thisindicates that your vehicle is not ready forInspection and Maintenance (I/M) testing.
See Catalytic Converter (page 207).
Stability Control and Traction ControlIndicator
Flashes during operation.
If it does not illuminate when youswitch the ignition on, or remainson when the engine is running, this indicatesa malfunction. Have your vehicle checkedas soon as possible.
See Using Stability Control (page 233).
118
Navigator (TB9) Canada/United States of America, enUSA, Edition date: 201808, First-Printing
Instrument Cluster E181350 E132353 E138639
Page 260 of 645
WARNING: Adaptive cruise controlis not a crash warning or avoidancesystem.
The system adjusts your vehicle speed tomaintain the set gap between you and thevehicle in front of you in the same lane. Youcan select four gap settings.
The system uses a radar sensor whichprojects a beam directly in front of yourvehicle.
Note:It is your responsibility to stay alert,drive safely and be in control of the vehicleat all times.
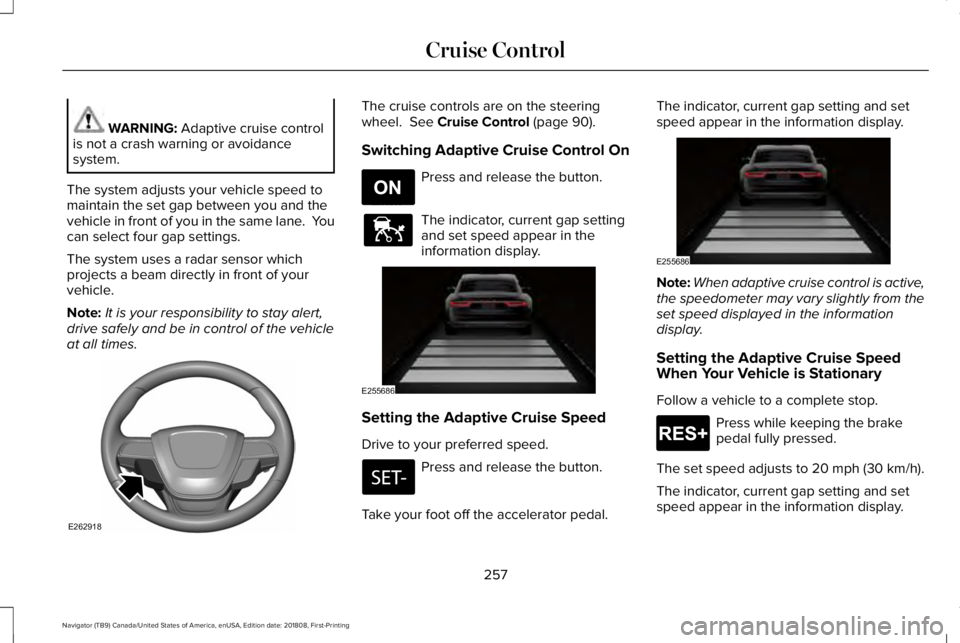
The cruise controls are on the steeringwheel. See Cruise Control (page 90).
Switching Adaptive Cruise Control On
Press and release the button.
The indicator, current gap settingand set speed appear in theinformation display.
Setting the Adaptive Cruise Speed
Drive to your preferred speed.
Press and release the button.
Take your foot off the accelerator pedal.
The indicator, current gap setting and setspeed appear in the information display.
Note:When adaptive cruise control is active,the speedometer may vary slightly from theset speed displayed in the informationdisplay.
Setting the Adaptive Cruise SpeedWhen Your Vehicle is Stationary
Follow a vehicle to a complete stop.
Press while keeping the brakepedal fully pressed.
The set speed adjusts to 20 mph (30 km/h).
The indicator, current gap setting and setspeed appear in the information display.
257
Navigator (TB9) Canada/United States of America, enUSA, Edition date: 201808, First-Printing
Cruise ControlE262918 E265296 E144529 E255686 E255686 E265299
Page 378 of 645
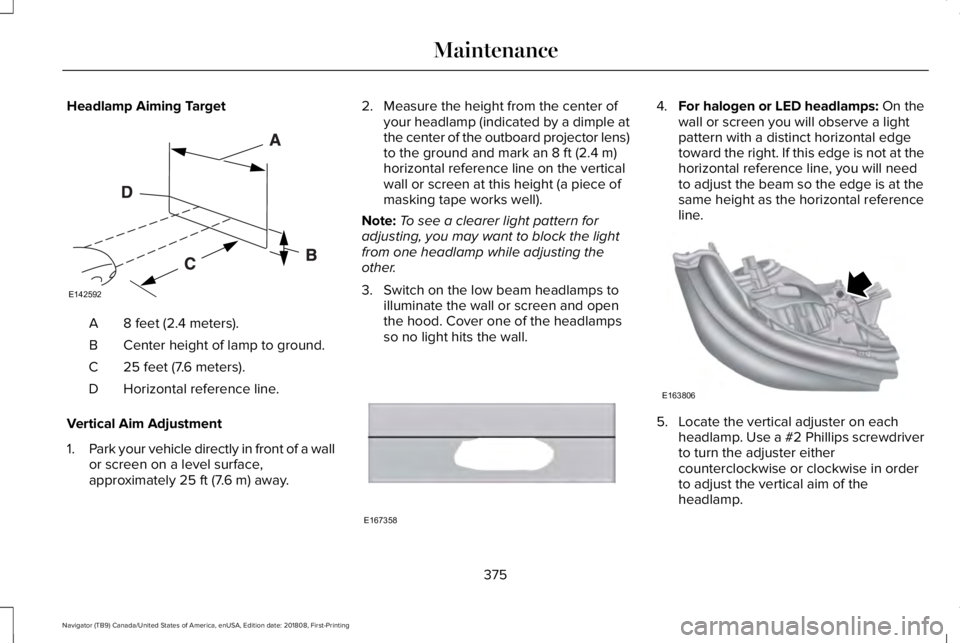
Headlamp Aiming Target
8 feet (2.4 meters).A
Center height of lamp to ground.B
25 feet (7.6 meters).C
Horizontal reference line.D
Vertical Aim Adjustment
1.Park your vehicle directly in front of a wallor screen on a level surface,approximately 25 ft (7.6 m) away.
2. Measure the height from the center ofyour headlamp (indicated by a dimple atthe center of the outboard projector lens)to the ground and mark an 8 ft (2.4 m)horizontal reference line on the verticalwall or screen at this height (a piece ofmasking tape works well).
Note:To see a clearer light pattern foradjusting, you may want to block the lightfrom one headlamp while adjusting theother.
3. Switch on the low beam headlamps toilluminate the wall or screen and openthe hood. Cover one of the headlampsso no light hits the wall.
4.For halogen or LED headlamps: On thewall or screen you will observe a lightpattern with a distinct horizontal edgetoward the right. If this edge is not at thehorizontal reference line, you will needto adjust the beam so the edge is at thesame height as the horizontal referenceline.
5. Locate the vertical adjuster on eachheadlamp. Use a #2 Phillips screwdriverto turn the adjuster eithercounterclockwise or clockwise in orderto adjust the vertical aim of theheadlamp.
375
Navigator (TB9) Canada/United States of America, enUSA, Edition date: 201808, First-Printing
MaintenanceE142592 E167358 E163806
Page 433 of 645
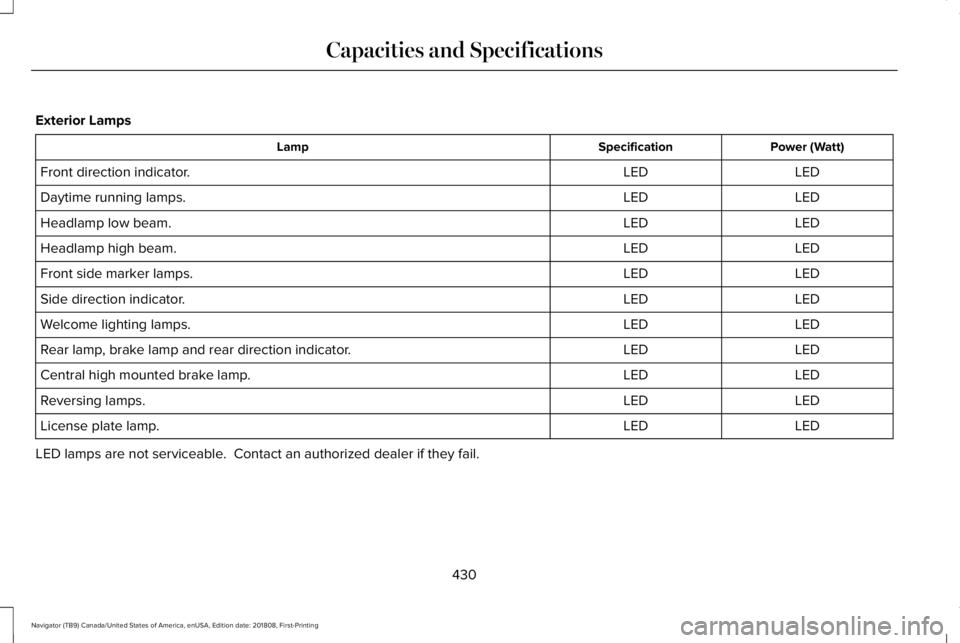
Exterior Lamps
Power (Watt)SpecificationLamp
LEDLEDFront direction indicator.
LEDLEDDaytime running lamps.
LEDLEDHeadlamp low beam.
LEDLEDHeadlamp high beam.
LEDLEDFront side marker lamps.
LEDLEDSide direction indicator.
LEDLEDWelcome lighting lamps.
LEDLEDRear lamp, brake lamp and rear direction indicator.
LEDLEDCentral high mounted brake lamp.
LEDLEDReversing lamps.
LEDLEDLicense plate lamp.
LED lamps are not serviceable. Contact an authorized dealer if they fail.
430
Navigator (TB9) Canada/United States of America, enUSA, Edition date: 201808, First-Printing
Capacities and Specifications
Page 633 of 645
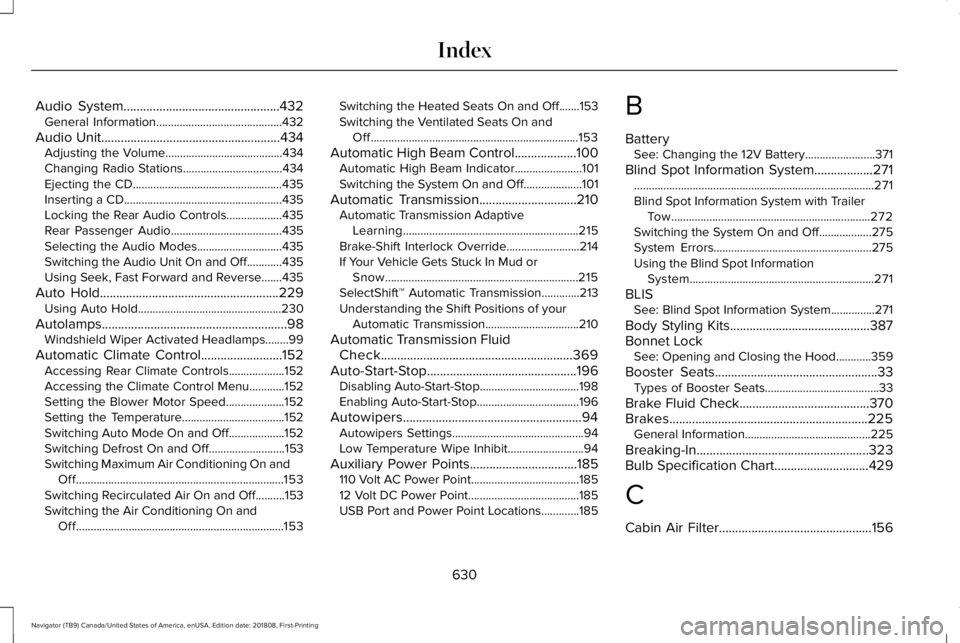
Audio System................................................432General Information...........................................432
Audio Unit.......................................................434Adjusting the Volume........................................434Changing Radio Stations..................................434Ejecting the CD...................................................435Inserting a CD......................................................435Locking the Rear Audio Controls...................435Rear Passenger Audio......................................435Selecting the Audio Modes.............................435Switching the Audio Unit On and Off............435Using Seek, Fast Forward and Reverse.......435
Auto Hold.......................................................229Using Auto Hold.................................................230
Autolamps.........................................................98Windshield Wiper Activated Headlamps........99
Automatic Climate Control.........................152Accessing Rear Climate Controls...................152Accessing the Climate Control Menu............152Setting the Blower Motor Speed....................152Setting the Temperature...................................152Switching Auto Mode On and Off...................152Switching Defrost On and Off..........................153Switching Maximum Air Conditioning On andOff.......................................................................153Switching Recirculated Air On and Off..........153Switching the Air Conditioning On andOff.......................................................................153
Switching the Heated Seats On and Off.......153Switching the Ventilated Seats On andOff.......................................................................153
Automatic High Beam Control...................100Automatic High Beam Indicator.......................101Switching the System On and Off....................101
Automatic Transmission..............................210Automatic Transmission AdaptiveLearning............................................................215Brake-Shift Interlock Override.........................214If Your Vehicle Gets Stuck In Mud orSnow..................................................................215SelectShift™ Automatic Transmission.............213Understanding the Shift Positions of yourAutomatic Transmission................................210
Automatic Transmission FluidCheck...........................................................369Auto-Start-Stop..............................................196Disabling Auto-Start-Stop..................................198Enabling Auto-Start-Stop...................................196
Autowipers.......................................................94Autowipers Settings.............................................94Low Temperature Wipe Inhibit..........................94
Auxiliary Power Points.................................185110 Volt AC Power Point.....................................18512 Volt DC Power Point......................................185USB Port and Power Point Locations.............185
B
BatterySee: Changing the 12V Battery........................371
Blind Spot Information System..................271..................................................................................271Blind Spot Information System with TrailerTow....................................................................272Switching the System On and Off..................275System Errors......................................................275Using the Blind Spot InformationSystem...............................................................271
BLISSee: Blind Spot Information System...............271
Body Styling Kits...........................................387Bonnet LockSee: Opening and Closing the Hood............359
Booster Seats..................................................33Types of Booster Seats.......................................33
Brake Fluid Check........................................370Brakes.............................................................225General Information...........................................225
Breaking-In.....................................................323Bulb Specification Chart.............................429
C
Cabin Air Filter...............................................156
630
Navigator (TB9) Canada/United States of America, enUSA, Edition date: 201808, First-Printing
Index