service indicator LINCOLN NAVIGATOR 2019 Owners Manual
[x] Cancel search | Manufacturer: LINCOLN, Model Year: 2019, Model line: NAVIGATOR, Model: LINCOLN NAVIGATOR 2019Pages: 645, PDF Size: 5.02 MB
Page 4 of 645
Introduction
About This Manual...........................................7
Symbols Glossary.............................................7
Data Recording...............................................10
Perchlorate.......................................................12
Lincoln Automotive Financial Services..........................................................................12
Replacement Parts Recommendation..........................................................................12
Special Notices...............................................13
Mobile Communications Equipment.........14
Export Unique Options..................................14
Environment
Protecting the Environment.........................15
At a Glance
Instrument Panel Overview..........................16
Child Safety
General Information.......................................18
Installing Child Restraints............................20
Booster Seats.................................................33
Child Restraint Positioning..........................36
Child Safety Locks.........................................38
Seatbelts
Principle of Operation..................................39
Fastening the Seatbelts...............................40
Seatbelt Height Adjustment.......................45
Seatbelt Warning Lamp and IndicatorChime...........................................................45
Seatbelt Reminder.........................................46
Child Restraint and Seatbelt Maintenance.........................................................................48
Seatbelt Extension........................................48
Personal Safety System™
Personal Safety System™.............................50
Supplementary Restraints System
Principle of Operation...................................51
Driver and Passenger Airbags...................52
Front Passenger Sensing System.............54
Side Airbags...................................................56
Safety Canopy™..............................................57
Crash Sensors and Airbag Indicator........59
Airbag Disposal..............................................60
Keys and Remote Controls
General Information on Radio Frequencies..........................................................................61
Remote Control..............................................62
Replacing a Lost Key or Remote Control........................................................................66
MyKey™
Principle of Operation..................................67
Creating a MyKey..........................................68
Clearing All MyKeys......................................69
Checking MyKey System Status................69
Using MyKey With Remote Start Systems.........................................................................70
MyKey — Troubleshooting..........................70
Doors and Locks
Locking and Unlocking.................................72
Keyless Entry...................................................76
1
Navigator (TB9) Canada/United States of America, enUSA, Edition date: 201808, First-Printing
Table of Contents
Page 59 of 645
Make sure the front passengersensing system is operatingproperly. See Crash Sensors andAirbag Indicator (page 59).
If the airbag readiness light is lit, do thefollowing:
The driver and adult passengers shouldcheck for objects lodged underneath thefront passenger seat or cargo interfering withthe seat.
If objects are lodged or cargo is interferingwith the seat, please take the following stepsto remove the obstruction:
•Pull your vehicle over.
•Switch your vehicle off.
•Driver or adult passengers should checkfor any objects lodged underneath thefront passenger seat or cargo interferingwith the seat.
•Remove the obstruction(s) (if found).
•Restart your vehicle.
•Wait at least two minutes and verify thatthe airbag readiness light in theinstrument cluster is no longerilluminated.
•If the airbag readiness light in theinstrument cluster remains illuminated,this may or may not be a problem due tothe front passenger sensing system.
Do not attempt to repair or service thesystem. Take your vehicle immediately to anauthorized dealer.
If it is necessary to modify an advanced frontairbag system to accommodate a personwith disabilities, contact your CustomerRelationship Center.
SIDE AIRBAGS
WARNING: Do not place objects ormount equipment on or near the airbagcover, on the side of the front or rearseatbacks, or in areas that may come intocontact with a deploying airbag. Failure tofollow these instructions may increase therisk of personal injury in the event of acrash.
WARNING: Do not use accessoryseat covers. The use of accessory seatcovers may prevent the deployment of theside airbags and increase the risk of injuryin an accident.
WARNING: Do not lean your headon the door. The side airbag could injureyou as it deploys from the side of theseatback.
56
Navigator (TB9) Canada/United States of America, enUSA, Edition date: 201808, First-Printing
Supplementary Restraints SystemE67017
Page 60 of 645
WARNING: Do not attempt to service,repair, or modify the supplementaryrestraint system or associated components.Failure to follow this instruction could resultin personal injury or death.
WARNING: If a supplementaryrestraint system component has deployed,it will not function again. Have the systemand associated components inspected assoon as possible. Failure to follow thisinstruction could result in personal injuryor death.
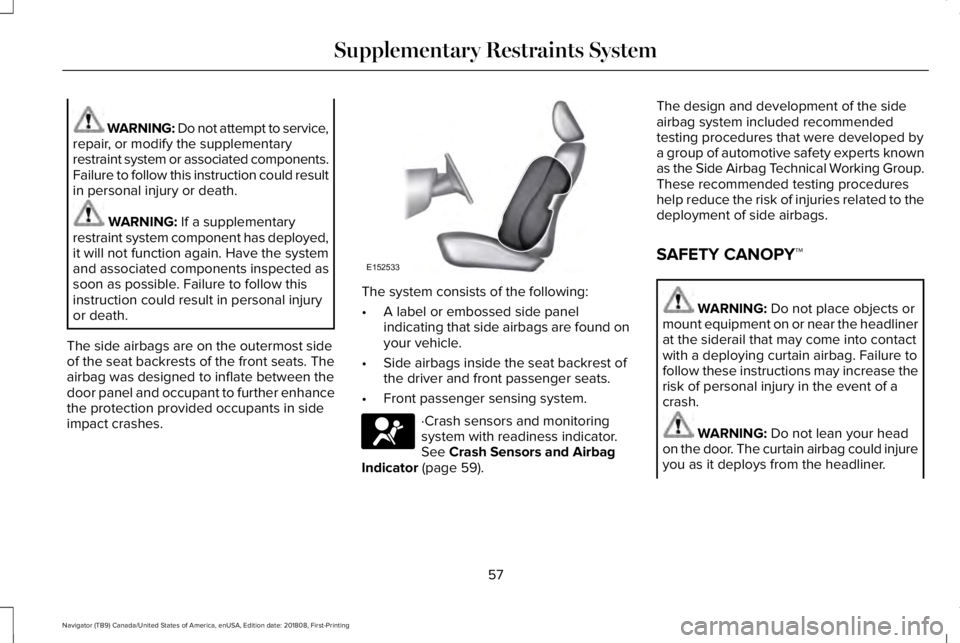
The side airbags are on the outermost sideof the seat backrests of the front seats. Theairbag was designed to inflate between thedoor panel and occupant to further enhancethe protection provided occupants in sideimpact crashes.
The system consists of the following:
•A label or embossed side panelindicating that side airbags are found onyour vehicle.
•Side airbags inside the seat backrest ofthe driver and front passenger seats.
•Front passenger sensing system.
·Crash sensors and monitoringsystem with readiness indicator.See Crash Sensors and AirbagIndicator (page 59).
The design and development of the sideairbag system included recommendedtesting procedures that were developed bya group of automotive safety experts knownas the Side Airbag Technical Working Group.These recommended testing procedureshelp reduce the risk of injuries related to thedeployment of side airbags.
SAFETY CANOPY™
WARNING: Do not place objects ormount equipment on or near the headlinerat the siderail that may come into contactwith a deploying curtain airbag. Failure tofollow these instructions may increase therisk of personal injury in the event of acrash.
WARNING: Do not lean your headon the door. The curtain airbag could injureyou as it deploys from the headliner.
57
Navigator (TB9) Canada/United States of America, enUSA, Edition date: 201808, First-Printing
Supplementary Restraints SystemE152533 E67017
Page 61 of 645
WARNING: Do not attempt to service,repair, or modify the supplementaryrestraint system or associated components.Failure to follow this instruction could resultin personal injury or death.
WARNING: All occupants of yourvehicle, including the driver, should alwaysproperly wear their seatbelts, even whenan airbag supplemental restraint system isprovided. Failure to properly wear yourseatbelt could seriously increase the riskof injury or death.
WARNING: To reduce risk of injury,do not obstruct or place objects in thedeployment path of the airbag.
WARNING: If a supplementaryrestraint system component has deployed,it will not function again. Have the systemand associated components inspected assoon as possible. Failure to follow thisinstruction could result in personal injuryor death.
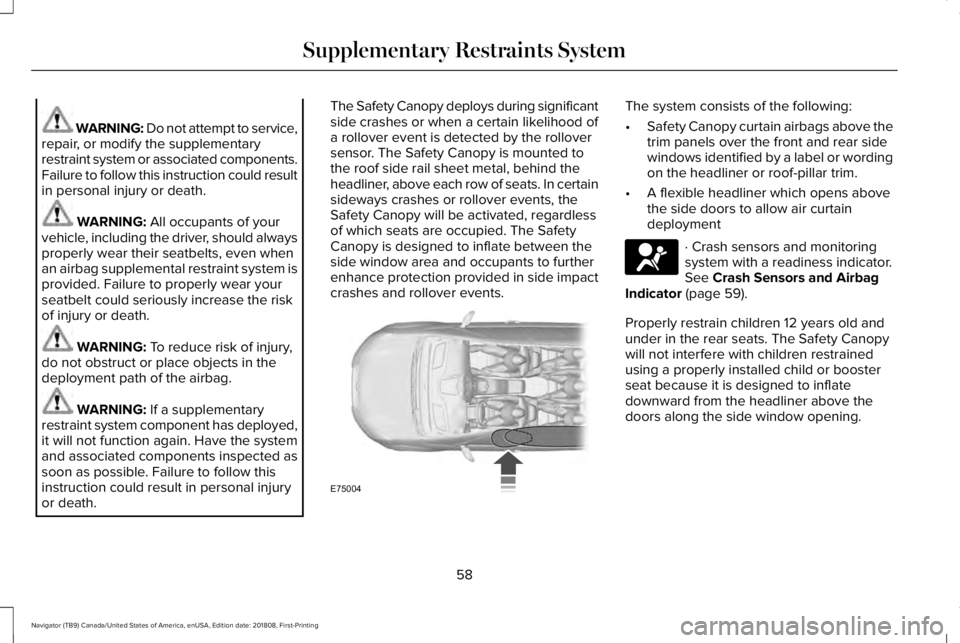
The Safety Canopy deploys during significantside crashes or when a certain likelihood ofa rollover event is detected by the rolloversensor. The Safety Canopy is mounted tothe roof side rail sheet metal, behind theheadliner, above each row of seats. In certainsideways crashes or rollover events, theSafety Canopy will be activated, regardlessof which seats are occupied. The SafetyCanopy is designed to inflate between theside window area and occupants to furtherenhance protection provided in side impactcrashes and rollover events.
The system consists of the following:
•Safety Canopy curtain airbags above thetrim panels over the front and rear sidewindows identified by a label or wordingon the headliner or roof-pillar trim.
•A flexible headliner which opens abovethe side doors to allow air curtaindeployment
· Crash sensors and monitoringsystem with a readiness indicator.See Crash Sensors and AirbagIndicator (page 59).
Properly restrain children 12 years old andunder in the rear seats. The Safety Canopywill not interfere with children restrainedusing a properly installed child or boosterseat because it is designed to inflatedownward from the headliner above thedoors along the side window opening.
58
Navigator (TB9) Canada/United States of America, enUSA, Edition date: 201808, First-Printing
Supplementary Restraints SystemE75004 E67017
Page 62 of 645
The design and development of the SafetyCanopy included recommended testingprocedures that were developed by a groupof automotive safety experts known as theSide Airbag Technical Working Group. Theserecommended testing procedures helpreduce the risk of injuries related to thedeployment of side airbags (including theSafety Canopy).
CRASH SENSORS AND AIRBAG
INDICATOR
WARNING: Modifying or addingequipment to the front end of your vehicle(including hood, bumper system, frame,front end body structure, tow hooks andhood pins) may affect the performance ofthe airbag system, increasing the risk ofinjury. Do not modify or add equipment tothe front end of your vehicle.
Your vehicle has a collection of crash andoccupant sensors which provide informationto the restraints control module whichdeploys (activates) the front seatbeltpretensioners, driver airbag, passengerairbag, rear inflatable belts, seat mountedside airbags, and the Safety Canopy. Basedon the type of crash, the restraints controlmodule will deploy the appropriate safetydevices.
The restraints control module also monitorsthe readiness of the above safety devicesplus the crash and occupant sensors. Thereadiness of the safety system is indicatedby a warning indicator light in the instrumentcluster or by a backup tone if the warninglight is not working. See Instrument Cluster(page 113). Routine maintenance of theairbag is not required.
A difficulty with the system is indicated byone or more of the following:
The readiness light will notilluminate immediately after youswitch the ignition on.
•The readiness light either flashes or stayslit.
•A series of five beeps will be heard. Thetone pattern will repeat periodically untilthe problem, the light or both arerepaired.
If any of these things happen, evenintermittently, have the supplementalrestraint system serviced at an authorizeddealer immediately. Unless serviced, thesystem may not function properly in theevent of a crash.
59
Navigator (TB9) Canada/United States of America, enUSA, Edition date: 201808, First-Printing
Supplementary Restraints SystemE67017
Page 121 of 645
Low Tire Pressure Warning Lamp
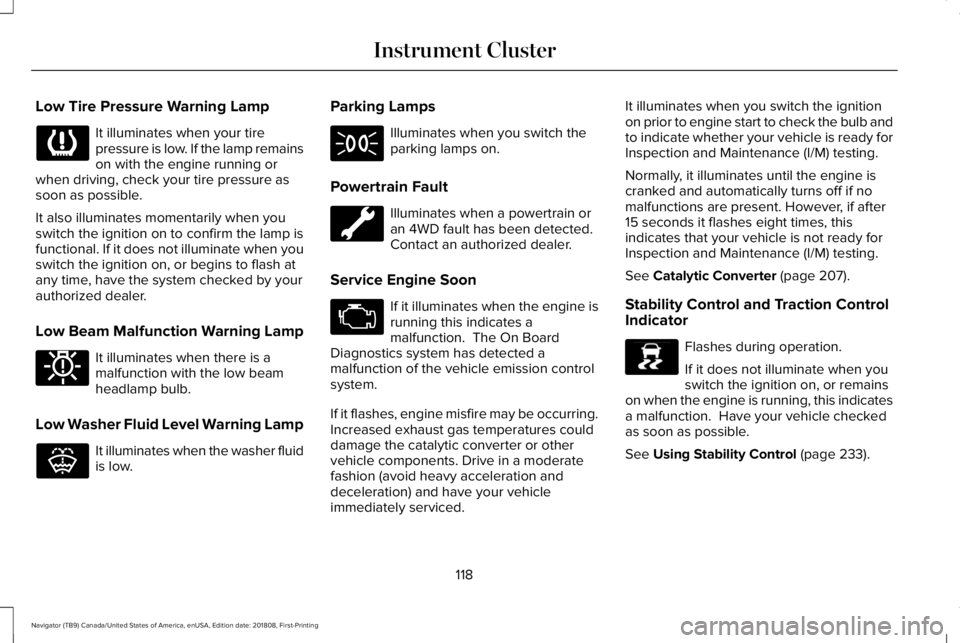
It illuminates when your tirepressure is low. If the lamp remainson with the engine running orwhen driving, check your tire pressure assoon as possible.
It also illuminates momentarily when youswitch the ignition on to confirm the lamp isfunctional. If it does not illuminate when youswitch the ignition on, or begins to flash atany time, have the system checked by yourauthorized dealer.
Low Beam Malfunction Warning Lamp
It illuminates when there is amalfunction with the low beamheadlamp bulb.
Low Washer Fluid Level Warning Lamp
It illuminates when the washer fluidis low.
Parking Lamps
Illuminates when you switch theparking lamps on.
Powertrain Fault
Illuminates when a powertrain oran 4WD fault has been detected. Contact an authorized dealer.
Service Engine Soon
If it illuminates when the engine isrunning this indicates amalfunction. The On BoardDiagnostics system has detected amalfunction of the vehicle emission controlsystem.
If it flashes, engine misfire may be occurring.Increased exhaust gas temperatures coulddamage the catalytic converter or othervehicle components. Drive in a moderatefashion (avoid heavy acceleration anddeceleration) and have your vehicleimmediately serviced.
It illuminates when you switch the ignitionon prior to engine start to check the bulb andto indicate whether your vehicle is ready forInspection and Maintenance (I/M) testing.
Normally, it illuminates until the engine iscranked and automatically turns off if nomalfunctions are present. However, if after15 seconds it flashes eight times, thisindicates that your vehicle is not ready forInspection and Maintenance (I/M) testing.
See Catalytic Converter (page 207).
Stability Control and Traction ControlIndicator
Flashes during operation.
If it does not illuminate when youswitch the ignition on, or remainson when the engine is running, this indicatesa malfunction. Have your vehicle checkedas soon as possible.
See Using Stability Control (page 233).
118
Navigator (TB9) Canada/United States of America, enUSA, Edition date: 201808, First-Printing
Instrument Cluster E181350 E132353 E138639
Page 211 of 645
The scheduled maintenance items listed inscheduled maintenance information areessential to the life and performance of yourvehicle and to its emissions system.
If you use anything other than Lincoln,Motorcraft or Lincoln-authorized parts formaintenance replacements or for service ofcomponents affecting emission control, suchnon-Lincoln parts should be equivalent togenuine Lincoln Motor Company parts inperformance and durability.
Illumination of the service engine soonindicator, charging system warning light orthe temperature warning light, fluid leaks,strange odors, smoke or loss of enginepower could indicate that the emissioncontrol system is not working properly.
An improperly operating or damaged exhaustsystem may allow exhaust to enter thevehicle. Have a damaged or improperlyoperating exhaust system inspected andrepaired immediately.
Do not make any unauthorized changes toyour vehicle or engine. By law, vehicleowners and anyone who manufactures,repairs, services, sells, leases, tradesvehicles, or supervises a fleet of vehicles arenot permitted to intentionally remove anemission control device or prevent it fromworking. Information about your vehicle’semission system is on the Vehicle EmissionControl Information Decal located on or nearthe engine. This decal also lists enginedisplacement.
Please consult your warranty information forcomplete details.
On-Board Diagnostics (OBD-II)
Your vehicle has a computer known as theon-board diagnostics system (OBD-II) thatmonitors the engine’s emission controlsystem. The system protects the environmentby making sure that your vehicle continuesto meet government emission standards. TheOBD-II system also assists a servicetechnician in properly servicing your vehicle.
When the service engine soonindicator illuminates, the OBD-IIsystem has detected a malfunction.Temporary malfunctions may cause theservice engine soon indicator to illuminate.Examples are:
1. Your vehicle has run out of fuel—theengine may misfire or run poorly.
2.Poor fuel quality or water in the fuel—theengine may misfire or run poorly.
3. The fuel fill inlet may not have closedproperly. See Refueling (page 202).
4. Driving through deep water—theelectrical system may be wet.
You can correct these temporarymalfunctions by filling the fuel tank with goodquality fuel, properly closing the fuel fill inletor letting the electrical system dry out. Afterthree driving cycles without these or anyother temporary malfunctions present, theservice engine soon indicator should stay offthe next time you start the engine. A drivingcycle consists of a cold engine startupfollowed by mixed city and highway driving.No additional vehicle service is required.
208
Navigator (TB9) Canada/United States of America, enUSA, Edition date: 201808, First-Printing
Engine Emission Control
Page 212 of 645
If the service engine soon indicator remainson, have your vehicle serviced at the firstavailable opportunity. Although somemalfunctions detected by the OBD-II may nothave symptoms that are apparent, continueddriving with the service engine soon indicatoron can result in increased emissions, lowerfuel economy, reduced engine andtransmission smoothness and lead to morecostly repairs.
Readiness for Inspection andMaintenance (I/M) Testing
Some state and provincial and localgovernments may haveInspection/Maintenance (I/M) programs toinspect the emission control equipment onyour vehicle. Failure to pass this inspectioncould prevent you from getting a vehicleregistration.
If the service engine soon indicatoris on or the bulb does not work,your vehicle may need service.See On-Board Diagnostics.
Your vehicle may not pass the I/M test if theservice engine soon indicator is on or notworking properly (bulb is burned out), or ifthe OBD-II system has determined that someof the emission control systems have notbeen properly checked. In this case, thevehicle is not ready for I/M testing.
If the vehicle’s engine or transmission hasjust been serviced, or the battery hasrecently run down or been replaced, theOBD-II system may indicate that the vehicleis not ready for I/M testing. To determine ifthe vehicle is ready for I/M testing, turn theignition key to the on position for 15 secondswithout cranking the engine. If the serviceengine soon indicator blinks eight times, itmeans that the vehicle is not ready for I/Mtesting; if the service engine soon indicatorstays on solid, it means that your vehicle isready for I/M testing.
The OBD-II system checks the emissioncontrol system during normal driving. Acomplete check may take several days.
If the vehicle is not ready for I/M testing, youcan perform the following driving cycleconsisting of mixed city and highway driving:
1. 15 minutes of steady driving on anexpressway or highway followed by 20minutes of stop-and-go driving with atleast four 30-second idle periods.
2.Allow your vehicle to sit for at least eighthours with the ignition off. Then, start thevehicle and complete the above drivingcycle. The vehicle must warm up to itsnormal operating temperature. Oncestarted, do not turn off the vehicle untilthe above driving cycle is complete.
If the vehicle is still not ready for I/M testing,you need to repeat the above driving cycle.
209
Navigator (TB9) Canada/United States of America, enUSA, Edition date: 201808, First-Printing
Engine Emission Control
Page 219 of 645
USING FOUR-WHEEL DRIVE
Note:For important information regardingsafe operation of this type of vehicle, seeGeneral Information in the Wheels and Tireschapter.
Note:Do not use SLIPPERY, DEEPCONDITIONS or SLOW CLIMB on dry, hardsurfaced roads. Doing so producesexcessive noise, increases tire wear and maydamage drive components. The 4X4 systemin these modes is only intended forconsistently slippery or loose surfaces.
Note:If you select a drive mode that uses4L when your vehicle is moving above 3 mph(5 km/h), the 4WD system does not performa shift. This is normal and should be noreason for concern. Refer to Shifting to orfrom 4L for proper operation.
4X4 Indicator Lights
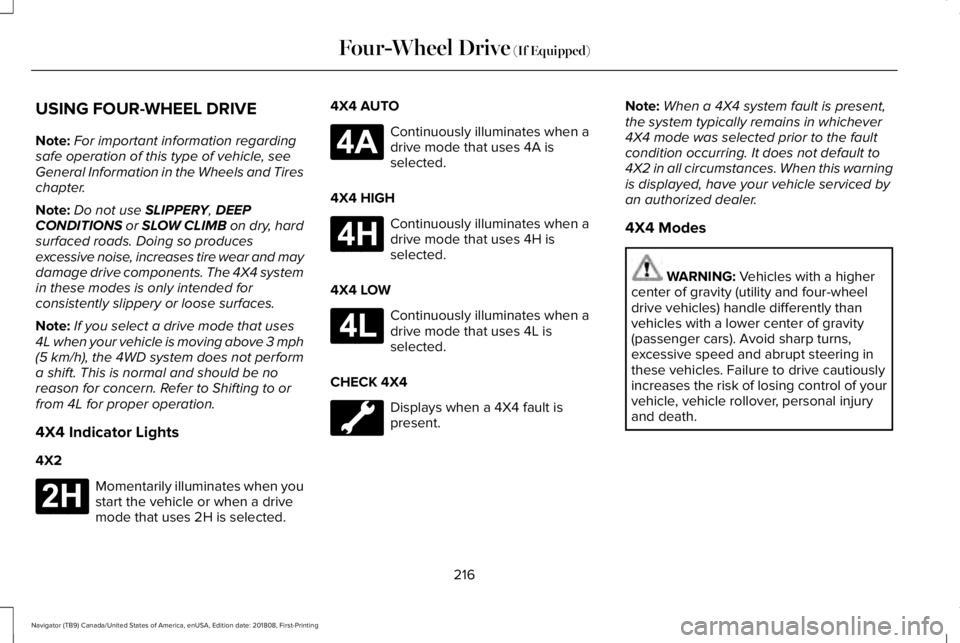
4X2
Momentarily illuminates when youstart the vehicle or when a drivemode that uses 2H is selected.
4X4 AUTO
Continuously illuminates when adrive mode that uses 4A isselected.
4X4 HIGH
Continuously illuminates when adrive mode that uses 4H isselected.
4X4 LOW
Continuously illuminates when adrive mode that uses 4L isselected.
CHECK 4X4
Displays when a 4X4 fault ispresent.
Note:When a 4X4 system fault is present,the system typically remains in whichever4X4 mode was selected prior to the faultcondition occurring. It does not default to4X2 in all circumstances. When this warningis displayed, have your vehicle serviced byan authorized dealer.
4X4 Modes
WARNING: Vehicles with a highercenter of gravity (utility and four-wheeldrive vehicles) handle differently thanvehicles with a lower center of gravity(passenger cars). Avoid sharp turns,excessive speed and abrupt steering inthese vehicles. Failure to drive cautiouslyincreases the risk of losing control of yourvehicle, vehicle rollover, personal injuryand death.
216
Navigator (TB9) Canada/United States of America, enUSA, Edition date: 201808, First-Printing
Four-Wheel Drive (If Equipped)E181778 E181781 E181779 E181780
Page 228 of 645
GENERAL INFORMATION
Note: Occasional brake noise is normal. Ifa metal-to-metal, continuous grinding orcontinuous squeal sound is present, thebrake linings may be worn-out and anauthorized dealer should check them. If thevehicle has continuous vibration or shudderin the steering wheel while braking, anauthorized dealer should check your vehicle.
Note:Brake dust may accumulate on thewheels, even under normal drivingconditions. Some dust is inevitable as thebrakes wear and does not contribute tobrake noise. See Cleaning the Wheels(page 385).
See Warning Lamps andIndicators (page 114).
Wet brakes result in reduced brakingefficiency. Gently press the brake pedal afew times when driving from a car wash orstanding water to dry the brakes.
Brake Over Accelerator
In the event the accelerator pedal becomesstuck or entrapped, apply steady and firmpressure to the brake pedal to slow thevehicle and reduce engine power. If youexperience this condition, apply the brakesand bring your vehicle to a safe stop. Switchthe engine off, move the transmission to park(P) and apply the parking brake. Inspect theaccelerator pedal and the area around it forany items or debris that may be obstructingits movement.If none are found and thecondition persists, have your vehicle towedto the nearest authorized dealer.
Emergency Brake Assist
Emergency brake assist detects when youbrake heavily by measuring the rate at whichyou press the brake pedal. It providesmaximum braking efficiency as long as youpress the pedal. Emergency brake assistcan reduce stopping distances in criticalsituations.
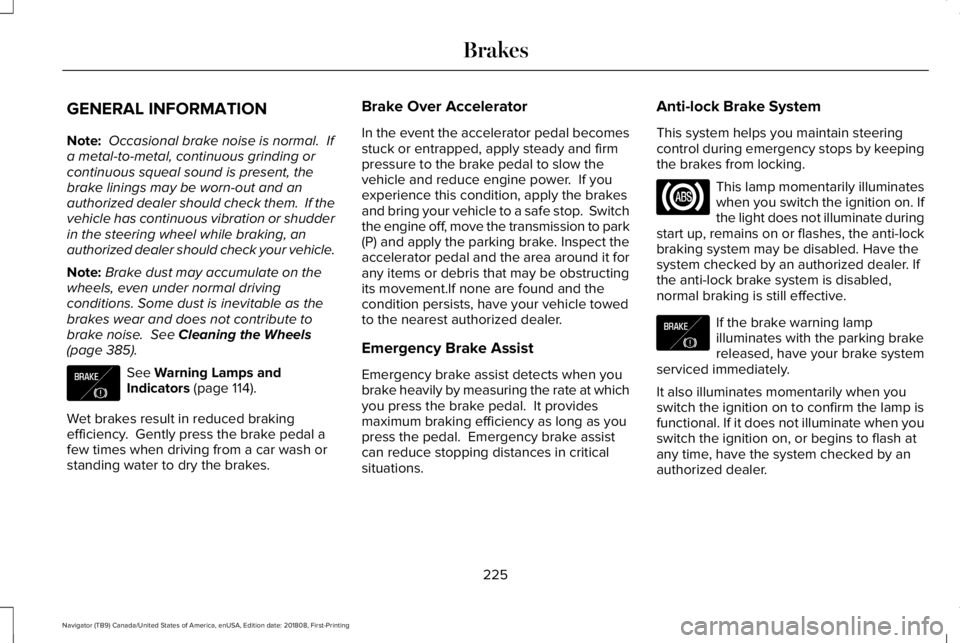
Anti-lock Brake System
This system helps you maintain steeringcontrol during emergency stops by keepingthe brakes from locking.
This lamp momentarily illuminateswhen you switch the ignition on. Ifthe light does not illuminate duringstart up, remains on or flashes, the anti-lockbraking system may be disabled. Have thesystem checked by an authorized dealer. Ifthe anti-lock brake system is disabled,normal braking is still effective.
If the brake warning lampilluminates with the parking brakereleased, have your brake systemserviced immediately.
It also illuminates momentarily when youswitch the ignition on to confirm the lamp isfunctional. If it does not illuminate when youswitch the ignition on, or begins to flash atany time, have the system checked by anauthorized dealer.
225
Navigator (TB9) Canada/United States of America, enUSA, Edition date: 201808, First-Printing
BrakesE138644 E138644