set clock LINCOLN NAVIGATOR 2019 Owners Manual
[x] Cancel search | Manufacturer: LINCOLN, Model Year: 2019, Model line: NAVIGATOR, Model: LINCOLN NAVIGATOR 2019Pages: 645, PDF Size: 5.02 MB
Page 41 of 645
Note:The child restraint must rest tightlyagainst the vehicle seat upon which it isinstalled. It may be necessary to lift orremove the head restraint. See Seats (page158).
CHILD SAFETY LOCKS
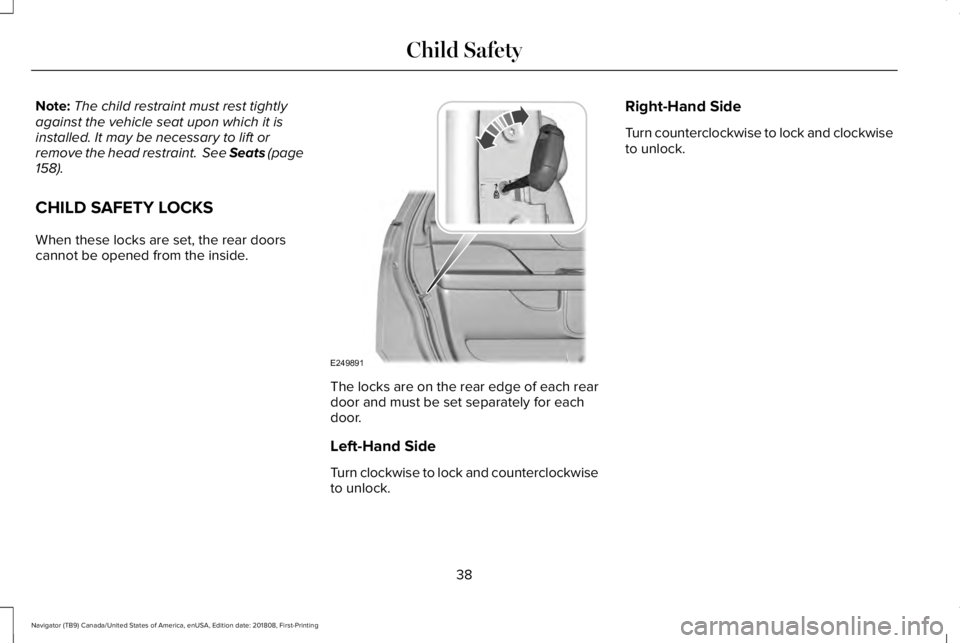
When these locks are set, the rear doorscannot be opened from the inside.
The locks are on the rear edge of each reardoor and must be set separately for eachdoor.
Left-Hand Side
Turn clockwise to lock and counterclockwiseto unlock.
Right-Hand Side
Turn counterclockwise to lock and clockwiseto unlock.
38
Navigator (TB9) Canada/United States of America, enUSA, Edition date: 201808, First-Printing
Child SafetyE249891
Page 45 of 645
3.Pull the larger tongue across the lap andinsert it into the buckle to the right of thecenter seat.
Note:If in constant use, you can leave thebelt buckled in the smaller buckle. When itis not in use, or when you fold or move therear seats, you should release the belt fromthe smaller buckle. Using the tongue of theadjacent seatbelt, press the red button onthe smaller buckle.
Using Seatbelts During Pregnancy
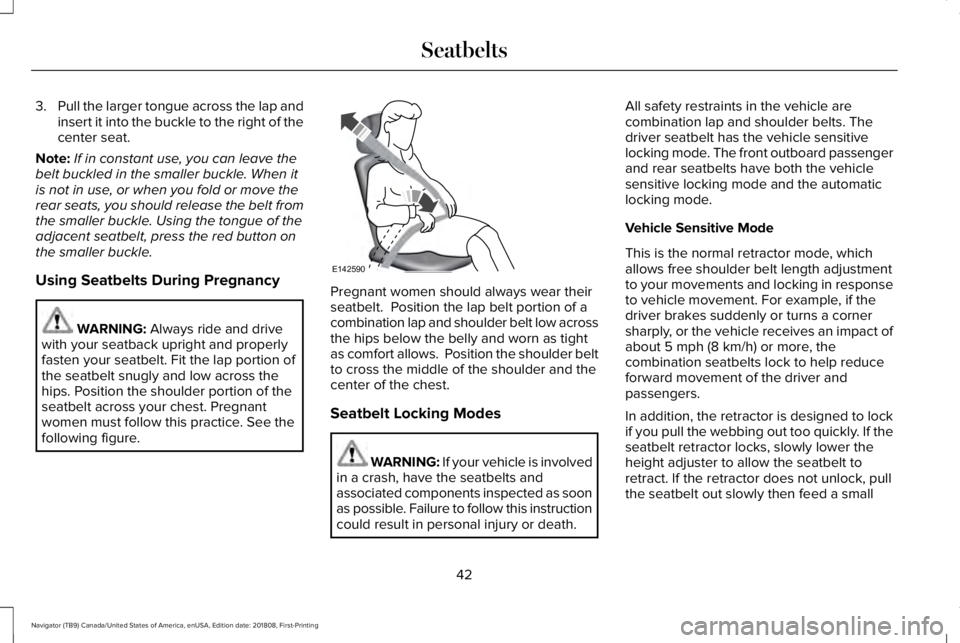
WARNING: Always ride and drivewith your seatback upright and properlyfasten your seatbelt. Fit the lap portion ofthe seatbelt snugly and low across thehips. Position the shoulder portion of theseatbelt across your chest. Pregnantwomen must follow this practice. See thefollowing figure.
Pregnant women should always wear theirseatbelt. Position the lap belt portion of acombination lap and shoulder belt low acrossthe hips below the belly and worn as tightas comfort allows. Position the shoulder beltto cross the middle of the shoulder and thecenter of the chest.
Seatbelt Locking Modes
WARNING: If your vehicle is involvedin a crash, have the seatbelts andassociated components inspected as soonas possible. Failure to follow this instructioncould result in personal injury or death.
All safety restraints in the vehicle arecombination lap and shoulder belts. Thedriver seatbelt has the vehicle sensitivelocking mode. The front outboard passengerand rear seatbelts have both the vehiclesensitive locking mode and the automaticlocking mode.
Vehicle Sensitive Mode
This is the normal retractor mode, whichallows free shoulder belt length adjustmentto your movements and locking in responseto vehicle movement. For example, if thedriver brakes suddenly or turns a cornersharply, or the vehicle receives an impact ofabout 5 mph (8 km/h) or more, thecombination seatbelts lock to help reduceforward movement of the driver andpassengers.
In addition, the retractor is designed to lockif you pull the webbing out too quickly. If theseatbelt retractor locks, slowly lower theheight adjuster to allow the seatbelt toretract. If the retractor does not unlock, pullthe seatbelt out slowly then feed a small
42
Navigator (TB9) Canada/United States of America, enUSA, Edition date: 201808, First-Printing
SeatbeltsE142590
Page 366 of 645
Note:Do not remove the dipstick when theengine is running.
Note: If the oil level is between themaximum and minimum marks, the oil levelis acceptable. Do not add oil.
Note:The oil consumption of new enginesreaches its normal level after approximately3,000 mi (5,000 km).
Adding Engine Oil
WARNING: Do not remove the fillercap when the engine is running.
Do not use supplemental engine oil additivesbecause they are unnecessary and couldlead to engine damage that may not becovered by the vehicle Warranty.
Only use oils certified for gasoline enginesby the American Petroleum Institute (API). An oil with this trademark symbol conformsto the current engine and emission systemprotection standards and fuel economyrequirements of the International LubricantsSpecification Advisory Committee (ILSAC).
To top up the engine oil level do thefollowing:
1. Clean the area surrounding the engineoil filler cap before you remove it.
2. Remove the engine oil filler cap. SeeUnder Hood Overview (page 360). Turnit counterclockwise and remove it.
3. Add engine oil that meets ourspecifications. See Capacities andSpecifications (page 422). You may haveto use a funnel to pour the engine oil intothe opening.
4. Recheck the oil level.
5. If the oil level is correct, replace thedipstick and make sure it is fully seated.
6. Replace the engine oil filler cap. Turn itclockwise until you feel a strongresistance.
Note: Do not add oil further than themaximum mark. Oil levels above themaximum mark may cause engine damage.
Note:Make sure you install the oil filler capcorrectly.
Note:Soak up any spillage with anabsorbent cloth immediately.
OIL CHANGE INDICATOR RESET
Use the information display controls on thesteering wheel to reset the oil changeindicator.
363
Navigator (TB9) Canada/United States of America, enUSA, Edition date: 201808, First-Printing
MaintenanceE142732
Page 375 of 645
WARNING: This vehicle may havemore than one battery. Removing thebattery cables from only one battery doesnot disconnect your vehicle electricalsystem. Make sure you disconnect thebattery cables from all batteries whendisconnecting power. Failure to do so maycause serious personal injury or propertydamage.
Your vehicle is fitted with a Motorcraftmaintenance-free battery which normallydoes not require additional water.
When a battery replacement is required, youmust use a recommended replacementbattery that matches the electricalrequirements of the vehicle.
Note:After cleaning or replacing the battery,make sure you reinstall the battery cover orshield.
Note:If you add electrical accessories orcomponents to the vehicle, it may adverselyaffect the low voltage battery performanceand durability. This may also affect theperformance of other electrical systems inthe vehicle.
For longer, trouble-free operation, keep thetop of the battery clean and dry.
If you see any corrosion on the battery orterminals, remove the cables from theterminals and clean with a wire brush. Youcan neutralize the acid with a solution ofbaking soda and water.
Because your vehicle’s engine iselectronically controlled by a computer, somecontrol conditions are maintained by powerfrom the battery. When the battery isdisconnected or a new battery is installed,the engine must relearn its idle and fuel trimstrategy for optimum driveability andperformance. Flexible fuel vehicles (FFV)must also relearn the ethanol content of thefuel for optimum driveability andperformance.
To restore the settings, do the following:
1. Apply the parking brake.
2. Shift into park (P) or neutral (N).
3. Switch off all accessories.
4. Press the brake pedal and start yourvehicle.
5. Run the engine until it reaches normaloperating temperature. While the engineis warming up, complete the following:Reset the clock. Reset the powerwindows bounce-back feature. SeeWindows and Mirrors (page 105). Resetthe radio station presets. See AudioSystem (page 432).
6. Allow the engine to idle for at least oneminute.
7.Drive the vehicle at least 10 mi (16 km) tocompletely relearn the idle trim and fueltrim strategy.
Note:If you do not allow the engine torelearn the idle and fuel trim strategy, theidle quality of your vehicle may be adverselyaffected until the engine computereventually relearns the idle trim and fuel trimstrategy.
372
Navigator (TB9) Canada/United States of America, enUSA, Edition date: 201808, First-Printing
Maintenance
Page 418 of 645
WARNING: Never place anythingbetween the vehicle jack and your vehicle.
WARNING: It is recommended thatthe wheels of the vehicle be chocked, andthat no person should remain in a vehiclethat is being jacked.
WARNING: Failure to follow theseguidelines could result in an increased riskof loss of vehicle control, injury or death.
Note:The jack does not requiremaintenance or additional lubrication overthe service life of your vehicle.
Note:Jack at the specified locations to avoiddamaging your vehicle.
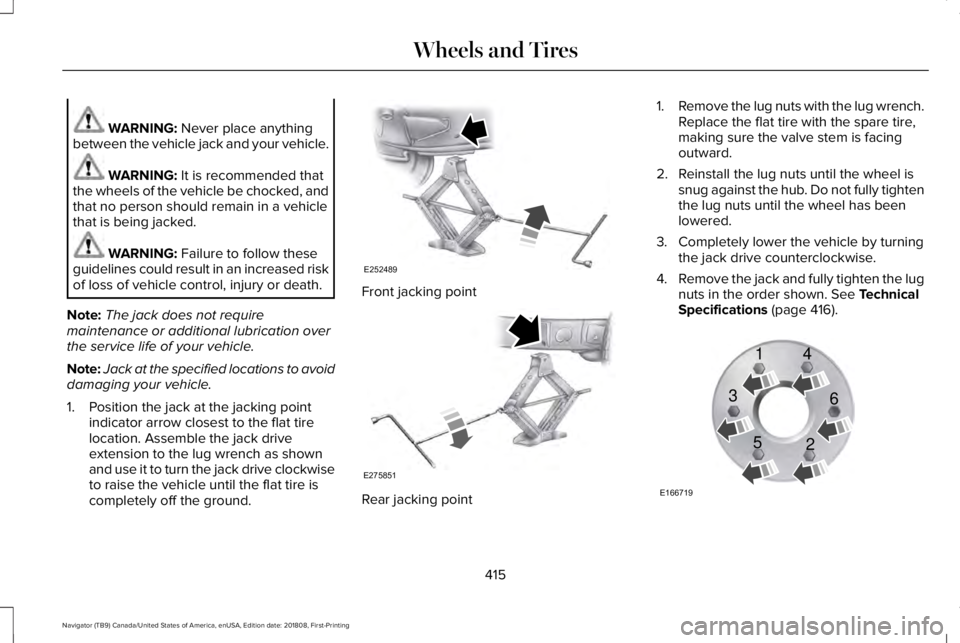
1. Position the jack at the jacking pointindicator arrow closest to the flat tirelocation. Assemble the jack driveextension to the lug wrench as shownand use it to turn the jack drive clockwiseto raise the vehicle until the flat tire iscompletely off the ground.
Front jacking point
Rear jacking point
1.Remove the lug nuts with the lug wrench.Replace the flat tire with the spare tire,making sure the valve stem is facingoutward.
2. Reinstall the lug nuts until the wheel issnug against the hub. Do not fully tightenthe lug nuts until the wheel has beenlowered.
3. Completely lower the vehicle by turningthe jack drive counterclockwise.
4.Remove the jack and fully tighten the lugnuts in the order shown. See TechnicalSpecifications (page 416).
415
Navigator (TB9) Canada/United States of America, enUSA, Edition date: 201808, First-Printing
Wheels and TiresE252489 E275851 E166719
1
3
5 4
6
2
Page 446 of 645
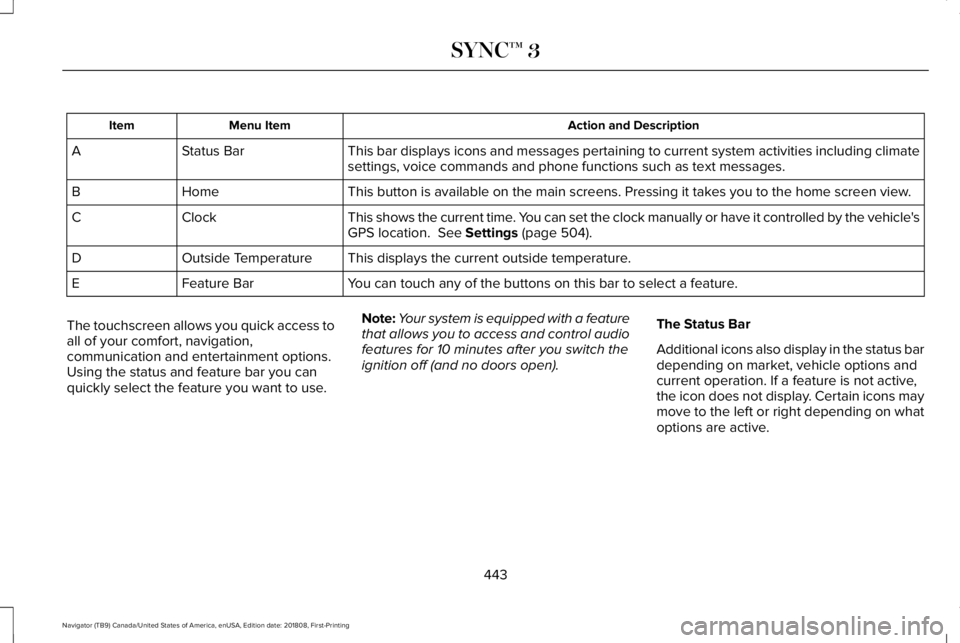
Action and DescriptionMenu ItemItem
This bar displays icons and messages pertaining to current system activities including climatesettings, voice commands and phone functions such as text messages.Status BarA
This button is available on the main screens. Pressing it takes you to the home screen view.HomeB
This shows the current time. You can set the clock manually or have it controlled by the vehicle'sGPS location. See Settings (page 504).ClockC
This displays the current outside temperature.Outside TemperatureD
You can touch any of the buttons on this bar to select a feature.Feature BarE
The touchscreen allows you quick access toall of your comfort, navigation,communication and entertainment options.Using the status and feature bar you canquickly select the feature you want to use.
Note:Your system is equipped with a featurethat allows you to access and control audiofeatures for 10 minutes after you switch theignition off (and no doors open).
The Status Bar
Additional icons also display in the status bardepending on market, vehicle options andcurrent operation. If a feature is not active,the icon does not display. Certain icons maymove to the left or right depending on whatoptions are active.
443
Navigator (TB9) Canada/United States of America, enUSA, Edition date: 201808, First-Printing
SYNC™ 3
Page 510 of 645
Action and DescriptionMenu Item
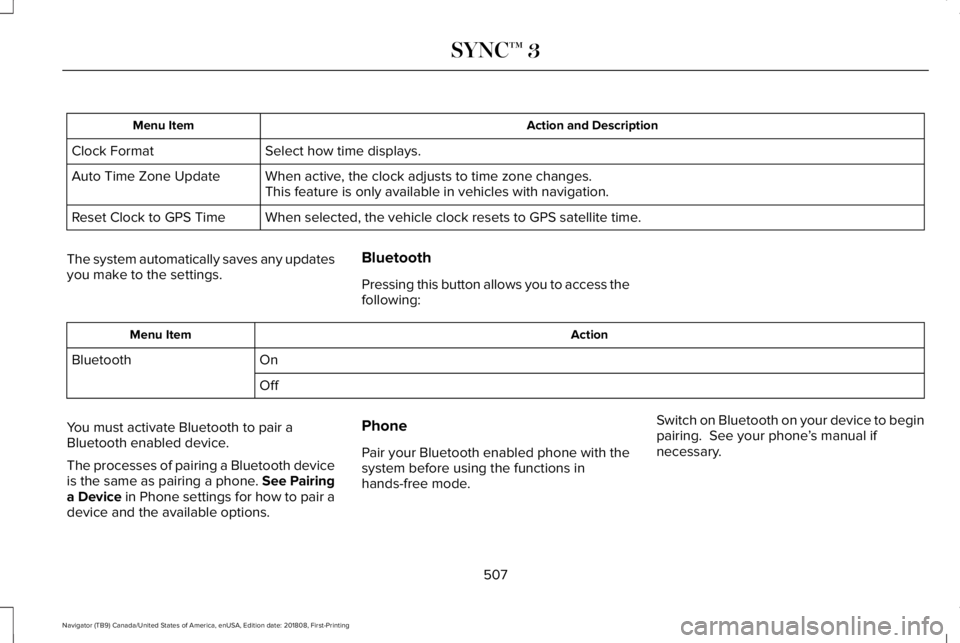
Select how time displays.Clock Format
When active, the clock adjusts to time zone changes.Auto Time Zone UpdateThis feature is only available in vehicles with navigation.
When selected, the vehicle clock resets to GPS satellite time.Reset Clock to GPS Time
The system automatically saves any updatesyou make to the settings.
Bluetooth
Pressing this button allows you to access thefollowing:
ActionMenu Item
OnBluetooth
Off
You must activate Bluetooth to pair aBluetooth enabled device.
The processes of pairing a Bluetooth deviceis the same as pairing a phone. See Pairinga Device in Phone settings for how to pair adevice and the available options.
Phone
Pair your Bluetooth enabled phone with thesystem before using the functions inhands-free mode.
Switch on Bluetooth on your device to beginpairing. See your phone’s manual ifnecessary.
507
Navigator (TB9) Canada/United States of America, enUSA, Edition date: 201808, First-Printing
SYNC™ 3
Page 641 of 645
Remote Control...............................................62Car Finder...............................................................64Intelligent Access Key.........................................62Memory Feature....................................................66Remote Start..........................................................65Replacing the Battery..........................................63Sounding the Panic Alarm..................................64Using the Key Blade............................................62
Remote Start...................................................157Automatic Settings..............................................157Heated and Cooled Features...........................157Last Settings.........................................................157
Repairing Minor Paint Damage.................385Replacement Parts Recommendation........12Collision Repairs.....................................................13Scheduled Maintenance and MechanicalRepairs.................................................................12Warranty on Replacement Parts.........................13
Replacing a Lost Key or RemoteControl............................................................66Reporting Safety Defects (CanadaOnly)..............................................................340Reporting Safety Defects (U.S. Only).......339Roadside Assistance...................................326Vehicles Sold in Canada: Getting RoadsideAssistance........................................................327Vehicles Sold in the United States: GettingRoadside Assistance.....................................326
Vehicles Sold in the United States: UsingRoadside Assistance.....................................326
Roadside Emergencies...............................326Roof Racks and Load Carriers..................290Adjusting the Crossbar......................................291Maximum Recommended LoadAmounts............................................................291
Running-InSee: Breaking-In.................................................323
Running Out of Fuel.....................................201Adding Fuel From a Portable FuelContainer..........................................................201Filling a Portable Fuel Container.....................201
S
Safety Canopy™...............................................57Safety Precautions........................................199Satellite Radio...............................................436Satellite Radio Electronic Serial Number(ESN)..................................................................438Satellite Radio Reception Factors..................437SiriusXM Satellite Radio Service.....................437Troubleshooting..................................................438
Scheduled Maintenance Record..............558Scheduled Maintenance.............................547Seatbelt Extension.........................................48Seatbelt Height Adjustment.........................45
Seatbelt Reminder..........................................46Seatbelt Status.......................................................47
Seatbelts...........................................................39Principle of Operation..........................................39
Seatbelt Warning Lamp and IndicatorChime..............................................................45Conditions of operation......................................46
Seats.................................................................158Security..............................................................83Settings...........................................................504911 Assist................................................................512Ambient Lighting.................................................521Bluetooth..............................................................507Clock.....................................................................506Display...................................................................523General..................................................................518Media Player........................................................505Mobile Apps..........................................................517Navigation.............................................................514Phone....................................................................507Radio.......................................................................513SiriusXM.................................................................514Sound....................................................................504Valet Mode...........................................................524Vehicle...................................................................521Voice Control.......................................................523Wi-Fi & Hotspot....................................................519
Side Airbags.....................................................56
638
Navigator (TB9) Canada/United States of America, enUSA, Edition date: 201808, First-Printing
Index