Rear light LINCOLN NAVIGATOR 2022 User Guide
[x] Cancel search | Manufacturer: LINCOLN, Model Year: 2022, Model line: NAVIGATOR, Model: LINCOLN NAVIGATOR 2022Pages: 646, PDF Size: 7.29 MB
Page 135 of 646
SWITCHING ALL OF THE INTERIOR
LAMPS ON AND OFF
The lamps turn on under the following
conditions:
•
You open any door.
• You press a button on the remote control.
• You press the all lamps on button on the
overhead console. Press to switch all interior lamps
on or off.
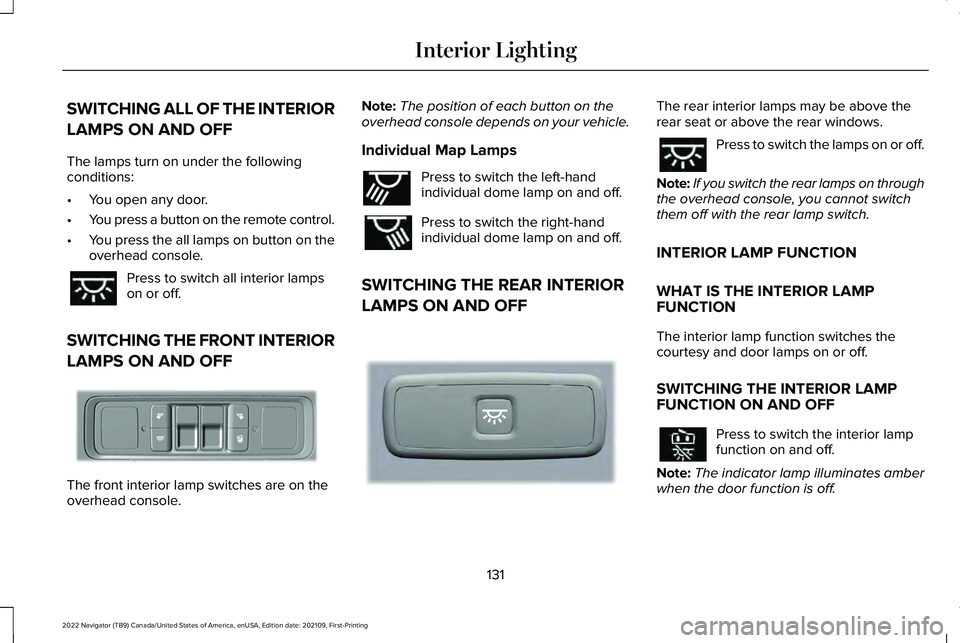
SWITCHING THE FRONT INTERIOR
LAMPS ON AND OFF The front interior lamp switches are on the
overhead console. Note:
The position of each button on the
overhead console depends on your vehicle.
Individual Map Lamps Press to switch the left-hand
individual dome lamp on and off.
Press to switch the right-hand
individual dome lamp on and off.
SWITCHING THE REAR INTERIOR
LAMPS ON AND OFF The rear interior lamps may be above the
rear seat or above the rear windows.
Press to switch the lamps on or off.
Note: If you switch the rear lamps on through
the overhead console, you cannot switch
them off with the rear lamp switch.
INTERIOR LAMP FUNCTION
WHAT IS THE INTERIOR LAMP
FUNCTION
The interior lamp function switches the
courtesy and door lamps on or off.
SWITCHING THE INTERIOR LAMP
FUNCTION ON AND OFF Press to switch the interior lamp
function on and off.
Note: The indicator lamp illuminates amber
when the door function is off.
131
2022 Navigator (TB9) Canada/United States of America, enUSA, Edition date: 202109, First-Printing Interior Lighting E339273 E262193 E281231
Page 140 of 646
INTERIOR MIRROR PRECAUTIONS
WARNING: Do not adjust the mirrors
when your vehicle is moving. This could
result in the loss of control of your vehicle,
serious personal injury or death.
Note: Do not clean the mirror housing or
glass with harsh abrasives, fuel or other
petroleum-based cleaning products.
AUTO-DIMMING INTERIOR MIRROR
WHAT IS THE AUTO-DIMMING
INTERIOR MIRROR
The mirror dims to reduce the effect of bright
light from behind. It returns to normal when
the bright light from behind is no longer
present or if you shift into reverse (R). AUTO-DIMMING INTERIOR MIRROR
LIMITATIONS
Do not block the sensors on the front and
back of the mirror.
Note:
A rear center passenger or raised rear
center head restraint could prevent light from
reaching the sensor.
136
2022 Navigator (TB9) Canada/United States of America, enUSA, Edition date: 202109, First-Printing Interior Mirror
Page 150 of 646
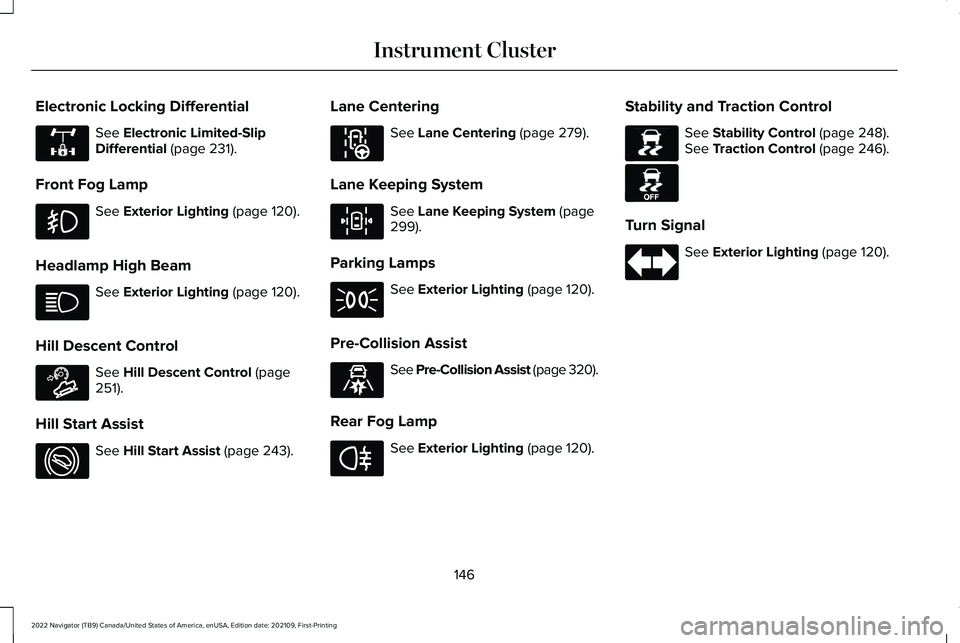
Electronic Locking Differential
See Electronic Limited-Slip
Differential (page 231).
Front Fog Lamp See
Exterior Lighting (page 120).
Headlamp High Beam See
Exterior Lighting (page 120).
Hill Descent Control See
Hill Descent Control (page
251).
Hill Start Assist See
Hill Start Assist (page 243).Lane Centering See
Lane Centering (page 279).
Lane Keeping System See
Lane Keeping System (page
299).
Parking Lamps See
Exterior Lighting (page 120).
Pre-Collision Assist See Pre-Collision Assist (page 320).
Rear Fog Lamp See
Exterior Lighting (page 120).Stability and Traction Control See
Stability Control (page 248).
See Traction Control (page 246).
Turn Signal See
Exterior Lighting (page 120).
146
2022 Navigator (TB9) Canada/United States of America, enUSA, Edition date: 202109, First-Printing Instrument ClusterE325779 E163171 E274708 E297977 E308131 E329466 E67040 E138639 E130458
Page 186 of 646
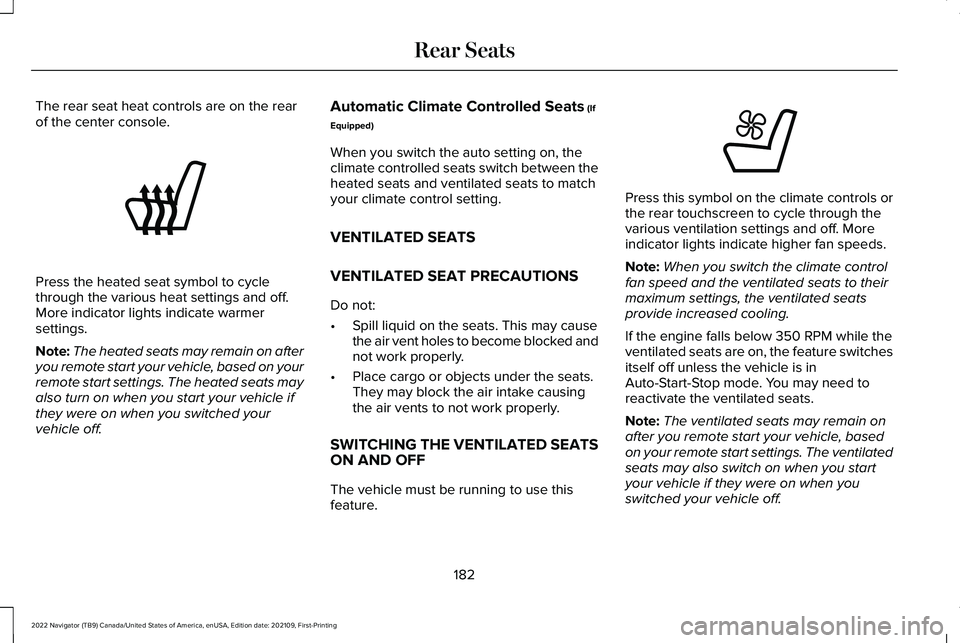
The rear seat heat controls are on the rear
of the center console.
Press the heated seat symbol to cycle
through the various heat settings and off.
More indicator lights indicate warmer
settings.
Note:
The heated seats may remain on after
you remote start your vehicle, based on your
remote start settings. The heated seats may
also turn on when you start your vehicle if
they were on when you switched your
vehicle off. Automatic Climate Controlled Seats (If
Equipped)
When you switch the auto setting on, the
climate controlled seats switch between the
heated seats and ventilated seats to match
your climate control setting.
VENTILATED SEATS
VENTILATED SEAT PRECAUTIONS
Do not:
• Spill liquid on the seats. This may cause
the air vent holes to become blocked and
not work properly.
• Place cargo or objects under the seats.
They may block the air intake causing
the air vents to not work properly.
SWITCHING THE VENTILATED SEATS
ON AND OFF
The vehicle must be running to use this
feature. Press this symbol on the climate controls or
the rear touchscreen to cycle through the
various ventilation settings and off. More
indicator lights indicate higher fan speeds.
Note:
When you switch the climate control
fan speed and the ventilated seats to their
maximum settings, the ventilated seats
provide increased cooling.
If the engine falls below 350 RPM while the
ventilated seats are on, the feature switches
itself off unless the vehicle is in
Auto-Start-Stop mode. You may need to
reactivate the ventilated seats.
Note: The ventilated seats may remain on
after you remote start your vehicle, based
on your remote start settings. The ventilated
seats may also switch on when you start
your vehicle if they were on when you
switched your vehicle off.
182
2022 Navigator (TB9) Canada/United States of America, enUSA, Edition date: 202109, First-Printing Rear SeatsE146322 E224689
Page 198 of 646
WHAT IS THE POWER OUTLET
The power outlet can power devices using
a 12 V outlet adapter.
POWER OUTLET PRECAUTIONS WARNING:
Do not plug optional
electrical accessories into the cigar lighter
socket. Incorrect use of the cigar lighter
can cause damage not covered by the
vehicle warranty, and can result in fire or
serious injury.
When you switch the vehicle on, you can use
the socket to power
12 V appliances with a
maximum current rating of 20 A. Do not use
the power point over the vehicle capacity of
12 V
DC 240 W or a fuse could blow. Do not
plug in any device that supplies power to the
vehicle through the power points. This could
result in damage to vehicle systems. Do not
hang any accessory from the accessory plug.
Always keep the power point caps closed
when not in use. Do not insert objects other
than an accessory plug into the power point. To prevent the battery from running out of
charge:
•
Do not use the power point longer than
necessary when the vehicle is off.
• Do not leave devices plugged in
overnight or when you park your vehicle
for extended periods.
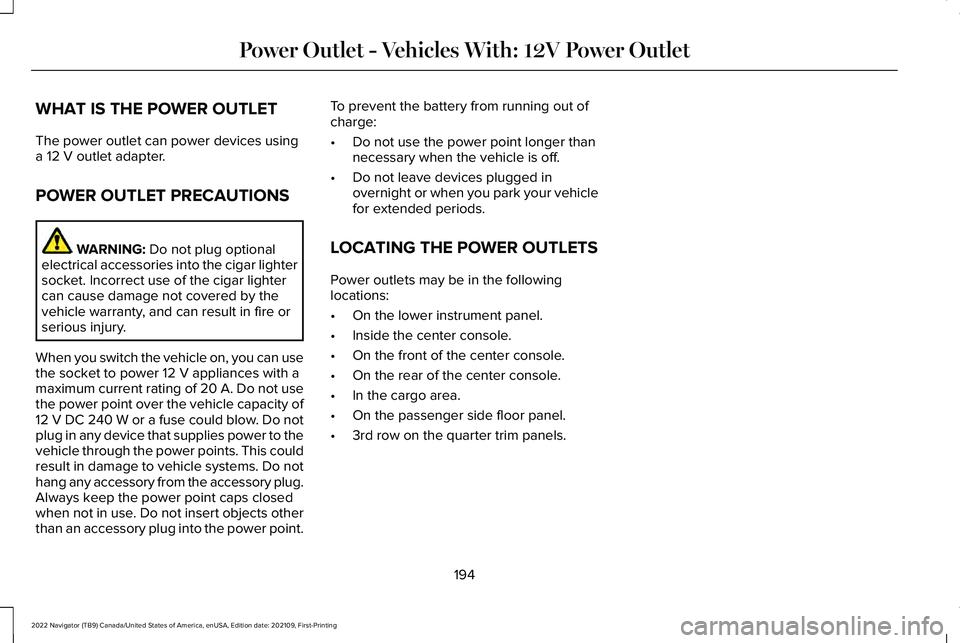
LOCATING THE POWER OUTLETS
Power outlets may be in the following
locations:
• On the lower instrument panel.
• Inside the center console.
• On the front of the center console.
• On the rear of the center console.
• In the cargo area.
• On the passenger side floor panel.
• 3rd row on the quarter trim panels.
194
2022 Navigator (TB9) Canada/United States of America, enUSA, Edition date: 202109, First-Printing Power Outlet - Vehicles With: 12V Power Outlet
Page 243 of 646
WHAT IS REVERSE BRAKING
ASSIST
The system uses sensors on the rear of your
vehicle to detect a possible collision and
applies the brakes to either reduce the
damage from impact, or to assist in avoiding
the collision.
HOW DOES REVERSE BRAKING
ASSIST WORK
Reverse Braking Assist functions when in
reverse (R) and traveling at a speed of
1–7 mph (1.5–12 km/h).
If the system detects an obstacle behind your
vehicle, it provides a warning through the
rear parking aid or cross traffic alert system. REVERSE BRAKING ASSIST
PRECAUTIONS WARNING:
You are responsible for
controlling your vehicle at all times. The
system is designed to be an aid and does
not relieve you of your responsibility to
drive with due care and attention. Failure
to follow this instruction could result in the
loss of control of your vehicle, personal
injury or death. WARNING:
To help avoid personal
injury, always use caution when in reverse
(R) and when using the sensing system. WARNING:
The system may not
operate properly during severe weather
conditions, for example snow, ice, heavy
rain and spray. Always drive with due care
and attention. Failure to take care may
result in a crash. WARNING:
Traffic control systems,
fluorescent lamps, inclement weather, air
brakes, external motors and fans may
affect the correct operation of the sensing
system. This may cause reduced
performance or false alerts. WARNING:
Some situations and
objects prevent hazard detection. For
example low or direct sunlight, inclement
weather, unconventional vehicle types, and
pedestrians. Apply the brakes when
necessary. Failure to follow this instruction
could result in the loss of control of your
vehicle, personal injury or death. WARNING:
Do not use the system
with accessories that extend beyond the
front or rear of your vehicle, for example a
trailer hitch or bike rack. The system is not
able to make corrections for the additional
length of the accessories.
239
2022 Navigator (TB9) Canada/United States of America, enUSA, Edition date: 202109, First-Printing Reverse Braking Assist
Page 317 of 646
BLIND SPOT INFORMATION SYSTEM
WITH TRAILER COVERAGE
WHAT IS BLIND SPOT INFORMATION
SYSTEM WITH TRAILER COVERAGE
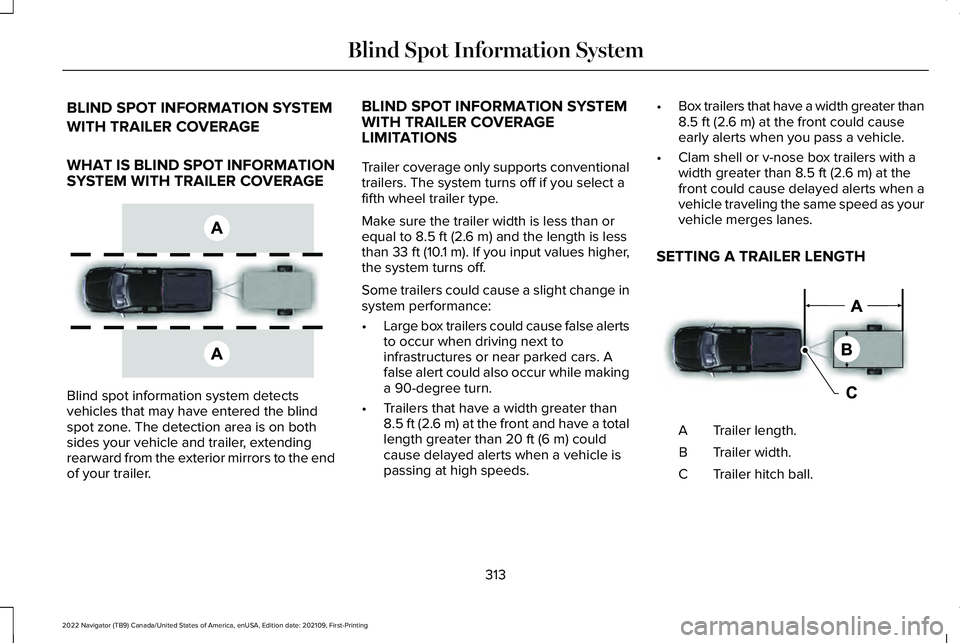
Blind spot information system detects
vehicles that may have entered the blind
spot zone. The detection area is on both
sides your vehicle and trailer, extending
rearward from the exterior mirrors to the end
of your trailer. BLIND SPOT INFORMATION SYSTEM
WITH TRAILER COVERAGE
LIMITATIONS
Trailer coverage only supports conventional
trailers. The system turns off if you select a
fifth wheel trailer type.
Make sure the trailer width is less than or
equal to 8.5 ft (2.6 m) and the length is less
than 33 ft (10.1 m). If you input values higher,
the system turns off.
Some trailers could cause a slight change in
system performance:
• Large box trailers could cause false alerts
to occur when driving next to
infrastructures or near parked cars. A
false alert could also occur while making
a 90-degree turn.
• Trailers that have a width greater than
8.5 ft (2.6 m)
at the front and have a total
length greater than 20 ft (6 m) could
cause delayed alerts when a vehicle is
passing at high speeds. •
Box trailers that have a width greater than
8.5 ft (2.6 m)
at the front could cause
early alerts when you pass a vehicle.
• Clam shell or v-nose box trailers with a
width greater than
8.5 ft (2.6 m) at the
front could cause delayed alerts when a
vehicle traveling the same speed as your
vehicle merges lanes.
SETTING A TRAILER LENGTH Trailer length.
A
Trailer width.
B
Trailer hitch ball.
C
313
2022 Navigator (TB9) Canada/United States of America, enUSA, Edition date: 202109, First-Printing Blind Spot Information SystemE225007 E225008
Page 318 of 646
You can set-up a trailer to work with the blind
spot information system through the
touchscreen. When setting up a trailer, a
sequence of screens appear asking for trailer
information.
1. Select type of trailer screen -
conventional, fifth wheel or gooseneck.
Note: The system only supports conventional
trailers.
2. Do you want to set up blind spot with trailer screen? If no, the system turns off.
If yes, the menu goes to the next screen.
3. Is the width less than 9 ft (2.7 m) and
length less than 33 ft (10.1 m)? If no, the
system turns off. If yes, the menu goes
to the next screen.
4. Trailer width measurement. Measure the
width at the front of the trailer. It is not
measured at the widest point of the
trailer. The maximum width at the front
of the trailer the system can support is
8.5 ft (2.6 m)
. Note:
You do not need to enter an exact
trailer width measurement. You only need
to confirm that the width of the trailer is less
than
9 ft (2.7 m).
5. Trailer length measurement. The trailer length is the distance between the trailer
hitch ball and the rear of the trailer. The
maximum length that the system can
support is
33 ft (10.1 m).
6. Enter the length of trailer. The default setting is
18 ft (5.5 m). Toggling up or
down using the menu buttons increases
or decreases the measurement by
3 ft
(1 m). Select a length that is equal to or
within 3 ft (1 m) of the actual measured
length. For example, if the actual
measure length is
25 ft (7.5 m), toggle
the length in the menu to 27 ft (8.2 m).
The system setup saves when you enter
the length of the trailer.
Note: If the trailer is a bike rack or cargo
rack with electrical lighting, enter a length
of 3 ft (1 m). Cross traffic alert remains on for
trailers with a length of
3 ft (1 m) or less. Note:
The system requires proper
measurement and measure entry to function
properly.
SELECTING A TRAILER
When you connect a trailer to your vehicle,
the trailer set up menu appears in the
touchscreen. This menu allows you to set up
a new trailer or choose from a previously set
up trailer. A warning message appears and
the system turns off if you do not choose or
add a new trailer.
Note: The warning message may not appear
until your vehicle reaches 22 mph (35 km/h).
314
2022 Navigator (TB9) Canada/United States of America, enUSA, Edition date: 202109, First-Printing Blind Spot Information System
Page 374 of 646
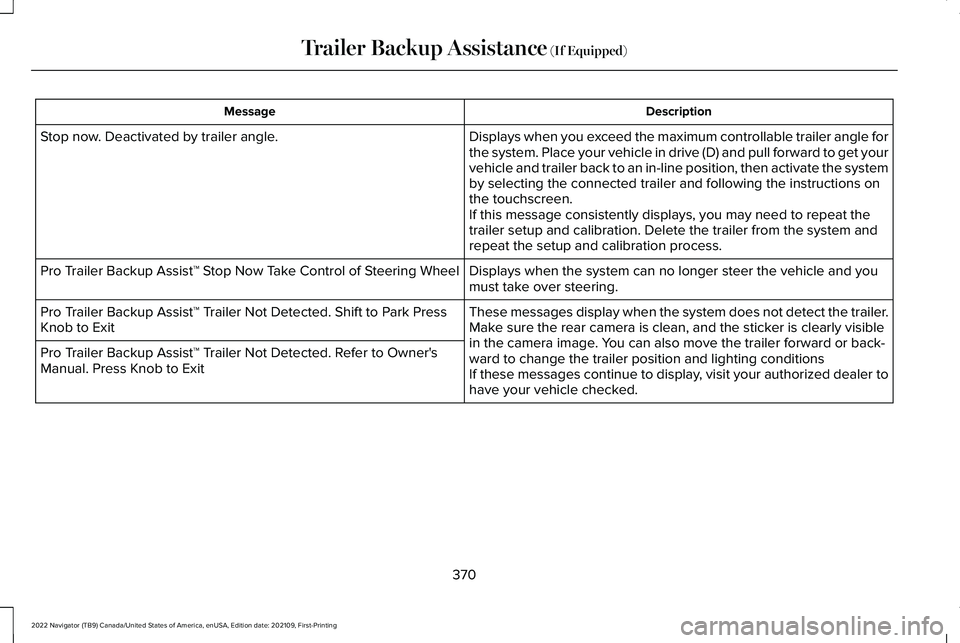
Description
Message
Displays when you exceed the maximum controllable trailer angle for
the system. Place your vehicle in drive (D) and pull forward to get yo\
ur
vehicle and trailer back to an in-line position, then activate the syste\
m
by selecting the connected trailer and following the instructions on
the touchscreen.
If this message consistently displays, you may need to repeat the
trailer setup and calibration. Delete the trailer from the system and
repeat the setup and calibration process.
Stop now. Deactivated by trailer angle.
Displays when the system can no longer steer the vehicle and you
must take over steering.
Pro Trailer Backup Assist™ Stop Now Take Control of Steering Wheel
These messages display when the system does not detect the trailer.
Make sure the rear camera is clean, and the sticker is clearly visible
in the camera image. You can also move the trailer forward or back-
ward to change the trailer position and lighting conditions
If these messages continue to display, visit your authorized dealer to
have your vehicle checked.
Pro Trailer Backup Assist™ Trailer Not Detected. Shift to Park Press
Knob to Exit
Pro Trailer Backup Assist™ Trailer Not Detected. Refer to Owner's
Manual. Press Knob to Exit
370
2022 Navigator (TB9) Canada/United States of America, enUSA, Edition date: 202109, First-Printing Trailer Backup Assistance (If Equipped)
Page 390 of 646
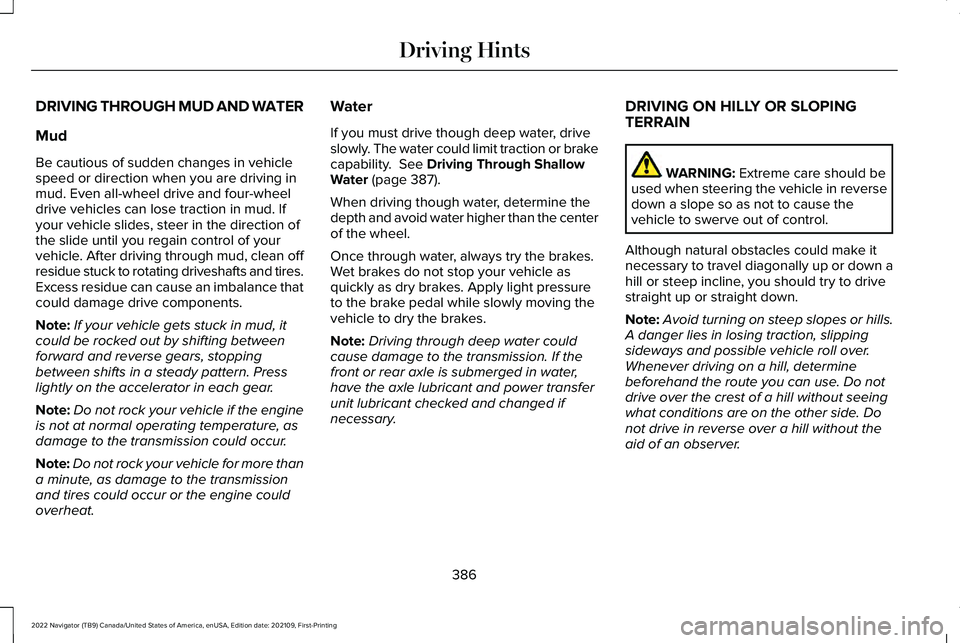
DRIVING THROUGH MUD AND WATER
Mud
Be cautious of sudden changes in vehicle
speed or direction when you are driving in
mud. Even all-wheel drive and four-wheel
drive vehicles can lose traction in mud. If
your vehicle slides, steer in the direction of
the slide until you regain control of your
vehicle. After driving through mud, clean off
residue stuck to rotating driveshafts and tires.
Excess residue can cause an imbalance that
could damage drive components.
Note:
If your vehicle gets stuck in mud, it
could be rocked out by shifting between
forward and reverse gears, stopping
between shifts in a steady pattern. Press
lightly on the accelerator in each gear.
Note: Do not rock your vehicle if the engine
is not at normal operating temperature, as
damage to the transmission could occur.
Note: Do not rock your vehicle for more than
a minute, as damage to the transmission
and tires could occur or the engine could
overheat. Water
If you must drive though deep water, drive
slowly. The water could limit traction or brake
capability. See Driving Through Shallow
Water (page 387).
When driving though water, determine the
depth and avoid water higher than the center
of the wheel.
Once through water, always try the brakes.
Wet brakes do not stop your vehicle as
quickly as dry brakes. Apply light pressure
to the brake pedal while slowly moving the
vehicle to dry the brakes.
Note: Driving through deep water could
cause damage to the transmission. If the
front or rear axle is submerged in water,
have the axle lubricant and power transfer
unit lubricant checked and changed if
necessary. DRIVING ON HILLY OR SLOPING
TERRAIN WARNING: Extreme care should be
used when steering the vehicle in reverse
down a slope so as not to cause the
vehicle to swerve out of control.
Although natural obstacles could make it
necessary to travel diagonally up or down a
hill or steep incline, you should try to drive
straight up or straight down.
Note: Avoid turning on steep slopes or hills.
A danger lies in losing traction, slipping
sideways and possible vehicle roll over.
Whenever driving on a hill, determine
beforehand the route you can use. Do not
drive over the crest of a hill without seeing
what conditions are on the other side. Do
not drive in reverse over a hill without the
aid of an observer.
386
2022 Navigator (TB9) Canada/United States of America, enUSA, Edition date: 202109, First-Printing Driving Hints