buttons LINCOLN NAVIGATOR 2023 User Guide
[x] Cancel search | Manufacturer: LINCOLN, Model Year: 2023, Model line: NAVIGATOR, Model: LINCOLN NAVIGATOR 2023Pages: 660, PDF Size: 14.04 MB
Page 190 of 660
WHAT IS THE MEMORY FUNCTION
The driver seat memory function recalls theposition of these features:
•Driver seat.
•Power mirrors.
•Power steering column.
•Power adjustable foot pedals.
The passenger seat memory function recallsthe position of the passenger seat.
MEMORY FUNCTION
PRECAUTIONS
WARNING: Before activating thememory seat, make sure that the areaimmediately surrounding the seat is clearof obstructions and that all occupants areclear of moving parts.
WARNING: Do not use the memoryfunction when your vehicle is moving.
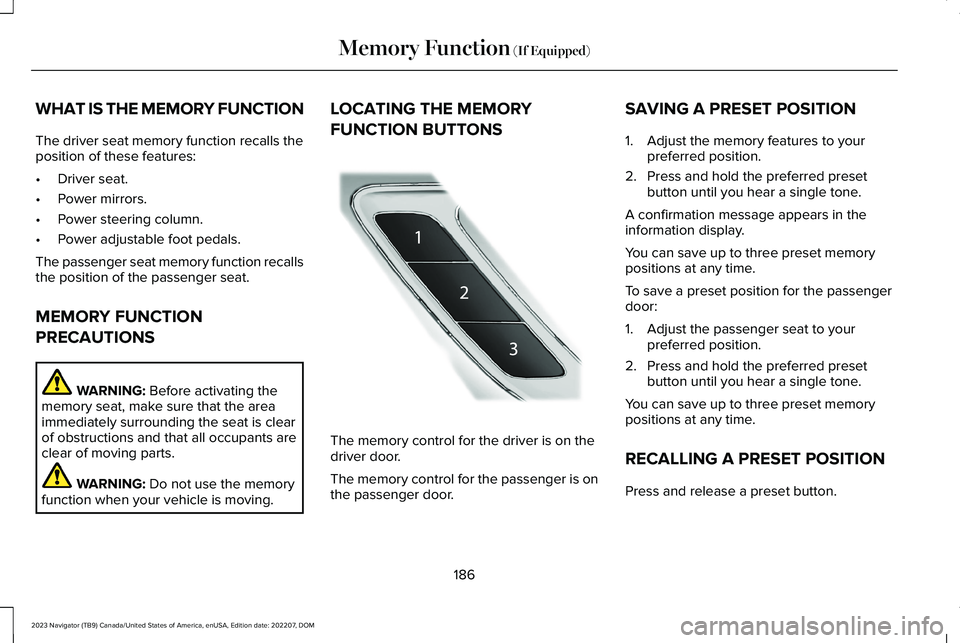
LOCATING THE MEMORY
FUNCTION BUTTONS
The memory control for the driver is on thedriver door.
The memory control for the passenger is onthe passenger door.
SAVING A PRESET POSITION
1.Adjust the memory features to yourpreferred position.
2.Press and hold the preferred presetbutton until you hear a single tone.
A confirmation message appears in theinformation display.
You can save up to three preset memorypositions at any time.
To save a preset position for the passengerdoor:
1.Adjust the passenger seat to yourpreferred position.
2.Press and hold the preferred presetbutton until you hear a single tone.
You can save up to three preset memorypositions at any time.
RECALLING A PRESET POSITION
Press and release a preset button.
186
2023 Navigator (TB9) Canada/United States of America, enUSA, Edition date: 202207, DOMMemory Function (If Equipped)E222235
Page 191 of 660
Note:You can recall a preset memoryposition when the ignition is off, or when youplace the transmission in park (P) or neutral(N) if the ignition is on and the vehicle is notmoving.
Note:Pressing any of the preset buttons orany memory feature control during a memoryrecall cancels the operation.
You can also recall a preset memory positionby:
•Pressing the unlock button on yourremote control if you linked it to a presetposition.
•Unlocking the intelligent driver doorhandle if a linked remote control ispresent.
•Recalling a personal profile in your SYNCmenu.
Using a linked remote control to recall yourmemory position when the ignition is offmoves the seat and steering column to theeasy entry position.
To recall a preset position on the passengerdoor, press and release the preset button.The passenger seat features move to theposition stored for that preset. You can recalla passenger seat preset memory at any time.
Linking a Preset Position to Your
Remote Control or Passive Key
See Linking or Unlinking a Personal Profileto a Remote Control (page 516).
187
2023 Navigator (TB9) Canada/United States of America, enUSA, Edition date: 202207, DOMMemory Function (If Equipped)
Page 193 of 660
FCC and RSS-210 Industry CanadaCompliance
WARNING: Changes or modificationsnot expressively approved by the partyresponsible for compliance could void theuser's authority to operate the equipment.The term "IC:" before the radio certificationnumber only signifies that Industry Canadatechnical specifications were met.
This device complies with Part 15 of the FCCRules and with RSS-210 of Industry Canada.Operation is subject to the following twoconditions: (1) this device may not causeharmful interference, and (2) this device mustaccept any interference received, includinginterference that may cause undesiredoperation.
This equipment complies with FCC radiationexposure limits set forth for an uncontrolledenvironment. End Users must follow thespecific operating instructions for satisfyingRF exposure compliance. This transmittermust be at least 8 in (20 cm) from the userand must not be co-located or operating inconjunction with any other antenna ortransmitter.
PROGRAMMING THE GARAGE
DOOR OPENER
To clear all stored codes in the garage dooropener in your vehicle, use the clearfunction. To override one button, use thereprogram function.
Note:Make sure that the garage door andsecurity device are free from obstructionwhen you are programming. Do not programthe system with the vehicle in the garage.
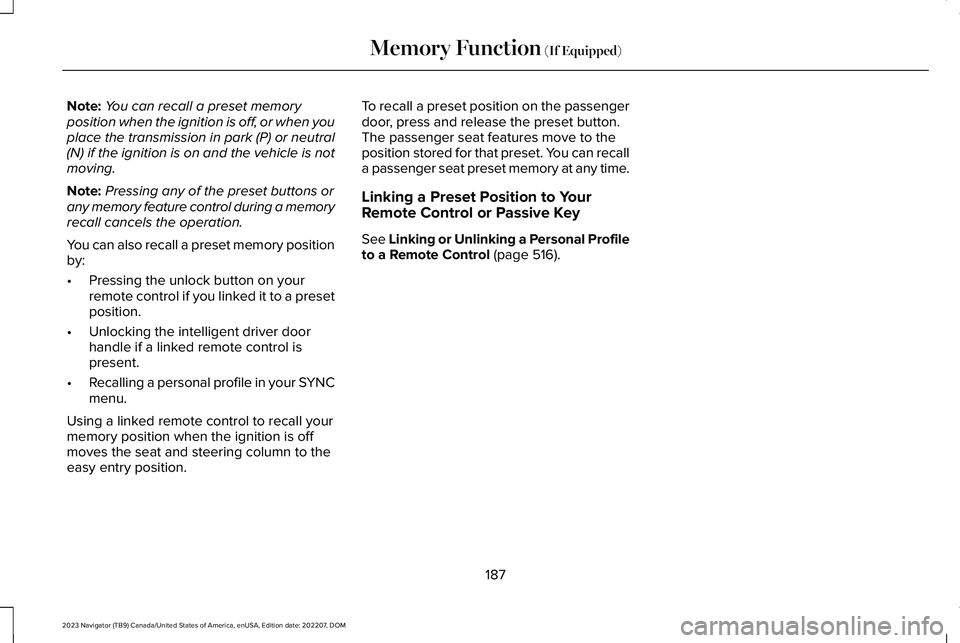
Clearing the Garage Door Opener
To clear all stored codes in the garage dooropener in the vehicle:
1.Press and hold the outer two functionbuttons simultaneously for approximately10 seconds until the indicator above thebuttons flashes rapidly.
2.When the indicator flashes, release thebuttons.
Note:This clears all stored codes. Youcannot erase individual buttons.
189
2023 Navigator (TB9) Canada/United States of America, enUSA, Edition date: 202207, DOMGarage Door OpenerE188213
Page 194 of 660

Note:You can program a maximum of threedevices. To change or replace any of thethree devices after they have been initiallyprogrammed, you must either clear all codes,or reprogram each individual button.
Note:We recommend that upon the sale orlease termination of your vehicle, you erasethe programmed function buttons for securityreasons.
Reprogramming the Garage DoorOpener
If a button on your garage door opener hasalready been programmed, you can overrideit. To program a device to a previouslytrained button:
1.Press and hold the desired button forapproximately 20 seconds until theindicator begins to flash.
2.Without releasing the button, proceed toStep 3 of Programming the Garage DoorOpener to your Handheld Transmitter.
Programming the Garage Door Openerto your Handheld Transmitter
Note:The programming steps below assumeyou are programming a HomeLink that wasnot previously programmed. If yourHomeLink was previously programmed, youmay need to clear or reprogram yourHomeLink buttons.
Note:Put a new battery in the handheldtransmitter. This allows for quicker trainingand accurate transmission of theradio-frequency signal.
Note:Make sure that the garage door andsecurity device are free from obstructionwhen you are programming. Do not programthe system with the vehicle in the garage.
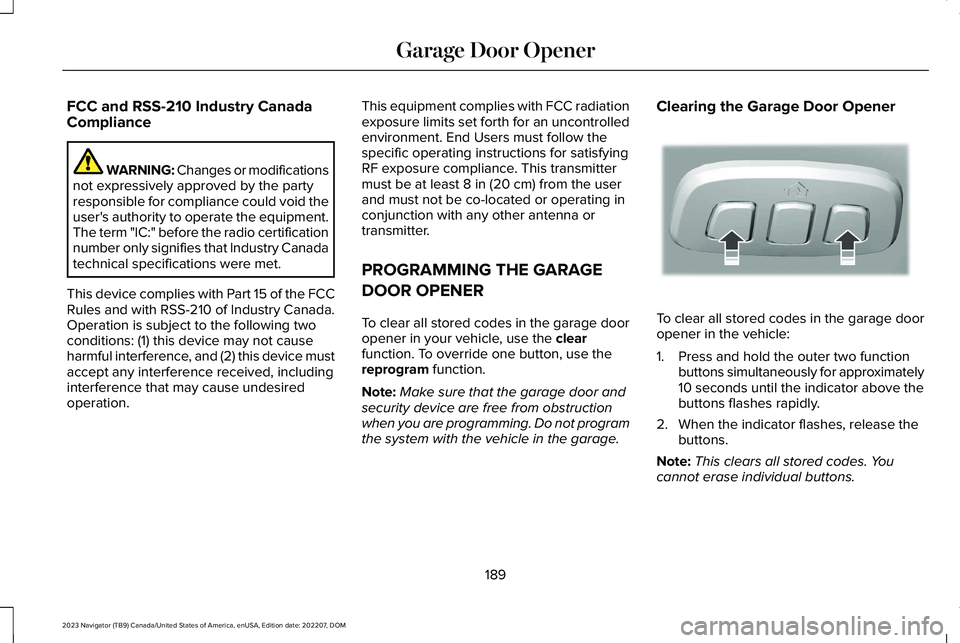
To program your in-vehicle HomeLinkfunction button with your handheldtransmitter:
1.With your vehicle parked outside of thegarage, switch your vehicle on, but donot start your vehicle.
2.Press and release one of the threeHomeLink function buttons that youwould like to program.
Note:The indicator should begin to flash. Ifthe indicator does not flash, press and holdthe function button for 20 seconds until theindicator begins to flash.
190
2023 Navigator (TB9) Canada/United States of America, enUSA, Edition date: 202207, DOMGarage Door OpenerE188213
Page 195 of 660
3.Hold your handheld garage doortransmitter 1–3 in (2–8 cm) away from theHomeLink button you want to program.
4.Press and hold the handheld transmitterbutton you want to program whilewatching the indicator on HomeLink.Continue to hold the handheld buttonuntil the HomeLink indicator flashesrapidly or is continuously on.
Note:You may need to use a differentmethod if you live in Canada or havedifficulties programming your gate operatoror garage door opener.
5.Press and hold the HomeLink button youprogrammed for two seconds, thenrelease. You may need to do this twiceto activate the door.
Note:If the indicator stays on, theprogramming is complete.
Note:If the HomeLink indicator flashesrapidly, repeat Step 5.
Note:If your device still does not operate,you must program your garage door.
6.To program additional buttons, repeatSteps 1–4.
Note:Make sure you keep the originalremote control transmitter for use in othervehicles as well as for future systemprogramming.
Programming the Garage Door Openerto your Garage Door Opener Motor
Note:Make sure that the garage door andsecurity device are free from obstructionwhen you are programming. Do not programthe system with the vehicle in the garage.
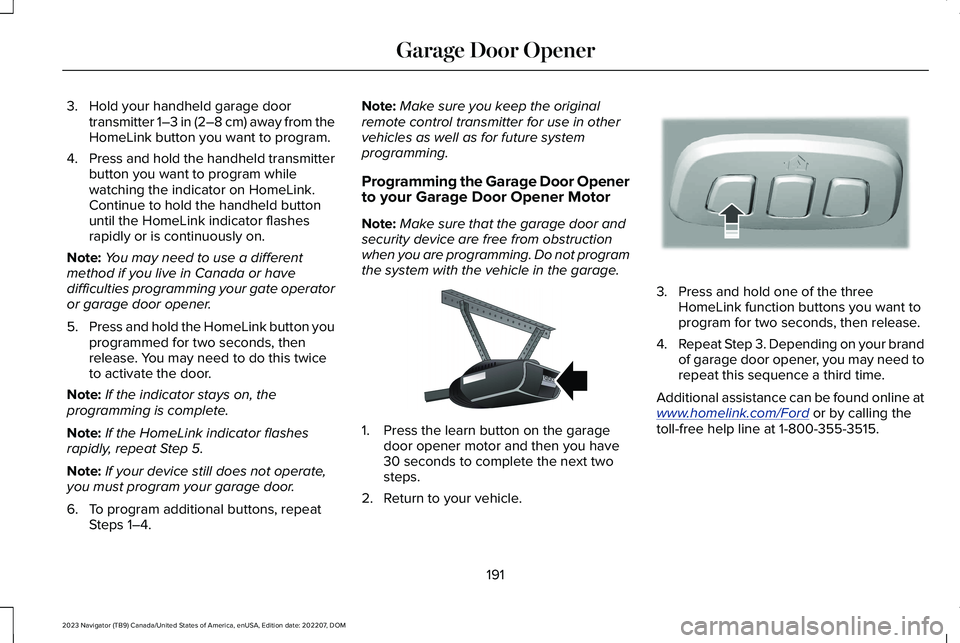
1.Press the learn button on the garagedoor opener motor and then you have30 seconds to complete the next twosteps.
2.Return to your vehicle.
3.Press and hold one of the threeHomeLink function buttons you want toprogram for two seconds, then release.
4.Repeat Step 3. Depending on your brandof garage door opener, you may need torepeat this sequence a third time.
Additional assistance can be found online atwww.homelink.com/Ford or by calling thetoll-free help line at 1-800-355-3515.
191
2023 Navigator (TB9) Canada/United States of America, enUSA, Edition date: 202207, DOMGarage Door OpenerE142659 E188212
Page 196 of 660
Programming the Garage Door Openerto your Gate Opener Motor
Gate Operator / Canadian Programming
Canadian radio-frequency laws requiretransmitter signals to time-out (or quit) afterseveral seconds of transmission – which maynot be long enough for HomeLink to pick upthe signal during programming. Similar tothis Canadian law, some U.S. gate operatorsare designed to time-out in the same manner.
Note:If programming a garage door openeror gate operator, it is advised that youunplug the device during the cycling processto prevent possible overheating.
1.Press and release your handheldtransmitter, every two seconds, until theHomeLink indicator flashes rapidly or iscontinuously on.
2.Release the handheld transmitter button.
3.Press and hold the HomeLink functionbutton you want to program for twoseconds, then release. You may need todo this twice to activate the door.
Note:If the indicator stays on, theprogramming is complete.
Note:If the HomeLink indicator flashesrapidly, repeat Step 3.
4.To program additional buttons, repeatSteps 1–4.
Additional assistance can be found online atwww.homelink.com/Ford or by calling thetoll-free help line at 1-800-355-3515.
GARAGE DOOR OPENER
ADDITIONAL ASSISTANCE
Video Setup Instructions
Universal Garage Door Opener: HomeLink
Universal Garage Door Opener: HomeLinkfor Genie Intellicode 2
Universal Garage Door Opener Homelinkfor Genie Intellicode
Additional assistance can be found online atwww.homelink.com/Ford or by calling thetoll-free help line at 1-800-355-3515.
192
2023 Navigator (TB9) Canada/United States of America, enUSA, Edition date: 202207, DOMGarage Door Opener
Page 209 of 660
HOW DOES AUTOMATIC ENGINESTOP WORK
Automatic engine stop turns the engine off.The ignition also turns off in order to savebattery power. Before the engine shutsdown, a message appears in the informationdisplay showing a timer counting down. Ifyou do not intervene within 30 seconds, theengine shuts down. Another messageappears in the information display to informyou that the engine has shut down in orderto save fuel. Start your vehicle as younormally do.
SWITCHING AUTOMATIC ENGINESTOP ON AND OFF
1.Press Settings on the touchscreen.
2.Press Vehicle Settings.
3.Switch 30min Max Idle on or off.
Note:You cannot permanently switch off theautomatic shutdown. If you switch it off, itturns on each time you switch the ignitionon.
OVERRIDING AUTOMATIC ENGINESTOP
You can stop the engine shutdown, or resetthe timer, at any point before the 30-secondcountdown has expired by doing any of thefollowing:
•Pressing the brake pedal or acceleratorpedal.
•Pressing the OK or RESET button duringthe countdown.
Note: You cannot permanently switch offthe automatic engine shutdown feature. When you switch it off temporarily, it turnson at the next ignition cycle.
ACCESSING THE PASSIVE KEY
BACKUP POSITION
If you are unable to start your vehicle, do thefollowing:
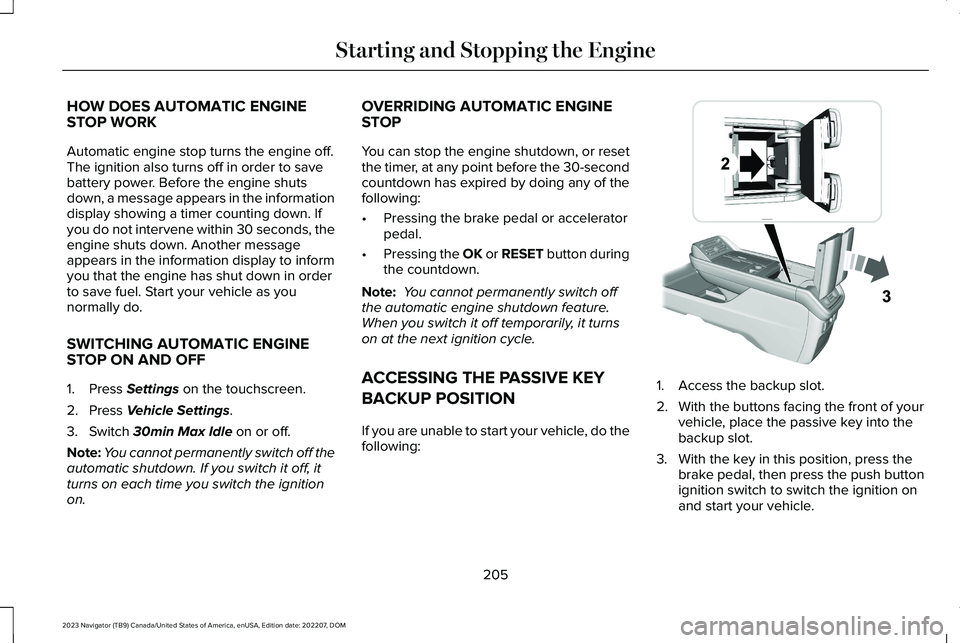
1.Access the backup slot.
2.With the buttons facing the front of yourvehicle, place the passive key into thebackup slot.
3.With the key in this position, press thebrake pedal, then press the push buttonignition switch to switch the ignition onand start your vehicle.
205
2023 Navigator (TB9) Canada/United States of America, enUSA, Edition date: 202207, DOMStarting and Stopping the EngineE247437
Page 255 of 660
SETTING THE HILL DESCENT
SPEED
To increase or decrease the descent speed,press the accelerator or brake pedal, or use
the SET + and SET - buttons on the steeringwheel. Once you reach the preferred speedremove your feet from the pedals.
HILL DESCENT CONTROL
INDICATOR
Illuminates when you switch hilldescent control on.
HILL DESCENT CONTROL – TROUBLESHOOTING
HILL DESCENT CONTROL – INFORMATION MESSAGES
ActionMessage
Your vehicle speed requirement for off-road mode entry has not been met.For Hill Descent Reduce Speed XX MPH/km/h or Less
You need to select a transmission gear for hill descent mode.For Hill Descent Select Gear
Hill descent control mode is deactivated and you must resume control.Hill Descent Driver Resume Control
A hill descent system fault is present.Hill Descent Control Fault
The hill descent system is cooling due to overuse.Hill Descent Control Off System Cooling
The hill descent system cannot activate while Cruise Control is actively controllingspeed.Hill Descent Control not available with Cruise ControlActive
251
2023 Navigator (TB9) Canada/United States of America, enUSA, Edition date: 202207, DOMHill Descent Control (If Equipped)E163171
Page 279 of 660
A vehicle image illuminates if there is avehicle detected in front of you.
Note:When adaptive cruise control is active,the speedometer can vary slightly from theset speed displayed in the instrument clusterdisplay.
Setting the Adaptive Cruise Speedfrom a Complete Stop
Press the SET+ or SET- buttonswhile keeping the brake pedal fullydepressed.
The set speed adjusts to 20 km/h when inmetric units or 15 mph when in imperial units.
The indicator, current gap setting and setspeed appear in the instrument clusterdisplay.
Note:The system activates from a completestop only when it detects a lead vehicle inclose proximity.
Manually Changing the Set Speed
Press the button to increase theset speed in small increments.Press and hold the button toincrease the set speed in large increments.Release the button when the set speed isequal to the desired speed.
Press the button to decrease theset speed in small increments.Press and hold the button todecrease the set speed in large increments.Release the button when the set speed isequal to the desired speed.
You can also press the accelerator or brakepedal until you reach the speed you prefer.Press either button to select the currentspeed as the set speed.
The system could apply the brakes to slowthe vehicle to the new set speed. The setspeed continuously displays in theinstrument cluster display when the systemis active.
SETTING THE ADAPTIVE CRUISE
CONTROL GAP
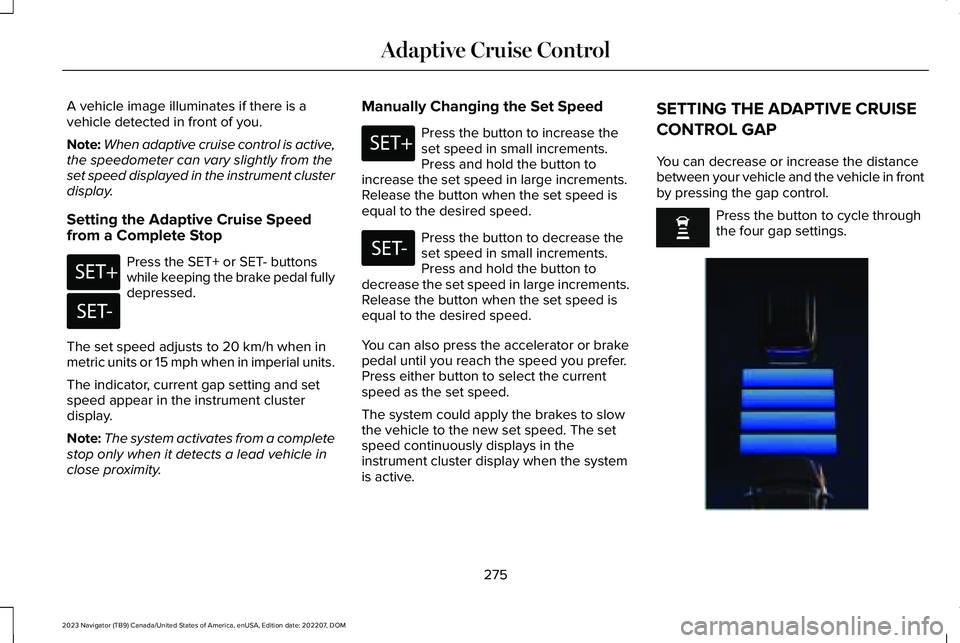
You can decrease or increase the distancebetween your vehicle and the vehicle in frontby pressing the gap control.
Press the button to cycle throughthe four gap settings.
275
2023 Navigator (TB9) Canada/United States of America, enUSA, Edition date: 202207, DOMAdaptive Cruise ControlE246884 E246885 E246884 E246885 E354843
Page 293 of 660
The driver-facing camera may not operatecorrectly due to any of the following:
•If you have a pre-existing eye condition,such as an eye misalignment, or havehad eye surgery.
•You cover your facial features by a mask,hat or other items.
•The lighting conditions changesignificantly.
•You are not in the field of view of thecamera.
•You position or tilt yourself to one side.
•You are moving around extensively.
•You are wearing glasses or sunglassesthat are too dark or reflective.
Note:The system has limited steeringassistance and may not be sufficient for alldriving situations.
Note:In exceptional conditions, such asinclement weather or direct sunlight, thesystem could deviate from the center line.
Note:The information provided by thenavigation map data could be inaccurate orout of date.
ACTIVEGLIDE™ SETTINGS
Enabling ActiveGlide
1.Press Features on the touchscreen.
2.Press Driver Assistance.
3.Press Cruise Control.
4.Press Adaptive Cruise Control.
5.Press Lane Centering with Hands-Free.
Enabling Activation Prompts
1.Press Features on the touchscreen.
2.Press Driver Assistance.
3.Press Cruise Control.
4.Press Adaptive Cruise Control.
5.Press Activation Prompts.
SWITCHING ACTIVEGLIDE™ ON
AND OFF
Switching ActiveGlide On
The controls are on the steering wheel.
Using Activation Prompts
When the prompt appears, pressthe button to switch ActiveGlideon.
The indicator appears in the instrumentcluster. When the system is on, the color ofthe indicator changes to indicate the systemstatus.
Note:You must enable activation promptsin the touchscreen.
Using Steering Wheel Controls
Using the adaptive cruise controland lateral support buttons, makesure both systems are active.ActiveGlide activates.
Switching ActiveGlide Off
Press either the lateral support oradaptive cruise control buttonwhen system is active or instandby mode.
ActiveGlide turns off through eachignition cycle.
289
2023 Navigator (TB9) Canada/United States of America, enUSA, Edition date: 202207, DOMActiveGlide™ (If Equipped)E144529 E308131 E144529 E308131 E144529