Locking LINCOLN TOWN CAR 1998 Owners Manual
[x] Cancel search | Manufacturer: LINCOLN, Model Year: 1998, Model line: TOWN CAR, Model: LINCOLN TOWN CAR 1998Pages: 188, PDF Size: 1.29 MB
Page 34 of 188
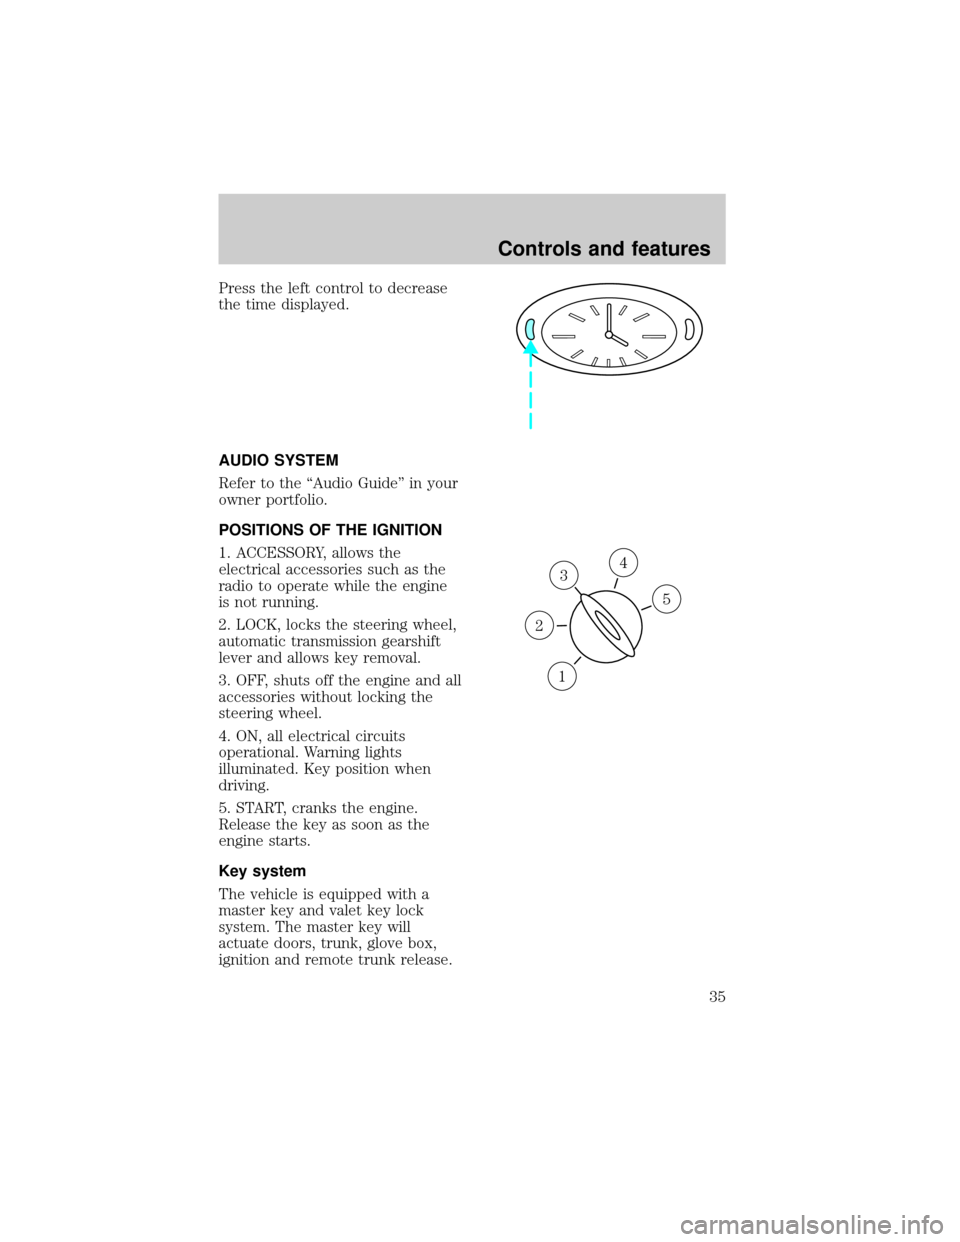
Press the left control to decrease
the time displayed.
AUDIO SYSTEM
Refer to the ªAudio Guideº in your
owner portfolio.
POSITIONS OF THE IGNITION
1. ACCESSORY, allows the
electrical accessories such as the
radio to operate while the engine
is not running.
2. LOCK, locks the steering wheel,
automatic transmission gearshift
lever and allows key removal.
3. OFF, shuts off the engine and all
accessories without locking the
steering wheel.
4. ON, all electrical circuits
operational. Warning lights
illuminated. Key position when
driving.
5. START, cranks the engine.
Release the key as soon as the
engine starts.
Key system
The vehicle is equipped with a
master key and valet key lock
system. The master key will
actuate doors, trunk, glove box,
ignition and remote trunk release.
3
1
2
5
4
Controls and features
35
Page 47 of 188
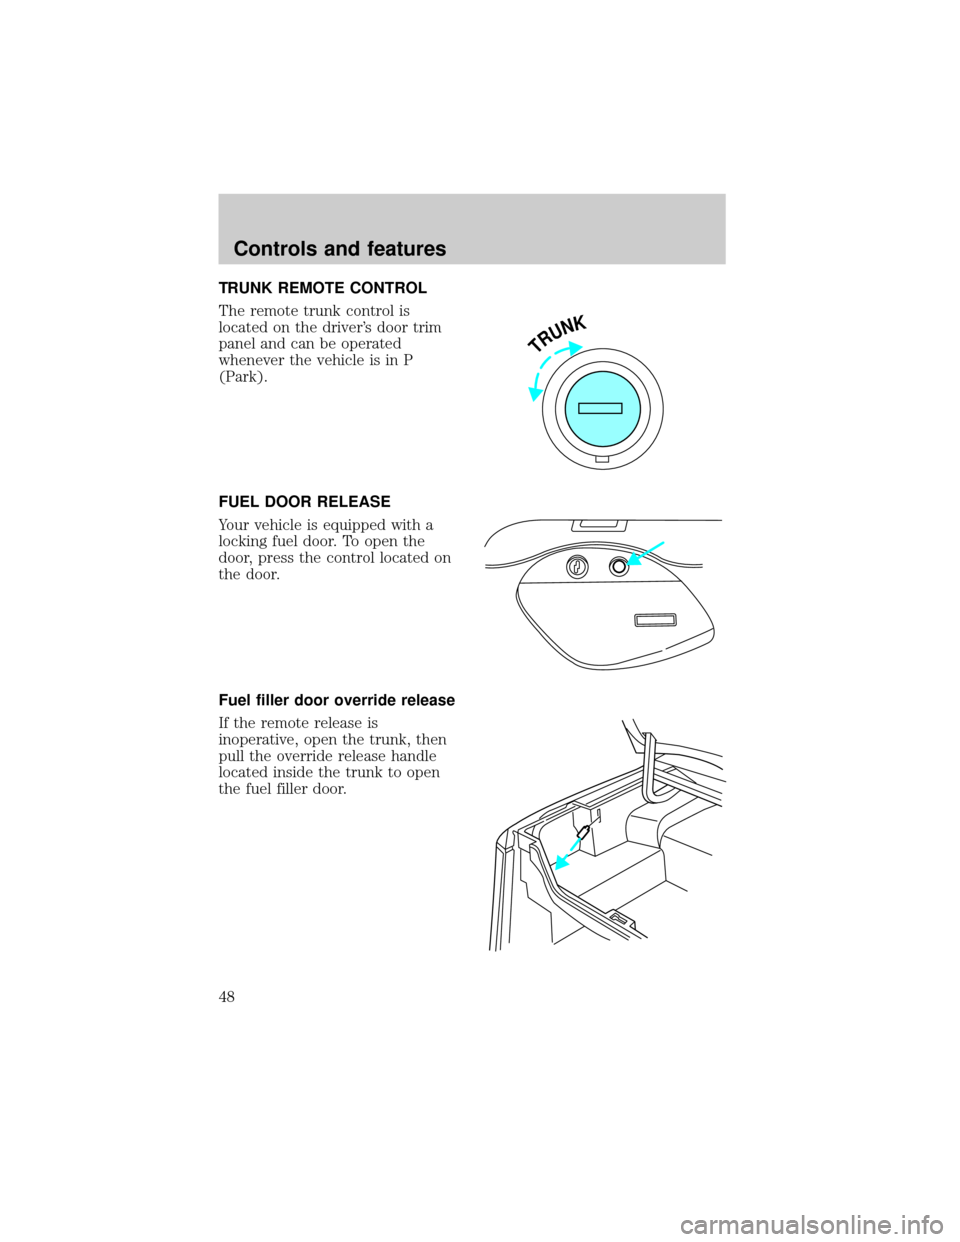
TRUNK REMOTE CONTROL
The remote trunk control is
located on the driver's door trim
panel and can be operated
whenever the vehicle is in P
(Park).
FUEL DOOR RELEASE
Your vehicle is equipped with a
locking fuel door. To open the
door, press the control located on
the door.
Fuel filler door override release
If the remote release is
inoperative, open the trunk, then
pull the override release handle
located inside the trunk to open
the fuel filler door.
TRUNK
Controls and features
48
Page 52 of 188
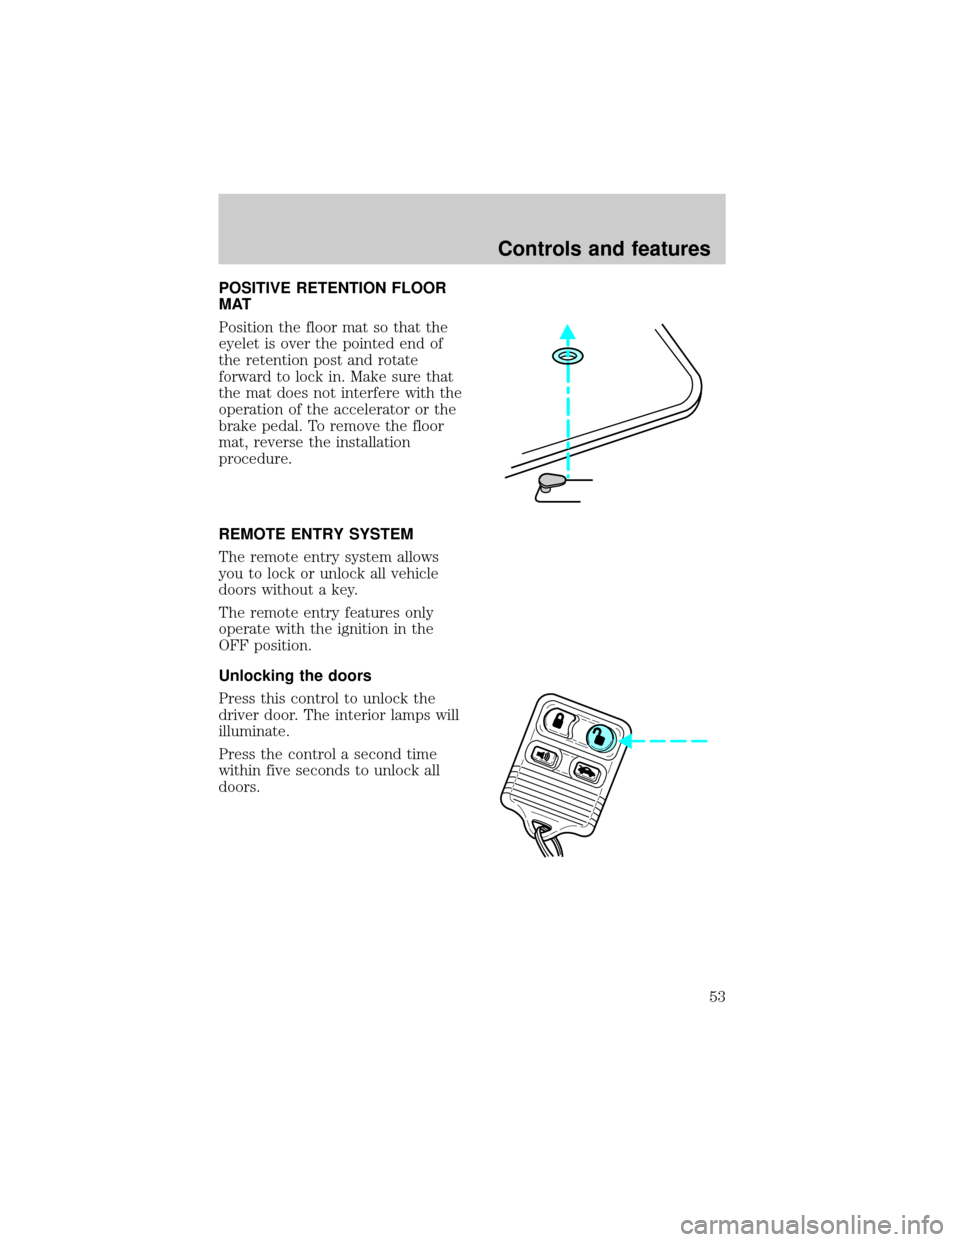
POSITIVE RETENTION FLOOR
MAT
Position the floor mat so that the
eyelet is over the pointed end of
the retention post and rotate
forward to lock in. Make sure that
the mat does not interfere with the
operation of the accelerator or the
brake pedal. To remove the floor
mat, reverse the installation
procedure.
REMOTE ENTRY SYSTEM
The remote entry system allows
you to lock or unlock all vehicle
doors without a key.
The remote entry features only
operate with the ignition in the
OFF position.
Unlocking the doors
Press this control to unlock the
driver door. The interior lamps will
illuminate.
Press the control a second time
within five seconds to unlock all
doors.
Controls and features
53
Page 53 of 188

Locking the doors
Press this control to lock all doors.
The horn will chirp and the
parklamps/taillamps will flash to
confirm that the control was
pressed. This feature can be
turned on/off through the following
procedure:
You must complete steps 1-5
within 30 seconds or the
procedure will have to be
repeated. If procedure needs to be
repeated, you must wait 30
seconds.
1. Turn ignition key to ON.
2. Press power door unlock control
3 times.
3. Turn ignition key from ON to
OFF.
4. Press power door unlock control
3 times.
5. Turn ignition key back to ON.
The doors will lock and unlock.
6. Press unlock control twice
within 5 seconds. The horn will
chirp twice upon successful
toggling of the horn chirp feature.
7. Turn ignition to OFF.
Controls and features
54
Page 69 of 188
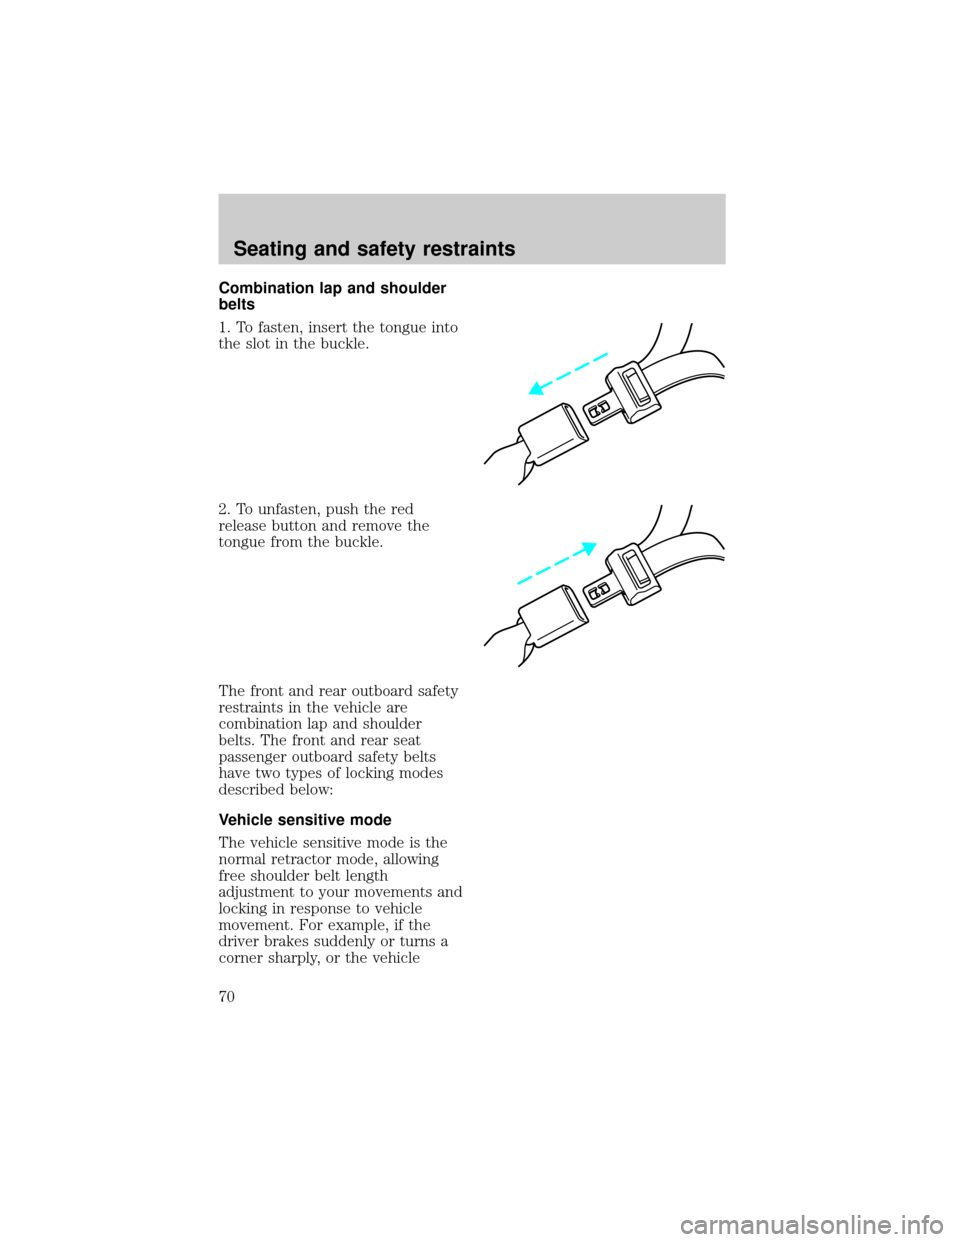
Combination lap and shoulder
belts
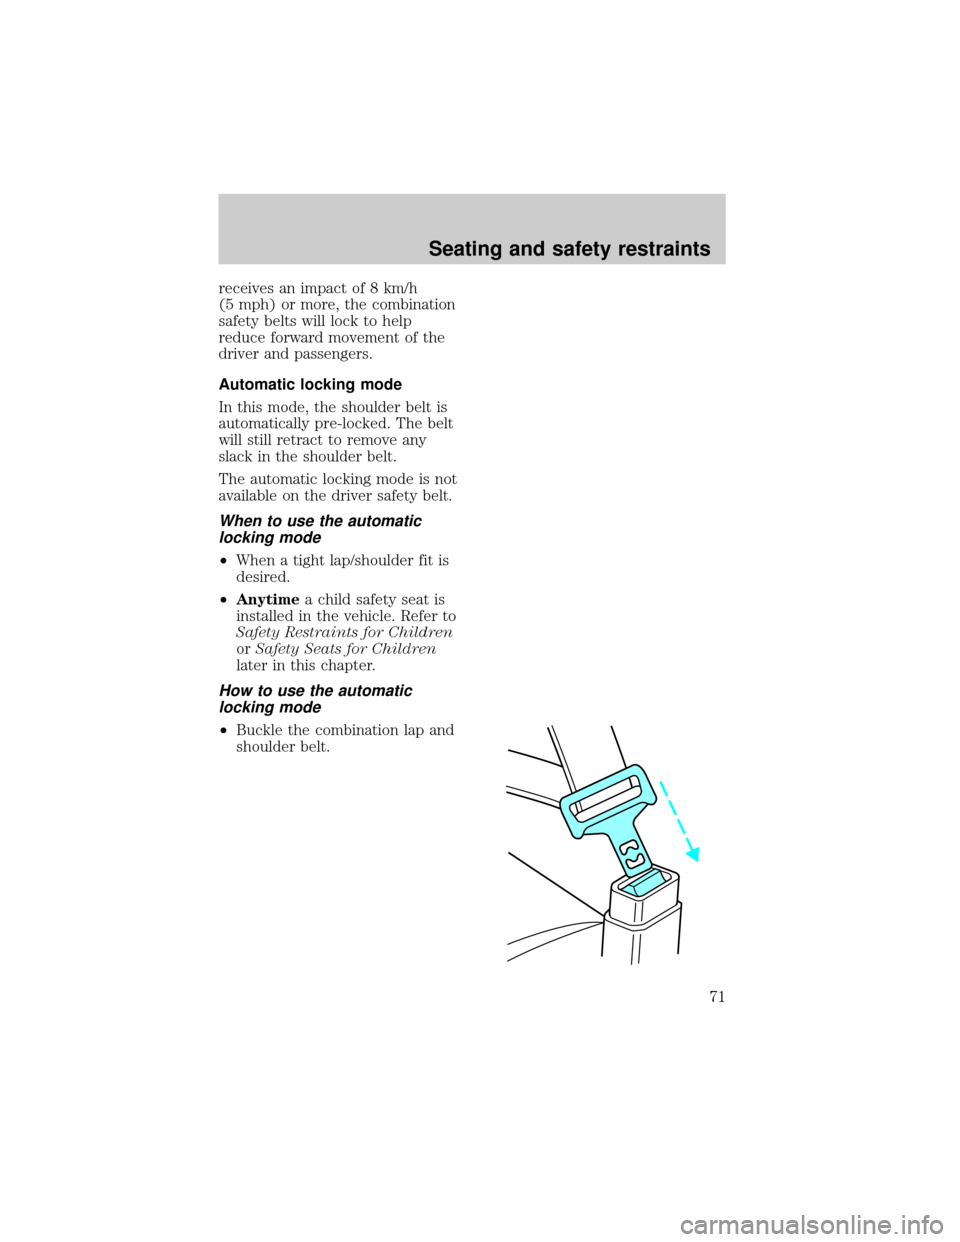
1. To fasten, insert the tongue into
the slot in the buckle.
2. To unfasten, push the red
release button and remove the
tongue from the buckle.
The front and rear outboard safety
restraints in the vehicle are
combination lap and shoulder
belts. The front and rear seat
passenger outboard safety belts
have two types of locking modes
described below:
Vehicle sensitive mode
The vehicle sensitive mode is the
normal retractor mode, allowing
free shoulder belt length
adjustment to your movements and
locking in response to vehicle
movement. For example, if the
driver brakes suddenly or turns a
corner sharply, or the vehicle
Seating and safety restraints
70
Page 70 of 188
receives an impact of 8 km/h
(5 mph) or more, the combination
safety belts will lock to help
reduce forward movement of the
driver and passengers.
Automatic locking mode
In this mode, the shoulder belt is
automatically pre-locked. The belt
will still retract to remove any
slack in the shoulder belt.
The automatic locking mode is not
available on the driver safety belt.
When to use the automatic
locking mode
²When a tight lap/shoulder fit is
desired.
²Anytimea child safety seat is
installed in the vehicle. Refer to
Safety Restraints for Children
orSafety Seats for Children
later in this chapter.
How to use the automatic
locking mode
²Buckle the combination lap and
shoulder belt.
Seating and safety restraints
71
Page 71 of 188
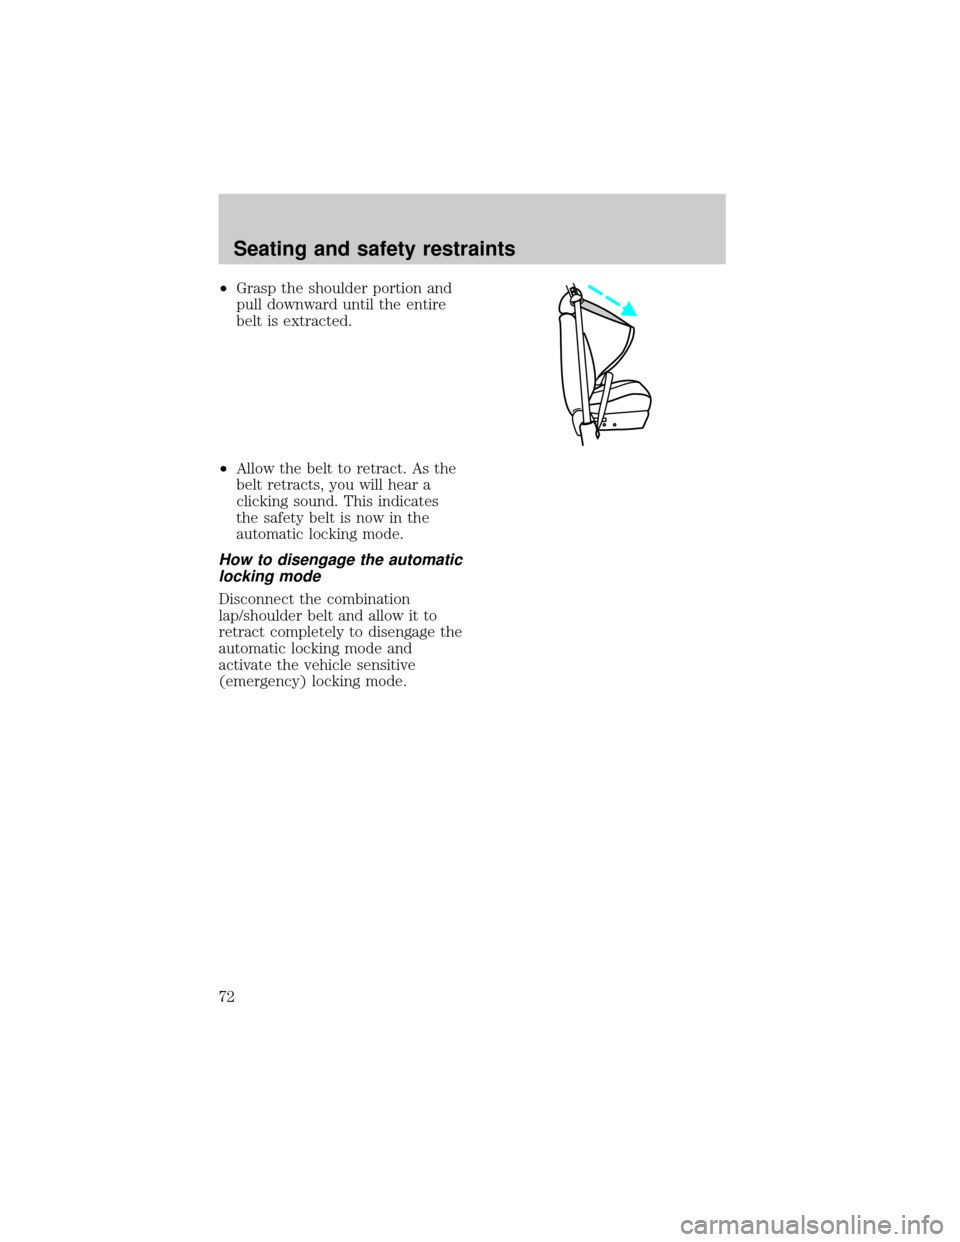
²Grasp the shoulder portion and
pull downward until the entire
belt is extracted.
²Allow the belt to retract. As the
belt retracts, you will hear a
clicking sound. This indicates
the safety belt is now in the
automatic locking mode.
How to disengage the automatic
locking mode
Disconnect the combination
lap/shoulder belt and allow it to
retract completely to disengage the
automatic locking mode and
activate the vehicle sensitive
(emergency) locking mode.
Seating and safety restraints
72
Page 83 of 188
special needs of your child with
your pediatrician.
SAFETY SEATS FOR CHILDREN
Child and infant or child safety
seats
Use a safety seat that is
recommended for the size and
weight of the child. Carefully
follow all of the manufacturer's
instructions with the safety seat
you put in your vehicle. If you do
not install and use the safety seat
properly, the child may be injured
in a sudden stop or collision.
When installing a child safety seat:
²Use the correct safety belt
buckle for that seating position.
²Make sure the tongue is
securely fastened in the buckle.
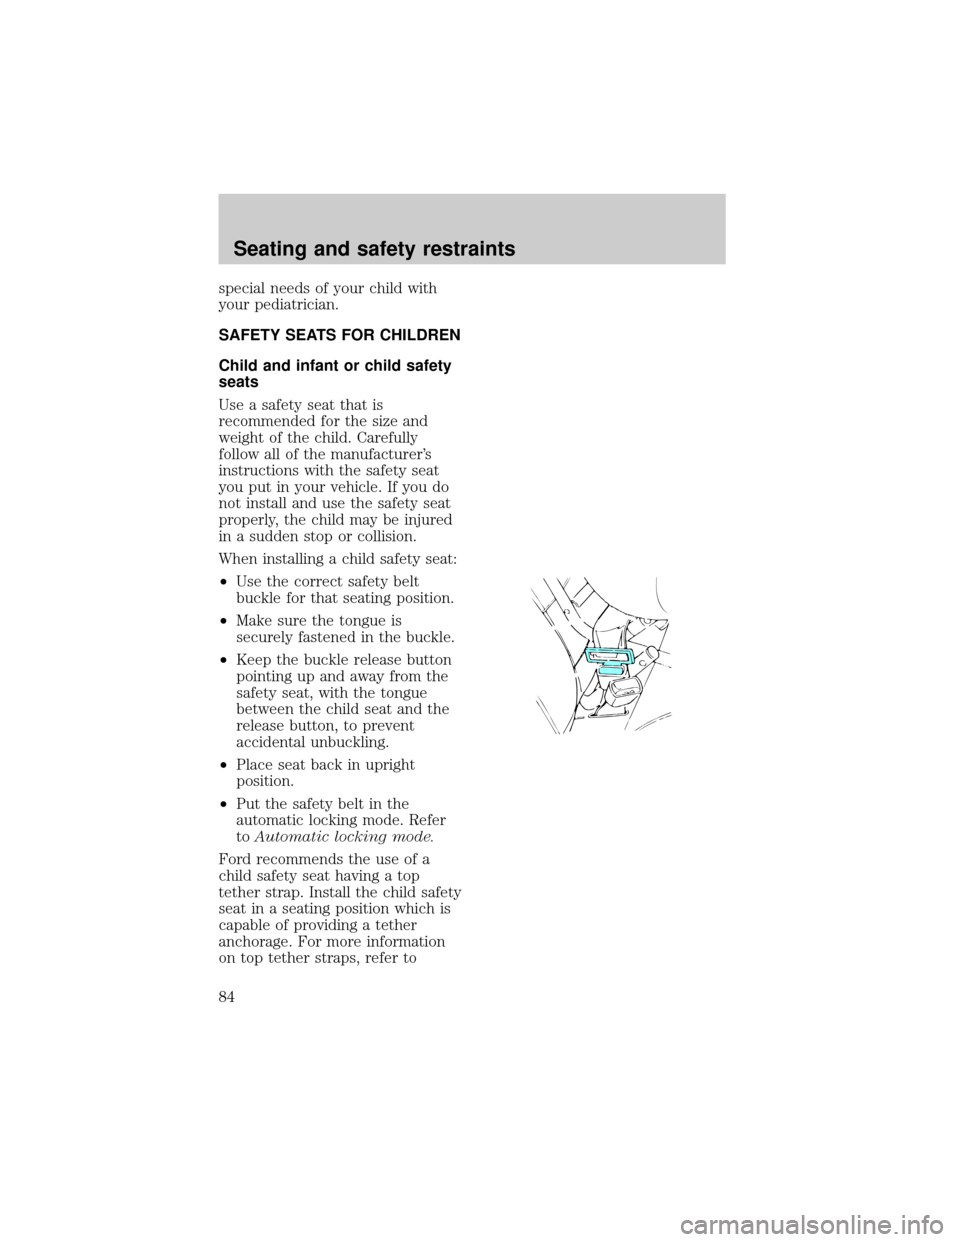
²Keep the buckle release button
pointing up and away from the
safety seat, with the tongue
between the child seat and the
release button, to prevent
accidental unbuckling.
²Place seat back in upright
position.
²Put the safety belt in the
automatic locking mode. Refer
toAutomatic locking mode.
Ford recommends the use of a
child safety seat having a top
tether strap. Install the child safety
seat in a seating position which is
capable of providing a tether
anchorage. For more information
on top tether straps, refer to
Seating and safety restraints
84
Page 86 of 188
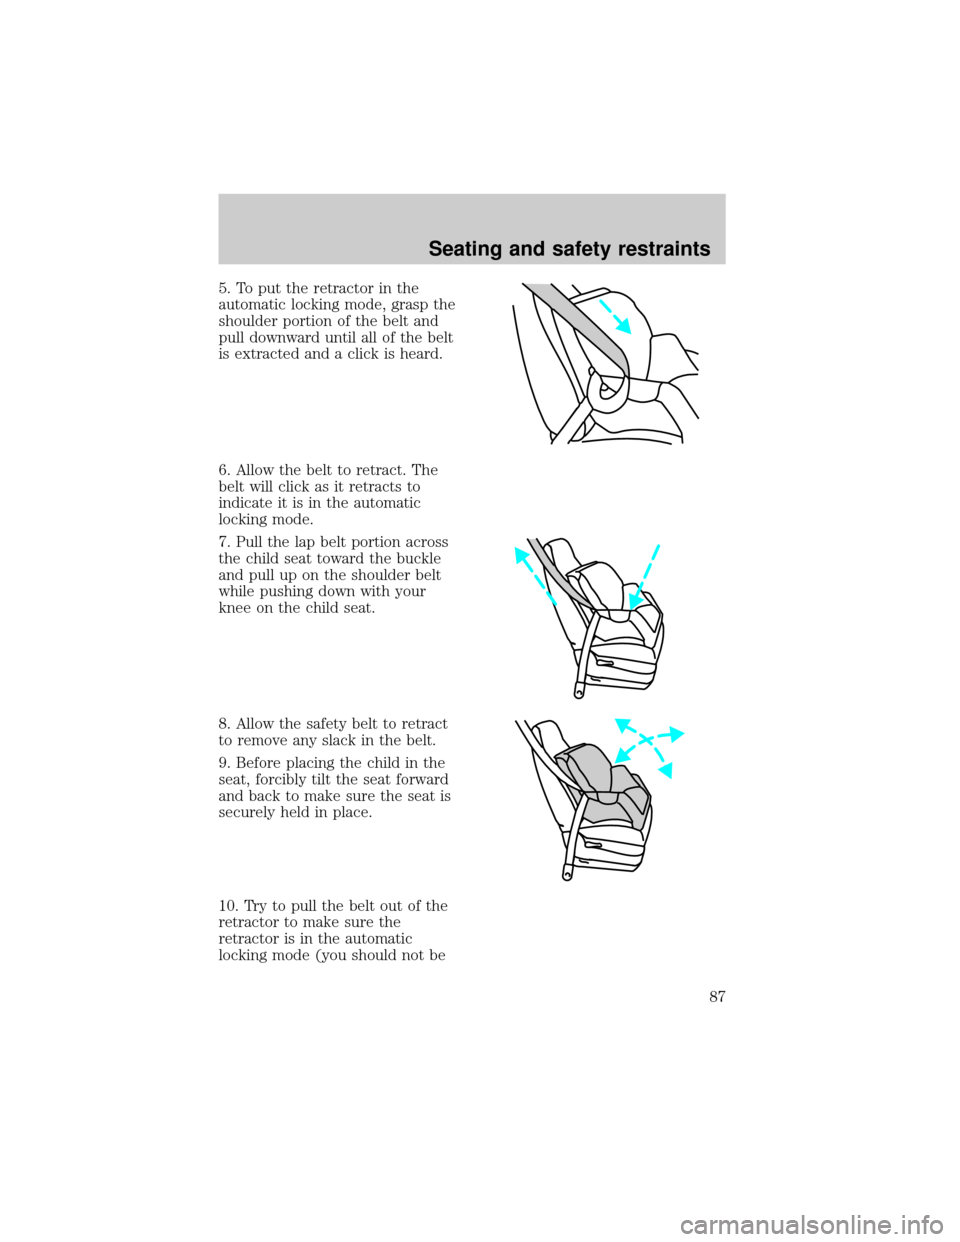
5. To put the retractor in the
automatic locking mode, grasp the
shoulder portion of the belt and
pull downward until all of the belt
is extracted and a click is heard.
6. Allow the belt to retract. The
belt will click as it retracts to
indicate it is in the automatic
locking mode.
7. Pull the lap belt portion across
the child seat toward the buckle
and pull up on the shoulder belt
while pushing down with your
knee on the child seat.
8. Allow the safety belt to retract
to remove any slack in the belt.
9. Before placing the child in the
seat, forcibly tilt the seat forward
and back to make sure the seat is
securely held in place.
10. Try to pull the belt out of the
retractor to make sure the
retractor is in the automatic
locking mode (you should not be
Seating and safety restraints
87
Page 96 of 188
shudder while braking, felt mainly
in the steering wheel, the vehicle
most likely needs service.
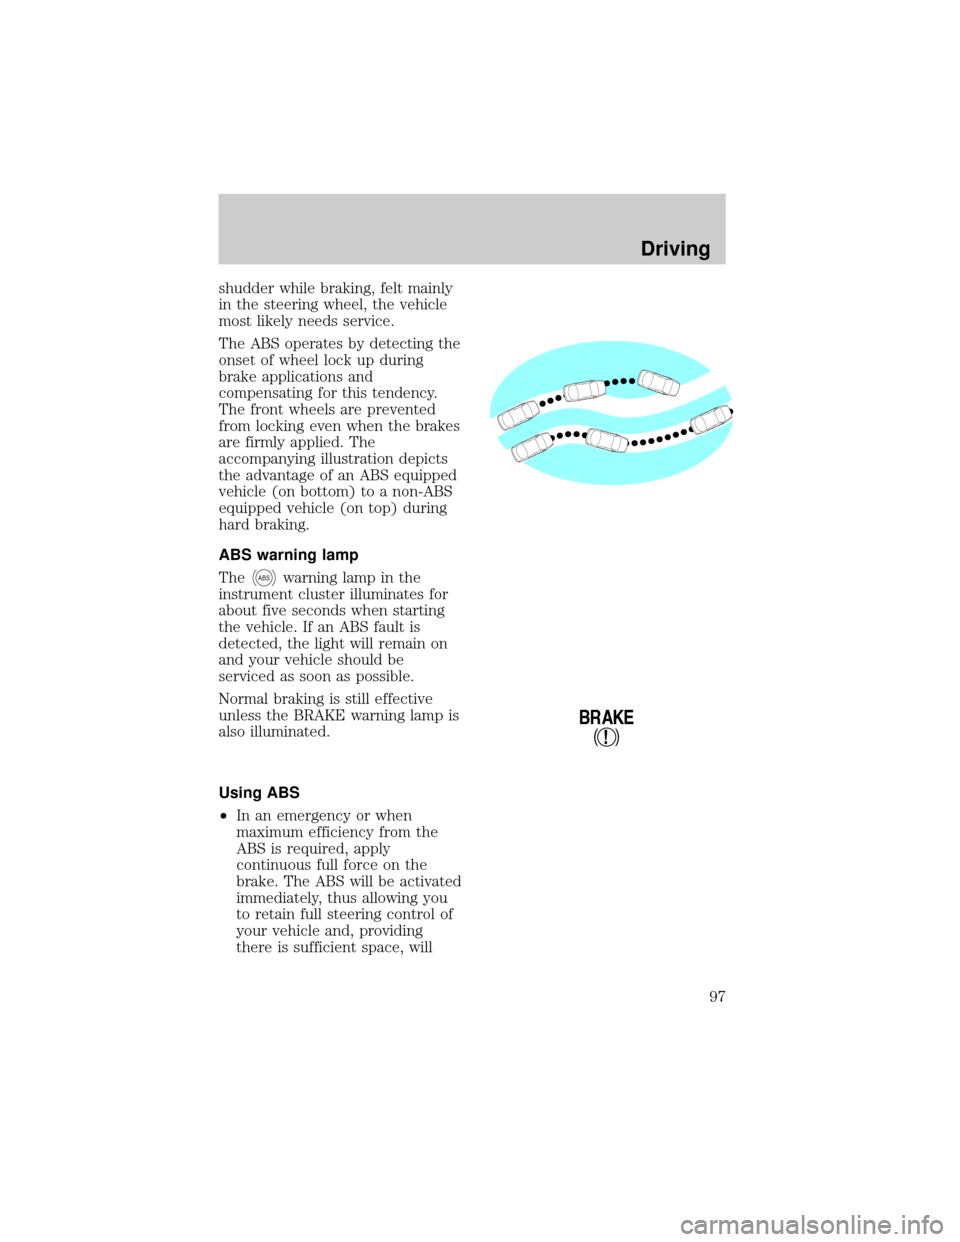
The ABS operates by detecting the
onset of wheel lock up during
brake applications and
compensating for this tendency.
The front wheels are prevented
from locking even when the brakes
are firmly applied. The
accompanying illustration depicts
the advantage of an ABS equipped
vehicle (on bottom) to a non-ABS
equipped vehicle (on top) during
hard braking.
ABS warning lamp
The
ABSwarning lamp in the
instrument cluster illuminates for
about five seconds when starting
the vehicle. If an ABS fault is
detected, the light will remain on
and your vehicle should be
serviced as soon as possible.
Normal braking is still effective
unless the BRAKE warning lamp is
also illuminated.
Using ABS
²In an emergency or when
maximum efficiency from the
ABS is required, apply
continuous full force on the
brake. The ABS will be activated
immediately, thus allowing you
to retain full steering control of
your vehicle and, providing
there is sufficient space, will
!
BRAKE
Driving
97