service indicator LINCOLN TOWN CAR 1998 Owners Manual
[x] Cancel search | Manufacturer: LINCOLN, Model Year: 1998, Model line: TOWN CAR, Model: LINCOLN TOWN CAR 1998Pages: 188, PDF Size: 1.29 MB
Page 5 of 188

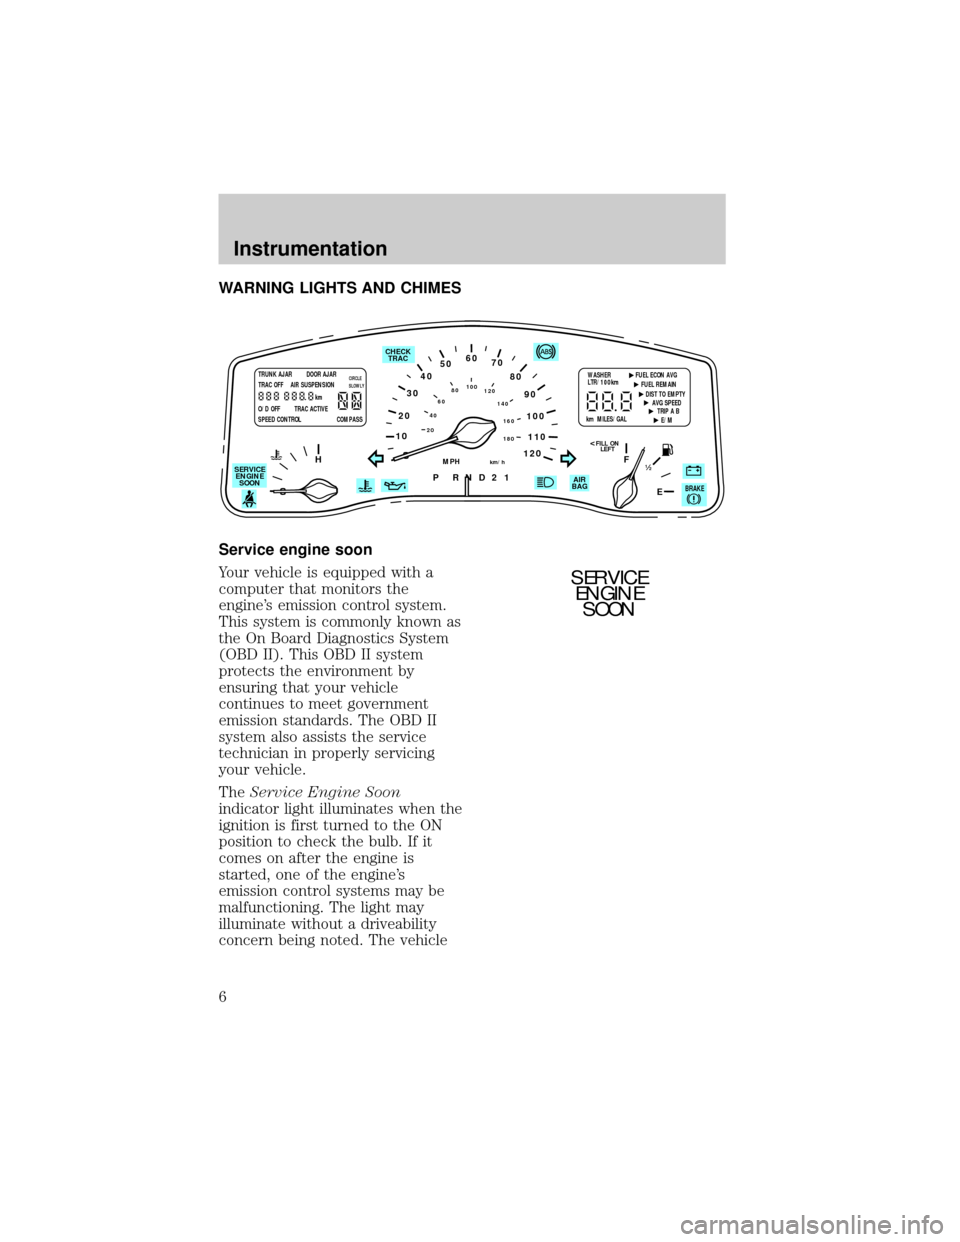
WARNING LIGHTS AND CHIMES
Service engine soon
Your vehicle is equipped with a
computer that monitors the
engine's emission control system.
This system is commonly known as
the On Board Diagnostics System
(OBD II). This OBD II system
protects the environment by
ensuring that your vehicle
continues to meet government
emission standards. The OBD II
system also assists the service
technician in properly servicing
your vehicle.
TheService Engine Soon
indicator light illuminates when the
ignition is first turned to the ON
position to check the bulb. If it
comes on after the engine is
started, one of the engine's
emission control systems may be
malfunctioning. The light may
illuminate without a driveability
concern being noted. The vehicle
10
2030405060
70
80
90
100
120206080
40100
120
160 140
180
P R N D 2 1
MPHkm/h
110
HF
E1
2
FILL ON
LEFT<
AIR
BAG CHECK
TRAC
SERVICE
ENGINE
SOON
TRUNK AJAR DOOR AJAR
TRAC OFF AIR SUSPENSION
O/D OFF TRAC ACTIVE
SPEED CONTROL COMPASSkmCIRCLE
SLOWLYWASHER FUEL ECON AVG
LTR/100km
FUEL REMAIN
DIST TO EMPTY
AVG SPEED
TRIP A B
E/M km MILES/GAL
BRAKE
SERVICE
ENGINE
SOON
Instrumentation
6
Page 8 of 188

parking brake indicates low brake
fluid level.
Anti-lock brake system (ABS)
Momentarily illuminates when the
ignition is turned on and the
engine is off. If the light remains
on, continues to flash or fails to
illuminate, have the system
serviced immediately.
Turn signal
Illuminates when the left or right
turn signal or the hazard lights are
turned on. If one or both of the
indicators stay on continuously or
flash faster, check for a burned-out
turn signal bulb. Refer toExterior
bulbsin theMaintenance and
carechapter.
High beams
Illuminates when the high beam
headlamps are turned on.
Charging system
Momentarily illuminates when the
ignition is turned ON and the
engine is off. The light also
illuminates when the battery is not
charging properly, requiring
electrical system service.
ABS
Instrumentation
9
Page 60 of 188

SecuriLockykeysfor more
information.
If one or both of your SecuriLocky
keys are lost or stolen and you
want to ensure the lost or stolen
key will not operate your vehicle,
bring your vehicle and all available
SecuriLockykeys to your
dealership for reinitialization.
Theft indicator
The theft indicator on top of the
instrument panel will operate as
follows:
²When the ignition is OFF, the
theft indicator will flash briefly
every 2 seconds to indicate the
SecuriLockysystem is
protecting your vehicle.
²When the ignition is turned to
RUN or START, the theft
indicator will light for 3 seconds
and then go out. If the theft
indicator stays on for an
extended period of time or
flashes rapidly, have the system
serviced by your dealership or a
qualified technician.
Programming spare
SecuriLockYkeys
Spare SecuriLockykeys can be
purchased from your dealership
and programmed to your
SecuriLockyanti-theft system (up
to a total of 8 keys). Your
dealership can program your new
SecuriLockykey(s) to your
vehicle or you can do it yourself
using the following simple
Controls and features
61
Page 135 of 188

²If the oil level isbetween the
MIN and MAX marks, the oil
level is acceptable.DO NOT
ADD OIL.
²If the oil level is below the MIN
mark, add enough oil to raise
the level within the MIN-MAX
range.
²Oil levels above the MAX mark
may cause engine damage. Some
oil must be removed from the
engine by a service technician.
7. Put the indicator back in and
ensure it is fully seated.
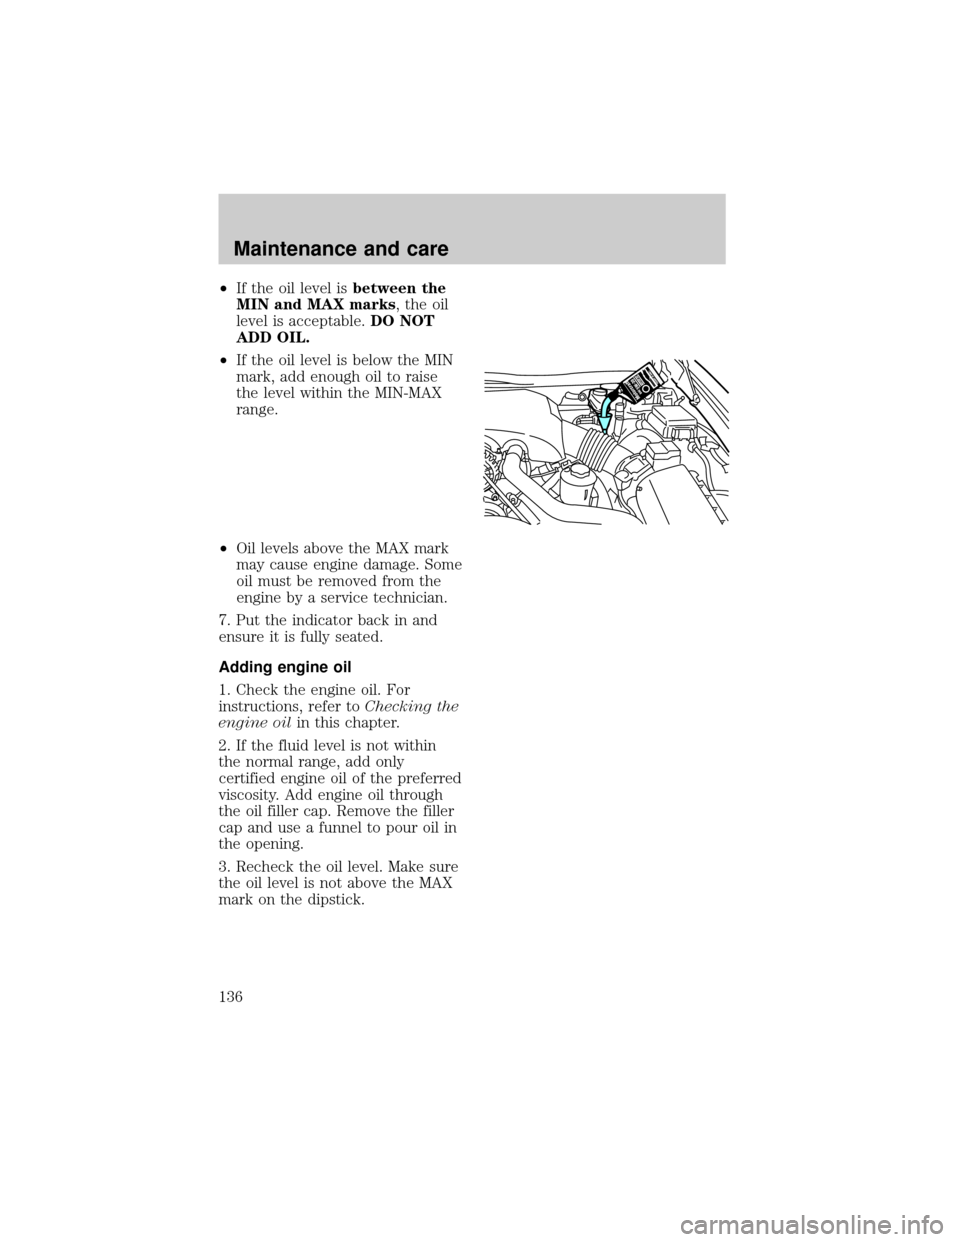
Adding engine oil
1. Check the engine oil. For
instructions, refer toChecking the
engine oilin this chapter.
2. If the fluid level is not within
the normal range, add only
certified engine oil of the preferred
viscosity. Add engine oil through
the oil filler cap. Remove the filler
cap and use a funnel to pour oil in
the opening.
3. Recheck the oil level. Make sure
the oil level is not above the MAX
mark on the dipstick.
Maintenance and care
136
Page 148 of 188

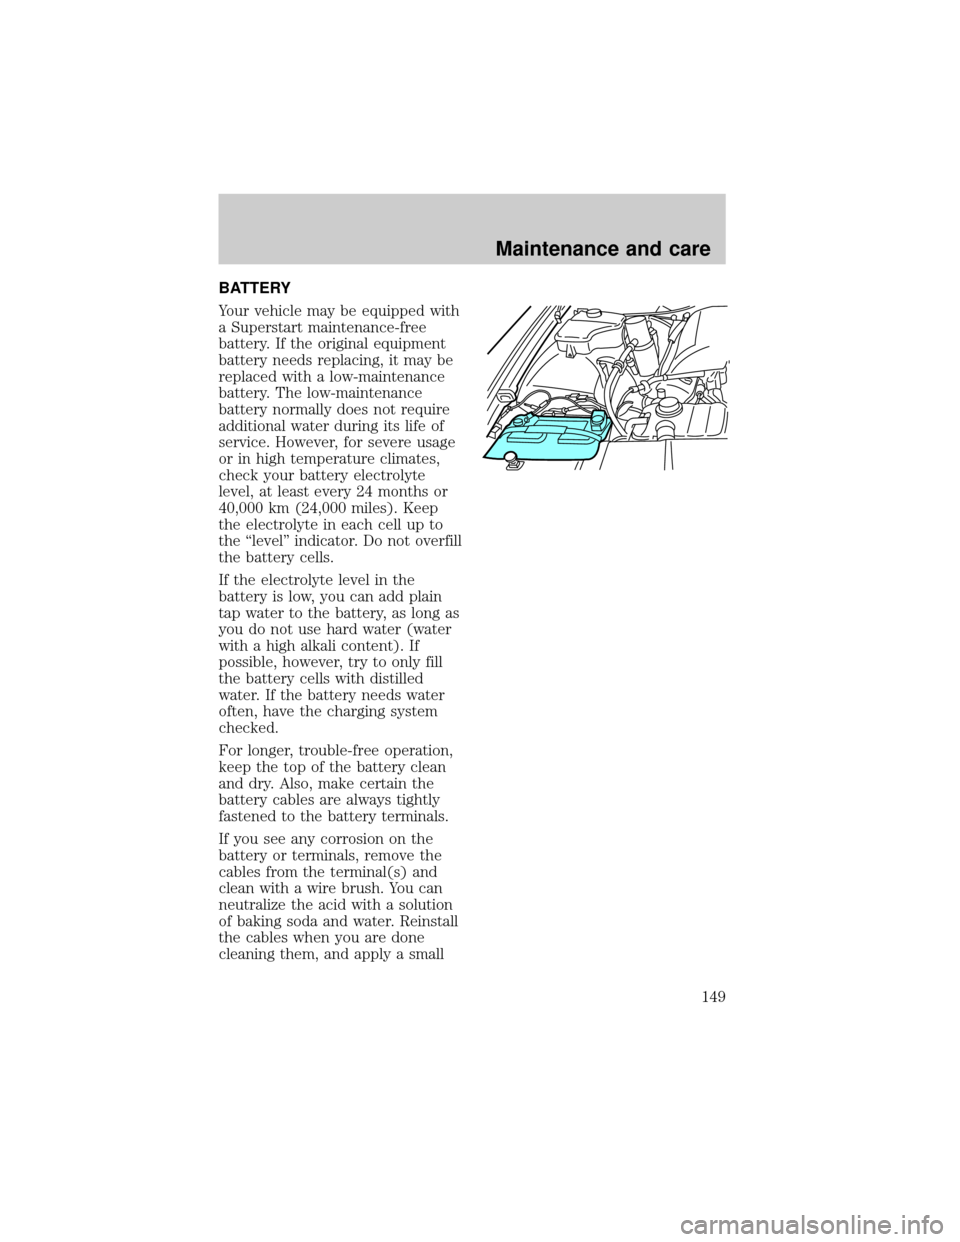
BATTERY
Your vehicle may be equipped with
a Superstart maintenance-free
battery. If the original equipment
battery needs replacing, it may be
replaced with a low-maintenance
battery. The low-maintenance
battery normally does not require
additional water during its life of
service. However, for severe usage
or in high temperature climates,
check your battery electrolyte
level, at least every 24 months or
40,000 km (24,000 miles). Keep
the electrolyte in each cell up to
the ªlevelº indicator. Do not overfill
the battery cells.
If the electrolyte level in the
battery is low, you can add plain
tap water to the battery, as long as
you do not use hard water (water
with a high alkali content). If
possible, however, try to only fill
the battery cells with distilled
water. If the battery needs water
often, have the charging system
checked.
For longer, trouble-free operation,
keep the top of the battery clean
and dry. Also, make certain the
battery cables are always tightly
fastened to the battery terminals.
If you see any corrosion on the
battery or terminals, remove the
cables from the terminal(s) and
clean with a wire brush. You can
neutralize the acid with a solution
of baking soda and water. Reinstall
the cables when you are done
cleaning them, and apply a small
Maintenance and care
149
Page 169 of 188

The horizontal aim must be
adjusted first. You will need one 4
mm box wrench or open end
wrench.
The following procedure assumes
that the vehicle's front structure is
properly aligned. If the vehicle has
been in an accident requiring the
front end of the vehicle to be
repaired, the horizontal indicator
should be recalibrated by the
service facility.
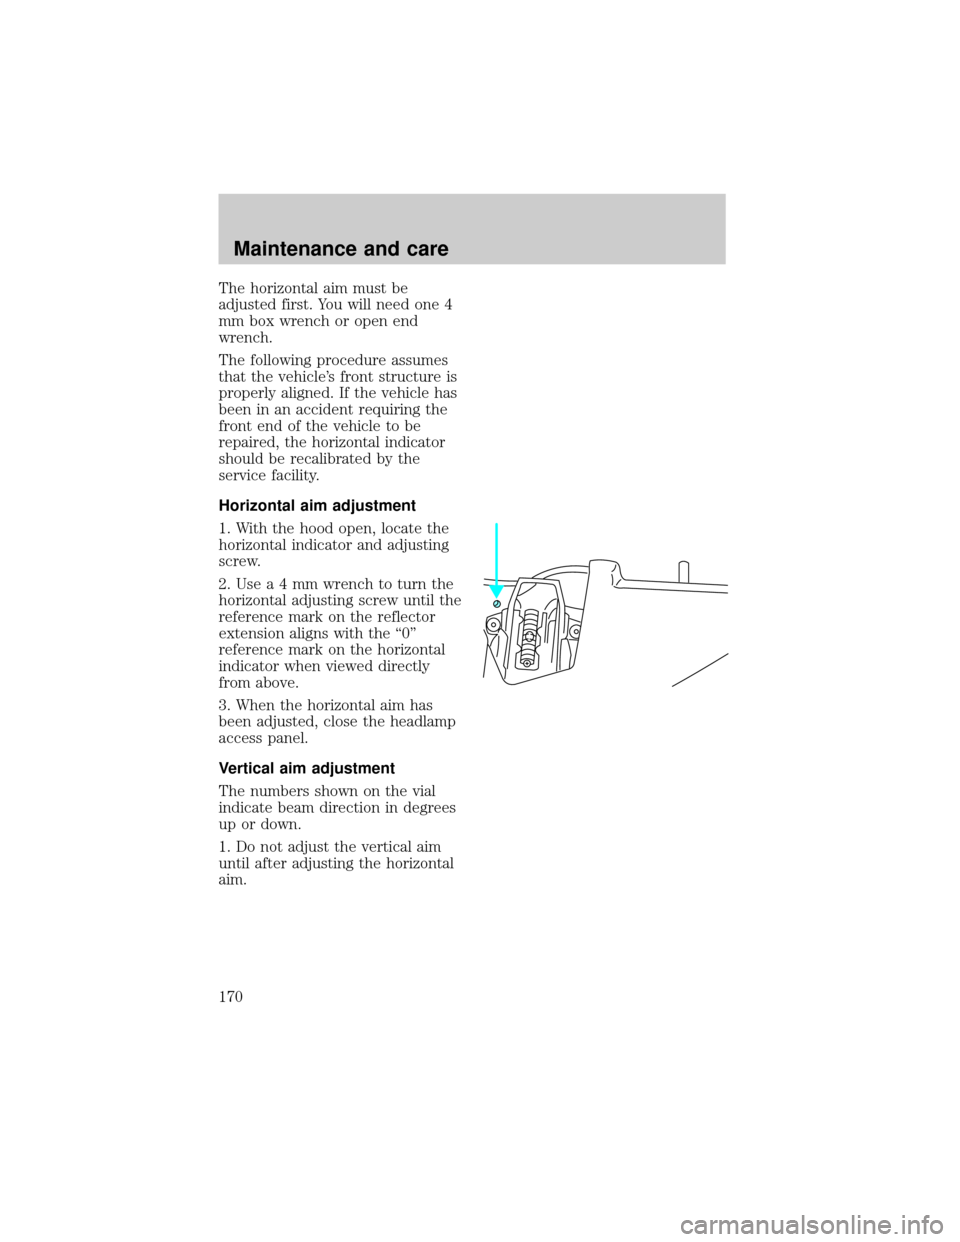
Horizontal aim adjustment
1. With the hood open, locate the
horizontal indicator and adjusting
screw.
2.Usea4mmwrench to turn the
horizontal adjusting screw until the
reference mark on the reflector
extension aligns with the ª0º
reference mark on the horizontal
indicator when viewed directly
from above.
3. When the horizontal aim has
been adjusted, close the headlamp
access panel.
Vertical aim adjustment
The numbers shown on the vial
indicate beam direction in degrees
up or down.
1. Do not adjust the vertical aim
until after adjusting the horizontal
aim.
Maintenance and care
170
Page 185 of 188

Aiming headlamps ....................169
Air bag supplemental restraint
system ..........................................76
and child safety seats ..............78
description ................................77
disposal ......................................81
indicator light ...........................80
passenger air bag .....................79
Air suspension
description ..............................102
Anti-lock brake system
(ABS)#$description
Battery .......................................149
Brake fluid
checking and adding ..............138
Brakes ..........................................96
anti-lock .....................................96
anti-lock brake system (ABS)
warning light .............................97
fluid, checking and adding ....138
traction control .........................99
Brake-shift interlock .................103
Break-in period .............................2
Bulbs, replacing ........................166
headlamps ...............................167
specifications ..........................171
Changing a tire .........................122
Child safety seats ........................84
Childproof locks ..........................51
Chime
headlamps on ............................13
Cleaning your vehicle ...............172
engine compartment ..............173
fabric ........................................175
instrument panel ....................175
plastic parts ............................174
safety belts ..............................176
tail lamps .................................175
washing ....................................172
waxing .....................................172
wheels ......................................173
windows ..................................178Climate control system
automatic temperature
control ..............26,27,28,29,32,33
Clock ............................................34
Compass, electronic
calibration .................................19
set zone adjustment .................18
Controls .......................................52
Daytime running light system ...25
Defrost
rear window ..............................34
Emission control system ..........163
Engine
service points ..........................134
Engine block heater ...................93
Engine coolant
checking and adding ..............140
disposal ....................................142
refill capacities ........................142
Engine oil ...........................135,137
changing oil and oil filter .......137
checking and adding .......135,136
Exhaust fumes ............................94
Fail safe cooling ........................143
Floor mats ...................................53
Fuel
calculating fuel economy .......162
improving fuel economy ........113
octane rating ...........................161
quality ......................................161
safety information relating to
automotive fuels .....................158
Fuel gauge ...................................14
Fuel pump shut-off switch .......114
Fuse panels
instrument panel ....................117
power distribution box ...........120
Fuses ...................................115,116
Gauges, Mechanical ....................14
engine coolant temperature
gauge .........................................15
Hazard flashers .........................114
Index
186
Page 186 of 188

Headlamps ...................................24
autolamp system .......................24
flashing ......................................26
high beam .................................25
Heating ........................................26
High beams
indicator light .............................9
Hood
release lever ............................133
Ignition
positions of the ignition ...........35
Instrument panel
lighting up panel and interior .24
Jump-starting
your vehicle ........................126,128
attaching cables ......................127
disconnecting cables ..............128
Keyless entry system
autolock .....................................57
Keys
key in ignition chime ...............13
Lamps
interior lamps .........................171
Lights, warning and indicator
air bag ..........................................8
anti-lock brakes (ABS) ..............9
brake ............................................8
charging system ..........................9
low coolant ................................10
oil pressure ...............................10
safety belt ...................................8
service engine soon .................6,7
traction control system ............10
turn signal indicator ...................9
Lubricant specifications ...........181
Message center ...........................16
reset button ..............................17
select button .............................17
Mirrors
automatic dimming rearview
mirror ........................................47
cleaning ...................................178heated ........................................50
side view mirrors (power) .......50
Moon roof ....................................46
Odometer .....................................14
Panic alarm feature, remote
entry system ................................55
Parking brake ..............................98
Parts (see Motorcraft parts) ....179
Power door locks ........................49
Power steering
fluid, checking and adding ....145
Refill capacities for fluids ........180
Relays ........................................115
Remote entry system .................53
illuminated entry ......................57
locking/unlocking doors ......53,54
replacement/additional
transmitters ...............................56
replacing the batteries .............55
Reporting safety defects ..........185
Safety restraints
automatic locking mode
(retractor) ............................71,72
extension assembly ..................74
for children ...............................81
lap and shoulder belts .............70
maintenance ..............................75
proper use .................................68
warning light and chime .....13,75
Safety seats for children
attaching with tether straps ....89
automatic locking mode
(retractor) .................................85
in rear seat ................................88
tether anchorage hardware .....89
Seats ............................................64
adjusting the seat, manual .......67
adjusting the seat, power ...64,66
head restraints ..........................64
heated seats ..............................66
lumbar support .........................67
Servicing your vehicle ..............131
Index
187