CD changer LINCOLN TOWN CAR 1999 Owners Manual
[x] Cancel search | Manufacturer: LINCOLN, Model Year: 1999, Model line: TOWN CAR, Model: LINCOLN TOWN CAR 1999Pages: 208, PDF Size: 1.59 MB
Page 35 of 208
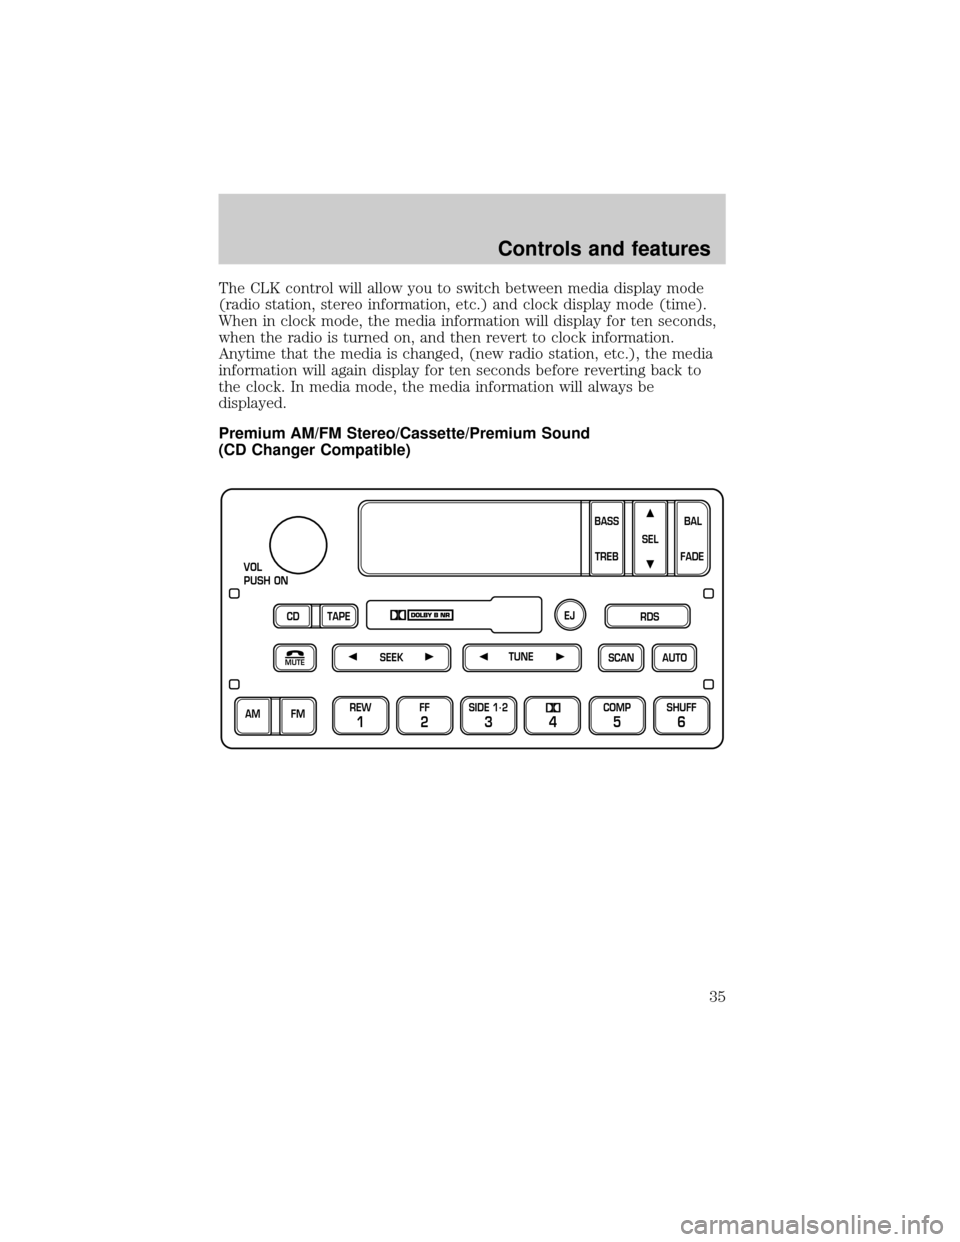
The CLK control will allow you to switch between media display mode
(radio station, stereo information, etc.) and clock display mode (time).
When in clock mode, the media information will display for ten seconds,
when the radio is turned on, and then revert to clock information.
Anytime that the media is changed, (new radio station, etc.), the media
information will again display for ten seconds before reverting back to
the clock. In media mode, the media information will always be
displayed.
Premium AM/FM Stereo/Cassette/Premium Sound
(CD Changer Compatible)
SCAN
VOL
PUSH ON
REW
1
FF
2
SIDE 1.
2
34
COMP
5
SHUFF
6
AUTO TUNE
SEEK
SEL
BAL
FADE
MUTE
FM AM
EJ
BASS
TREB
CD TAPERDS
Controls and features
35
Page 36 of 208
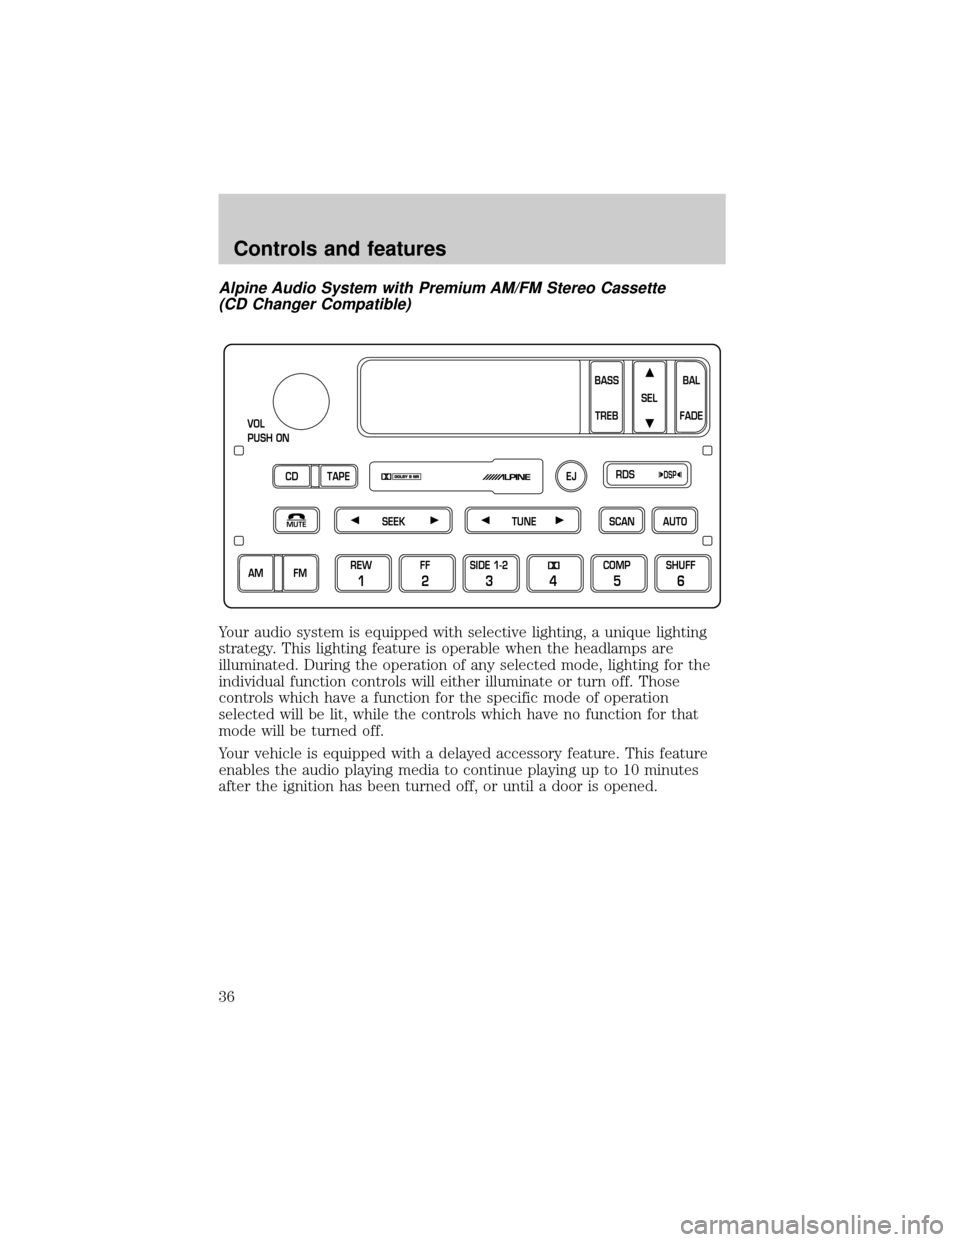
Alpine Audio System with Premium AM/FM Stereo Cassette
(CD Changer Compatible)
Your audio system is equipped with selective lighting, a unique lighting
strategy. This lighting feature is operable when the headlamps are
illuminated. During the operation of any selected mode, lighting for the
individual function controls will either illuminate or turn off. Those
controls which have a function for the specific mode of operation
selected will be lit, while the controls which have no function for that
mode will be turned off.
Your vehicle is equipped with a delayed accessory feature. This feature
enables the audio playing media to continue playing up to 10 minutes
after the ignition has been turned off, or until a door is opened.
SEEKMUTETUNESCANAUTO
VOL
PUSH ON
BASS
TREBBAL
FADE SEL
CD TAPERDS
EJ
AM FMREW
1
FF
2
SIDE 1-2
34
COMP
5
SHUFF
6
DSP
Controls and features
36
Page 39 of 208
Tune adjust for CD changer
²Pressto select the previous
disc in the CD changer. (Play will
begin on the first track of the
disc unless the CD changer is in
shuffle mode.) Refer toShuffle featurefor more information. Hold the
control to continue reversing through the discs.
²Press
to select the next disc in the CD changer. Hold the control
to fast-forward through the remaining discs.
Seek function
The seek function control works in radio, tape or CD mode
(if equipped).
Seek function in radio mode
²Pressto find the next
listenable station down the
frequency band.
²Press
to find the next
listenable station up the frequency band.
Seek function in tape mode
²Pressto listen to the previous selection on the tape or return to
the beginning of the current selection.
²Press
to listen to the next selection on the tape.
Seek function for CD changer
²Pressto seek to the previous
track of the current disc. If a
selection has been playing for
three seconds or more and you
press
, the CD changer will replay that selection from the
beginning.
²Press
to seek forward to the next track of the current disc. After
the last track has been completed, the first track of the current disc
will automatically replay.
TUNE
SEEK
SEEK
Controls and features
39
Page 44 of 208
Compression feature
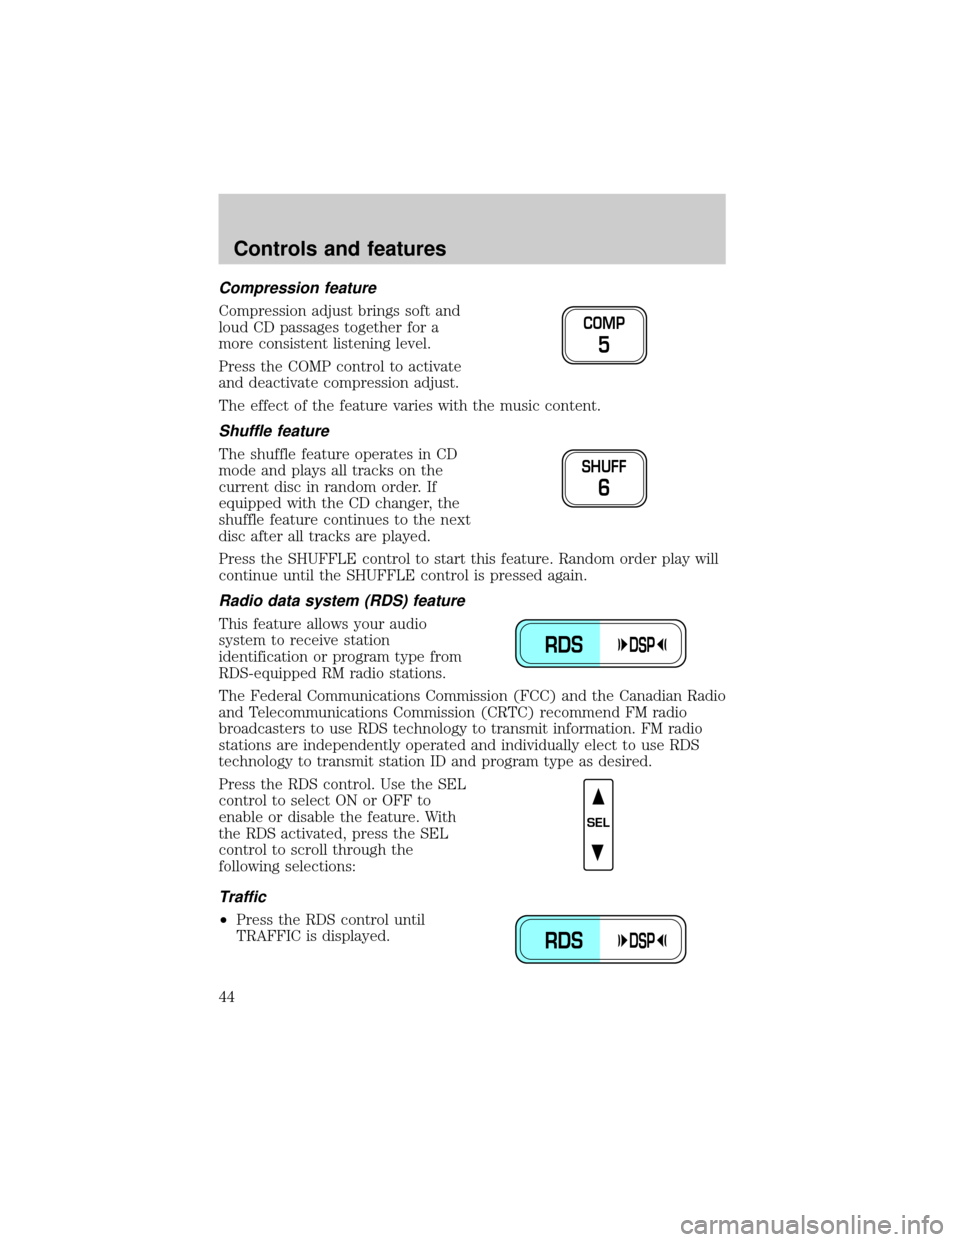
Compression adjust brings soft and
loud CD passages together for a
more consistent listening level.
Press the COMP control to activate
and deactivate compression adjust.
The effect of the feature varies with the music content.
Shuffle feature
The shuffle feature operates in CD
mode and plays all tracks on the
current disc in random order. If
equipped with the CD changer, the
shuffle feature continues to the next
disc after all tracks are played.
Press the SHUFFLE control to start this feature. Random order play will
continue until the SHUFFLE control is pressed again.
Radio data system (RDS) feature
This feature allows your audio
system to receive station
identification or program type from
RDS-equipped RM radio stations.
The Federal Communications Commission (FCC) and the Canadian Radio
and Telecommunications Commission (CRTC) recommend FM radio
broadcasters to use RDS technology to transmit information. FM radio
stations are independently operated and individually elect to use RDS
technology to transmit station ID and program type as desired.
Press the RDS control. Use the SEL
control to select ON or OFF to
enable or disable the feature. With
the RDS activated, press the SEL
control to scroll through the
following selections:
Traffic
²Press the RDS control until
TRAFFIC is displayed.
COMP
5
SHUFF
6
RDSDSP
SEL
RDSDSP
Controls and features
44
Page 48 of 208
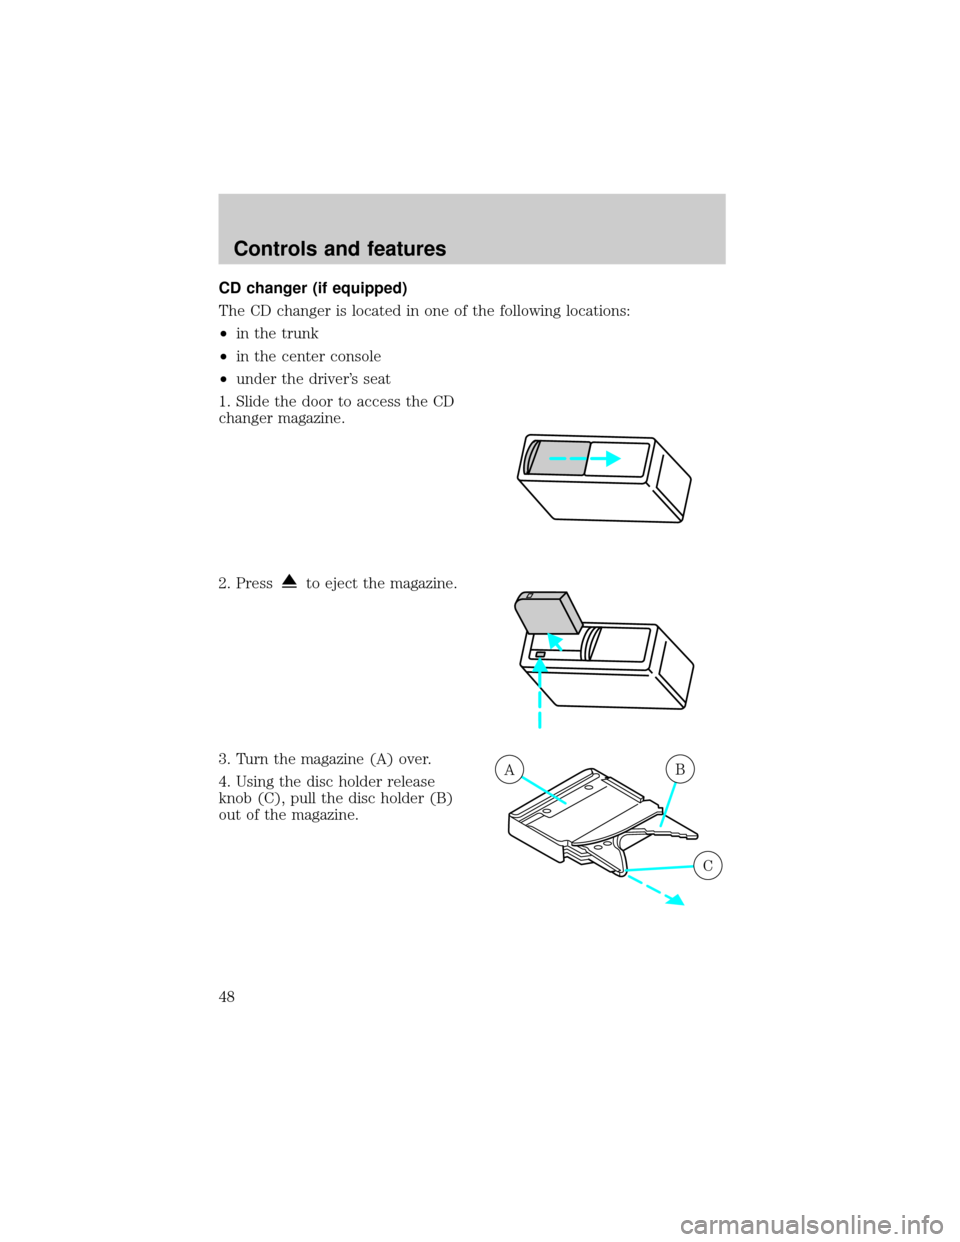
CD changer (if equipped)
The CD changer is located in one of the following locations:
²in the trunk
²in the center console
²under the driver's seat
1. Slide the door to access the CD
changer magazine.
2. Press
to eject the magazine.
3. Turn the magazine (A) over.
4. Using the disc holder release
knob (C), pull the disc holder (B)
out of the magazine.
AB
C
Controls and features
48
Page 49 of 208
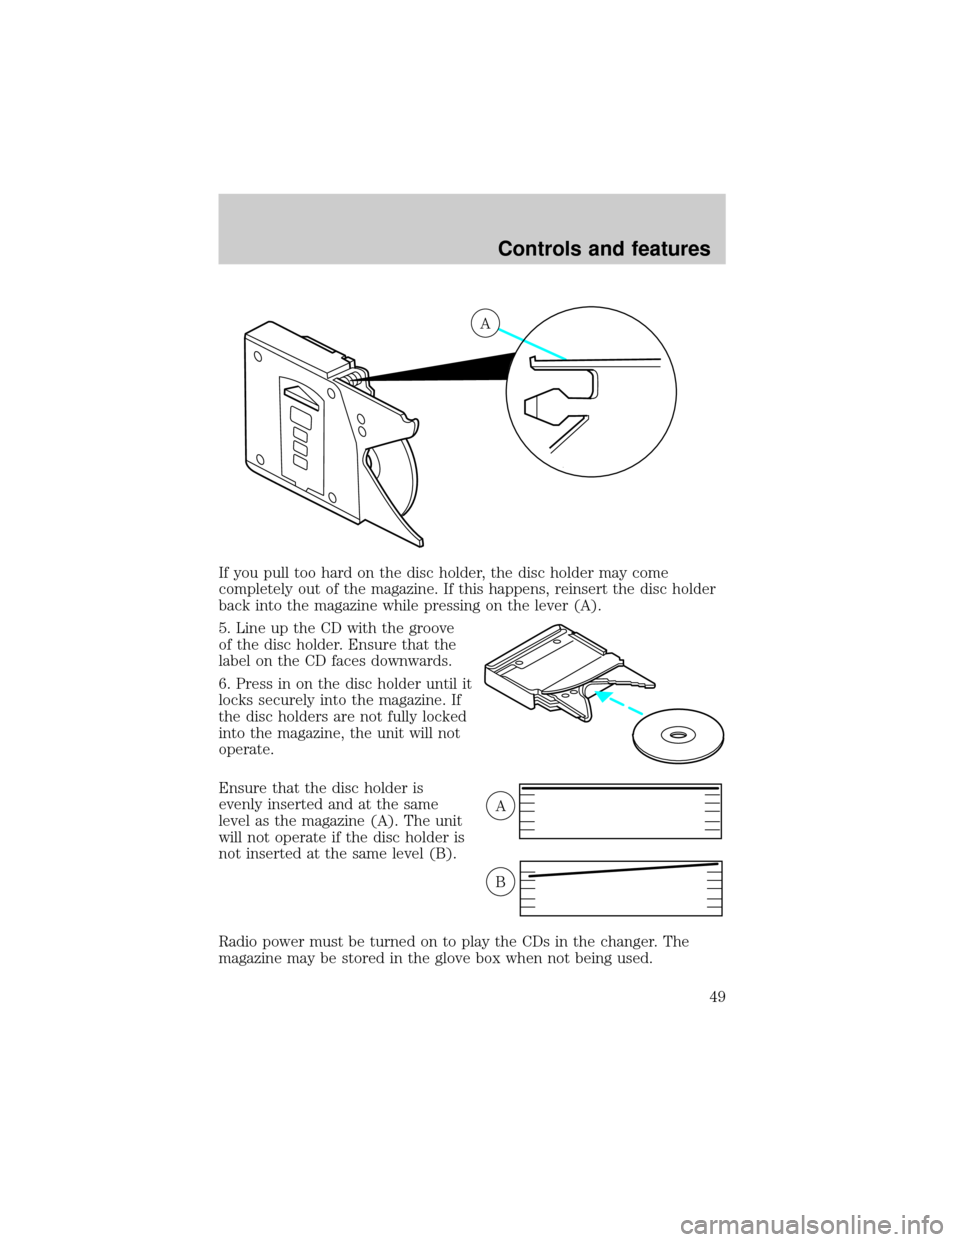
If you pull too hard on the disc holder, the disc holder may come
completely out of the magazine. If this happens, reinsert the disc holder
back into the magazine while pressing on the lever (A).
5. Line up the CD with the groove
of the disc holder. Ensure that the
label on the CD faces downwards.
6. Press in on the disc holder until it
locks securely into the magazine. If
the disc holders are not fully locked
into the magazine, the unit will not
operate.
Ensure that the disc holder is
evenly inserted and at the same
level as the magazine (A). The unit
will not operate if the disc holder is
not inserted at the same level (B).
Radio power must be turned on to play the CDs in the changer. The
magazine may be stored in the glove box when not being used.
A
A
B
Controls and features
49
Page 50 of 208
The CD magazine may be inserted or ejected with the radio power off.
ONLY use the magazine supplied with the CD changer, other types will
damage the unit.
Keep the CD changer door closed. Coins and foreign objects will damage
the CD player and void your audio system warranty.
Troubleshooting the CD changer (if equipped)
The laser beam used in the compact disc player is harmful to the
eyes. Do not attempt to disassemble the case.
If sound skips:
²You may be traveling on a rough road, playing badly scratched discs or
the disc may be dirty. Skipping will not scratch the discs or damage
the player.
If your changer does not work, it may be that:
²A disc is already loaded where you want to insert a disc.
²The disc is inserted with the label surface downward.
²The disc is dusty or defective.
²The player's internal temperature is above 60ÉC (140ÉF). Allow the
player to cool down before operating.
²A disc with format and dimensions not within industry standards is
inserted.
Cleaning compact discs
Inspect all discs for contamination before playing. If necessary, clean
discs only with an approved CD cleaner and wipe from the center out to
the edge. Do not use circular motion.
CD and CD changer care
²Handle discs by their edges only. Never touch the playing surface.
²Do not expose discs to direct sunlight or heat sources for extended
periods of time.
²Do not insert more than one disc into each slot of the CD changer
magazine.
Controls and features
50
Page 128 of 208
Fuse/Relay
LocationFuse Amp
RatingDescription
30 7.5A LF Seat Module, Trunk Lid Release Switch,
Door Lock Switches, LF Seat Control
Switch, LF Door Module, Power Mirror
Switch
31 7.5A Main Light Switch, Lighting Control Module
(LCM)
33 15A Front Radio Control Unit, Digital Compact
Disk Changer, Cellular Telephone
Transceiver
Relay 1 Ð Accessory Delay Relay (Signature/Cartier)
or Power Window Relay (Executive)
Power distribution box
The power distribution box is located in the engine compartment. The
power distribution box contains high-current fuses that protect your
vehicle's main electrical systems from overloads.
Always disconnect the battery before servicing high current
fuses.
Always replace the cover to the Power Distribution Box before
reconnecting the battery or refilling fluid reservoirs.
If the battery has been disconnected and reconnected, refer to the
Batterysection of theMaintenance and Carechapter.
Roadside emergencies
128
Page 200 of 208

Accessory delay ..........................67
Air bag supplemental
restraint system .....................91,95
and child safety seats ..............92
description ...........................91,95
disposal ......................................98
driver air bag .......................93,96
indicator light ...................7,94,97
operation ..............................93,96
passenger air bag ................93,96
Air cleaner filter .......................181
Air conditioning ..........................22
automatic temperature
control system ..........................22
Air suspension ...........................113
air leveling disabled warning,
message center .......................113
air ride switch off warning,
message center .......................113
check air ride system
warning, message center .......113
check air suspension warning,
message center .......................113
description ..............................113
warning light ...........................113
Anti-theft system ..............77,78,79
Automatic transmission
driving an automatic
overdrive .................................115
fluid, refill capacities ..............181
fluid, specification ..................184
Axle
lubricant specifications ..........184
refill capacities ........................181
traction lok ..............................117
Battery .......................................154
acid, treating emergencies .....154
jumping a disabled battery ....135
maintenance-free ....................154
replacement, specifications ...181
servicing ..................................154
Brakes ........................................109anti-lock ............................109,110
anti-lock brake system
(ABS) warning light ............8,110
brake warning light ....................8
fluid, checking and adding ....146
fluid, refill capacities ..............181
fluid, specifications ..........182,184
lubricant specifications ...182,184
shift interlock ..........................114
Break-in period .............................2
Capacities for refilling fluids ....181
CD changer .................................48
Child safety restraints ................98
child safety belts ......................98
child safety seats ......................99
Child safety seats ........................99
attaching with tether straps ..103
built-in child seat .....................99
in front seat ............................101
in rear seat ..............................101
tether anchorage hardware ...104
Cleaning your vehicle ...............176
engine compartment ..............178
exterior .............................177,180
exterior lamps .........................179
instrument panel ....................179
interior ..............................179,180
mirrors .....................................180
plastic parts ............................178
safety belts ..............................180
washing ....................................176
waxing .....................................177
wheels ......................................177
windows ..................................180
wiper blades ............................179
Clock ............................................52
Compass, electronic
calibration .................................17
set zone adjustment .................16
Controls ........................60,61,62,63
power seat ............................80,82
steering column ........................59
Index
200