AUX LINCOLN TOWN CAR 2001 Owners Manual
[x] Cancel search | Manufacturer: LINCOLN, Model Year: 2001, Model line: TOWN CAR, Model: LINCOLN TOWN CAR 2001Pages: 240, PDF Size: 1.92 MB
Page 59 of 240

AUXILIARY POWER POINT
Power outlets are designed for
accessory plugs only. Do not
hang any type of accessory or
accessory bracket from the plug.
Improper use of the power
outlet can cause damage not
covered by your warranty.
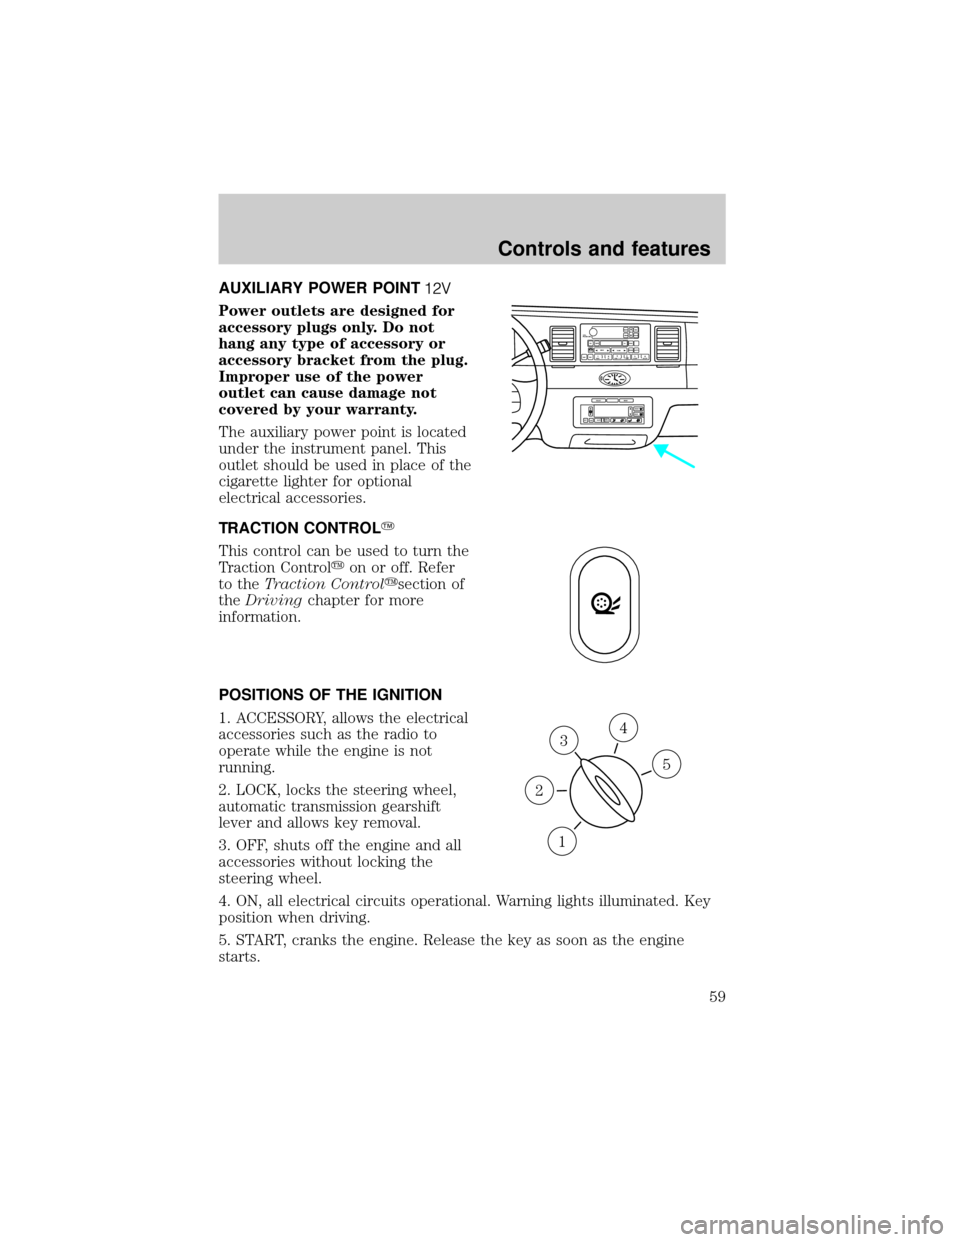
The auxiliary power point is located
under the instrument panel. This
outlet should be used in place of the
cigarette lighter for optional
electrical accessories.
TRACTION CONTROLY
This control can be used to turn the
Traction Controlyon or off. Refer
to theTraction Controlysection of
theDrivingchapter for more
information.
POSITIONS OF THE IGNITION
1. ACCESSORY, allows the electrical
accessories such as the radio to
operate while the engine is not
running.
2. LOCK, locks the steering wheel,
automatic transmission gearshift
lever and allows key removal.
3. OFF, shuts off the engine and all
accessories without locking the
steering wheel.
4. ON, all electrical circuits operational. Warning lights illuminated. Key
position when driving.
5. START, cranks the engine. Release the key as soon as the engine
starts.
VOL
PUSH ONTAPE
MUTESEEK
TUNE
AM
FM
REW
FFSIDE 1 2
COMP
SHUFFCDEJ
RDS
SCAN AUTO123
4
56
BASS
TREBSELBAL
FADE
EXT
OFFMAX
A/CAUTOFRONT
REARSELECTRESET
3
1
2
5
4
Controls and features
59
Page 76 of 240

MEMORY SEATS/REARVIEW MIRRORS/ADJUSTABLE PEDALS
(IF EQUIPPED)
This system allows automatic
positioning of the driver seat,
outside rearview mirrors, and
adjustable pedals to three
programmable positions.
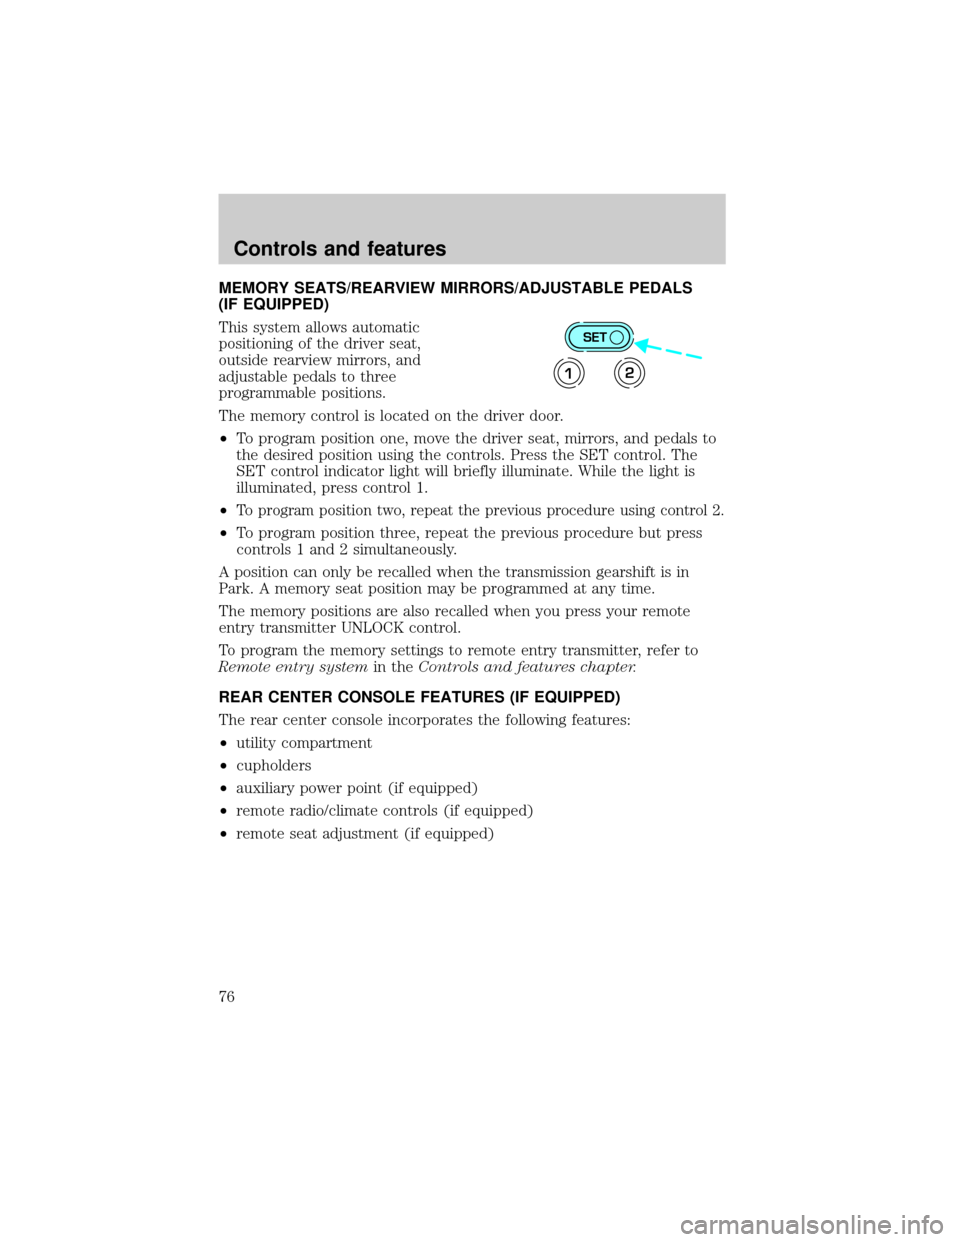
The memory control is located on the driver door.
²To program position one, move the driver seat, mirrors, and pedals to
the desired position using the controls. Press the SET control. The
SET control indicator light will briefly illuminate. While the light is
illuminated, press control 1.
²
To program position two, repeat the previous procedure using control 2.
²To program position three, repeat the previous procedure but press
controls 1 and 2 simultaneously.
A position can only be recalled when the transmission gearshift is in
Park. A memory seat position may be programmed at any time.
The memory positions are also recalled when you press your remote
entry transmitter UNLOCK control.
To program the memory settings to remote entry transmitter, refer to
Remote entry systemin theControls and features chapter.
REAR CENTER CONSOLE FEATURES (IF EQUIPPED)
The rear center console incorporates the following features:
²utility compartment
²cupholders
²auxiliary power point (if equipped)
²remote radio/climate controls (if equipped)
²remote seat adjustment (if equipped)
SET
12
Controls and features
76
Page 153 of 240

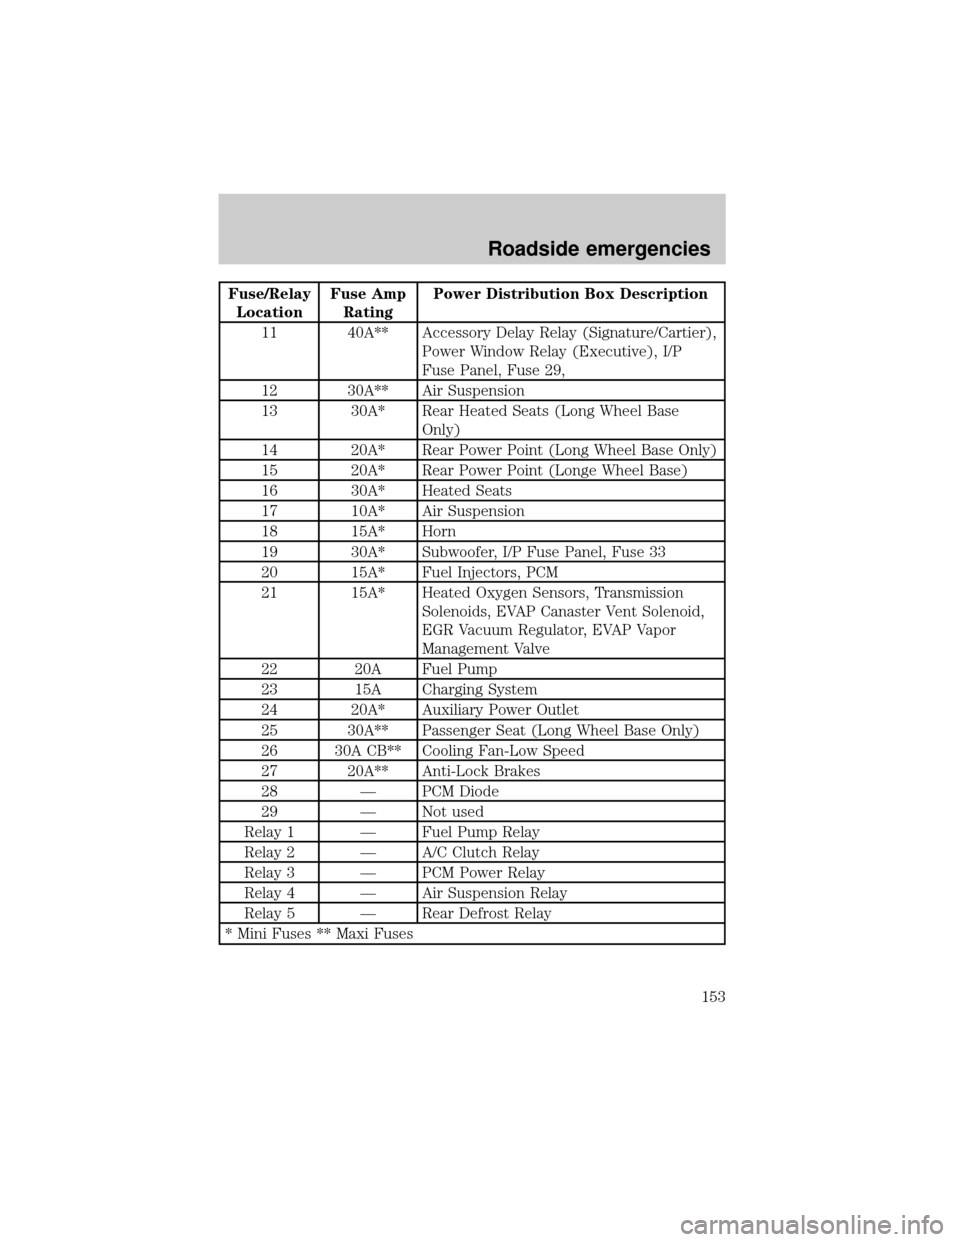
Fuse/Relay
LocationFuse Amp
RatingPower Distribution Box Description
11 40A** Accessory Delay Relay (Signature/Cartier),
Power Window Relay (Executive), I/P
Fuse Panel, Fuse 29,
12 30A** Air Suspension
13 30A* Rear Heated Seats (Long Wheel Base
Only)
14 20A* Rear Power Point (Long Wheel Base Only)
15 20A* Rear Power Point (Longe Wheel Base)
16 30A* Heated Seats
17 10A* Air Suspension
18 15A* Horn
19 30A* Subwoofer, I/P Fuse Panel, Fuse 33
20 15A* Fuel Injectors, PCM
21 15A* Heated Oxygen Sensors, Transmission
Solenoids, EVAP Canaster Vent Solenoid,
EGR Vacuum Regulator, EVAP Vapor
Management Valve
22 20A Fuel Pump
23 15A Charging System
24 20A* Auxiliary Power Outlet
25 30A** Passenger Seat (Long Wheel Base Only)
26 30A CB** Cooling Fan-Low Speed
27 20A** Anti-Lock Brakes
28 Ð PCM Diode
29 Ð Not used
Relay 1 Ð Fuel Pump Relay
Relay 2 Ð A/C Clutch Relay
Relay 3 Ð PCM Power Relay
Relay 4 Ð Air Suspension Relay
Relay 5 Ð Rear Defrost Relay
* Mini Fuses ** Maxi Fuses
Roadside emergencies
153
Page 165 of 240

Working with the engine off
1. Set the parking brake and ensure the gearshift is securely latched in P
(Park).
2. Turn off the engine and remove the key.
3. Block the wheels to prevent the vehicle from moving unexpectedly.
Working with the engine on
1. Set the parking brake and ensure the gearshift is securely latched in P
(Park).
2. Block the wheels to prevent the vehicle from moving unexpectedly.
Note:Do not start your engine with the air cleaner removed and do not
remove it while the engine is running.
OPENING THE HOOD
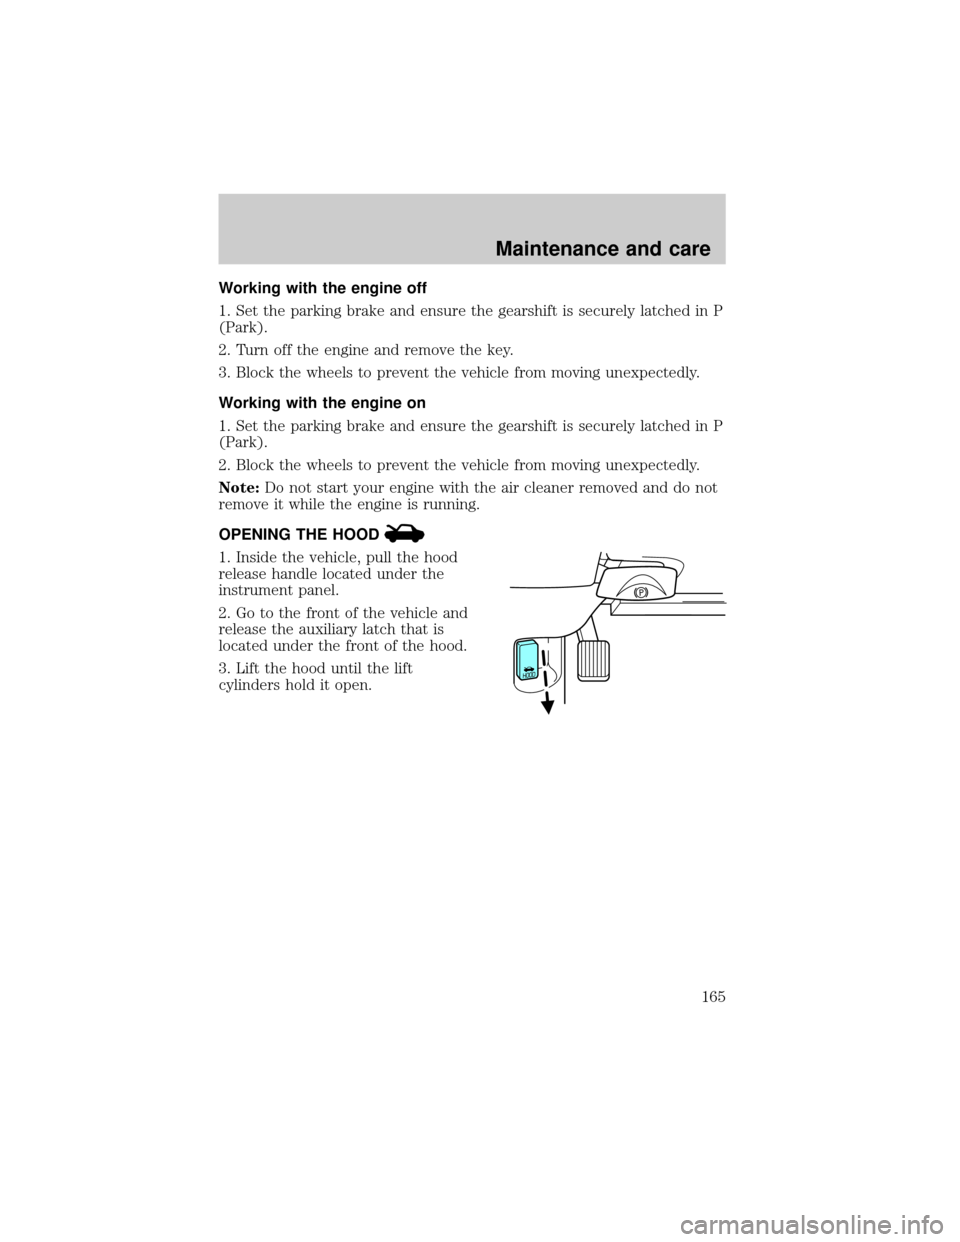
1. Inside the vehicle, pull the hood
release handle located under the
instrument panel.
2. Go to the front of the vehicle and
release the auxiliary latch that is
located under the front of the hood.
3. Lift the hood until the lift
cylinders hold it open.
Maintenance and care
165
Page 231 of 240

A
Accessory delay ..........................74
Air bag supplemental restraint
system ................................110, 115
and child safety seats ............112
description ......................110, 115
disposal ....................................118
driver air bag ..................112, 116
indicator light .............9, 114, 117
operation .........................112, 116
passenger air bag ...........112, 116
side air bag ..............................115
Air cleaner filter ...............183, 212
Air conditioning ..........................27
automatic temperature
control system ..........................27
Air suspension ...........................134
description ..............................134
warning light .............................13
Antifreeze (see Engine
coolant) .....................................171
Anti-lock brake system (see
Brakes) ..............................130±131
Audio system (see Radio) .........33
Automatic transmission
driving an automatic
overdrive .................................136
fluid, adding ............................178
fluid, checking ........................178
fluid, refill capacities ..............212
fluid, specification ..................215
Auxiliary power point .................59
Axle
lubricant specifications ..214±215
refill capacities ........................212
traction lok ..............................139B
Battery .......................................181
acid, treating emergencies .....181
charging system warning
light ............................................11
jumping a disabled battery ....158
maintenance-free ....................181
replacement, specifications ...212
servicing ..................................181
Belt minder ...............................106
Brakes ........................................130
anti-lock ...........................130±131
anti-lock brake system
(ABS) warning light .........10, 131
brake warning light ..................10
fluid, checking and adding ....170
fluid, refill capacities ..............212
fluid, specifications .........214±215
lubricant specifications ..214±215
pedals (see Power adjustable
foot pedals) ...............................58
shift interlock ..........................135
Break-in period .............................3
C
Capacities for refilling fluids ....212
Cassette tape player ...................41
CD changer .................................53
Certification Label ....................218
Child safety restraints ..............118
child safety belts ....................118
Child safety seats ......................119
attaching with tether straps ..123
in front seat ............................121
in rear seat ..............................121
Cleaning your vehicle ...............206
Index
231