lights LINCOLN TOWN CAR 2001 Owners Manual
[x] Cancel search | Manufacturer: LINCOLN, Model Year: 2001, Model line: TOWN CAR, Model: LINCOLN TOWN CAR 2001Pages: 240, PDF Size: 1.92 MB
Page 8 of 240
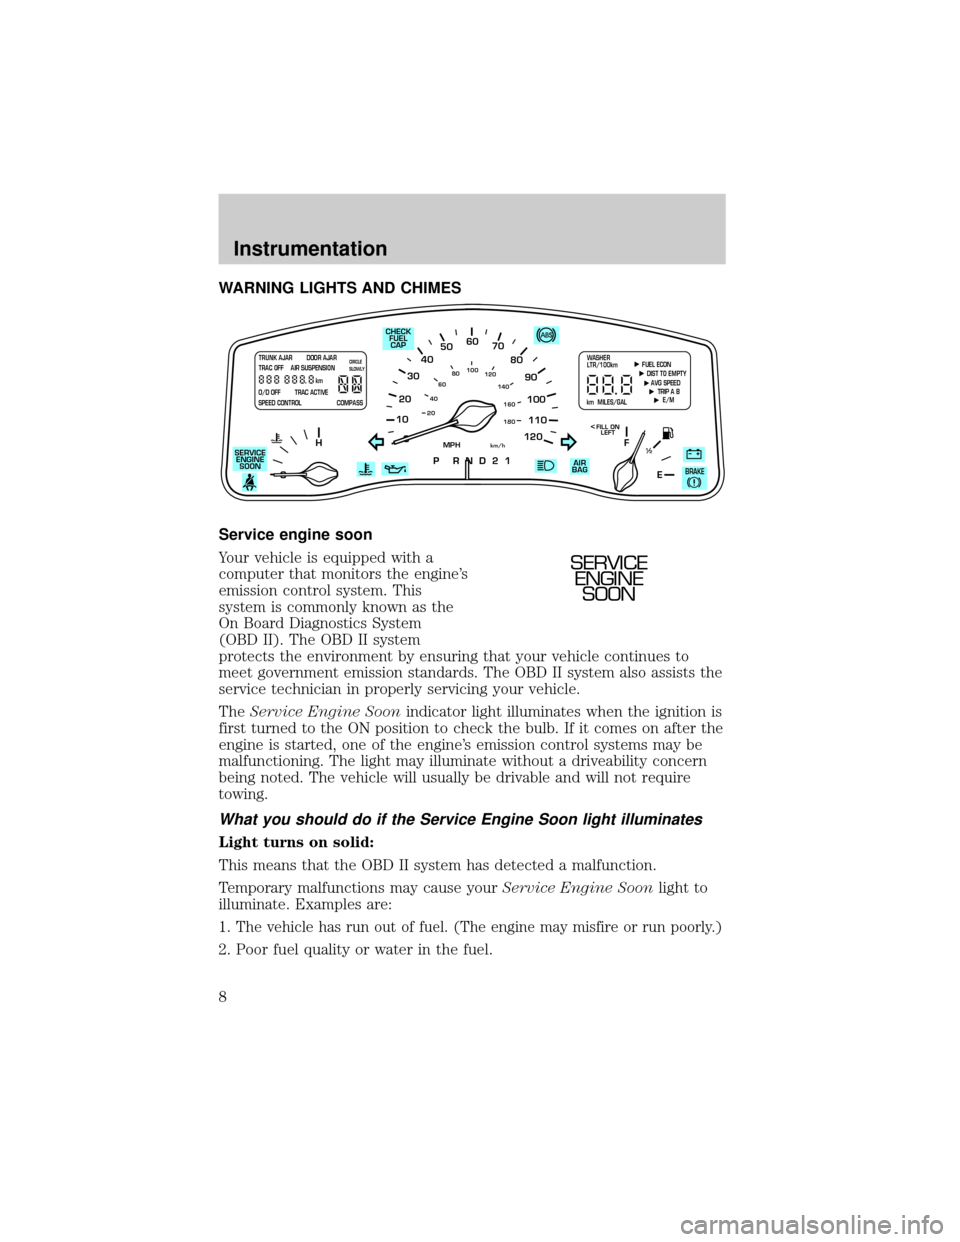
WARNING LIGHTS AND CHIMES
Service engine soon
Your vehicle is equipped with a
computer that monitors the engine's
emission control system. This
system is commonly known as the
On Board Diagnostics System
(OBD II). The OBD II system
protects the environment by ensuring that your vehicle continues to
meet government emission standards. The OBD II system also assists the
service technician in properly servicing your vehicle.
TheService Engine Soonindicator light illuminates when the ignition is
first turned to the ON position to check the bulb. If it comes on after the
engine is started, one of the engine's emission control systems may be
malfunctioning. The light may illuminate without a driveability concern
being noted. The vehicle will usually be drivable and will not require
towing.
What you should do if the Service Engine Soon light illuminates
Light turns on solid:
This means that the OBD II system has detected a malfunction.
Temporary malfunctions may cause yourService Engine Soonlight to
illuminate. Examples are:
1.
The vehicle has run out of fuel. (The engine may misfire or run poorly.)
2. Poor fuel quality or water in the fuel.
10
2030405060
70
80
90
100
120206080
40100
120
160 140
180
P R N D 2 1
MPHkm/h
110
HF
E1
2
FILL ON
LEFT<
AIR
BAG CHECK
FUEL
CAP
SERVICE
ENGINE
SOON
TRUNK AJAR DOOR AJAR
TRAC OFF AIR SUSPENSION
O/D OFF TRAC ACTIVE
SPEED CONTROL COMPASSkmCIRCLE
SLOWLY FUEL ECON
DIST TO EMPTY
AVG SPEED
TRIP A B
E/M
km MILES/GALWASHER
LTR/100km
BRAKE
SERVICE
ENGINE
SOON
Instrumentation
8
Page 11 of 240
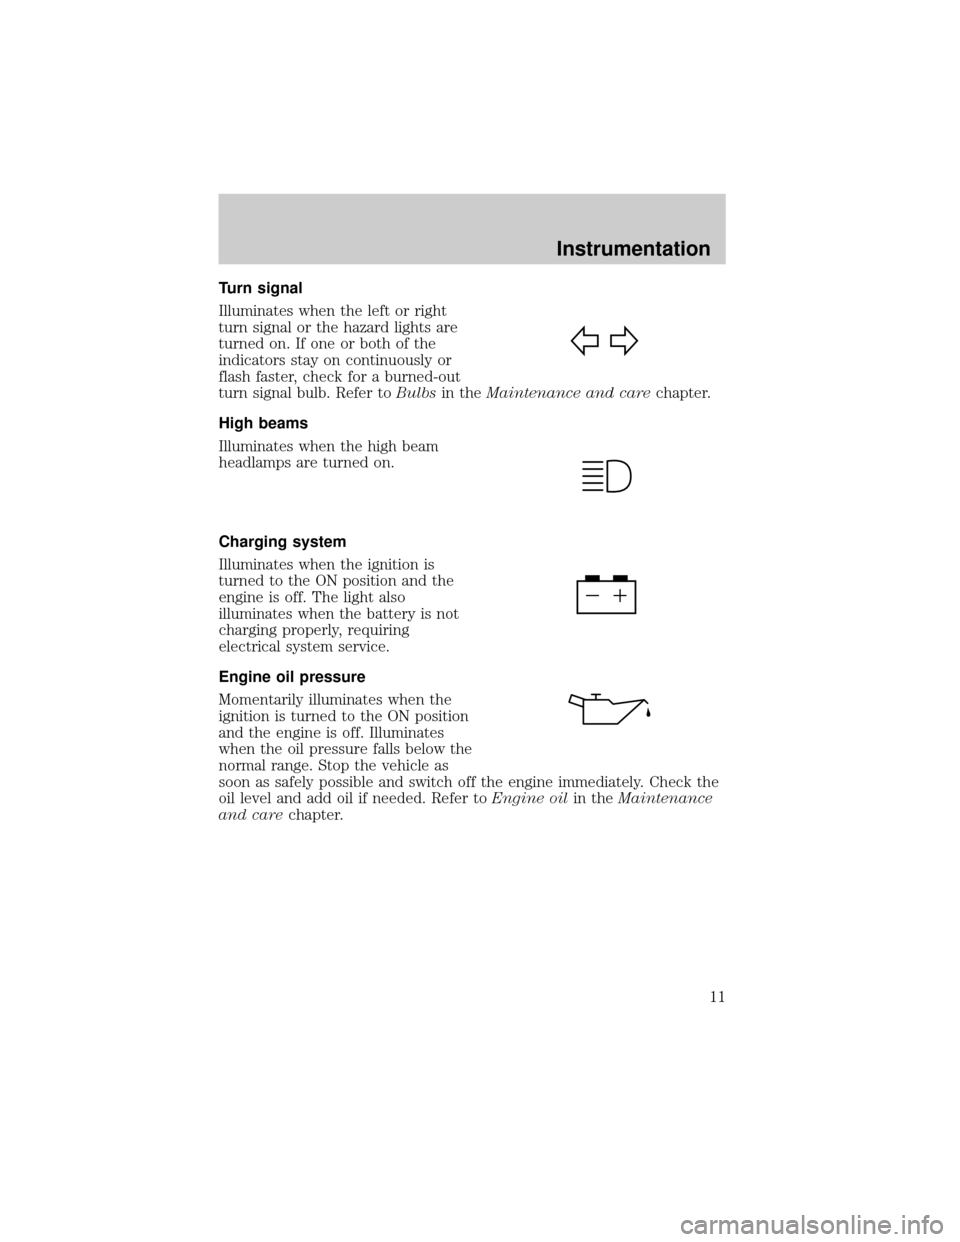
Turn signal
Illuminates when the left or right
turn signal or the hazard lights are
turned on. If one or both of the
indicators stay on continuously or
flash faster, check for a burned-out
turn signal bulb. Refer toBulbsin theMaintenance and carechapter.
High beams
Illuminates when the high beam
headlamps are turned on.
Charging system
Illuminates when the ignition is
turned to the ON position and the
engine is off. The light also
illuminates when the battery is not
charging properly, requiring
electrical system service.
Engine oil pressure
Momentarily illuminates when the
ignition is turned to the ON position
and the engine is off. Illuminates
when the oil pressure falls below the
normal range. Stop the vehicle as
soon as safely possible and switch off the engine immediately. Check the
oil level and add oil if needed. Refer toEngine oilin theMaintenance
and carechapter.
Instrumentation
11
Page 25 of 240
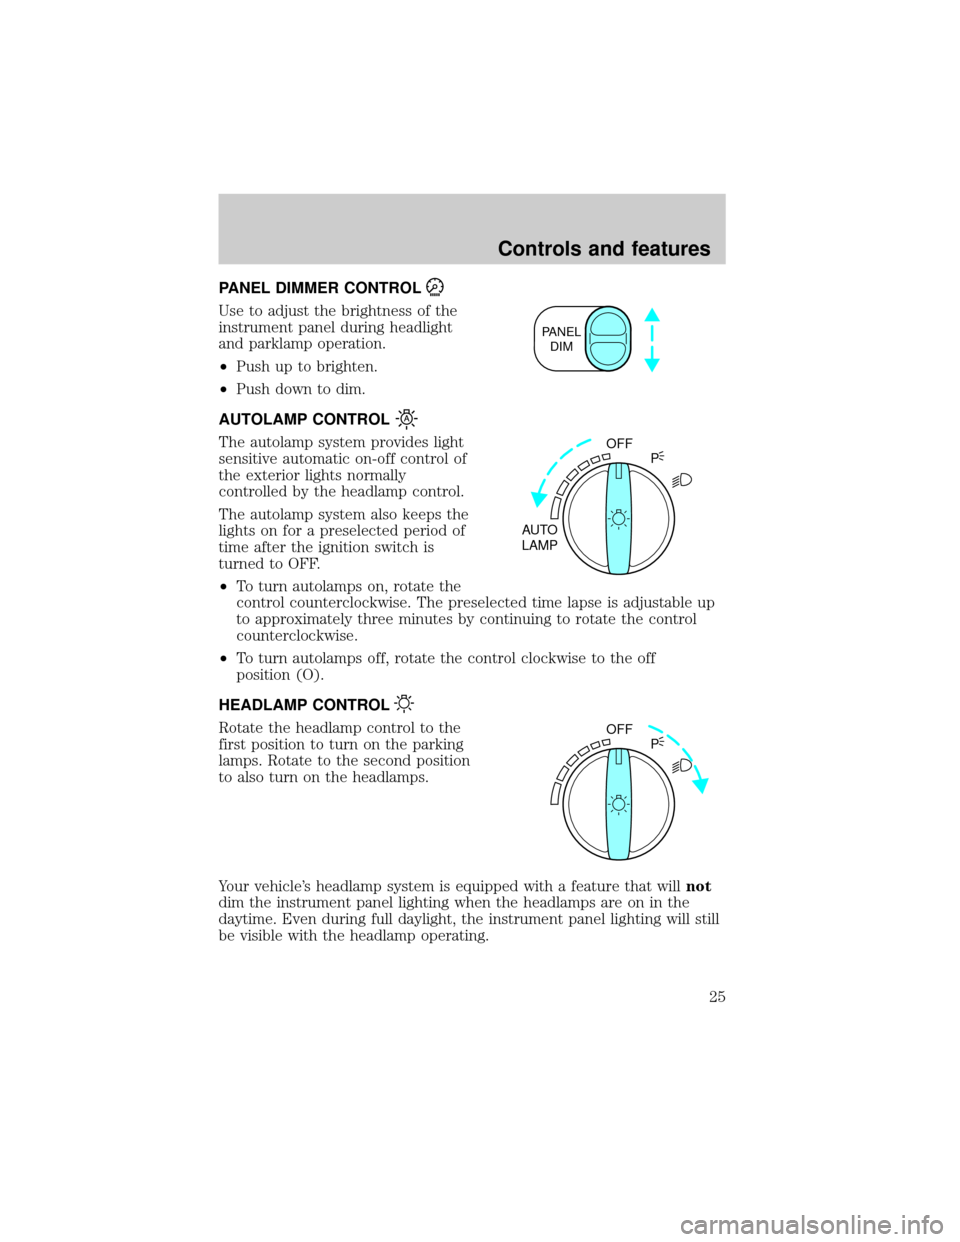
PANEL DIMMER CONTROL
Use to adjust the brightness of the
instrument panel during headlight
and parklamp operation.
²Push up to brighten.
²Push down to dim.
AUTOLAMP CONTROL
The autolamp system provides light
sensitive automatic on-off control of
the exterior lights normally
controlled by the headlamp control.
The autolamp system also keeps the
lights on for a preselected period of
time after the ignition switch is
turned to OFF.
²To turn autolamps on, rotate the
control counterclockwise. The preselected time lapse is adjustable up
to approximately three minutes by continuing to rotate the control
counterclockwise.
²To turn autolamps off, rotate the control clockwise to the off
position (O).
HEADLAMP CONTROL
Rotate the headlamp control to the
first position to turn on the parking
lamps. Rotate to the second position
to also turn on the headlamps.
Your vehicle's headlamp system is equipped with a feature that willnot
dim the instrument panel lighting when the headlamps are on in the
daytime. Even during full daylight, the instrument panel lighting will still
be visible with the headlamp operating.
PANEL
DIM
OFF
AUTO
LAMPP
OFF
P
Controls and features
25
Page 57 of 240

Radio frequency information
The Federal Communications Commission (FCC) and the Canadian Radio
and Telecommunications Commission(CRTC) establish the frequencies
AM and FM stations may use for their broadcasts. Allowable frequencies
are:
AM 530, 540±1600, 1610 kHz
FM 87.7, 87.9±107.7, 107.9 MHz
Not all frequencies are used in a given area.
Radio reception factors
Three factors can affect radio reception:
²Distance/strength.The further an FM signal travels, the weaker it is.
The listenable range of the average FM station is approximately 40 km
(24 miles). This range can be affected by ªsignal modulation.º Signal
modulation is a process radio stations use to increase their
strength/volume relative to other stations.
²Terrain.Hills, mountains and tall buildings between your vehicle's
antenna and the radio station signal can cause FM reception problems.
Static can be caused on AM stations by power lines, electric fences,
traffic lights and thunderstorms. Moving away from an interfering
structure (out of its ªshadowº) returns your reception to normal.
²Station overload.Weak signals are sometimes captured by stronger
signals when you pass a broadcast tower. A stronger signal may
temporarily overtake a weaker signal and play while the weak station
frequency is displayed.
The audio system automatically switches to single channel reception if it
will improve the reception of a station normally received in stereo.
Audio system warranties and service
Refer to theWarranty Guidefor audio system warranty information.
If service is necessary, see your dealer or a qualified technician.
Controls and features
57
Page 59 of 240
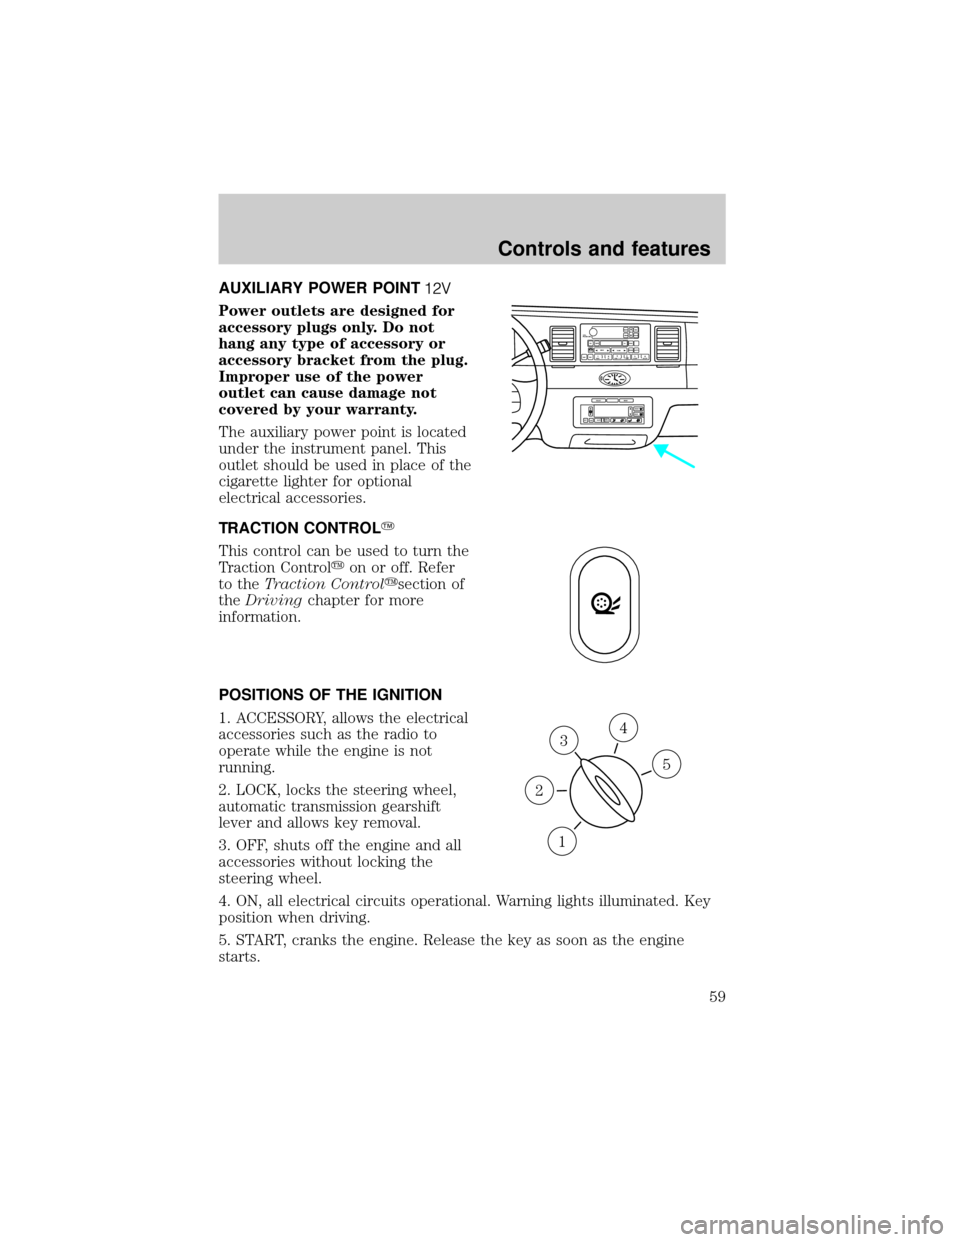
AUXILIARY POWER POINT
Power outlets are designed for
accessory plugs only. Do not
hang any type of accessory or
accessory bracket from the plug.
Improper use of the power
outlet can cause damage not
covered by your warranty.
The auxiliary power point is located
under the instrument panel. This
outlet should be used in place of the
cigarette lighter for optional
electrical accessories.
TRACTION CONTROLY
This control can be used to turn the
Traction Controlyon or off. Refer
to theTraction Controlysection of
theDrivingchapter for more
information.
POSITIONS OF THE IGNITION
1. ACCESSORY, allows the electrical
accessories such as the radio to
operate while the engine is not
running.
2. LOCK, locks the steering wheel,
automatic transmission gearshift
lever and allows key removal.
3. OFF, shuts off the engine and all
accessories without locking the
steering wheel.
4. ON, all electrical circuits operational. Warning lights illuminated. Key
position when driving.
5. START, cranks the engine. Release the key as soon as the engine
starts.
VOL
PUSH ONTAPE
MUTESEEK
TUNE
AM
FM
REW
FFSIDE 1 2
COMP
SHUFFCDEJ
RDS
SCAN AUTO123
4
56
BASS
TREBSELBAL
FADE
EXT
OFFMAX
A/CAUTOFRONT
REARSELECTRESET
3
1
2
5
4
Controls and features
59
Page 61 of 240
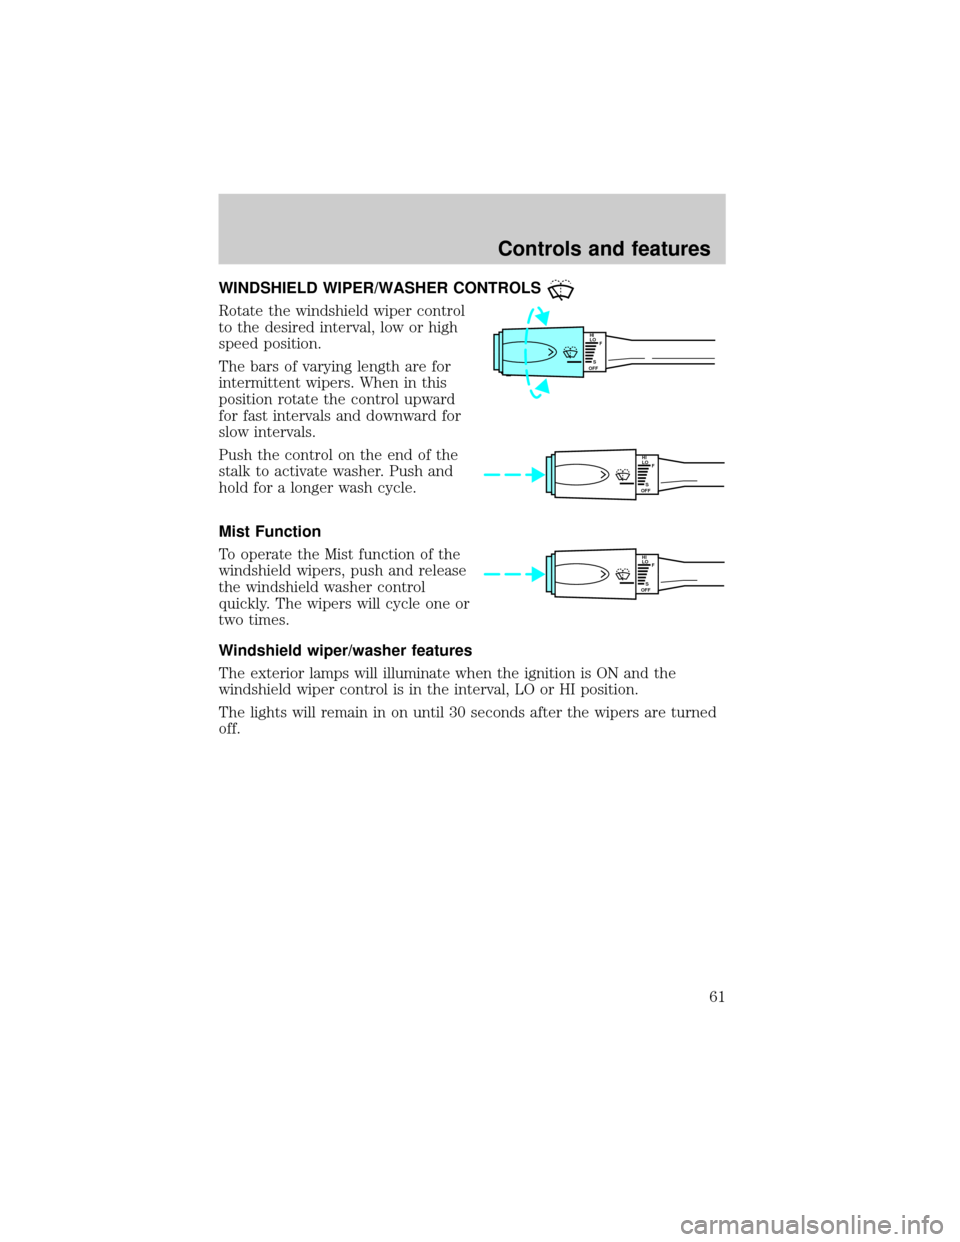
WINDSHIELD WIPER/WASHER CONTROLS
Rotate the windshield wiper control
to the desired interval, low or high
speed position.
The bars of varying length are for
intermittent wipers. When in this
position rotate the control upward
for fast intervals and downward for
slow intervals.
Push the control on the end of the
stalk to activate washer. Push and
hold for a longer wash cycle.
Mist Function
To operate the Mist function of the
windshield wipers, push and release
the windshield washer control
quickly. The wipers will cycle one or
two times.
Windshield wiper/washer features
The exterior lamps will illuminate when the ignition is ON and the
windshield wiper control is in the interval, LO or HI position.
The lights will remain in on until 30 seconds after the wipers are turned
off.
HI
LO
F
S
OFF
HI
LO
F
S
OFF
HI
LO
F
S
OFF
Controls and features
61
Page 71 of 240
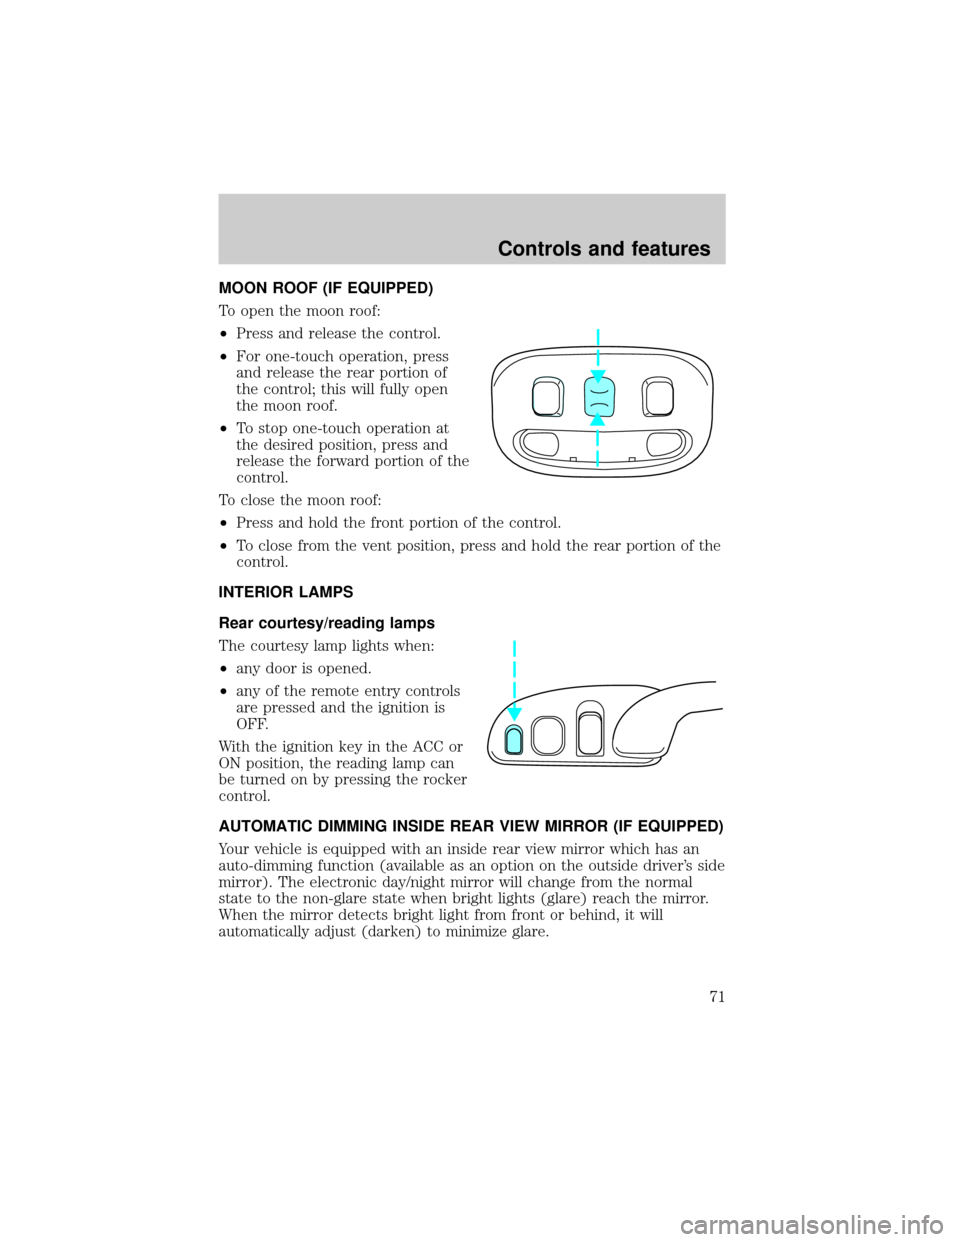
MOON ROOF (IF EQUIPPED)
To open the moon roof:
²Press and release the control.
²For one-touch operation, press
and release the rear portion of
the control; this will fully open
the moon roof.
²To stop one-touch operation at
the desired position, press and
release the forward portion of the
control.
To close the moon roof:
²Press and hold the front portion of the control.
²To close from the vent position, press and hold the rear portion of the
control.
INTERIOR LAMPS
Rear courtesy/reading lamps
The courtesy lamp lights when:
²any door is opened.
²any of the remote entry controls
are pressed and the ignition is
OFF.
With the ignition key in the ACC or
ON position, the reading lamp can
be turned on by pressing the rocker
control.
AUTOMATIC DIMMING INSIDE REAR VIEW MIRROR (IF EQUIPPED)
Your vehicle is equipped with an inside rear view mirror which has an
auto-dimming function (available as an option on the outside driver's side
mirror). The electronic day/night mirror will change from the normal
state to the non-glare state when bright lights (glare) reach the mirror.
When the mirror detects bright light from front or behind, it will
automatically adjust (darken) to minimize glare.
Controls and features
71
Page 83 of 240
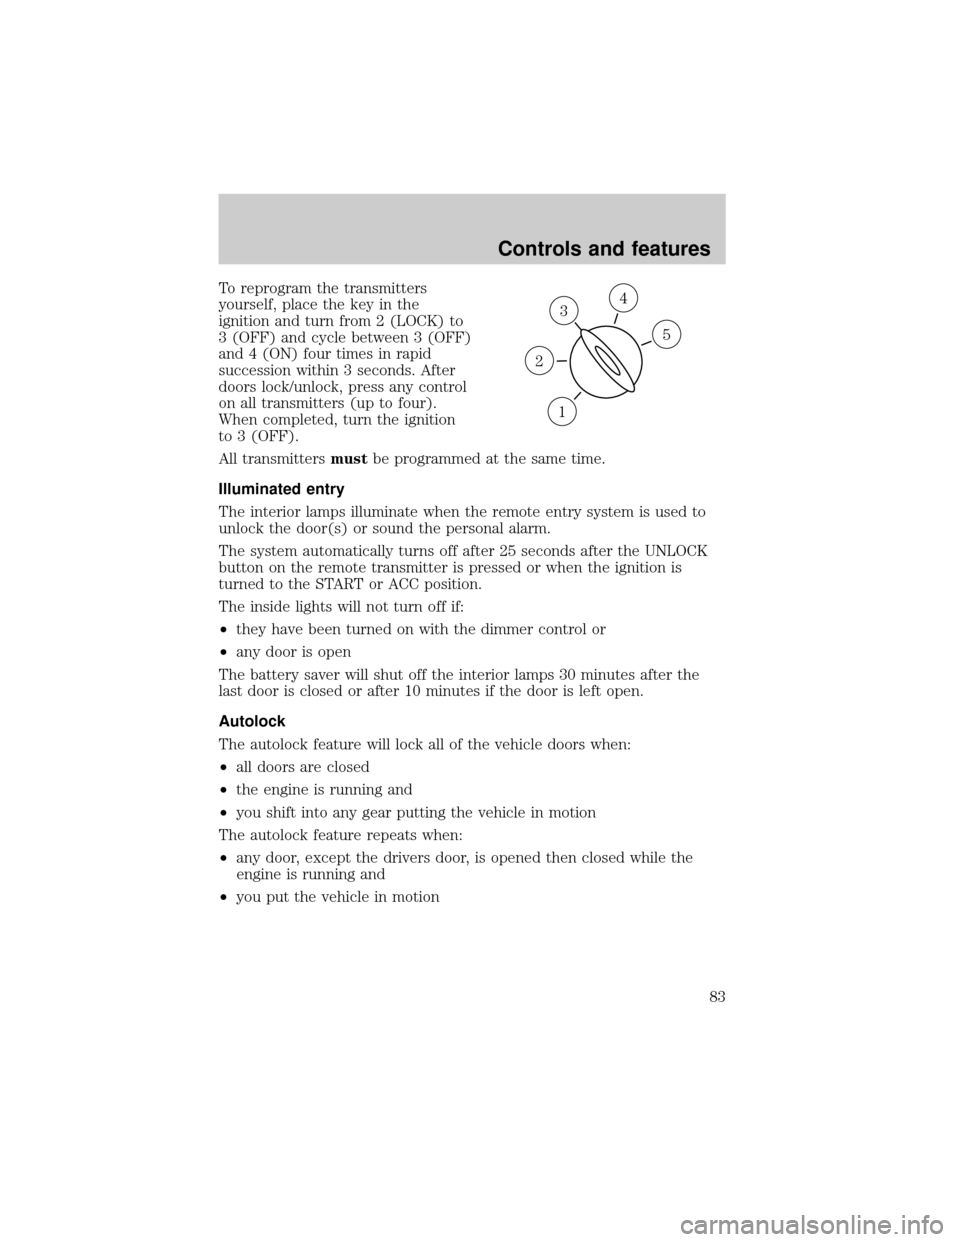
To reprogram the transmitters
yourself, place the key in the
ignition and turn from 2 (LOCK) to
3 (OFF) and cycle between 3 (OFF)
and 4 (ON) four times in rapid
succession within 3 seconds. After
doors lock/unlock, press any control
on all transmitters (up to four).
When completed, turn the ignition
to 3 (OFF).
All transmittersmustbe programmed at the same time.
Illuminated entry
The interior lamps illuminate when the remote entry system is used to
unlock the door(s) or sound the personal alarm.
The system automatically turns off after 25 seconds after the UNLOCK
button on the remote transmitter is pressed or when the ignition is
turned to the START or ACC position.
The inside lights will not turn off if:
²they have been turned on with the dimmer control or
²any door is open
The battery saver will shut off the interior lamps 30 minutes after the
last door is closed or after 10 minutes if the door is left open.
Autolock
The autolock feature will lock all of the vehicle doors when:
²all doors are closed
²the engine is running and
²you shift into any gear putting the vehicle in motion
The autolock feature repeats when:
²any door, except the drivers door, is opened then closed while the
engine is running and
²you put the vehicle in motion
3
1
2
5
4
Controls and features
83
Page 97 of 240

²Front crash severity sensor.
²Restraints Control Module (RCM) with impact and safing sensors.
²Restraint system warning light and back-up tone.
²The electrical wiring for the air bags, crash sensor(s), safety belt
pretensioners, front safety belt usage sensors, driver seat position
sensor, passenger occupant classification sensor (if equipped), and
indicator lights.
How does the personal safety system work?
The Personal Safety System can adapt the deployment strategy of your
vehicle's safety devices according to crash severity and occupant
conditions. A collection of crash and occupant sensors provides
information to the Restraints Control Module (RCM). During a crash, the
RCM activates the safety belt pretensioners and/or either one or both
stages of the dual-stage air bag supplemental restraints based on crash
severity and occupant conditions.
The fact that the pretensioners or air bags did not activate for both front
seat occupants in a collision does not mean that something is wrong with
the system. Rather, it means the Personal Safety System determined the
accident conditions (crash severity, belt usage, etc.) were not
appropriate to activate these safety devices. Front air bags and
pretensioners are designed to activate only in frontal and near-frontal
collisions, not rollovers, side-impacts, or rear-impacts unless the collision
causes sufficient longitudinal deceleration.
Driver and passenger dual-stage air bag supplemental restraints
The dual-stage air bags offer the capability to tailor the level of air bag
inflation energy. A lower, less forceful energy level is provided for more
common, moderate-severity impacts. A higher energy level is used for
the most severe impacts. Refer toAir bag Supplemental Restraints
section in this chapter.
Front crash severity sensor
The front crash severity sensor enhances the ability to detect the
severity of an impact. Positioned up front, it provides valuable
information early in the crash event on the severity of the impact. This
allows your Personal Safety System to distinguish between different
levels of crash severity and modify the deployment strategy of the
dual-stage air bags and safety belt pretensioners.
Seating and safety restraints
97
Page 99 of 240

Front safety belt usage sensors
The front safety belt usage sensors detect whether or not the driver and
front outboard passenger safety belts are fastened. This information
allows your Personal Safety System to tailor the air bag deployment and
safety belt pretensioner activation depending upon safety belt usage.
Refer toSafety Beltsection in this chapter.
Front safety belt pretensioners
The safety belt pretensioners are designed to tighten the safety belts
firmly against the occupant's body during a collision. This maximizes the
effectiveness of the safety belts and helps properly position the occupant
relative to the air bag to improve protection. The safety belt
pretensioners can be either activated alone or, if the collision is of
sufficient severity, together with the air bags.
Front safety belt energy management retractors
The front safety belt energy management retractors allow webbing to be
pulled out of the retractor in a gradual and controlled manner in
response to the occupant's forward momentum. This helps reduce the
risk of force-related injuries to the occupant's chest by limiting the load
on the occupant. Refer toSafety Beltsection in this chapter.
Determining if the Personal Safety System is operational
The Personal Safety System uses a warning light in the instrument
cluster or a back-up tone to indicate the condition of the system. Refer
to theWarning Lightsection in theInstrument Clusterchapter.
Routine maintenance of the Personal Safety System is not required.
The Restraints Control Module (RCM) monitors its own internal circuits
and the circuits for the air bag supplemental restraints, crash sensor(s),
safety belt pretensioners, front safety belt buckle sensors, driver seat
position sensor, and passenger occupant classification sensor (if
equipped). In addition, the RCM also monitors the restraints warning
light in the instrument cluster. A difficulty with the system is indicated
by one or more of the following.
²The warning light will either flash or stay lit.
²The warning light will not illuminate immediately after ignition is
turned on.
²A series of five beeps will be heard. The tone pattern will repeat
periodically until the problem and warning light are repaired.
Seating and safety restraints
99