remote control LINCOLN TOWN CAR 2001 Owners Manual
[x] Cancel search | Manufacturer: LINCOLN, Model Year: 2001, Model line: TOWN CAR, Model: LINCOLN TOWN CAR 2001Pages: 240, PDF Size: 1.92 MB
Page 60 of 240
KEYS
The vehicle is equipped with a master key and valet key lock system.
The master key will access doors, trunk, glove box, ignition and remote
trunk release. The valet key (marked ªvaletº) will access doors and
ignition only. Before using this key, lock the trunk remote control to
disable theTrunk remote controlon the drivers door, then lock the
glove compartment with your master key.
TILT STEERING
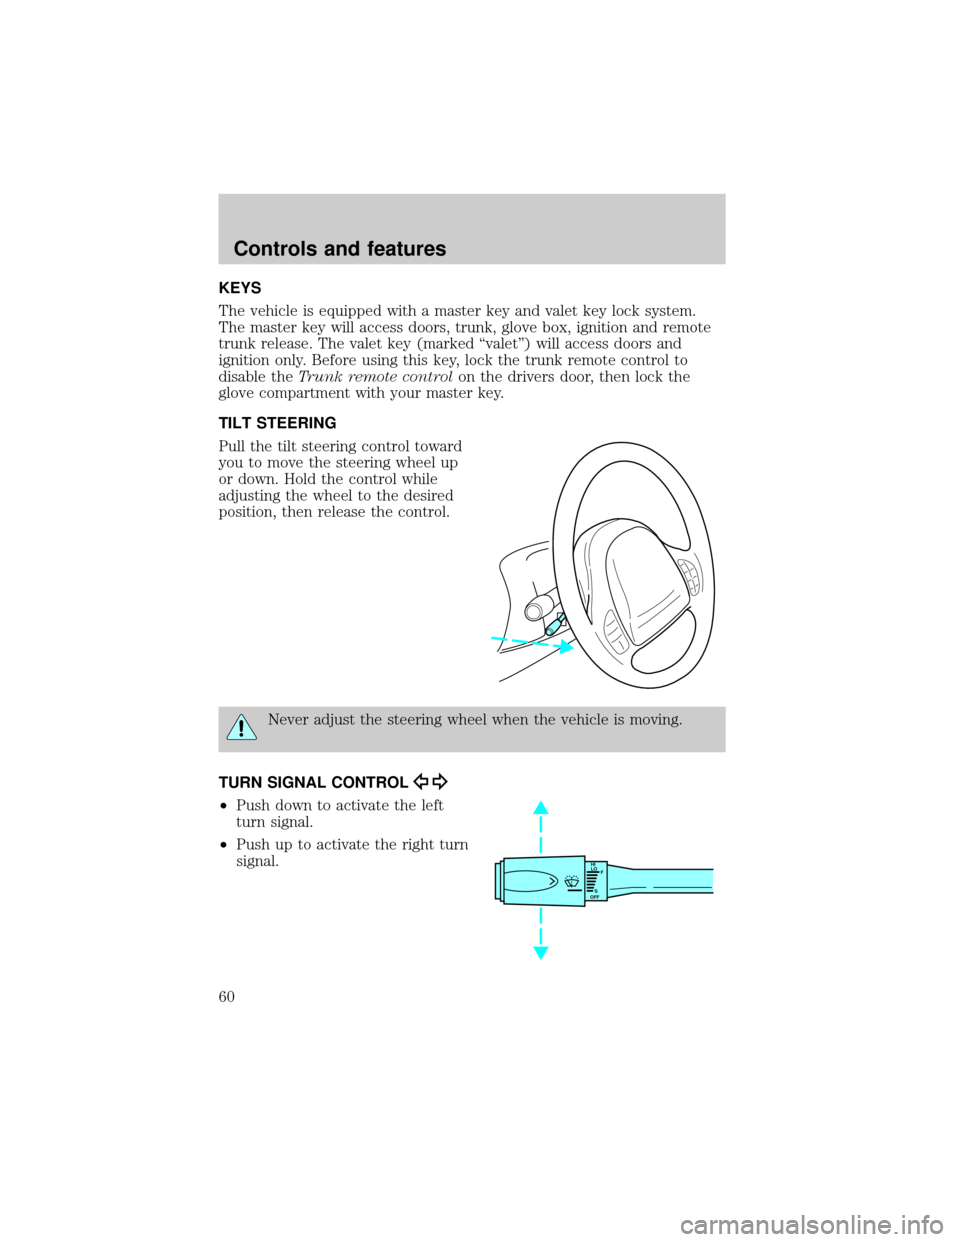
Pull the tilt steering control toward
you to move the steering wheel up
or down. Hold the control while
adjusting the wheel to the desired
position, then release the control.
Never adjust the steering wheel when the vehicle is moving.
TURN SIGNAL CONTROL
²Push down to activate the left
turn signal.
²Push up to activate the right turn
signal.
HI
LO
F
S
OFF
Controls and features
60
Page 71 of 240
MOON ROOF (IF EQUIPPED)
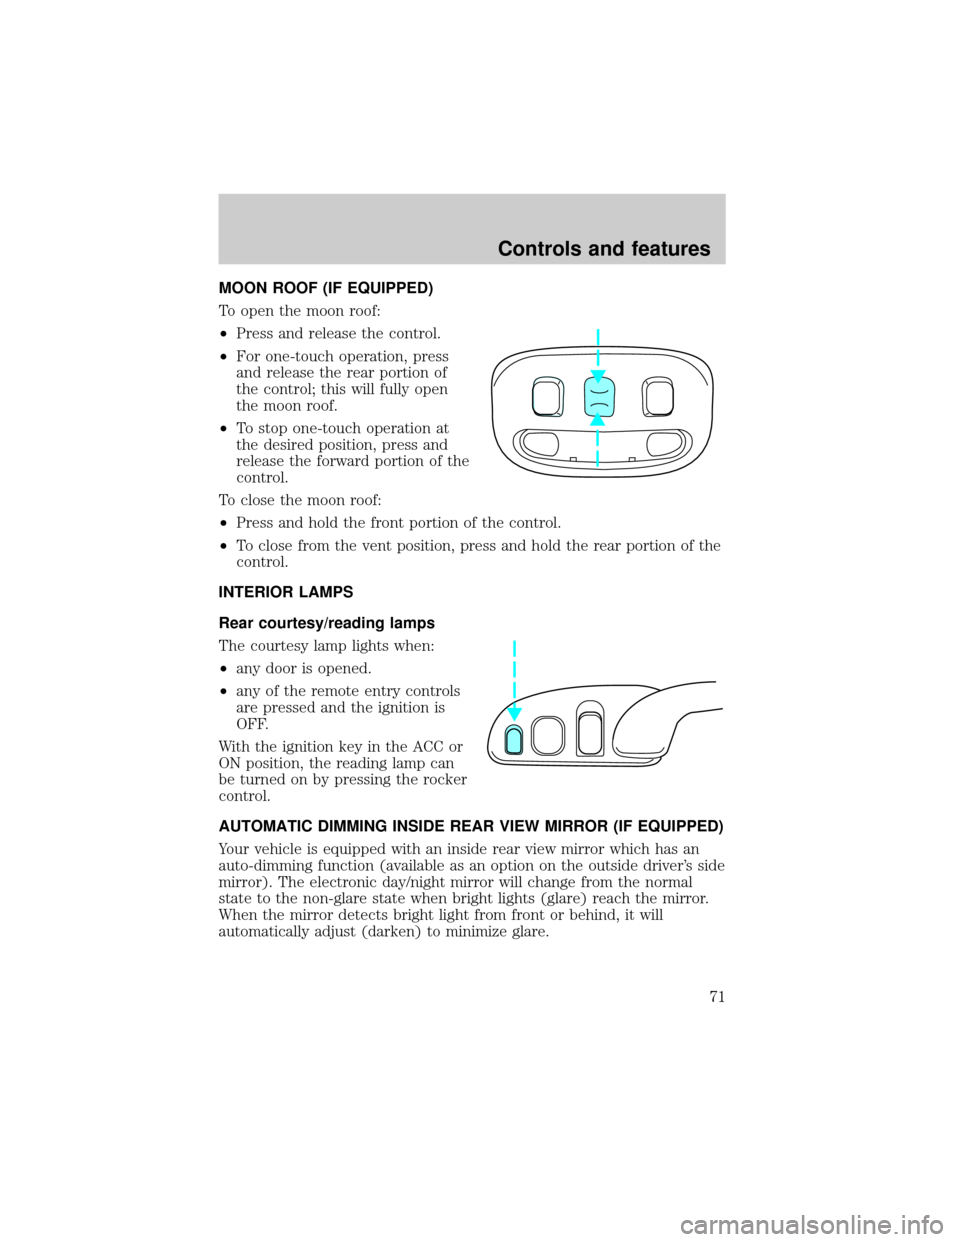
To open the moon roof:
²Press and release the control.
²For one-touch operation, press
and release the rear portion of
the control; this will fully open
the moon roof.
²To stop one-touch operation at
the desired position, press and
release the forward portion of the
control.
To close the moon roof:
²Press and hold the front portion of the control.
²To close from the vent position, press and hold the rear portion of the
control.
INTERIOR LAMPS
Rear courtesy/reading lamps
The courtesy lamp lights when:
²any door is opened.
²any of the remote entry controls
are pressed and the ignition is
OFF.
With the ignition key in the ACC or
ON position, the reading lamp can
be turned on by pressing the rocker
control.
AUTOMATIC DIMMING INSIDE REAR VIEW MIRROR (IF EQUIPPED)
Your vehicle is equipped with an inside rear view mirror which has an
auto-dimming function (available as an option on the outside driver's side
mirror). The electronic day/night mirror will change from the normal
state to the non-glare state when bright lights (glare) reach the mirror.
When the mirror detects bright light from front or behind, it will
automatically adjust (darken) to minimize glare.
Controls and features
71
Page 72 of 240
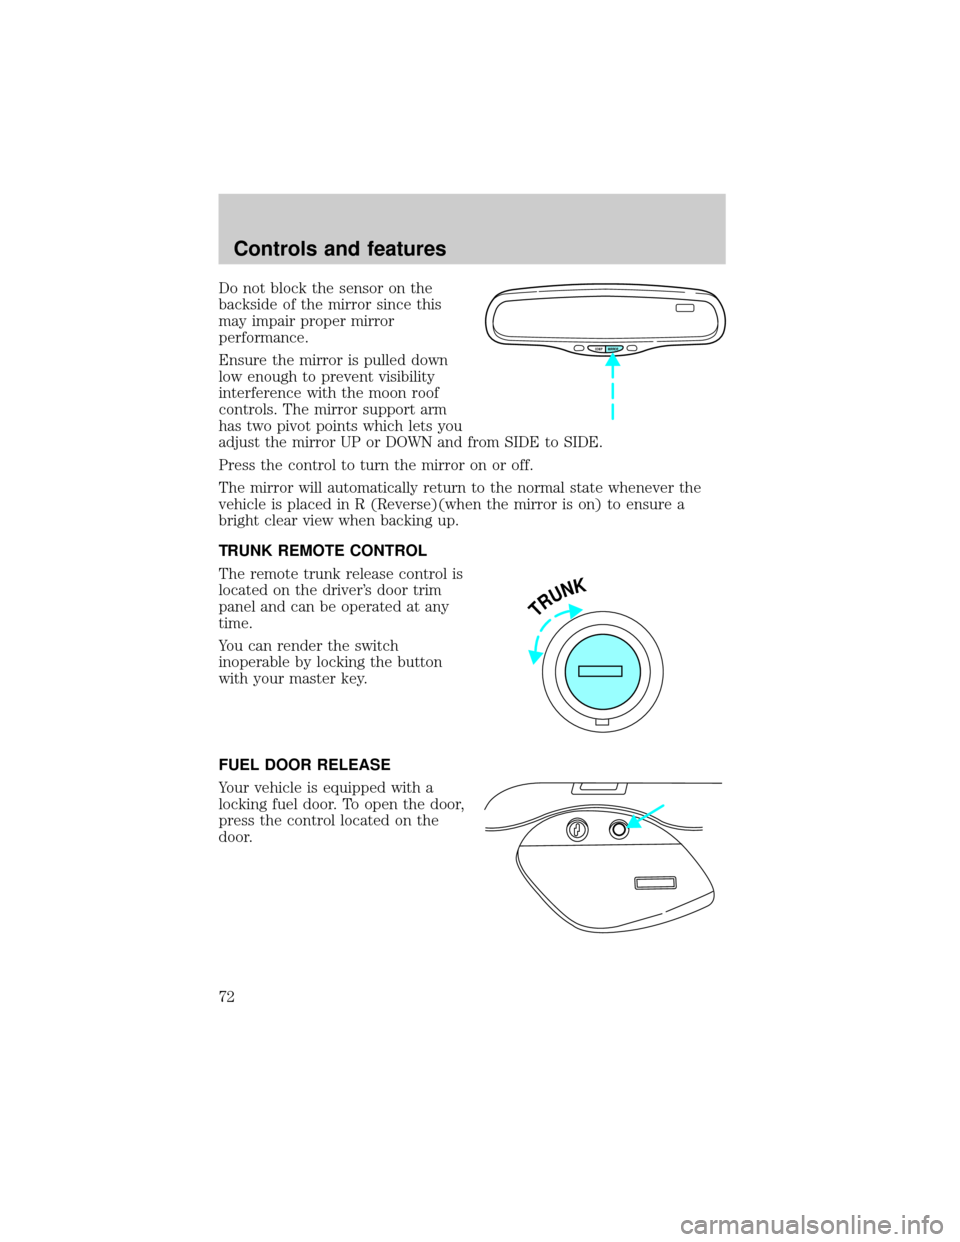
Do not block the sensor on the
backside of the mirror since this
may impair proper mirror
performance.
Ensure the mirror is pulled down
low enough to prevent visibility
interference with the moon roof
controls. The mirror support arm
has two pivot points which lets you
adjust the mirror UP or DOWN and from SIDE to SIDE.
Press the control to turn the mirror on or off.
The mirror will automatically return to the normal state whenever the
vehicle is placed in R (Reverse)(when the mirror is on) to ensure a
bright clear view when backing up.
TRUNK REMOTE CONTROL
The remote trunk release control is
located on the driver's door trim
panel and can be operated at any
time.
You can render the switch
inoperable by locking the button
with your master key.
FUEL DOOR RELEASE
Your vehicle is equipped with a
locking fuel door. To open the door,
press the control located on the
door.
COMP MIRROR
TRUNK
Controls and features
72
Page 73 of 240
Fuel filler door override release
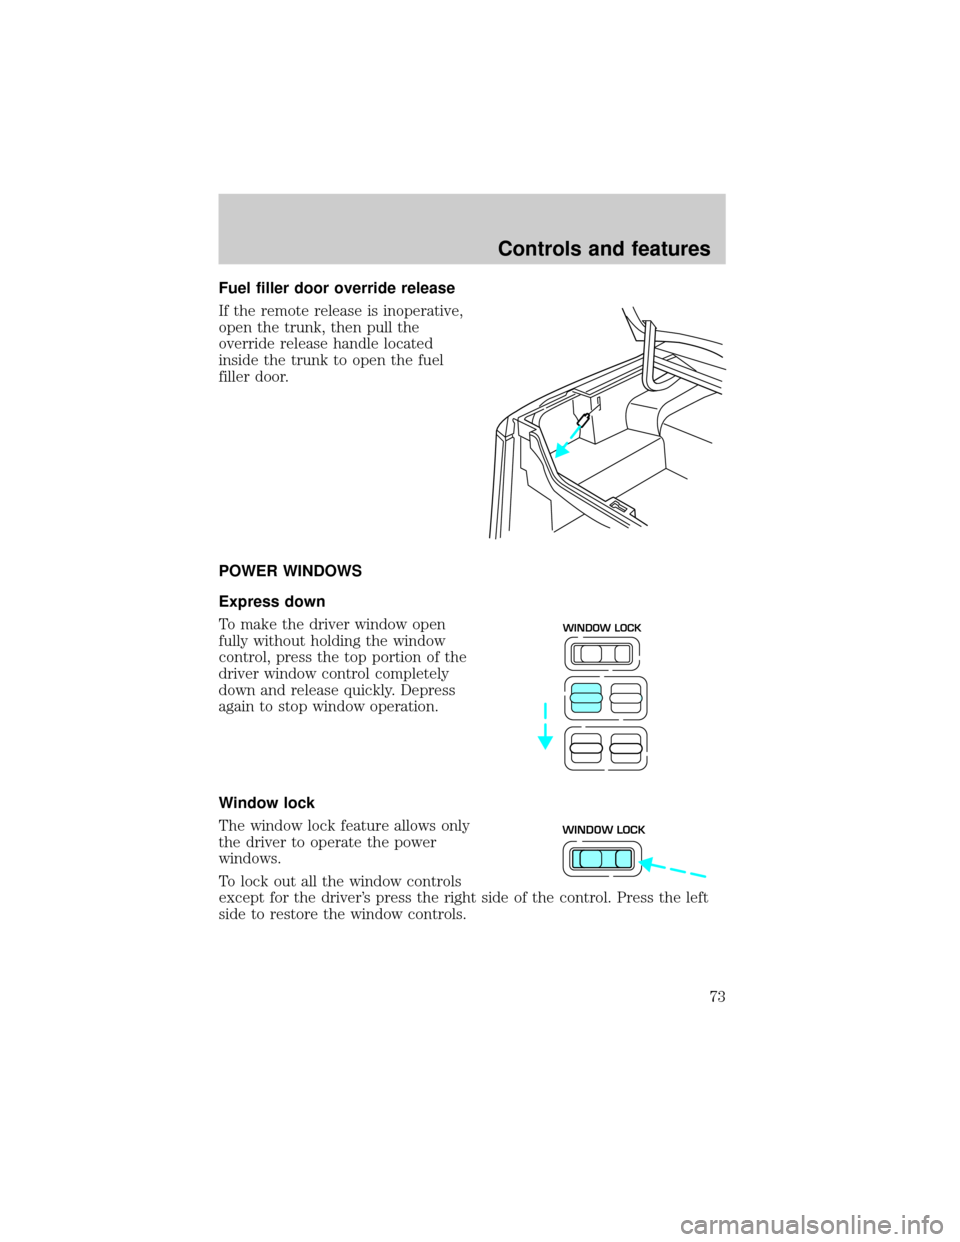
If the remote release is inoperative,
open the trunk, then pull the
override release handle located
inside the trunk to open the fuel
filler door.
POWER WINDOWS
Express down
To make the driver window open
fully without holding the window
control, press the top portion of the
driver window control completely
down and release quickly. Depress
again to stop window operation.
Window lock
The window lock feature allows only
the driver to operate the power
windows.
To lock out all the window controls
except for the driver's press the right side of the control. Press the left
side to restore the window controls.
WINDOW LOCK
WINDOW LOCK
Controls and features
73
Page 76 of 240
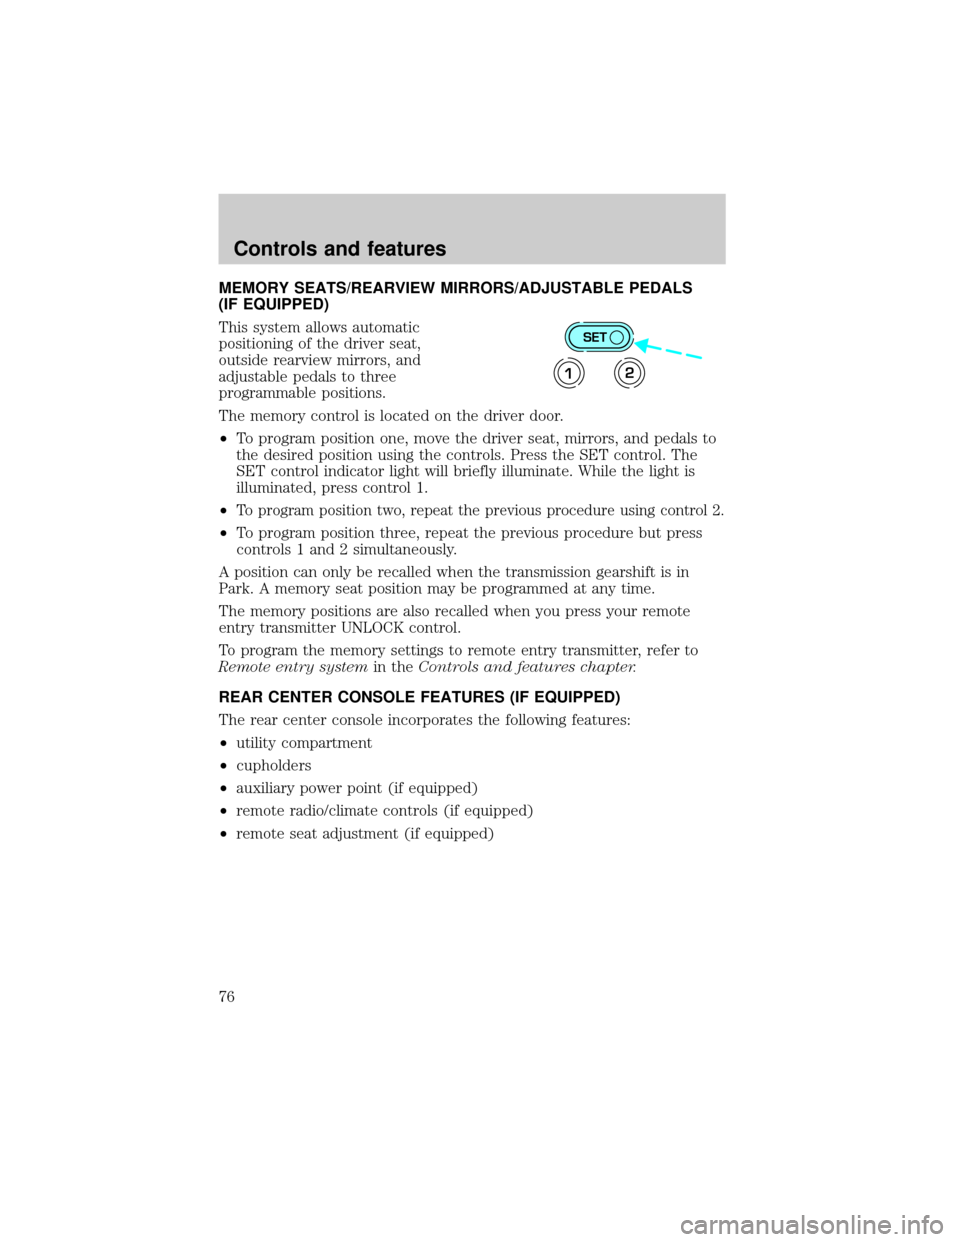
MEMORY SEATS/REARVIEW MIRRORS/ADJUSTABLE PEDALS
(IF EQUIPPED)
This system allows automatic
positioning of the driver seat,
outside rearview mirrors, and
adjustable pedals to three
programmable positions.
The memory control is located on the driver door.
²To program position one, move the driver seat, mirrors, and pedals to
the desired position using the controls. Press the SET control. The
SET control indicator light will briefly illuminate. While the light is
illuminated, press control 1.
²
To program position two, repeat the previous procedure using control 2.
²To program position three, repeat the previous procedure but press
controls 1 and 2 simultaneously.
A position can only be recalled when the transmission gearshift is in
Park. A memory seat position may be programmed at any time.
The memory positions are also recalled when you press your remote
entry transmitter UNLOCK control.
To program the memory settings to remote entry transmitter, refer to
Remote entry systemin theControls and features chapter.
REAR CENTER CONSOLE FEATURES (IF EQUIPPED)
The rear center console incorporates the following features:
²utility compartment
²cupholders
²auxiliary power point (if equipped)
²remote radio/climate controls (if equipped)
²remote seat adjustment (if equipped)
SET
12
Controls and features
76
Page 77 of 240
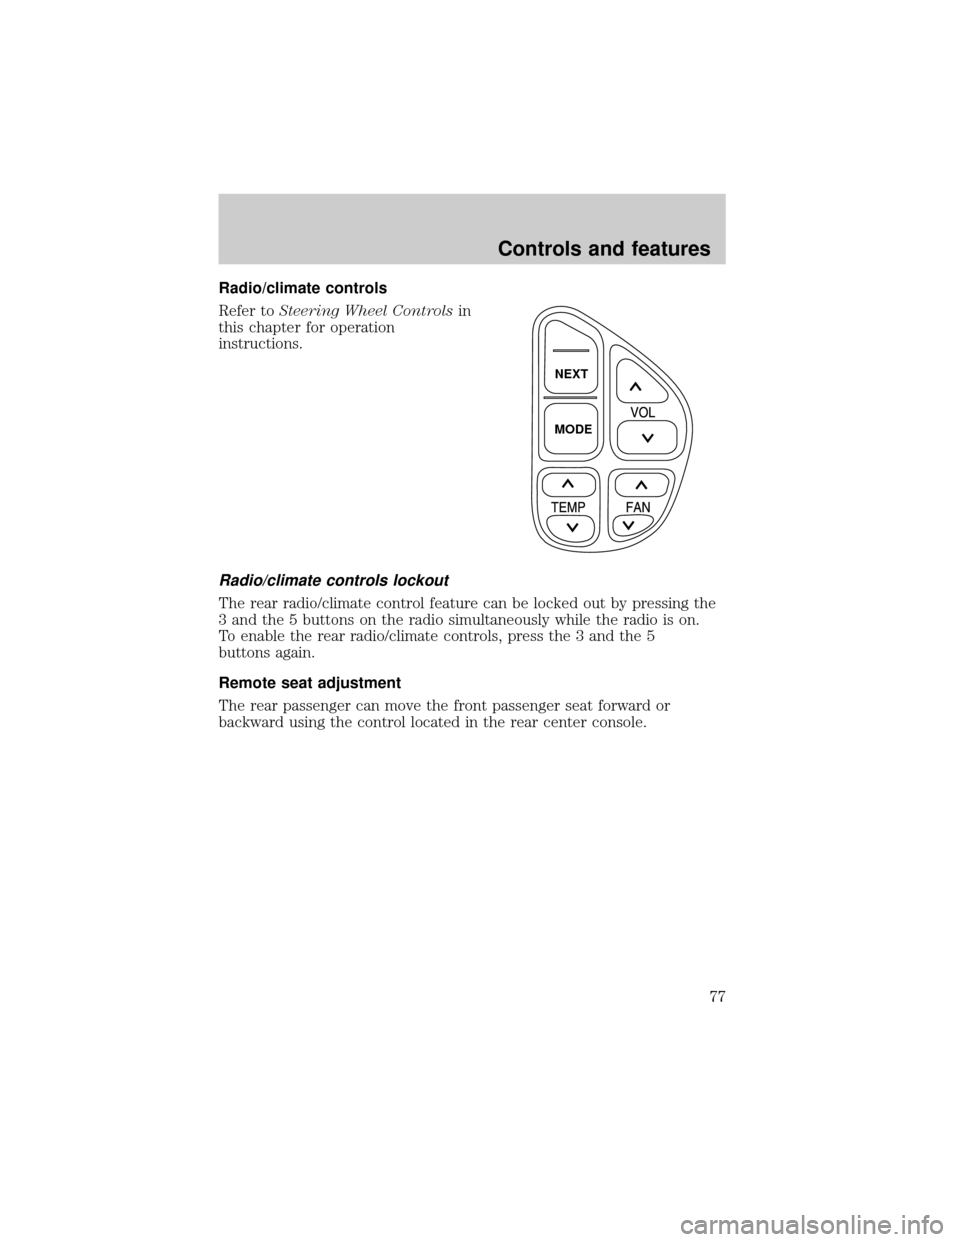
Radio/climate controls
Refer toSteering Wheel Controlsin
this chapter for operation
instructions.
Radio/climate controls lockout
The rear radio/climate control feature can be locked out by pressing the
3 and the 5 buttons on the radio simultaneously while the radio is on.
To enable the rear radio/climate controls, press the 3 and the 5
buttons again.
Remote seat adjustment
The rear passenger can move the front passenger seat forward or
backward using the control located in the rear center console.
NEXT
MODE
Controls and features
77
Page 78 of 240
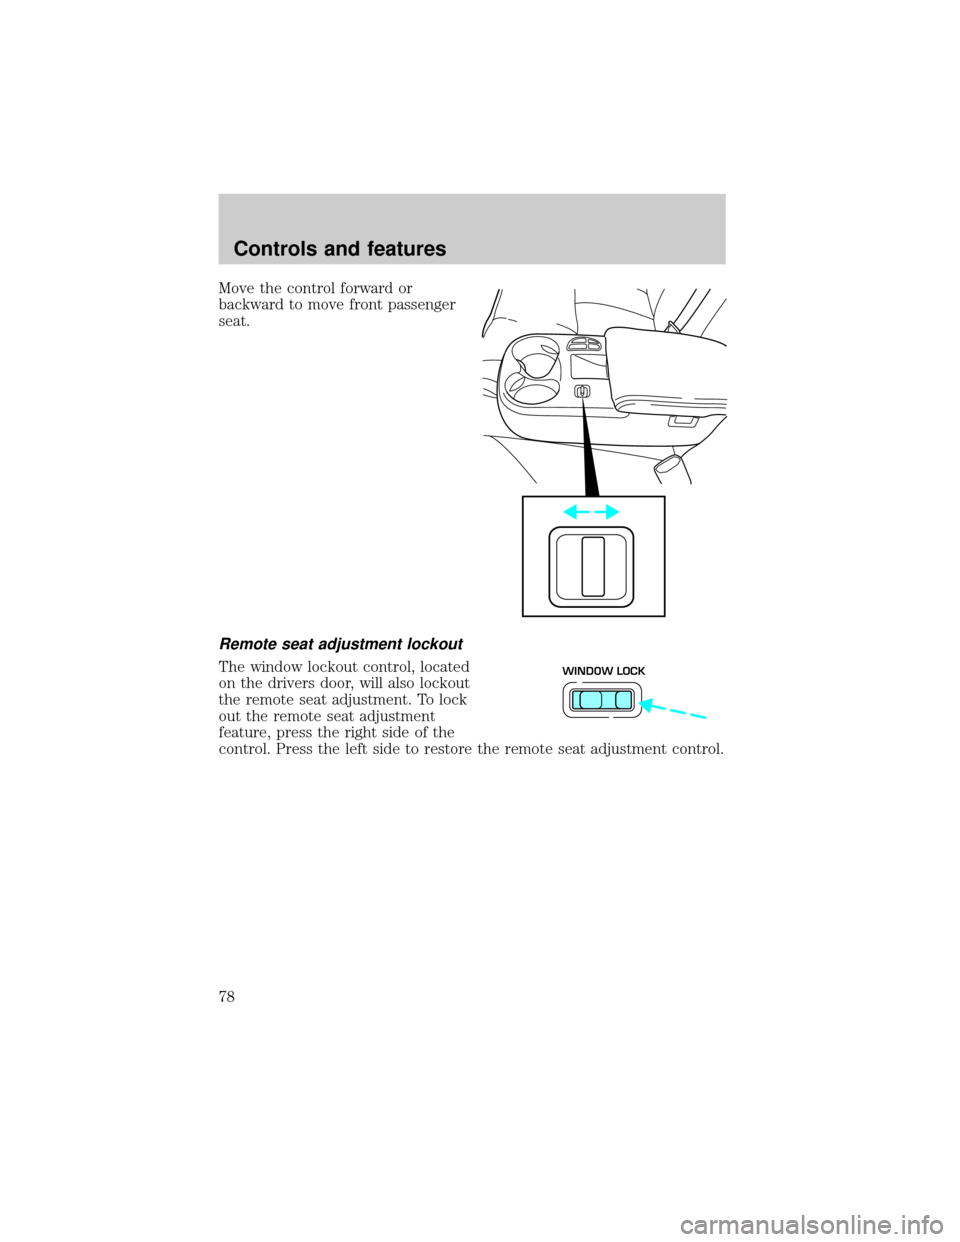
Move the control forward or
backward to move front passenger
seat.
Remote seat adjustment lockout
The window lockout control, located
on the drivers door, will also lockout
the remote seat adjustment. To lock
out the remote seat adjustment
feature, press the right side of the
control. Press the left side to restore the remote seat adjustment control.WINDOW LOCK
Controls and features
78
Page 79 of 240
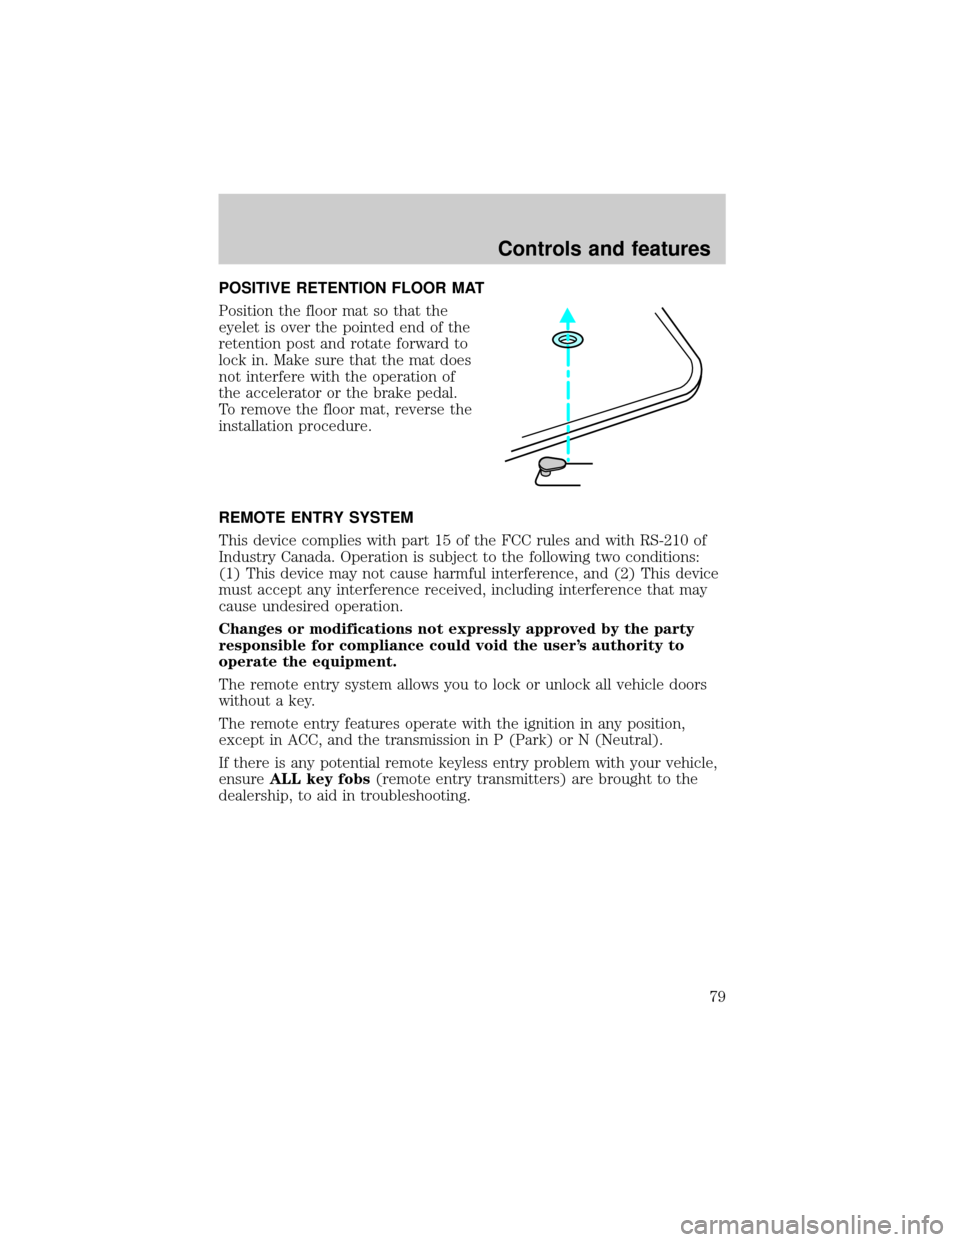
POSITIVE RETENTION FLOOR MAT
Position the floor mat so that the
eyelet is over the pointed end of the
retention post and rotate forward to
lock in. Make sure that the mat does
not interfere with the operation of
the accelerator or the brake pedal.
To remove the floor mat, reverse the
installation procedure.
REMOTE ENTRY SYSTEM
This device complies with part 15 of the FCC rules and with RS-210 of
Industry Canada. Operation is subject to the following two conditions:
(1) This device may not cause harmful interference, and (2) This device
must accept any interference received, including interference that may
cause undesired operation.
Changes or modifications not expressly approved by the party
responsible for compliance could void the user's authority to
operate the equipment.
The remote entry system allows you to lock or unlock all vehicle doors
without a key.
The remote entry features operate with the ignition in any position,
except in ACC, and the transmission in P (Park) or N (Neutral).
If there is any potential remote keyless entry problem with your vehicle,
ensureALL key fobs(remote entry transmitters) are brought to the
dealership, to aid in troubleshooting.
Controls and features
79
Page 81 of 240
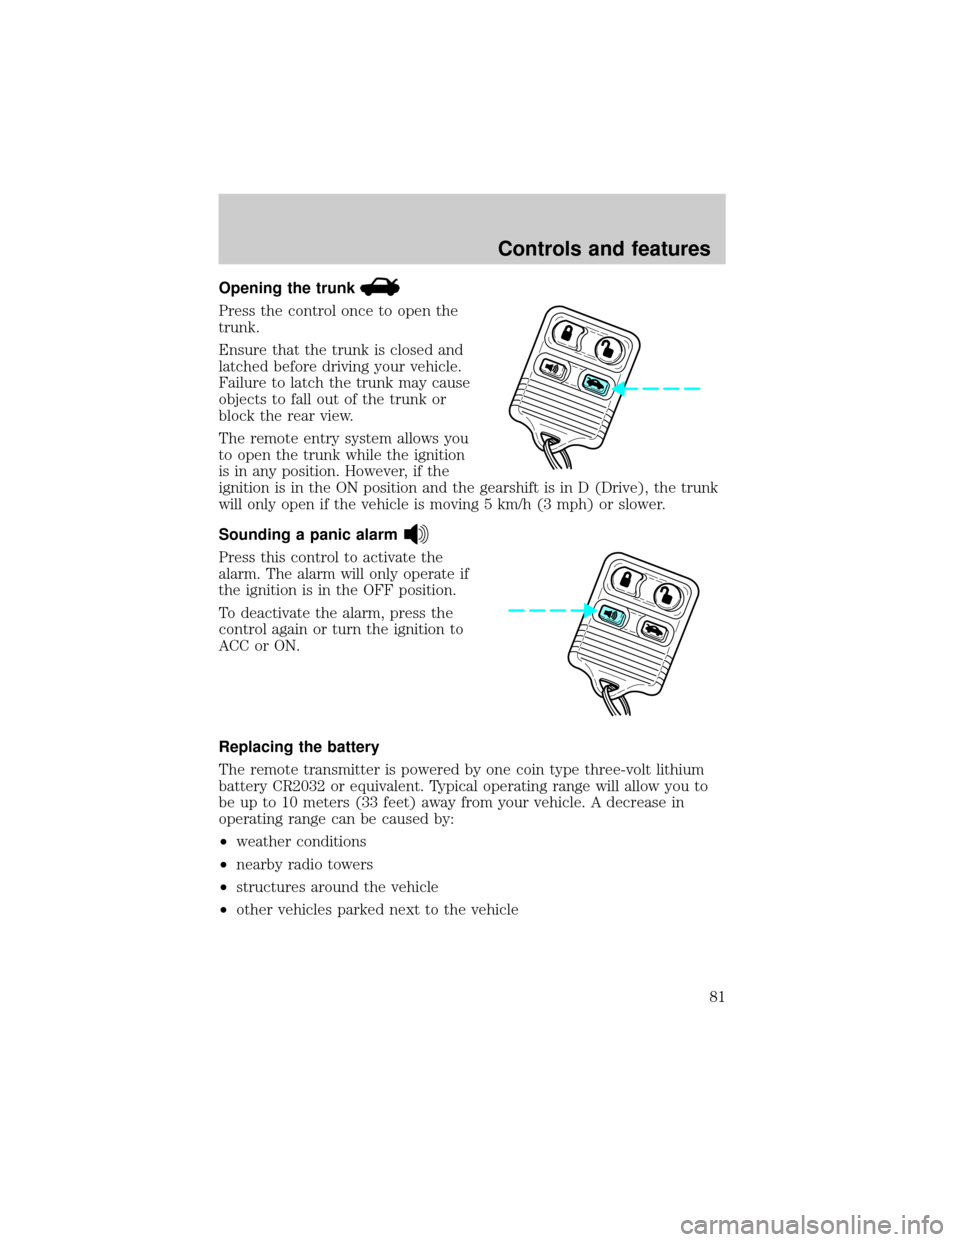
Opening the trunk
Press the control once to open the
trunk.
Ensure that the trunk is closed and
latched before driving your vehicle.
Failure to latch the trunk may cause
objects to fall out of the trunk or
block the rear view.
The remote entry system allows you
to open the trunk while the ignition
is in any position. However, if the
ignition is in the ON position and the gearshift is in D (Drive), the trunk
will only open if the vehicle is moving 5 km/h (3 mph) or slower.
Sounding a panic alarm
Press this control to activate the
alarm. The alarm will only operate if
the ignition is in the OFF position.
To deactivate the alarm, press the
control again or turn the ignition to
ACC or ON.
Replacing the battery
The remote transmitter is powered by one coin type three-volt lithium
battery CR2032 or equivalent. Typical operating range will allow you to
be up to 10 meters (33 feet) away from your vehicle. A decrease in
operating range can be caused by:
²weather conditions
²nearby radio towers
²structures around the vehicle
²other vehicles parked next to the vehicle
Controls and features
81
Page 82 of 240
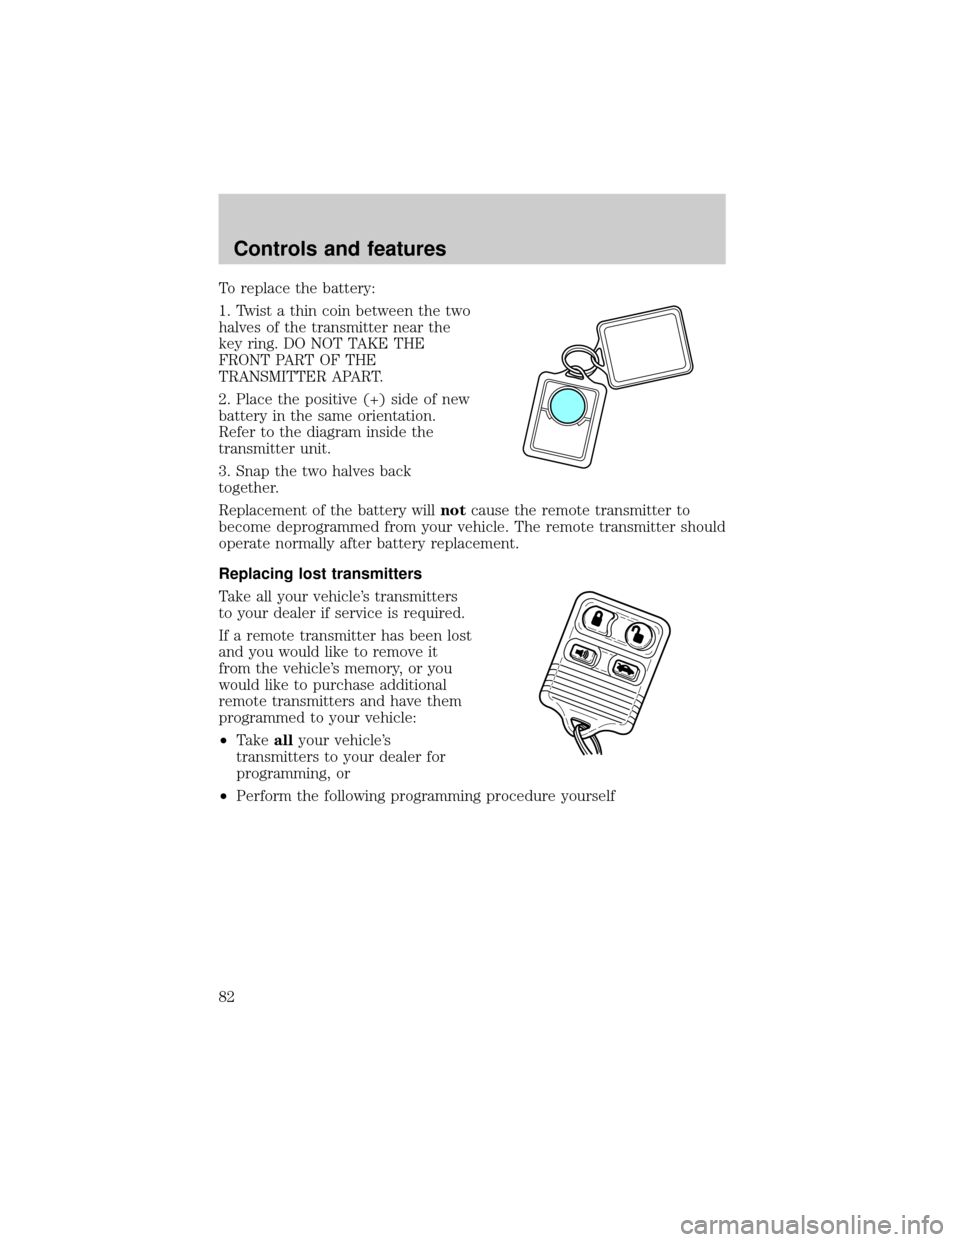
To replace the battery:
1. Twist a thin coin between the two
halves of the transmitter near the
key ring. DO NOT TAKE THE
FRONT PART OF THE
TRANSMITTER APART.
2. Place the positive (+) side of new
battery in the same orientation.
Refer to the diagram inside the
transmitter unit.
3. Snap the two halves back
together.
Replacement of the battery willnotcause the remote transmitter to
become deprogrammed from your vehicle. The remote transmitter should
operate normally after battery replacement.
Replacing lost transmitters
Take all your vehicle's transmitters
to your dealer if service is required.
If a remote transmitter has been lost
and you would like to remove it
from the vehicle's memory, or you
would like to purchase additional
remote transmitters and have them
programmed to your vehicle:
²Takeallyour vehicle's
transmitters to your dealer for
programming, or
²Perform the following programming procedure yourself
Controls and features
82