mirror LINCOLN TOWN CAR 2002 Owners Manual
[x] Cancel search | Manufacturer: LINCOLN, Model Year: 2002, Model line: TOWN CAR, Model: LINCOLN TOWN CAR 2002Pages: 248, PDF Size: 1.9 MB
Page 1 of 248
Introduction 4
Congratulations 4
Safety and environment protection 5
Symbol glossary 8
Instrument Cluster 10
Warning and control lights 10
Gauges 17
Entertainment Systems 19
AM/FM stereo cassette 19
AM/FM stereo cassette (CD changer compatible) 26
CD changer 38
Climate Controls 43
Electronic automatic temperature control 43
Lights 49
Headlamps 49
Bulb replacement 53
Driver Controls 59
Steering wheel adjustment 60
Power windows 62
Mirrors 63
Message center 77
Locks and Security 88
Keys 88
Locks 88
Anti-theft system 90
Table of Contents
1
Page 61 of 248
Never adjust the steering wheel when the vehicle is moving.
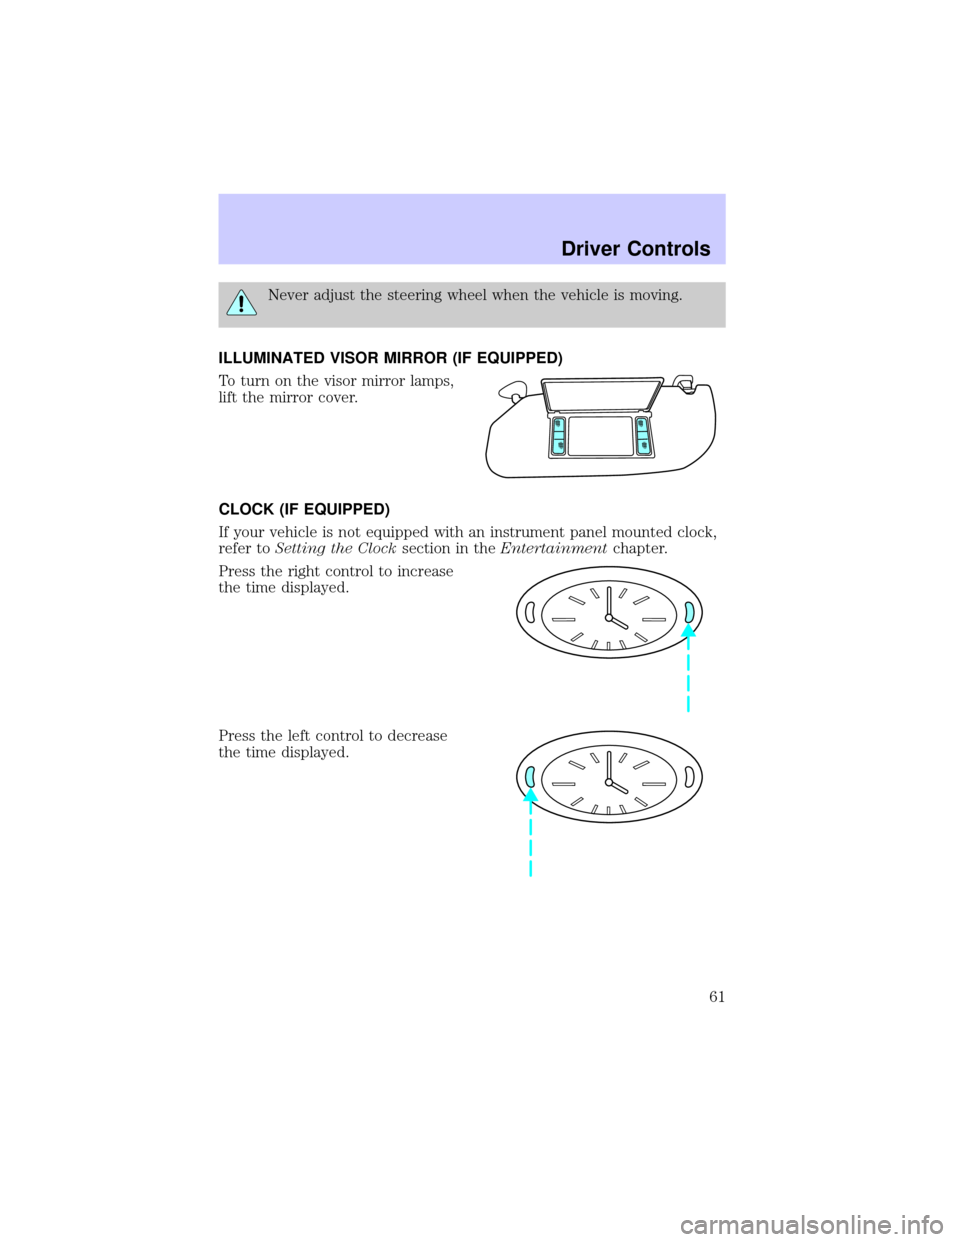
ILLUMINATED VISOR MIRROR (IF EQUIPPED)
To turn on the visor mirror lamps,
lift the mirror cover.
CLOCK (IF EQUIPPED)
If your vehicle is not equipped with an instrument panel mounted clock,
refer toSetting the Clocksection in theEntertainmentchapter.
Press the right control to increase
the time displayed.
Press the left control to decrease
the time displayed.
Driver Controls
61
Page 63 of 248
MIRRORS
Automatic dimming inside rear view mirror (if equipped)
Your vehicle is equipped with an inside rear view mirror which has an
auto-dimming function (available as an option on the outside driver's side
mirror). The electronic day/night mirror will change from the normal
state to the non-glare state when bright lights (glare) reach the mirror.
When the mirror detects bright light from front or behind, it will
automatically adjust (darken) to minimize glare.
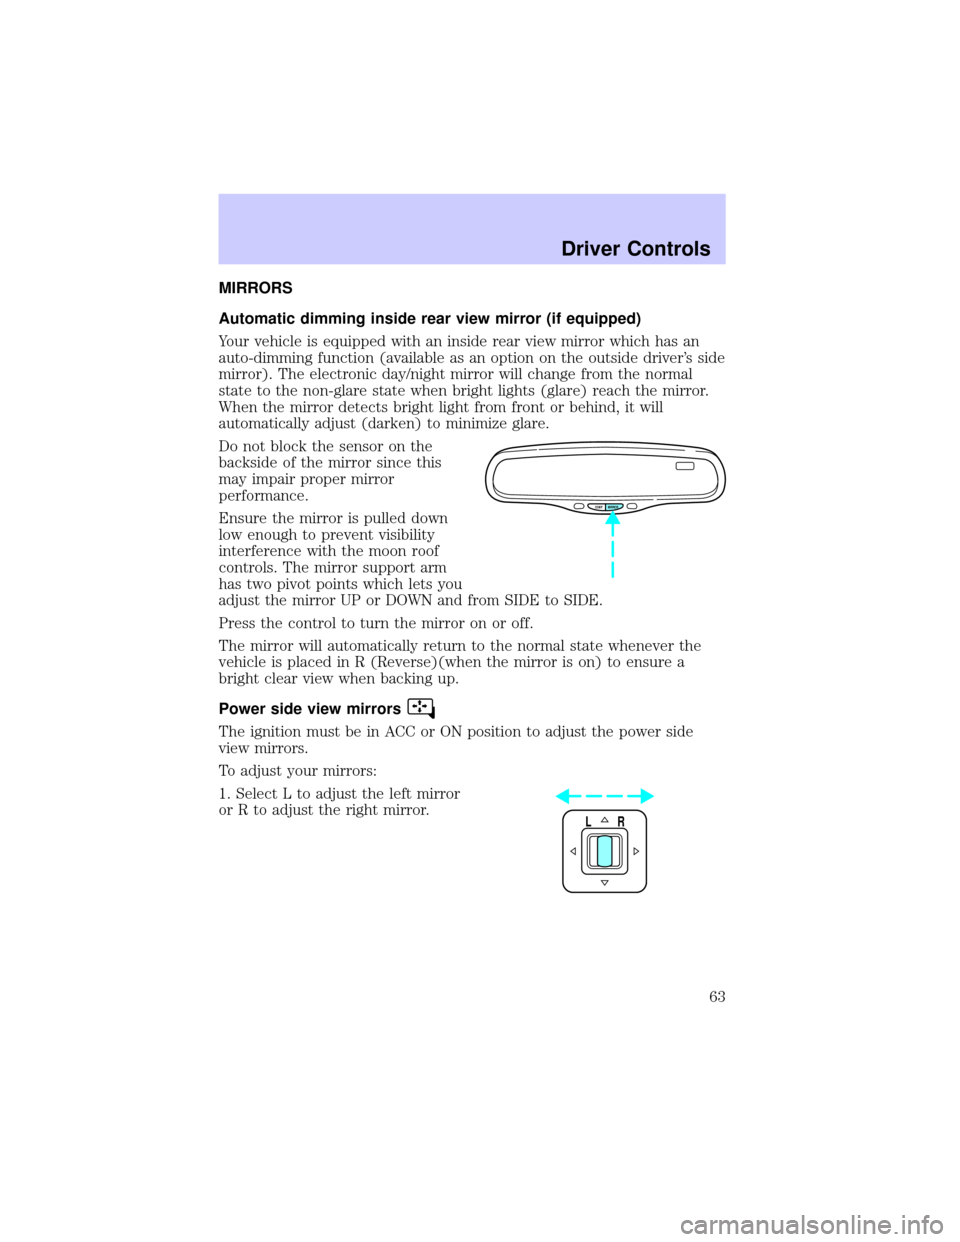
Do not block the sensor on the
backside of the mirror since this
may impair proper mirror
performance.
Ensure the mirror is pulled down
low enough to prevent visibility
interference with the moon roof
controls. The mirror support arm
has two pivot points which lets you
adjust the mirror UP or DOWN and from SIDE to SIDE.
Press the control to turn the mirror on or off.
The mirror will automatically return to the normal state whenever the
vehicle is placed in R (Reverse)(when the mirror is on) to ensure a
bright clear view when backing up.
Power side view mirrors
The ignition must be in ACC or ON position to adjust the power side
view mirrors.
To adjust your mirrors:
1. Select L to adjust the left mirror
or R to adjust the right mirror.
COMP MIRROR
LR
Driver Controls
63
Page 64 of 248
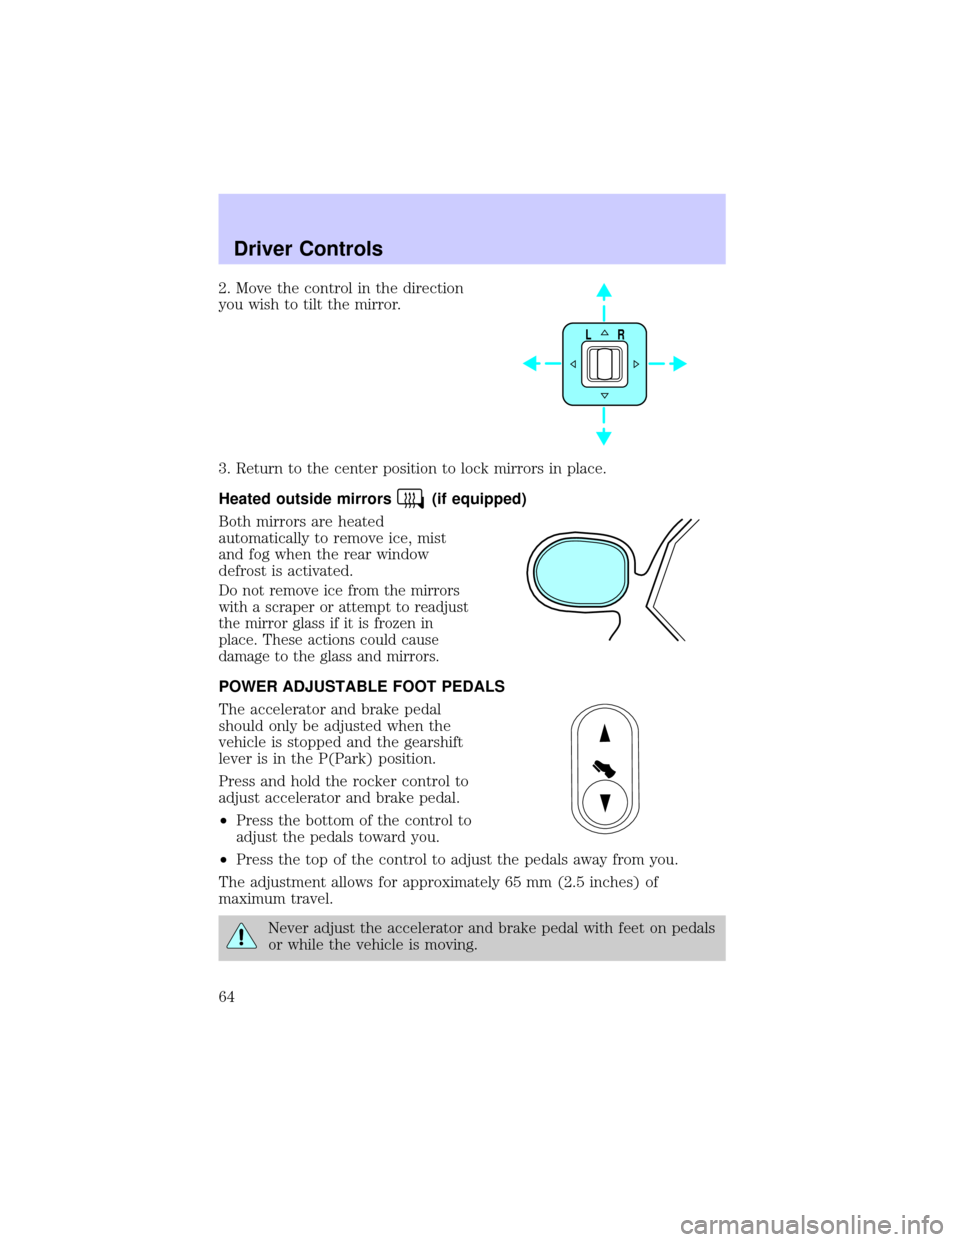
2. Move the control in the direction
you wish to tilt the mirror.
3. Return to the center position to lock mirrors in place.
Heated outside mirrors
(if equipped)
Both mirrors are heated
automatically to remove ice, mist
and fog when the rear window
defrost is activated.
Do not remove ice from the mirrors
with a scraper or attempt to readjust
the mirror glass if it is frozen in
place. These actions could cause
damage to the glass and mirrors.
POWER ADJUSTABLE FOOT PEDALS
The accelerator and brake pedal
should only be adjusted when the
vehicle is stopped and the gearshift
lever is in the P(Park) position.
Press and hold the rocker control to
adjust accelerator and brake pedal.
²Press the bottom of the control to
adjust the pedals toward you.
²Press the top of the control to adjust the pedals away from you.
The adjustment allows for approximately 65 mm (2.5 inches) of
maximum travel.
Never adjust the accelerator and brake pedal with feet on pedals
or while the vehicle is moving.
LR
Driver Controls
64
Page 79 of 248
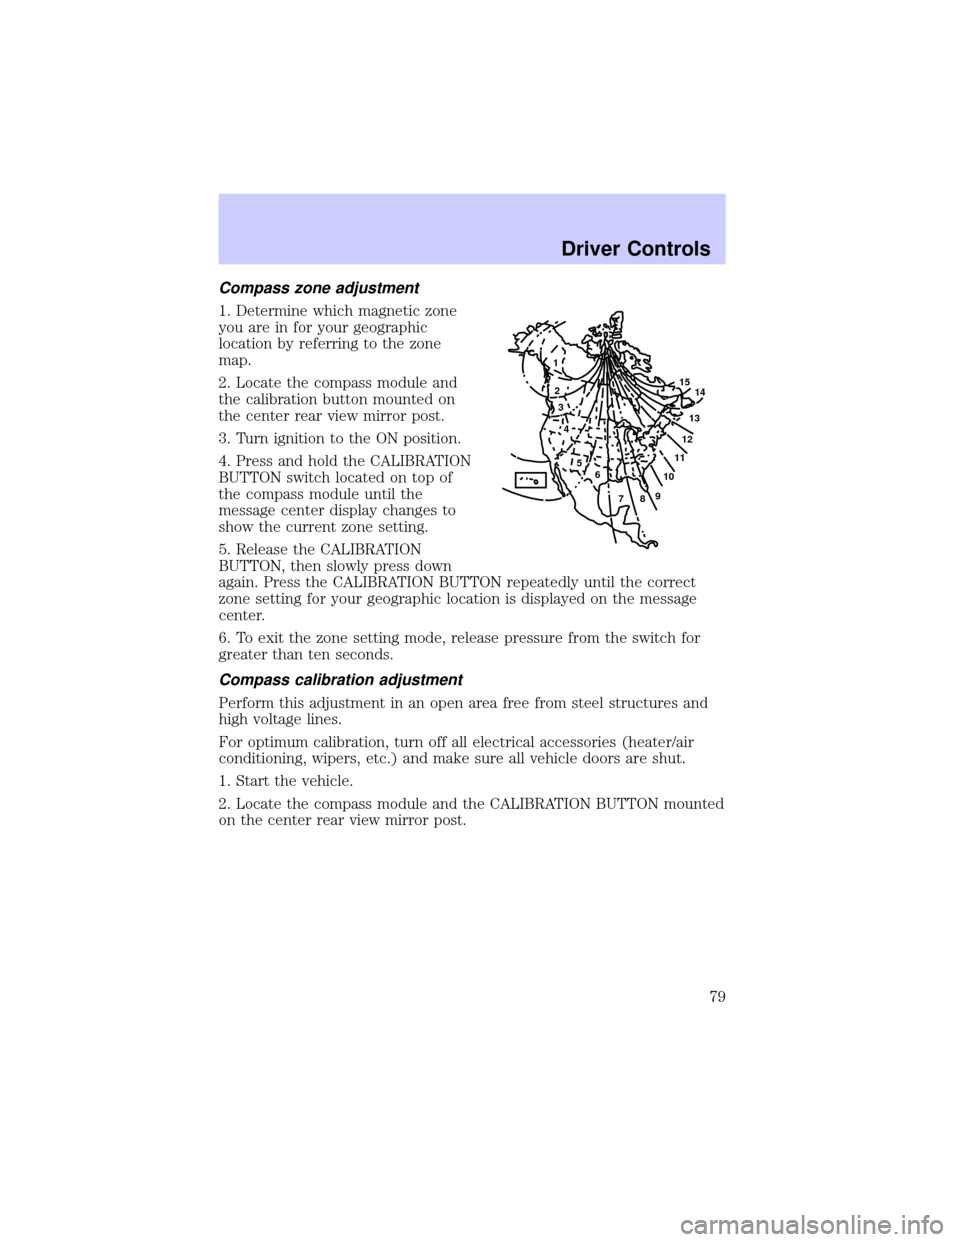
Compass zone adjustment
1. Determine which magnetic zone
you are in for your geographic
location by referring to the zone
map.
2. Locate the compass module and
the calibration button mounted on
the center rear view mirror post.
3. Turn ignition to the ON position.
4. Press and hold the CALIBRATION
BUTTON switch located on top of
the compass module until the
message center display changes to
show the current zone setting.
5. Release the CALIBRATION
BUTTON, then slowly press down
again. Press the CALIBRATION BUTTON repeatedly until the correct
zone setting for your geographic location is displayed on the message
center.
6. To exit the zone setting mode, release pressure from the switch for
greater than ten seconds.
Compass calibration adjustment
Perform this adjustment in an open area free from steel structures and
high voltage lines.
For optimum calibration, turn off all electrical accessories (heater/air
conditioning, wipers, etc.) and make sure all vehicle doors are shut.
1. Start the vehicle.
2. Locate the compass module and the CALIBRATION BUTTON mounted
on the center rear view mirror post.
1
2
3
4
5
6
7891011121314 15
Driver Controls
79
Page 84 of 248
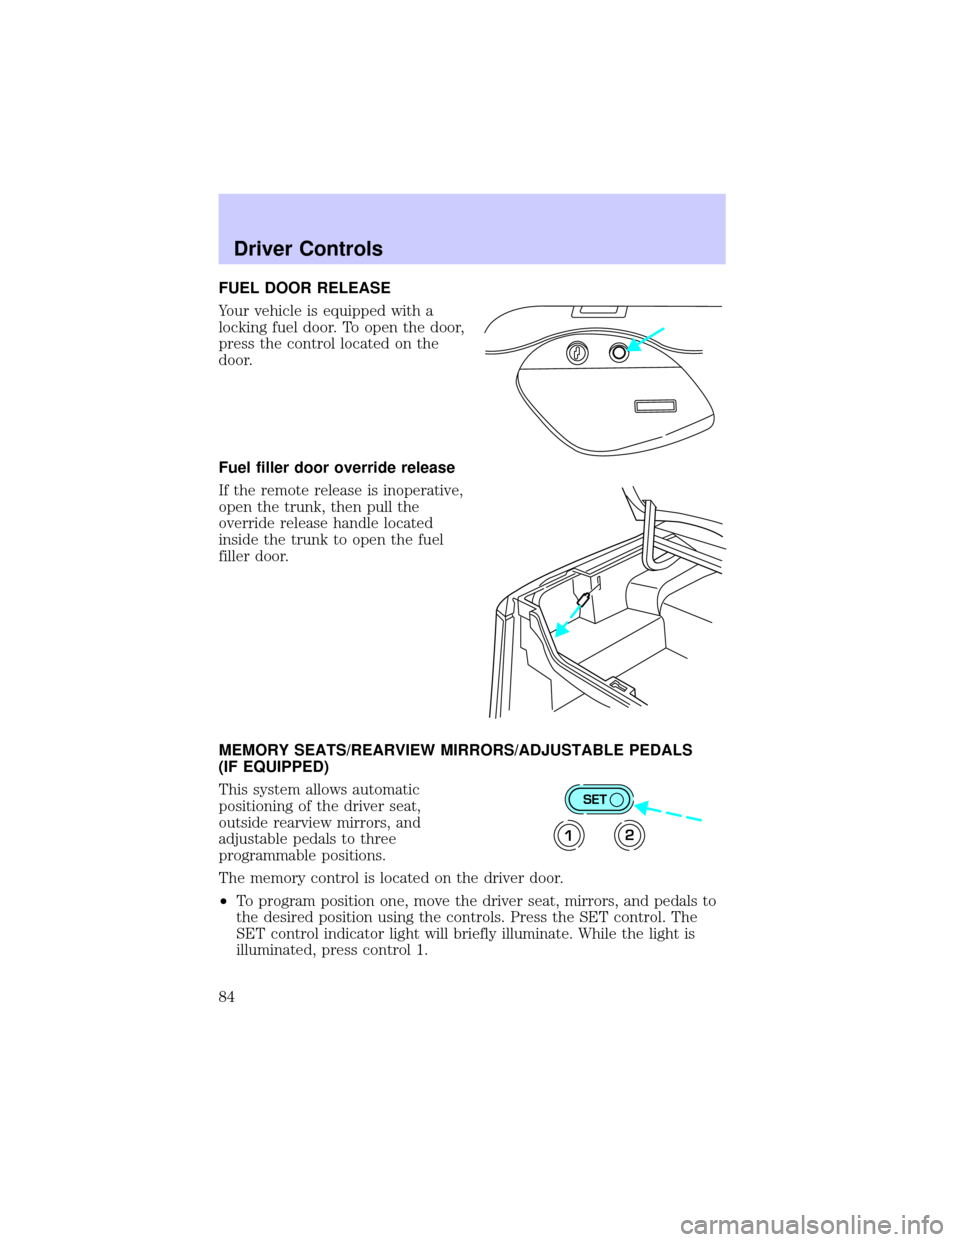
FUEL DOOR RELEASE
Your vehicle is equipped with a
locking fuel door. To open the door,
press the control located on the
door.
Fuel filler door override release
If the remote release is inoperative,
open the trunk, then pull the
override release handle located
inside the trunk to open the fuel
filler door.
MEMORY SEATS/REARVIEW MIRRORS/ADJUSTABLE PEDALS
(IF EQUIPPED)
This system allows automatic
positioning of the driver seat,
outside rearview mirrors, and
adjustable pedals to three
programmable positions.
The memory control is located on the driver door.
²To program position one, move the driver seat, mirrors, and pedals to
the desired position using the controls. Press the SET control. The
SET control indicator light will briefly illuminate. While the light is
illuminated, press control 1.
SET
12
Driver Controls
84
Page 94 of 248

Autolock
The autolock feature will lock all of the vehicle doors when:
²all doors are closed
²the engine is running and
²you shift into any gear putting the vehicle in motion
The autolock feature repeats when:
²any door, except the drivers door, is opened then closed while the
engine is running and
²you put the vehicle in motion
Autolock can also be activated or deactivated using the following
procedure:
You must complete steps 1 through 7 within 30 seconds or the procedure
will have to be repeated. If the procedure needs to be repeated, you
must wait 30 seconds.
1. Turn the ignition key to ON.
2. Press the power door unlock control on the door panel three times.
3. Turn the ignition key from ON to OFF.
4. Press the power door unlock control three times.
5. Turn the ignition key back to ON. The doors will lock and unlock.
6. Press the power door unlock control. The horn will chirp once upon
successful toggling of the Autolock feature.
7. Turn ignition to OFF.
Memory seat/mirrors/adjustable pedals feature (if equipped)
The remote keyless entry system can also control the
seat/mirrors/adjustable pedals feature. With this feature, the first two
programmed transmitters will recall a different memory position.
Locks and Security
94
Page 95 of 248
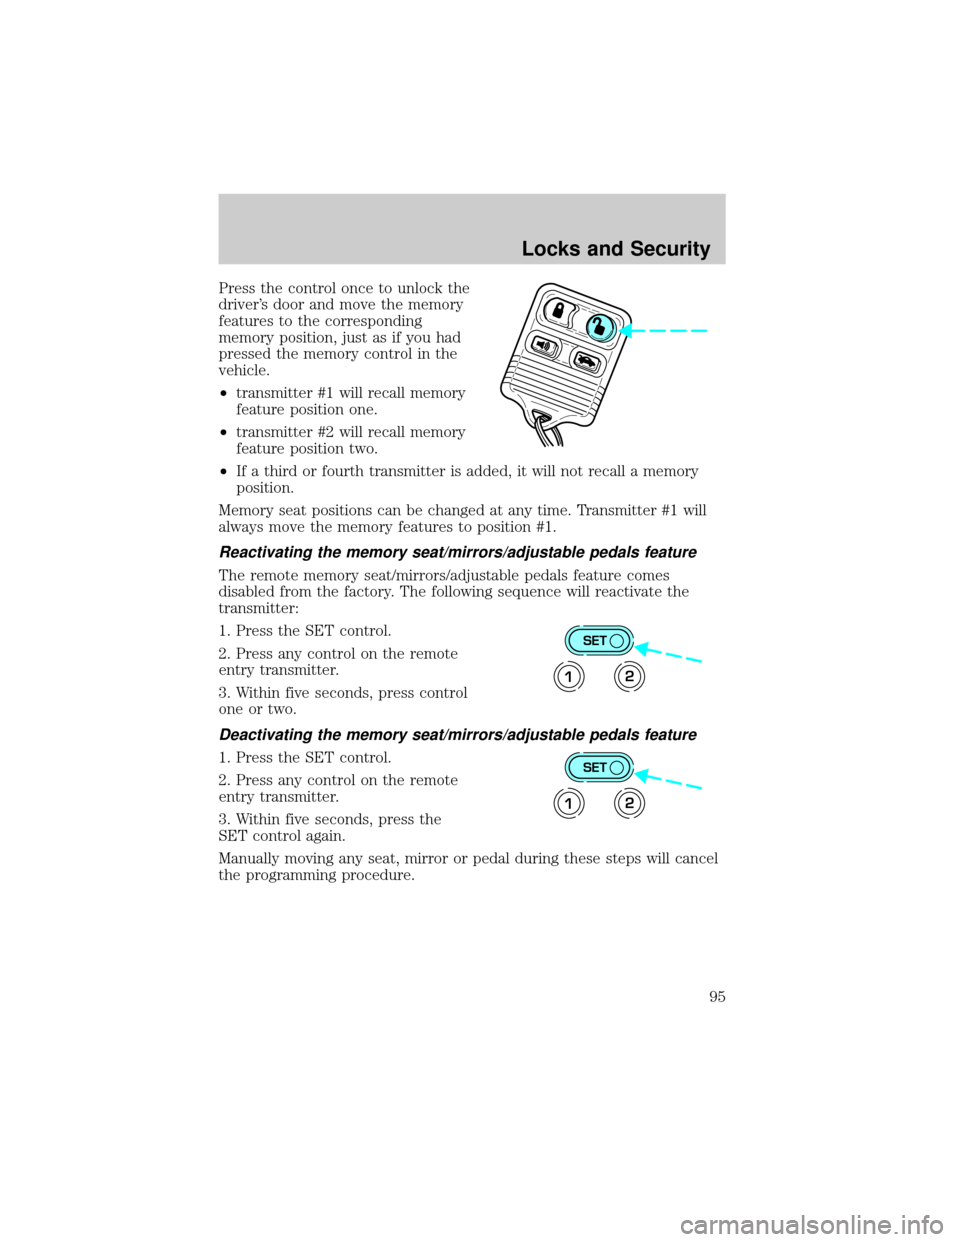
Press the control once to unlock the
driver's door and move the memory
features to the corresponding
memory position, just as if you had
pressed the memory control in the
vehicle.
²transmitter #1 will recall memory
feature position one.
²transmitter #2 will recall memory
feature position two.
²If a third or fourth transmitter is added, it will not recall a memory
position.
Memory seat positions can be changed at any time. Transmitter #1 will
always move the memory features to position #1.
Reactivating the memory seat/mirrors/adjustable pedals feature
The remote memory seat/mirrors/adjustable pedals feature comes
disabled from the factory. The following sequence will reactivate the
transmitter:
1. Press the SET control.
2. Press any control on the remote
entry transmitter.
3. Within five seconds, press control
one or two.
Deactivating the memory seat/mirrors/adjustable pedals feature
1. Press the SET control.
2. Press any control on the remote
entry transmitter.
3. Within five seconds, press the
SET control again.
Manually moving any seat, mirror or pedal during these steps will cancel
the programming procedure.
SET
12
SET
12
Locks and Security
95
Page 106 of 248
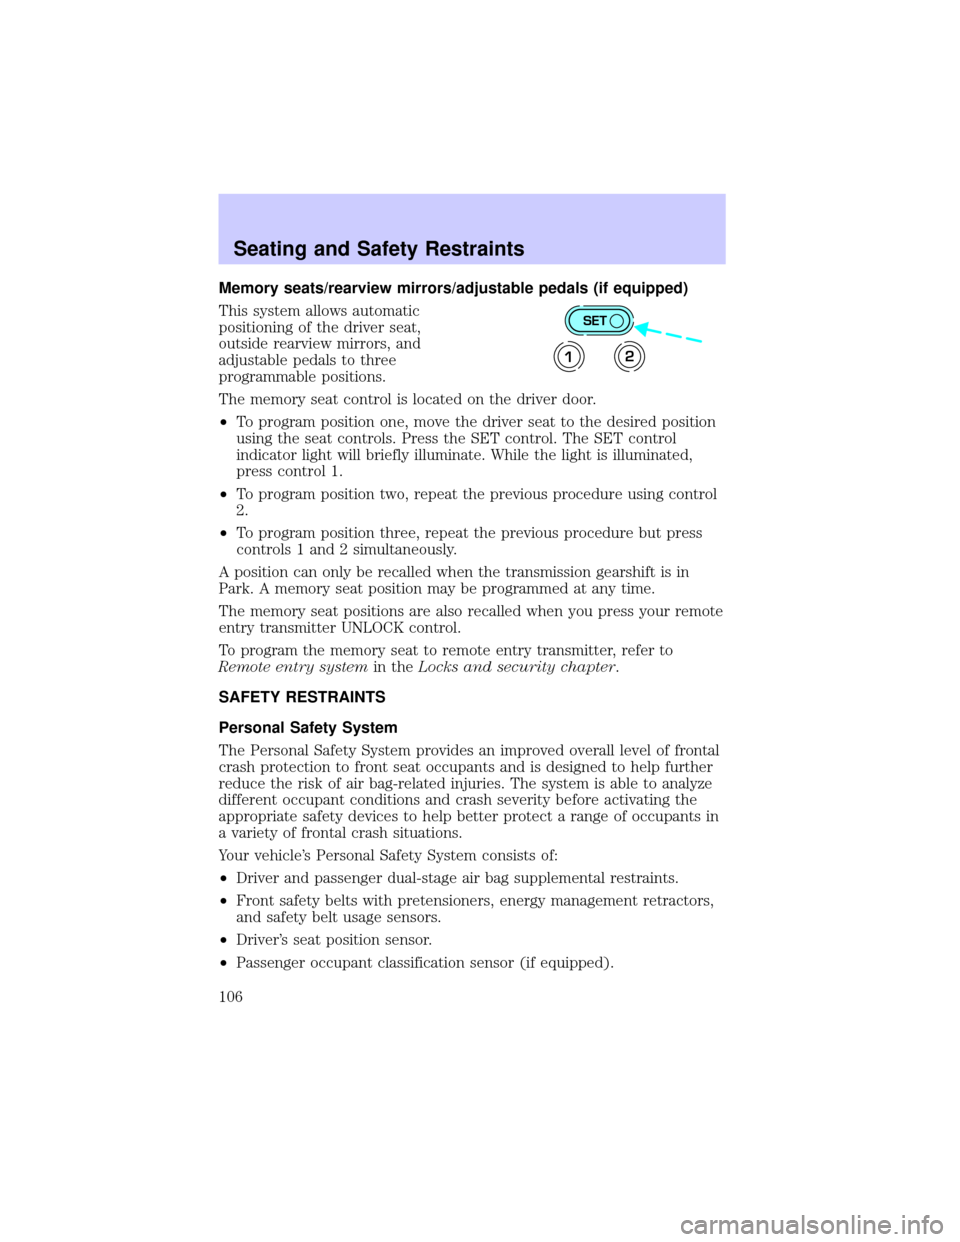
Memory seats/rearview mirrors/adjustable pedals (if equipped)
This system allows automatic
positioning of the driver seat,
outside rearview mirrors, and
adjustable pedals to three
programmable positions.
The memory seat control is located on the driver door.
²To program position one, move the driver seat to the desired position
using the seat controls. Press the SET control. The SET control
indicator light will briefly illuminate. While the light is illuminated,
press control 1.
²To program position two, repeat the previous procedure using control
2.
²To program position three, repeat the previous procedure but press
controls 1 and 2 simultaneously.
A position can only be recalled when the transmission gearshift is in
Park. A memory seat position may be programmed at any time.
The memory seat positions are also recalled when you press your remote
entry transmitter UNLOCK control.
To program the memory seat to remote entry transmitter, refer to
Remote entry systemin theLocks and security chapter.
SAFETY RESTRAINTS
Personal Safety System
The Personal Safety System provides an improved overall level of frontal
crash protection to front seat occupants and is designed to help further
reduce the risk of air bag-related injuries. The system is able to analyze
different occupant conditions and crash severity before activating the
appropriate safety devices to help better protect a range of occupants in
a variety of frontal crash situations.
Your vehicle's Personal Safety System consists of:
²Driver and passenger dual-stage air bag supplemental restraints.
²Front safety belts with pretensioners, energy management retractors,
and safety belt usage sensors.
²Driver's seat position sensor.
²Passenger occupant classification sensor (if equipped).
SET
12
Seating and Safety Restraints
106
Page 161 of 248
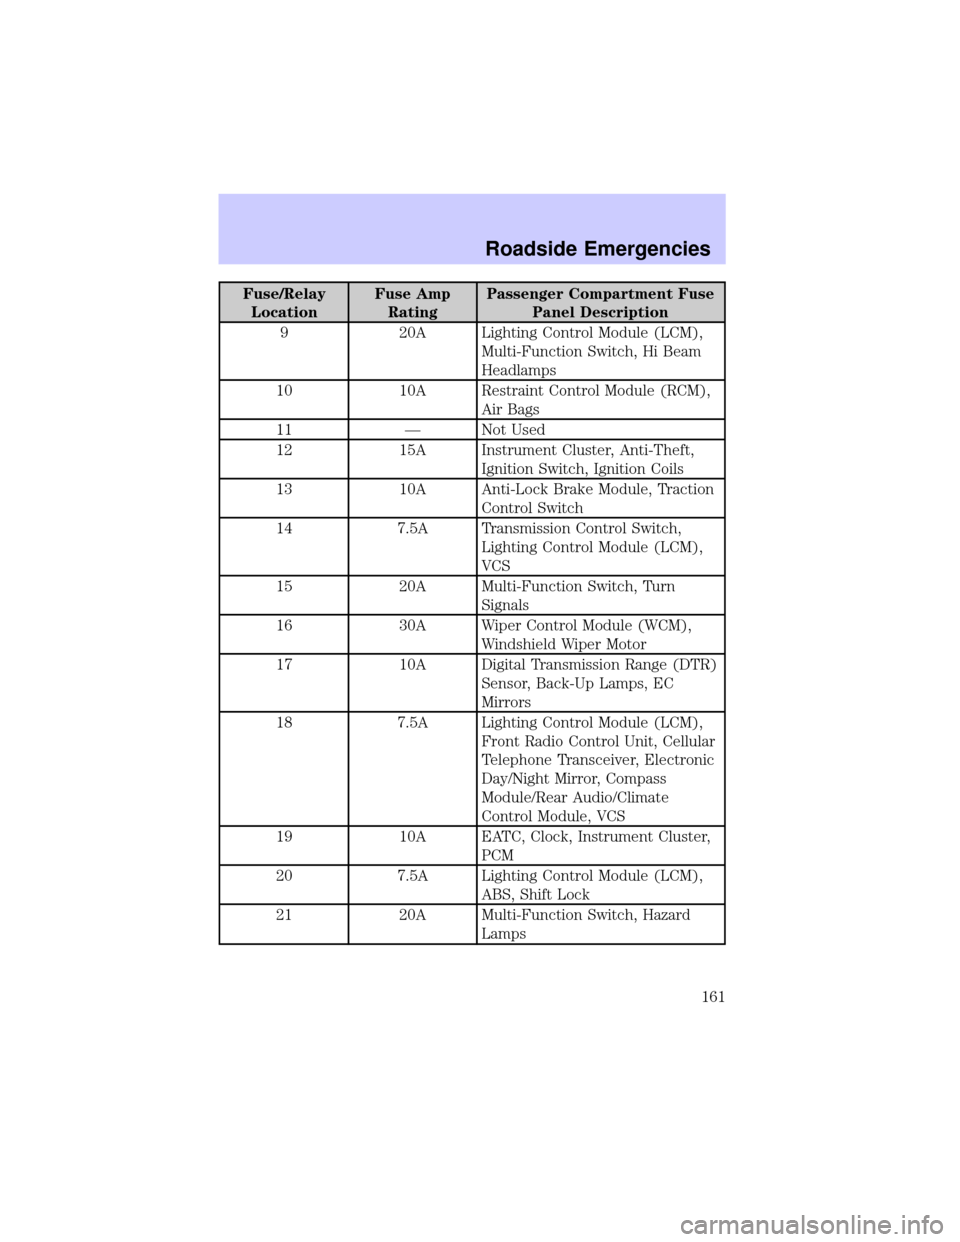
Fuse/Relay
LocationFuse Amp
RatingPassenger Compartment Fuse
Panel Description
9 20A Lighting Control Module (LCM),
Multi-Function Switch, Hi Beam
Headlamps
10 10A Restraint Control Module (RCM),
Air Bags
11 Ð Not Used
12 15A Instrument Cluster, Anti-Theft,
Ignition Switch, Ignition Coils
13 10A Anti-Lock Brake Module, Traction
Control Switch
14 7.5A Transmission Control Switch,
Lighting Control Module (LCM),
VCS
15 20A Multi-Function Switch, Turn
Signals
16 30A Wiper Control Module (WCM),
Windshield Wiper Motor
17 10A Digital Transmission Range (DTR)
Sensor, Back-Up Lamps, EC
Mirrors
18 7.5A Lighting Control Module (LCM),
Front Radio Control Unit, Cellular
Telephone Transceiver, Electronic
Day/Night Mirror, Compass
Module/Rear Audio/Climate
Control Module, VCS
19 10A EATC, Clock, Instrument Cluster,
PCM
20 7.5A Lighting Control Module (LCM),
ABS, Shift Lock
21 20A Multi-Function Switch, Hazard
Lamps
Roadside Emergencies
161