trunk LINCOLN TOWN CAR 2004 Owners Manual
[x] Cancel search | Manufacturer: LINCOLN, Model Year: 2004, Model line: TOWN CAR, Model: LINCOLN TOWN CAR 2004Pages: 304, PDF Size: 2.87 MB
Page 14 of 304
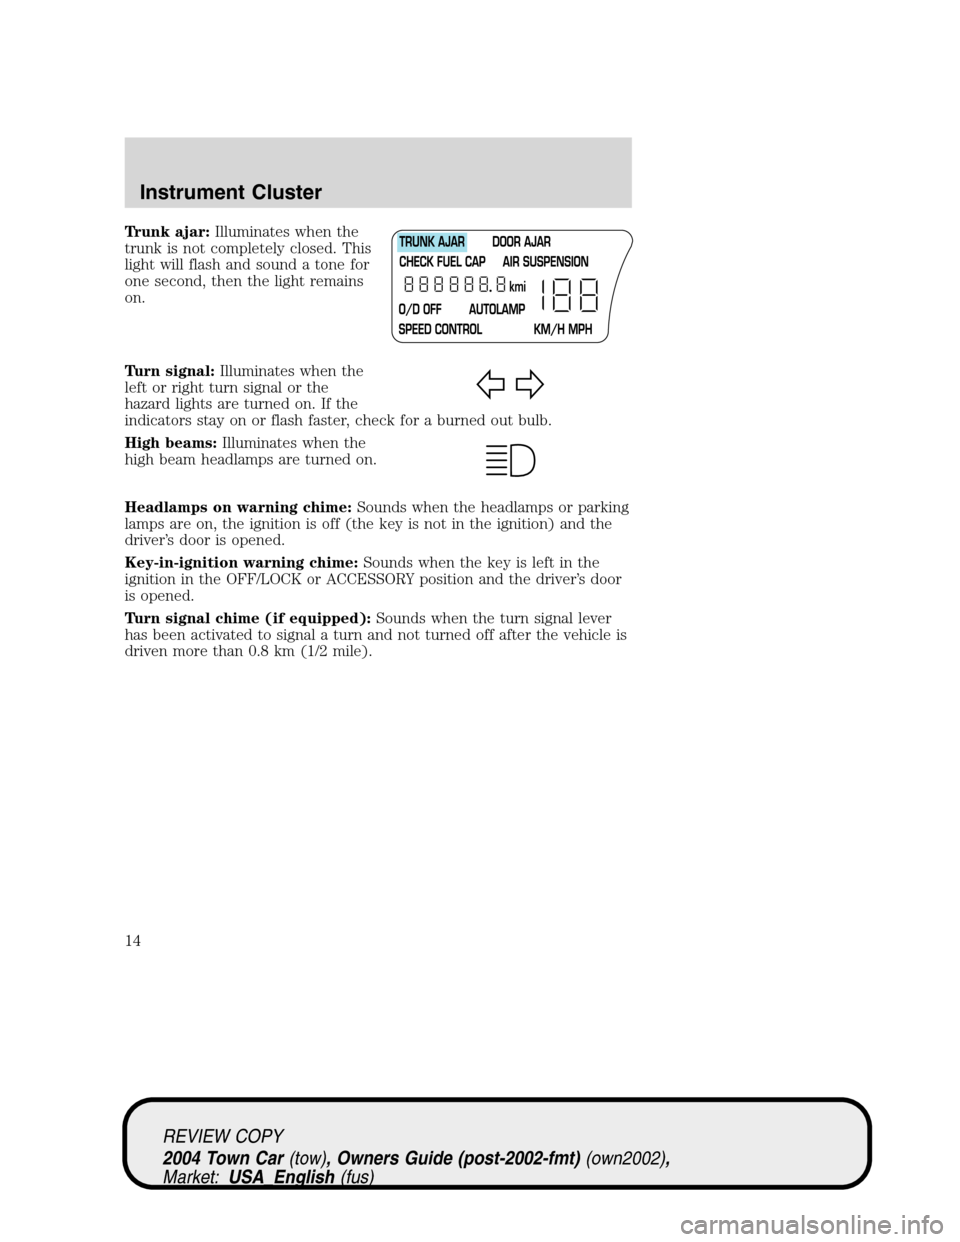
Trunk ajar:Illuminates when the
trunk is not completely closed. This
light will flash and sound a tone for
one second, then the light remains
on.
Turn signal:Illuminates when the
left or right turn signal or the
hazard lights are turned on. If the
indicators stay on or flash faster, check for a burned out bulb.
High beams:Illuminates when the
high beam headlamps are turned on.
Headlamps on warning chime:Sounds when the headlamps or parking
lamps are on, the ignition is off (the key is not in the ignition) and the
driver’s door is opened.
Key-in-ignition warning chime:Sounds when the key is left in the
ignition in the OFF/LOCK or ACCESSORY position and the driver’s door
is opened.
Turn signal chime (if equipped):Sounds when the turn signal lever
has been activated to signal a turn and not turned off after the vehicle is
driven more than 0.8 km (1/2 mile).
REVIEW COPY
2004 Town Car(tow), Owners Guide (post-2002-fmt)(own2002),
Market:USA_English(fus)
Instrument Cluster
14
Page 21 of 304
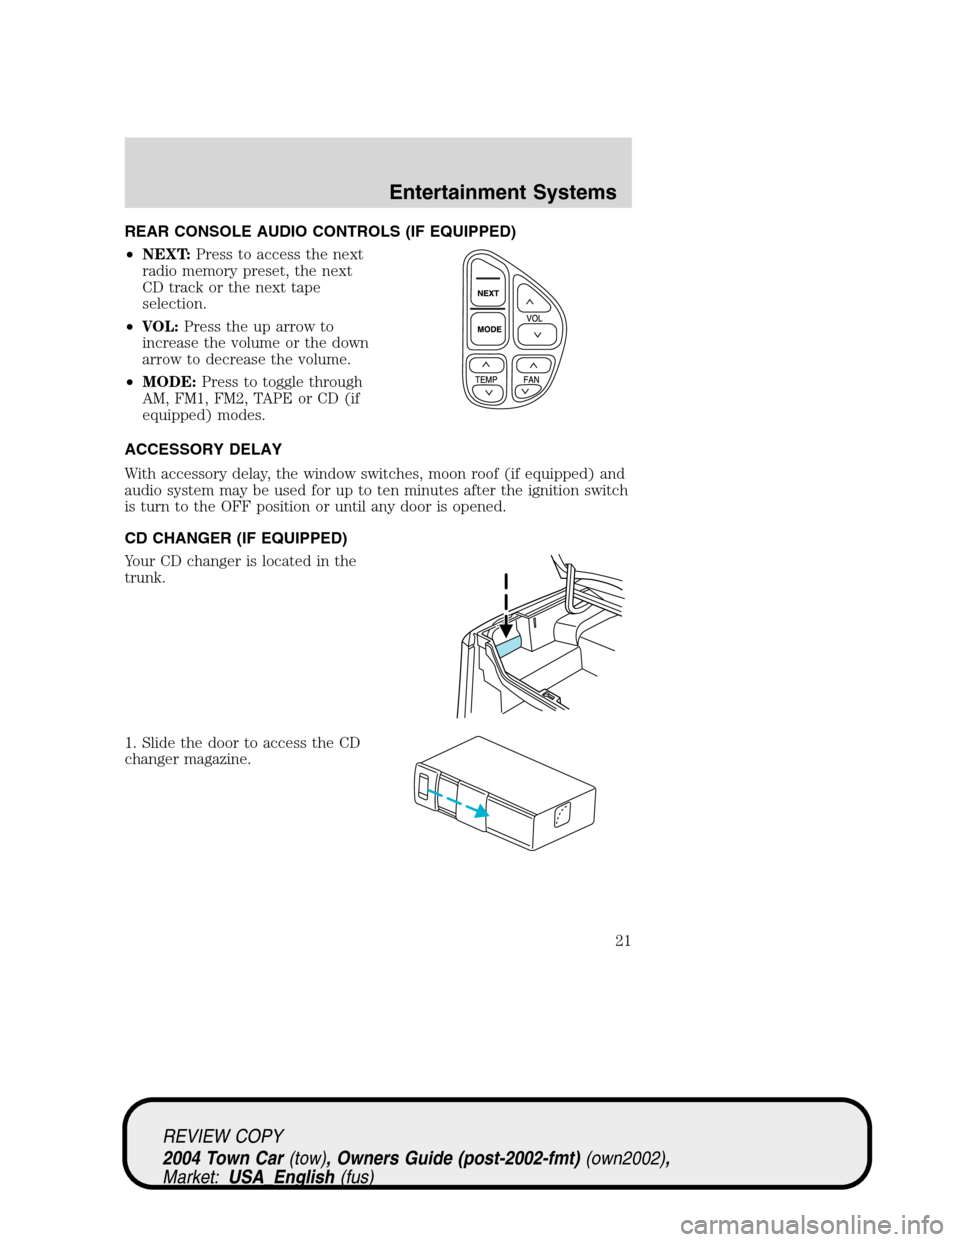
REAR CONSOLE AUDIO CONTROLS (IF EQUIPPED)
•NEXT:Press to access the next
radio memory preset, the next
CD track or the next tape
selection.
•VOL:Press the up arrow to
increase the volume or the down
arrow to decrease the volume.
•MODE:Press to toggle through
AM, FM1, FM2, TAPE or CD (if
equipped) modes.
ACCESSORY DELAY
With accessory delay, the window switches, moon roof (if equipped) and
audio system may be used for up to ten minutes after the ignition switch
is turn to the OFF position or until any door is opened.
CD CHANGER (IF EQUIPPED)
Your CD changer is located in the
trunk.
1. Slide the door to access the CD
changer magazine.
REVIEW COPY
2004 Town Car(tow), Owners Guide (post-2002-fmt)(own2002),
Market:USA_English(fus)
Entertainment Systems
21
Page 86 of 304
Ensure that you do not have any metal objects on the rear parcel shelf.
If your windows are tinted, ensure that you use non-metal tinting instead
of metal oxide tinting. Both of these factors can interrupt GPS reception.
Cleaning the display
Do not spray cleaning fluid directly onto the unit. Instead, spray onto a
soft cloth and gently wipe the unit. Only recommended products should
be used.
•Recommended products- Rubbing alcohol based cleaner (i.e., methyl
alcohol) or a damp clean cloth.
•Not harmful but not recommended- ammonia cleaner, neutral
detergent.
•Harmful to system and not recommended- acid cleaner, alkali cleaner,
benzene cleaner.
Do not clean any part of the system with benzene, paint thinner or any
other solvent.
Do not spill liquids of any kind onto the unit.
Loading the map DVD
•Your navigation DVD unit is located in the trunk (mounted under the
rear window or in a left side compartment with access door).
•Ensure that the vehicle ignition is ON.
•If a DVD is already loaded in the Navigation unit, push the eject
button.
•Load the DVD with the printed side up. Do not allow moisture or
foreign objects to enter the slot.
The navigation system utilizes a database stored in a special format on a
DVD. It is recommended always to use the latest update of this map
DVD.
•The navigation system will only work with DVDs specifically intended
for your navigation system.
•Always store the map DVDs in their protective cases when not in use.
Ordering additional map DVDs
If you wish to order a replacement or additional map, please call
1–888–NAV-MAPS (1–888–628–6277) or to log onto www.navtech.com.
REVIEW COPY
2004 Town Car(tow), Owners Guide (post-2002-fmt)(own2002),
Market:USA_English(fus)
Entertainment Systems
86
Page 99 of 304
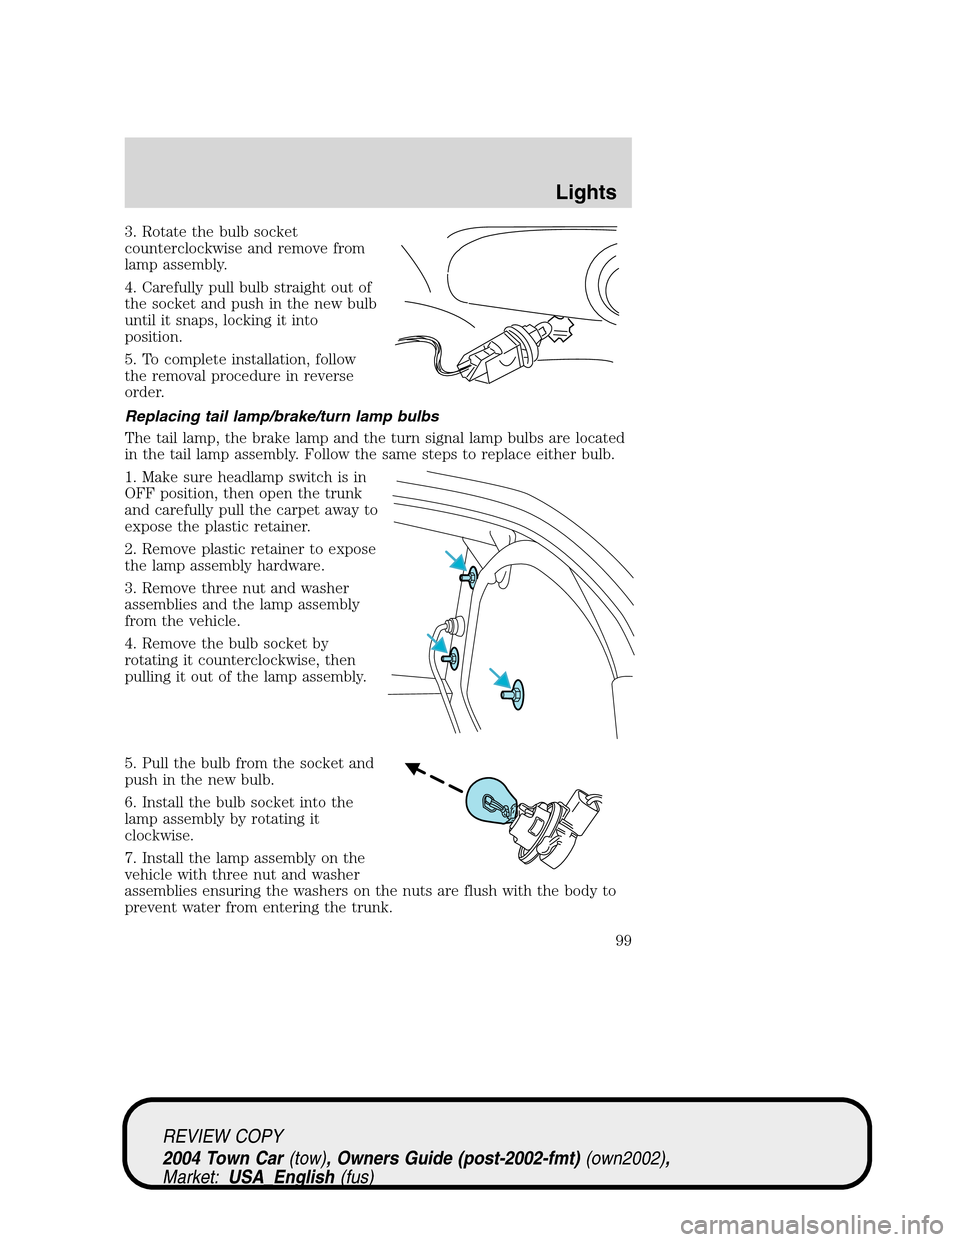
3. Rotate the bulb socket
counterclockwise and remove from
lamp assembly.
4. Carefully pull bulb straight out of
the socket and push in the new bulb
until it snaps, locking it into
position.
5. To complete installation, follow
the removal procedure in reverse
order.
Replacing tail lamp/brake/turn lamp bulbs
The tail lamp, the brake lamp and the turn signal lamp bulbs are located
in the tail lamp assembly. Follow the same steps to replace either bulb.
1. Make sure headlamp switch is in
OFF position, then open the trunk
and carefully pull the carpet away to
expose the plastic retainer.
2. Remove plastic retainer to expose
the lamp assembly hardware.
3. Remove three nut and washer
assemblies and the lamp assembly
from the vehicle.
4. Remove the bulb socket by
rotating it counterclockwise, then
pulling it out of the lamp assembly.
5. Pull the bulb from the socket and
push in the new bulb.
6. Install the bulb socket into the
lamp assembly by rotating it
clockwise.
7. Install the lamp assembly on the
vehicle with three nut and washer
assemblies ensuring the washers on the nuts are flush with the body to
prevent water from entering the trunk.
REVIEW COPY
2004 Town Car(tow), Owners Guide (post-2002-fmt)(own2002),
Market:USA_English(fus)
Lights
99
Page 100 of 304
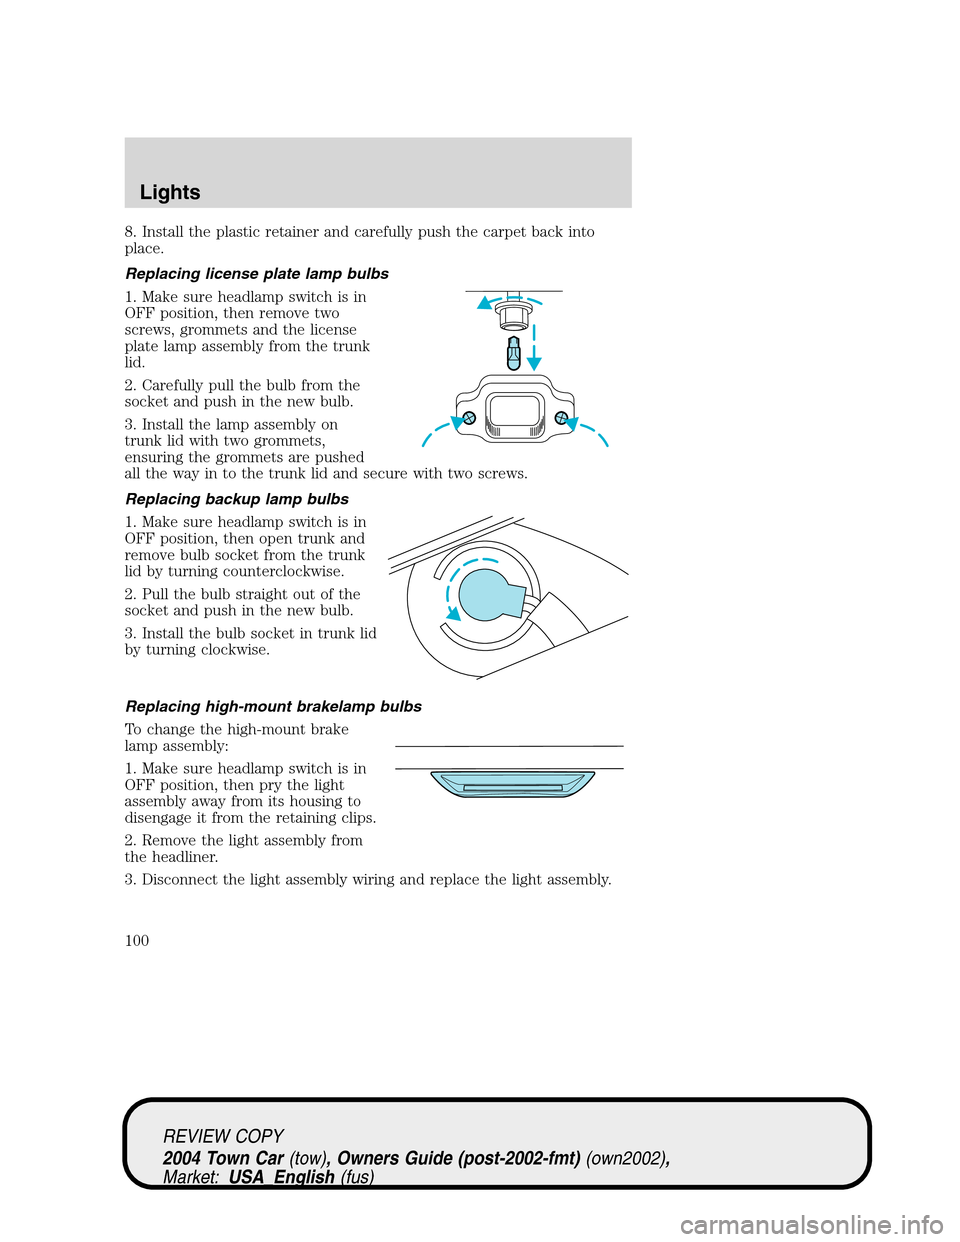
8. Install the plastic retainer and carefully push the carpet back into
place.
Replacing license plate lamp bulbs
1. Make sure headlamp switch is in
OFF position, then remove two
screws, grommets and the license
plate lamp assembly from the trunk
lid.
2. Carefully pull the bulb from the
socket and push in the new bulb.
3. Install the lamp assembly on
trunk lid with two grommets,
ensuring the grommets are pushed
all the way in to the trunk lid and secure with two screws.
Replacing backup lamp bulbs
1. Make sure headlamp switch is in
OFF position, then open trunk and
remove bulb socket from the trunk
lid by turning counterclockwise.
2. Pull the bulb straight out of the
socket and push in the new bulb.
3. Install the bulb socket in trunk lid
by turning clockwise.
Replacing high-mount brakelamp bulbs
To change the high-mount brake
lamp assembly:
1. Make sure headlamp switch is in
OFF position, then pry the light
assembly away from its housing to
disengage it from the retaining clips.
2. Remove the light assembly from
the headliner.
3. Disconnect the light assembly wiring and replace the light assembly.
REVIEW COPY
2004 Town Car(tow), Owners Guide (post-2002-fmt)(own2002),
Market:USA_English(fus)
Lights
100
Page 123 of 304
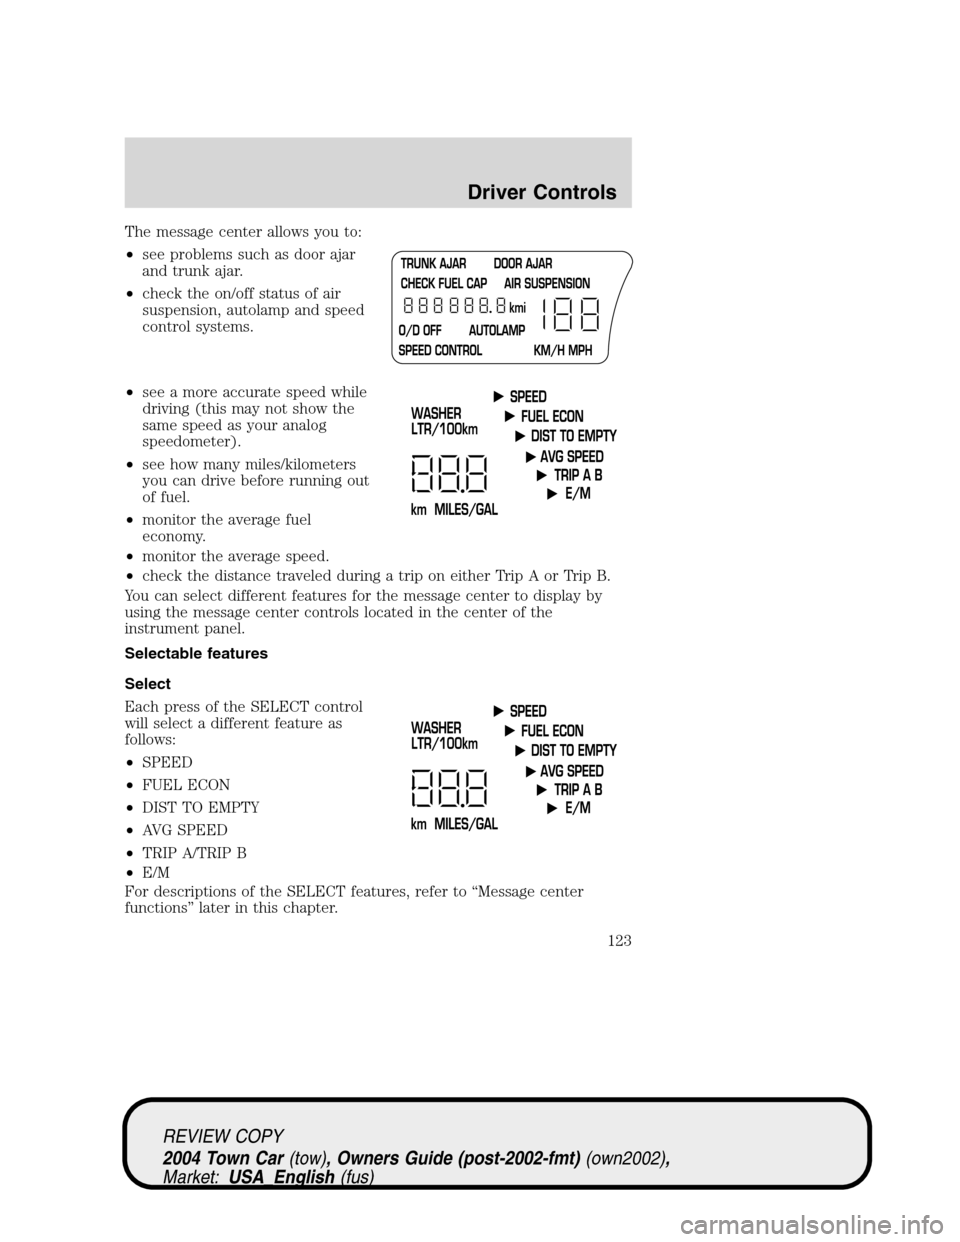
The message center allows you to:
•see problems such as door ajar
and trunk ajar.
•check the on/off status of air
suspension, autolamp and speed
control systems.
•see a more accurate speed while
driving (this may not show the
same speed as your analog
speedometer).
•see how many miles/kilometers
you can drive before running out
of fuel.
•monitor the average fuel
economy.
•monitor the average speed.
•check the distance traveled during a trip on either Trip A or Trip B.
You can select different features for the message center to display by
using the message center controls located in the center of the
instrument panel.
Selectable features
Select
Each press of the SELECT control
will select a different feature as
follows:
•SPEED
•FUEL ECON
•DIST TO EMPTY
•AVG SPEED
•TRIP A/TRIP B
•E/M
For descriptions of the SELECT features, refer to“Message center
functions”later in this chapter.
REVIEW COPY
2004 Town Car(tow), Owners Guide (post-2002-fmt)(own2002),
Market:USA_English(fus)
Driver Controls
123
Page 127 of 304
POWER TRUNK (IF EQUIPPED)
Your vehicle may be equipped with a power trunk controlled by the
interior trunk control, the key fob or the keypad on the door.
If anything obstructs the power trunk while it is closing, the trunk will
automatically reverse to the open position, provided it meets sufficient
resistance. Resistance must be as strong as the force of the closing
trunk, or stronger. The force of the closing trunk increases as the trunk
approaches the latched position. The trunk will close with the next press
of the interior trunk control or key fob button.
Make sure all persons are clear of the luggage compartment area
before using the power trunk control.
If the battery is disconnected, discharged, or a new battery is installed,
the power trunk needs to be reset. To reset the power trunk:
•Reconnect the battery with the trunk closed
•Power activate the trunk with the power interior trunk release, the
key fob or the keypad on the door to the full open position, then
power activate the same power source and fully close the trunk. The
power trunk is now reset.
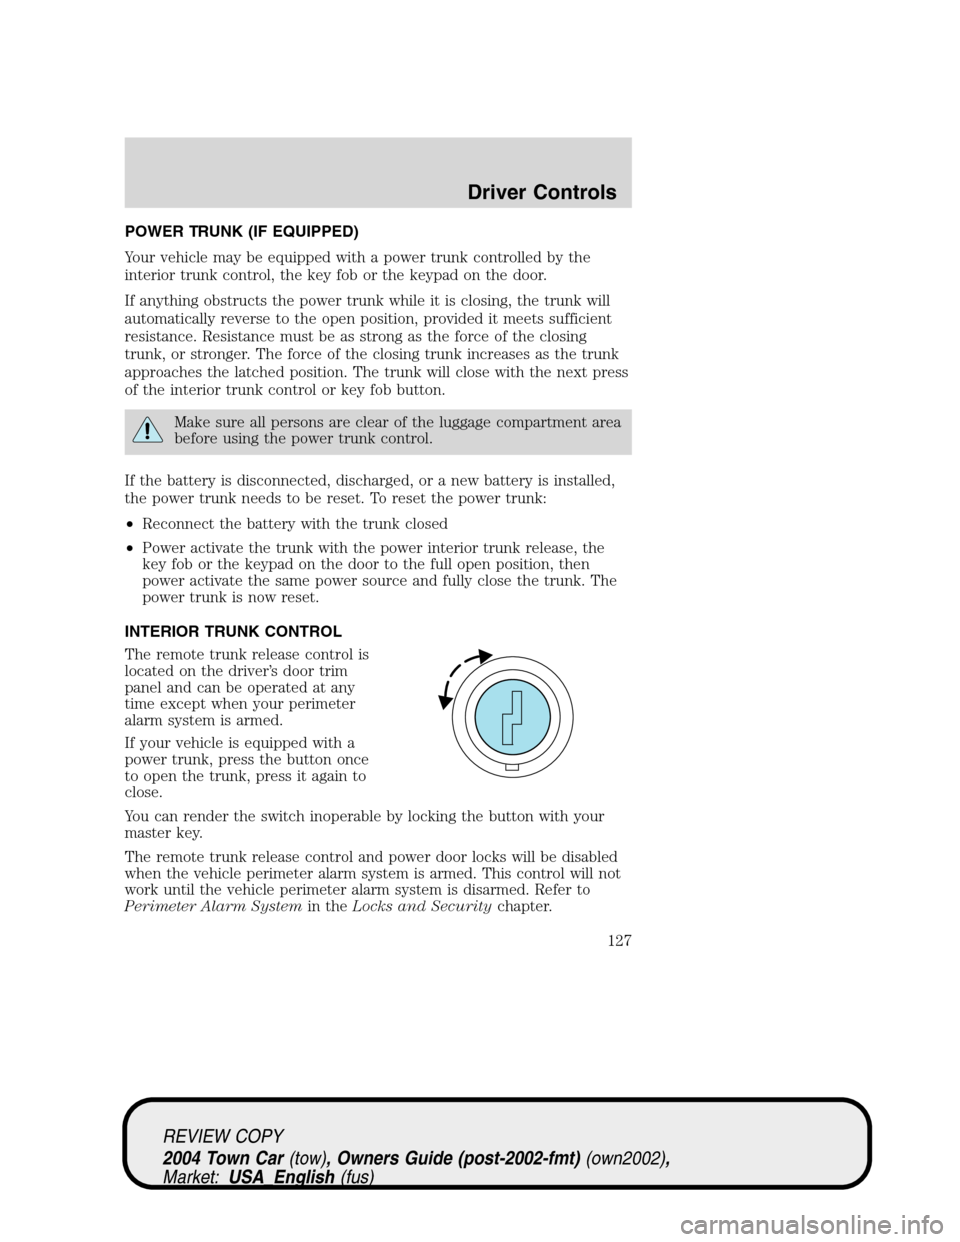
INTERIOR TRUNK CONTROL
The remote trunk release control is
located on the driver’s door trim
panel and can be operated at any
time except when your perimeter
alarm system is armed.
If your vehicle is equipped with a
power trunk, press the button once
to open the trunk, press it again to
close.
You can render the switch inoperable by locking the button with your
master key.
The remote trunk release control and power door locks will be disabled
when the vehicle perimeter alarm system is armed. This control will not
work until the vehicle perimeter alarm system is disarmed. Refer to
Perimeter Alarm Systemin theLocks and Securitychapter.
REVIEW COPY
2004 Town Car(tow), Owners Guide (post-2002-fmt)(own2002),
Market:USA_English(fus)
Driver Controls
127
Page 128 of 304
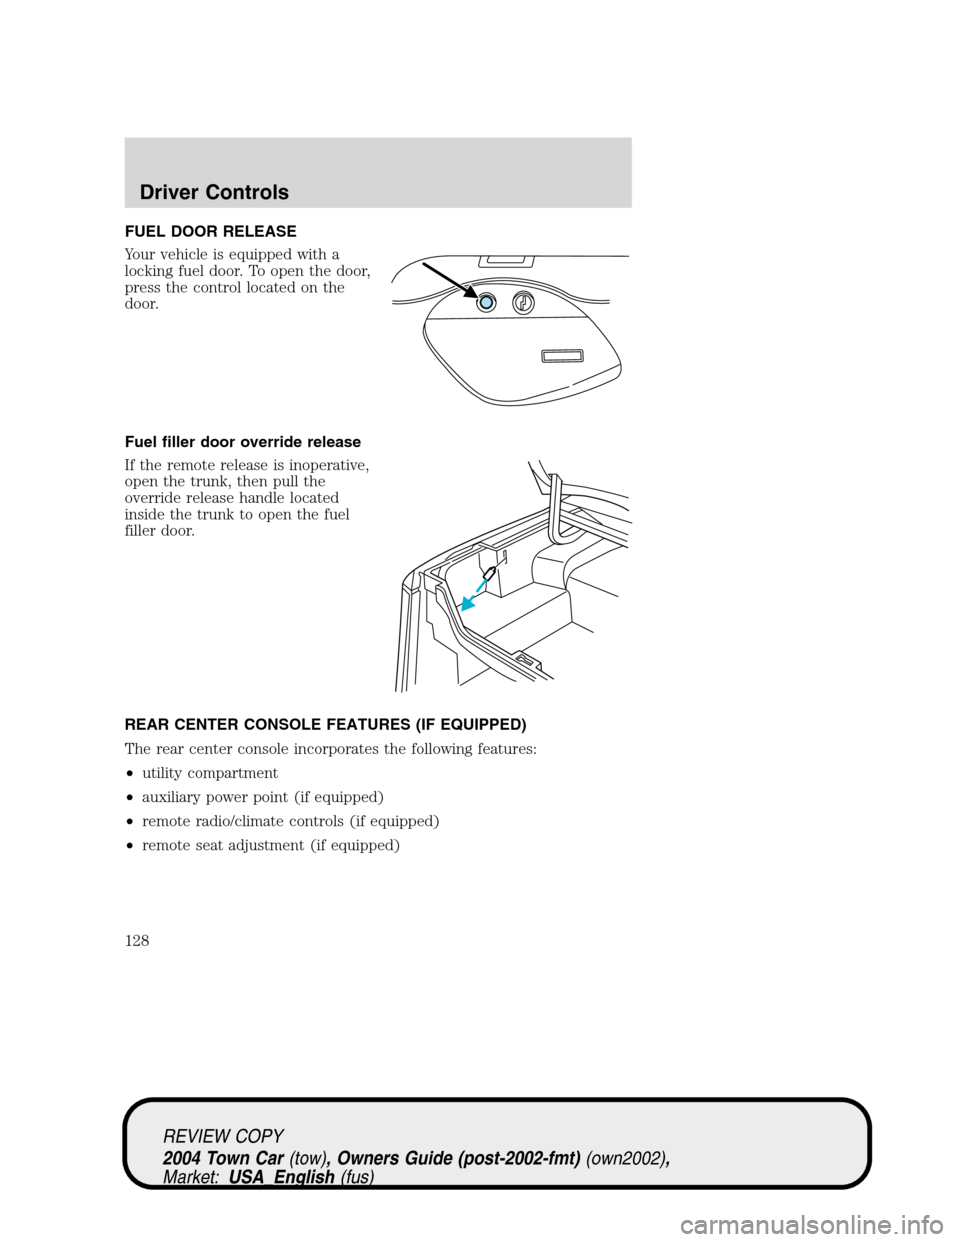
FUEL DOOR RELEASE
Your vehicle is equipped with a
locking fuel door. To open the door,
press the control located on the
door.
Fuel filler door override release
If the remote release is inoperative,
open the trunk, then pull the
override release handle located
inside the trunk to open the fuel
filler door.
REAR CENTER CONSOLE FEATURES (IF EQUIPPED)
The rear center console incorporates the following features:
•utility compartment
•auxiliary power point (if equipped)
•remote radio/climate controls (if equipped)
•remote seat adjustment (if equipped)
REVIEW COPY
2004 Town Car(tow), Owners Guide (post-2002-fmt)(own2002),
Market:USA_English(fus)
Driver Controls
128
Page 130 of 304
KEYS
Your vehicle is equipped with a master key and a valet (identified with
the word VALET) key lock system. The master key will access:
•the driver’s door,
•the trunk,
•the glove box,
•the ignition, and
•the interior trim remote trunk release.
The valet key will access:
•the driver’s door,
•the ignition.
Before handing over the valet key to a valet attendant, lock the interior
remote trunk release control and the glove box with the master key. Do
not hand over the remote entry transmitter or the master key to the
valet attendant.
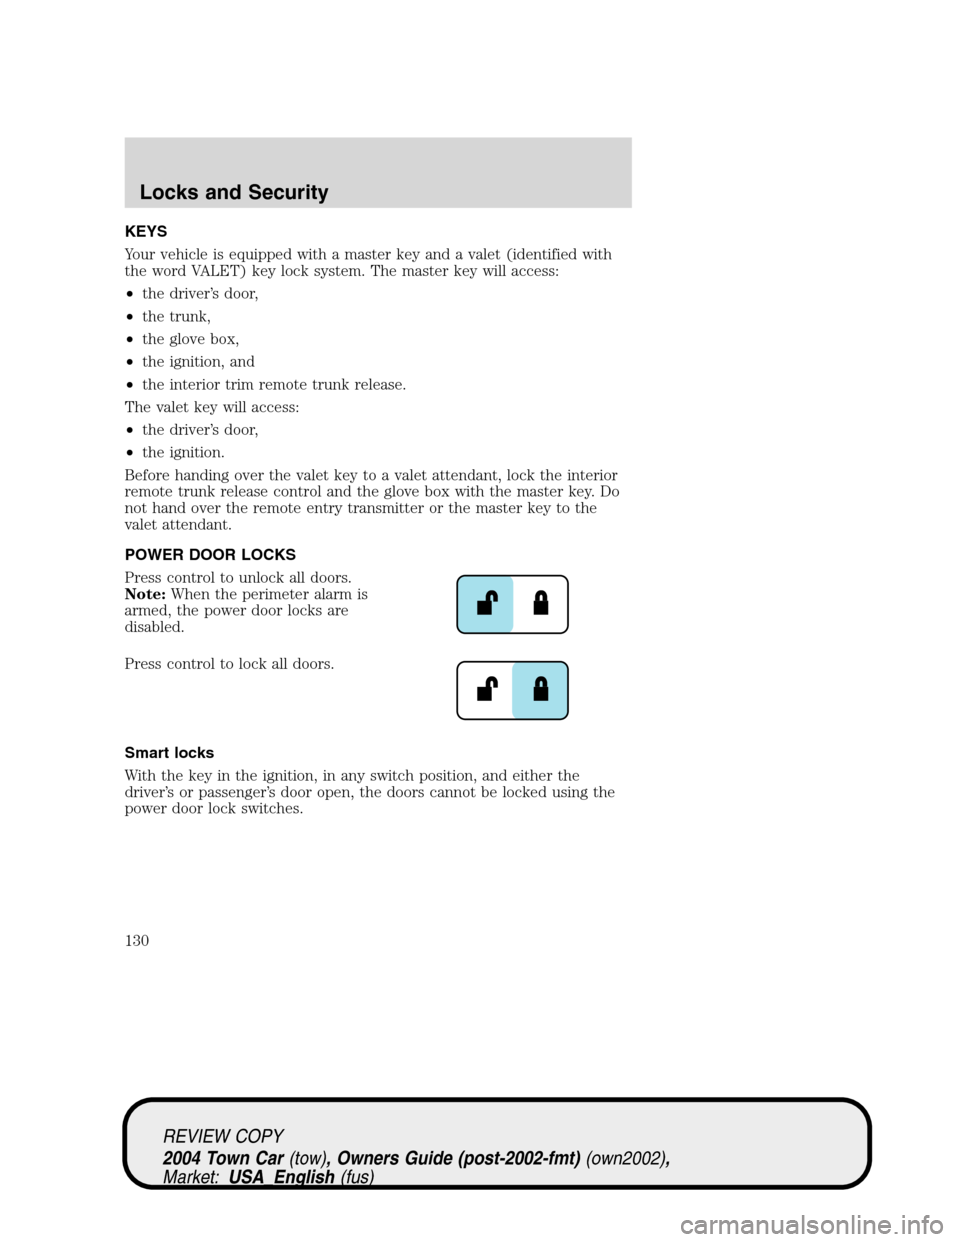
POWER DOOR LOCKS
Press control to unlock all doors.
Note:When the perimeter alarm is
armed, the power door locks are
disabled.
Press control to lock all doors.
Smart locks
With the key in the ignition, in any switch position, and either the
driver’s or passenger’s door open, the doors cannot be locked using the
power door lock switches.
REVIEW COPY
2004 Town Car(tow), Owners Guide (post-2002-fmt)(own2002),
Market:USA_English(fus)
Locks and Security
Locks and Security
130
Page 131 of 304
Central locking/unlocking
•All doors are locked when the key is inserted into the driver door key
cylinder and turned to the lock position.
•The driver’s door is unlocked when the key is inserted into the driver
door key cylinder and turned to the unlock position.
•If the key is turned a second time to the unlock position within 5
seconds, all vehicle doors will unlock.
Power door trim switch inhibit
This feature disables the power door locks and trunk interior release
switches if all doors are closed and the perimeter alarm becomes armed.
Once the power door trim switches are disabled, they can only become
active when perimeter alarm is disarmed.
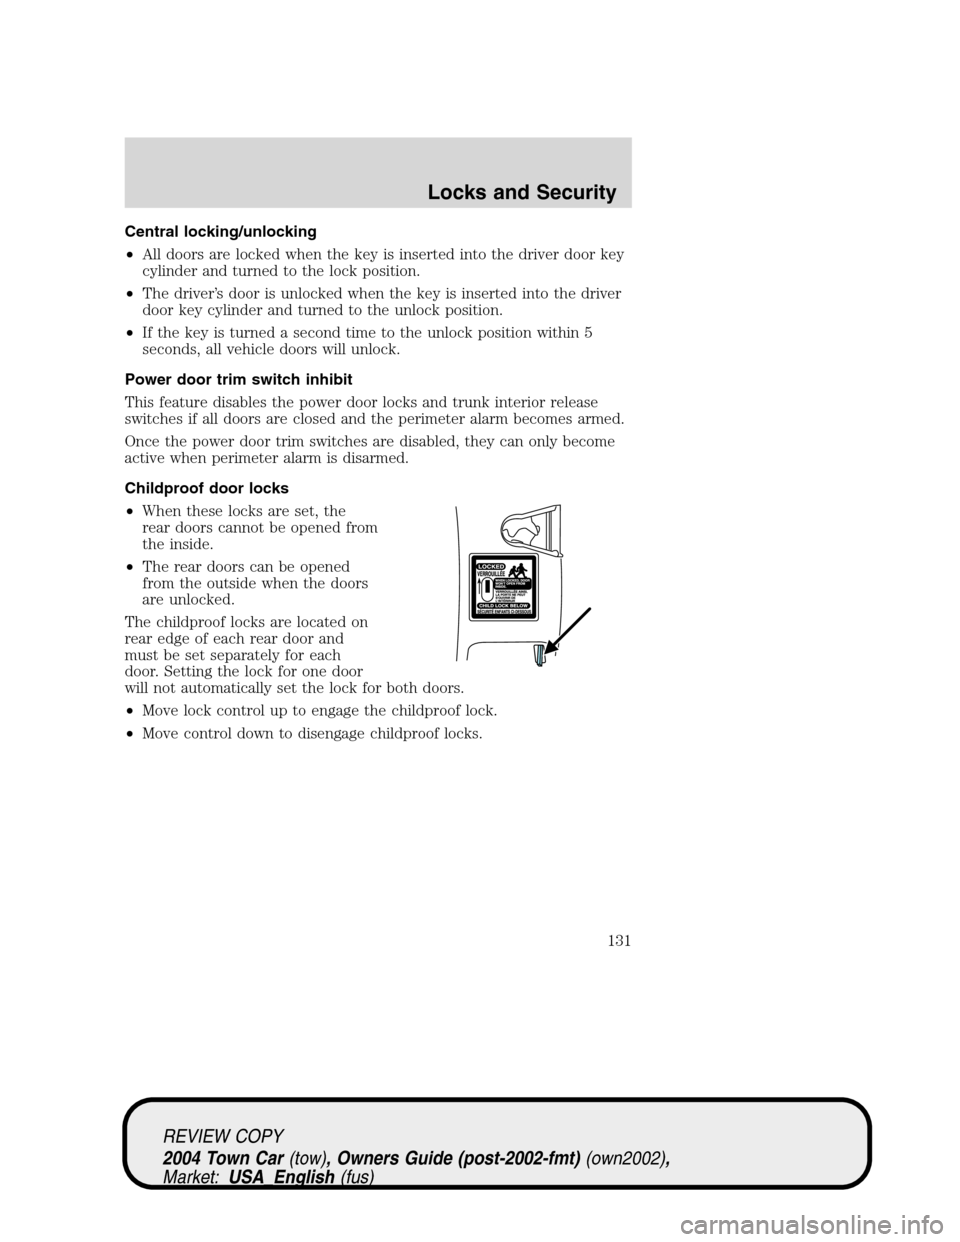
Childproof door locks
•When these locks are set, the
rear doors cannot be opened from
the inside.
•The rear doors can be opened
from the outside when the doors
are unlocked.
The childproof locks are located on
rear edge of each rear door and
must be set separately for each
door. Setting the lock for one door
will not automatically set the lock for both doors.
•Move lock control up to engage the childproof lock.
•Move control down to disengage childproof locks.
REVIEW COPY
2004 Town Car(tow), Owners Guide (post-2002-fmt)(own2002),
Market:USA_English(fus)
Locks and Security
131