lock LINCOLN TOWN CAR 2005 Owners Manual
[x] Cancel search | Manufacturer: LINCOLN, Model Year: 2005, Model line: TOWN CAR, Model: LINCOLN TOWN CAR 2005Pages: 328, PDF Size: 3.44 MB
Page 1 of 328
Introduction 4
Instrument Cluster 10
Warning and control lights 10
Gauges 15
Entertainment Systems 17
AM/FM stereo cassette with CD 30
CD changer 36
Navigation system 38
Climate Controls 101
Dual automatic temperature control 101
Rear window defroster 104
Lights 105
Headlamps 105
Turn signal control 108
Bulb replacement 109
Driver Controls 115
Windshield wiper/washer control 115
Steering wheel adjustment 116
Power windows 129
Mirrors 130
Speed control 132
Message center 138
Locks and Security 146
Locks 146
Anti-theft system 157
Table of Contents
1
2005 Town Car(tow)
Owners Guide (post-2002-fmt)
USA_English(fus)
Page 8 of 328
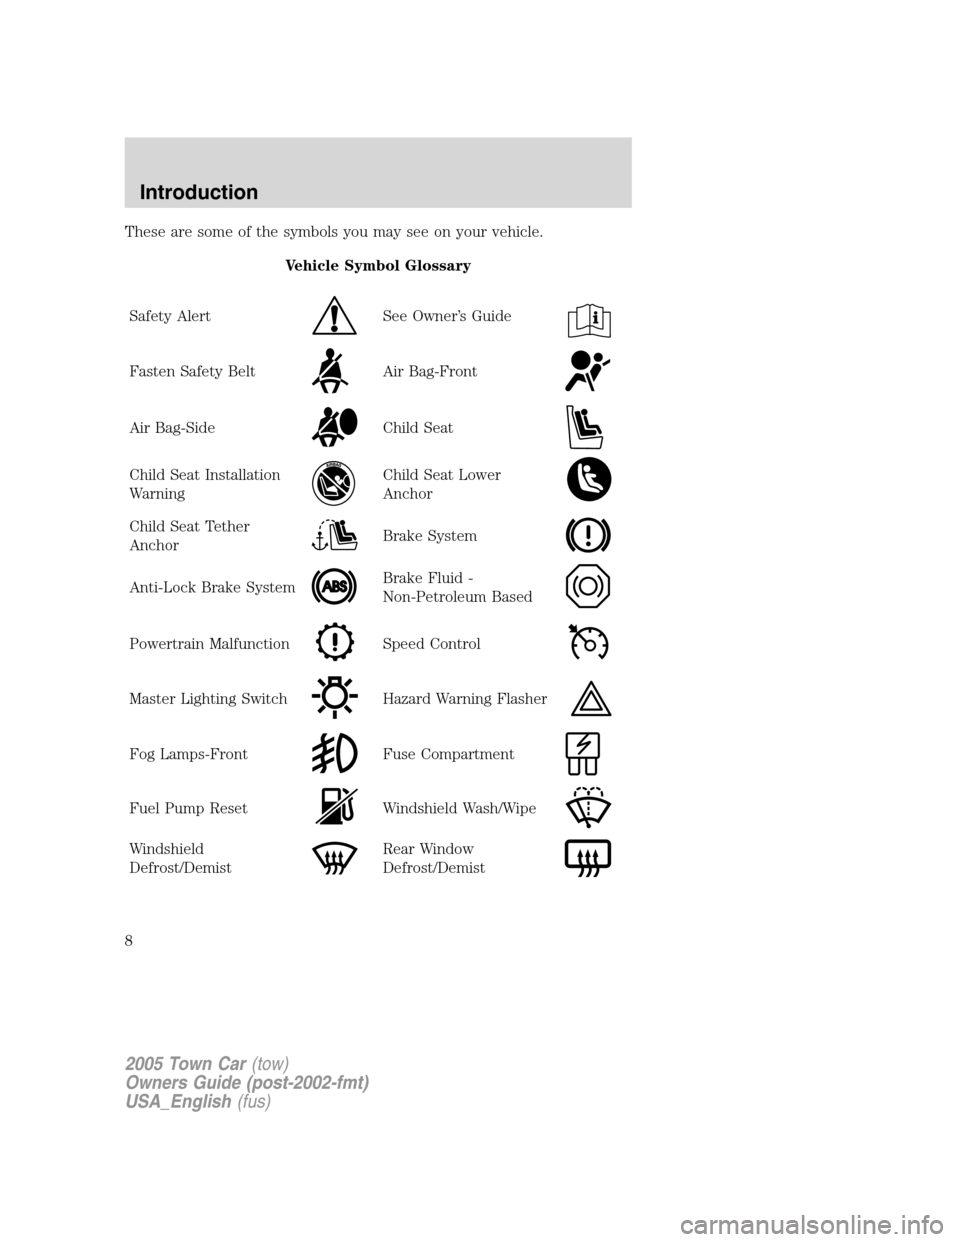
These are some of the symbols you may see on your vehicle.
Vehicle Symbol Glossary
Safety Alert
See Owner’s Guide
Fasten Safety BeltAir Bag-Front
Air Bag-SideChild Seat
Child Seat Installation
WarningChild Seat Lower
Anchor
Child Seat Tether
AnchorBrake System
Anti-Lock Brake SystemBrake Fluid -
Non-Petroleum Based
Powertrain MalfunctionSpeed Control
Master Lighting SwitchHazard Warning Flasher
Fog Lamps-FrontFuse Compartment
Fuel Pump ResetWindshield Wash/Wipe
Windshield
Defrost/DemistRear Window
Defrost/Demist
2005 Town Car(tow)
Owners Guide (post-2002-fmt)
USA_English(fus)
Introduction
8
Page 9 of 328
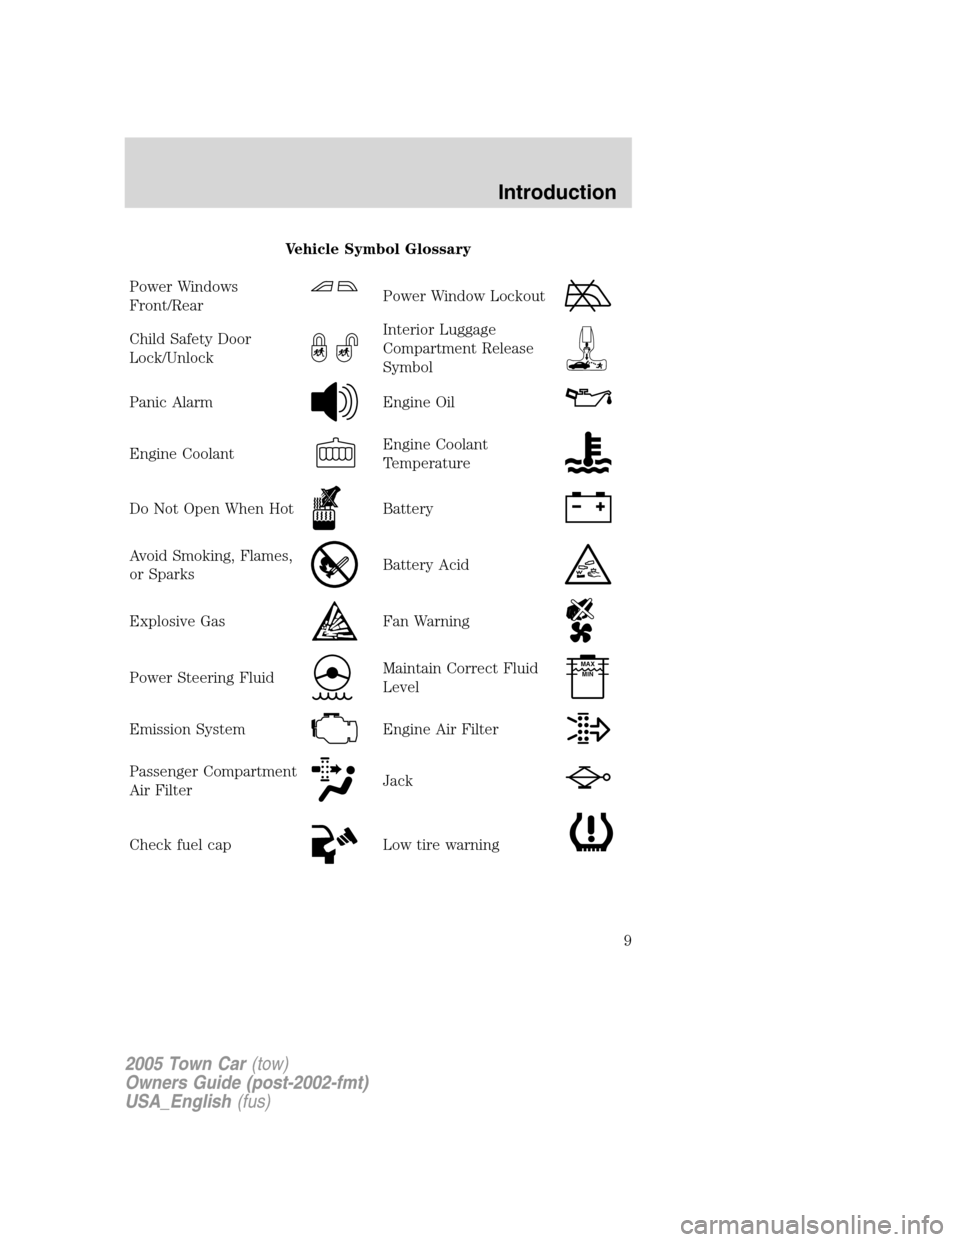
Vehicle Symbol Glossary
Power Windows
Front/Rear
Power Window Lockout
Child Safety Door
Lock/UnlockInterior Luggage
Compartment Release
Symbol
Panic AlarmEngine Oil
Engine CoolantEngine Coolant
Temperature
Do Not Open When HotBattery
Avoid Smoking, Flames,
or SparksBattery Acid
Explosive GasFan Warning
Power Steering FluidMaintain Correct Fluid
LevelMAX
MIN
Emission SystemEngine Air Filter
Passenger Compartment
Air FilterJack
Check fuel capLow tire warning
2005 Town Car(tow)
Owners Guide (post-2002-fmt)
USA_English(fus)
Introduction
9
Page 11 of 328
defaulted to a ’limp-home’ operation. Report the fault to a dealer at the
earliest opportunity.
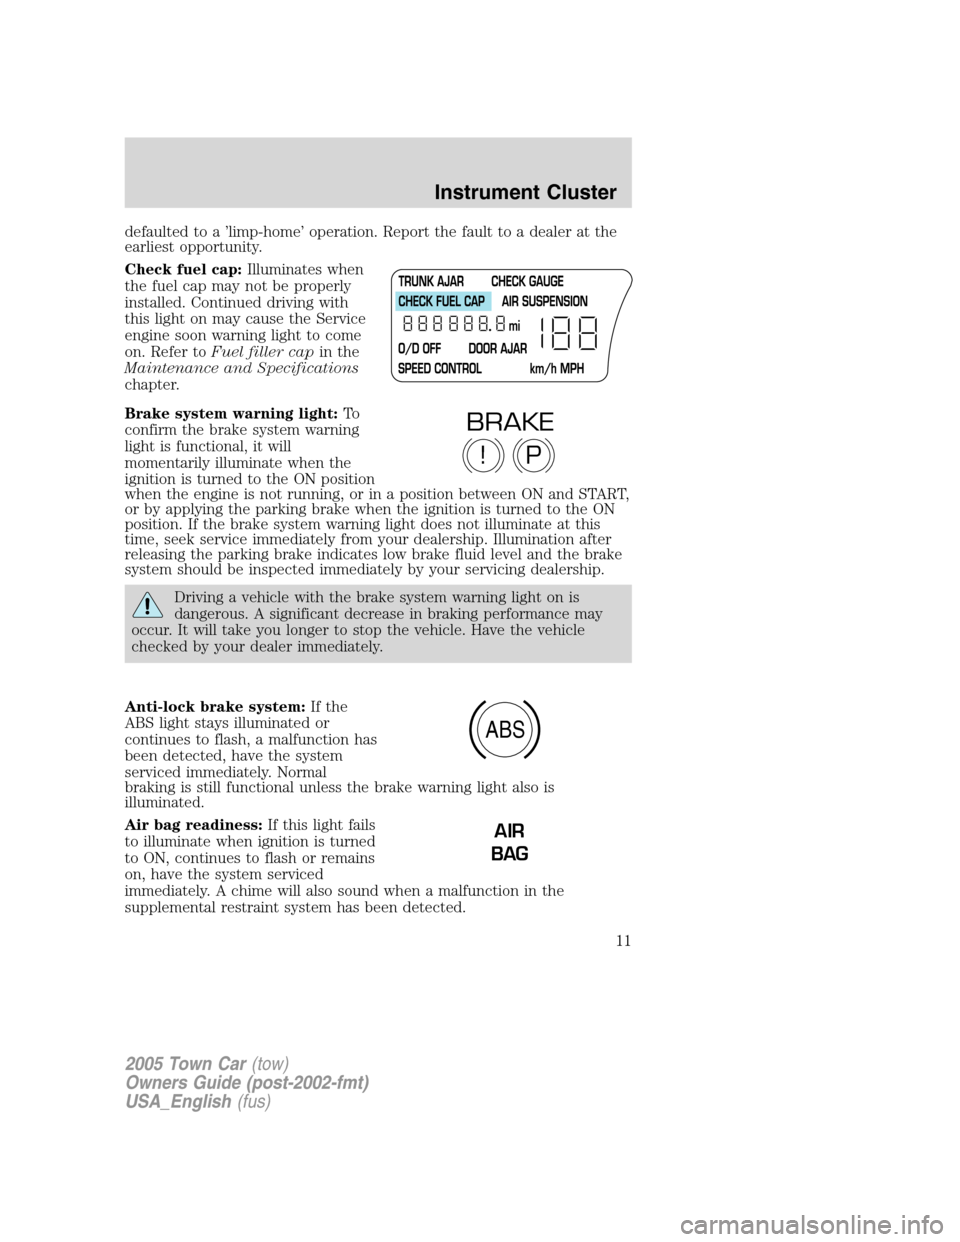
Check fuel cap:Illuminates when
the fuel cap may not be properly
installed. Continued driving with
this light on may cause the Service
engine soon warning light to come
on. Refer toFuel filler capin the
Maintenance and Specifications
chapter.
Brake system warning light:To
confirm the brake system warning
light is functional, it will
momentarily illuminate when the
ignition is turned to the ON position
when the engine is not running, or in a position between ON and START,
or by applying the parking brake when the ignition is turned to the ON
position. If the brake system warning light does not illuminate at this
time, seek service immediately from your dealership. Illumination after
releasing the parking brake indicates low brake fluid level and the brake
system should be inspected immediately by your servicing dealership.
Driving a vehicle with the brake system warning light on is
dangerous. A significant decrease in braking performance may
occur. It will take you longer to stop the vehicle. Have the vehicle
checked by your dealer immediately.
Anti-lock brake system:If the
ABS light stays illuminated or
continues to flash, a malfunction has
been detected, have the system
serviced immediately. Normal
braking is still functional unless the brake warning light also is
illuminated.
Air bag readiness:If this light fails
to illuminate when ignition is turned
to ON, continues to flash or remains
on, have the system serviced
immediately. A chime will also sound when a malfunction in the
supplemental restraint system has been detected.
P!
BRAKE
ABS
AIR
BAG
2005 Town Car(tow)
Owners Guide (post-2002-fmt)
USA_English(fus)
Instrument Cluster
11
Page 14 of 328
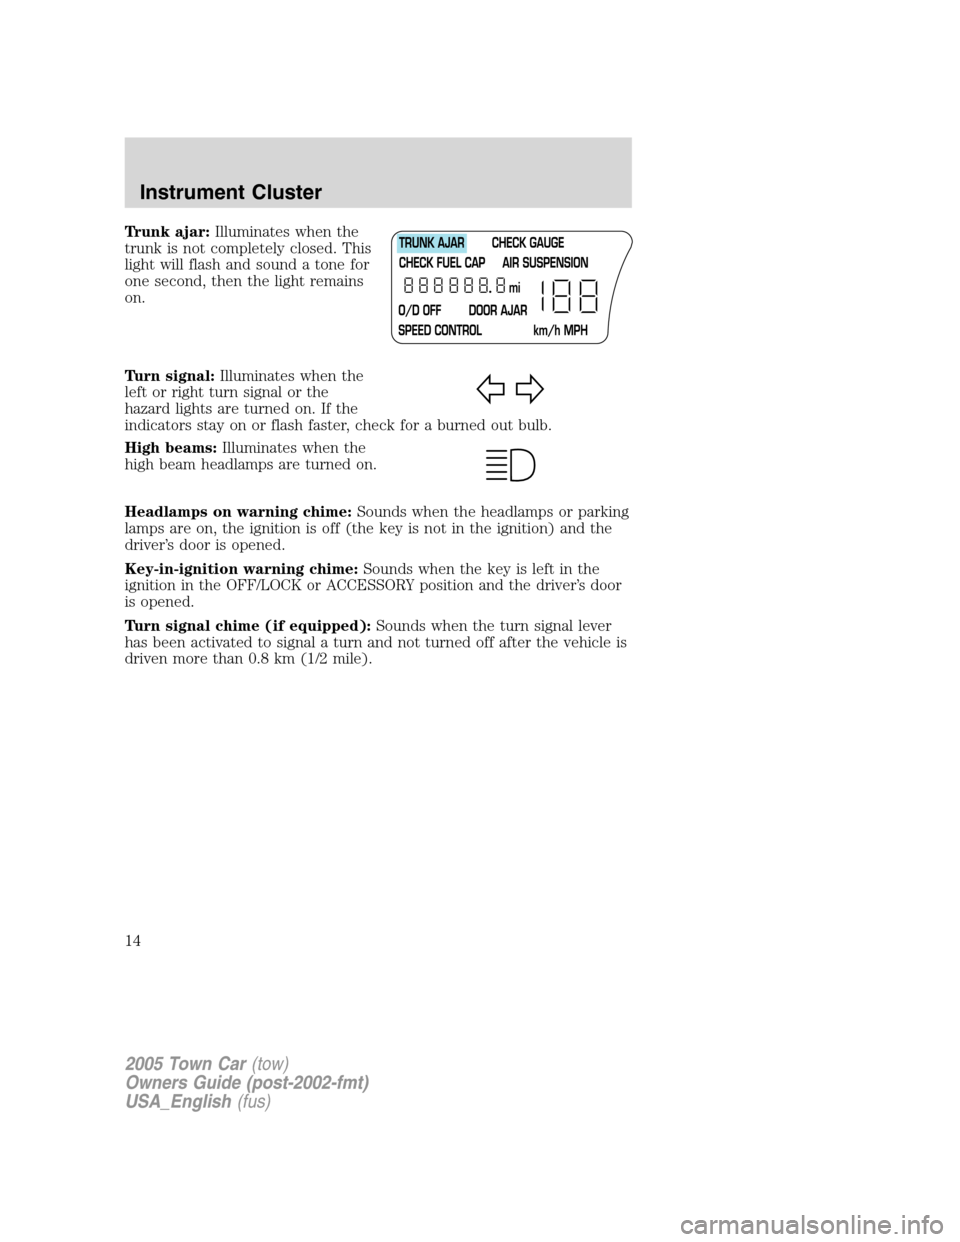
Trunk ajar:Illuminates when the
trunk is not completely closed. This
light will flash and sound a tone for
one second, then the light remains
on.
Turn signal:Illuminates when the
left or right turn signal or the
hazard lights are turned on. If the
indicators stay on or flash faster, check for a burned out bulb.
High beams:Illuminates when the
high beam headlamps are turned on.
Headlamps on warning chime:Sounds when the headlamps or parking
lamps are on, the ignition is off (the key is not in the ignition) and the
driver’s door is opened.
Key-in-ignition warning chime:Sounds when the key is left in the
ignition in the OFF/LOCK or ACCESSORY position and the driver’s door
is opened.
Turn signal chime (if equipped):Sounds when the turn signal lever
has been activated to signal a turn and not turned off after the vehicle is
driven more than 0.8 km (1/2 mile).
2005 Town Car(tow)
Owners Guide (post-2002-fmt)
USA_English(fus)
Instrument Cluster
14
Page 19 of 328
When activated, AUTOSET will momentarily appear in the display when
any of the preset controls are pressed.
Speed sensitive volume:Radio volume changes automatically and
slightly with vehicle speed to compensate for road and wind noise.
Recommended level is 1–3. Level 0 turns the feature off and level 7 is
the maximum setting.
Press MENU to access and use
SELto adjust the volume setting.
The level will appear in the display.
Setting the clock:Your vehicle is equipped with an in-dash clock. Refer
toSetting the clockin theDriver ControlsChapter.
Note:The menu selections will remain in the display for approximately
10 seconds, at which time the display will return to the previous mode.
You may also exit the menu options by pressing any other audio control.
10.Memory presets:To set a
station: Select frequency band, tune
to a station, press and hold a preset
button until sound returns.
11.On/Off/Volume:Push to turn
on/off; turn to adjust the volume
levels.
Note:With the ignition turned off,
you may press the volume control to
momentarily view the clock.
12.CD:Press to enter CD mode if a CD is already present in the system.
In radio mode, the CD icon will appear in the display if a CD is loaded
into the system.
13.AM:Press to select the AM
frequency.
14.FM:Press to select the FM
frequency. Press repeatedly to
toggle between FM1 and FM2.
15.SHUF (Shuffle):Press to play
all tracks on the current CD in
random order. Press again to stop.
16.SCAN:Press SCAN to hear a
brief sampling of radio stations or
CD tracks. Press again to stop.
2005 Town Car(tow)
Owners Guide (post-2002-fmt)
USA_English(fus)
Entertainment Systems
19
Page 24 of 328
PressSEL-TEXTto toggle ON/OFF. When the feature is turned
ON, rear seat passengers can adjust the settings of the front audio stem.
For further information, refer toRear Console Audio Controls (if
equipped)later in this chapter.
Setting the clock:Your vehicle is equipped with a separate in-dash
clock. Refer toSetting the clockin theDriver ControlsChapter.
Note:The menu selections will remain in the display for approximately
10 seconds, at which time the display will return to the previous mode.
You may also exit the menu options by pressing any other audio control.
8.Cassette:Insert a cassette facing to the right.
9.TUNE:Press to manually go up
or down the radio frequency.
CAT:CAT is only available when equipped with Satellite Radio. Your
vehicle may be equipped with Satellite ready capability. The kit to enable
Satellite reception is available through your dealer. Detailed Satellite
instructions are included with the dealer installed kit.
Dealer installed satellite kit not available in Canada.
10.Side 1–2:Press to access the
next side of the cassette tape. The
display will indicate whether TAPE
1orTAPE2isplaying.
11.SEEK:Press to access the
next/previous radio station, tape
selection or CD track. Press and
hold to advance/reverse in the current CD track.
12.REW (Rewind):Press to
rewind in tape or CD mode.
FF (Fast forward):Press to fast
forward in tape or CD mode.
13.SCAN:Press SCAN to hear a
brief sampling of radio stations,
selections or CD tracks. Press again
to stop.
REWFF34
2005 Town Car(tow)
Owners Guide (post-2002-fmt)
USA_English(fus)
Entertainment Systems
24
Page 29 of 328
Speed sensitive volume:Radio volume changes automatically and
slightly with vehicle speed to compensate for road and wind noise.
Recommended level is 1–3. Level 0 turns the feature off and level 7 is
the maximum setting.
Press MENU to access and use
SEL-TEXTto adjust the volume
setting. The level will appear in the display.
Setting the clock:Your vehicle is equipped with an in-dash clock. Refer
toSetting the Clockin theDriver ControlsChapter.
10.Memory presets:To set a
station: Select frequency band, tune
to a station, press and hold a preset
button until sound returns.
11.On/Off/Volume:Push to turn
on/off; turn to adjust the volume
levels.
Note:With the ignition and audio
system off, you may press the
volume control to momentarily view the clock.
12.LOAD:Press to load a CD.
Press LOAD and a specific preset to
load in that particular slot. Available
slots are indicated by small flashing indicators in the display. When the
system is ready to accept a disc, LOAD CD X will appear in the display.
Load the CD. Press and hold to autoload up to six discs.
Note:Ensure that the system is ready to accept the CD and do not try
to force the disc into the CD slot as damage could result.
13.AM/FM:Press repeatedly to
toggle between AM/FM1/FM2 mode.
14.CD:Press to enter CD mode.
Press CD and a preset to select a
specific CD to play.
15.SAT:SAT is only available when equipped with Satellite radio. Your
vehicle may be equipped with Satellite ready capability. The kit to enable
Satellite reception is available through your dealer. Detailed Satellite
instructions are included with the dealer installed kit.Dealer installed
satellite kit available only in the continental United States.
2005 Town Car(tow)
Owners Guide (post-2002-fmt)
USA_English(fus)
Entertainment Systems
29
Page 33 of 328
•REAR SEATS
RDS:(Radio Data System): Allows
you to access FM stations which are
RDS- equipped. Press RDS then
SEL to select from:
Traffic — Allows you to receive traffic announcements and control their
volume level.Traffic information is not available in most U.S.
markets.
Show — Allows you to view the frequency and program type of the
chosen radio station.
The Federal Communications Commission (FCC) and the Canadian Radio
and Telecommunications Commission (CRTC) recommend that FM radio
broadcasters use RDS technology to transmit information. FM radio
stations are independently operated and individually elect to use RDS
technology to transmit station ID and program type as desired.
Setting the clock:Your vehicle is equipped with an in-dash mounted
clock. Refer toClockin the Driver Controls Chapter for further
information.
10.Autoset:Press to set first six
strong stations into AM, FM1 or
FM2 memory buttons; press again to
return to normal stations.
11.Scan:Works in radio, tape and
CD modes. Press SCAN for a brief
sampling of radio stations, tape
selections or CD tracks.
12.Seek:Works in radio, tape and
CD modes. Press to access the
previous
or nextlistenable
radio station, tape selection or CD track.
13.Tune:Works in radio mode.
Press to manually advance up or
down the frequency band.
14.AM/FM/CD:Press AM/FM to
select a radio frequency. Press while
in tape or CD mode to return to
radio mode. Press CD to enter CD mode and to play a CD already in the
system.
2005 Town Car(tow)
Owners Guide (post-2002-fmt)
USA_English(fus)
Entertainment Systems
33
Page 40 of 328
4.DEST: Press to enter Destination Entry mode. This allows you to
enter a destination and route to it. With an active route, pressing DEST
allows the user to request a Detour, display entire route, select route
preferences, or change or cancel the destination. This will not function
without a map DVD loaded.
5.MENU: Press to access system settings such as display, brightness,
clock mode (if equipped), etc.
6.CD OPEN CLOSE: Press to open/close the display screen and access
the CD player.
Cold temperature advisory
When operating the system below 32° Fahrenheit (0° Celsius), the
display screen requires 20–30 minutes warm-up to achieve maximum
brightness. Ensure that the system display setting is set to DAY mode
until maximum brightness is achieved (refer toMenu modesection).
Once maximum brightness is achieved, revert to AUTO mode display
setting.
Initial map display
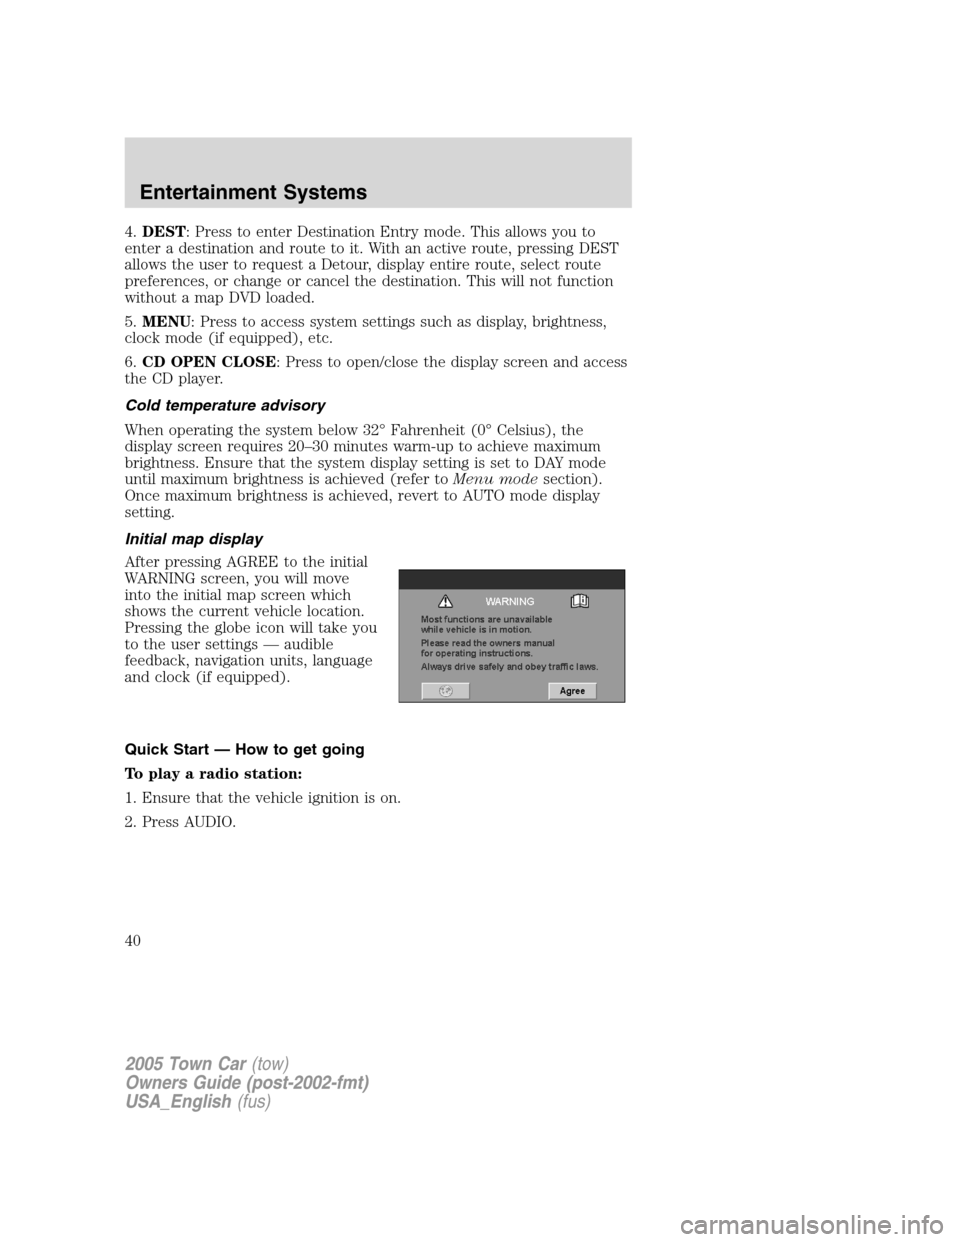
After pressing AGREE to the initial
WARNING screen, you will move
into the initial map screen which
shows the current vehicle location.
Pressing the globe icon will take you
to the user settings — audible
feedback, navigation units, language
and clock (if equipped).
Quick Start — How to get going
To play a radio station:
1. Ensure that the vehicle ignition is on.
2. Press AUDIO.
2005 Town Car(tow)
Owners Guide (post-2002-fmt)
USA_English(fus)
Entertainment Systems
40