check engine light LOTUS ELISE 2005 Owners Manual
[x] Cancel search | Manufacturer: LOTUS, Model Year: 2005, Model line: ELISE, Model: LOTUS ELISE 2005Pages: 205, PDF Size: 4.51 MB
Page 4 of 205
8. INSTRUMENTS & SWITCHES
Ignition Switch/Steering Lock ..........................................
44
Engine Start Button .........................................................
45
Warning âTell Taleâ Lamps ...............................................
46
Bulb Check ................................................................
46
Turn Tell Tale .............................................................
46
Seat Belt Tell Tale ......................................................
47
Brake Tell Tale ...........................................................
47
Oil Pressure Tell Tale ................................................
47
Low Fuel Level Tell Tale ............................................
48
ABS Tell Tale ............................................................
48
High Beam Tell Tale ..................................................
48
Airbag Tell Tale ..........................................................
48
Battery Charging Tell Tale .........................................
48
Engine Malfunction Indicator Lamp ...........................
49
Security/RPM Tell Tale ..............................................
49
Instruments .................................................................
51
Speedometer .............................................................
51
Tachometer ...............................................................
51
LCD Display Panel ....................................................
52
Fuel Level Display ...............................................
52
Coolant Temperature Display ..............................
53
Odometer ............................................................
53
Trip Recorder .......................................................
53
Dashboard Switches .......................................................
54
Parking Lamp Switch ................................................
54
Headlamp Switch ......................................................
54
Lights-on Buzzer .......................................................
55
Hazard Warning Lamps Switch .................................
55
Instrument Illumination ..............................................
56
Auxiliary Power Socket .............................................
57
Column Switches & Horn ................................................
58
Headlamp High/Low Beam/Flasher/Turn Indicators .
58
Windscreen Wiper/Washer .......................................
59
Horn .................................................................
60
Audio Equipment ............................................................
60
9. HEATING, VENTILATION & AIR CONDITIONING
Air Conditioning ..............................................................
61
Air Re-circulation ............................................................
62
Heater Temperature ........................................................
62
Fan Speed .................................................................
62
Air Distribution ................................................................
63
Engine Bay Ventilation ....................................................
65
Contents
2
oh_croft_InD.indd 220/05/2004 07:58:39ProCarManuals.com
Page 16 of 205
NOTICE: DO NOT push or tow start the car; or turn off the igni-
tion at engine speeds above idle; or run the fuel tank dry: Any of these actions may damage the catalytic converter.
Before driving the car:
⢠Check tires for damage, wear and proper inï¬ation.
Under-inï¬a-
tion causes increased rolling resistance and uses more fuel.
(Please refer to the section in this handbook on tires, page 115).
⢠Check all windows, mirrors and lights are clear and unob
-
structed and all lights are correctly working.
⢠Check that the engine cover and front body access panels
are correctly latched;
⢠Adjust the seat and mirrors, and familiarise yourself with
the controls.
⢠Check all instruments and warning lamps (âtell talesâ) are reading correctly.
⢠Ensure that both driver and passenger are properly restrained
by their seat belts.
Care of the Environment By virtue of its light weight, simple content, constructional
process and fuel efï¬ciency, the Elise has a low environmental im
-
pact compared with many road cars. All drivers should, however,
be aware of the effect of motor car exhaust emissions on the
environment and drive in a way which minimises pollution by:
⢠Anticipating traffic flow to avoid needless acceleration
and braking.
⢠Using the highest suitable gear.
⢠Switching off rather than idling for long periods.
⢠Driving off as soon as it is safe to do so; it is not necessary or beneï¬cial to the engine to allow extended idling from cold.
⢠Having the car serviced regularly as a poorly maintained car will use more fuel; have any engine faults attended to imme
-
diately.
⢠Considering the need to use the car for very short journeys.
The emissions produced by an engine are many times greater
when cold than when warm.
Safety Information
14
oh_croft_InD.indd 1420/05/2004 07:58:42ProCarManuals.com
Page 48 of 205
Passive Ilisation: The start button will operate only when the
security tell tale in the tachometer face is out. If the tell tale is
ï¬ashing, the engine is immobilised; Press once,
and for a full second, the larger of the two buttons on the trans
-
mitter fob. The security tell tale will be extinguished. For further
information see âCar Security Alarmâ.
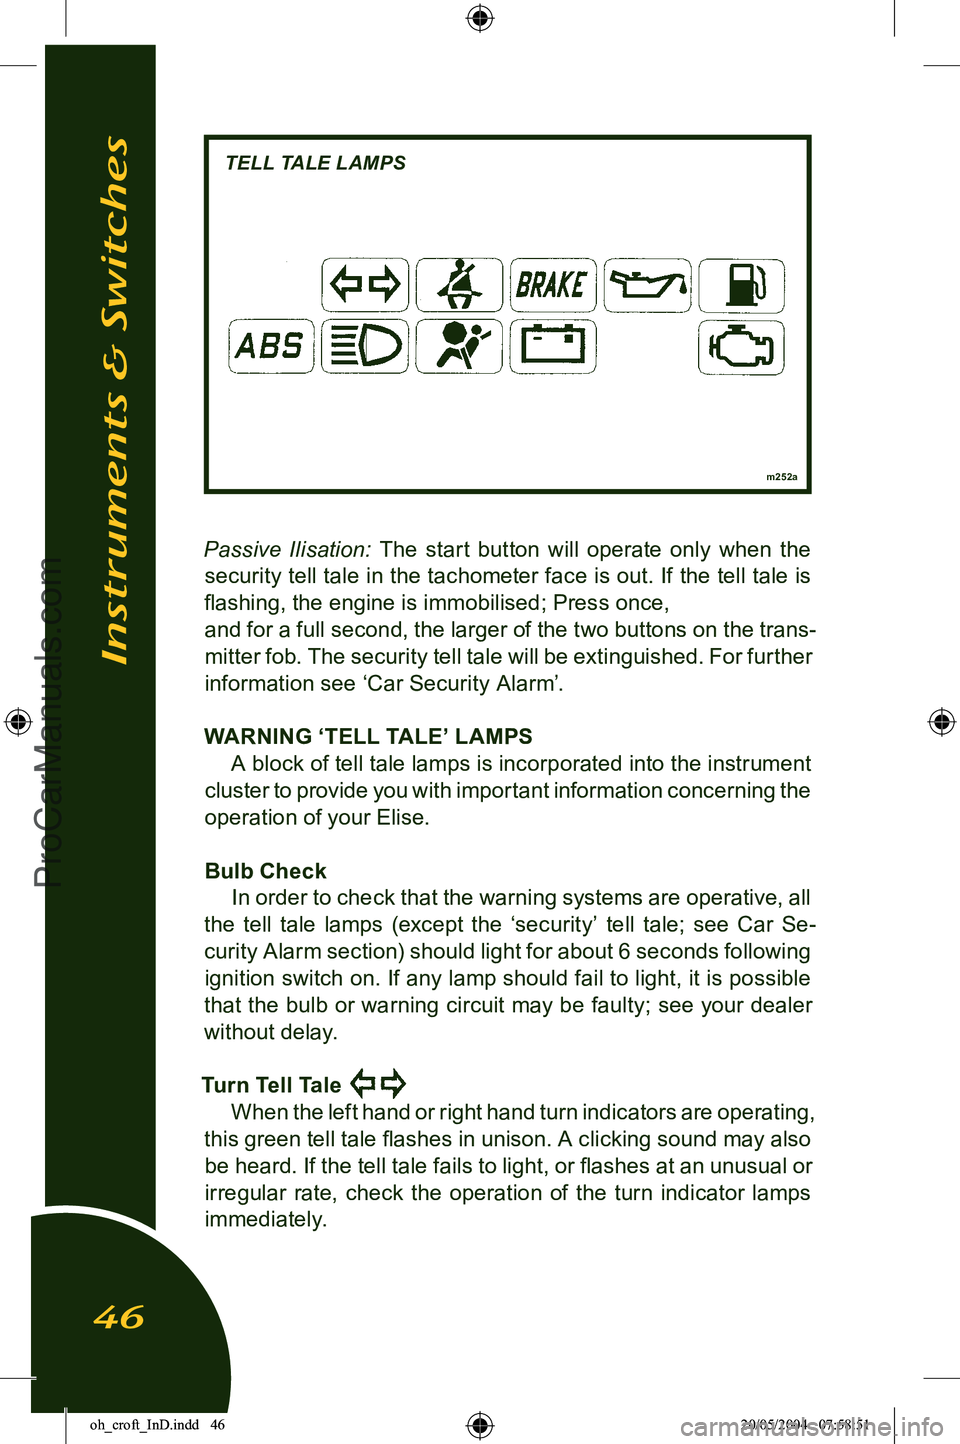
WARNING âTELL TALEâ LAMPS A block of tell tale lamps is incorporated into the instrument
cluster to provide you with important information concerning the
operation of your Elise.
Bulb Check In order to check that the warning systems are operative, all
the tell tale lamps (except the âsecurityâ tell tale; see Car Se
-
curity Alarm section) should light for about 6 seconds following ignition switch on. If any lamp should fail to light, it is possible
that the bulb or warning circuit may be faulty; see your dealer
without delay.
Turn Tell Tale
When the left hand or right hand turn indicators are operating,
this green tell tale ï¬ashes in unison. A clicking sound may also be heard. If the tell tale fails to light, or ï¬ashes at an unusual or
irregular rate, check the operation of the turn indicator lamps
immediately.
m252a
Instruments & Switches
46
TELL TALE LAMPS
oh_croft_InD.indd 4620/05/2004 07:58:51ProCarManuals.com
Page 49 of 205
Seat Belt Tell Tale
The red seat belt tell tale is provided as a reminder that both
driver and passenger should always wear the seat belts, no
matter how short the journey. The lamp will ï¬ash until the driv
-
erâs seat belt is fastened, accompanied for the ï¬rst 8 seconds by a buzzer.
Brake Tell Tale
This tell tale will glow red with the ignition switched on
whenever the parking brake is applied. Driving the car with the brake not fully released will cause overheat damage to the rear
brakes. Each time the parking brake is released, check that the
tell tale is extinguished. With the parking brake released, if the tell tale should light
at any time after the six second check period, stop the car im
-
mediately, as the circuit has detected a dangerously low level of brake ï¬uid in the master cylinder reservoir, possibly caused
by a hydraulic leak in one of the separate front or rear brake
circuits. In the event of a leak there is a danger that air may enter the hydraulic system and cause spongy operation and
extended pedal travel. The divided brake circuit should ensure
that emergency braking remains, but the car should not be driven until the fault has been identiï¬ed and rectiï¬ed.
WARNING: If the tell tale remains lit when the parking brake has been
released, the footbrake may not be working properly. Stop
the car immediately it is safe to do so, and do not continue until the fault has been rectiï¬ed. Continuing to drive could cause a crash and result in death or serious injury.
Oil Pressure Tell Tale
This red tell tale warns of low engine oil pressure. The lamp
will be lit whenever the ignition is on and the engine is stopped, but should go out as soon as the engine is started. If the lamp
fails to go out after engine start up, or comes on when the engine is running, stop the engine immediately and do not restart until
the cause has been investigated and rectiï¬ed.
Instruments & Switches
47
oh_croft_InD.indd 4720/05/2004 07:58:52ProCarManuals.com
Page 50 of 205
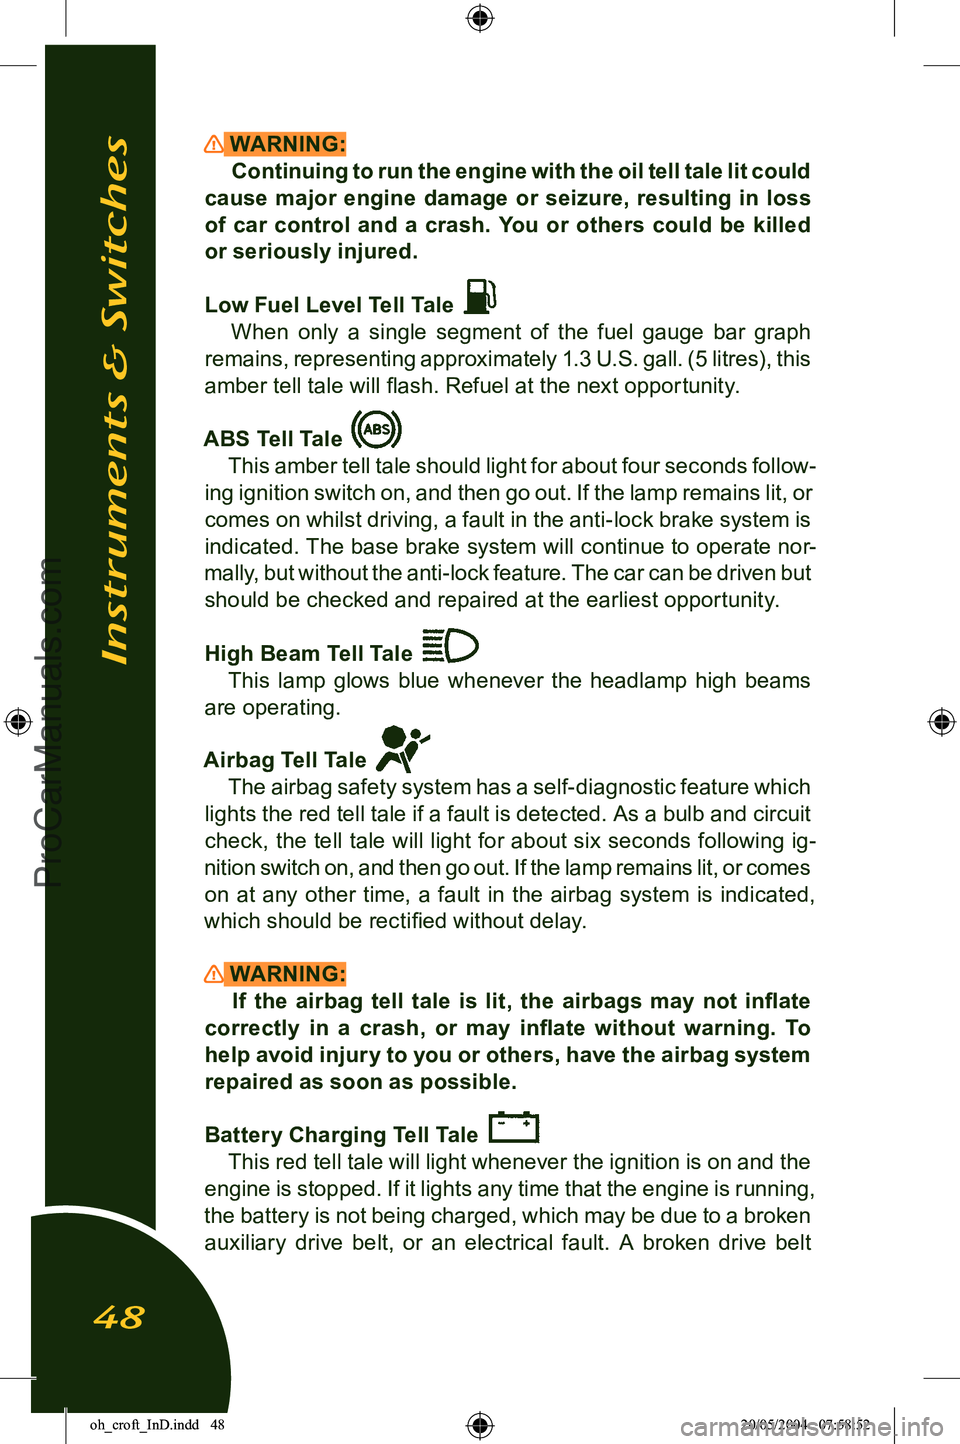
WARNING:Continuing to run the engine with the oil tell tale lit could
cause major engine damage or seizure, resulting in loss
of car control and a crash. You or others could be killed
or seriously injured.
Low Fuel Level Tell Tale
When only a single segment of the fuel gauge bar graph
remains, representing approximately 1.3 U.S. gall. (5 litres), this
amber tell tale will ï¬ash. Refuel at the next opportunity.
ABS Tell Tale
This amber tell tale should light for about four seconds follow-
ing ignition switch on, and then go out. If the lamp remains lit, or
comes on whilst driving, a fault in the anti-lock brake system is
indicated. The base brake system will continue to operate nor
-
mally, but without the anti-lock feature. The car can be driven but should be checked and repaired at the earliest opportunity.
High Beam Tell Tale
This lamp glows blue whenever the headlamp high beams
are operating.
Airbag Tell Tale
The airbag safety system has a self-diagnostic feature which
lights the red tell tale if a fault is detected. As a bulb and circuit
check, the tell tale will light for about six seconds following ig
-
nition switch on, and then go out. If the lamp remains lit, or comes on at any other time, a fault in the airbag system is indicated,
which should be rectiï¬ed without delay.
WARNING: If the airbag tell tale is lit, the airbags may not inï¬ate
correctly in a crash, or may inï¬ate without warning. To
help avoid injury to you or others, have the airbag system repaired as soon as possible.
Battery Charging Tell Tale
This red tell tale will light whenever the ignition is on and the
engine is stopped. If it lights any time that the engine is running,
the battery is not being charged, which may be due to a broken
auxiliary drive belt, or an electrical fault. A broken drive belt
Instruments & Switches
48
oh_croft_InD.indd 4820/05/2004 07:58:52ProCarManuals.com
Page 132 of 205
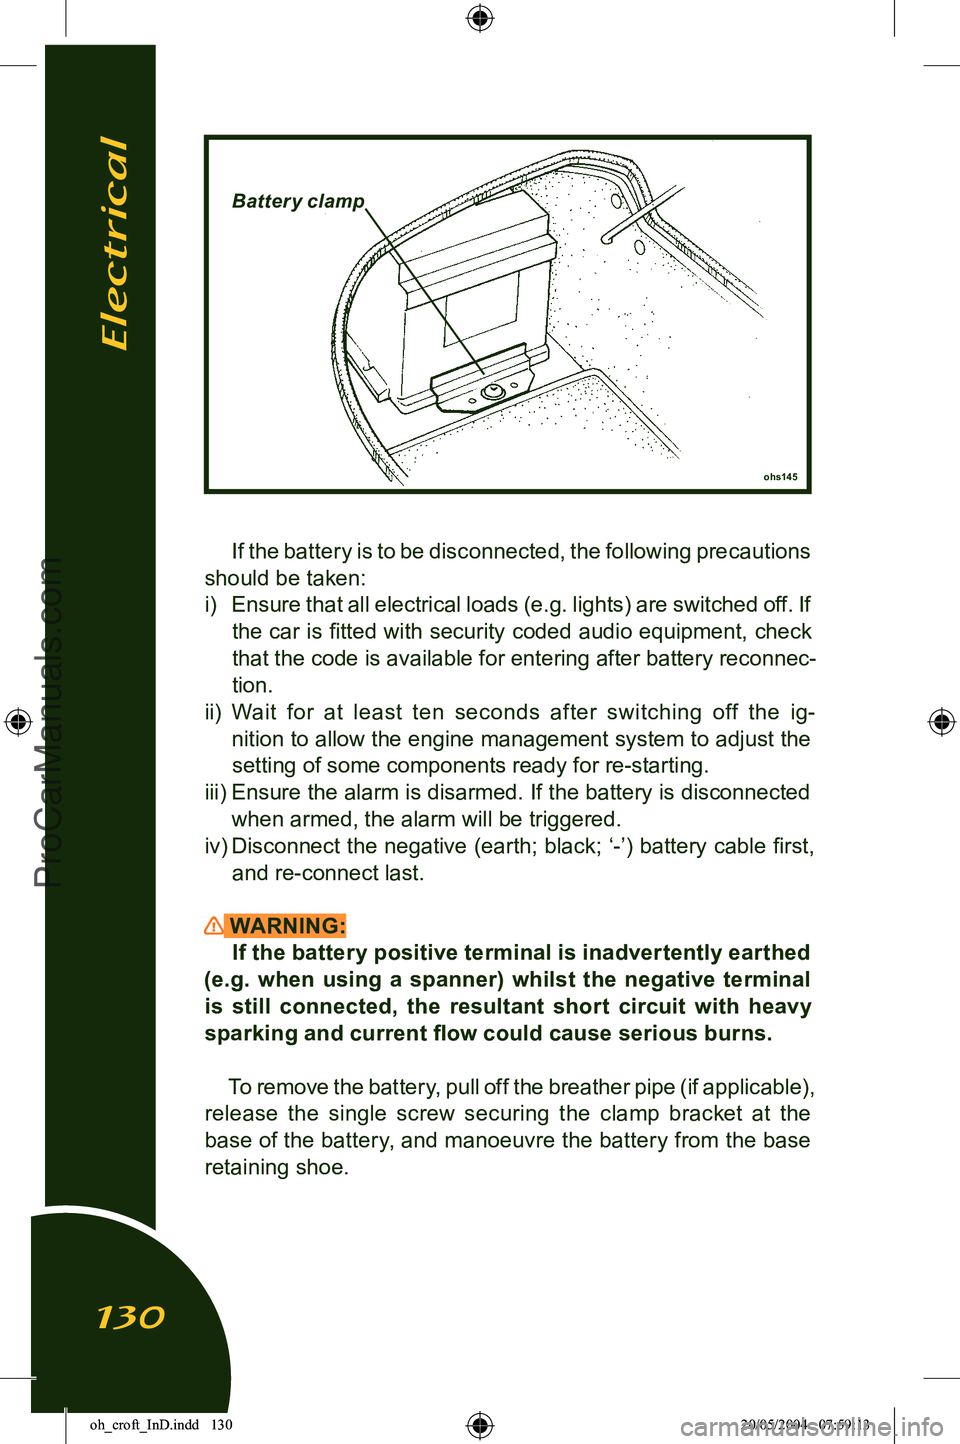
If the battery is to be disconnected, the following precautions
should be taken: i) Ensure that all electrical loads (e.g. lights) are switched off. If
the car is ï¬tted with security coded audio equipment, check
that the code is available for entering after battery reconnec
-
tion.
ii) Wait for at least ten seconds after switching off the ig-
nition to allow the engine management system to adjust the
setting of some components ready for re-starting.
iii) Ensure the alarm is disarmed. If the battery is disconnected
when armed, the alarm will be triggered.
iv) Disconnect the
negative (earth; black; â-â) battery cable ï¬rst,
and re-connect last.
WARNING:
If the battery positive terminal is inadvertently earthed
(e.g. when using a spanner) whilst the negative terminal
is still connected, the resultant short circuit with heavy sparking and current ï¬ow could cause serious burns.
To remove the battery, pull off the breather pipe (if applicable),
release the single screw securing the clamp bracket at the
base of the battery, and manoeuvre the battery from the base
retaining shoe.
ohs145
Batter y clamp
Electrical
130
oh_croft_InD.indd 13020/05/2004 07:59:13ProCarManuals.com
Page 191 of 205
Headlamp Flasher .................................................................58
Heating & Ventilation .............................................................. 61
Horn ...................................................................................... 60
Idle Speed ............................................................................. 73
Ignition Switch ....................................................................... 44
Immobiliser, engine ................................................................ 31
Inertia Switch ...................................................................... 135
Instrument Illumination .......................................................... 56
Interior Lamp .......................................................................... 41
Jacking Points, lifting you car .............................................. 148
âJumpâ Starting ..................................................................... 133
Keys ...................................................................................... 29
Lighting Switches .................................................................. 54
Lights On Buzzer .............................................................. 40,55
Lubrication - Dipstick, engine oil level check ....................................... 99
- Engine Oil Change ........................................................ 100
- Oil Filter ......................................................................... 102
- Recommended Lubricants ............................................ 153
- Tran smission Oil ............................................................ 103
Mirrors ................................................................................... 40
Odometer .............................................................................. 53
Parking Brake ........................................................................ 70
Pedals ................................................................................... 66
Queenâs Award ..................................................................... 191
Roof, Hard Top ...................................................................... 85
Roof, Soft Top ....................................................................... 82
Safety Information ....................................................................
7
Seat Be lts .............................................................................. 18
Seats ...................................................................................... 17
Servicing ............... see separate Maintenance Record booklet
Sparking Plugs ..................................................................... 114
Speedometer .......................................................................... 51
Start Button, engine .............................................................. 45
Starting Procedure ................................................................ 72
Index
189
oh_croft_InD.indd 18920/05/2004 07:59:26ProCarManuals.com