headlamp LOTUS ELISE 2005 Owners Manual
[x] Cancel search | Manufacturer: LOTUS, Model Year: 2005, Model line: ELISE, Model: LOTUS ELISE 2005Pages: 205, PDF Size: 4.51 MB
Page 4 of 205
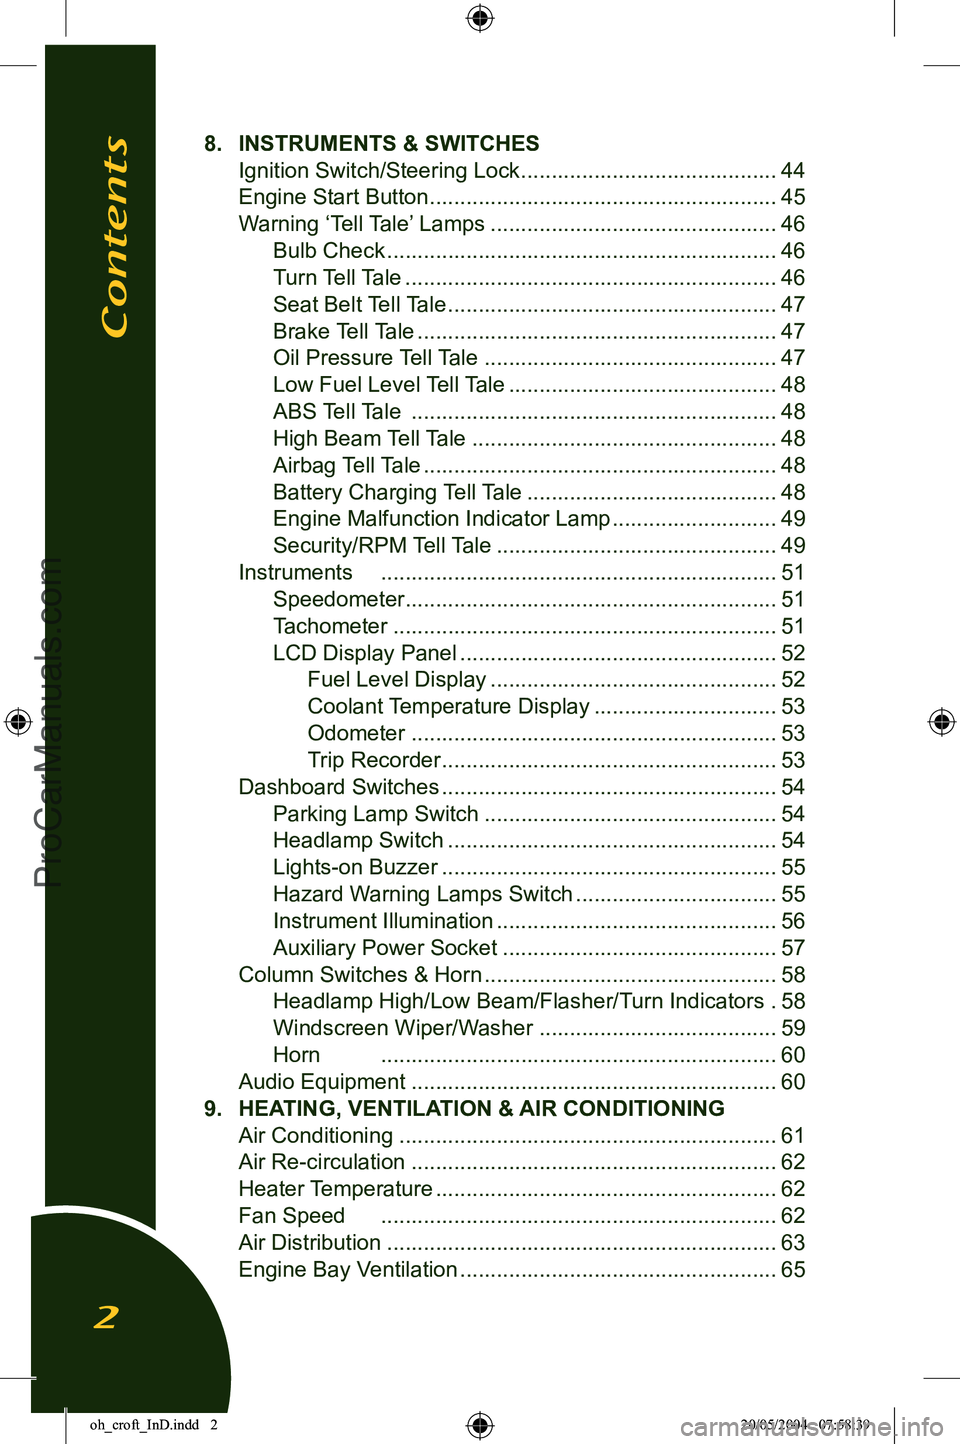
8. INSTRUMENTS & SWITCHES
Ignition Switch/Steering Lock ..........................................
44
Engine Start Button .........................................................
45
Warning âTell Taleâ Lamps ...............................................
46
Bulb Check ................................................................
46
Turn Tell Tale .............................................................
46
Seat Belt Tell Tale ......................................................
47
Brake Tell Tale ...........................................................
47
Oil Pressure Tell Tale ................................................
47
Low Fuel Level Tell Tale ............................................
48
ABS Tell Tale ............................................................
48
High Beam Tell Tale ..................................................
48
Airbag Tell Tale ..........................................................
48
Battery Charging Tell Tale .........................................
48
Engine Malfunction Indicator Lamp ...........................
49
Security/RPM Tell Tale ..............................................
49
Instruments .................................................................
51
Speedometer .............................................................
51
Tachometer ...............................................................
51
LCD Display Panel ....................................................
52
Fuel Level Display ...............................................
52
Coolant Temperature Display ..............................
53
Odometer ............................................................
53
Trip Recorder .......................................................
53
Dashboard Switches .......................................................
54
Parking Lamp Switch ................................................
54
Headlamp Switch ......................................................
54
Lights-on Buzzer .......................................................
55
Hazard Warning Lamps Switch .................................
55
Instrument Illumination ..............................................
56
Auxiliary Power Socket .............................................
57
Column Switches & Horn ................................................
58
Headlamp High/Low Beam/Flasher/Turn Indicators .
58
Windscreen Wiper/Washer .......................................
59
Horn .................................................................
60
Audio Equipment ............................................................
60
9. HEATING, VENTILATION & AIR CONDITIONING
Air Conditioning ..............................................................
61
Air Re-circulation ............................................................
62
Heater Temperature ........................................................
62
Fan Speed .................................................................
62
Air Distribution ................................................................
63
Engine Bay Ventilation ....................................................
65
Contents
2
oh_croft_InD.indd 220/05/2004 07:58:39ProCarManuals.com
Page 7 of 205
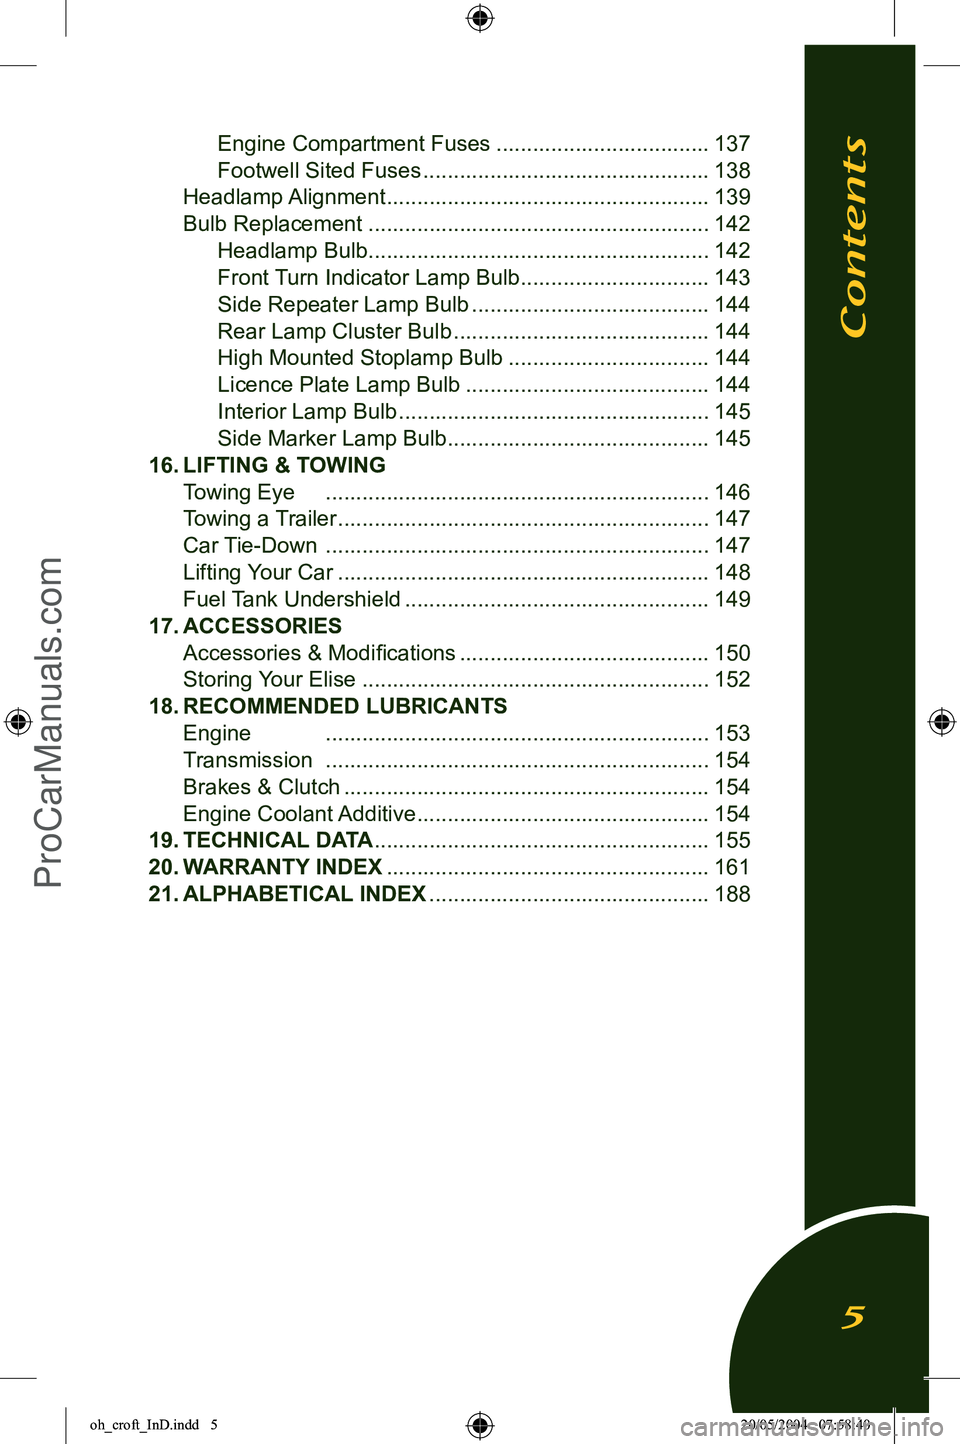
Engine Compartment Fuses ...................................137
Footwell Sited Fuses ...............................................
138
Headlamp Alignment .....................................................
139
Bulb Replacement ........................................................
142
Headlamp Bulb ........................................................
142
Front Turn Indicator Lamp Bulb ...............................
143
Side Repeater Lamp Bulb .......................................
144
Rear Lamp Cluster Bulb ..........................................
144
High Mounted Stoplamp Bulb .................................
144
Licence Plate Lamp Bulb ........................................
144
Interior Lamp Bulb ...................................................
145
Side Marker Lamp Bulb ...........................................
145
16. LIFTING & TOWING
Towing Eye ...............................................................146
Towing a Trailer .............................................................147
Car Tie-Down ...............................................................
147
Lifting Your Car .............................................................148
Fuel Tank Undershi
eld ..................................................149
17. A
CCESSORIES
Accessories & Modiï¬cations .........................................150
Storing Your Elise .........................................................
152
18. RECOMMENDED LUBRICANTS
Engine ...............................................................
153
Transmission ...............................................................
154
Br
akes & Clutch ............................................................154
Engine Coolant Additive ................................................
154
19. TECHNICAL DATA .......................................................155
20. WARRANTY INDEX .....................................................161
21. ALPHABETICAL INDEX ..............................................188
Contents
5
oh_croft_InD.indd 520/05/2004 07:58:40ProCarManuals.com
Page 42 of 205
ohs149
NightDay
âLights Onâ Buzzer
A âlights onâ reminder buzzer will sound if the lights are on, the
ignition is switched off, and the driverâs door is then opened.
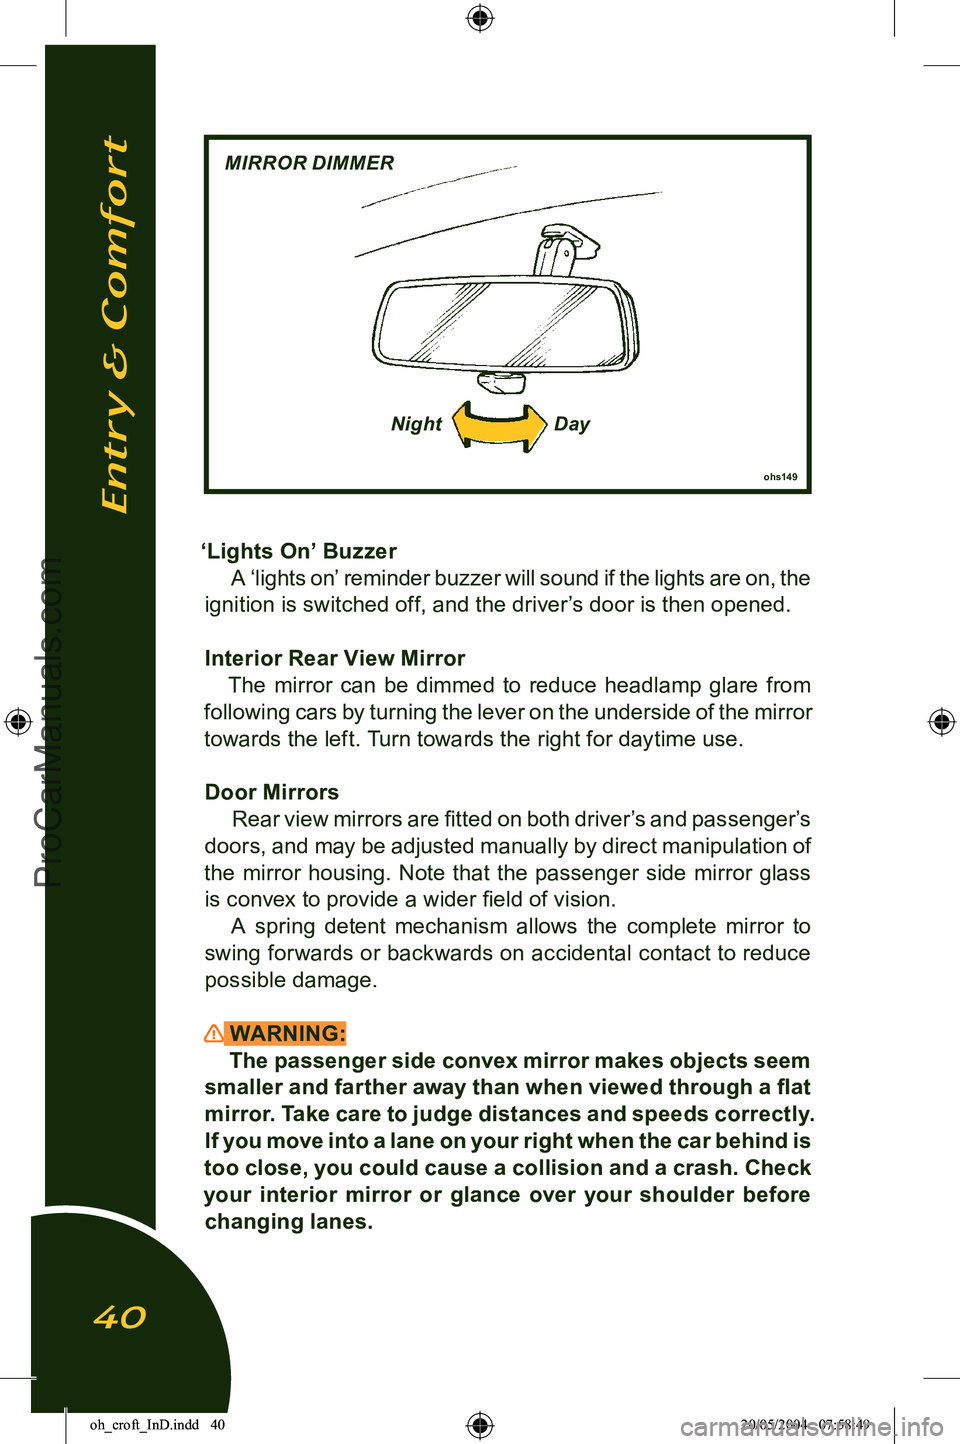
Interior Rear View Mirror The mirror can be dimmed to reduce headlamp glare from
following cars by turning the lever on the underside of the mirror
towards the left. Turn towards the right for daytime use.
Door Mirrors Rear view mirrors are ï¬tted on both driverâs and passengerâs
doors, and may be adjusted manually by direct manipulation of
the mirror housing. Note that the passenger side mirror glass is convex to provide a wider ï¬eld of vision. A spring detent mechanism allows the complete mirror to
swing forwards or backwards on accidental contact to reduce
possible damage.
WARNING: The passenger side convex mirror makes objects seem
smaller and farther away than when viewed through a ï¬at
mirror. Take care to judge distances and speeds correctly.
If you move into a lane on your right when the car behind is
too close, you could cause a collision and a crash. Check
your interior mirror or glance over your shoulder before
changing lanes.
Entry & Comfort
40
MIRROR DIMMER
oh_croft_InD.indd 4020/05/2004 07:58:49ProCarManuals.com
Page 50 of 205
WARNING:Continuing to run the engine with the oil tell tale lit could
cause major engine damage or seizure, resulting in loss
of car control and a crash. You or others could be killed
or seriously injured.
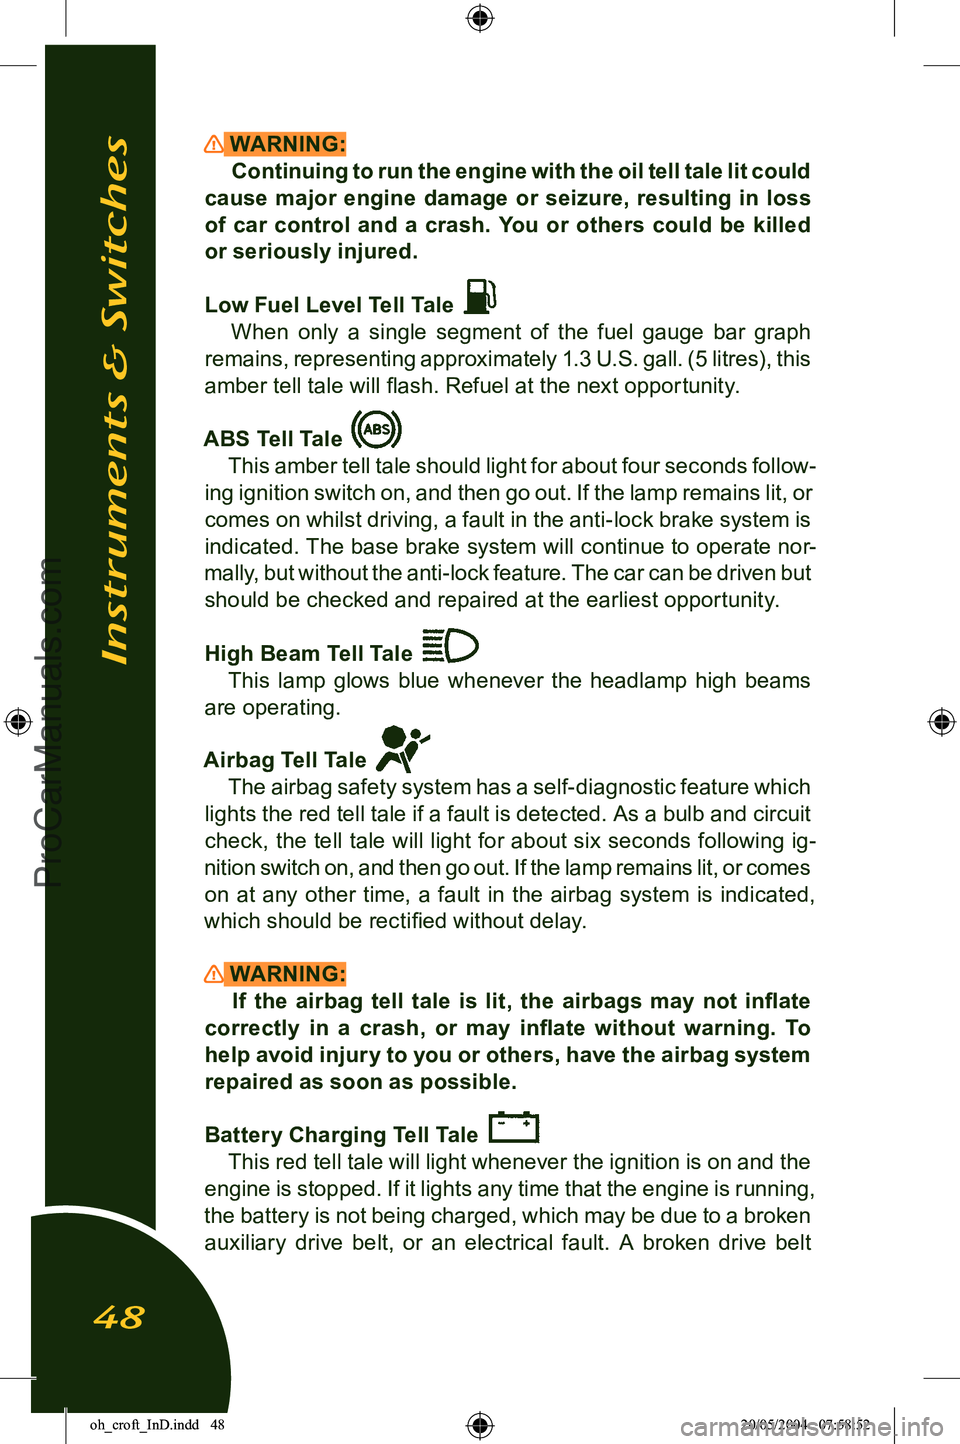
Low Fuel Level Tell Tale
When only a single segment of the fuel gauge bar graph
remains, representing approximately 1.3 U.S. gall. (5 litres), this
amber tell tale will ï¬ash. Refuel at the next opportunity.
ABS Tell Tale
This amber tell tale should light for about four seconds follow-
ing ignition switch on, and then go out. If the lamp remains lit, or
comes on whilst driving, a fault in the anti-lock brake system is
indicated. The base brake system will continue to operate nor
-
mally, but without the anti-lock feature. The car can be driven but should be checked and repaired at the earliest opportunity.
High Beam Tell Tale
This lamp glows blue whenever the headlamp high beams
are operating.
Airbag Tell Tale
The airbag safety system has a self-diagnostic feature which
lights the red tell tale if a fault is detected. As a bulb and circuit
check, the tell tale will light for about six seconds following ig
-
nition switch on, and then go out. If the lamp remains lit, or comes on at any other time, a fault in the airbag system is indicated,
which should be rectiï¬ed without delay.
WARNING: If the airbag tell tale is lit, the airbags may not inï¬ate
correctly in a crash, or may inï¬ate without warning. To
help avoid injury to you or others, have the airbag system repaired as soon as possible.
Battery Charging Tell Tale
This red tell tale will light whenever the ignition is on and the
engine is stopped. If it lights any time that the engine is running,
the battery is not being charged, which may be due to a broken
auxiliary drive belt, or an electrical fault. A broken drive belt
Instruments & Switches
48
oh_croft_InD.indd 4820/05/2004 07:58:52ProCarManuals.com
Page 56 of 205
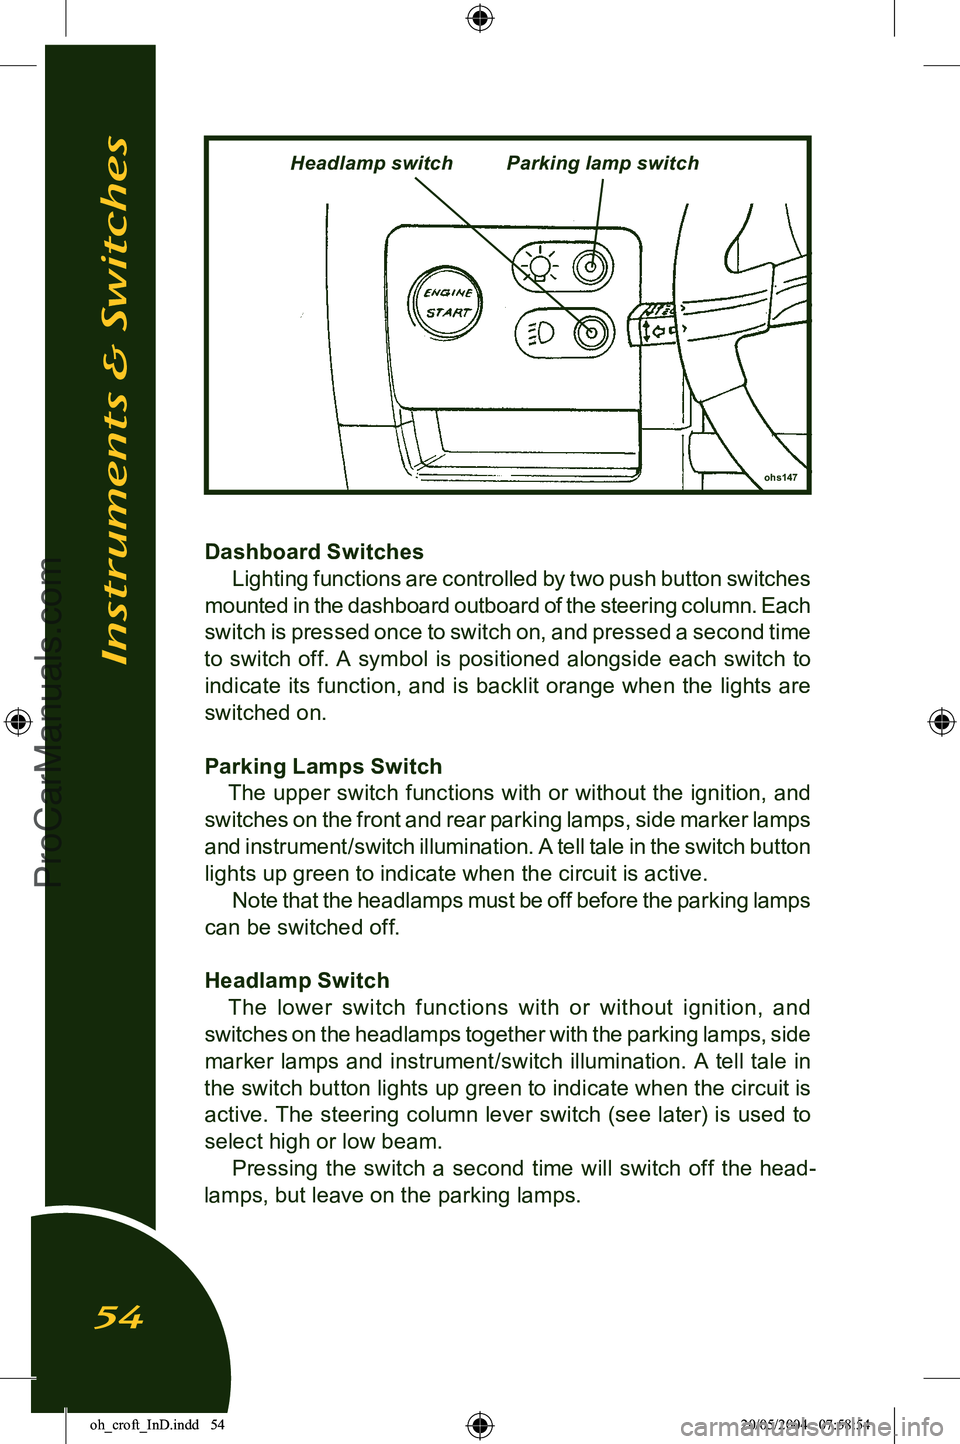
Dashboard SwitchesLighting functions are controlled by two push button switches
mounted in the dashboard outboard of the steering column. Each
switch is pressed once to switch on, and pressed a second time
to switch off. A symbol is positioned alongside each switch to indicate its function, and is backlit orange when the lights are
switched on.
Parking Lamps Switch The upper switch functions with or without the ignition, and
switches on the front and rear parking lamps, side marker lamps and instrument/switch illumination. A tell tale in the switch button
lights up green to indicate when the circuit is active. Note that the headlamps must be off before the parking lamps
can be switched off.
Headlamp Switch The lower switch functions with or without ignition, and
switches on the headlamps together with the parking lamps, side marker lamps and instrument/switch illumination. A tell tale in
the switch button lights up green to indicate when the circuit is
active. The steering column lever switch (see later) is used to
select high or low beam. Pressing the switch a second time will switch off the head
-
lamps, but leave on the parking lamps.
Instruments & Switches
54
ohs147
Headlamp switchParking lamp switch
oh_croft_InD.indd 5420/05/2004 07:58:54ProCarManuals.com
Page 60 of 205
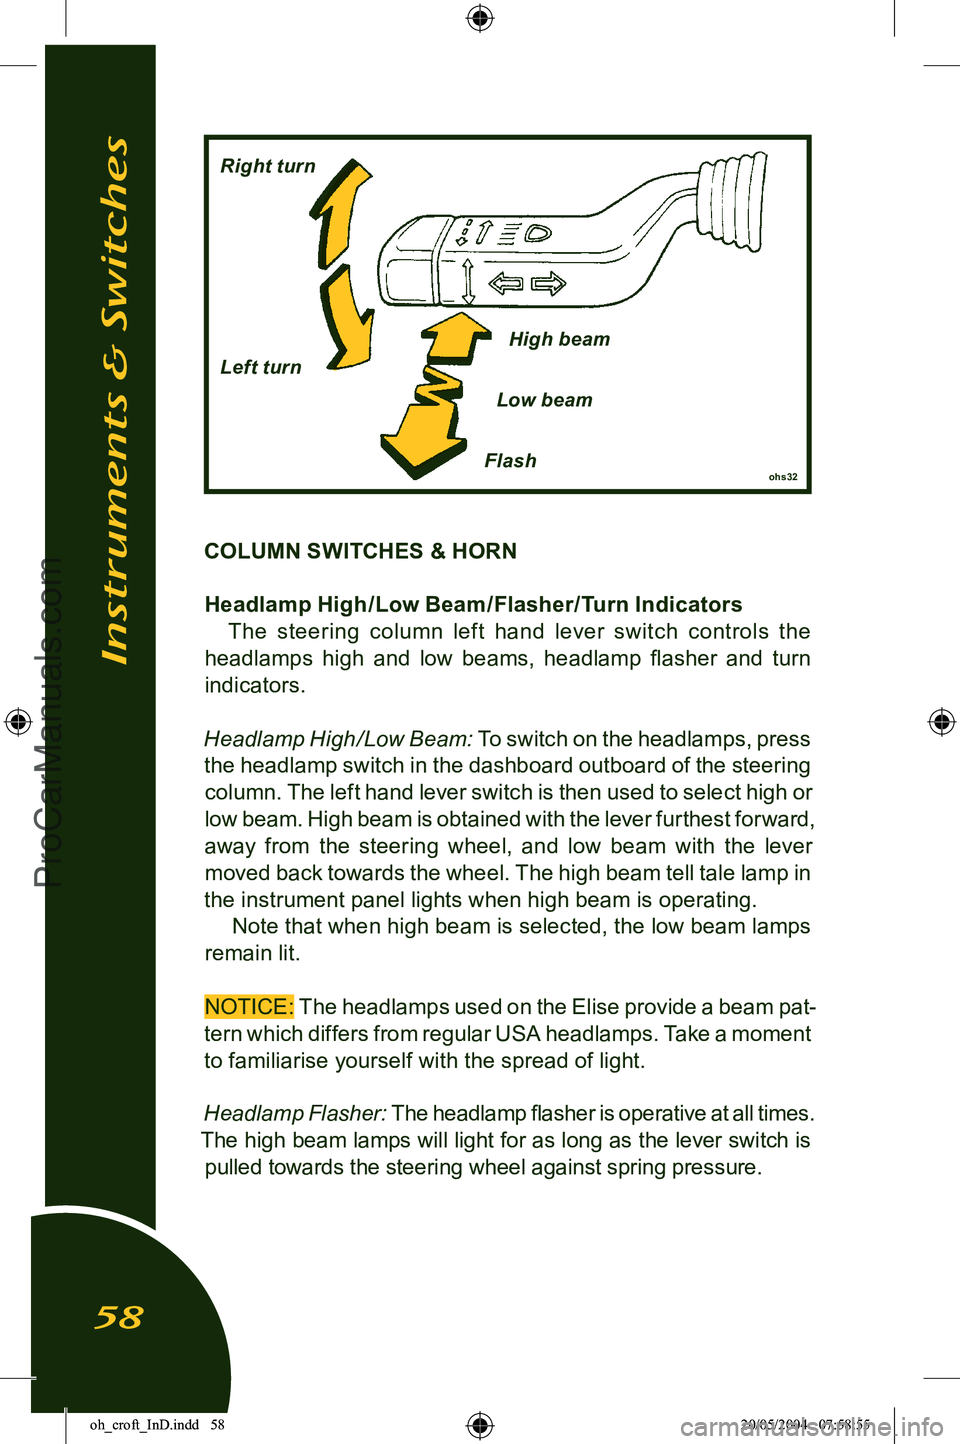
COLUMN SWITCHES & HORNHeadlamp High /Low Beam /Flasher/Turn Indicators The steering column lef t hand lever switch controls the
headlamps high and low beams, headlamp ï¬asher and turn
indicators.
Headlamp High/Low Beam:
To switch on the headlamps, press
the headlamp switch in the dashboard outboard of the steering column. The left hand lever switch is then used to select high or
low beam. High beam is obtained with the lever furthest forward,
away from the steering wheel, and low beam with the lever moved back towards the wheel. The high beam tell tale lamp in
the instrument panel lights when high beam is operating.
Note that when high beam is selected, the low beam lamps
remain lit.
NOTICE:
The headlamps used on the Elise provide a beam pat-
tern which differs from regular USA headlamps. Take a moment
to familiarise yourself with the spread of light.
Headlamp Flasher:
The headlamp ï¬asher is operative at all times.
The high beam lamps will light for as long as the lever switch is pulled towards the steering wheel against spring pressure.
Instruments & Switches
58
ohs32Flash
Right turn
Left turn
High beam
Low beam
oh_croft_InD.indd 5820/05/2004 07:58:55ProCarManuals.com
Page 130 of 205
NOTICE: Using incorrect wheel/tire equipment can also cause problems with wheel bearing life, brake cooling, speedo and
odometer calibration, headlamp aim, ground clearance and tire
clearance to the body.
WARNING: Dirt or corrosion on a wheel or hub mounting ï¬ange or
wheel bolts, can result in the wheel bolts coming loose.
The wheel could come off and cause a crash in which you and others could be killed or seriously injured. Thoroughly
clean these components or ï¬t new Lotus approved replace
-
ments before ï¬tting a wheel. Never use oil or grease on the wheel bolts or hub threads.
If you do, the bolts could come loose and the wheel could
come off, causing a crash in which you and others could be killed or seriously injured. Using incorrect wheel bolts, or the wrong tightening
torque could cause the bolts to come loose and the wheel to come off, resulting in a crash in which you and others could be killed or seriously injured. Use only the correct Lotus
approved wheel bolts tightened to 77 lbf.ft (105 Nm).
NOTICE: Improperly tightened wheel bolts, or dirt on the wheel
to hub mounting face can cause brake pulsation and judder, and damage the brake discs. To avoid expensive brake repairs,
ensure complete cleanliness on assembly and tighten the wheel
bolts in a diagonal sequence to the correct torque.
For advice and information on lifting the Elise, refer to âLifting
Pointsâ on page 148Tires & Wheels
128
oh_croft_InD.indd 12820/05/2004 07:59:12ProCarManuals.com
Page 141 of 205
Headlamp AlignmentThe headlamps of your Elise were correctly adjusted during
the manufacture of the car, and should only require subsequent
adjustment if the headlamp assembly or front body is disturbed.
Simply replacing the bulb will not affect alignment. Incorrectly adjusted headlamps can cause poor lighting performance or dazzle to oncoming traf ï¬c. Special headlamp setting equip
-
ment is required to correctly set the headlamps, such that only
qualiï¬ed technicians using appropriate equipment should be
entrusted with this procedure:
1. Using beam setting equipment compatible with local regu
-
lations, position the machine between 300 and 700mm in
front of the LH headlamp, and parallel with the two headlamp
units using the sight bar or similar device dependent on the machine design, to ensure cross car match. Use the guides provided on the machine to ensure the correct height and
lateral setting.
2. Switch on the headlamp low beams (uppermost lamps) and check the lateral beam alignment. The âknee pointâ of the beam cut off line must lie within a tolerance of 2% to the pas
-
senger side, and 0%. Check the vertical alignment of the low beam which must lie within a tolerance of - 0.5% and -2%.
Electrical
139
oh_croft_InD.indd 13920/05/2004 07:59:15ProCarManuals.com
Page 142 of 205
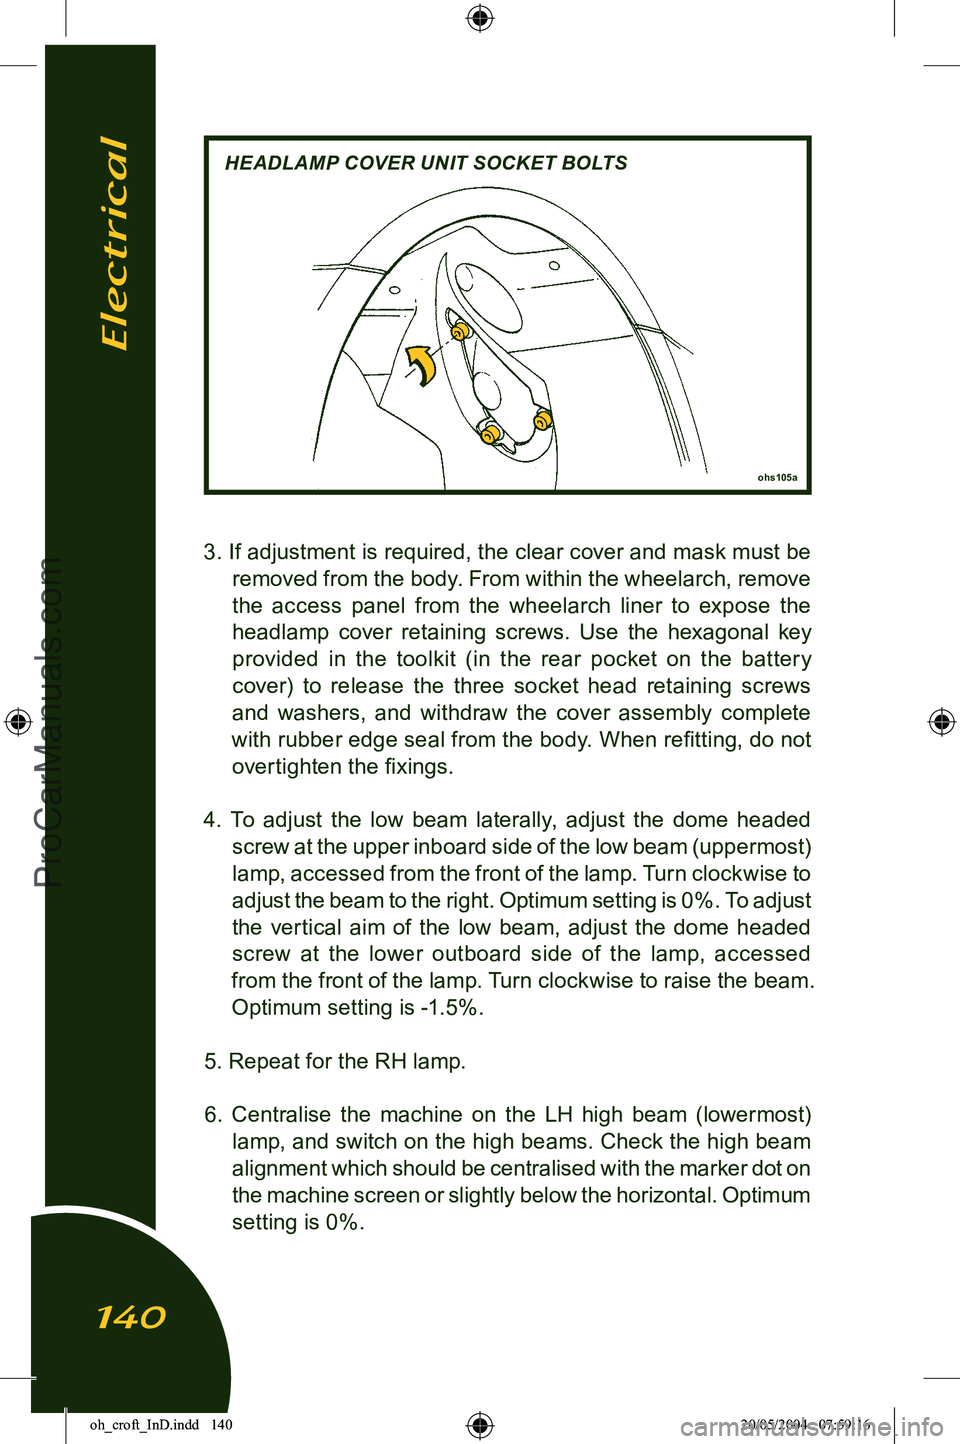
3. If adjustment is required, the clear cover and mask must be removed from the body. From within the wheelarch, remove
the access panel from the wheelarch liner to expose the
headlamp cover retaining screws. Use the hexagonal key provided in the toolkit (in the rear pocket on the batter y
cover) to release the three socket head retaining screws and washers, and withdraw the cover assembly complete
with rubber edge seal from the body. When reï¬tting, do not overtighten the ï¬xings.
4. To adjust the low beam laterally, adjust the dome headed screw at the upper inboard side of the low beam (uppermost)
lamp, accessed from the front of the lamp. Turn clockwise to
adjust the beam to the right. Optimum setting is 0%. To adjust
the vertical aim of the low beam, adjust the dome headed screw at the lower outboard side of the lamp, accessed
from the front of the lamp. Turn clockwise to raise the beam.
Optimum setting is -1.5%.
5. Repeat for the RH lamp. 6. Centralise the machine on the LH high beam (lowermost) lamp, and switch on the high beams. Check the high beam
alignment which should be centralised with the marker dot on
the machine screen or slightly below the horizontal. Optimum
setting is 0%.
ohs105a
HEADLAMP COVER UNIT SOCKET BOLTS
Electrical
140
oh_croft_InD.indd 14020/05/2004 07:59:16ProCarManuals.com
Page 144 of 205
BULB REPLACEMENT
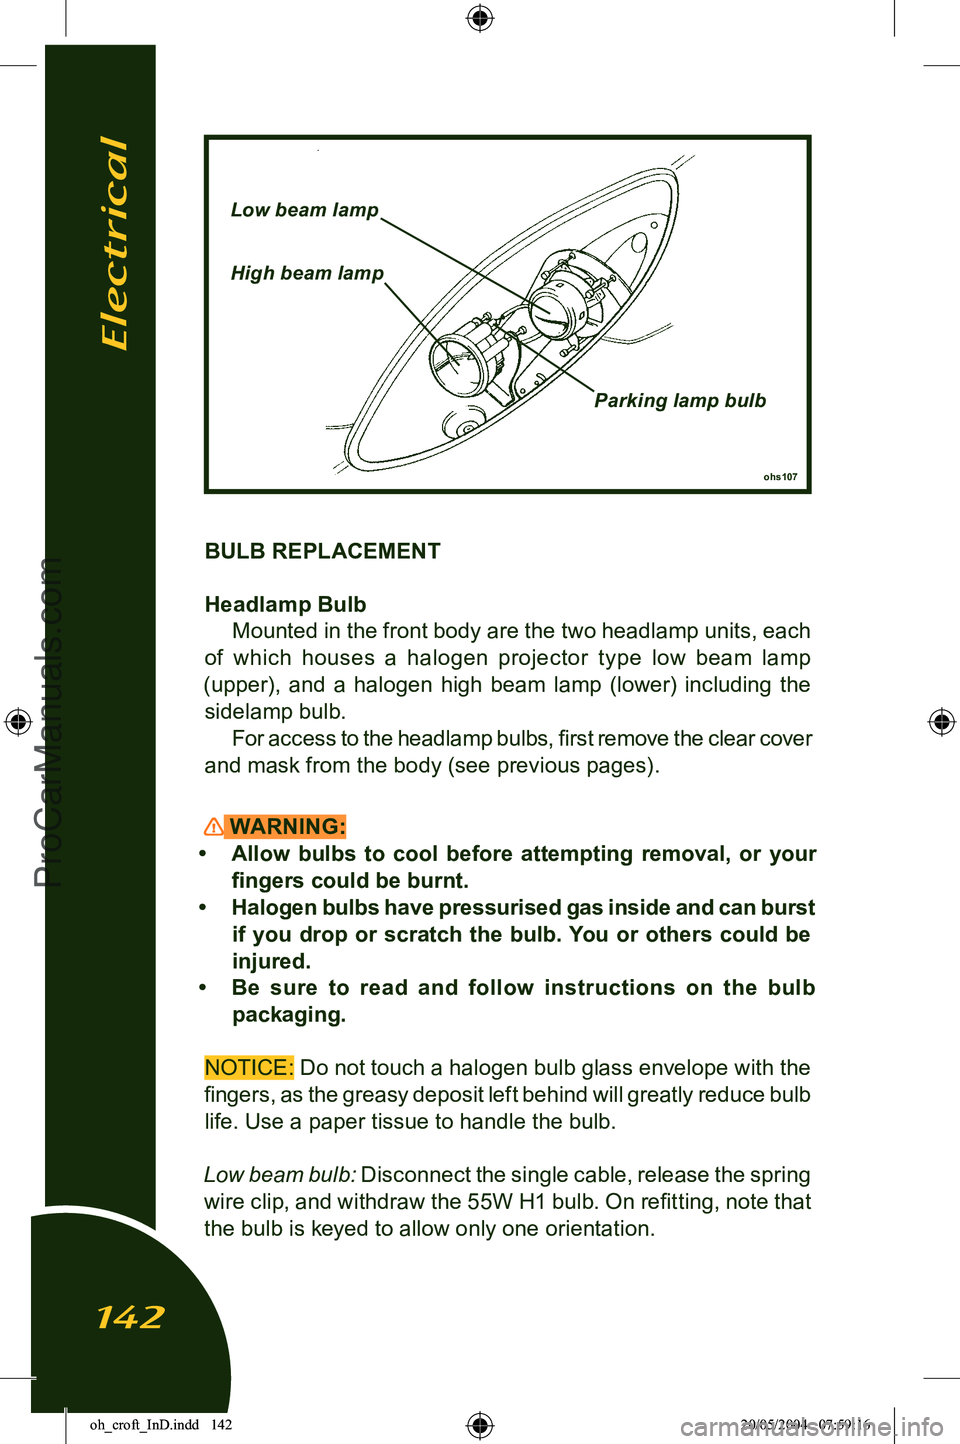
Headlamp BulbMounted in the front body are the two headlamp units, each
of which houses a halogen projector type low beam lamp
(upper), and a halogen high beam lamp (lower) including the sidelamp bulb. For access to the headlamp bulbs, ï¬rst remove the clear cover
and mask from the body (see previous pages).
WARNING:
⢠Allow bulbs to cool before attempting removal, or your ï¬ngers could be burnt.
⢠Halogen bulbs have pressurised gas inside and can burst if you drop or scratch the bulb. You or others could be
injured.
⢠Be sure to read and follow instructions on the bulb
packaging.
NOTICE: Do not touch a halogen bulb glass envelope with the
ï¬ngers, as the greasy deposit left behind will greatly reduce bulb life. Use a paper tissue to handle the bulb.
Low beam bulb: Disconnect the single cable, release the spring wire clip, and withdraw the 55W H1 bulb. On reï¬tting, note that the bulb is keyed to allow only one orientation.
ohs107
Low beam lamp
High beam lamp
Parking lamp bulb
Electrical
142
oh_croft_InD.indd 14220/05/2004 07:59:16ProCarManuals.com