service LUCID AIR 2022 User Guide
[x] Cancel search | Manufacturer: LUCID, Model Year: 2022, Model line: AIR, Model: LUCID AIR 2022Pages: 241, PDF Size: 5.15 MB
Page 93 of 241
Vehicle Hold
Vehicle Hold controls brake settings, and cankeep your vehicle stopped even when your
foot is not on the brake pedal.
When set to HOLD, the vehicle remains
stationary after a stop. The brakes hold until
the driver presses the accelerator pedal again.
If set to ROLL, the car rolls freely after releasing the accelerator.
To configure, use the Pilot Panel and touch
> Vehicle > Drive Settings, then
select the desired mode.
Note: The default setting is HOLD, and can
only be changed when the vehicle is in
P (Park). The setting saves to your User
Profile.
Note: Vehicle Hold disengages if the driver
shifts into N (Neutral) or presses and releases
the brake pedal.
Note: Vehicle Hold will disengage and shift
into P (Park) in any of the following instances:
-Hold has been braking for approximately
10 minutes.
- The system detects that the driver has
exited the vehicle.
Parking Brake
CAUTION: In the unlikely event that
your vehicle loses electrical power,
you will not be able to select another
gear and therefore will be unable to
release the parking brake. Contact a
Lucid Service Center for assistance.
The parking brake operates on the rear wheels
only, and is independently controlled of the
pedal-operated brake system.
The parking brake automatically applies when
P (Park) is selected, and releases when any other gear is selected. It is also engaged by
certain systems when a time limit is reached. See Vehicle Hold on page 80.
The red parking brake indicator
is displayed on the Cockpit Panel
when the parking brake is engaged.
A flashing indicator signals either
operating wiht a fault, or a parking brake
stuck in operation.
If the indicator is amber, a fault
has been detected and the parking
brake may not be applied when the
vehicle is in P (Park). This will be
accompanied by a notification on the Cockpit
Panel. Contact a Lucid Service Center to have
the fault repaired.
Emergency useCAUTION: Driving the vehicle with the
parking brake applied, or repeated
use of the parking brake to slow the
vehicle, may cause serious damage to
the brake system.
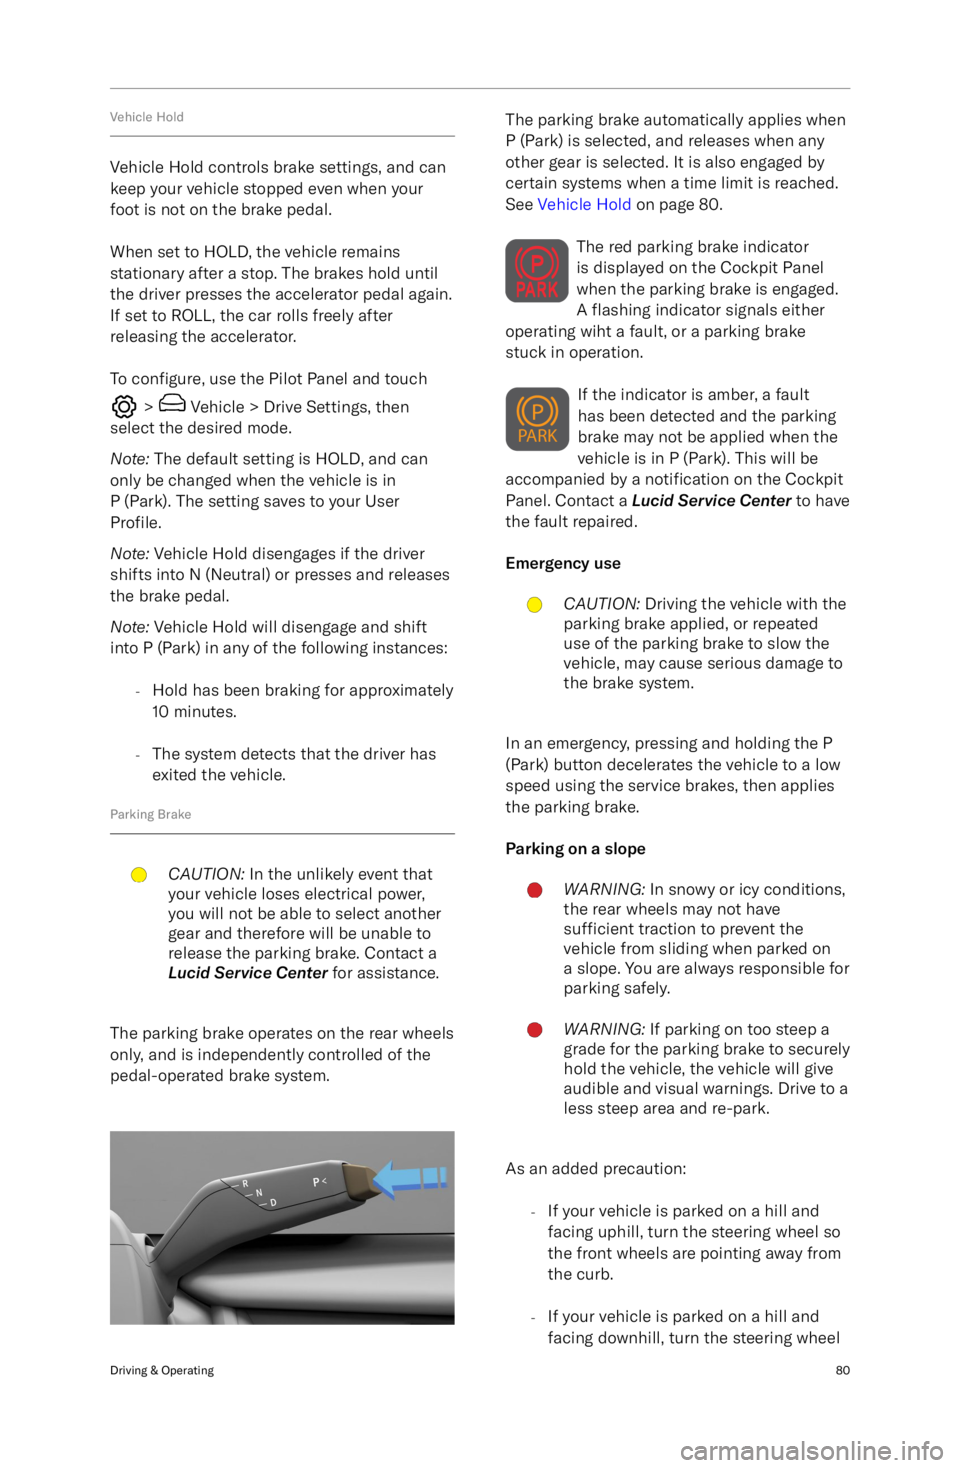
In an emergency, pressing and holding the P
(Park) button decelerates the vehicle to a low
speed using the service brakes, then applies
the parking brake.
Parking on a slope
WARNING: In snowy or icy conditions,
the rear wheels may not have
sufficient traction to prevent the
vehicle from sliding when parked on
a slope. You are always responsible for parking safely.WARNING: If parking on too steep a
grade for the parking brake to securely
hold the vehicle, the vehicle will give
audible and visual warnings. Drive to a
less steep area and re-park.
As an added precaution:
-If your vehicle is parked on a hill and
facing uphill, turn the steering wheel so
the front wheels are pointing away from
the curb.
- If your vehicle is parked on a hill and
facing downhill, turn the steering wheel
Driving & Operating80
Page 119 of 241
-Steering wheel is turned abruptly.
- Brake pedal is pressed and released
while Automatic Emergency Braking is
applying the brakes.
- Accelerator is pressed abruptly while
Automatic Emergency Braking is
applying the brakes.
- Hazard (vehicle, motorcycle, bicycle or
pedestrian) is no longer detected in the
vehicle path.
Note: Automatic Emergency Braking can
be adversely affected by the limitations of
Advanced Driver Assistance components. See
ADAS Limitations . Use appropriate caution
when driving.
If Automatic Emergency Braking is
unavailable, a warning message and
indicator display on the Cockpit
Panel. If either of these items
appear, contact a Lucid Service Center.
Speed limitationsWARNING: The Automatic Emergency
Braking system automatically disables
when you manually disable Lucid
Stability Control.
The Automatic Emergency Braking system,
including Forward Collision Warning, is
active at speeds above approximately 4
mph (7 km/h) and up to 112 mph (180
km/h). Pedestrian detection and reaction to
stationary vehicles is active at speeds up to
53 mph (85 km/h).
Automatic Emergency Braking settings
See Collision Protection on page 105.
Forward Collision Warning
WARNING: Forward Collision Warning
is an assist feature only, and is
not a substitute for attentive driving
and sound judgment. The driver is
responsible for paying attention to the
road, maintaining a suitable distance
from the vehicle ahead, and braking or
steering the vehicle when necessary.WARNING: There are factors that can
reduce or impair the performance ofthe Forward Collision Warning system,
causing either unnecessary, invalid,
inaccurate, or missed warnings. Do
not rely solely on Forward Collision
Warning to warn you of a potential
collision.WARNING: Forward Collision Warning
only monitors what is in front of the
vehicle. Be aware of your surroundings
at all times while operating the
vehicle.WARNING: Forward Collision Warning
does not provide alerts when the
driver is already applying the brake.
The Forward Collision Warning system uses
the front camera mounted behind the
windshield and the radar sensor mounted behind the front bumper to detect the
presence of an object (such as a vehicle,
bicycle, or pedestrian).
If the system detects that a collision is likely
to happen, it will sound an alert and prompt
you to brake in the Center Cockpit Panel. If
this happens, TAKE IMMEDIATE CORRECTIVE
ACTION and apply the brakes or steer clear of
the impending collision.
Note: If the driver presses the brake, the
system provides additional brake support.
If you do not react sufficiently to the warning,
the Automatic Emergency Braking system
should reduce speed, which is intended to help reduce the severity of a collision.
When Automatic Emergency Braking is
activated, the Cockpit Panel flashes red and
an audible alert sounds. If this happens, TAKE
IMMEDIATE CORRECTIVE ACTION.
DreamDrive106
Page 139 of 241
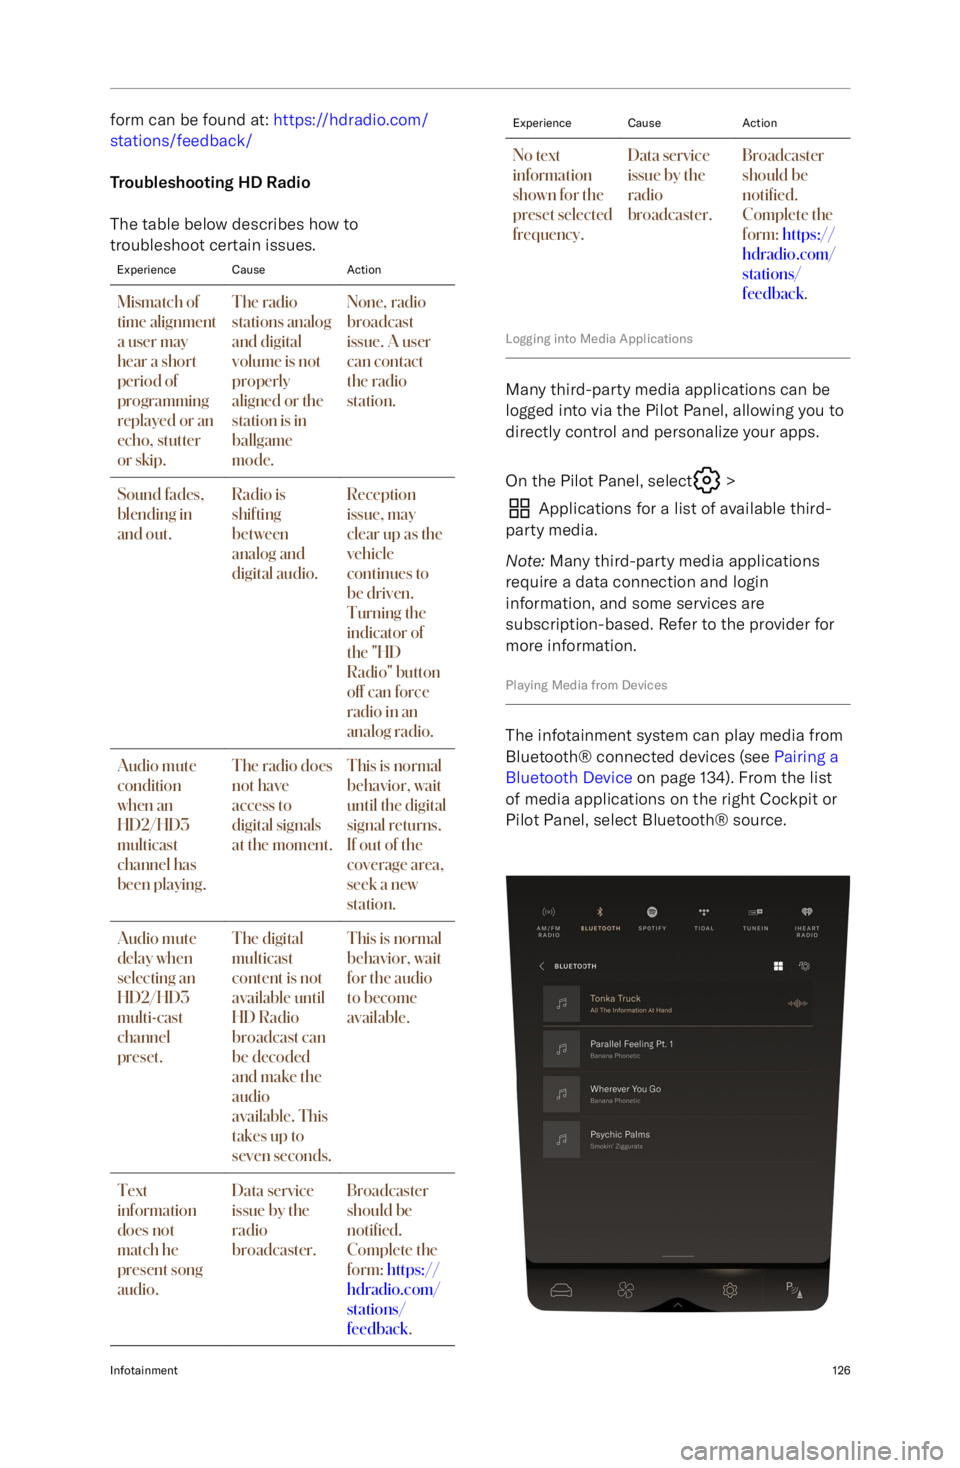
form can be found at: https://hdradio.com/
stations/feedback/
Troubleshooting HD Radio
The table below describes how to
troubleshoot certain issues.ExperienceCauseActionMismatch of
time alignment
a user may
hear a short
period of
programming
replayed or an
echo, stutter
or skip.The radio
stations analog
and digital
volume is not
properly
aligned or the
station is in
ballgame
mode.None, radio
broadcast
issue. A user
can contact
the radio
station.Sound fades,
blending in
and out.Radio is
shifting
between
analog and
digital audio.Reception
issue, may
clear up as the
vehicle
continues to
be driven.
Turning the
indicator of
the "HD
Radio" button
off can force
radio in an
analog radio.Audio mute
condition
when an
HD2/HD3
multicast
channel has
been playing.The radio does
not have
access to
digital signals
at the moment.This is normal
behavior, wait
until the digital
signal returns.
If out of the
coverage area,
seek a new
station.Audio mute
delay when
selecting an
HD2/HD3
multi-cast
channel
preset.The digital
multicast
content is not
available until
HD Radio
broadcast can
be decoded
and make the
audio
available. This
takes up to
seven seconds.This is normal
behavior, wait
for the audio
to become
available.Text
information
does not
match he
present song
audio.Data service
issue by the
radio
broadcaster.Broadcaster
should be
noti
Page 156 of 241

Schedule an update
On the software update screen, press
SCHEDULE TIME if you wish to start the
update later. Updates can be scheduled up to 48 hours later.
1. Read the cautionary statement and press CONFIRM to consent to the
update.
2. Select the time to start on the screen provided and press SET TIME to save.
3. Your scheduled date and time will be displayed on the main software update
screen, and can be edited by pressing
the
icon beside it. Ensure that all
update prerequisites will be met at the scheduled time.
30 minutes before a scheduled update, you
will receive a notification on the right Cockpit
Panel, with options to DELAY AN HOUR or CANCEL SCHEDULE.
Install an update now
On the software update screen, press
INSTALL NOW to proceed with the update.
1. Read the cautionary statement and press CONFIRM to consent to the
update.
2. The system will perform a series of checks to ensure all prerequisites havebeen met.
3. A 2-minute countdown will display. Exit and lock the doors at this time. See
Doors on page 20.
4. During the update, the Pilot Panel and left Cockpit Panel screens will be blank.
The Cockpit Panel indicates the update
is proceeding. The progress can be
viewed on the right Cockpit Panel and
within the Lucid mobile app.
5. When the update is complete, a notification will appear on the left Pilot
Panel and a push notification will be
sent to the Lucid mobile app.
Note: If an update fails to install, a notification
will display on the Infotainment screens and a
push notification is sent to the Lucid mobile
app.
- If a failure was due to a prerequisite
not being met (e.g., battery was at less
than 20% or vehicle was not put in Park),
resolve the issue and press TRY AGAIN.
- If a failure was due to another reason,
contact a Lucid Service Center for
assistance.
Viewing Release Notes
Lucid strongly recommends that all users read
the release notes for every software update.
They can contain important information about
your vehicle, including safety information or
new operating instructions.
Release notes can be viewed before and after
a software update:
-On the Pilot Panel, select
>
About Vehicle. The software
versions for the current installation and any available updates will be listed.
Press Learn More next to a version to
read the notes for it.
- When an update has installed
successfully, press Learn More on the
prompt that appears on the right
Cockpit Panel.
Infotainment143
Page 158 of 241

Electric Vehicle Components
High-Voltage ComponentsWARNING: The high-voltage system in this vehicle has no user-serviceable parts. Do not
disassemble, remove, or replace high-voltage components, connectors, or cables. High-
voltage cables are colored orange for easy identification.WARNING: In the unlikely event that a fire occurs, exit the vehicle and immediately contact
your local fire emergency responders.WARNING: For your safety, always read and follow the instructions and warnings written on
all labels attached to your vehicle.
1. Front Inverter
2. High-voltage cables (not all high-voltage cables are shown)
3. Front Drive unit
4. Wunderbox
5. Charge port
6. Battery pack
7. Rear drive unit
8. Rear inverter
High-Voltage Battery Pack & Charging145
Page 160 of 241

Battery Information
About the Vehicle BatteriesWARNING: Only a Lucid Service
Center should service the high-
voltage battery pack. Improper
handling can result in death or serious injury.
There are two types of batteries powering
your vehicle: a high-voltage lithium ion
battery pack that powers the vehicle
Page 161 of 241
Charging Instructions
Safety ChecklistWARNING: If you have any concerns
with the condition of a wall outlet, the
charge port or the charging cable, DO NOT use them. Seek assistance from a
qualified electrician or a Lucid Service
Center. Using charging equipment
that is damaged or faulty may result
in injury, death, or property damage.
Before charging your vehicle, check the
following items:
-If using a domestic wall outlet, inspect
the outlet and do not use it if it appears
damaged or worn.
- Inspect the charging cable and
connector for damage, including frays or
cracks. If a part appears damaged, do not use it.
Note: If the Lucid Mobile Charging Cable
is damaged, contact a Lucid Service
Center .
- Ensure that the charging cable is fully
uncoiled before use.
- Check that the charging connector and
charge port are clean and unobstructed.
If you find any contamination or a
foreign object in either part, do not
use them and contact a Lucid Service
Center .
- Check that the charging cable and
charge port are dry. Ensure that your hands are dry, and there is no water
or other fluids in the surrounding area
(such as puddles on the ground).
Charge Port Door
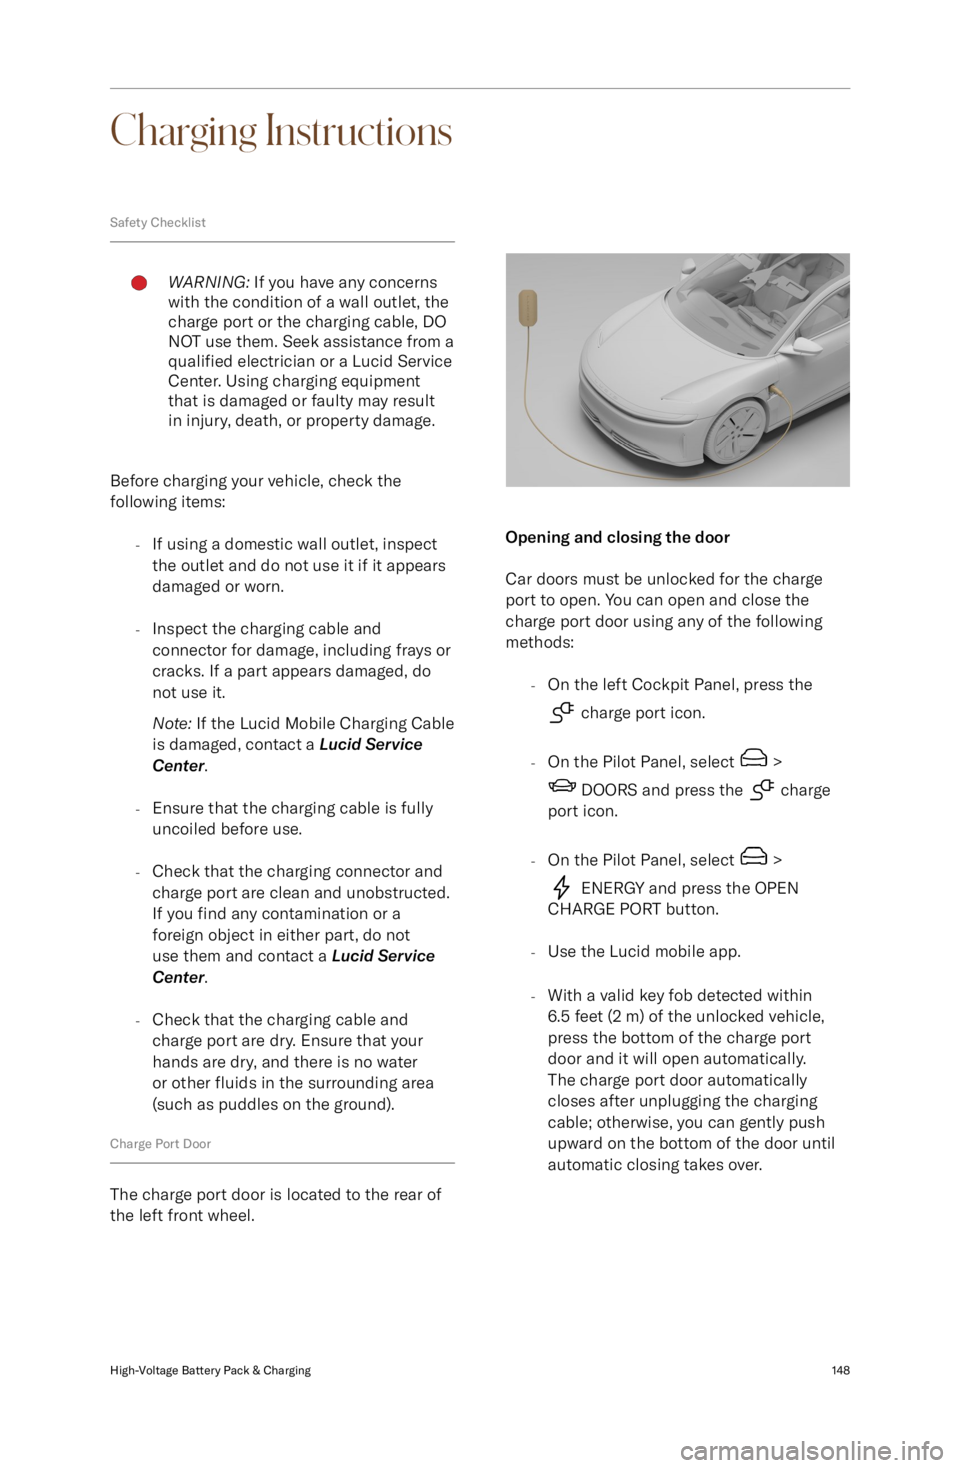
The charge port door is located to the rear of
the left front wheel.
Opening and closing the door
Car doors must be unlocked for the charge
port to open. You can open and close the
charge port door using any of the following
methods:
-On the left Cockpit Panel, press the
charge port icon.
- On the Pilot Panel, select
>
DOORS and press the charge
port icon.
- On the Pilot Panel, select
>
ENERGY and press the OPEN
CHARGE PORT button.
- Use the Lucid mobile app.
- With a valid key fob detected within
6.5 feet (2 m) of the unlocked vehicle,
press the bottom of the charge port
door and it will open automatically.
The charge port door automatically
closes after unplugging the charging
cable; otherwise, you can gently push
upward on the bottom of the door until
automatic closing takes over.
High-Voltage Battery Pack & Charging148
Page 167 of 241

Electrical and High Voltage SafetyWARNING: Always disconnect the
charging cable before working
underneath the vehicle or the hood,
regardless of whether or not it
is charging. See Disconnecting the
Charging Cable on page 149.WARNING: Some cooling fans operate
even when the vehicle is powered off.
Keep hands, hair, clothing, and tools
clear of the fan blades at all times.
While your vehicle was built with the safety
of you and your occupants as first priority,
it is important to be aware of the risk of
injury associated with high-voltage systems
and protect yourself accordingly.
-Read and follow the directions on all
safety labels attached to the vehicle.
- There are no user-serviceable parts
in your high-voltage system. Do not
attempt to access the high-voltage
system or disassemble, remove, or
replace any system components. All
high-voltage cables are colored orange
for easy identification.
- In the event a high-voltage cable
or component becomes damaged,
never touch any high-voltage cables,
connectors, or components connected
to the cables. There is a risk of fatal
injury by burning and electrocution if the
system
Page 168 of 241
Maintenance Schedule
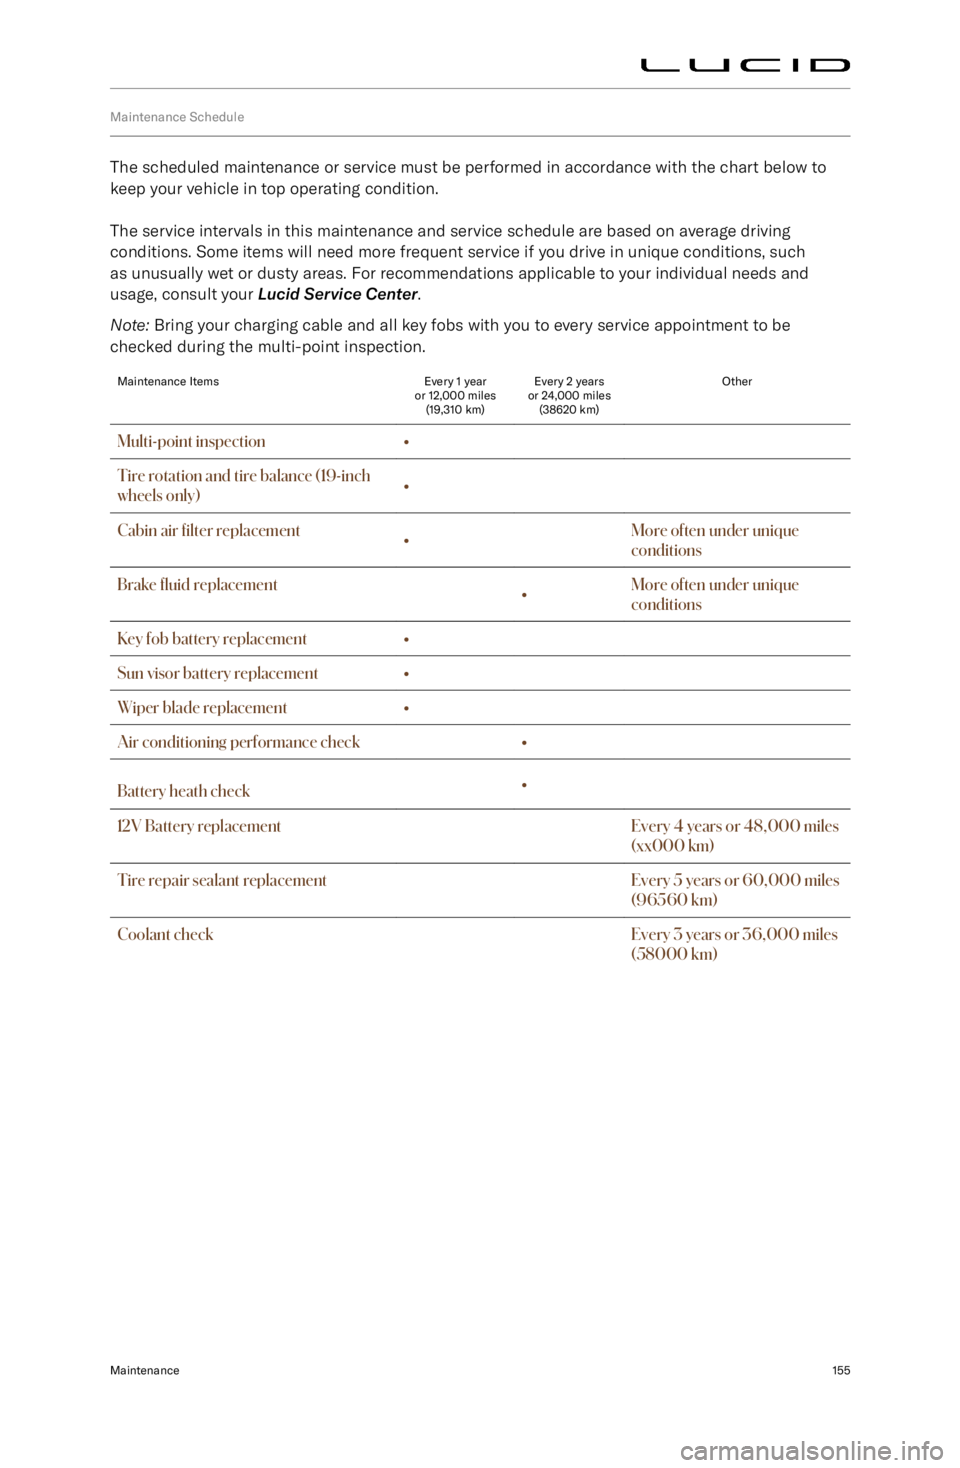
The scheduled maintenance or service must be performed in accordance with the chart below tokeep your vehicle in top operating condition.
The service intervals in this maintenance and service schedule are based on average driving
conditions. Some items will need more frequent service if you drive in unique conditions, such
as unusually wet or dusty areas. For recommendations applicable to your individual needs and
usage, consult your Lucid Service Center .
Note: Bring your charging cable and all key fobs with you to every service appointment to be
checked during the multi-point inspection.
Maintenance ItemsEvery 1 year
or 12,000 miles (19,310 km)Every 2 years
or 24,000 miles (38620 km)OtherMulti-point inspection
Page 169 of 241

Multi-Point Inspection
Your vehicle should be given a full multi-point
inspection service every 12 months or 12,000
miles (19300 km), whichever comes first.
Note: A message displays on the Cockpit
Panel to remind you to service your vehicle.
This service includes inspections and checks
for the following systems:
-Steering alignment
- Battery (12V) condition
- Battery pack (HV) condition
- Coolant condition
- Brake
fluid condition
- Brake rotors and pads wear
- Chassis bolts torque
- Closures (doors, hood, and trunk)
operation
- Condenser (check for debris)
- Electronic parking brake operation
- Heating, ventilation, and air conditioning
operation
- Horn
- Interior and exterior lights
- Key fob operation
- Seat belts operation
- Tire pressure and tire wear
- Visual signs of fluid leaks
- Wipers and washers
- Charging system and charging cable
- Firmware
Your vehicle will also be given a road test to inspect its current driving condition (such
as pedal operation, vehicle handling, and
steering alignment) and to check for any abnormal operational noises.WARNING: Your vehicle is equipped
with two 12V batteries. It