steering LUCID AIR 2022 User Guide
[x] Cancel search | Manufacturer: LUCID, Model Year: 2022, Model line: AIR, Model: LUCID AIR 2022Pages: 241, PDF Size: 5.15 MB
Page 80 of 241
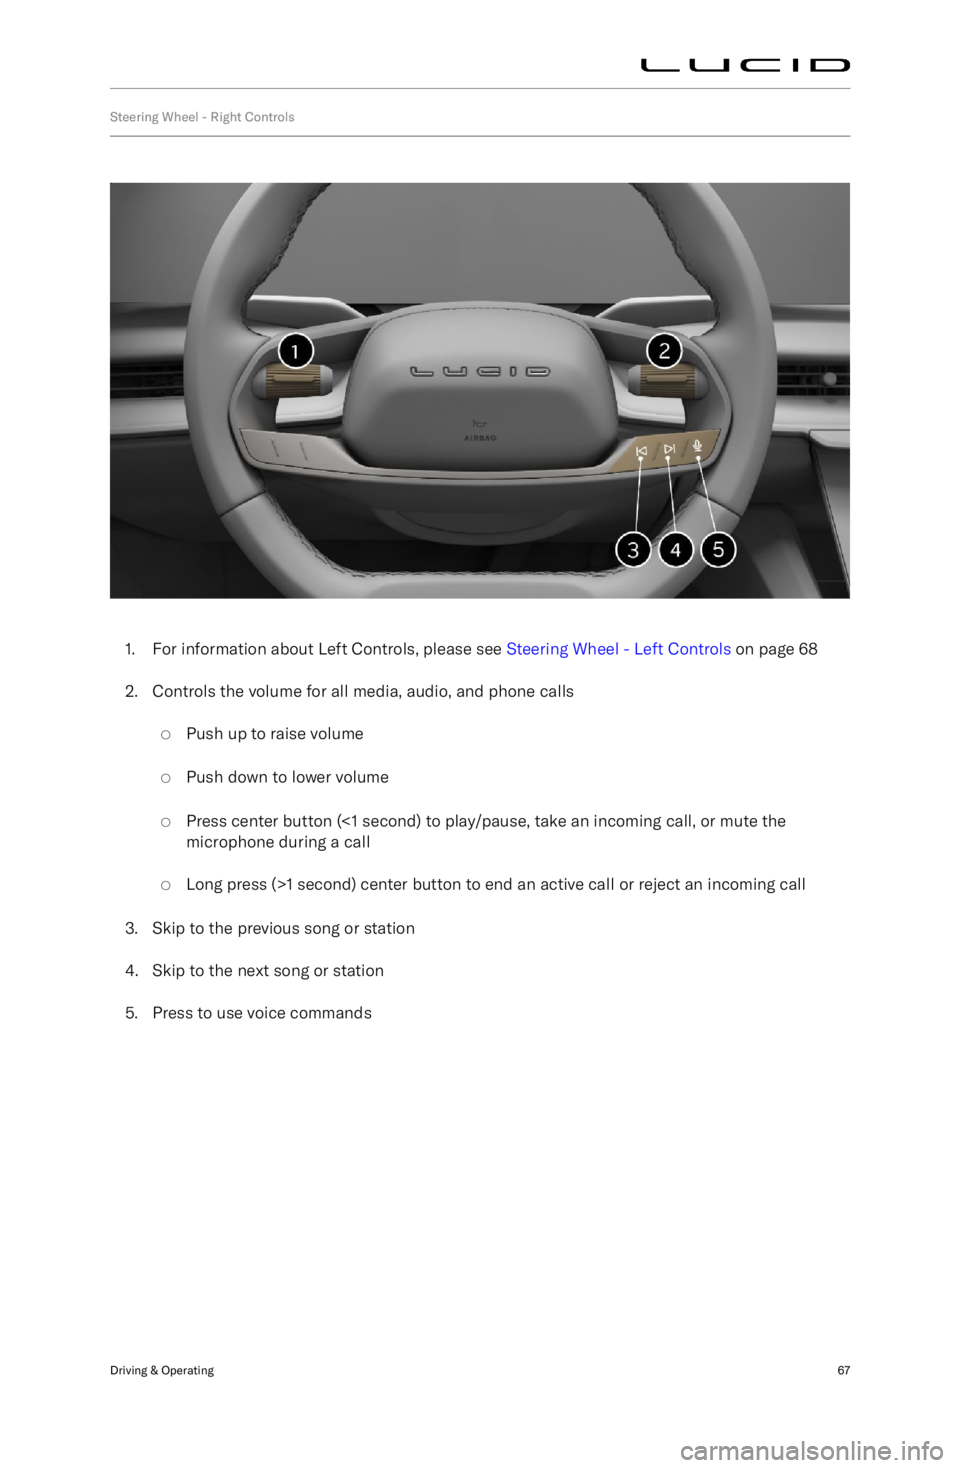
Steering Wheel - Right Controls
1. For information about Left Controls, please see Steering Wheel - Left Controls on page 68
2. Controls the volume for all media, audio, and phone calls
Page 81 of 241

Steering Wheel - Left Controls
1. Cancel cruise control.Set and adjust Adaptive Cruise Control
(ACC) cruising speed:
Page 82 of 241
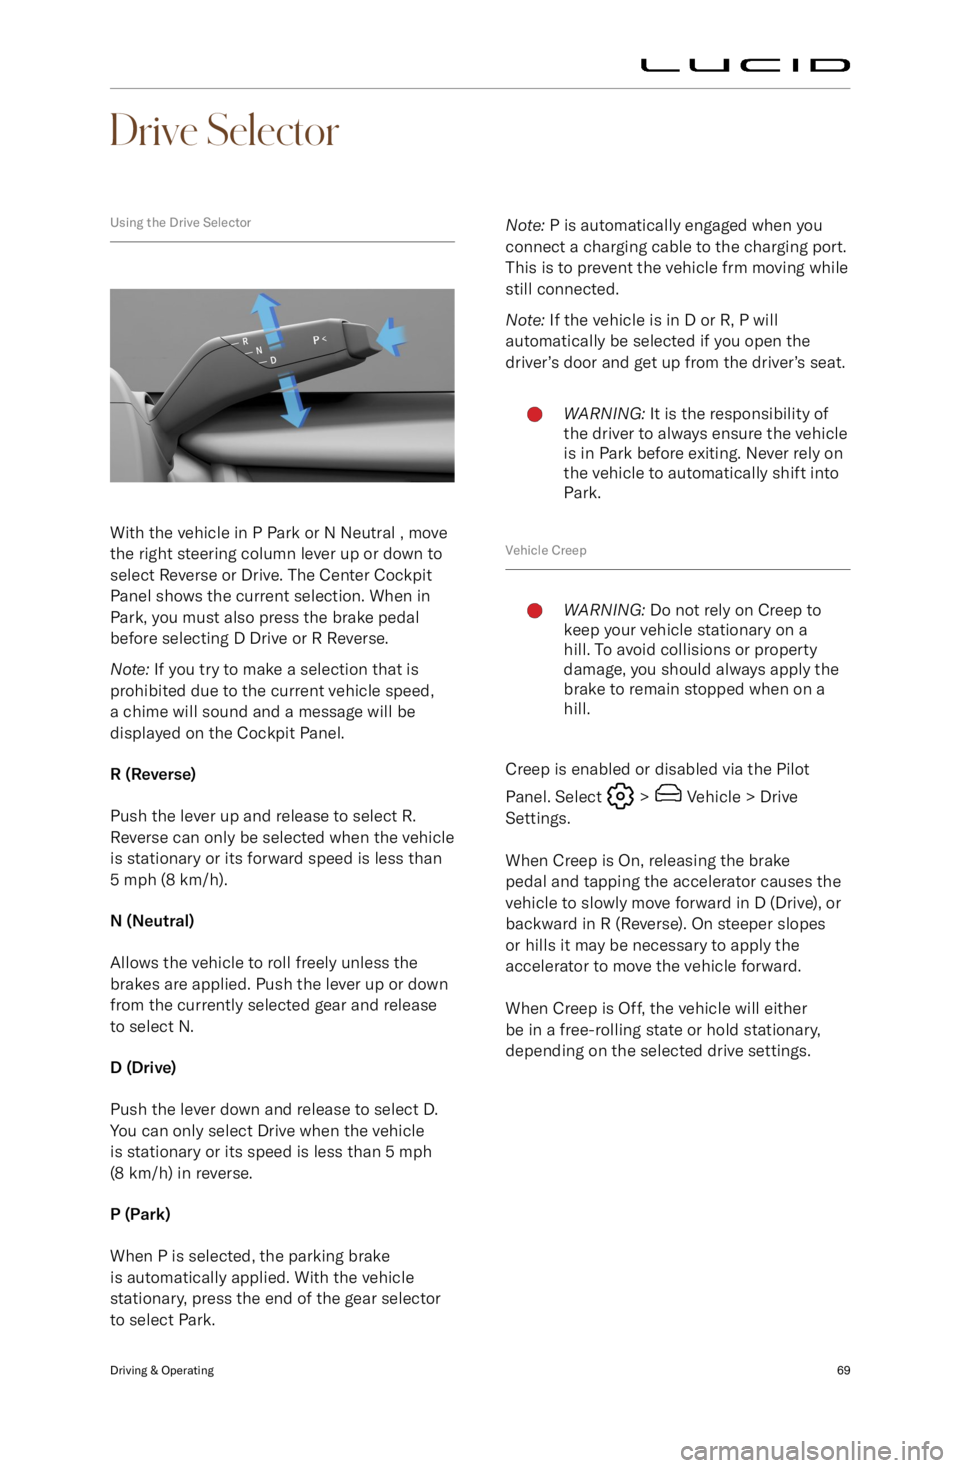
Drive Selector
Using the Drive Selector
With the vehicle in P Park or N Neutral , move
the right steering column lever up or down to
select Reverse or Drive. The Center Cockpit
Panel shows the current selection. When in
Park, you must also press the brake pedal
before selecting D Drive or R Reverse.
Note: If you try to make a selection that is
prohibited due to the current vehicle speed,
a chime will sound and a message will be displayed on the Cockpit Panel.
R (Reverse)
Push the lever up and release to select R.
Reverse can only be selected when the vehicle
is stationary or its forward speed is less than
5 mph (8 km/h).
N (Neutral)
Allows the vehicle to roll freely unless the
brakes are applied. Push the lever up or down
from the currently selected gear and release
to select N.
D (Drive)
Push the lever down and release to select D.
You can only select Drive when the vehicle
is stationary or its speed is less than 5 mph
(8 km/h) in reverse.
P (Park)
When P is selected, the parking brake is automatically applied. With the vehicle
stationary, press the end of the gear selector
to select Park.
Note: P is automatically engaged when you
connect a charging cable to the charging port.
This is to prevent the vehicle frm moving while
still connected.
Note: If the vehicle is in D or R, P will
automatically be selected if you open the
driver
Page 83 of 241
Drive Modes
Using Neutral
1. To shift out of park unlock the car witheither the keyfob, the nfc card, a pairedphone, or the phone app with correct
credentials.
2. Once the car is unlocked and powered on, you can open the driver door and
shift to neutral by pressing the brake
pedal and operating the shift lever.
The park brake will disengage, and the
vehicle will be ready to be pushed or
pulled.
3. If the electrical system of the vehicle is dead where the vehicle does not
wake up and unlock when asked for, the operator needs to connect a 12v jump-
start battery to the jump-start terminal so that operations A and B can be
conducted.
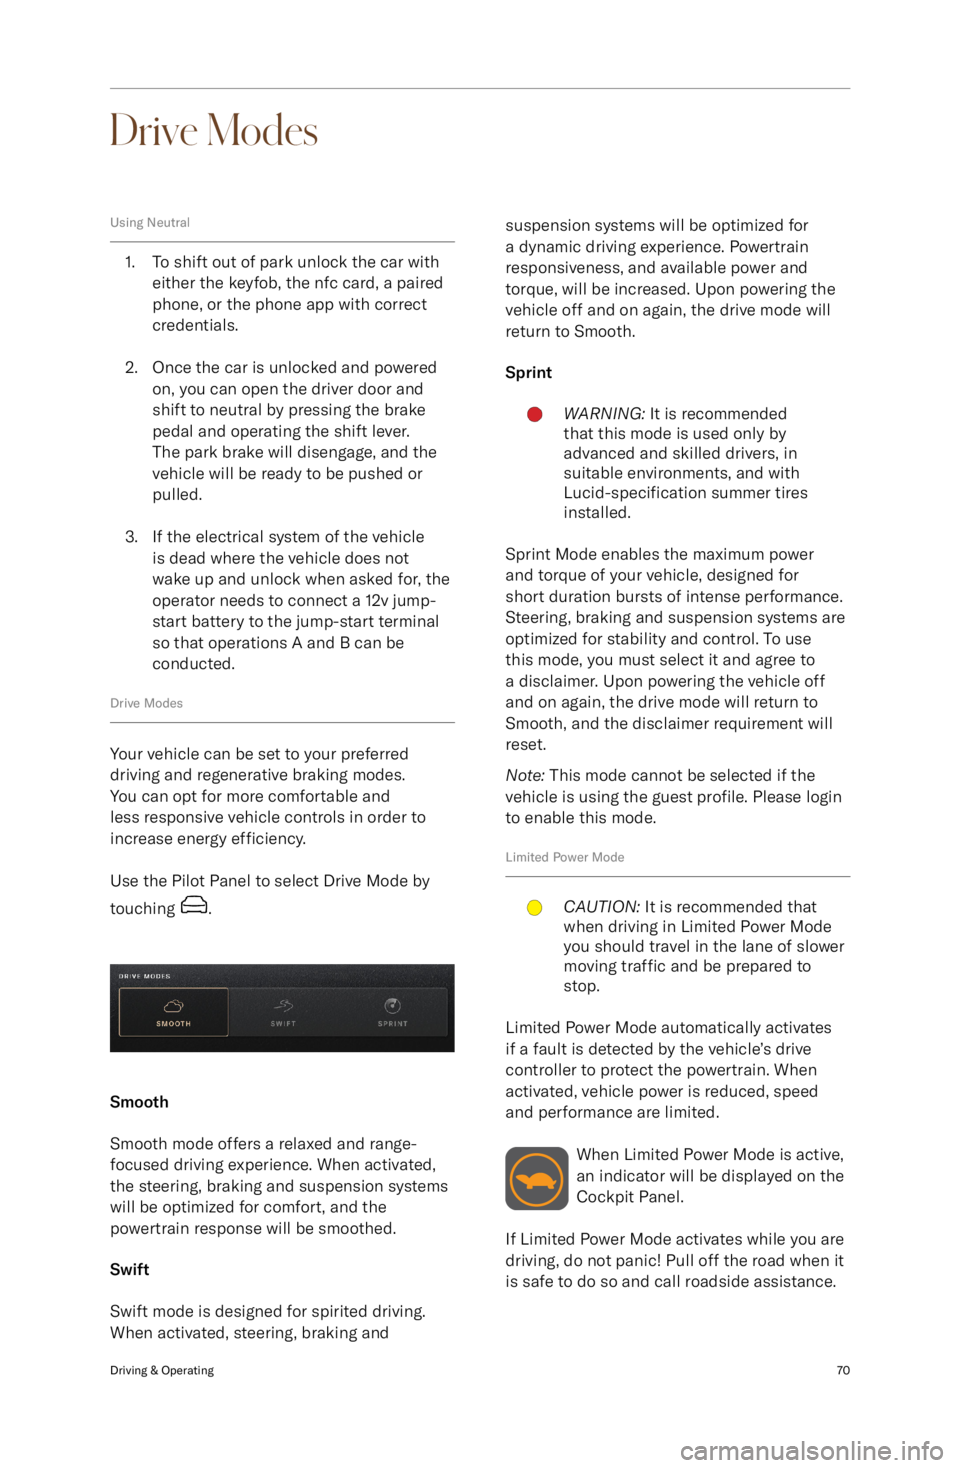
Drive Modes
Your vehicle can be set to your preferred
driving and regenerative braking modes.
You can opt for more comfortable and
less responsive vehicle controls in order to increase energy efficiency.
Use the Pilot Panel to select Drive Mode by
touching
.
Smooth
Smooth mode offers a relaxed and range-
focused driving experience. When activated,
the steering, braking and suspension systems
will be optimized for comfort, and the
powertrain response will be smoothed.
Swift
Swift mode is designed for spirited driving.
When activated, steering, braking and
suspension systems will be optimized for
a dynamic driving experience. Powertrain
responsiveness, and available power and
torque, will be increased. Upon powering the
vehicle off and on again, the drive mode will return to Smooth.
SprintWARNING: It is recommended
that this mode is used only by
advanced and skilled drivers, in
suitable environments, and with
Lucid-specification summer tires
installed.
Sprint Mode enables the maximum power
and torque of your vehicle, designed for
short duration bursts of intense performance.
Steering, braking and suspension systems are
optimized for stability and control. To use
this mode, you must select it and agree to
a disclaimer. Upon powering the vehicle off
and on again, the drive mode will return to
Smooth, and the disclaimer requirement will
reset.
Note: This mode cannot be selected if the
vehicle is using the guest profile. Please login
to enable this mode.
Limited Power Mode
CAUTION: It is recommended that
when driving in Limited Power Mode
you should travel in the lane of slower
moving traffic and be prepared to
stop.
Limited Power Mode automatically activates
if a fault is detected by the vehicle
Page 86 of 241
Exterior Lights
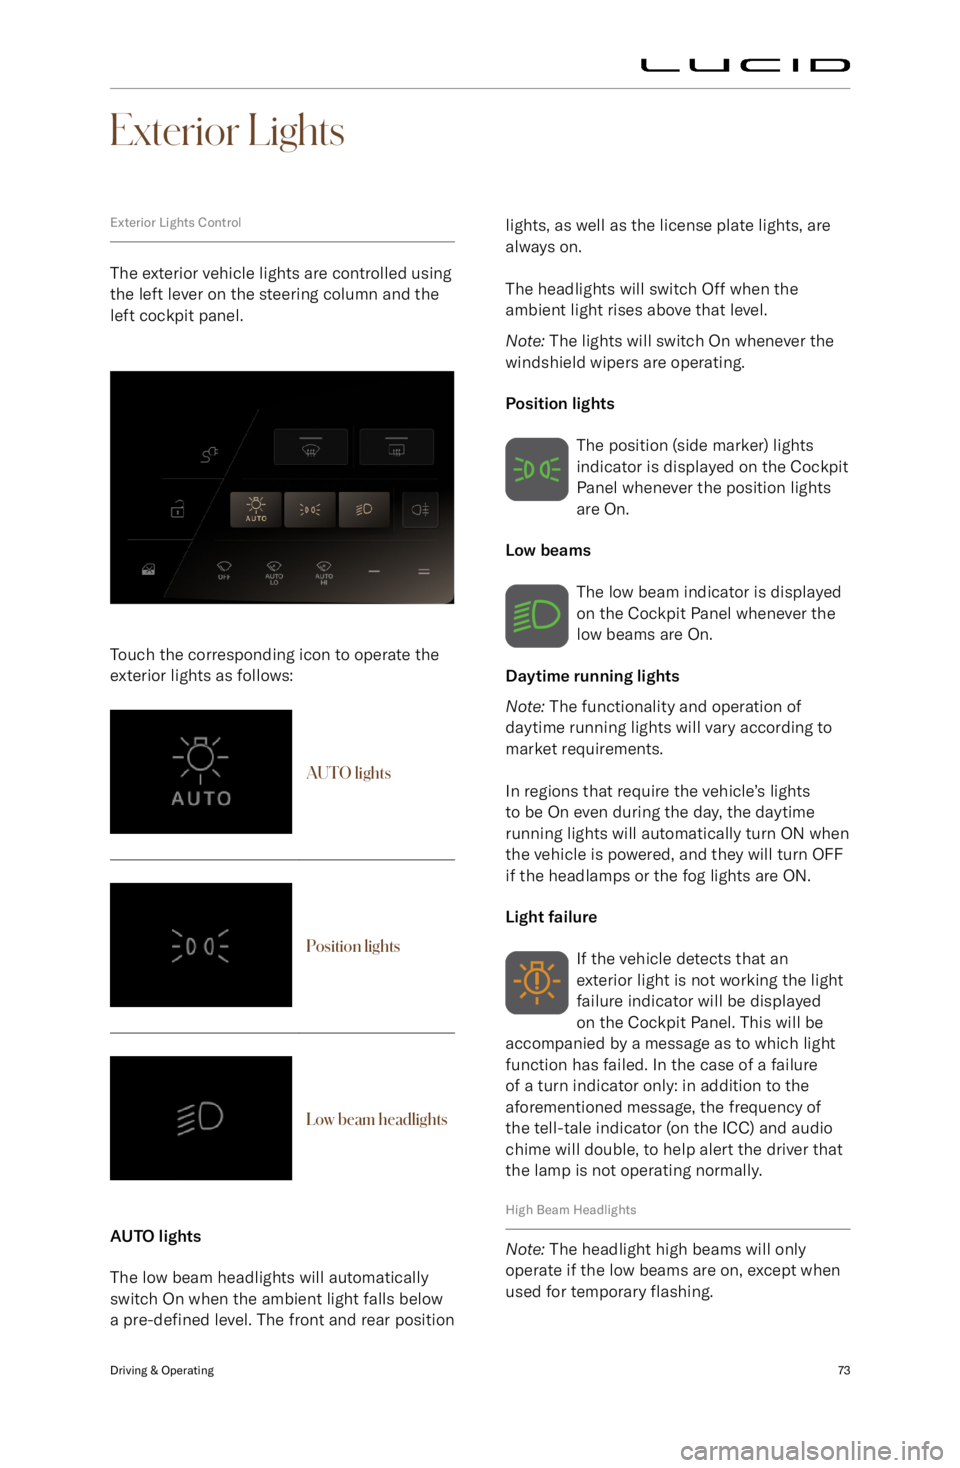
Exterior Lights Control
The exterior vehicle lights are controlled using
the left lever on the steering column and the
left cockpit panel.
Touch the corresponding icon to operate the exterior lights as follows:
AUTO lightsPosition lightsLow beam headlights
AUTO lights
The low beam headlights will automatically switch On when the ambient light falls below
a pre-defined level. The front and rear position
lights, as well as the license plate lights, are
always on.
The headlights will switch Off when the
ambient light rises above that level.
Note: The lights will switch On whenever the
windshield wipers are operating.
Position lights The position (side marker) lights
indicator is displayed on the Cockpit
Panel whenever the position lights
are On.
Low beams
The low beam indicator is displayed
on the Cockpit Panel whenever the
low beams are On.
Daytime running lights
Note: The functionality and operation of
daytime running lights will vary according to
market requirements.
In regions that require the vehicle
Page 87 of 241
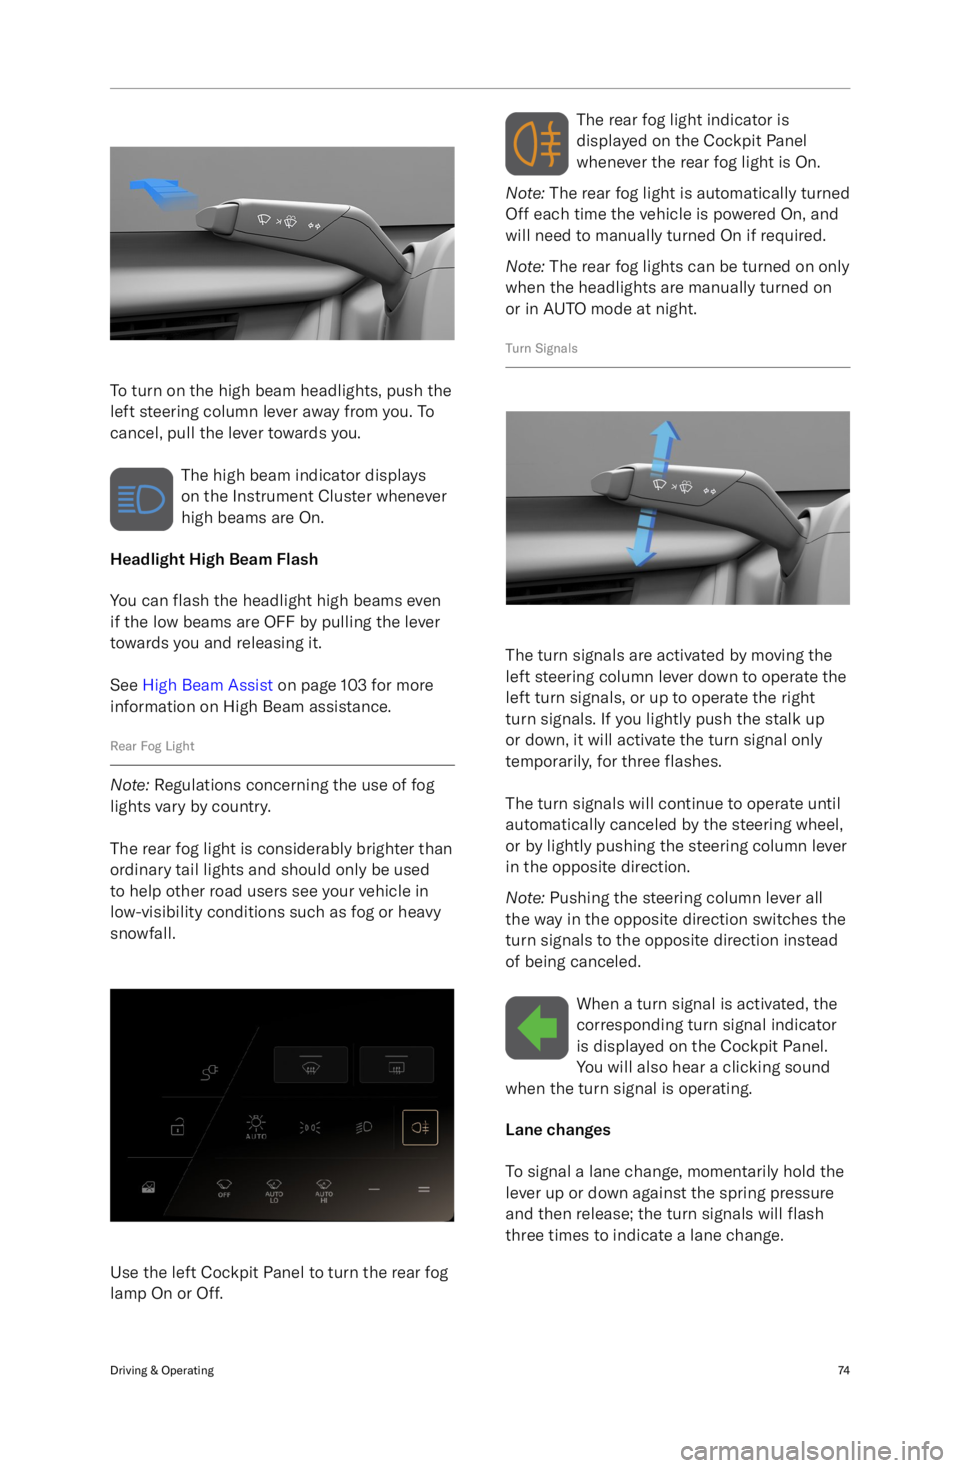
To turn on the high beam headlights, push the
left steering column lever away from you. To
cancel, pull the lever towards you.
The high beam indicator displays
on the Instrument Cluster whenever
high beams are On.
Headlight High Beam Flash
You can flash the headlight high beams even
if the low beams are OFF by pulling the lever
towards you and releasing it.
See High Beam Assist on page 103 for more
information on High Beam assistance.
Rear Fog Light
Note: Regulations concerning the use of fog
lights vary by country.
The rear fog light is considerably brighter than
ordinary tail lights and should only be used to help other road users see your vehicle in
low-visibility conditions such as fog or heavy
snowfall.
Use the left Cockpit Panel to turn the rear fog
lamp On or Off.
The rear fog light indicator is
displayed on the Cockpit Panel
whenever the rear fog light is On.
Note: The rear fog light is automatically turned
Off each time the vehicle is powered On, and
will need to manually turned On if required.
Note: The rear fog lights can be turned on only
when the headlights are manually turned on
or in AUTO mode at night.
Turn Signals
The turn signals are activated by moving the
left steering column lever down to operate the
left turn signals, or up to operate the right
turn signals. If you lightly push the stalk up
or down, it will activate the turn signal only
temporarily, for three flashes.
The turn signals will continue to operate until
automatically canceled by the steering wheel,
or by lightly pushing the steering column lever
in the opposite direction.
Note: Pushing the steering column lever all
the way in the opposite direction switches the
turn signals to the opposite direction instead
of being canceled.
When a turn signal is activated, thecorresponding turn signal indicator
is displayed on the Cockpit Panel.
You will also hear a clicking sound
when the turn signal is operating.
Lane changes
To signal a lane change, momentarily hold the
lever up or down against the spring pressure
and then release; the turn signals will flash
three times to indicate a lane change.
Driving & Operating74
Page 93 of 241
Vehicle Hold
Vehicle Hold controls brake settings, and cankeep your vehicle stopped even when your
foot is not on the brake pedal.
When set to HOLD, the vehicle remains
stationary after a stop. The brakes hold until
the driver presses the accelerator pedal again.
If set to ROLL, the car rolls freely after releasing the accelerator.
To configure, use the Pilot Panel and touch
> Vehicle > Drive Settings, then
select the desired mode.
Note: The default setting is HOLD, and can
only be changed when the vehicle is in
P (Park). The setting saves to your User
Profile.
Note: Vehicle Hold disengages if the driver
shifts into N (Neutral) or presses and releases
the brake pedal.
Note: Vehicle Hold will disengage and shift
into P (Park) in any of the following instances:
-Hold has been braking for approximately
10 minutes.
- The system detects that the driver has
exited the vehicle.
Parking Brake
CAUTION: In the unlikely event that
your vehicle loses electrical power,
you will not be able to select another
gear and therefore will be unable to
release the parking brake. Contact a
Lucid Service Center for assistance.
The parking brake operates on the rear wheels
only, and is independently controlled of the
pedal-operated brake system.
The parking brake automatically applies when
P (Park) is selected, and releases when any other gear is selected. It is also engaged by
certain systems when a time limit is reached. See Vehicle Hold on page 80.
The red parking brake indicator
is displayed on the Cockpit Panel
when the parking brake is engaged.
A flashing indicator signals either
operating wiht a fault, or a parking brake
stuck in operation.
If the indicator is amber, a fault
has been detected and the parking
brake may not be applied when the
vehicle is in P (Park). This will be
accompanied by a notification on the Cockpit
Panel. Contact a Lucid Service Center to have
the fault repaired.
Emergency useCAUTION: Driving the vehicle with the
parking brake applied, or repeated
use of the parking brake to slow the
vehicle, may cause serious damage to
the brake system.
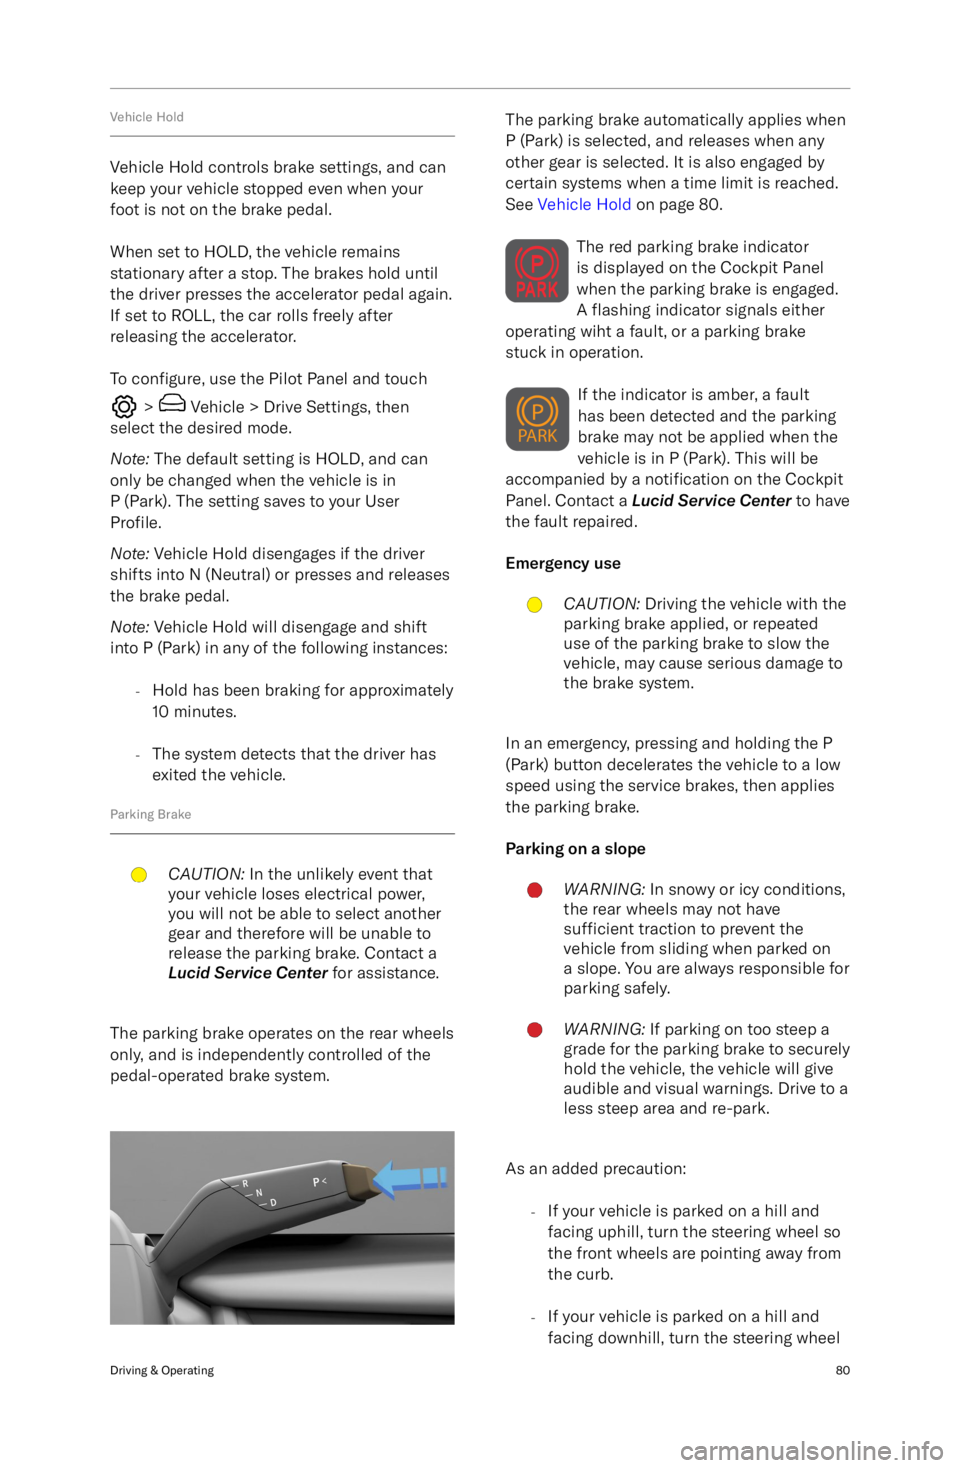
In an emergency, pressing and holding the P
(Park) button decelerates the vehicle to a low
speed using the service brakes, then applies
the parking brake.
Parking on a slope
WARNING: In snowy or icy conditions,
the rear wheels may not have
sufficient traction to prevent the
vehicle from sliding when parked on
a slope. You are always responsible for parking safely.WARNING: If parking on too steep a
grade for the parking brake to securely
hold the vehicle, the vehicle will give
audible and visual warnings. Drive to a
less steep area and re-park.
As an added precaution:
-If your vehicle is parked on a hill and
facing uphill, turn the steering wheel so
the front wheels are pointing away from
the curb.
- If your vehicle is parked on a hill and
facing downhill, turn the steering wheel
Driving & Operating80
Page 109 of 241
Driving Experience
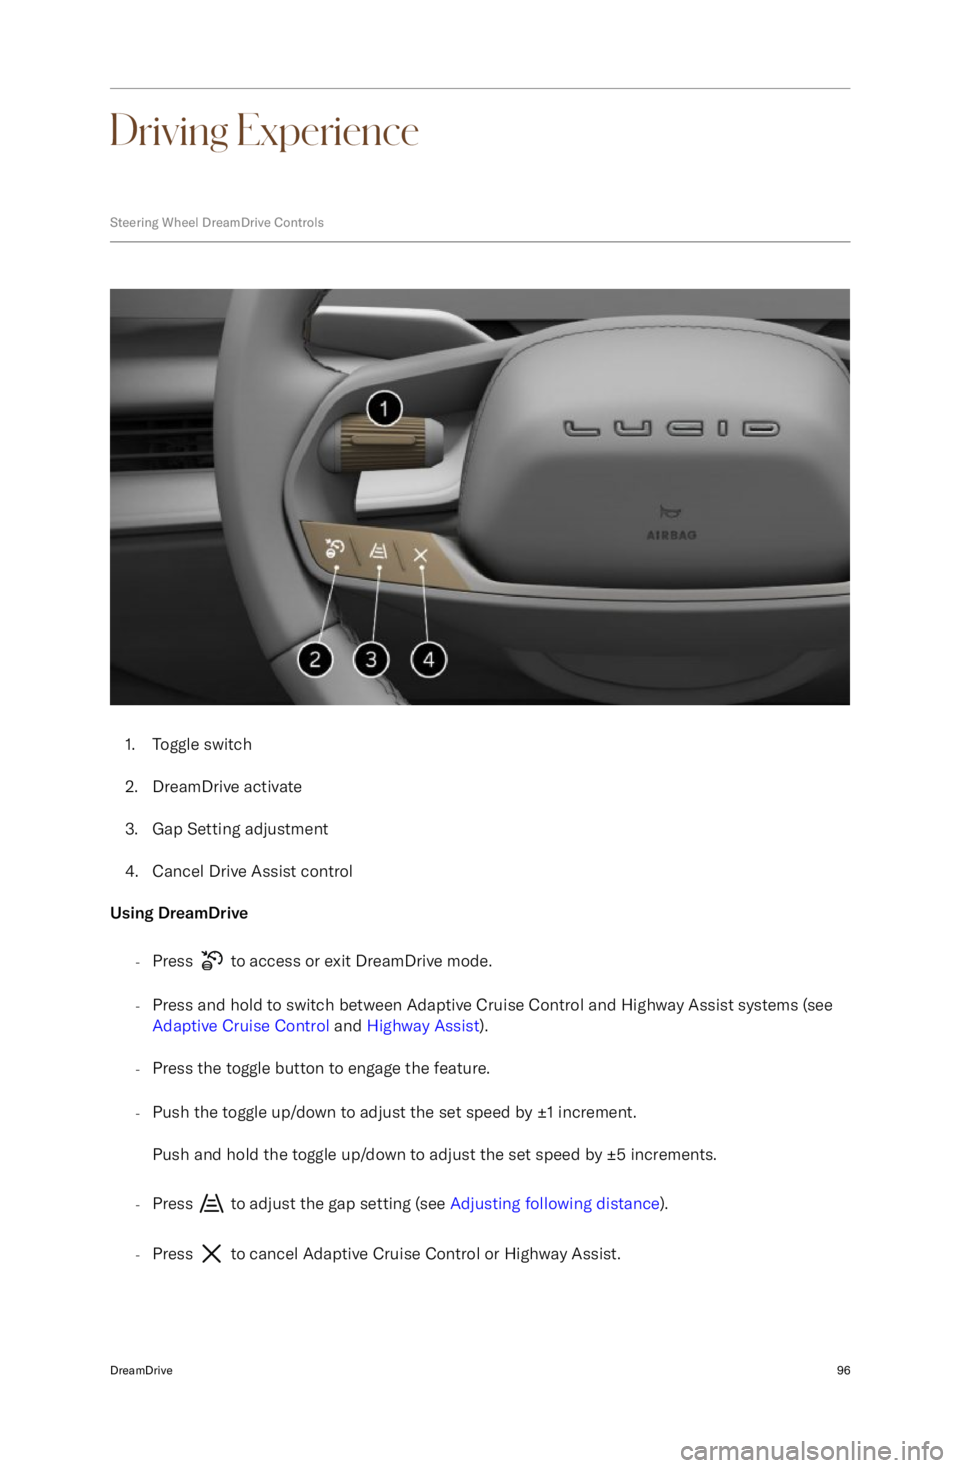
Steering Wheel DreamDrive Controls
1.Toggle switch
2. DreamDrive activate
3. Gap Setting adjustment
4. Cancel Drive Assist control
Using DreamDrive
-Press
to access or exit DreamDrive mode.
- Press and hold to switch between Adaptive Cruise Control and Highway Assist systems (see
Adaptive Cruise Control and Highway Assist ).
- Press the toggle button to engage the feature.
- Push the toggle up/down to adjust the set speed by
Page 111 of 241

ahead. The default distance maintained is
the furthest allowed. See Adjusting following
distance
Adaptive Cruise Control is primarily intended
for driving on dry, straight roads with no
stops or sharp curves, such as highways and
freeways.
If the adaptive Cruise Control cannot brake the vehicle safely, it will issue a takeover
request.
Note: If your vehicle stops behind another
vehicle and remains stationary for more than
10 minutes while Adaptive Cruise Control is
active, the system will disengage and apply the Emergency Parking Brake (EPB).
Setting and changing cruising speed To activate Adaptive Cruise Control, press the
DreamDrive button on the steering wheel.
See Steering Wheel DreamDrive Controls .
Note: The DreamDrive mode defaults to
Highway Assist for first-time users. When a
User Profile is active, the system will go to
the last used DreamDrive mode (Adaptive
Cruise Control or Highway Assist). If Highway
Assist is activated, press and hold the
. DreamDrive button to switch to Adaptive
Cruise Control.
To set the cruising speed: -Push the left toggle up or down to adjust
speed by
Page 114 of 241
Cruise Control and Highway Assist will be
unavailable until the next drive cycle.
Once an in-lane stop has completed: -The vehicle automatically shifts into P
(Park).
- Highway Assist is canceled.
- DreamDrive will be unavailable until the
next drive cycle.
- All doors unlock.
- An audible alert sounds.
Note: Warnings will be dismissed if the vehicle
is shifted out of P (Park). See Using the Drive
Selector on page 69.
Steering override
While Highway Assist is active, you can
temporarily override it by using the steering wheel. When you turn the steering wheel, the
Highway Assist indicator will gray out on the
Cockpit Panel.
Once the steering wheel returns to its neutral
position, the vehicle is centered in the lane,
and the system detects lanes again, Highway Assist should automatically resume and the
Cockpit Panel will return to displaying the
active Highway Assist mode.
Manually canceling Highway Assist To cancel Highway Assist, press the
Cancel button on the steering wheel.
The system can also be canceled by pressing
the brake pedal if it is safe to do so in the current traffic conditions.
Traffic Sign Recognition
WARNING: Traffic Sign Recognition
is an assist feature only. The driver
is responsible for paying attention
to the road signs and determining
the appropriate speed limit, road
conditions, and driving speed.WARNING: Traffic Sign Recognition is
not available in all countries.WARNING: Map data is not always
accurate. The GPS can miscalculatethe vehicle location, which may
provide an incorrect traffic sign.WARNING: If a road or a traffic
sign has recently been changed, the
Traffic Sign Recognition system may
not be fully functional or may provide
inaccurate information.WARNING: In situations where the
Traffic Sign Recognition system is
unable to determine a traffic sign, or if
it is uncertain that an acquired speed
limit is accurate, the system may not
display the information and warnings
may not take effect.
The Traffic Sign Recognition system uses the
front cameras and navigation system data to
recognize traffic signs on the road, providing
you with driving information such as speed limits and other regulations.
When a traffic sign is detected, it displays on
the Cockpit Panel next to the speedometer.
Speed Limit Alerts
When Speed Limit Alert is enabled (see Speed
Limit Alert Settings ), if the current vehicle
speed exceeds the detected speed limit, the display color of the speed limit sign willchange color and may increase in size. Thedisplay will return to the normal color and
size when the vehicle is slowed to within the
speed limit.
Wrong-way warnings
If a Wrong Way road sign is detected and the
vehicle passes the sign, the system will alert you with an audible alert and a notification on
the Cockpit Panel.
Speed Limit Alert settings To configure Speed Limit Alert settings,
use the Pilot Panel and touch
>
DreamDrive.
- Touch to enable or disable Speed Limit
Alert. Additional options to receive
VISUAL or VISUAL AND AUDIO alerts are available when this feature is
enabled.
- Touch to enable or disable Cruise Speed
Update. When enabled, this feature
DreamDrive101