radio LUCID AIR 2022 Owners Manual
[x] Cancel search | Manufacturer: LUCID, Model Year: 2022, Model line: AIR, Model: LUCID AIR 2022Pages: 241, PDF Size: 5.15 MB
Page 8 of 241
Removing Secondary User Profiles120
Factory Reset 120
Changing Display Settings 121
Media and Audio 122
Media Overview 122 Physical Media Controls 123
Searching Media Content 125
AM and FM Radio 125
Logging into Media Applications 126
Playing Media from Devices 126
Audio Settings 127
Using Alexa 128
Alexa Built-In 128
Maps and Navigation 129
Navigation Overview 129
Navigation Settings 129
Navigating 130
Adjusting the Map 131
Predicting Energy Usage 132
Setting Home and Work Destinations 132 Map Updates and Offline Mode 133
Phone and Smart Devices 134 Bluetooth
Page 103 of 241
user is encouraged to try to correct the
interference by one or more of the following
measures:
-Reorient or relocate the receiving
antenna.
- Increase the separation between the
equipment and receiver.
- Connect the equipment into an outlet on
a circuit different from that to which thereceiver is connected.
- Consult the dealer or an experienced
radio/TV technician for help.
12 Volt Power SocketWARNING: Close the cover when not
in use. If this outlet is mishandled, it
may cause an electric shock.CAUTION: The 12 Volt power socket
should not be used with a cigarette
lighter. Lighters could potentially
cause heat damage to the socket.
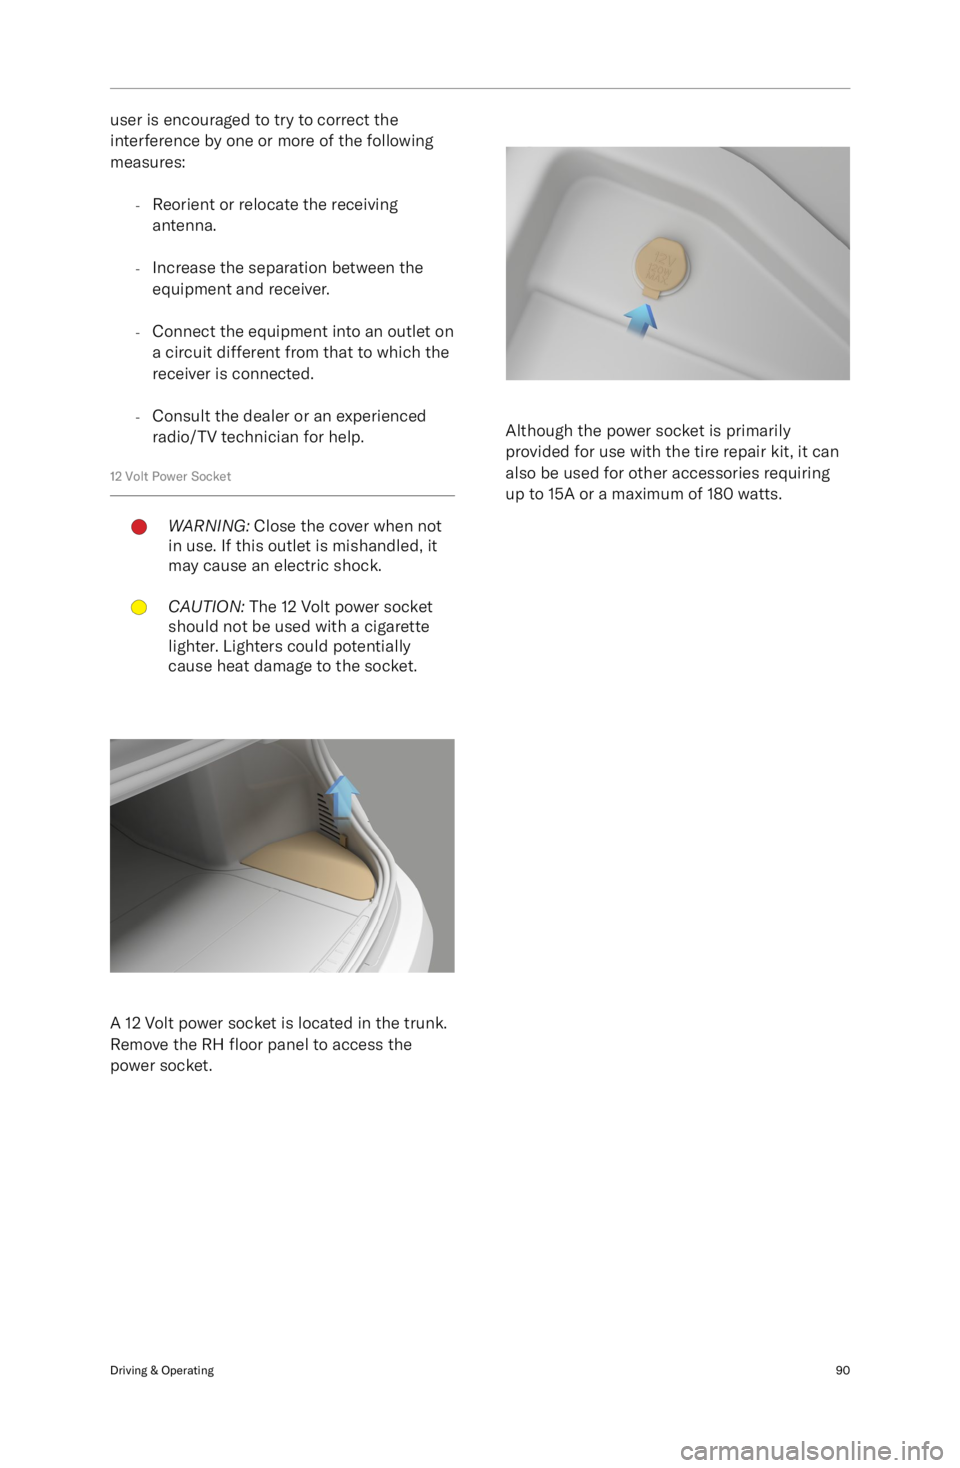
A 12 Volt power socket is located in the trunk.
Remove the RH floor panel to access the
power socket.
Although the power socket is primarily
provided for use with the tire repair kit, it can
also be used for other accessories requiring
up to 15A or a maximum of 180 watts.
Driving & Operating90
Page 136 of 241
Physical Media Controls
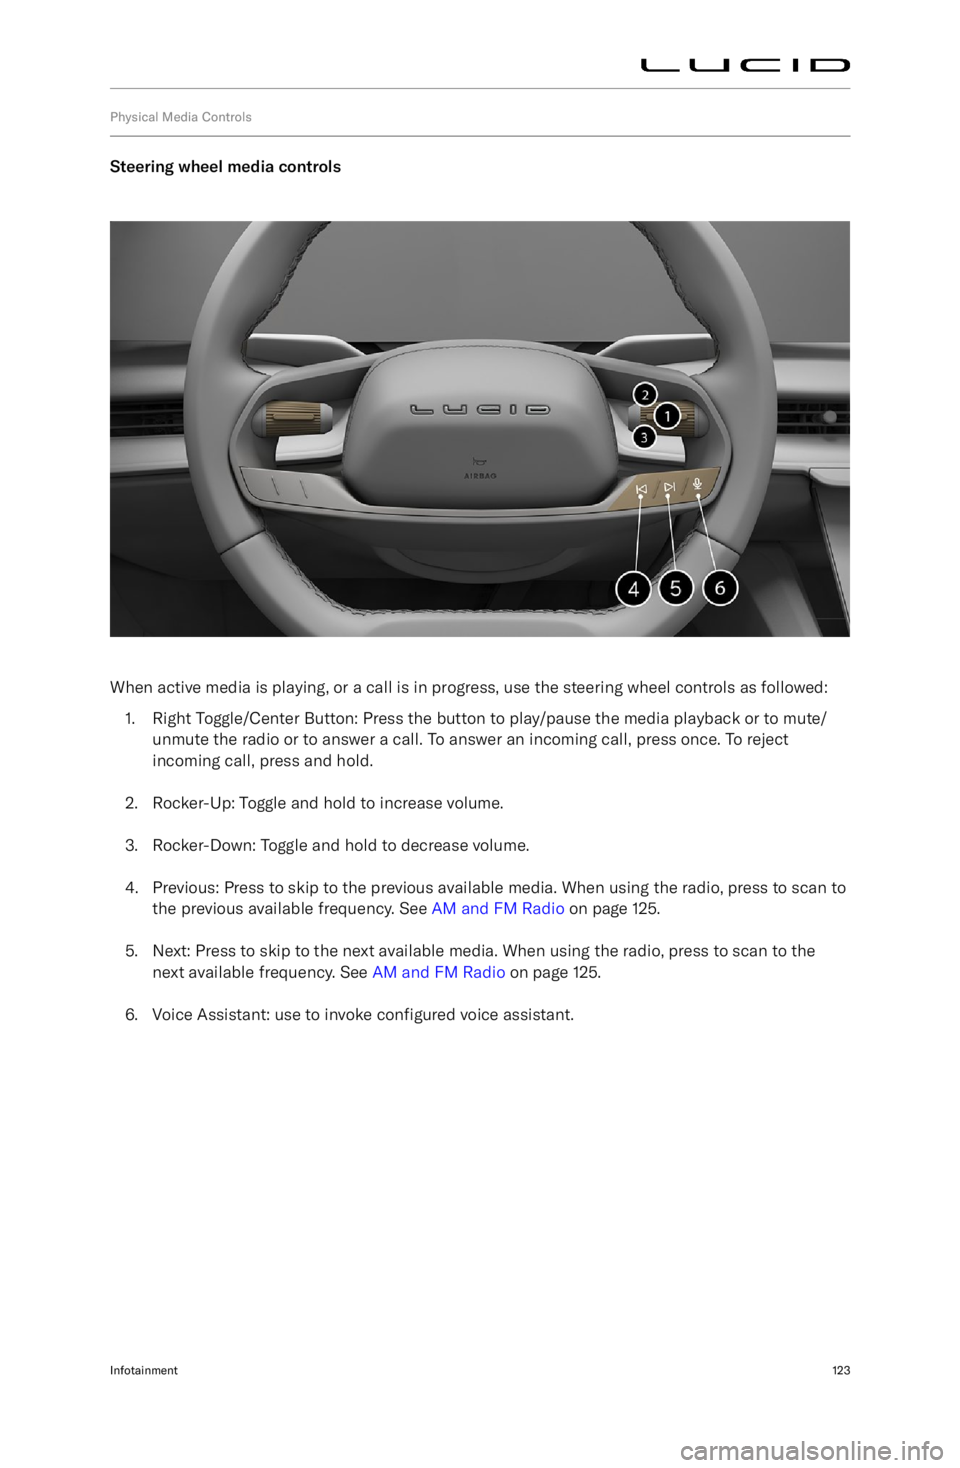
Steering wheel media controls
When active media is playing, or a call is in progress, use the steering wheel controls as followed:1. Right Toggle/Center Button: Press the button to play/pause the media playback or to mute/
unmute the radio or to answer a call. To answer an incoming call, press once. To reject
incoming call, press and hold.
2. Rocker-Up: Toggle and hold to increase volume.
3. Rocker-Down: Toggle and hold to decrease volume.
4. Previous: Press to skip to the previous available media. When using the radio, press to scan to the previous available frequency. See AM and FM Radio on page 125.
5. Next: Press to skip to the next available media. When using the radio, press to scan to the next available frequency. See AM and FM Radio on page 125.
6. Voice Assistant: use to invoke configured voice assistant.
Infotainment123
Page 138 of 241
Searching Media Content
When media applications are opened on the
Pilot Panel, use the
search bar to search
for a particular song, album, artist, station,
or podcast. Note that search may not be
available for a particular media source.
Note: Search functions are not available when
the vehicle is not in P (Park).
AM and FM Radio
About HD Radio
Page 139 of 241
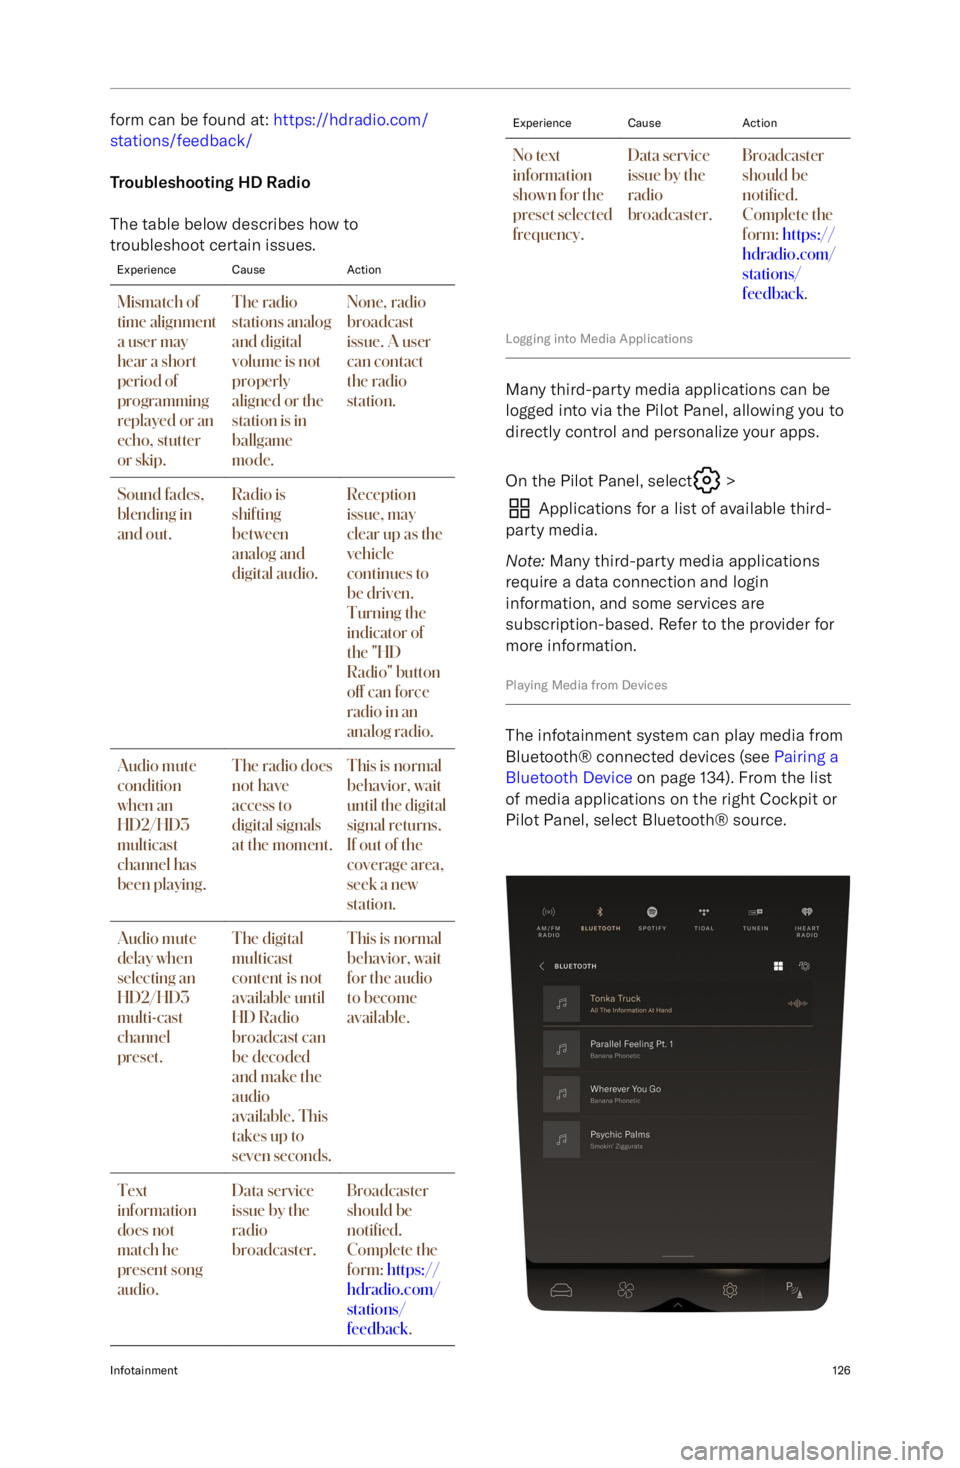
form can be found at: https://hdradio.com/
stations/feedback/
Troubleshooting HD Radio
The table below describes how to
troubleshoot certain issues.ExperienceCauseActionMismatch of
time alignment
a user may
hear a short
period of
programming
replayed or an
echo, stutter
or skip.The radio
stations analog
and digital
volume is not
properly
aligned or the
station is in
ballgame
mode.None, radio
broadcast
issue. A user
can contact
the radio
station.Sound fades,
blending in
and out.Radio is
shifting
between
analog and
digital audio.Reception
issue, may
clear up as the
vehicle
continues to
be driven.
Turning the
indicator of
the "HD
Radio" button
off can force
radio in an
analog radio.Audio mute
condition
when an
HD2/HD3
multicast
channel has
been playing.The radio does
not have
access to
digital signals
at the moment.This is normal
behavior, wait
until the digital
signal returns.
If out of the
coverage area,
seek a new
station.Audio mute
delay when
selecting an
HD2/HD3
multi-cast
channel
preset.The digital
multicast
content is not
available until
HD Radio
broadcast can
be decoded
and make the
audio
available. This
takes up to
seven seconds.This is normal
behavior, wait
for the audio
to become
available.Text
information
does not
match he
present song
audio.Data service
issue by the
radio
broadcaster.Broadcaster
should be
noti
Page 151 of 241
HomeLink
What is HomeLink?
HomeLink is a wireless control system that
enables you to remotely operate up to
15 Radio Frequency (RF) devices, such as
garage doors, gates, lights, and home security systems.
Additional system information can be found
online at www.homelink.com .
HomeLink FCC/ISED Advisory
FCC (USA) and ISED (Canada)
This device complies with FCC rules part
15 and Innovation, Science, and Economic
Development Canada RSS-210. Operation is subject to the following two conditions:
(1) This device may not cause harmful
interference, and (2) This device must
accept any interference that may be
received including interference that may
cause undesired operation. WARNING: The
transmitter has been tested and complies
with FCC and ISED rules. Changes or
modifications not expressly approved by the
party responsible for compliance could void
the user
Page 194 of 241
Tire Pressure Monitoring System
Tire Pressure Monitoring System (TPMS)WARNING: The TPMS is not a
substitute for manually checking tire
pressures. The TPMS only provides a
tire pressure warning and does not re-
inflate the tires.WARNING: The TPMS cannot register
damage to a tire. Regularly check the
condition of your tires.WARNING: Using liquid or aerosol tire
sealants may cause a malfunction of
tire pressure sensors.
The TPMS monitors the pressure of the
tires using sensors located in each wheel.
In-vehicle sensors receive TMPS data using
Radio Frequency (RF) signals.
Note: Installing accessories that are not
approved by Lucid may interfere with the
TPMS system.
Tire pressure warnings are displayed
on the Cockpit Panel using an
amber warning indicator. A warning
chime will sound, and a warning
message will display to alert you to a problem.
The tire pressure warning indicator will
illuminate if a tire is under-inflated.
If the tire pressure warning indicator
illuminates, stop and check your tires as soon as possible and inflate them to the correct
pressure. If the tire pressure warning occurs
frequently, the cause must be determined and rectified.
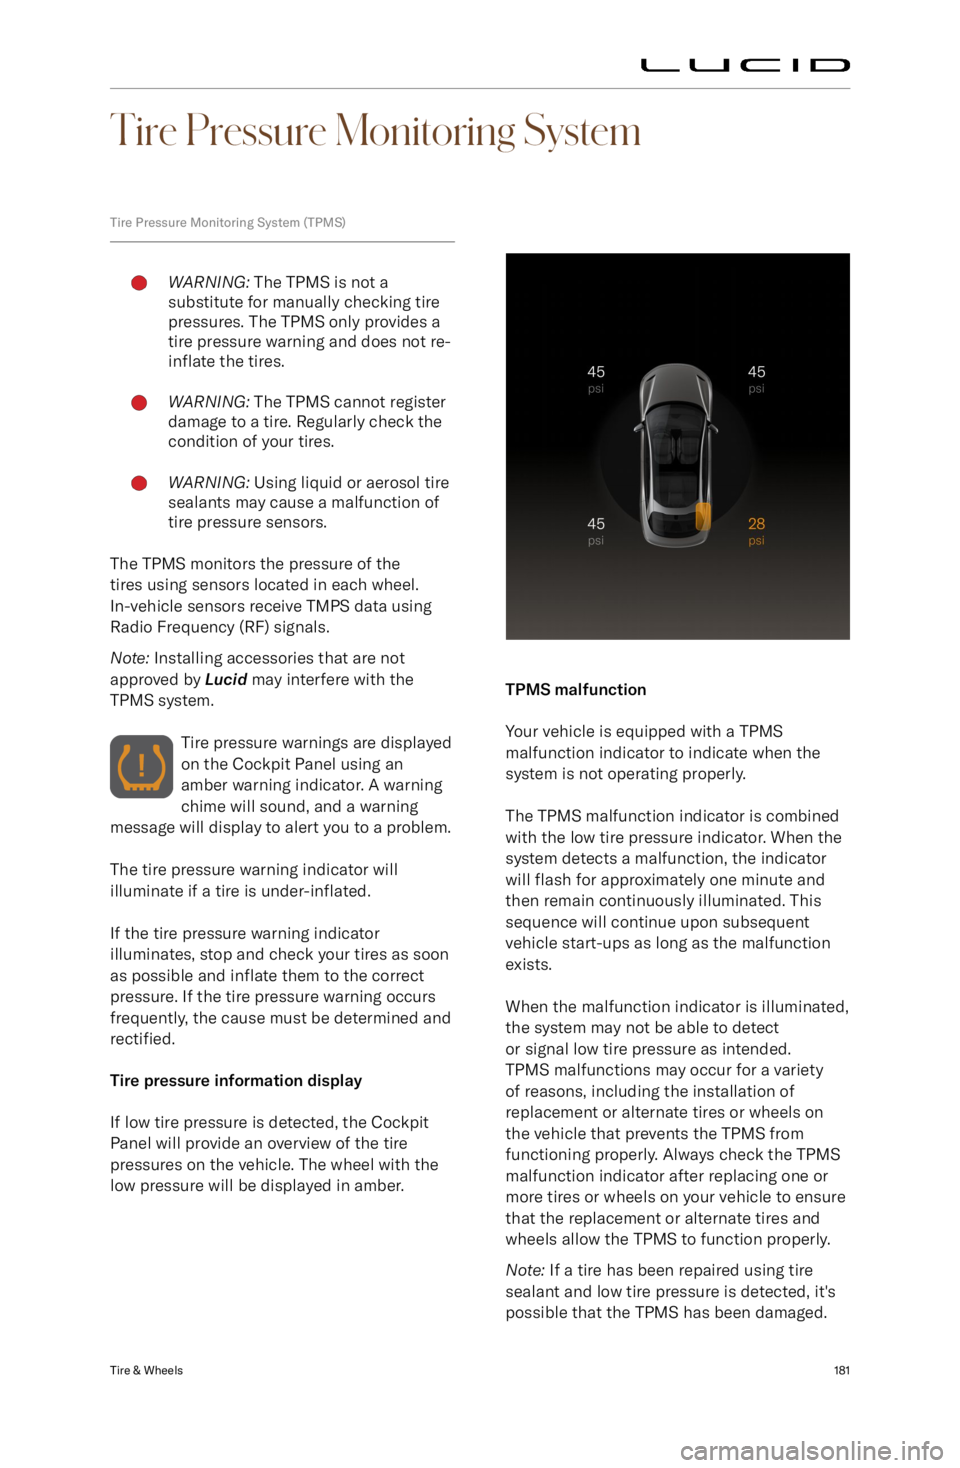
Tire pressure information display
If low tire pressure is detected, the Cockpit
Panel will provide an overview of the tire
pressures on the vehicle. The wheel with the low pressure will be displayed in amber.
TPMS malfunction
Your vehicle is equipped with a TPMS
malfunction indicator to indicate when the system is not operating properly.
The TPMS malfunction indicator is combined
with the low tire pressure indicator. When the system detects a malfunction, the indicatorwill flash for approximately one minute and
then remain continuously illuminated. This
sequence will continue upon subsequent
vehicle start-ups as long as the malfunction
exists.
When the malfunction indicator is illuminated,
the system may not be able to detect
or signal low tire pressure as intended.
TPMS malfunctions may occur for a variety
of reasons, including the installation of
replacement or alternate tires or wheels on
the vehicle that prevents the TPMS from
functioning properly. Always check the TPMS
malfunction indicator after replacing one or
more tires or wheels on your vehicle to ensure that the replacement or alternate tires and
wheels allow the TPMS to function properly.
Note: If a tire has been repaired using tire
sealant and low tire pressure is detected, it
Page 231 of 241

against harmful interference in a residential installation. This equipment generates uses and can
radiate radio frequency energy and, if not installed and used in accordance with the instructions,
may cause harmful interference to radio communications. However, there is no guarantee that
interference will not occur in a particular installation. If this equipment does cause harmful
interference to radio or television reception, which can be determined by turning the equipment off and on, the user is encouraged to try to correct the interference by one of the following measures:
-Reorient or relocate the receiving antenna.
- Increase the separation between the equipment and receiver.
- Connect the equipment into an outlet on a circuit different from that to which the receiver is
connected.
- Consult the dealer or an experienced radio/TV technician for help.
FCC Part 15 Clause 15.21
Changes or modifications not expressly approved by the party responsible for compliance could
void the user