run flat LUCID AIR 2022 Owners Manual
[x] Cancel search | Manufacturer: LUCID, Model Year: 2022, Model line: AIR, Model: LUCID AIR 2022Pages: 241, PDF Size: 5.15 MB
Page 189 of 241

Tire Care and Maintenance
Inspecting and Maintaining TiresWARNING: The tires should be
regularly checked for wear and to
make sure that there are no cuts,
bulges, or exposure of the ply/cord
structure. Do not drive with tires that
are worn, damaged, or inflated to
the incorrect pressure. Driving under
any of these conditions could lead to
collision due to tire failure and/or loss
of control and result in serious injury
or death to the occupants or others.
Always consider tire conditions when driving,
and regularly inspect the tread and sidewalls for any sign of distortion (bulges), cuts, or
wear.
Good driving practice will improve the
mileage you obtain from your tires and avoid
unnecessary damage.
-Always ensure that the tire pressures
are correctly adjusted.
- Always observe the posted speed limits
and advisory speeds.
- Avoid pulling away quickly or hard
acceleration.
- Avoid making fast turns or braking
sharply.
- Avoid potholes and objects on the road.
- Do not run over curbs or hit the tire
against the curb when parking.
CAUTION: Avoid contaminating tires
with vehicle fluids that can cause
damage.
Tire wear
WARNING: The tire wear indicators
show the minimum tread depth
recommended by the tire
manufacturer. Tires that have worn
to this point will have reduced
grip and poor water displacement
characteristics.
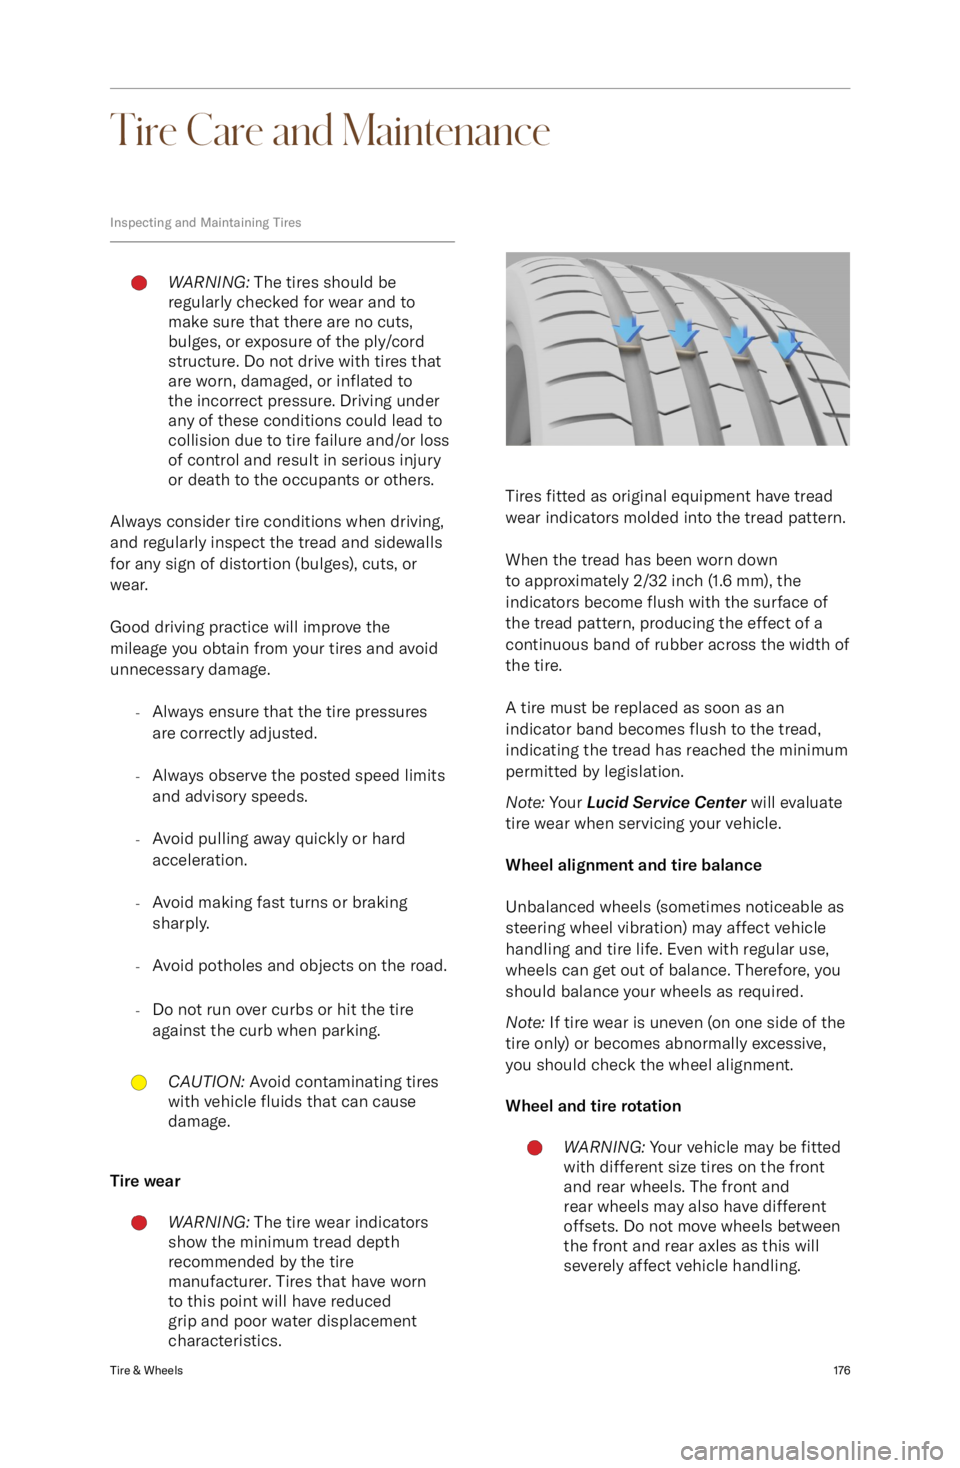
Tires fitted as original equipment have tread
wear indicators molded into the tread pattern.
When the tread has been worn down
to approximately 2/32 inch (1.6 mm), the
indicators become flush with the surface of
the tread pattern, producing the effect of a
continuous band of rubber across the width of
the tire.
A tire must be replaced as soon as an
indicator band becomes flush to the tread,
indicating the tread has reached the minimum
permitted by legislation.
Note: Your Lucid Service Center will evaluate
tire wear when servicing your vehicle.
Wheel alignment and tire balance
Unbalanced wheels (sometimes noticeable as
steering wheel vibration) may affect vehicle
handling and tire life. Even with regular use,
wheels can get out of balance. Therefore, you
should balance your wheels as required.
Note: If tire wear is uneven (on one side of the
tire only) or becomes abnormally excessive, you should check the wheel alignment.
Wheel and tire rotation
WARNING: Your vehicle may be fitted
with different size tires on the front and rear wheels. The front and
rear wheels may also have different
offsets. Do not move wheels between
the front and rear axles as this will
severely affect vehicle handling.Tire & Wheels176
Page 211 of 241

Tow Truck Mode
When loading and unloading the vehicle onto
a flatbed tow truck, put the vehicle in Tow
Truck Mode. This can be done on the Pilot
Panel by navigating to Settings > Vehicle and
toggling Tow Truck Mode.
Tow Truck Mode disables the emergency
parking brake, disables the alarm, and shifts
the vehicle into neutral to allow for transport
on and off the flatbed truck.
Lucid recommends that Tow Truck Mode
remain active until after transportation has been completed.
Pulling the Vehicle onto a Trailer or TransporterCAUTION: Under no circumstances
should the vehicle be towed using
the vehicle recovery eye. Doing so
can cause significant damage to your
vehicle.CAUTION: Incorrect installation of the
recovery eye can cause it to become
detached while pulling the vehicle,
resulting in significant damage.WARNING: If the recovery eye mount
is not accessible and the vehicle
is recovered by attaching to a
frame, suspension, or other means,
the vehicle may sustain damage.
Inspect the vehicle and ensure it is
safe to operate.The Towing provider
MUST document the method of
vehicle recovery, whether using the
recovery eye, attachment to the body,
suspension, or other means.Failure to
do so could result in a hazardous
situation when operating the vehicle.
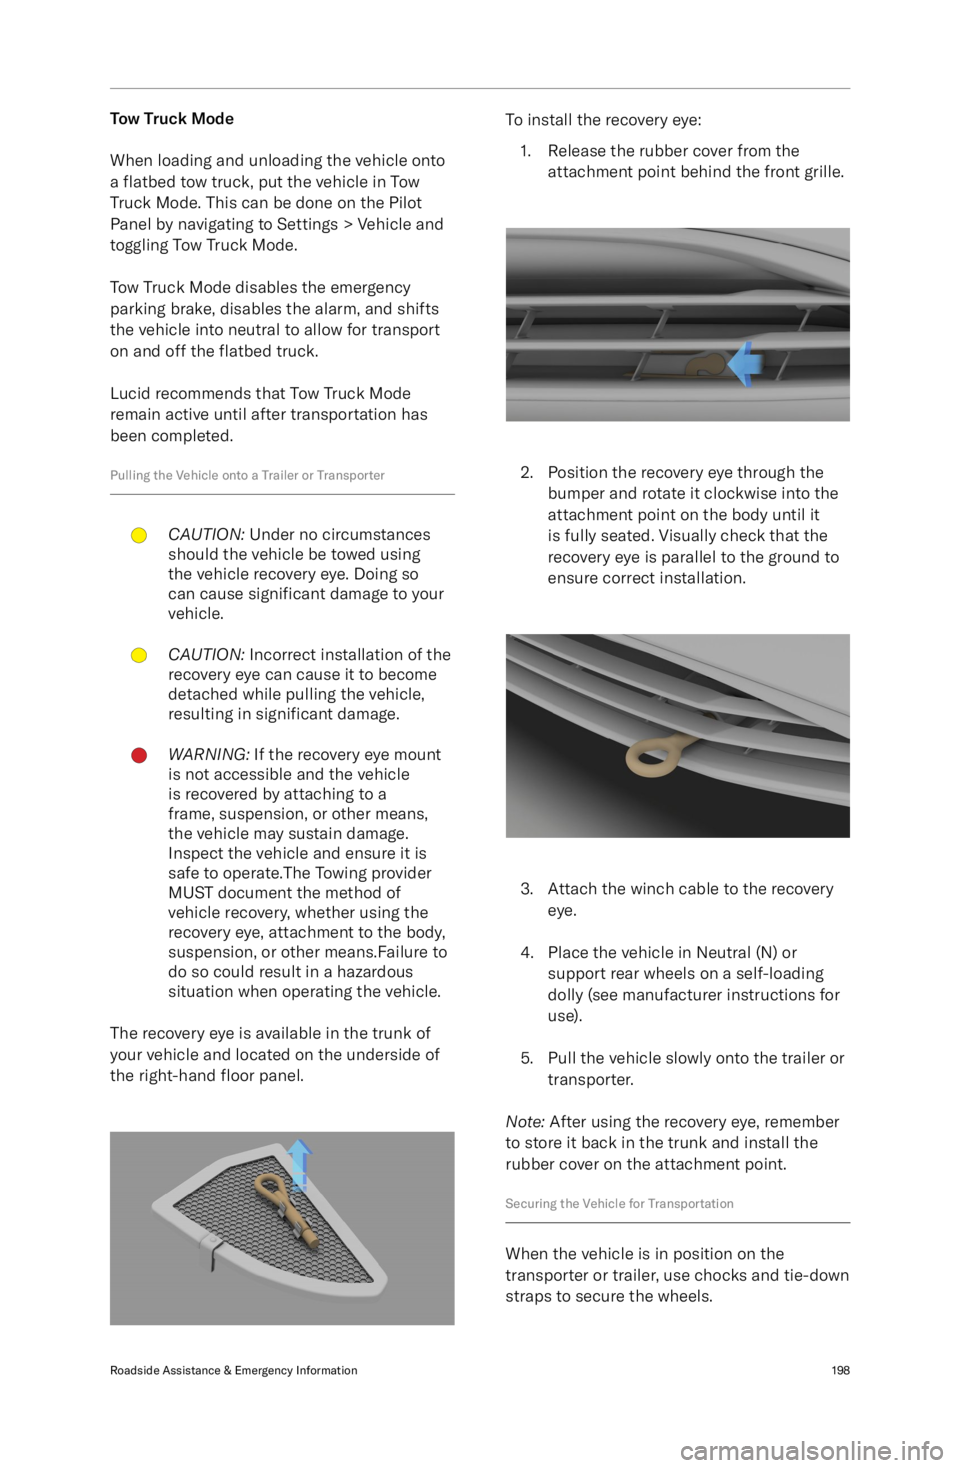
The recovery eye is available in the trunk of
your vehicle and located on the underside of
the right-hand floor panel.
To install the recovery eye:
1. Release the rubber cover from the attachment point behind the front grille.
2. Position the recovery eye through thebumper and rotate it clockwise into the
attachment point on the body until it
is fully seated. Visually check that the
recovery eye is parallel to the ground to
ensure correct installation.
3. Attach the winch cable to the recovery eye.
4. Place the vehicle in Neutral (N) or support rear wheels on a self-loading
dolly (see manufacturer instructions for use).
5. Pull the vehicle slowly onto the trailer or transporter.
Note: After using the recovery eye, remember
to store it back in the trunk and install the
rubber cover on the attachment point.
Securing the Vehicle for Transportation
When the vehicle is in position on the
transporter or trailer, use chocks and tie-down
straps to secure the wheels.
Roadside Assistance & Emergency Information198
Page 240 of 241

Rear suspension specifications 193
Rear view camera 115
Regenerative braking 79
Reporting safety defects 212Rescue operationsFirefighting 201
S
Safety instructionsElectrical/high voltage safety 154
Obstruction of air bags 49Seat beltsFastening and releasing 38
In a collision 39
Reminders 38
Testing 40
Wearing correctly 37
Wearing when pregnant 39SeatsAdjustment 30
Folding (rear) 33
Heating (rear) 33
Heating and ventilation 31
Massage 31
Pass-through hatch 33ServiceData recording 213
Side airbags 48
Specifications12V battery 194
Brakes 191
Front suspension 192
High-voltage battery
194
Rear suspension 193
Steering 190
Tire pressures 189
Tires 188
Wheels 188
Steering specifications 190
Steering wheelMedia controls 123
Sunshades 22
T
Tire and loading information label 174
Tire care 176
Tire Identification Number (TIN) 171
Tire pressure checking 177
Tire Pressure Monitoring SystemMalfunction 181
Operation 181Tires 170Asymmetric 179
Chains 180
Degradation 177
Flat spots 178
Grading 173Tires (continued)Markings 170
Pressure label 174
Pressure monitoring 181
Pressures 177
Quality 173
Replacement of 179
Rotation 176
Run-flat 179
Socks 180
Specifications 188
Wear 176
Wheel alignment 176
Winter 180
TPMS 181
Traction control 82
Traffic Drive-Off Alert 102
Traffic Sign Recognition 101
Trailer towing 183
Trip information 55
Trunk 26Interior emergency release 27
U
Uniform tire quality grading 173
Unlocking your vehicle 16
User ProfileCreating 118
Loading preferences 120
Managing 120
Settings 119
Types 118
Using 16
V
VehicleAccessories and modifications 167
Certification label 10
Modifications 4
Vehicle Identification Number (VIN) 10
Vehicle lashing 198
Vehicle loading 183Determining correct load limit 183
Example load calculations 184
Vehicle weights 187
W
WashersChecking fluid level 158
Cleaning washer jets 159WheelsReplacement 179
Specifications 188
Wi-Fi 137
Window lock 22
Windows