fuel cap MASERATI GHIBLI 2019 Owners Manual
[x] Cancel search | Manufacturer: MASERATI, Model Year: 2019, Model line: GHIBLI, Model: MASERATI GHIBLI 2019Pages: 384, PDF Size: 13.33 MB
Page 294 of 384

off until the tire pressure is equal or
above the recommended cold inflation
pressure. Once the low tire pressure
warning light
illuminates, you must
increase the tire pressure to the
recommended cold inflation pressure
in order for the TPMS light
to turn
off. The system will automatically
update and the TPMS light
will turn
off once the system acquires the
correct tire pressure.
The vehicle may need to be driven for
up to 20 minutes above 15 mph
(24 km/h) in order for the TPMS to
acquire and process the updated
setting. WARNING!
The TPMS warns the driver that the
tire pressure has decreased. This
warning does not exempt the driver
from periodically checking the tires
and from complying with the
prescribed tire pressure levels.
CAUTION!
• The TPMS has been optimized for the
original equipment tires and wheels.
TPMS pressures and warning have
been established for the tire size
equipped on your vehicle.
Undesirable system operation or
sensor damage may occur when
using replacement equipment that is
not of the same size, type, and/or
style. Aftermarket wheels can cause
sensor damage. Do not use aftermarket tire sealants or balance
beads if your vehicle is equipped
with a TPMS, as damage to the
sensors may result.
• The system can temporarily
experience radio-electric
interference emitted by devices
using similar frequencies.
• After inspecting or adjusting the tire
pressure, always reinstall the valve
stem cap. This will prevent moisture
and dirt from entering the valve
stem and damage the TPMS internal
sensor.
NOTE:
• Driving
on a
significantly
underinflated tire causes the tire to
overheat and may lead to tire failure.
Under-inflation also reduces fuel
efficiency and tire tread life, and may
affect the vehicle’s handling and
stopping ability.
• The TPMS is not a substitute for
proper tire maintenance, and it is the
driver’s responsibility to maintain
correct tire pressure using an
accurate tire pressure gage, even if
under-inflation has not reached the
level to trigger illumination of the
TPMS light
.
• Seasonal temperature changes will
affect tire pressure, and the TPMSDriving
5
290
Page 301 of 384

fumes, do not breathe close to the
fuel filler door, when opened.
• Never have any smoking materials
lit in or near the vehicle when the
fuel filler door is open or the tank is
being filled.
• Never add fuel when the engine is
running. This violates most
fire-prevention regulations and may
cause the Malfunction Indicator
Light
to turn on (see
“Instrument Cluster” in section
“Dashboard Instruments and
Controls”).
• Fill the vehicle with fuel. Fuel tank
capacity
is indicated in the
“Refillings” table in section
“Features and Specifications”.
When the fuel nozzle “clicks” or
shuts off, the fuel tank is basically
full: it is possible to further ensure
refueling by enabling the fuel nozzle
additional fuel supply until two
clicks. After the two additional clicks,
the amount of fuel allowed by the
system is very low, we recommend
therefore not to persist further.
• Wait approximately 10 seconds
before removing the fuel nozzle in
order to ensure completed supply of residual fuel and restrict the risk of
fouling the fuel filler door area.
• Remove the fuel nozzle.
• Close the fuel filler door.
CAUTION!
To avoid fuel spillage and overfilling,
do not “top off” the fuel tank after
filling.
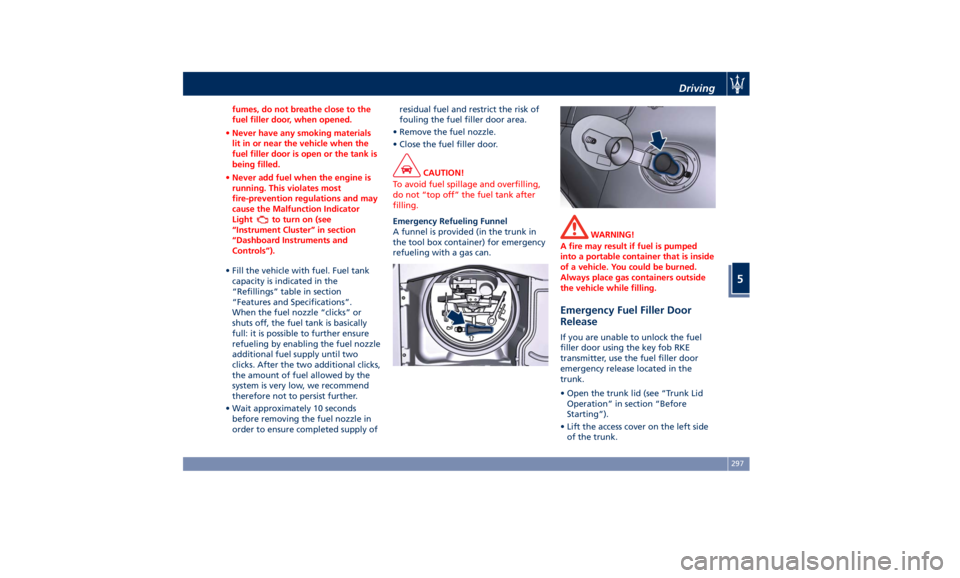
Emergency Refueling Funnel
A
funnel is provided (in the trunk in
the tool box container) for emergency
refueling with a gas can. WARNING!
A fire may result if fuel is pumped
into a portable container that is inside
of a vehicle. You could be burned.
Always place gas containers outside
the vehicle while filling.
Emergency Fuel Filler Door
Release If you are unable to unlock the fuel
filler door using the key fob RKE
transmitter, use the fuel filler door
emergency release located in the
trunk.
• Open the trunk lid (see “Trunk Lid
Operation” in section “Before
Starting”).
• Lift the access cover on the left side
of the trunk.Driving
5
297