lane assist MASERATI GHIBLI 2019 Owners Manual
[x] Cancel search | Manufacturer: MASERATI, Model Year: 2019, Model line: GHIBLI, Model: MASERATI GHIBLI 2019Pages: 384, PDF Size: 13.33 MB
Page 13 of 384
ECU Electronic Control Unit.
EDR Event Data Recorder.
EPB Electric Parking Brake.
ESC Electronic Stability Control.
ETC Electronic Throttle Control.
FCW Forward Collision Warning.
HAS Highway Assist.
HSA Hill Start Assist.
HBA Hydraulic Brake Assistance.
I.C.E. Increased Control and
Efficiency.
LATCH Lower Anchors and Tether
for Children.
LDW Lane Departure Warning
(LaneSense).
LKA Lane Keeping Assist.
MIL Malfunction Indicator
Light.
MTC+ Maserati Touch Control
Plus.
OBD On Board Diagnostics.
ORC Occupant Restraint
Controller.
PDC Park Distance Control.
PEB Pedestrian Emergency
Braking.
RAB Ready Alert Braking. RCP Rear Cross Path.
RKE Remote Keyless Entry.
SAB Side Air Bag.
SABIC Supplemental Side Air Bag
Inflatable Curtains.
SBR Seat Belt Reminder.
SRS Supplemental Restraint
System.
TCS Traction Control System.
TFT Thin Film Transistor.
TPMS Tire Pressure Monitoring
System.
TSA Traffic Sign Assist.
VIN Vehicle Identification
Number.Updating Constant improvements are being
performed to maintain this vehicle's
high level of quality. Therefore, there
may be differences between this
manual and your vehicle.
Maserati reserves the right to carry
out design and functional changes
and to provide updates or
improvements.
This Owner's Manual illustrates and
describes all versions of the current
vehicle model. Therefore, some of the
equipment and accessories in this
publication may not appear on your
vehicle; please only consider the
information related to your vehicle.
All specifications and illustrations
contained in this manual are as of the
Manual publishing date.
NOTE:
The updated version of the on-board
documentation can be consulted by
accessing the section “Services” on the
website www.maserati.com .Introduction
1
9
Page 112 of 384
(Continued)
operational. For more details see
chapter “Blind Spot Assist” in section
“Driving”.
The external of the rear-view mirror
support is equipped with LEDs,
lighting up when the turn signals and
vehicle entry/exit lights are activated.
When the surround view camera
system is installed, at the external
bottom side of the rear-view mirror is
the side view camera (refer to
“Surround View Camera System
(optional)” in section “Before
Starting”).
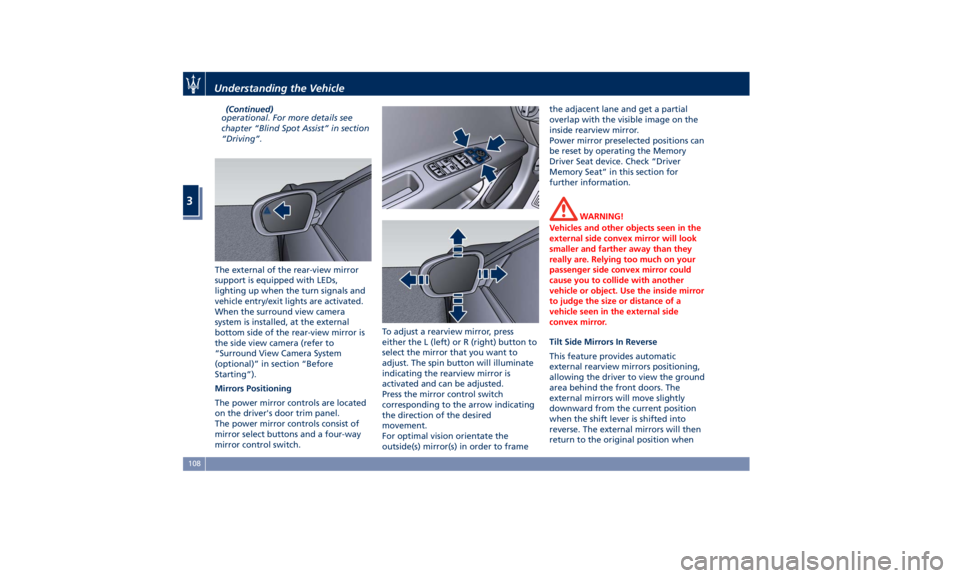
Mirrors Positioning
The power mirror controls are located
on the driver's door trim panel.
The power mirror controls consist of
mirror select buttons and a four-way
mirror control switch. To adjust a rearview mirror, press
either the L (left) or R (right) button to
select the mirror that you want to
adjust. The spin button will illuminate
indicating the rearview mirror is
activated and can be adjusted.
Press the mirror control switch
corresponding to the arrow indicating
the direction of the desired
movement.
For optimal vision orientate the
outside(s) mirror(s) in order to frame the adjacent lane and get a partial
overlap with the visible image on the
inside rearview mirror.
Power mirror preselected positions can
be reset by operating the Memory
Driver Seat device. Check “Driver
Memory Seat” in this section for
further information.
WARNING!
Vehicles and other objects seen in the
external side convex mirror will look
smaller and farther away than they
really are. Relying too much on your
passenger side convex mirror could
cause you to collide with another
vehicle or object. Use the inside mirror
to judge the size or distance of a
vehicle seen in the external side
convex mirror.
Tilt Side Mirrors In Reverse
This
feature provides automatic
external rearview mirrors positioning,
allowing the driver to view the ground
area behind the front doors. The
external mirrors will move slightly
downward from the current position
when the shift lever is shifted into
reverse. The external mirrors will then
return to the original position whenUnderstanding the Vehicle
3
108
Page 118 of 384

Automatic High Beam (for
versions/markets, where
provided) The Automatic High Beam headlight
control system provides increased
forward lighting at night by
automating high beam control
through the use of the forward-facing
digital camera located behind the
rear-view mirror, which is the same
one used for example by the Lane
Keeping Assist - LKA system on vehicles
with ADAS systems.
This camera detects the environmental
luminosity, the headlamps of
oncoming vehicles and the tail lamps
of proceding vehicles in the front area.
In these cases, the system
automatically switches from high
beams to low beams until the
approaching vehicle is out of view.
Futhermore, the digital camera is able
to detect the urban areas and the
inhabited centers and to turn off the
high beams when driving near of one
of them.
The properly working for this feature
(if all the other conditions are met) is
ensured between 21.7 mph (35 km/h)
and 155 mph (250 km/h). Activation Mode
To activate Automatic High Beam
feature:
• Shift the multifunction lever onward
.
• Put the light switch in “AUTO”
position.
• Touch the “Controls” soft-key in the
lower part of the MTC+ display.
• Within 15 seconds, touch the "Auto
High Beam Assist" soft-key to turn
on the feature. • Within 15 seconds, touch the "Auto
High Beam Assist" soft-key a second
time to turn it off.
After these steps, the green indicator
on the upper right side of the TFT
display comes on.
Without ADAS With ADASUnderstanding the Vehicle
3
114
Page 121 of 384

You can signal another vehicle with
your headlights by lightly pulling the
multifunction lever toward you. This
will turn on the high beams headlights
until the lever is released.
Flashing occurs also with lights off
(lights switch in position “0”) if the
ignition switch is RUN position.
CAUTION!
The high beams can only be switched
on manually by pushing the
multifunction lever forward.
WARNING!
If the high beams are activated, they
will turn on automatically every time
the low beams are switched on either
manually or automatically. We
recommend therefore that you switch them off when they are no longer
necessary and every time the twilight
sensor deactivates the external lights.
Automatic High Beams (if equipped)
The
Automatic High Beam headlight
control system provides increased
forward lighting at night by
automating high beam control
through the use of the forward digital
camera mounted behind the rearview
mirror, which is the same one used
also by the Lane Departure Warning
(LDW) system. This camera detects
vehicle specific light and automatically
switches from high beams to low
beams until the approaching vehicle is
out of view. Furthermore, the digital
camera is able to detect the urban
areas and the inhabited centers and to
turn off the high beams when driving
near of one of them.
The high beam can be turned back on
if there are all the necessary
conditions and if the vehicle speed
exceed 21.7 mph (35 km/h).
The “Auto High Beam Assist” feature
can be turned on or off using the
MTC+ System. Refer to “MTC+
Settings” in section "Dashboard
Instruments and Controls" for further
information. The function is enabled only if the
brightness sensor detects the right
lighting conditions.
To activate this function:
• Shift the multifunction lever onward
.
• Put the headlight switch in “AUTO”
position.
• Enable the “Auto High Beam Assist”
function on MTC+.
After these steps, the green indicator
on the upper right side of the TFT
display comes on.Understanding the Vehicle
3
117
Page 157 of 384
Main Menu & Submenu Content
Overview
1. MAIN MENU
• View speed in mph or km/h
2. VEHICLE INFO
• Tire Pressure
• Transmission Temperature
• Oil Temperature
• Oil Pressure
• Battery Voltage
• Maintenance
3. DRIVE MODE
• Drive Mode - Torque Distribution (on
AWD version only) - Powertrain
status - ESC status - Suspension
stiffness status
4. Driver Assist (if equipped)
• Shows the status of any active driver
assist systems: CC, ACC, LKA and
HAS. Graphics in the main area of
TFT display only refer to ACC, LKA
and HAS systems
• LKA (LaneSense) status
5. FUEL ECONOMY
• Average, Range, Current gage
6. TRIP
• Trip A: Average, Avg. speed, Elapsed
time, Distance • Trip B: Average, Avg. speed, Elapsed
time, Distance
7. START&STOP
• Messages relating to the Start&Stop
function
8. AUDIO
• Information concerning audio status
according to current media source,
track and station.
9. STORED MESSAGES
10. VEHICLE SETTINGS
• Speed Warning: enables, disables or
sets the speed limit represented in
the dynamic icon on the TFT display
• Auto apply Off/On of the Electric
Parking Brake
• Screen Setup
– Upper Left
– Upper Right
– Main Menu: Line 1
– Main Menu: Line 2
– Main Menu: Line 3
– MPH km/h Display On/Off
– Main Menu Navigation
– Outline Coloring
– Key-On Display
– Key-Off Display
– Defaults Messages on Main Display Area
The main display area also displays
"pop up" messages. These pop up
messages fall into several categories:
• Five-Second Stored Messages
When the appropriate conditions
occur, this type of message appears
on the main display area for five
seconds and then returns to the
previous screen. Most of the
messages of this type are then
stored (as long as the condition that
activated them remains active) and
can be reviewed from the "Stored
Messages" main menu item.
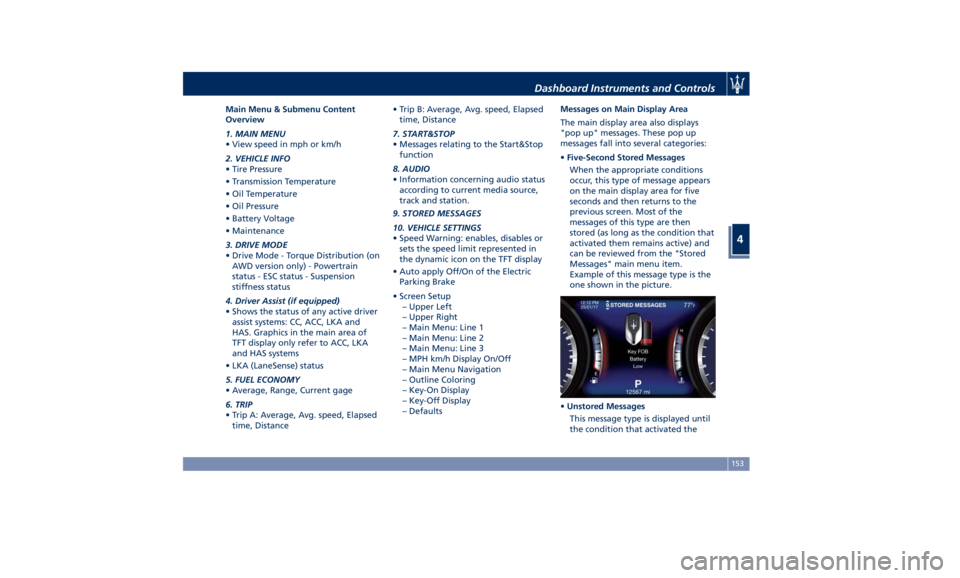
Example of this message type is the
one shown in the picture.
• Unstored Messages
This message type is displayed until
the condition that activated theDashboard Instruments and Controls
4
153
Page 160 of 384
Press and release the button to
return to the main menu.
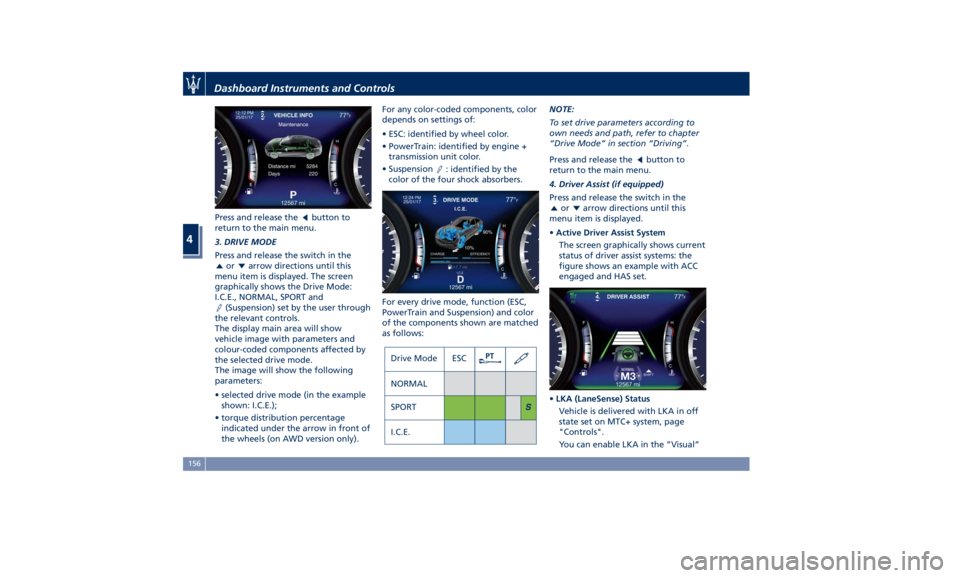
3. DRIVE MODE
Press and release the switch in the
or arrow directions until this
menu item is displayed. The screen
graphically shows the Drive Mode:
I.C.E., NORMAL, SPORT and
(Suspension) set by the user through
the relevant controls.
The display main area will show
vehicle image with parameters and
colour-coded components affected by
the selected drive mode.
The image will show the following
parameters:
• selected drive mode (in the example
shown: I.C.E.);
• torque distribution percentage
indicated under the arrow in front of
the wheels (on AWD version only). For any color-coded components, color
depends on settings of:
• ESC: identified by wheel color.
• PowerTrain: identified by engine +
transmission unit color.
• Suspension
: identified by the
color of the four shock absorbers.
For every drive mode, function (ESC,
PowerTrain and Suspension) and color
of the components shown are matched
as follows: NOTE:
To set drive parameters according to
own needs and path, refer to chapter
“Drive Mode” in section “Driving”.
Press and release the
button to
return to the main menu.
4. Driver Assist (if equipped)
Press and release the switch in the
or arrow directions until this
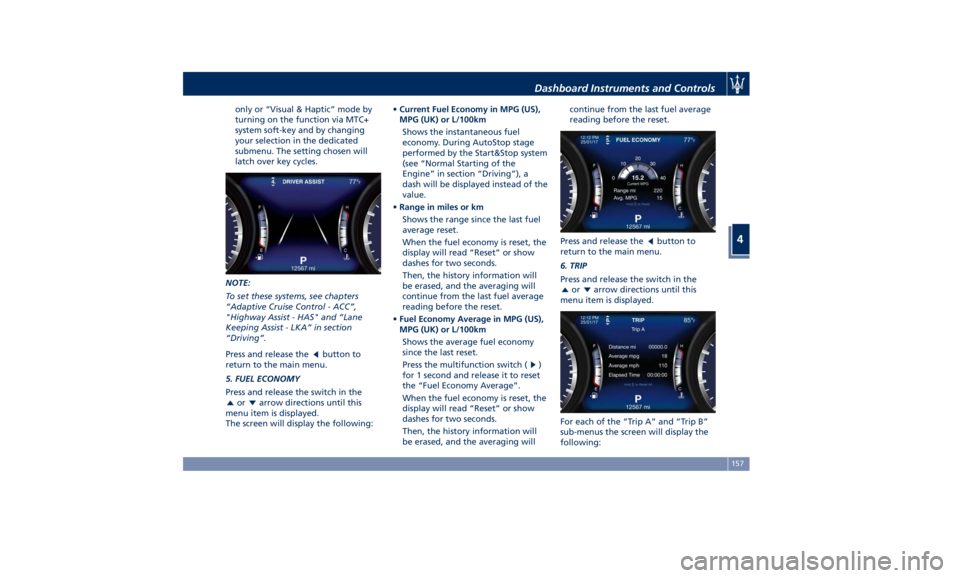
menu item is displayed.
• Active Driver Assist System
The screen graphically shows current
status of driver assist systems: the
figure shows an example with ACC
engaged and HAS set.
• LKA (LaneSense) Status
Vehicle is delivered with LKA in off
state set on MTC+ system, page
"Controls".
You can enable LKA in the ”Visual”Dashboard Instruments and Controls
4
156
Page 161 of 384
only or “Visual & Haptic” mode by
turning on the function via MTC+
system soft-key and by changing
your selection in the dedicated
submenu. The setting chosen will
latch over key cycles.
NOTE:
To set these systems, see chapters
“Adaptive Cruise Control - ACC”,
"Highway Assist - HAS" and “Lane
Keeping Assist - LKA” in section
“Driving”.
Press and release the
button to
return to the main menu.
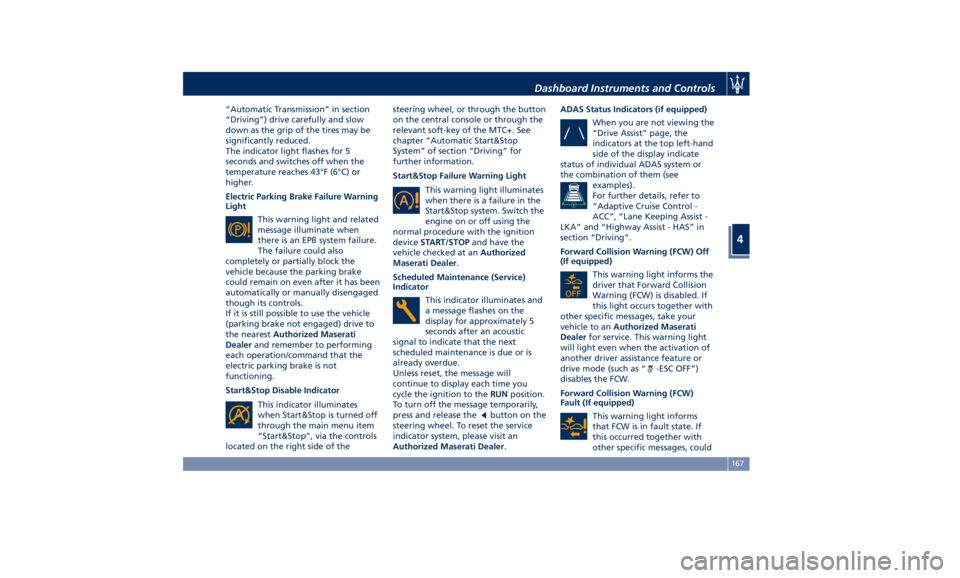
5. FUEL ECONOMY
Press and release the switch in the
or arrow directions until this
menu item is displayed.
The screen will display the following: • Current Fuel Economy in MPG (US),
MPG (UK) or L/100km
Shows the instantaneous fuel
economy. During AutoStop stage
performed by the Start&Stop system
(see “Normal Starting of the
Engine” in section “Driving”), a
dash will be displayed instead of the
value.
• Range in miles or km
Shows the range since the last fuel
average reset.
When the fuel economy is reset, the
display will read “Reset” or show
dashes for two seconds.
Then, the history information will
be erased, and the averaging will
continue from the last fuel average
reading before the reset.
• Fuel Economy Average in MPG (US),
MPG (UK) or L/100km
Shows the average fuel economy
since the last reset.
Press the multifunction switch (
)
for 1 second and release it to reset
the “Fuel Economy Average”.
When the fuel economy is reset, the
display will read “Reset” or show
dashes for two seconds.
Then, the history information will
be erased, and the averaging will continue from the last fuel average
reading before the reset.
Press and release the
button to
return to the main menu.
6. TRIP
Press and release the switch in the
or arrow directions until this
menu item is displayed.
For each of the “Trip A” and “Trip B”
sub-menus the screen will display the
following:Dashboard Instruments and Controls
4
157
Page 171 of 384
“Automatic Transmission” in section
“Driving”) drive carefully and slow
down as the grip of the tires may be
significantly reduced.
The indicator light flashes for 5
seconds and switches off when the
temperature reaches 43°F (6°C) or
higher.
Electric Parking Brake Failure Warning
Light
This warning light and related
message illuminate when
there is an EPB system failure.
The failure could also
completely or partially block the
vehicle because the parking brake
could remain on even after it has been
automatically or manually disengaged
though its controls.
If it is still possible to use the vehicle
(parking brake not engaged) drive to
the nearest Authorized Maserati
Dealer and remember to performing
each operation/command that the
electric parking brake is not
functioning.
Start&Stop Disable Indicator
This indicator illuminates
when Start&Stop is turned off
through the main menu item
“Start&Stop”, via the controls
located on the right side of the steering wheel, or through the button
on the central console or through the
relevant soft-key of the MTC+. See
chapter “Automatic Start&Stop
System” of section “Driving” for
further information.
Start&Stop Failure Warning Light
This warning light illuminates
when there is a failure in the
Start&Stop system. Switch the
engine on or off using the
normal procedure with the ignition
device START/STOP and have the
vehicle checked at an Authorized
Maserati Dealer .
Scheduled Maintenance (Service)
Indicator
This indicator illuminates and
a message flashes on the
display for approximately 5
seconds after an acoustic
signal to indicate that the next
scheduled maintenance is due or is
already overdue.
Unless reset, the message will
continue to display each time you
cycle the ignition to the RUN position.
To turn off the message temporarily,
press and release the
button on the
steering wheel. To reset the service
indicator system, please visit an
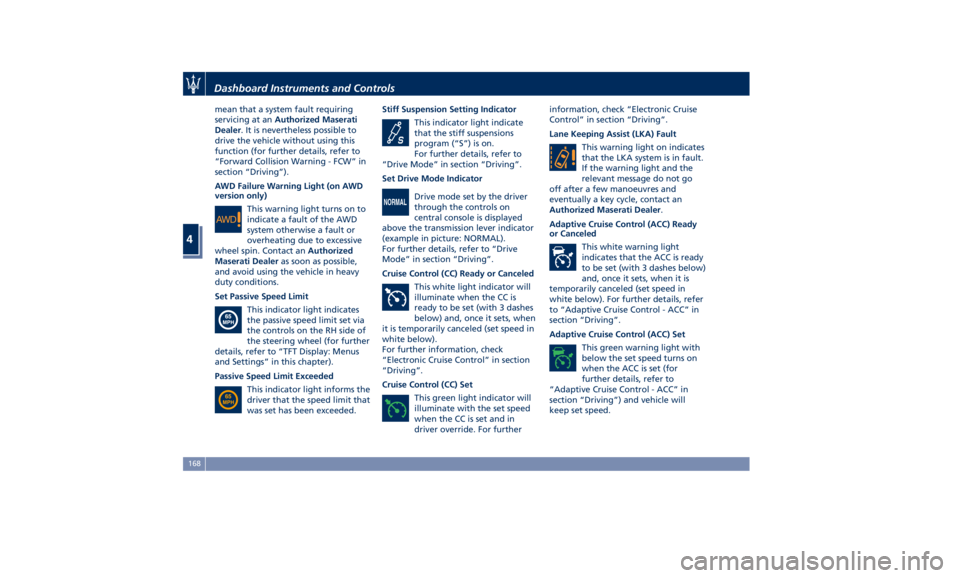
Authorized Maserati Dealer . ADAS Status Indicators (if equipped)
When you are not viewing the
“Drive Assist” page, the
indicators at the top left-hand
side of the display indicate
status of individual ADAS system or
the combination of them (see
examples).
For further details, refer to
“Adaptive Cruise Control -
ACC”, “Lane Keeping Assist -
LKA” and “Highway Assist - HAS” in
section “Driving”.
Forward Collision Warning (FCW) Off
(If equipped)
This warning light informs the
driver that Forward Collision
Warning (FCW) is disabled. If
this light occurs together with
other specific messages, take your
vehicle to an Authorized Maserati
Dealer for service. This warning light
will light even when the activation of
another driver assistance feature or
drive mode (such as “
-ESC OFF”)
disables the FCW.
Forward Collision Warning (FCW)
Fault (If equipped)
This warning light informs
that FCW is in fault state. If
this occurred together with
other specific messages, couldDashboard Instruments and Controls
4
167
Page 172 of 384
mean that a system fault requiring
servicing at an Authorized Maserati
Dealer . It is nevertheless possible to
drive the vehicle without using this
function (for further details, refer to
“Forward Collision Warning - FCW” in
section “Driving”).
AWD Failure Warning Light (on AWD
version only)
This warning light turns on to
indicate a fault of the AWD
system otherwise a fault or
overheating due to excessive
wheel spin. Contact an Authorized
Maserati Dealer as soon as possible,
and avoid using the vehicle in heavy
duty conditions.
Set Passive Speed Limit
This indicator light indicates
the passive speed limit set via
the controls on the RH side of
the steering wheel (for further
details, refer to “TFT Display: Menus
and Settings” in this chapter).
Passive Speed Limit Exceeded
This indicator light informs the
driver that the speed limit that
was set has been exceeded. Stiff Suspension Setting Indicator
This indicator light indicate
that the stiff suspensions
program (“S”) is on.
For further details, refer to
“Drive Mode” in section “Driving”.
Set Drive Mode Indicator
Drive mode set by the driver
through the controls on
central console is displayed
above the transmission lever indicator
(example in picture: NORMAL).
For further details, refer to “Drive
Mode” in section “Driving”.
Cruise Control (CC) Ready or Canceled
This white light indicator will
illuminate when the CC is
ready to be set (with 3 dashes
below) and, once it sets, when
it is temporarily canceled (set speed in
white below).
For further information, check
“Electronic Cruise Control” in section
“Driving”.
Cruise Control (CC) Set
This green light indicator will
illuminate with the set speed
when the CC is set and in
driver override. For further information, check “Electronic Cruise
Control” in section “Driving”.
Lane Keeping Assist (LKA) Fault
This warning light on indicates
that the LKA system is in fault.
If the warning light and the
relevant message do not go
off after a few manoeuvres and
eventually a key cycle, contact an
Authorized Maserati Dealer .
Adaptive Cruise Control (ACC) Ready
or Canceled
This white warning light
indicates that the ACC is ready
to be set (with 3 dashes below)
and, once it sets, when it is
temporarily canceled (set speed in
white below). For further details, refer
to “Adaptive Cruise Control - ACC” in
section “Driving”.
Adaptive Cruise Control (ACC) Set
This green warning light with
below the set speed turns on
when the ACC is set (for
further details, refer to
“Adaptive Cruise Control - ACC” in
section “Driving”) and vehicle will
keep set speed.Dashboard Instruments and Controls
4
168
Page 184 of 384
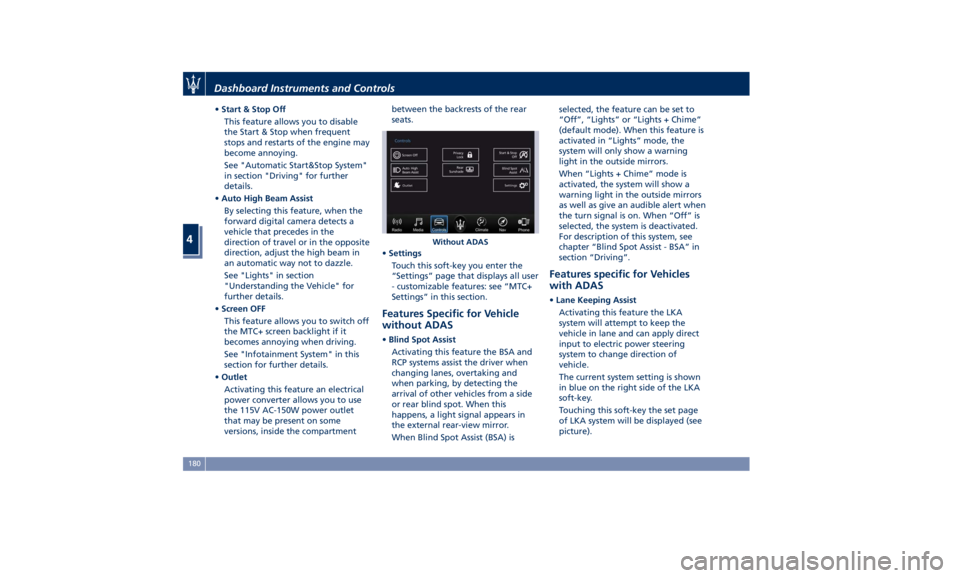
• Start & Stop Off
This feature allows you to disable
the Start & Stop when frequent
stops and restarts of the engine may
become annoying.
See "Automatic Start&Stop System"
in section "Driving" for further
details.
• Auto High Beam Assist
By selecting this feature, when the
forward digital camera detects a
vehicle that precedes in the
direction of travel or in the opposite
direction, adjust the high beam in
an automatic way not to dazzle.
See "Lights" in section
"Understanding the Vehicle" for
further details.
• Screen OFF
This feature allows you to switch off
the MTC+ screen backlight if it
becomes annoying when driving.
See "Infotainment System" in this
section for further details.
• Outlet
Activating this feature an electrical
power converter allows you to use
the 115V AC-150W power outlet
that may be present on some
versions, inside the compartment between the backrests of the rear
seats.
• Settings
Touch this soft-key you enter the
“Settings” page that displays all user
- customizable features: see “MTC+
Settings” in this section.
Features Specific for Vehicle
without ADAS • Blind Spot Assist
Activating this feature the BSA and
RCP systems assist the driver when
changing lanes, overtaking and
when parking, by detecting the
arrival of other vehicles from a side
or rear blind spot. When this
happens, a light signal appears in
the external rear-view mirror.
When Blind Spot Assist (BSA) is selected, the feature can be set to
“Off”, “Lights” or “Lights + Chime”
(default mode). When this feature is
activated in “Lights” mode, the
system will only show a warning
light in the outside mirrors.
When “Lights + Chime” mode is
activated, the system will show a
warning light in the outside mirrors
as well as give an audible alert when
the turn signal is on. When “Off” is
selected, the system is deactivated.
For description of this system, see
chapter “Blind Spot Assist - BSA” in
section “Driving”.
Features specific for Vehicles
with ADAS • Lane Keeping Assist
Activating this feature the LKA
system will attempt to keep the
vehicle in lane and can apply direct
input to electric power steering
system to change direction of
vehicle.
The current system setting is shown
in blue on the right side of the LKA
soft-key.
Touching this soft-key the set page
of LKA system will be displayed (see
picture).Without ADASDashboard Instruments and Controls
4
180