change wheel MASERATI GRANTURISMO CONVERTIBLE 2019 Owners Manual
[x] Cancel search | Manufacturer: MASERATI, Model Year: 2019, Model line: GRANTURISMO CONVERTIBLE, Model: MASERATI GRANTURISMO CONVERTIBLE 2019Pages: 296, PDF Size: 9.01 MB
Page 65 of 296
the rear ones for approx. 10 seconds
or until a speed of approx. 6 mph
(10 km/h) is exceeded, and the front
ones until a speed of approx. 6 mph
(10 km/h) is exceeded. When driving at
a speed equal to or lower than 6 mph
(10 km/h), as soon as the system
detects an obstacle, the front sensor
detection areas are displayed, and the
acoustic signals start to be emitted. If
no obstacle is detected for 10 seconds,
the displayed information disappears.
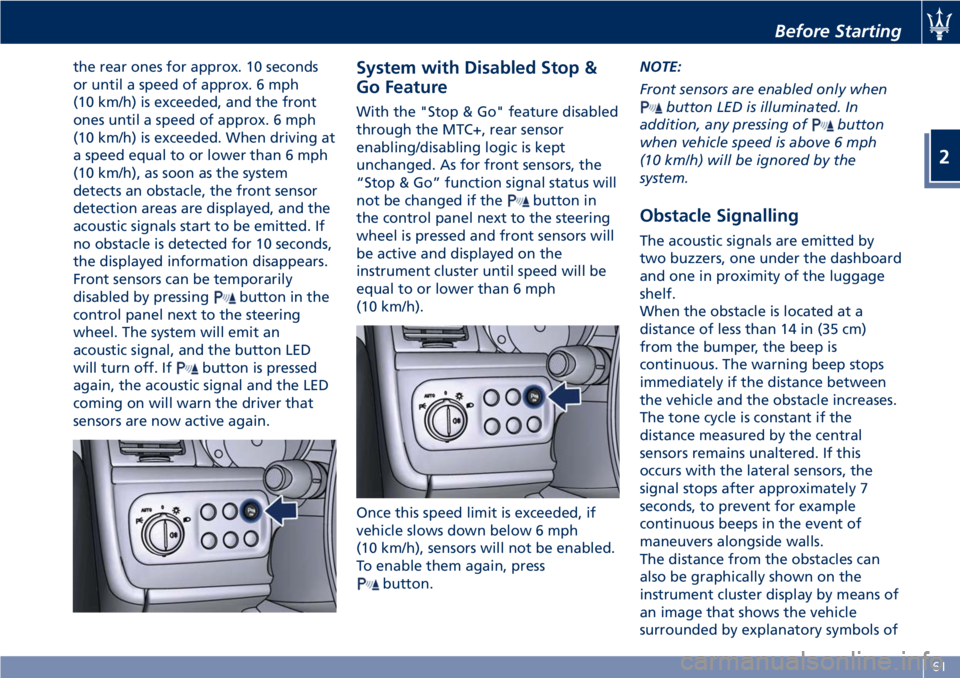
Front sensors can be temporarily
disabled by pressing
button in the
control panel next to the steering
wheel. The system will emit an
acoustic signal, and the button LED
will turn off. If
button is pressed
again, the acoustic signal and the LED
coming on will warn the driver that
sensors are now active again. System with Disabled Stop &
Go Feature With the "Stop & Go" feature disabled
through the MTC+, rear sensor
enabling/disabling logic is kept
unchanged. As for front sensors, the
“Stop & Go” function signal status will
not be changed if the
button in
the control panel next to the steering
wheel is pressed and front sensors will
be active and displayed on the
instrument cluster until speed will be
equal to or lower than 6 mph
(10 km/h).
Once this speed limit is exceeded, if
vehicle slows down below 6 mph
(10 km/h), sensors will not be enabled.
To enable them again, press
button. NOTE:
Front sensors are enabled only when
button LED is illuminated. In
addition, any pressing of
button
when vehicle speed is above 6 mph
(10 km/h) will be ignored by the
system.
Obstacle Signalling The acoustic signals are emitted by
two buzzers, one under the dashboard
and one in proximity of the luggage
shelf.
When the obstacle is located at a
distance of less than 14 in (35 cm)
from the bumper, the beep is
continuous. The warning beep stops
immediately if the distance between
the vehicle and the obstacle increases.
The tone cycle is constant if the
distance measured by the central
sensors remains unaltered. If this
occurs with the lateral sensors, the
signal stops after approximately 7
seconds, to prevent for example
continuous beeps in the event of
maneuvers alongside walls.
The distance from the obstacles can
also be graphically shown on the
instrument cluster display by means of
an image that shows the vehicle
surrounded by explanatory symbols ofBefore Starting
2
61
Page 81 of 296
• Once a heat setting is selected, heat
will be felt within 2 to 5 minutes.
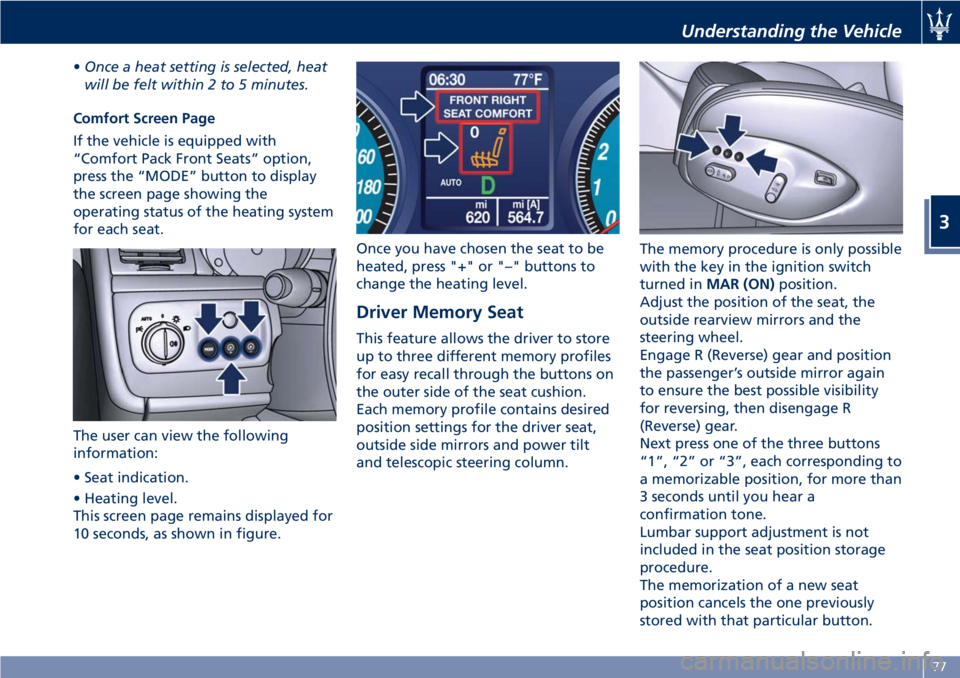
Comfort Screen Page
If the vehicle is equipped with
“Comfort Pack Front Seats” option,
press the “MODE” button to display
the screen page showing the
operating status of the heating system
for each seat.
The user can view the following
information:
• Seat indication.
• Heating level.
This screen page remains displayed for
10 seconds, as shown in figure. Once you have chosen the seat to be
heated, press "+" or "–" buttons to
change the heating level.
Driver Memory Seat This feature allows the driver to store
up to three different memory profiles
for easy recall through the buttons on
the outer side of the seat cushion.
Each memory profile contains desired
position settings for the driver seat,
outside side mirrors and power tilt
and telescopic steering column. The memory procedure is only possible
with the key in the ignition switch
turned in MAR (ON) position.
Adjust the position of the seat, the
outside rearview mirrors and the
steering wheel.
Engage R (Reverse) gear and position
the passenger’s outside mirror again
to ensure the best possible visibility
for reversing, then disengage R
(Reverse) gear.
Next press one of the three buttons
“1”, “2” or “3”, each corresponding to
a memorizable position, for more than
3 seconds until you hear a
confirmation tone.
Lumbar support adjustment is not
included in the seat position storage
procedure.
The memorization of a new seat
position cancels the one previously
stored with that particular button.Understanding the Vehicle
3
77
Page 90 of 296
Left-hand Multifunction Lever The multifunction lever on the left side
of the steering column controls the
operation of the turn signals,
headlight beam selection and
overtaking lights.
This multifunction lever also controls
the Cruise Control. See chapter "Cruise
Control" in section "Driving" for
further information.
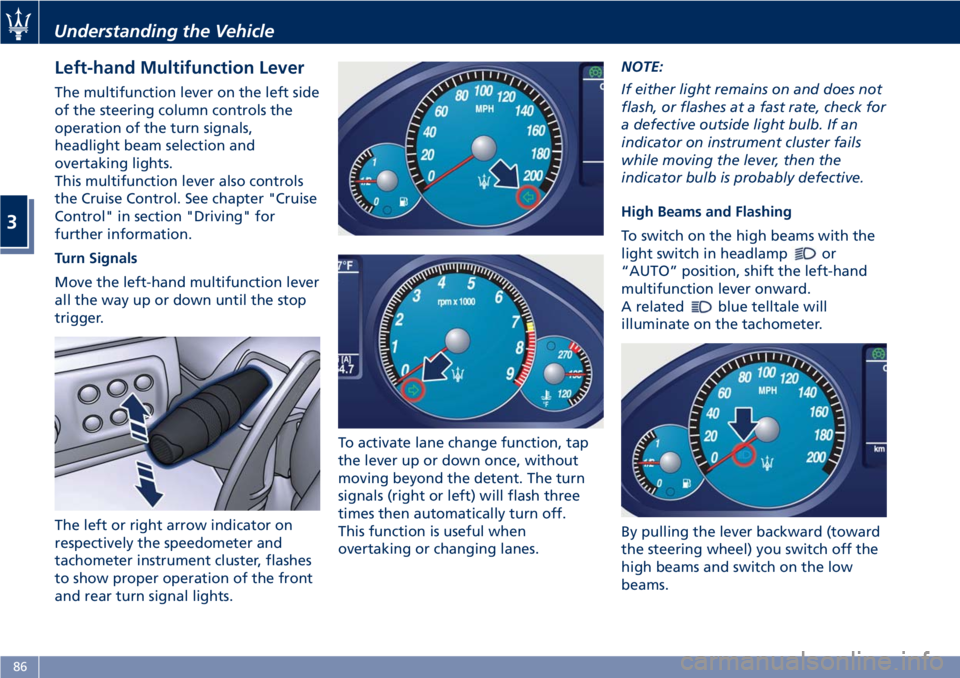
Turn Signals
Move the left-hand multifunction lever
all the way up or down until the stop
trigger.
The left or right arrow indicator on
respectively the speedometer and
tachometer instrument cluster, flashes
to show proper operation of the front
and rear turn signal lights. To activate lane change function, tap
the lever up or down once, without
moving beyond the detent. The turn
signals (right or left) will flash three
times then automatically turn off.
This function is useful when
overtaking or changing lanes. NOTE:
If either light remains on and does not
flash, or flashes at a fast rate, check for
a defective outside light bulb. If an
indicator on instrument cluster fails
while moving the lever, then the
indicator bulb is probably defective.
High Beams and Flashing
To switch on the high beams with the
light switch in headlamp
or
“AUTO” position, shift the left-hand
multifunction lever onward.
A related
blue telltale will
illuminate on the tachometer.
By pulling the lever backward (toward
the steering wheel) you switch off the
high beams and switch on the low
beams.Understanding the Vehicle
3
86
Page 142 of 296
Audio Controls The vehicle is equipped with audio
controls that allow both driver and
front passenger to operate the audio
system. These controls can be used to
adjust audio volume, change radio
station/channel or mode (FM, AM,
USB, etc).
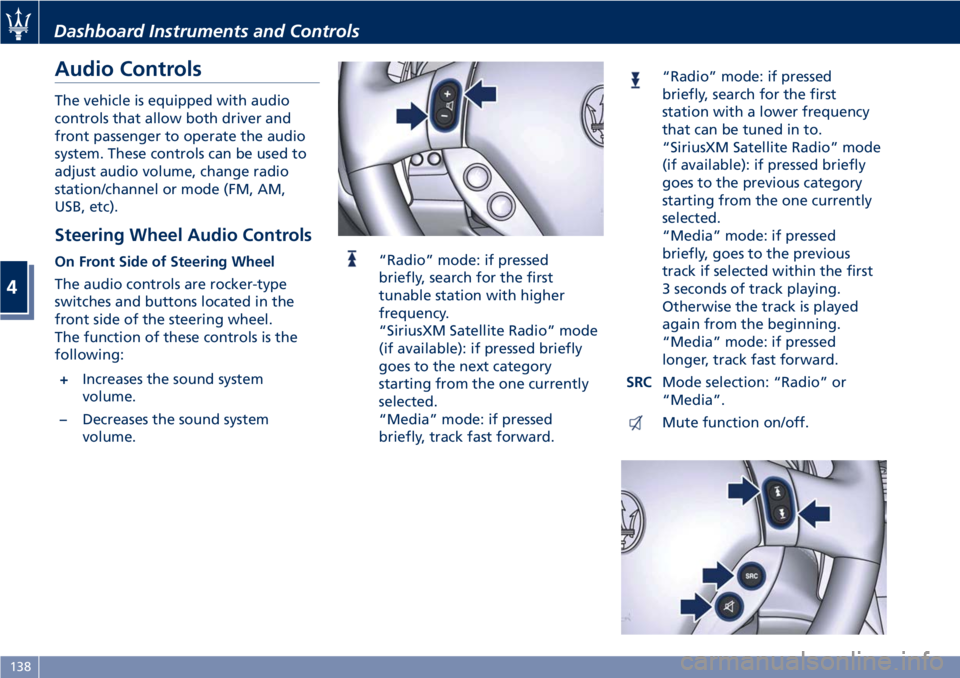
Steering Wheel Audio Controls On Front Side of Steering Wheel
The audio controls are rocker-type
switches and buttons located in the
front side of the steering wheel.
The function of these controls is the
following:
+ Increases the sound system
volume.
– Decreases the sound system
volume. “Radio” mode: if pressed
briefly, search for the first
tunable station with higher
frequency.
“SiriusXM Satellite Radio” mode
(if available): if pressed briefly
goes to the next category
starting from the one currently
selected.
“Media” mode: if pressed
briefly, track fast forward. “Radio” mode: if pressed
briefly, search for the first
station with a lower frequency
that can be tuned in to.
“SiriusXM Satellite Radio” mode
(if available): if pressed briefly
goes to the previous category
starting from the one currently
selected.
“Media” mode: if pressed
briefly, goes to the previous
track if selected within the first
3 seconds of track playing.
Otherwise the track is played
again from the beginning.
“Media” mode: if pressed
longer, track fast forward.
SRC Mode selection: “Radio” or
“Media”.
Mute function on/off.Dashboard Instruments and Controls
4
138
Page 143 of 296
NOTE:
“SiriusXM Satellite Radio” is the US
service only available in the 48
Continental United States and
Canadian markets. Subscription is
required. For further details refer to
the Maserati Touch Controls Plus
(MTC+) guide.
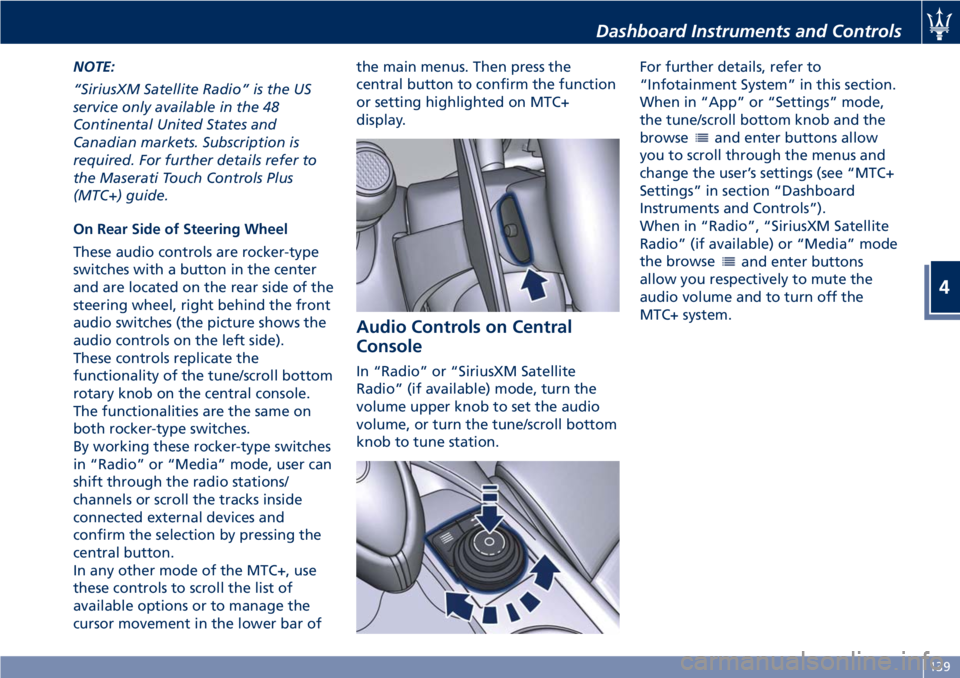
On Rear Side of Steering Wheel
These audio controls are rocker-type
switches with a button in the center
and are located on the rear side of the
steering wheel, right behind the front
audio switches (the picture shows the
audio controls on the left side).
These controls replicate the
functionality of the tune/scroll bottom
rotary knob on the central console.
The functionalities are the same on
both rocker-type switches.
By working these rocker-type switches
in “Radio” or “Media” mode, user can
shift through the radio stations/
channels or scroll the tracks inside
connected external devices and
confirm the selection by pressing the
central button.
In any other mode of the MTC+, use
these controls to scroll the list of
available options or to manage the
cursor movement in the lower bar of the main menus. Then press the
central button to confirm the function
or setting highlighted on MTC+
display.
Audio Controls on Central
Console In “Radio” or “SiriusXM Satellite
Radio” (if available) mode, turn the
volume upper knob to set the audio
volume, or turn the tune/scroll bottom
knob to tune station. For further details, refer to
“Infotainment System” in this section.
When in “App” or “Settings” mode,
the tune/scroll bottom knob and the
browse
and enter buttons allow
you to scroll through the menus and
change the user’s settings (see “MTC+
Settings” in section “Dashboard
Instruments and Controls”).
When in “Radio”, “SiriusXM Satellite
Radio” (if available) or “Media” mode
the browse
and enter buttons
allow you respectively to mute the
audio volume and to turn off the
MTC+ system.Dashboard Instruments and Controls
4
139
Page 160 of 296
commands can be invalidated when
speaking too quickly or too loudly.
WARNING!
Any voice-controlled system should be
used only in safe driving conditions
following all applicable regulations.
Full attention should be kept on
driving. Failure to do so may result in
a collision causing serious injury or
death.
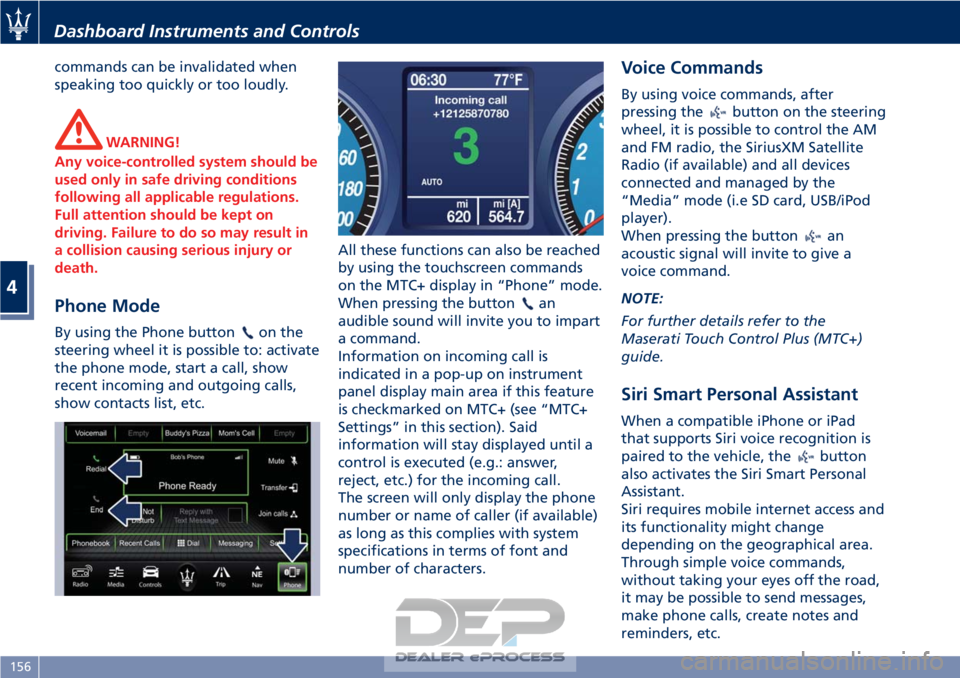
Phone Mode
By using the Phone buttonon the
steering wheel it is possible to: activate
the phone mode, start a call, show
recent incoming and outgoing calls,
show contacts list, etc. All these functions can also be reached
by using the touchscreen commands
on the MTC+ display in “Phone” mode.
When pressing the button
an
audible sound will invite you to impart
a command.
Information on incoming call is
indicated in a pop-up on instrument
panel display main area if this feature
is checkmarked on MTC+ (see “MTC+
Settings” in this section). Said
information will stay displayed until a
control is executed (e.g.: answer,
reject, etc.) for the incoming call.
The screen will only display the phone
number or name of caller (if available)
as long as this complies with system
specifications in terms of font and
number of characters.
Voice Commands
By using voice commands, after
pressing the
button on the steering
wheel, it is possible to control the AM
and FM radio, the SiriusXM Satellite
Radio (if available) and all devices
connected and managed by the
“Media” mode (i.e SD card, USB/iPod
player).
When pressing the button
an
acoustic signal will invite to give a
voice command.
NOTE:
For further details refer to the
Maserati Touch Control Plus (MTC+)
guide.
Siri Smart Personal Assistant
When a compatible iPhone or iPad
that supports Siri voice recognition is
paired to the vehicle, the
button
also activates the Siri Smart Personal
Assistant.
Siri requires mobile internet access and
its functionality might change
depending on the geographical area.
Through simple voice commands,
without taking your eyes off the road,
it may be possible to send messages,
make phone calls, create notes and
reminders, etc.
Dashboard Instruments and Controls
4
156
Page 177 of 296
When the system refuses to engage a
gear, an acoustic signal will sound for
a few seconds.
Sequential manual operation can only
be selected from the D (Drive) position
whatever the function (SPORT,
NORMAL) active at the time of the
request. The gear selected by the
automatic transmission will remain
engaged when the transmission shift
lever is moved.
Shifting the lever back to D (Drive),
automatic operation will instantly be
resumed, and a gear will be engaged
based on the driving style and mode
selected.
In the event of a failure of the
sequential manual gearshift system,
the transmission ECU will select
automatic operation.
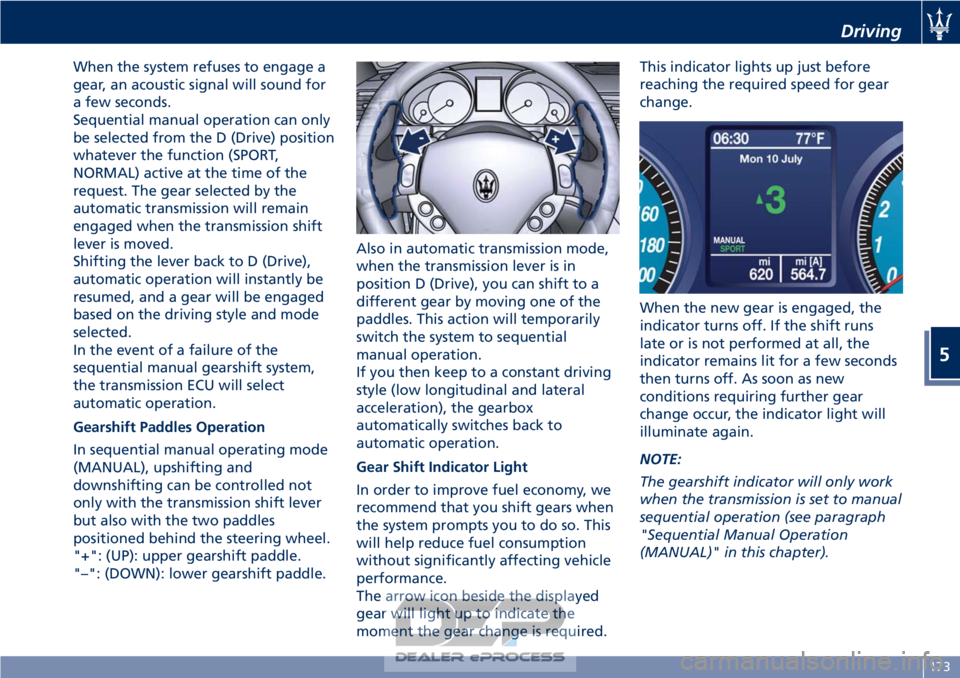
Gearshift Paddles Operation
In sequential manual operating mode
(MANUAL), upshifting and
downshifting can be controlled not
only with the transmission shift lever
but also with the two paddles
positioned behind the steering wheel.
"+": (UP): upper gearshift paddle.
"–": (DOWN): lower gearshift paddle.Also in automatic transmission mode,
when the transmission lever is in
position D (Drive), you can shift to a
different gear by moving one of the
paddles. This action will temporarily
switch the system to sequential
manual operation.
If you then keep to a constant driving
style (low longitudinal and lateral
acceleration), the gearbox
automatically switches back to
automatic operation.
Gear Shift Indicator Light
In order to improve fuel economy, we
recommend that you shift gears when
the system prompts you to do so. This
will help reduce fuel consumption
without significantly affecting vehicle
performance.
The arrow icon beside the displayed
gear will light up to indicate the
moment the gear change is required.This indicator lights up just before
reaching the required speed for gear
change.
When the new gear is engaged, the
indicator turns off. If the shift runs
late or is not performed at all, the
indicator remains lit for a few seconds
then turns off. As soon as new
conditions requiring further gear
change occur, the indicator light will
illuminate again.
NOTE:
The gearshift indicator will only work
when the transmission is set to manual
sequential operation (see paragraph
"Sequential Manual Operation
(MANUAL)" in this chapter).
Driving
5
173
Page 196 of 296
WARNING!
The wet performance (aquaplaning
resistance) will decrease
proportionally to the thickness of the
tread.
Tires Durability
The service life of a tire depends on
various factors including, but not
limited to:
• driving style;
• tire pressure;
• distance driven.
WARNING!
Tires and the spare tire (if equipped)
should be replaced after six years,
regardless of the remaining tread.
Failure to follow this warning could
result in tire failure.
Replacement Tires
NOTE:
In order to maintain high performance
and safety level under all driving
conditions, Maserati strongly
recommends to use tires equivalent to
the originals in size, quality and
performance when replacement is
needed.
For the size designation of your tire
see the label on the driver's side rear
door pillar or see table “Wheels” in
section “Features and Specifications”.
The “Load Index” and “Speed Symbol”
for your tire will be found on the
original equipment tire sidewall.
It is recommended to replace the two
front tires or two rear tires as a pair.
Replacing just one tire can seriously
affect your vehicle’s handling.
If you ever replace a wheel assembly,
make sure that the wheel’s
specifications (valve, TPMS sensor and
tire) match those of the original
wheels. Failure to use equivalent
replacement tires may adversely affect
the safety, handling, and ride of your
vehicle.
Your Authorized Maserati Dealer is
available to provide suggestions as to the types of tires most suited to the
use foreseen by the Customer.
WARNING!
• Do not use a tire, wheel size or
rating other than that specified for
your vehicle. Some combinations of
unapproved tires and wheels may
change suspension dimensions and
performance characteristics,
resulting in altered steering,
handling, and braking operations of
the vehicle. This can cause
unpredictable handling and stress to
steering and suspension
components. Use only the tire and
wheel sizes with load ratings
appointed for your vehicle.
• Never use a tire with a smaller load
index or capacity, other than what
was originally equipped on your
vehicle. Using a tire with a smaller
load index could result in tire
overloading and failure.
• Always check the maximum speed
rating on the tire sidewall on any
tire on the vehicle.
Driving
5
192
Page 200 of 296
(Continued)
style. Aftermarket wheels can cause
sensor damage. Do not use
aftermarket tire sealants or balance
beads, as damage to the sensors may
result.
• The system can temporarily experience radio-electric interference
emitted by devices using similar
frequencies.
• After inspecting or adjusting the tire pressure, always reinstall the valve
stem cap. This will prevent moisture
and dirt from entering the valve
stem and damage the TPMS internal
sensor.
NOTE:
• Driving
on a significantly
underinflated tire causes the tire to
overheat and may lead to tire failure.
Under-inflation also reduces fuel
efficiency and tire tread life, and may
affect the vehicle’s handling and
stopping ability.
• The TPMS is not a substitute for
proper tire maintenance, and it is the
driver’s responsibility to maintain
correct tire pressure using an
accurate tire pressure gage, even if
under-inflation has not reached the level to trigger illumination of the
TPMS light
.
• Seasonal temperature changes will
affect tire pressure, and the TPMS
will monitor the actual tire pressure
in the tire.
Viewing Messages on the
Display
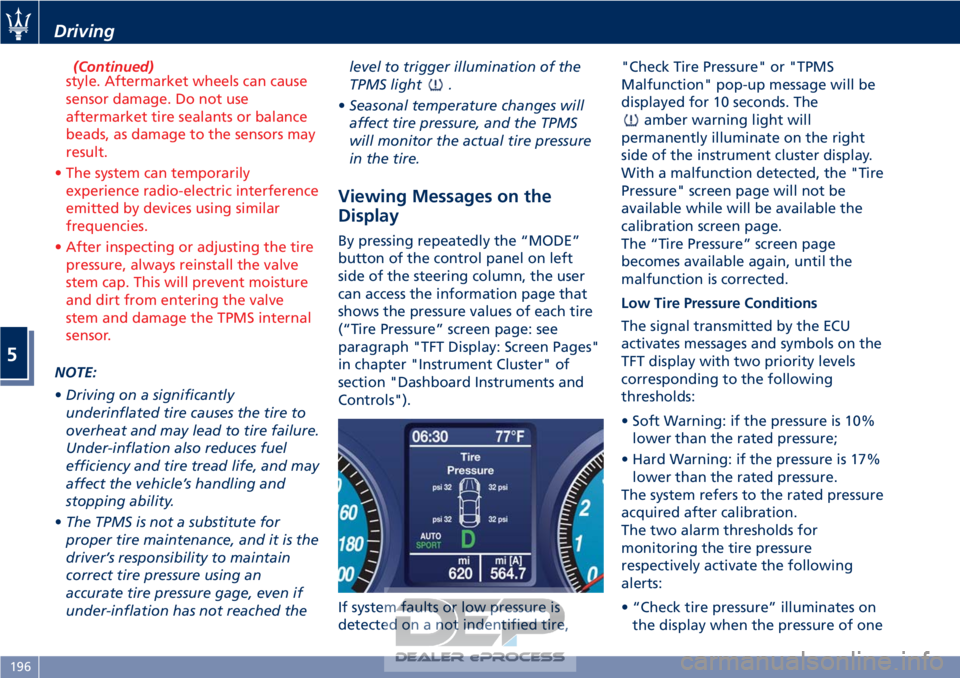
By pressing repeatedly the “MODE”
button of the control panel on left
side of the steering column, the user
can access the information page that
shows the pressure values of each tire
(“Tire Pressure” screen page: see
paragraph "TFT Display: Screen Pages"
in chapter "Instrument Cluster" of
section "Dashboard Instruments and
Controls").
If system faults or low pressure is
detected on a not indentified tire, "Check Tire Pressure" or "TPMS
Malfunction" pop-up message will be
displayed for 10 seconds. The
amber warning light will
permanently illuminate on the right
side of the instrument cluster display.
With a malfunction detected, the "Tire
Pressure" screen page will not be
available while will be available the
calibration screen page.
The “Tire Pressure” screen page
becomes available again, until the
malfunction is corrected.
Low Tire Pressure Conditions
The signal transmitted by the ECU
activates messages and symbols on the
TFT display with two priority levels
corresponding to the following
thresholds:
• Soft Warning: if the pressure is 10% lower than the rated pressure;
• Hard Warning: if the pressure is 17% lower than the rated pressure.
The system refers to the rated pressure
acquired after calibration.
The two alarm thresholds for
monitoring the tire pressure
respectively activate the following
alerts:
• “Check tire pressure” illuminates on the display when the pressure of one
Driving
5
196
Page 210 of 296
with the key removed to the ignition
switch.
• Remember that passing other vehicles when driving uphill is slower
and thus requires more free distance
on the road. If you are being
overtaken on a hill, slow down and
allow the other vehicle to pass.
Driving on Snow or Ice
Please consider some general advice
for driving in these conditions, listed
below.
• Maintain a very moderate speed.
• Fit snow chains or specific tires if the road is covered with snow: see the
paragraphs “Tires – General
Information” in this section.
• We recommend you to activate the “ICE” drive mode (see chapters
“Drive Mode” in this section).
• During the winter season, even apparently dry roads can have icy
sections. Be careful when crossing
bridges, viaducts and roads that have
little exposure to the sun and are
bordered by trees and rocks. They
may be icy.
• Keep an ample safe distance from the vehicles in front of you.
• Avoid sharp braking, sharp changes in direction and rapid acceleration. Rapid acceleration on snow covered
or icy surfaces may cause the driving
wheels to pull erratically to the right
or left. This phenomenon occurs
when there is a difference in the
surface traction under the rear
(driving) wheels.
WARNING!
Rapid acceleration on slippery surfaces
is dangerous. Unequal traction can
cause sudden pulling of the rear
driving wheels. You could lose control
of the vehicle and possibly have a
collision. Accelerate slowly and
carefully whenever there is likely to be
poor traction (ice, snow, wet mud,
loose sand, etc.).
Driving through Flooded
Sections
Driving through more than a
centimeters deep shallow standing
water section will require extra
caution to ensure passenger safety and
prevent damage to your vehicle.
WARNING!
Do not drive on or across a road or
path where water is flowing and/or
rising (as in storm run-off). Flowing
water can wear away the road or path
surface and cause your vehicle to sink
into deeper water. Furthermore,
flowing and/or rising water can carry
your vehicle away swiftly. Failure to
follow this warning may result in
injuries that are serious or fatal to
you, your passengers, and others
around you.
Although your vehicle is capable of
driving
through shallow standing
water, consider the following Caution
and Warning before doing so.
CAUTION!
• Always check the depth of the standing water before driving
through it. Never drive through
standing water that is deeper than
the bottom of the tire rims mounted
on the vehicle.
• Determine the condition of the road or the path that is under water and if
there are any obstacles in the way
Driving
5
206