tow MASERATI GRANTURISMO CONVERTIBLE 2020 User Guide
[x] Cancel search | Manufacturer: MASERATI, Model Year: 2020, Model line: GRANTURISMO CONVERTIBLE, Model: MASERATI GRANTURISMO CONVERTIBLE 2020Pages: 296, PDF Size: 8.23 MB
Page 90 of 296
Left-hand Multifunction Lever
The multifunction lever on the left side
of the steering column controls the
operation of the turn signals,
headlight beam selection and
overtaking lights.
This multifunction lever also controls
the Cruise Control. See chapter "Cruise
Control" in section "Driving" for
further information.
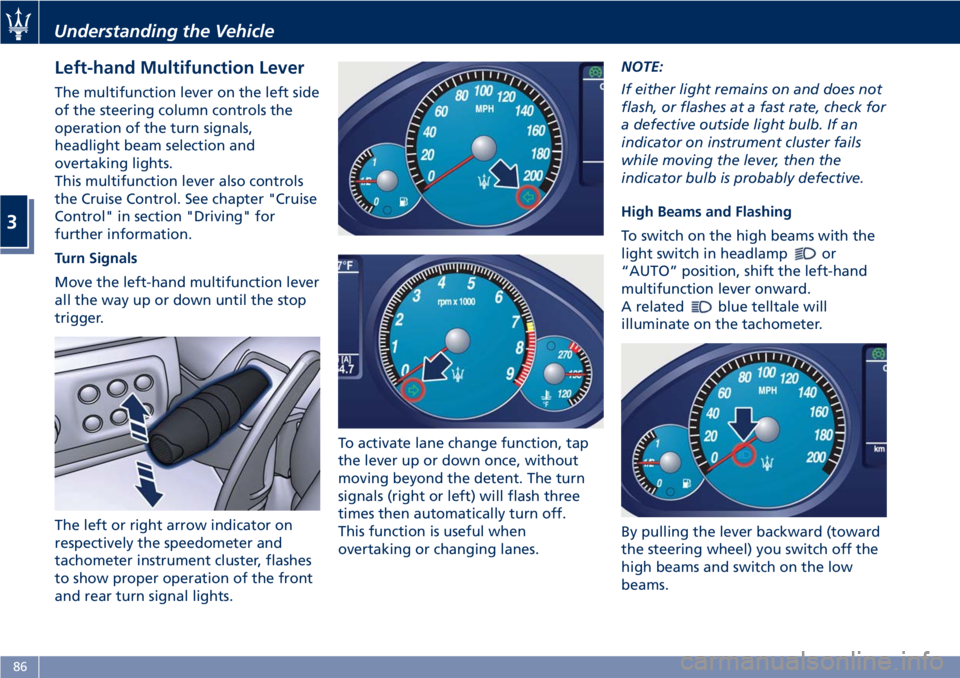
Turn Signals
Move the left-hand multifunction lever
all the way up or down until the stop
trigger.
The left or right arrow indicator on
respectively the speedometer and
tachometer instrument cluster, flashes
to show proper operation of the front
and rear turn signal lights.To activate lane change function, tap
the lever up or down once, without
moving beyond the detent. The turn
signals (right or left) will flash three
times then automatically turn off.
This function is useful when
overtaking or changing lanes.NOTE:
If either light remains on and does not
flash, or flashes at a fast rate, check for
a defective outside light bulb. If an
indicator on instrument cluster fails
while moving the lever, then the
indicator bulb is probably defective.
High Beams and Flashing
To switch on the high beams with the
light switch in headlamp
or
“AUTO” position, shift the left-hand
multifunction lever onward.
A related
blue telltale will
illuminate on the tachometer.
By pulling the lever backward (toward
the steering wheel) you switch off the
high beams and switch on the low
beams.
Understanding the Vehicle
3
86
Page 91 of 296
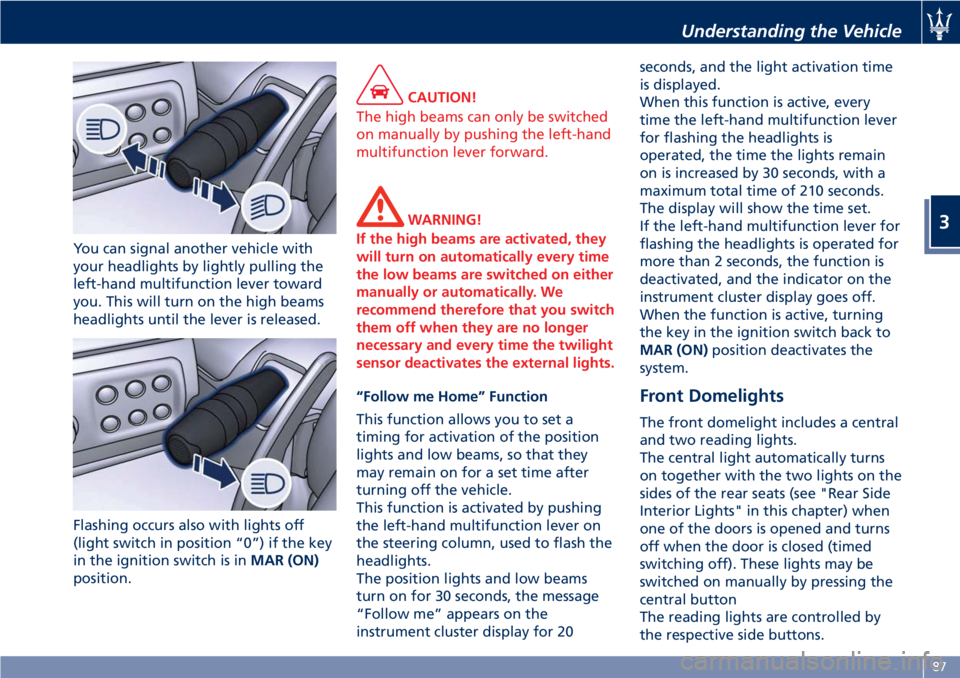
You can signal another vehicle with
your headlights by lightly pulling the
left-hand multifunction lever toward
you. This will turn on the high beams
headlights until the lever is released.
Flashing occurs also with lights off
(light switch in position “0”) if the key
in the ignition switch is inMAR (ON)
position.
CAUTION!
The high beams can only be switched
on manually by pushing the left-hand
multifunction lever forward.
WARNING!
If the high beams are activated, they
will turn on automatically every time
the low beams are switched on either
manually or automatically. We
recommend therefore that you switch
them off when they are no longer
necessary and every time the twilight
sensor deactivates the external lights.
“Follow me Home” Function
This function allows you to set a
timing for activation of the position
lights and low beams, so that they
may remain on for a set time after
turning off the vehicle.
This function is activated by pushing
the left-hand multifunction lever on
the steering column, used to flash the
headlights.
The position lights and low beams
turn on for 30 seconds, the message
“Follow me” appears on the
instrument cluster display for 20seconds, and the light activation time
is displayed.
When this function is active, every
time the left-hand multifunction lever
for flashing the headlights is
operated, the time the lights remain
on is increased by 30 seconds, with a
maximum total time of 210 seconds.
The display will show the time set.
If the left-hand multifunction lever for
flashing the headlights is operated for
more than 2 seconds, the function is
deactivated, and the indicator on the
instrument cluster display goes off.
When the function is active, turning
the key in the ignition switch back to
MAR (ON)position deactivates the
system.Front Domelights
The front domelight includes a central
and two reading lights.
The central light automatically turns
on together with the two lights on the
sides of the rear seats (see "Rear Side
Interior Lights" in this chapter) when
one of the doors is opened and turns
off when the door is closed (timed
switching off). These lights may be
switched on manually by pressing the
central button
The reading lights are controlled by
the respective side buttons.
Understanding the Vehicle
3
87
Page 95 of 296
Windshield Washers and
Headlight Washers
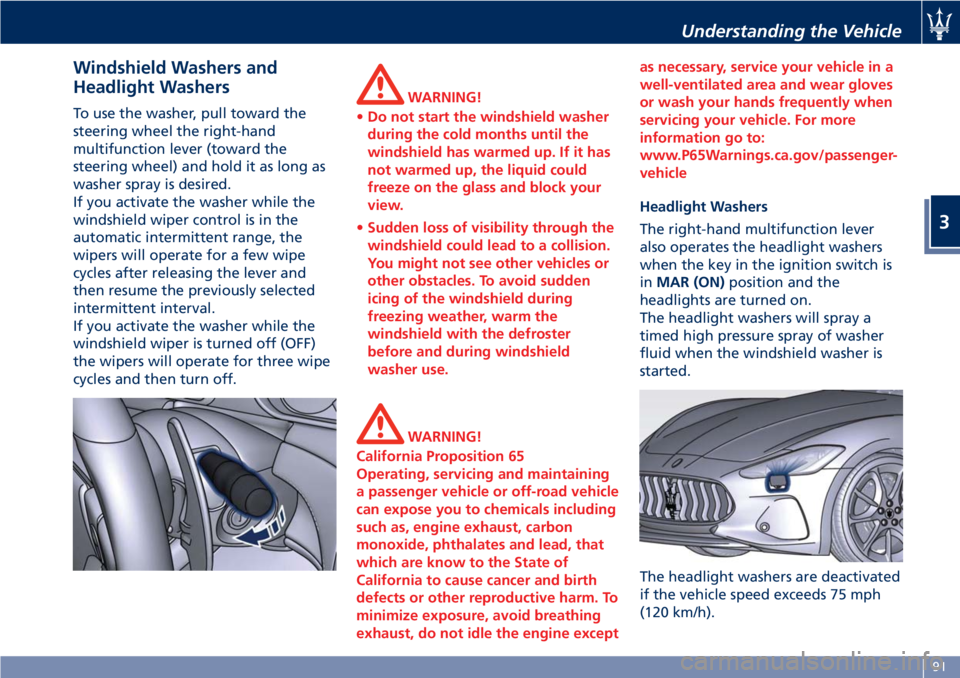
To use the washer, pull toward the
steering wheel the right-hand
multifunction lever (toward the
steering wheel) and hold it as long as
washer spray is desired.
If you activate the washer while the
windshield wiper control is in the
automatic intermittent range, the
wipers will operate for a few wipe
cycles after releasing the lever and
then resume the previously selected
intermittent interval.
If you activate the washer while the
windshield wiper is turned off (OFF)
the wipers will operate for three wipe
cycles and then turn off.WARNING!
•Do not start the windshield washer
during the cold months until the
windshield has warmed up. If it has
not warmed up, the liquid could
freeze on the glass and block your
view.
•Sudden loss of visibility through the
windshield could lead to a collision.
You might not see other vehicles or
other obstacles. To avoid sudden
icing of the windshield during
freezing weather, warm the
windshield with the defroster
before and during windshield
washer use.
WARNING!
California Proposition 65
Operating, servicing and maintaining
a passenger vehicle or off-road vehicle
can expose you to chemicals including
such as, engine exhaust, carbon
monoxide, phthalates and lead, that
which are know to the State of
California to cause cancer and birth
defects or other reproductive harm. To
minimize exposure, avoid breathing
exhaust, do not idle the engine exceptas necessary, service your vehicle in a
well-ventilated area and wear gloves
or wash your hands frequently when
servicing your vehicle. For more
information go to:
www.P65Warnings.ca.gov/passenger-
vehicle
Headlight Washers
The right-hand multifunction lever
also operates the headlight washers
when the key in the ignition switch is
inMAR (ON)position and the
headlights are turned on.
The headlight washers will spray a
timed high pressure spray of washer
fluid when the windshield washer is
started.
The headlight washers are deactivated
if the vehicle speed exceeds 75 mph
(120 km/h).
Understanding the Vehicle
3
91
Page 111 of 296
Cargo Area
WARNING!
To help protect against personal
injury, passengers must not be seated
in the rear cargo area. The rear cargo
space is intended for load carrying
purposes only, not for passengers,
who should sit in seats and use seat
belts.
Vehicle Load Carrying Capacity
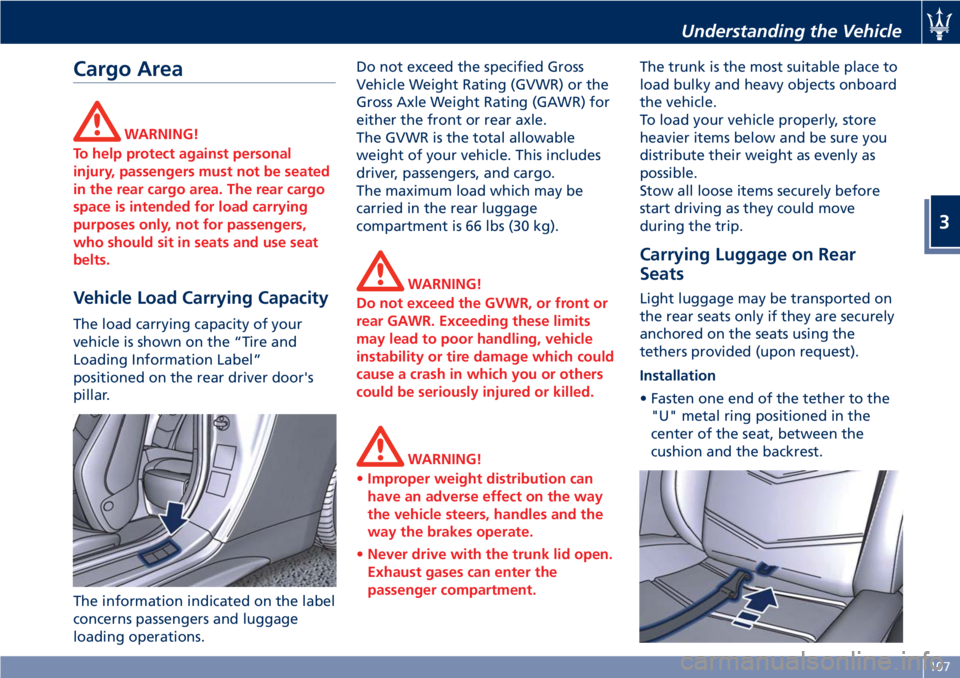
The load carrying capacity of your
vehicle is shown on the “Tire and
Loading Information Label”
positioned on the rear driver door's
pillar.
The information indicated on the label
concerns passengers and luggage
loading operations.Do not exceed the specified Gross
Vehicle Weight Rating (GVWR) or the
Gross Axle Weight Rating (GAWR) for
either the front or rear axle.
The GVWR is the total allowable
weight of your vehicle. This includes
driver, passengers, and cargo.
The maximum load which may be
carried in the rear luggage
compartment is 66 lbs (30 kg).
WARNING!
Do not exceed the GVWR, or front or
rear GAWR. Exceeding these limits
may lead to poor handling, vehicle
instability or tire damage which could
cause a crash in which you or others
could be seriously injured or killed.
WARNING!
•Improper weight distribution can
have an adverse effect on the way
the vehicle steers, handles and the
way the brakes operate.
•Never drive with the trunk lid open.
Exhaust gases can enter the
passenger compartment.
The trunk is the most suitable place to
load bulky and heavy objects onboard
the vehicle.
To load your vehicle properly, store
heavier items below and be sure you
distribute their weight as evenly as
possible.
Stow all loose items securely before
start driving as they could move
during the trip.
Carrying Luggage on Rear
Seats
Light luggage may be transported on
the rear seats only if they are securely
anchored on the seats using the
tethers provided (upon request).
Installation
• Fasten one end of the tether to the
"U" metal ring positioned in the
center of the seat, between the
cushion and the backrest.
Understanding the Vehicle
3
107
Page 163 of 296
Engine Start Failure
CAUTION!
• Do not attempt to push or tow your
vehicle to get it started. Vehicles
equipped with an automatic
transmission cannot be started this
way.
• If the vehicle battery is dead, booster
cables may be used to obtain a start
from a booster battery or the
battery in another vehicle. This type
of start can be dangerous if done
improperly. See “Auxiliary Jump
Start Procedure” in section “In an
Emergency” for further information.
Starting by cold engine
Start-off slowly, avoiding sudden
acceleration and rev the engine up at
low medium speeds. High-
performance driving should be
avoided until the engine temperature
reaches 149-158°F (65-70°C).
Engine Turn-Off
• Place the shift lever in P (Park) (see
“Automatic Transmission” in this
section).
• With the engine at idle, turn the key
in the ignition switch toSTOP (OFF)position. A burst on the accelerator
pedal before turning off the engine
has no purpose and increases fuel
consumption.
WARNING!
Never leave a vehicle out of the P
(Park) position, as it could move.
The key can only be removed from the
ignition switch when the transmission
is in P (Park) position and within 30
seconds after turning the key toSTOP
(OFF)position. If you do not remove
the key within 30 seconds, you will
need to turn it back toMAR (ON)and
then toSTOP (OFF)position to have a
further 30 seconds within which to
remove the key from the ignition
switch.
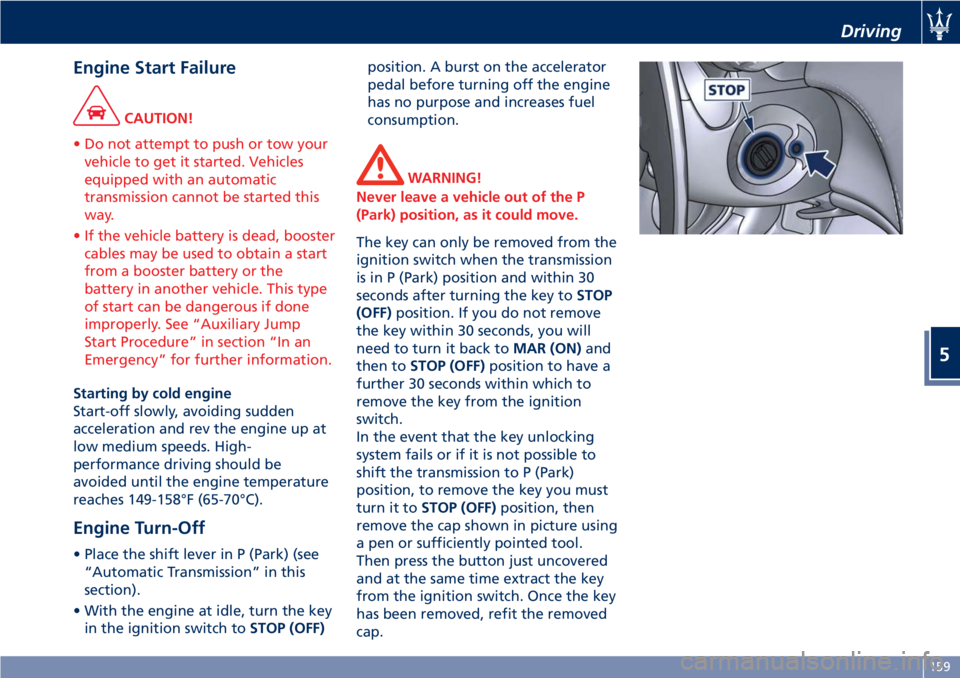
In the event that the key unlocking
system fails or if it is not possible to
shift the transmission to P (Park)
position, to remove the key you must
turn it toSTOP (OFF)position, then
remove the cap shown in picture using
a pen or sufficiently pointed tool.
Then press the button just uncovered
and at the same time extract the key
from the ignition switch. Once the key
has been removed, refit the removed
cap.
Driving
5
159
Page 167 of 296
pedal pressed. To move the shift lever
from P (Park) position to any other
position, the engine must be switched
on. The engine can be regularly
started in P (Park) range. Never
attempt to use P (Park) while the
vehicle is in motion.
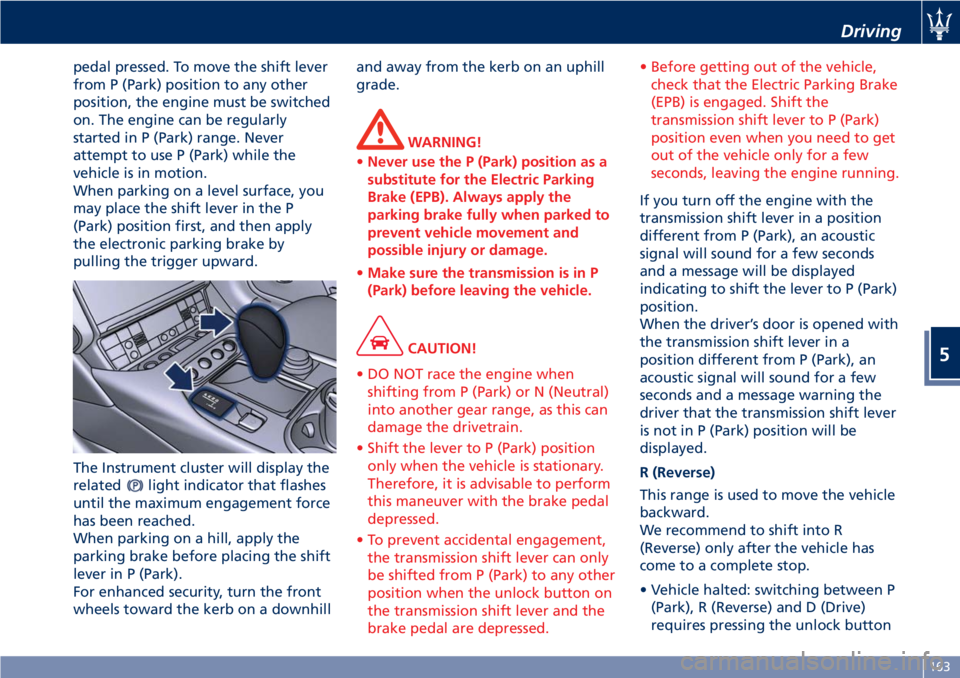
When parking on a level surface, you
may place the shift lever in the P
(Park) position first, and then apply
the electronic parking brake by
pulling the trigger upward.
The Instrument cluster will display the
related
light indicator that flashes
until the maximum engagement force
has been reached.
When parking on a hill, apply the
parking brake before placing the shift
lever in P (Park).
For enhanced security, turn the front
wheels toward the kerb on a downhilland away from the kerb on an uphill
grade.
WARNING!
•Never use the P (Park) position as a
substitute for the Electric Parking
Brake (EPB). Always apply the
parking brake fully when parked to
prevent vehicle movement and
possible injury or damage.
•Make sure the transmission is in P
(Park) before leaving the vehicle.
CAUTION!
• DO NOT race the engine when
shifting from P (Park) or N (Neutral)
into another gear range, as this can
damage the drivetrain.
• Shift the lever to P (Park) position
only when the vehicle is stationary.
Therefore, it is advisable to perform
this maneuver with the brake pedal
depressed.
• To prevent accidental engagement,
the transmission shift lever can only
be shifted from P (Park) to any other
position when the unlock button on
the transmission shift lever and the
brake pedal are depressed.• Before getting out of the vehicle,
check that the Electric Parking Brake
(EPB) is engaged. Shift the
transmission shift lever to P (Park)
position even when you need to get
out of the vehicle only for a few
seconds, leaving the engine running.
If you turn off the engine with the
transmission shift lever in a position
different from P (Park), an acoustic
signal will sound for a few seconds
and a message will be displayed
indicating to shift the lever to P (Park)
position.
When the driver’s door is opened with
the transmission shift lever in a
position different from P (Park), an
acoustic signal will sound for a few
seconds and a message warning the
driver that the transmission shift lever
is not in P (Park) position will be
displayed.
R (Reverse)
This range is used to move the vehicle
backward.
We recommend to shift into R
(Reverse) only after the vehicle has
come to a complete stop.
• Vehicle halted: switching between P
(Park), R (Reverse) and D (Drive)
requires pressing the unlock button
Driving
5
163
Page 168 of 296
on the lever and brake pedal: N
(Neutral) is reached only by pressing
the unlock button on the lever.
• Vehicle moving: the driver can switch
from R (Reverse) to N (Neutral), or
vice versa, by pressing the unlock
button on the shift lever.
When the transmission shift lever is in
R (Reverse) position, the system emits
an acoustic signal for a few seconds.
You can also shift the transmission
shift lever to R (Reverse) position when
the vehicle is not completely
stationary, however, this does not
mean that reverse gear is actually
engaged, since there is a limit speed
above which the gear may not be
engaged. When the speed goes below
this limit, reverse gear is engaged.
CAUTION!
To prevent accidental engagement,
the transmission shift lever can only be
moved from R (Reverse) to any other
position when the unlock button is
pressed. It is advisable to also depress
the brake pedal when shifting to this
position.
N (Neutral)
This range should be used when you
need to move the vehicle.• Vehicle halted and engine started:
switching from N (Neutral) to R
(Reverse), P (Park) and/or D (Drive)
requires brake pedal and unlock
button pressed.
• Vehicle moving: switching from N
(Neutral) to R (Reverse) and/or D
(Drive) requires pressing the unlock
button. Switching to R (Reverse)
starting from N (Neutral) is only
possible if the vehicle is moving
backward, while switching to D
(Drive) starting from N (Neutral) is
only possible if the vehicle is moving
forward.
Set the parking brake and shift the
transmission into P (Park) if you must
leave the vehicle.
WARNING!
Do not switch to N (Neutral) and/or
never turn off the ignition to coast
downhill. These are unsafe practices
that limit driver’s response to
changing traffic or road conditions. It
is possible to lose control of the
vehicle and have a collision.
CAUTION!
Towing the vehicle, coasting, ordriving for any other reason with the
transmission in N (Neutral) can result
in transmission damage. See “Towing a
Disabled Vehicle” in section “In an
Emergency” for further information.
D (Drive)
This range should be used for most city
and highway driving. It provides the
smoothest upshifts and downshifts and
the best fuel economy. The
transmission automatically shifts up
and down through all gears.
When this automatic forward gear is
set, the letter “D” illuminates on the
gear display and on the instrument
cluster.
The D (Drive) position provides
optimum driving characteristics under
all normal operating conditions of the
vehicle.
• Vehicle stationary: switching from D
(Drive) to R (Reverse) and/or to P
(Park) requires brake pedal and
unlock button pressed: reaching N
(Neutral) starting from D (Drive) is
allowed by only pressing the unlock
button on the shift lever.
• To enable special operations while
the car is moving at a low speed,
such as getting out of marsh or snow,
it is possible to run quickly from D
Driving
5
164
Page 175 of 296
can be activated at any time and the
system limits the engine speed rate to
3000 rpm in all gears except for the
6th, unrequested gearshifts could take
place.
In any case, it is advisable to
deactivate SPORT mode before
selecting ICE (low-grip) mode.
When sequential manual gearshifting
is active, regardless of the mode set
(NORMAL / SPORT / ICE), the
transmission will automatically upshift
or downshift when reaching the
minimum and maximum rpm. This is
to prevent engine overrevving or
underrevving.
(ESC Off) Mode
The ESC system is designed to
automatically activate every time the
engine is started and can be
deactivated by pressing
(ESC Off)
button on the central console for
about 2 seconds. The
(ESC Off)
amber warning light illuminates on
the instrument cluster as well as on
the display, where it is accompanied
by a specific message.
The ESC (Electronic Stability Control)
antiyawing system incorporates all of
the vehicle control systems: ABS, EBD,
ASR and MSR (see "Brake and StabilityControl System" in this section for
further information).
The system is fitted with a unit that
predicts the vehicle behavior with
extreme accuracy. The system can
detect when the driver is about to lose
control of the vehicle. In this case, it
can activate the brake calipers
individually and engine control, in
order to create a torque sufficient to
resist the vehicle’s yawing moment.
Press
(ESC Off) button again to
reactivate the system.
The
(ESC On) amber warning light
on the instrument cluster flashes
during all the operating phases.
, the system is automatically disabled
and cannot be re-activated. While
driving, this condition is signaled by
the
(ESC On) amber warning light,
that illuminates both on the
instrument cluster as well as on the
multi-function display, where it is
accompanied by the message “ESC
unavailable go to dealer”.
When the engine is started, the system
malfunction is indicated by the
illumination of the
(ESC On) amber
warning light.
CAUTION!
• In the event of a fault, and with the
ESC system disabled (
(ESC Off)
button pressed), the vehicle behaves
as if it were not equipped with this
system: however, we recommend
you contact theAuthorized Maserati
Dealeras soon as possible to have
the system checked.
• If you have to tow the vehicle with 2
wheels raised, make sure the key in
the ignition switch is in theSTOP
(OFF)position. Otherwise, with the
ESC system active (
(ESC Off)
button not pressed), the control unit
will store a malfunction with
consequent illumination of the
(ESC On) amber warning lights on
the instrument cluster and on the
display. Should this occur, contact
theAuthorized Maserati Dealerto
have the system repaired.
• In low- and medium-grip conditions
(e.g., rain, snow, ice, sand, etc.) it is
advisable not to activate SPORT
mode, even with the ESC system
active (
(ESC Off) button not
pressed).
Driving
5
171
Page 181 of 296
engage the parking brake, but also to
shift the transmission shift lever to P
(Park) before leaving the vehicle.
When parking on hill roads, it is
important to turn the front wheels
toward the curb on a downhill grade
and away from the curb on an uphill
grade.
Apply the parking brake before
placing the shift lever in P (Park),
otherwise the load on the
transmission locking mechanism may
make it difficult to move the shift
lever out of P (Park).
In certain conditions, it is however
advisable to disengage the parking
brake manually and slightly apply the
service brake for starting off. This is
advisable when there are obstacles
very close to the vehicle in the
direction in which you intend to move.
Brake and Stability
Control System
The vehicle is equipped with an
Electronic Stability Control (ESC)
anti-yawing system, which helps to
maintain directional control in the
event of loss of grip of the tires. The
system is able to detect potentially
dangerous situations for the stability
of the vehicle and automatically sets
the brakes on all four wheels in a
differentiated manner, in order to
provide a torque settlement of the
vehicle.
ESC includes the following subsystems:
• ASR (Anti-Slip Regulation)
• ABS (Anti-lock Braking System)
• EBD (Electronic Brake-force
Distribution)
• HBA (Hydraulic Brake Assistance)
• BOS (Brake Override System)
WARNING!
•These systems cannot prevent the
natural laws of physics from
affecting the vehicle, nor can they
increase traction, braking or steering
efficiency beyond that afforded by
the condition of the vehicle brakes
and tires.•These systems cannot prevent
collisions, including those resulting
from excessive speed in turns,
following another vehicle too
closely, or hydroplaning.
•The capabilities of a vehicle
equipped with these systems must
never be exploited in a reckless or
dangerous manner that could
jeopardize the driver’s and the
passenger’s safety or the safety of
others.
Electronic Stability Control
(ESC)
This system enhances directional
control and stability of the vehicle
under various driving conditions. The
ESC corrects over steering and under
steering of the vehicle by applying the
brake to the appropriate wheel.
Engine power may also be reduced to
assist in counteracting the conditions
of instability and maintain the right
direction. The system is also able to
reduce the engine power.
Through sensors fitted on the vehicle,
the ESC system detects the driver’s
chosen direction comparing it to the
one maintained while running. In case
of discrepancy between the required
trajectory and the current one, the
Driving
5
177
Page 188 of 296
and automatic transmission control
systems. When these systems are
operating properly, your vehicle will
provide excellent performance and
fuel economy, as well as engine
emissions well within current local
regulations of various countries.
If any of these systems require service,
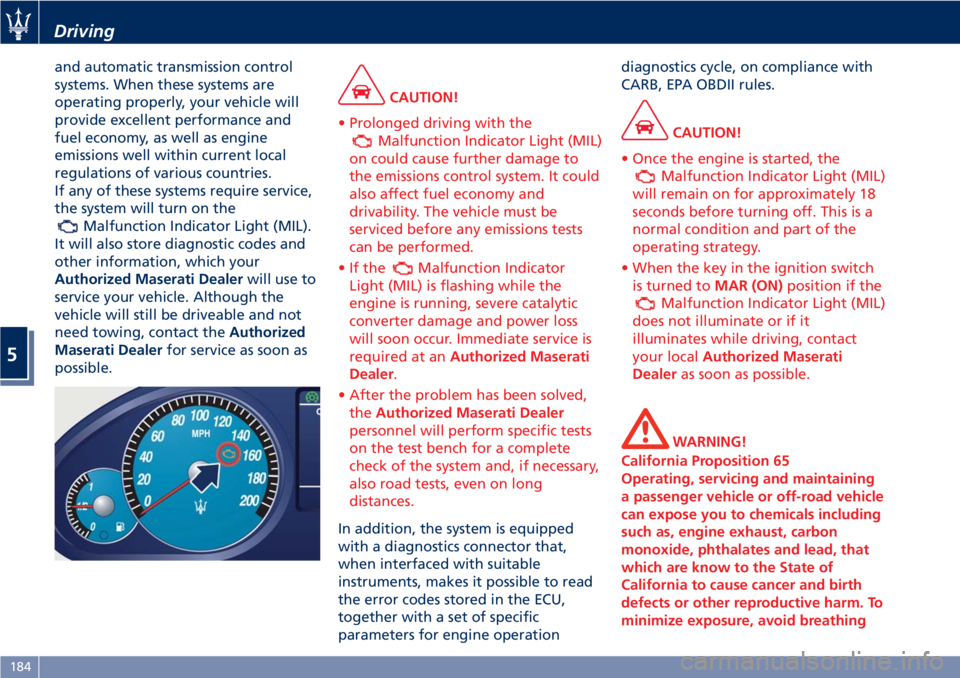
the system will turn on the
Malfunction Indicator Light (MIL).
It will also store diagnostic codes and
other information, which your
Authorized Maserati Dealerwill use to
service your vehicle. Although the
vehicle will still be driveable and not
need towing, contact theAuthorized
Maserati Dealerfor service as soon as
possible.
CAUTION!
• Prolonged driving with the
Malfunction Indicator Light (MIL)
on could cause further damage to
the emissions control system. It could
also affect fuel economy and
drivability. The vehicle must be
serviced before any emissions tests
can be performed.
•Ifthe
Malfunction Indicator
Light (MIL) is flashing while the
engine is running, severe catalytic
converter damage and power loss
will soon occur. Immediate service is
required at anAuthorized Maserati
Dealer.
• After the problem has been solved,
theAuthorized Maserati Dealer
personnel will perform specific tests
on the test bench for a complete
check of the system and, if necessary,
also road tests, even on long
distances.
In addition, the system is equipped
with a diagnostics connector that,
when interfaced with suitable
instruments, makes it possible to read
the error codes stored in the ECU,
together with a set of specific
parameters for engine operationdiagnostics cycle, on compliance with
CARB, EPA OBDII rules.
CAUTION!
• Once the engine is started, the
Malfunction Indicator Light (MIL)
will remain on for approximately 18
seconds before turning off. This is a
normal condition and part of the
operating strategy.
• When the key in the ignition switch
is turned toMAR (ON)position if the
Malfunction Indicator Light (MIL)
does not illuminate or if it
illuminates while driving, contact
your localAuthorized Maserati
Dealeras soon as possible.
WARNING!
California Proposition 65
Operating, servicing and maintaining
a passenger vehicle or off-road vehicle
can expose you to chemicals including
such as, engine exhaust, carbon
monoxide, phthalates and lead, that
which are know to the State of
California to cause cancer and birth
defects or other reproductive harm. To
minimize exposure, avoid breathing
Driving
5
184