parking sensors MASERATI LEVANTE 2019 Owners Manual
[x] Cancel search | Manufacturer: MASERATI, Model Year: 2019, Model line: LEVANTE, Model: MASERATI LEVANTE 2019Pages: 436, PDF Size: 15.24 MB
Page 83 of 436
• If using the vehicle seat belt, always
check that the belt does not restrain
the child's throat.
• Firmly pull the seat belt to check
that it is correctly buckled.
• Never allow a child to seat
improperly or to unbuckle the seat
belt while driving.
• Never allow a child to wear the
shoulder portion of the belt under
the arms or behind the back.
• Never carry children on your lap, not
even newborns. No one can restrain
a child in the event of an accident.
• In case of accident, replace the child
seat with a new one. Transporting Pets Air bags deploying in the front seat
could harm your pet. An unrestrained
pet will be thrown about and possibly
injured, or injure a passenger during
panic braking or in an accident.
Pets should be restrained in the rear
seat in pet harnesses or pet carriers
that are secured by vehicle seat belts.
Park Assist The Park Assist (also called
“ParkSense”) system provides visual
and audible indications of the distance
between the rear and/or front bumper
and a detected obstacle when backing
up or moving forward, e.g. during a
parking maneuver.
Besides the use of the sensors
available on the bumpers and of the
rear parking camera, the vehicle may
be equipped with surround view
cameras (optional) to assist the driver
during maneuvers on dead-ends/roads
and on intersections. For more details
on this option, see chapter "Surround
View Camera System (optional)" in
this section.
Refer to “Park Assist System Usage
Precautions” for limitations of this
system and recommendations.
Park Assist system will retain the last
system state (enabled or disabled)
from the last ignition cycle when the
ignition is changed to the RUN
position.
Park Assist system can be active only
when the shift lever is in R (Reverse) or
D (Drive).
If Park Assist is enabled at one of
these shift lever positions, the system
will remain active until the vehicleBefore Starting
2
79
Page 87 of 436
Enabling and Disabling Park
Assist By accessing the submenu “Safety &
Driving Assistant” from MTC+ System,
the “Park Assist” can be disabled
(option “Off”). The available options
regarding the warning alerts are:
“Sound” or “Sound + Display”. Refer
to “MTC+ Settings” in section
“Dashboard Instruments and
Controls” for further information.
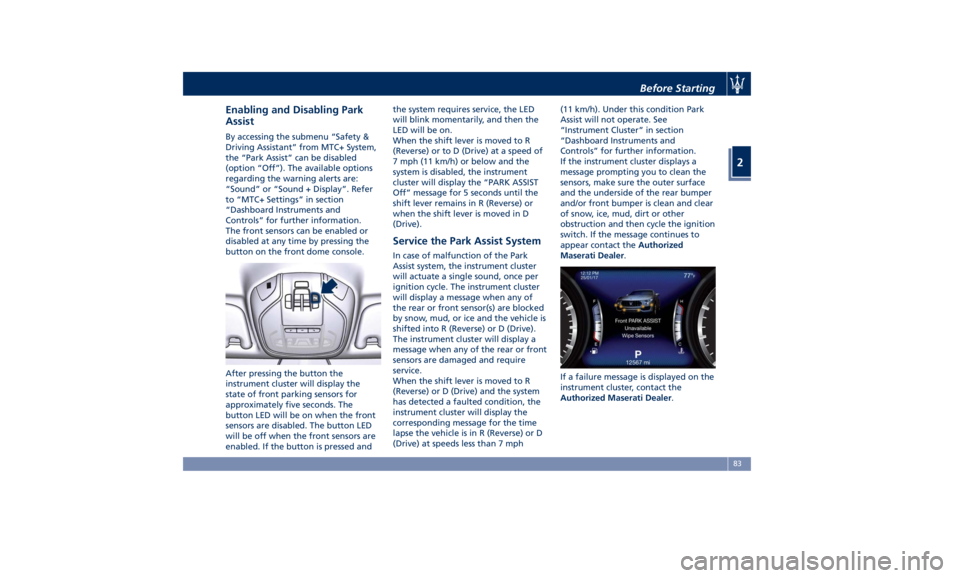
The front sensors can be enabled or
disabled at any time by pressing the
button on the front dome console.
After pressing the button the
instrument cluster will display the
state of front parking sensors for
approximately five seconds. The
button LED will be on when the front
sensors are disabled. The button LED
will be off when the front sensors are
enabled. If the button is pressed and the system requires service, the LED
will blink momentarily, and then the
LED will be on.
When the shift lever is moved to R
(Reverse) or to D (Drive) at a speed of
7 mph (11 km/h) or below and the
system is disabled, the instrument
cluster will display the “PARK ASSIST
Off” message for 5 seconds until the
shift lever remains in R (Reverse) or
when the shift lever is moved in D
(Drive).
Service the Park Assist System In case of malfunction of the Park
Assist system, the instrument cluster
will actuate a single sound, once per
ignition cycle. The instrument cluster
will display a message when any of
the rear or front sensor(s) are blocked
by snow, mud, or ice and the vehicle is
shifted into R (Reverse) or D (Drive).
The instrument cluster will display a
message when any of the rear or front
sensors are damaged and require
service.
When the shift lever is moved to R
(Reverse) or D (Drive) and the system
has detected a faulted condition, the
instrument cluster will display the
corresponding message for the time
lapse the vehicle is in R (Reverse) or D
(Drive) at speeds less than 7 mph (11 km/h). Under this condition Park
Assist will not operate. See
“Instrument Cluster” in section
“Dashboard Instruments and
Controls” for further information.
If the instrument cluster displays a
message prompting you to clean the
sensors, make sure the outer surface
and the underside of the rear bumper
and/or front bumper is clean and clear
of snow, ice, mud, dirt or other
obstruction and then cycle the ignition
switch. If the message continues to
appear contact the Authorized
Maserati Dealer .
If a failure message is displayed on the
instrument cluster, contact the
Authorized Maserati Dealer .Before Starting
2
83
Page 88 of 436
Cleaning the Park Assist
Sensors When cleaning the sensors, take
special care not to scratch or damage
them; therefore, do not use dry, rough
or hard cloths.
The sensors must be washed with clean
water, possibly adding car shampoo.
Should you need to repaint the
bumper or in case of paint touch-ups
in the sensor area, please contact
exclusively the Authorized Maserati
Dealer . Incorrect paint application
could affect the parking sensors
operation.
Park Assist System Usage
Precautions NOTE:
• Jackhammers, large trucks, and other
vibrations could affect the
performance of Park Assist.
• Objects such as bicycle carriers, trailer
hitches, etc., must not be placed
within 12 in (30 cm) from the rear
bumper while driving the vehicle.
Failure to do so can result in the
system misinterpreting a close object
as a sensor problem, causing the
service Park Assist message to be
displayed in the instrument cluster. CAUTION!
• Park Assist is only a parking aid and
it is unable to recognize every
obstacle, including small obstacles.
Parking curbs might only be
temporarily detected or not detected
at all. Obstacles located above or
below the sensors will not be
detected when they are in close
proximity.
• The vehicle must be driven slowly
when using Park Assist in order to be
able to stop in time when an
obstacle is detected. When backing
up, it is recommended that the driver
looks over his/her shoulder when
using Park Assist.
WARNING!
Drivers must be careful when backing
up even when using the Park Assist
system. Always check carefully behind
your vehicle, look behind you, and be
sure to check for pedestrians, animals,
other vehicles, obstructions, and blind
spots before backing up. You are
responsible for safety and must
continue to pay attention to your surroundings. Failure to do so can
result in serious injury or death.
Park Assist Volume The volume of the acoustic signal
emitted by the front and rear parking
sensors is set to the medium level.
Three different levels of volume can be
selected via the submenu “Safety &
Driving Assistant” from the MTC+
System.
Low level is useful in certain conditions
when the parking sensor acoustic
signal keeps coming on although there
is no actual collision hazard. This may
typically occur when driving in a queue
or when the vehicle is overtaken by
motorcycles or other vehicles on one
or both sides in a queue of traffic.
When you set the volume, only the
parking sensor acoustic signal will be
affected. The radio or any other
devices connected to the vehicle sound
system will not be affected.
Refer to chapter “MTC+ Settings” in
section “Dashboard Instruments and
Controls” for further information.
Operation with a Trailer The operation of the rear sensors is
automatically deactivated when the
trailer's electric plug is inserted in theBefore Starting
2
84
Page 89 of 436
vehicle's tow hook socket, while the
front sensors stay active and can
provide acoustic and visual warnings.
The rear sensors are automatically
reactivated when the trailer's cable
plug is removed.
Rear Parking Camera Your vehicle is equipped with a rear
parking camera that allows you to see
an image on the MTC+ screen of the
rear surroundings of your vehicle
whenever the shift lever is put into R
(Reverse).
When “Parkview Camera Off Delay”
mode is enabled, the rear view image
shall be displayed for up to 10 seconds
after shifting out of R (Reverse).
When “Rearwiew Camera Delay”
mode is enabled, the rear view image
shall be displayed for up to 10 seconds
after shifting out of R (Reverse).
To assist the driver during maneuvers
on dead-ends/roads and on
intersections, the vehicle may be
equipped with an optional surround
view camera system. In this case, the
rear parking camera is integrated into
the surround view camera system. In
both configurations (rear parking
camera only or surround view camera
system), you can monitor the rear
view. For more details on this option,
see chapter "Surround View Camera
System (optional)" in this section.
The image will be displayed along
with a caution note to “Check Entire
Surroundings” across the top of the screen. After five seconds this note
will disappear.
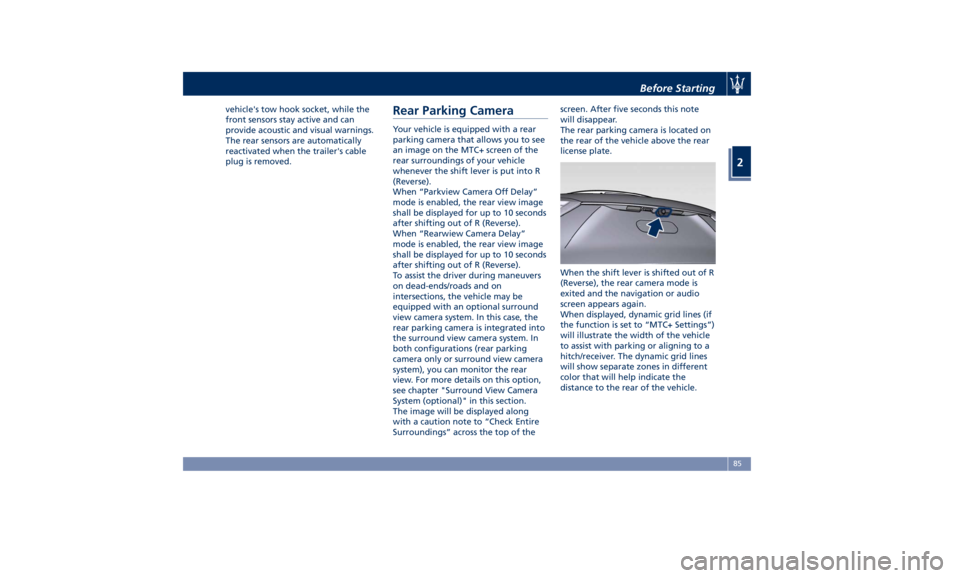
The rear parking camera is located on
the rear of the vehicle above the rear
license plate.
When the shift lever is shifted out of R
(Reverse), the rear camera mode is
exited and the navigation or audio
screen appears again.
When displayed, dynamic grid lines (if
the function is set to “MTC+ Settings”)
will illustrate the width of the vehicle
to assist with parking or aligning to a
hitch/receiver. The dynamic grid lines
will show separate zones in different
color that will help indicate the
distance to the rear of the vehicle.Before Starting
2
85
Page 206 of 436
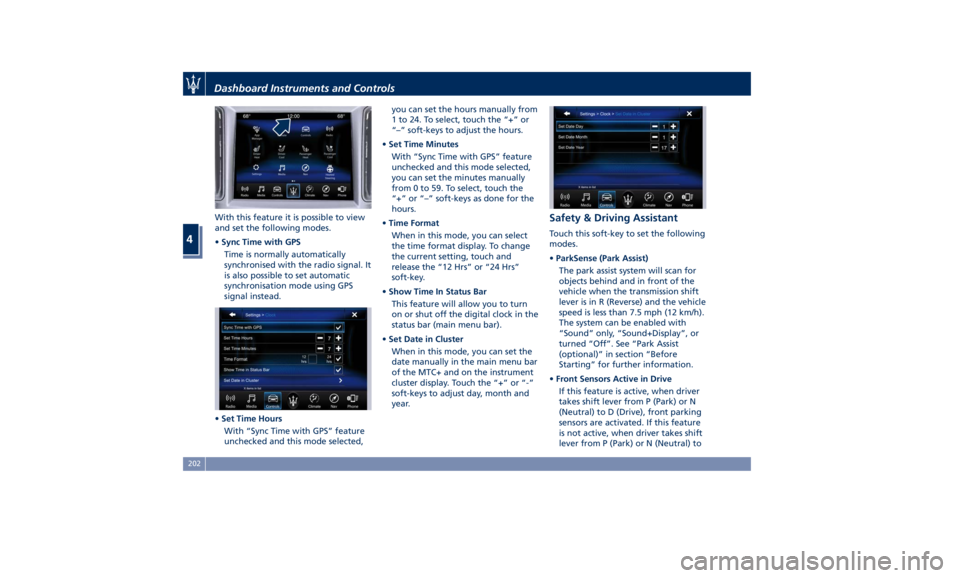
With this feature it is possible to view
and set the following modes.
• Sync Time with GPS
Time is normally automatically
synchronised with the radio signal. It
is also possible to set automatic
synchronisation mode using GPS
signal instead.
• Set Time Hours
With “Sync Time with GPS” feature
unchecked and this mode selected, you can set the hours manually from
1 to 24. To select, touch the “+” or
“–” soft-keys to adjust the hours.
• Set Time Minutes
With “Sync Time with GPS” feature
unchecked and this mode selected,
you can set the minutes manually
from 0 to 59. To select, touch the
“+” or “–” soft-keys as done for the
hours.
• Time Format
When in this mode, you can select
the time format display. To change
the current setting, touch and
release the “12 Hrs” or “24 Hrs”
soft-key.
• Show Time In Status Bar
This feature will allow you to turn
on or shut off the digital clock in the
status bar (main menu bar).
• Set Date in Cluster
When in this mode, you can set the
date manually in the main menu bar
of the MTC+ and on the instrument
cluster display. Touch the “+” or “-”
soft-keys to adjust day, month and
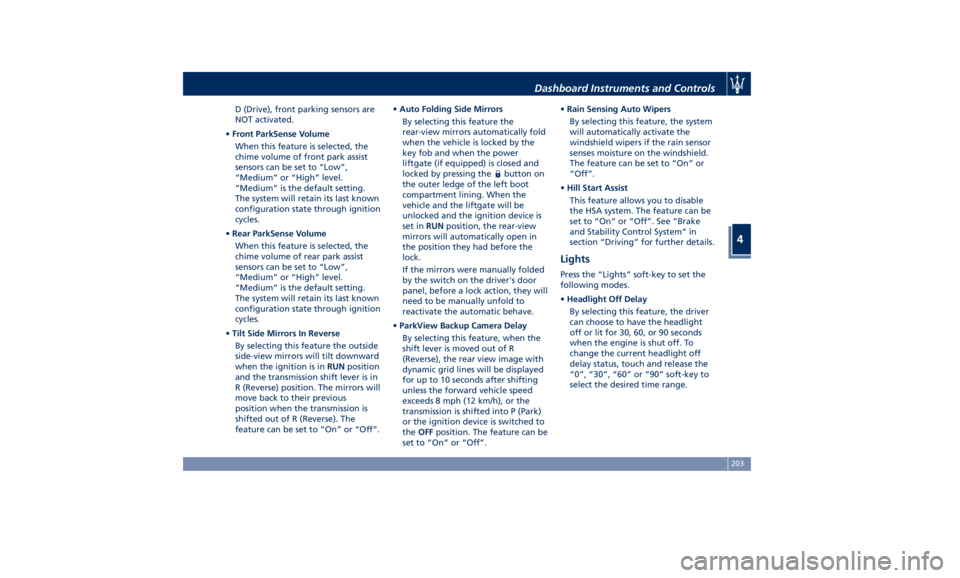
year. Safety & Driving Assistant Touch this soft-key to set the following
modes.
• ParkSense (Park Assist)
The park assist system will scan for
objects behind and in front of the
vehicle when the transmission shift
lever is in R (Reverse) and the vehicle
speed is less than 7.5 mph (12 km/h).
The system can be enabled with
“Sound” only, “Sound+Display”, or
turned “Off”. See “Park Assist
(optional)” in section “Before
Starting” for further information.
• Front Sensors Active in Drive
If this feature is active, when driver
takes shift lever from P (Park) or N
(Neutral) to D (Drive), front parking
sensors are activated. If this feature
is not active, when driver takes shift
lever from P (Park) or N (Neutral) toDashboard Instruments and Controls
4
202
Page 207 of 436
D (Drive), front parking sensors are
NOT activated.
• Front ParkSense Volume
When this feature is selected, the
chime volume of front park assist
sensors can be set to “Low”,
“Medium” or “High” level.
“Medium” is the default setting.
The system will retain its last known
configuration state through ignition
cycles.
• Rear ParkSense Volume
When this feature is selected, the
chime volume of rear park assist
sensors can be set to “Low”,
“Medium” or “High” level.
“Medium” is the default setting.
The system will retain its last known
configuration state through ignition
cycles.
• Tilt Side Mirrors In Reverse
By selecting this feature the outside
side-view mirrors will tilt downward
when the ignition is in RUN position
and the transmission shift lever is in
R (Reverse) position. The mirrors will
move back to their previous
position when the transmission is
shifted out of R (Reverse). The
feature can be set to “On” or “Off”. • Auto Folding Side Mirrors
By selecting this feature the
rear-view mirrors automatically fold
when the vehicle is locked by the
key fob and when the power
liftgate (if equipped) is closed and
locked by pressing the
button on
the outer ledge of the left boot
compartment lining. When the
vehicle and the liftgate will be
unlocked and the ignition device is
set in RUN position, the rear-view
mirrors will automatically open in
the position they had before the
lock.
If the mirrors were manually folded
by the switch on the driver's door
panel, before a lock action, they will
need to be manually unfold to
reactivate the automatic behave.
• ParkView Backup Camera Delay
By selecting this feature, when the
shift lever is moved out of R
(Reverse), the rear view image with
dynamic grid lines will be displayed
for up to 10 seconds after shifting
unless the forward vehicle speed
exceeds 8 mph (12 km/h), or the
transmission is shifted into P (Park)
or the ignition device is switched to
the OFF position. The feature can be
set to “On” or “Off”. • Rain Sensing Auto Wipers
By selecting this feature, the system
will automatically activate the
windshield wipers if the rain sensor
senses moisture on the windshield.
The feature can be set to “On” or
“Off”.
• Hill Start Assist
This feature allows you to disable
the HSA system. The feature can be
set to “On” or “Off”. See “Brake
and Stability Control System” in
section “Driving” for further details.
Lights Press the “Lights” soft-key to set the
following modes.
• Headlight Off Delay
By selecting this feature, the driver
can choose to have the headlight
off or lit for 30, 60, or 90 seconds
when the engine is shut off. To
change the current headlight off
delay status, touch and release the
“0”, “30”, “60” or “90” soft-key to
select the desired time range.Dashboard Instruments and Controls
4
203
Page 312 of 436
(Continued)
• The BSA system is not designed to
detect pedestrians, cyclists, or
animals.
• Even if your vehicle is equipped with
the BSA system, always check your
vehicle’s outside and rearview
mirrors for any vehicles approaching
from behind or overtaking.
• Use your turn signal before changing
lanes.
RCP - Rear Cross Path The Rear Cross Path (RCP) feature is
intended to aid the drivers when gear
in reverse of parking spaces where
their vision of oncoming vehicles may
be blocked.
The RCP system monitors the rear
detection zones on both sides of the
vehicle. Using sensors located on either
side of the rear bumper, it detects any
vehicles or objects that are moving
toward the side of the vehicle with a
minimum speed of approximately 1 to
2 mph (1 km/h to 3 km/h) to a
maximum of approximately 10 mph
(16 km/h), such as in parking lot
situations. NOTE:
In a parking lot situation, oncoming
vehicles can be obscured by vehicles
parked on either side. If the sensors
are blocked by other structures or
vehicles, the system will not be able to
alert the driver.
Proceed slowly and cautiously out of
the parking space until the rear end of
the vehicle is moderately exposed.
The RCP system will then have a clear
view of the cross traffic. If an
oncoming vehicle is detected, the RCP
system will alert the driver using both
the visual and audible alarms. If the
radio is on, it will also reduce the radio
volume.
WARNING!
RCP is not a Back Up Aid system. More specifically, it is intended to be used to
help a driver detect an oncoming
vehicle in a parking lot situation.
Drivers must be careful when backing
up, even when using RCP. Always
check carefully behind your vehicle,
look behind you, and be sure to check
for pedestrians, animals, other
vehicles, obstructions, and blind spots
before backing up. Failure to do so can
result in serious injury or death.
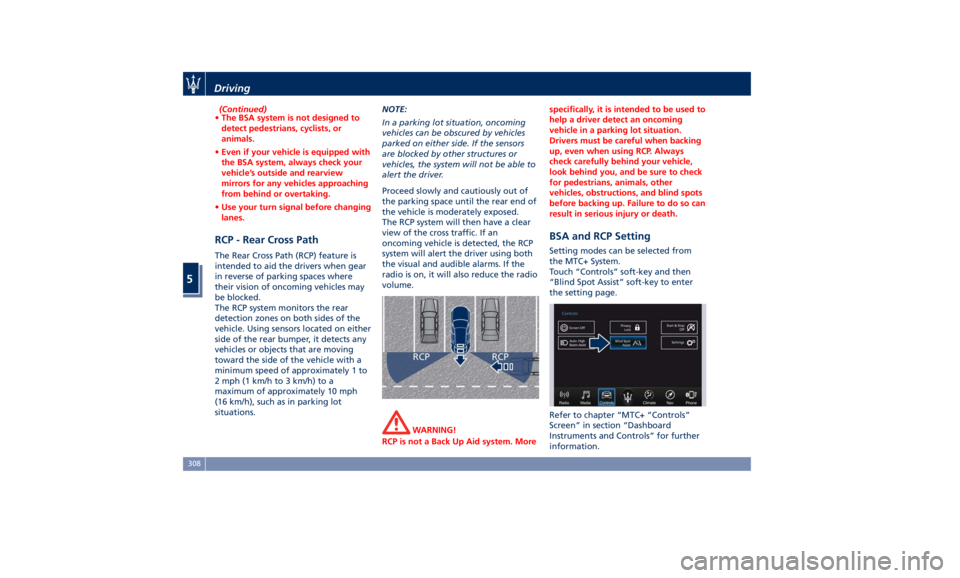
BSA and RCP Setting Setting modes can be selected from
the MTC+ System.
Touch “Controls” soft-key and then
“Blind Spot Assist” soft-key to enter
the setting page.
Refer to chapter “MTC+ “Controls”
Screen” in section “Dashboard
Instruments and Controls” for further
information.Driving
5
308
Page 428 of 436
Abbreviations .................9
Accessories
Aftermarket Parts and Accessories
Statement .................13
Active Blind Spot Assist - ABSA . . . .310
Adaptive Cruise Control (ACC) . . . .286
Activation/Deactivation ...... .289
Display Warnings and
Maintenance ............. .294
Precautions while Driving with
ACC ................... .295
Setting the Following Distance . .291
Setting the Speed .......... .290
Airbag.....................65
Advanced Front Air Bag
Properties .................66
Air Bag Deployment Result .....71
Air Bag Deployment Sensors and
Controls ..................15
Air Bag System Components .....66
Front Air Bag Inflator Units .....70
Passenger Air bag Labels .......20
Supplemental Restraint System
(SRS) .....................65
Supplemental Seat-mounted Side
Air Bags (SAB) ..............68
Supplemental Side Air Bag Inflatable
Curtain (SABIC) ..............68
Transport of persons with
disability ..................72
Air Conditioning (A/C) System . . . .214
A/C Distribution ........... .154
Dual-zone Climate Controls . . . .214 Four-zone Climate Controls . . . .221
Alarm, Vehicle Security ..........27
ALR (Automatic Locking Retractor) . .63
Anti-Lock Braking System (ABS) and
Electronic Brake-force Distribution
(EBD) ................... .274
Assistance ...................11
Assistance, if you need ..........11
ATC (Automatic Temperature
Control) ................. .220
Audio Controls .............. .192
Audio Controls on Central
Console ................. .192
Steering Wheel Audio Controls . .192
Audio, setting .............. .207
Audio System ............... .193
Automatic Transmission
Manual Release of Transmission .360
AUX, USB and SD Memory Card
Ports .................... .135
AWD, All-Wheel Drive ......... .243
BAS (Brake Assist System) ...... .275
Battery ................... .381
Battery Recharge .......... .384
Battery Remote Posts Position. . .358
Maintaining Battery Charge . . . .403
To Disconnect the Battery .... .382
To Reconnect the Battery
..... .383
Blind
Spot Alert ............. .305
Blind
Spot Alert (BSA)
BSA System .............. .305
RCP - Rear Cross Path ........ .308 Bluetooth, Customer settings .... .208
Bodywork Maintenance and Care . .397
Pre-Short Drop Function ..... .400
Protection from Atmospheric
Agents ................. .397
Useful Advice to Keep the Bodywork
in Good Condition ......... .398
Brakes
Brake and Stability Control System
(ESC) ................... .273
Brake Overheating ......... .280
Brake System ............. .273
Manual Release of Parking
Brake .................. .356
Parking Brake ............. .268
Using the Brakes ........... .280
Capacity/Refillings ........... .406
Cargo Area ................ .139
Accessories Compartment .... .142
Cargo Area Extension ....... .143
Installing the Cargo Net ...... .144
Loading with Rear Seatbacks Folded
Down .................. .141
Luggage Fasteners and
Retainers ................ .140
Ski and Snowboard Bag
Compartment ............. .141
Trunk Compartment Cover .... .142
Vehicle Load Carrying Capacity . .139
Child Restraint Systems ..........74
Children too large for Booster
Seats .....................75Index
9 424