ad blue MASERATI QUATTROPORTE 2019 Owners Manual
[x] Cancel search | Manufacturer: MASERATI, Model Year: 2019, Model line: QUATTROPORTE, Model: MASERATI QUATTROPORTE 2019Pages: 396, PDF Size: 13.9 MB
Page 126 of 396
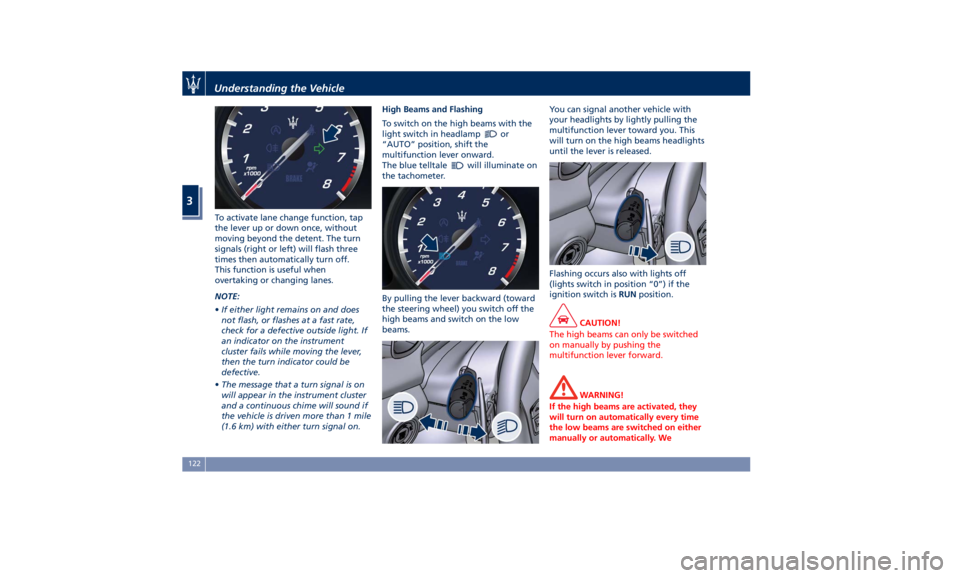
To activate lane change function, tap
the lever up or down once, without
moving beyond the detent. The turn
signals (right or left) will flash three
times then automatically turn off.
This function is useful when
overtaking or changing lanes.
NOTE:
• If either light remains on and does
not flash, or flashes at a fast rate,
check for a defective outside light. If
an indicator on the instrument
cluster fails while moving the lever,
then the turn indicator could be
defective.
• The message that a turn signal is on
will appear in the instrument cluster
and a continuous chime will sound if
the vehicle is driven more than 1 mile
(1.6 km) with either turn signal on. High Beams and Flashing
To switch on the high beams with the
light switch in headlamp
or
“AUTO” position, shift the
multifunction lever onward.
The blue telltale
will illuminate on
the tachometer.
By pulling the lever backward (toward
the steering wheel) you switch off the
high beams and switch on the low
beams. You can signal another vehicle with
your headlights by lightly pulling the
multifunction lever toward you. This
will turn on the high beams headlights
until the lever is released.
Flashing occurs also with lights off
(lights switch in position “0”) if the
ignition switch is RUN position.
CAUTION!
The high beams can only be switched
on manually by pushing the
multifunction lever forward.
WARNING!
If the high beams are activated, they
will turn on automatically every time
the low beams are switched on either
manually or automatically. WeUnderstanding the Vehicle
3
122
Page 162 of 396
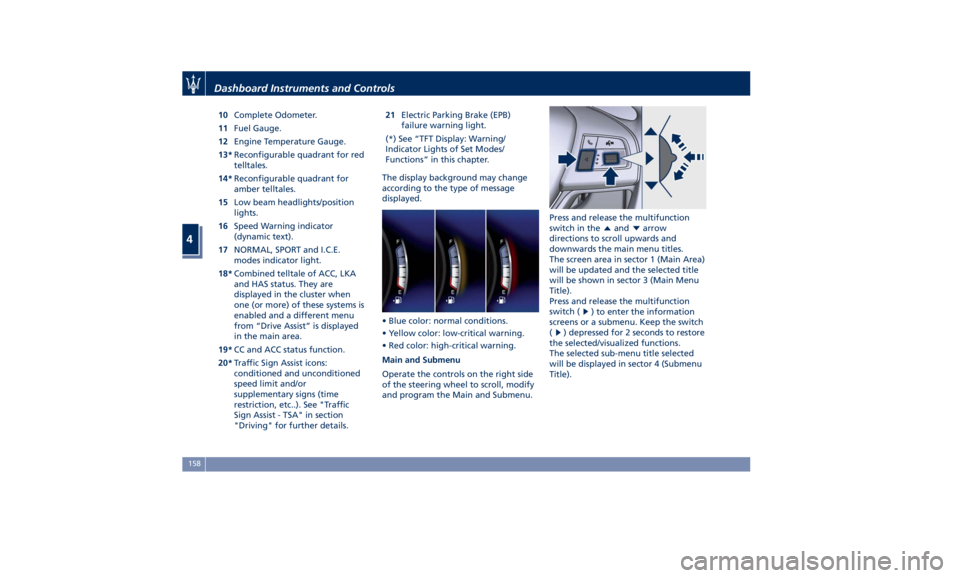
10 Complete Odometer.
11 Fuel Gauge.
12 Engine Temperature Gauge.
13* Reconfigurable quadrant for red
telltales.
14* Reconfigurable quadrant for
amber telltales.
15 Low beam headlights/position
lights.
16 Speed Warning indicator
(dynamic text).
17 NORMAL, SPORT and I.C.E.
modes indicator light.
18* Combined telltale of ACC, LKA
and HAS status. They are
displayed in the cluster when
one (or more) of these systems is
enabled and a different menu
from “Drive Assist” is displayed
in the main area.
19* CC and ACC status function.
20* Traffic Sign Assist icons:
conditioned and unconditioned
speed limit and/or
supplementary signs (time
restriction, etc..). See "Traffic
Sign Assist - TSA" in section
"Driving" for further details. 21 Electric Parking Brake (EPB)
failure warning light.
(*) See “TFT Display: Warning/
Indicator Lights of Set Modes/
Functions” in this chapter.
The display background may change
according to the type of message
displayed.
• Blue color: normal conditions.
• Yellow color: low-critical warning.
• Red color: high-critical warning.
Main and Submenu
Operate the controls on the right side
of the steering wheel to scroll, modify
and program the Main and Submenu. Press and release the multifunction
switch in the
and arrow
directions to scroll upwards and
downwards the main menu titles.
The screen area in sector 1 (Main Area)
will be updated and the selected title
will be shown in sector 3 (Main Menu
Title).
Press and release the multifunction
switch (
) to enter the information
screens or a submenu. Keep the switch
(
) depressed for 2 seconds to restore
the selected/visualized functions.
The selected sub-menu title selected
will be displayed in sector 4 (Submenu
Title).Dashboard Instruments and Controls
4
158
Page 169 of 396
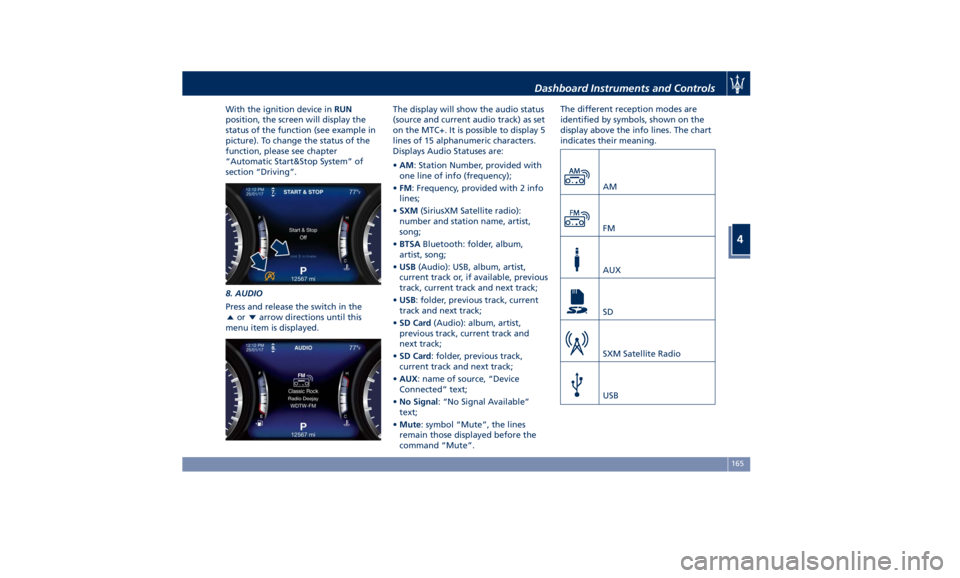
With the ignition device in RUN
position, the screen will display the
status of the function (see example in
picture). To change the status of the
function, please see chapter
“Automatic Start&Stop System” of
section “Driving”.
8. AUDIO
Press and release the switch in the
or arrow directions until this
menu item is displayed. The display will show the audio status
(source and current audio track) as set
on the MTC+. It is possible to display 5
lines of 15 alphanumeric characters.
Displays Audio Statuses are:
• AM : Station Number, provided with
one line of info (frequency);
• FM : Frequency, provided with 2 info
lines;
• SXM (SiriusXM Satellite radio):
number and station name, artist,
song;
• BTSA Bluetooth: folder, album,
artist, song;
• USB (Audio): USB, album, artist,
current track or, if available, previous
track, current track and next track;
• USB : folder, previous track, current
track and next track;
• SD Card (Audio): album, artist,
previous track, current track and
next track;
• SD Card : folder, previous track,
current track and next track;
• AUX : name of source, “Device
Connected” text;
• No Signal : “No Signal Available”
text;
• Mute : symbol “Mute”, the lines
remain those displayed before the
command “Mute”. The different reception modes are
identified by symbols, shown on the
display above the info lines. The chart
indicates their meaning.
AM
FM
AUX
SD
SXM Satellite Radio
USBDashboard Instruments and Controls
4
165
Page 173 of 396
“Time” is selected). A check mark will
remain next to the previously-selected
item until a new selection is made.
Press and release the switch (
)to
select an item. The notification of
setting saved appears as a popup for 2
seconds, then the display will show
the last-modified item.
Press and release the
button to
return to the “Screen Setup”
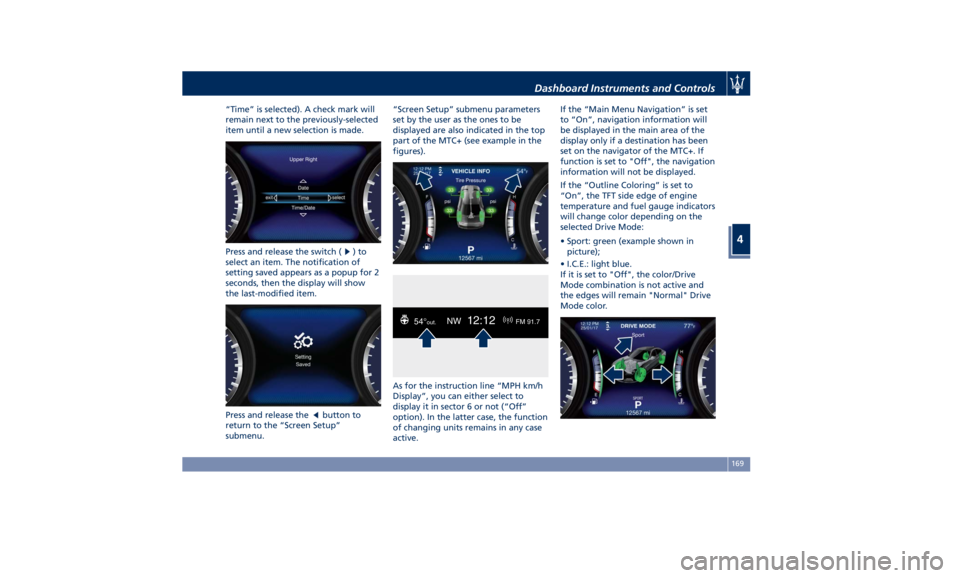
submenu. “Screen Setup” submenu parameters
set by the user as the ones to be
displayed are also indicated in the top
part of the MTC+ (see example in the
figures).
As for the instruction line “MPH km/h
Display”, you can either select to
display it in sector 6 or not (“Off”
option). In the latter case, the function
of changing units remains in any case
active. If the “Main Menu Navigation” is set
to “On”, navigation information will
be displayed in the main area of the
display only if a destination has been
set on the navigator of the MTC+. If
function is set to "Off", the navigation
information will not be displayed.
If the “Outline Coloring” is set to
“On”, the TFT side edge of engine
temperature and fuel gauge indicators
will change color depending on the
selected Drive Mode:
• Sport: green (example shown in
picture);
• I.C.E.: light blue.
If it is set to "Off", the color/Drive
Mode combination is not active and
the edges will remain "Normal" Drive
Mode color.Dashboard Instruments and Controls
4
169
Page 182 of 396
Tune/Scroll Control
By working this knob in “Radio” or
“Media” mode, user can go through
the radio stations or scroll the tracks
inside connected external devices and
confirm the selection by pressing enter
button.
In any other mode of the MTC+, use
this knob to scroll the list of available
options or to manage the cursor
movement in the lower bar of the
main menus. Then press enter button
to confirm the function or setting
highlighted on MTC+ display.
Browse button
After selecting a function, using the
tune/scroll knob or softkeys on MTC+
display, press this button to see the
detail of the items/options of the
selected function. This button is also
used as shortcut to display the phone
book, when the “Phone” menu is selected, or the favorites when the
“Nav (Navigation)” menu is selected.
Back button
Press this button to go back to
previous menu or previous screen.
Press this button to shift the
navigation one level backwards on
MTC+ screen. If it is pressed and held
for at least 2 seconds, it brings the
cursor back in the lower bar of the
main menus.
Enter Button
To confirm the function or setting
highlighted on MTC+ display.
When in “Radio” mode and the
ignition switch in RUN position, you
can save your preset stations.
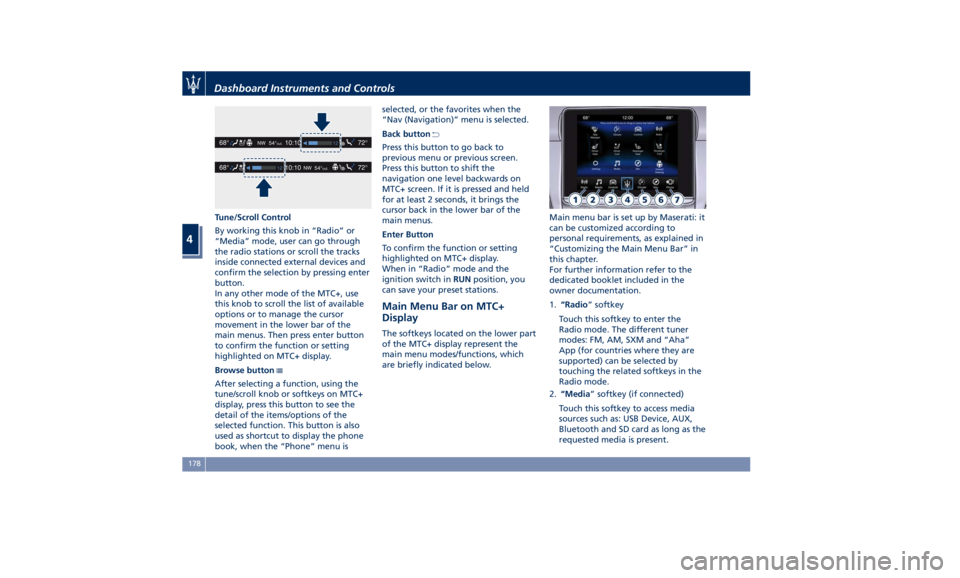
Main Menu Bar on MTC+
Display The softkeys located on the lower part
of the MTC+ display represent the
main menu modes/functions, which
are briefly indicated below. Main menu bar is set up by Maserati: it
can be customized according to
personal requirements, as explained in
“Customizing the Main Menu Bar” in
this chapter.
For further information refer to the
dedicated booklet included in the
owner documentation.
1. “Radio ” softkey
Touch this softkey to enter the
Radio mode. The different tuner
modes: FM, AM, SXM and “Aha”
App (for countries where they are
supported) can be selected by
touching the related softkeys in the
Radio mode.
2. “Media ” softkey (if connected)
Touch this softkey to access media
sources such as: USB Device, AUX,
Bluetooth and SD card as long as the
requested media is present.Dashboard Instruments and Controls
4
178
Page 189 of 396
MTC+ “Controls” Screen Touch the “Controls” soft-key on the
lower part of the MTC+ display to turn
on/off some on-board devices and turn
on/off and adjust some driver assist
systems (ADAS).
Once you enter the “Controls” screen,
use the touch soft-keys or turn the
tune/scroll knob to scroll and change
feature settings and press the enter
upper button to confirm the selection.
Some of these devices or systems are
optional or for a specific
model/version and may not be
available on your vehicle.
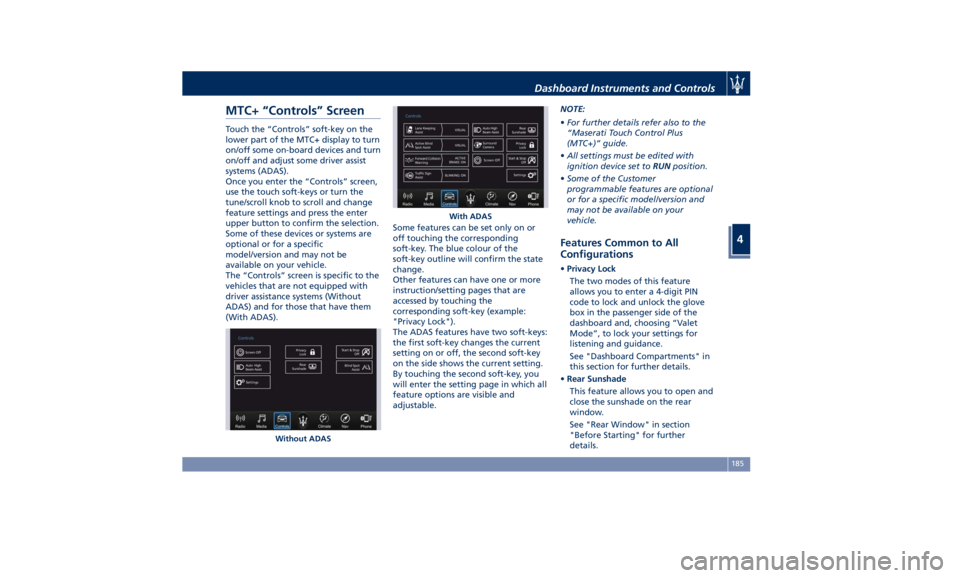
The “Controls” screen is specific to the
vehicles that are not equipped with
driver assistance systems (Without
ADAS) and for those that have them
(With ADAS). Some features can be set only on or
off touching the corresponding
soft-key. The blue colour of the
soft-key outline will confirm the state
change.
Other features can have one or more
instruction/setting pages that are
accessed by touching the
corresponding soft-key (example:
"Privacy Lock").
The ADAS features have two soft-keys:
the first soft-key changes the current
setting on or off, the second soft-key
on the side shows the current setting.
By touching the second soft-key, you
will enter the setting page in which all
feature options are visible and
adjustable. NOTE:
• For further details refer also to the
“Maserati Touch Control Plus
(MTC+)” guide.
• All settings must be edited with
ignition device set to RUN position.
• Some of the Customer
programmable features are optional
or for a specific model/version and
may not be available on your
vehicle.
Features Common to All
Configurations • Privacy Lock
The two modes of this feature
allows you to enter a 4-digit PIN
code to lock and unlock the glove
box in the passenger side of the
dashboard and, choosing “Valet
Mode”, to lock your settings for
listening and guidance.
See "Dashboard Compartments" in
this section for further details.
• Rear Sunshade
This feature allows you to open and
close the sunshade on the rear
window.
See "Rear Window" in section
"Before Starting" for further
details.Without ADAS With ADASDashboard Instruments and Controls
4
185
Page 190 of 396
• Start & Stop Off
This feature allows you to disable
the Start & Stop when frequent
stops and restarts of the engine may
become annoying.
See "Automatic Start&Stop System"
in section "Driving" for further
details.
• Auto High Beam Assist
By selecting this feature, when the
forward digital camera detects a
vehicle that precedes in the
direction of travel or in the opposite
direction, adjust the high beam in
an automatic way not to dazzle.
See "Lights" in section
"Understanding the Vehicle" for
further details.
• Screen OFF
This feature allows you to switch off
the MTC+ screen backlight if it
becomes annoying when driving.
See "Infotainment System" in this
section for further details.
• Outlet
Activating this feature an electrical
power converter allows you to use
the 115V AC-150W power outlet
that may be present on some
versions, inside the compartment between the backrests of the rear
seats.
• Settings
Touch this soft-key you enter the
“Settings” page that displays all user
- customizable features: see “MTC+
Settings” in this section.
Features Specific for Vehicle
without ADAS • Blind Spot Assist
Activating this feature the BSA and
RCP systems assist the driver when
changing lanes, overtaking and
when parking, by detecting the
arrival of other vehicles from a side
or rear blind spot. When this
happens, a light signal appears in
the external rear-view mirror.
When Blind Spot Assist (BSA) is selected, the feature can be set to
“Off”, “Lights” or “Lights + Chime”
(default mode). When this feature is
activated in “Lights” mode, the
system will only show a warning
light in the outside mirrors.
When “Lights + Chime” mode is
activated, the system will show a
warning light in the outside mirrors
as well as give an audible alert when
the turn signal is on. When “Off” is
selected, the system is deactivated.
For description of this system, see
chapter “Blind Spot Assist - BSA” in
section “Driving”.
Features specific for Vehicles
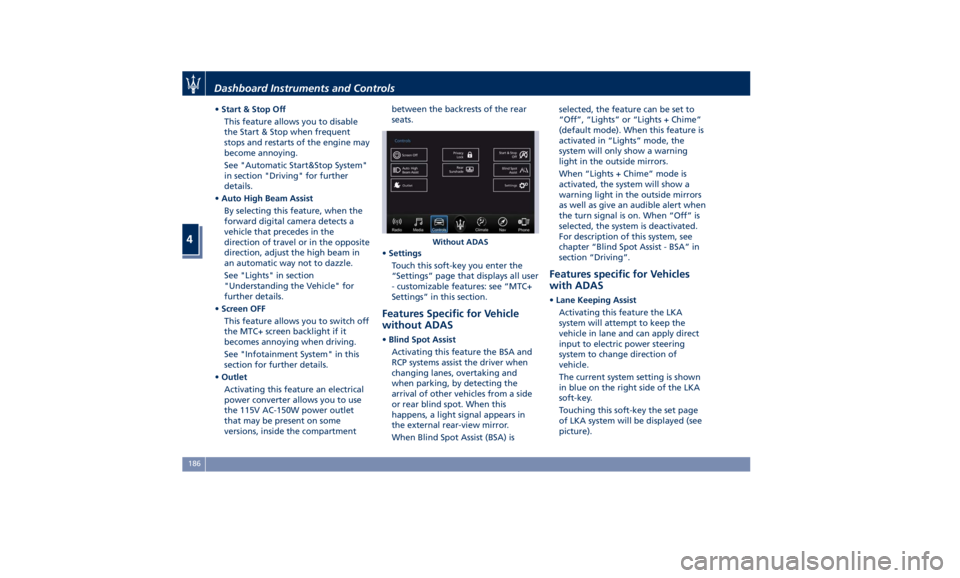
with ADAS • Lane Keeping Assist
Activating this feature the LKA
system will attempt to keep the
vehicle in lane and can apply direct
input to electric power steering
system to change direction of
vehicle.
The current system setting is shown
in blue on the right side of the LKA
soft-key.
Touching this soft-key the set page
of LKA system will be displayed (see
picture).Without ADASDashboard Instruments and Controls
4
186
Page 191 of 396
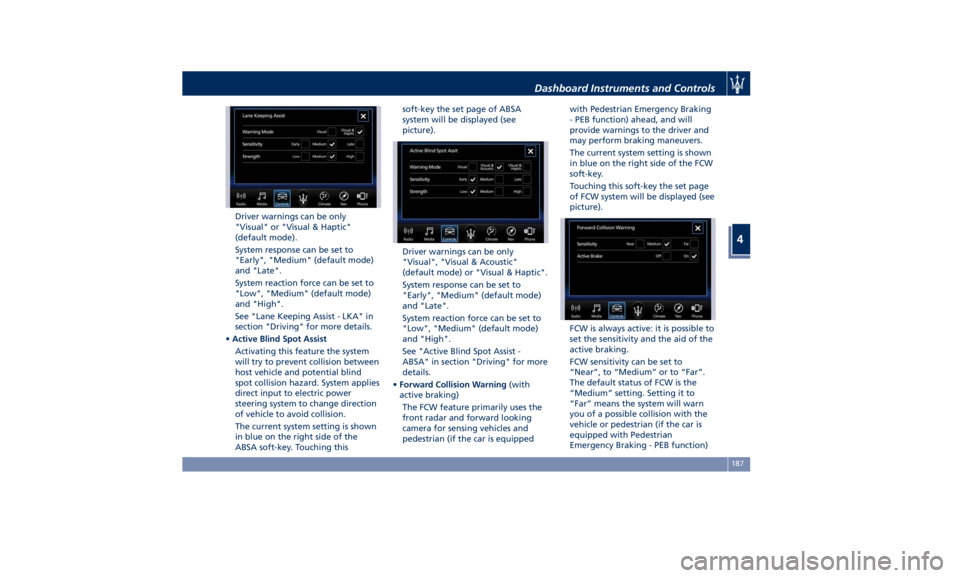
Driver warnings can be only
"Visual" or "Visual & Haptic"
(default mode).
System response can be set to
"Early", "Medium" (default mode)
and "Late".
System reaction force can be set to
"Low", "Medium" (default mode)
and "High".
See "Lane Keeping Assist - LKA" in
section "Driving" for more details.
• Active Blind Spot Assist
Activating this feature the system
will try to prevent collision between
host vehicle and potential blind
spot collision hazard. System applies
direct input to electric power
steering system to change direction
of vehicle to avoid collision.
The current system setting is shown
in blue on the right side of the
ABSA soft-key. Touching this soft-key the set page of ABSA
system will be displayed (see
picture).
Driver warnings can be only
"Visual", "Visual & Acoustic"
(default mode) or "Visual & Haptic".
System response can be set to
"Early", "Medium" (default mode)
and "Late".
System reaction force can be set to
"Low", "Medium" (default mode)
and "High".
See "Active Blind Spot Assist -
ABSA" in section "Driving" for more
details.
• Forward Collision Warning (with
active braking)
The FCW feature primarily uses the
front radar and forward looking
camera for sensing vehicles and
pedestrian (if the car is equipped with Pedestrian Emergency Braking
- PEB function) ahead, and will
provide warnings to the driver and
may perform braking maneuvers.
The current system setting is shown
in blue on the right side of the FCW
soft-key.
Touching this soft-key the set page
of FCW system will be displayed (see
picture).
FCW is always active: it is possible to
set the sensitivity and the aid of the
active braking.
FCW sensitivity can be set to
“Near”, to “Medium” or to “Far”.
The default status of FCW is the
“Medium” setting. Setting it to
“Far” means the system will warn
you of a possible collision with the
vehicle or pedestrian (if the car is
equipped with Pedestrian
Emergency Braking - PEB function)Dashboard Instruments and Controls
4
187
Page 193 of 396
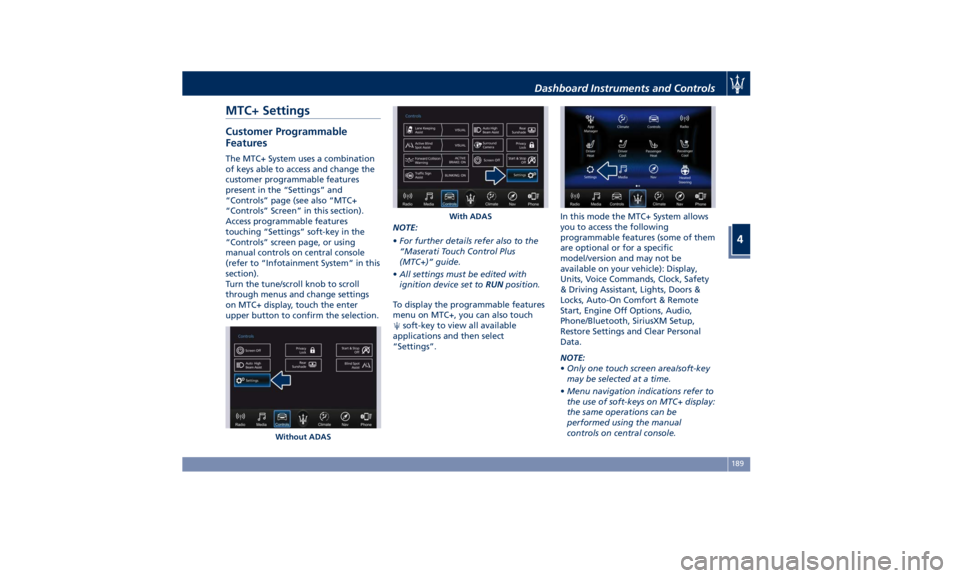
MTC+ Settings Customer Programmable
Features The MTC+ System uses a combination
of keys able to access and change the
customer programmable features
present in the “Settings” and
“Controls” page (see also “MTC+
“Controls” Screen” in this section).
Access programmable features
touching “Settings” soft-key in the
“Controls” screen page, or using
manual controls on central console
(refer to “Infotainment System” in this
section).
Turn the tune/scroll knob to scroll
through menus and change settings
on MTC+ display, touch the enter
upper button to confirm the selection. NOTE:
• For further details refer also to the
“Maserati Touch Control Plus
(MTC+)” guide.
• All settings must be edited with
ignition device set to RUN position.
To display the programmable features
menu on MTC+, you can also touch
soft-key to view all available
applications and then select
“Settings”. In this mode the MTC+ System allows
you to access the following
programmable features (some of them
are optional or for a specific
model/version and may not be
available on your vehicle): Display,
Units, Voice Commands, Clock, Safety
& Driving Assistant, Lights, Doors &
Locks, Auto-On Comfort & Remote
Start, Engine Off Options, Audio,
Phone/Bluetooth, SiriusXM Setup,
Restore Settings and Clear Personal
Data.
NOTE:
• Only one touch screen area/soft-key
may be selected at a time.
• Menu navigation indications refer to
the use of soft-keys on MTC+ display:
the same operations can be
performed using the manual
controls on central console.Without ADAS With ADASDashboard Instruments and Controls
4
189
Page 202 of 396
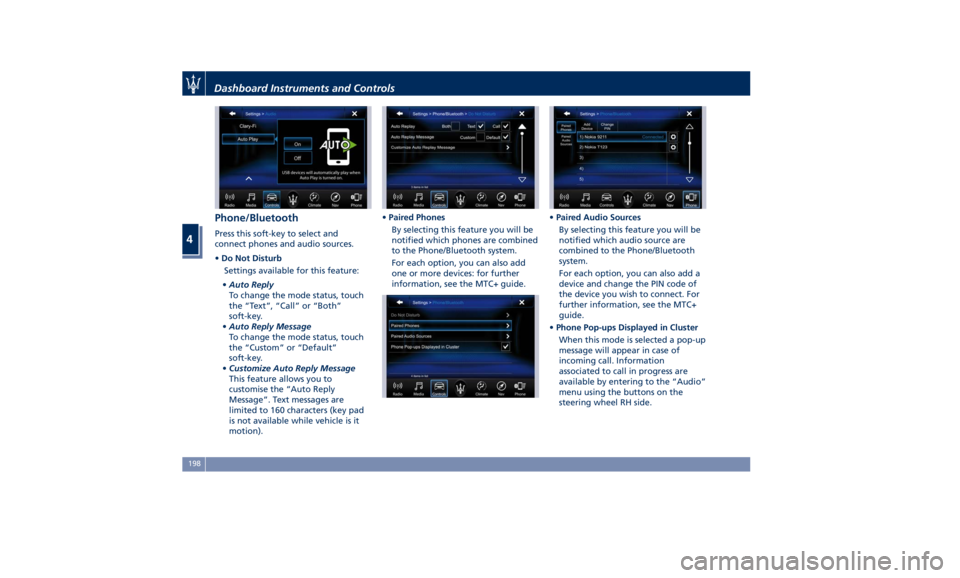
Phone/Bluetooth Press this soft-key to select and
connect phones and audio sources.
• Do Not Disturb
Settings available for this feature:
• Auto Reply
To change the mode status, touch
the “Text”, “Call” or “Both”
soft-key.
• Auto Reply Message
To change the mode status, touch
the “Custom” or “Default”
soft-key.
• Customize Auto Reply Message
This feature allows you to
customise the “Auto Reply
Message”. Text messages are
limited to 160 characters (key pad
is not available while vehicle is it
motion). • Paired Phones
By selecting this feature you will be
notified which phones are combined
to the Phone/Bluetooth system.
For each option, you can also add
one or more devices: for further
information, see the MTC+ guide. • Paired Audio Sources
By selecting this feature you will be
notified which audio source are
combined to the Phone/Bluetooth
system.
For each option, you can also add a
device and change the PIN code of
the device you wish to connect. For
further information, see the MTC+
guide.
• Phone Pop-ups Displayed in Cluster
When this mode is selected a pop-up
message will appear in case of
incoming call. Information
associated to call in progress are
available by entering to the “Audio”
menu using the buttons on the
steering wheel RH side.Dashboard Instruments and Controls
4
198