buttons MASERATI QUATTROPORTE 2019 Owners Manual
[x] Cancel search | Manufacturer: MASERATI, Model Year: 2019, Model line: QUATTROPORTE, Model: MASERATI QUATTROPORTE 2019Pages: 396, PDF Size: 13.9 MB
Page 33 of 396
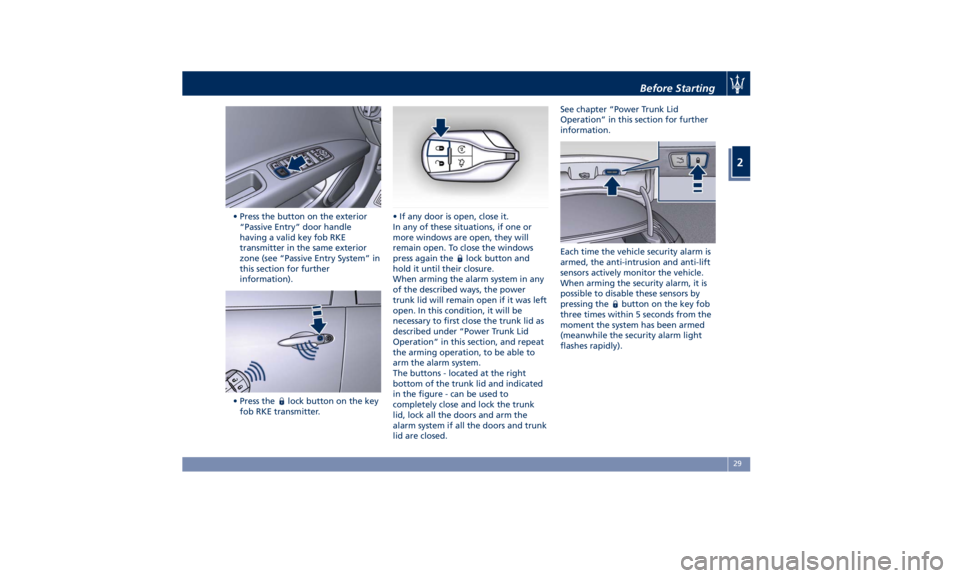
• Press the button on the exterior
“Passive Entry” door handle
having a valid key fob RKE
transmitter in the same exterior
zone (see “Passive Entry System” in
this section for further
information).
• Press the
lock button on the key
fob RKE transmitter. • If any door is open, close it.
In any of these situations, if one or
more windows are open, they will
remain open. To close the windows
press again the
lock button and
hold it until their closure.
When arming the alarm system in any
of the described ways, the power
trunk lid will remain open if it was left
open. In this condition, it will be
necessary to first close the trunk lid as
described under “Power Trunk Lid
Operation” in this section, and repeat
the arming operation, to be able to
arm the alarm system.
The buttons - located at the right
bottom of the trunk lid and indicated
in the figure - can be used to
completely close and lock the trunk
lid, lock all the doors and arm the
alarm system if all the doors and trunk
lid are closed. See chapter “Power Trunk Lid
Operation” in this section for further
information.
Each time the vehicle security alarm is
armed, the anti-intrusion and anti-lift
sensors actively monitor the vehicle.
When arming the security alarm, it is
possible to disable these sensors by
pressing the
button on the key fob
three times within 5 seconds from the
moment the system has been armed
(meanwhile the security alarm light
flashes rapidly).Before Starting
2
29
Page 34 of 396
To disarm the System Use any of the following steps to
disarm the vehicle security alarm.
• Press the button on key fob RKE
transmitter.
• Grasp the “Passive Entry” unlock
door handle (see “Passive Entry
System” in this section for further
information).
• Press the START/STOP button so as to
release the OFF position.
NOTE:
• When the vehicle security alarm is
armed, the interior power door lock
switch will not allow unlocking of
the doors.
• The use of the emergency key into
the driver door lock and the use of
the button
on the key fob
cannot arm or disarm the security
alarm of the vehicle.
• The vehicle security alarm remains
engaged while accessing the power
trunk lid. Pressing the button
between the license plate lights will
not disarm the vehicle security alarm.
If anyone enters the vehicle through
the trunk lid and opens a door, the
alarm will trigger. The vehicle security alarm is designed
to protect your vehicle; however, you
can create conditions where the
system will give you a false alarm. If
one of the previously described arming
sequences has occurred, the vehicle
security alarm will arm regardless of
whether you are in the vehicle or not.
If you remain in the vehicle and open a
door, the alarm will activate. If this
occurs, disarm the vehicle security
alarm.
If the vehicle security alarm is armed
and the battery becomes disconnected,
the vehicle security alarm will remain
armed when the battery is
reconnected; the exterior lights will
flash, the buzzer will activate. If this
occurs, disarm the vehicle security
alarm.
Tamper Alert If something has triggered the vehicle
security alarm in your absence, the
horn will sound three times when you
disarm the vehicle security alarm.
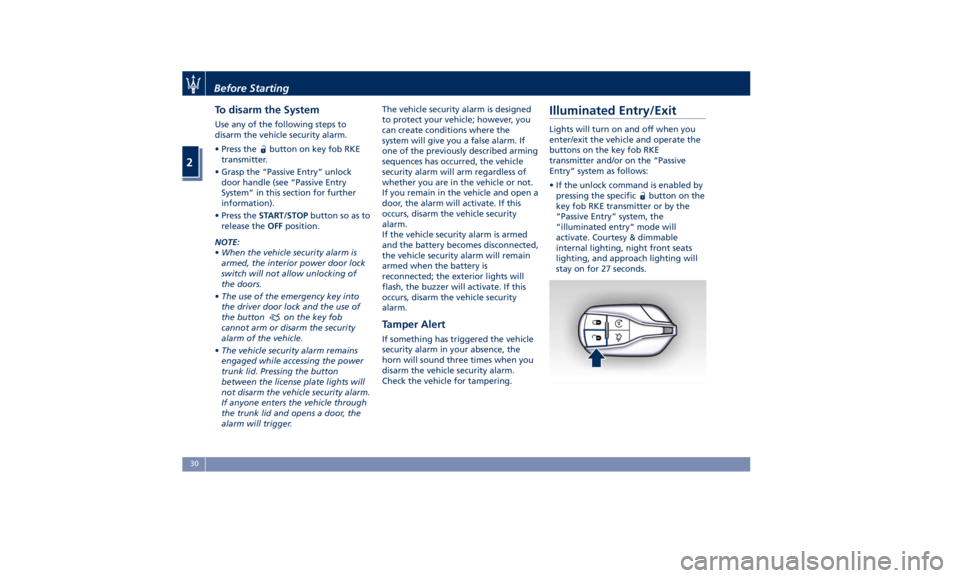
Check the vehicle for tampering.Illuminated Entry/Exit Lights will turn on and off when you
enter/exit the vehicle and operate the
buttons on the key fob RKE
transmitter and/or on the “Passive
Entry” system as follows:
• If the unlock command is enabled by
pressing the specific
button on the
key fob RKE transmitter or by the
“Passive Entry” system, the
“illuminated entry” mode will
activate. Courtesy & dimmable
internal lighting, night front seats
lighting, and approach lighting will
stay on for 27 seconds.Before Starting
2
30
Page 37 of 396
• If the light switch is in the “0” (OFF)
mode all switch backlights and the
front seats lighting will turn off.
• If the light switch is in the
position and the ignition switch
is in OFF position, the front low
intensity LEDs of the external
headlight and rear position light
guide LED will turn on and will turn
off automatically after 8 minutes to
preserve the battery charge.
• If the light switch is in
position
and the ignition switch is in RUN
position, no lighting feature will be
available.
• If the light switch is in
position
(Low beam mode) the front
domelight LED (if enabled), the
switches backlighting, the
instrument cluster’s display, the night
front seats lighting will turn on. The
front domelight LED and the night
lighting of the front seats will light
up with the intensity set by the
right-hand regulator. If the regulator
is in "0" (OFF) position, the night
lighting will turn off.
• If the light switch is turned in
“AUTO” position (on/off AUTO
mode) and the ignition is switched in
RUN position, as in “low beam
mode” all lights turn on either in “DAY” or “NIGHT” mode according
to the twilight sensor. In “DAY”
mode the switches backlighting will
be at 100% intensity, in “NIGHT”
mode they will be as set by the left
dimmer control switch.
NOTE:
In “DAY” mode, the switches are not
backlit, except the windows and
steering switches.
Light Dimmer Controls The light dimmer controls are part of
the headlight switch and are
positioned beside the switcher itself
(see “Lights” in section
"Understanding the Vehicle" for
further information).Unlock the Vehicle with
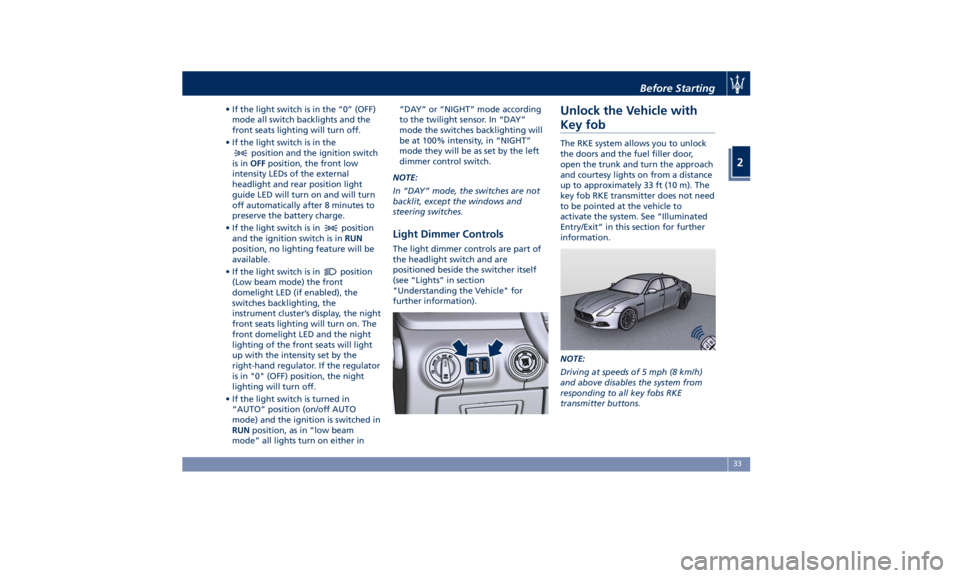
Key fob The RKE system allows you to unlock
the doors and the fuel filler door,
open the trunk and turn the approach
and courtesy lights on from a distance
up to approximately 33 ft (10 m). The
key fob RKE transmitter does not need
to be pointed at the vehicle to
activate the system. See “Illuminated
Entry/Exit” in this section for further
information.
NOTE:
Driving at speeds of 5 mph (8 km/h)
and above disables the system from
responding to all key fobs RKE
transmitter buttons.Before Starting
2
33
Page 46 of 396
Passive Entry System The “Passive Entry” system is an
enhancement to the vehicle’s Remote
Keyless Entry (RKE) system. This
feature allows you to lock and unlock
the vehicle’s door(s) without having to
press the key fob RKE transmitter lock
or unlock buttons.
NOTE:
• “Passive Entry” may be programmed
to on/off; see “MTC+ Settings” in
section “Dashboard Instruments and
Controls” for further information.
• If wearing gloves, or if it has been
raining on the “Passive Entry” door
handle, the unlock sensitivity can be
affected, resulting in a slower
response time.
• Access to the vehicle using “Passive
Entry” system may not work properly
in case of interference caused by
external sources such as metal
objects, mobile phones, overhead
power lines, antennas, etc. In these
cases, use the buttons of the key fob
RKE transmitter to open and close
the vehicle or the emergency key,
inserting it into the driver side door
lock.
• The “Passive Entry” system does not
lock and unlock the doors directly and immediately but with a slight
delay (about 2 seconds).
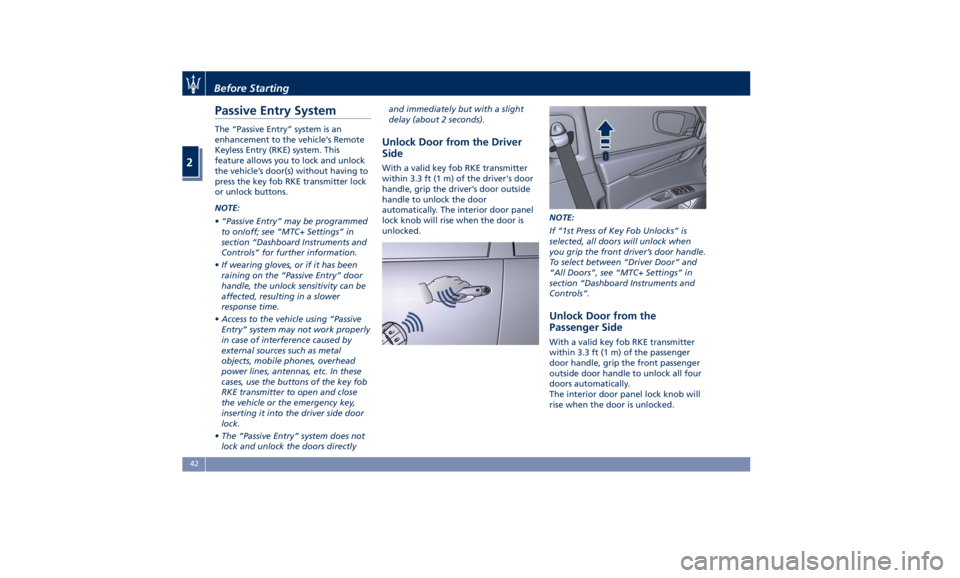
Unlock Door from the Driver
Side With a valid key fob RKE transmitter
within 3.3 ft (1 m) of the driver's door
handle, grip the driver’s door outside
handle to unlock the door
automatically. The interior door panel
lock knob will rise when the door is
unlocked. NOTE:
If “1st Press of Key Fob Unlocks” is
selected, all doors will unlock when
you grip the front driver’s door handle.
To select between “Driver Door” and
“All Doors”, see “MTC+ Settings” in
section “Dashboard Instruments and
Controls”.
Unlock Door from the
Passenger Side With a valid key fob RKE transmitter
within 3.3 ft (1 m) of the passenger
door handle, grip the front passenger
outside door handle to unlock all four
doors automatically.
The interior door panel lock knob will
rise when the door is unlocked.Before Starting
2
42
Page 55 of 396
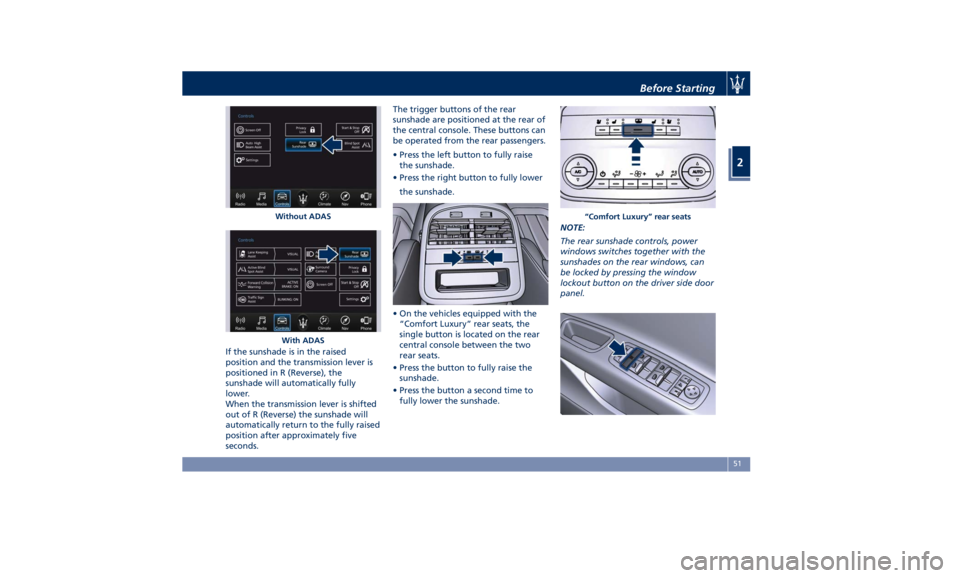
If the sunshade is in the raised
position and the transmission lever is
positioned in R (Reverse), the
sunshade will automatically fully
lower.
When the transmission lever is shifted
out of R (Reverse) the sunshade will
automatically return to the fully raised
position after approximately five
seconds. The trigger buttons of the rear
sunshade are positioned at the rear of
the central console. These buttons can
be operated from the rear passengers.
• Press the left button to fully raise
the sunshade.
• Press the right button to fully lower
the sunshade.
• On the vehicles equipped with the
“Comfort Luxury” rear seats, the
single button is located on the rear
central console between the two
rear seats.
• Press the button to fully raise the
sunshade.
• Press the button a second time to
fully lower the sunshade. NOTE:
The rear sunshade controls, power
windows switches together with the
sunshades on the rear windows, can
be locked by pressing the window
lockout button on the driver side door
panel.Without ADAS
With ADAS “Comfort Luxury” rear seatsBefore Starting
2
51
Page 57 of 396
Automatic Opening and
Closing Movement of the
Power Trunk Lid Automatic opening and closing
movement of the power trunk lid is
driven by electric actuators and a
motorized latch ensuring lid locking
upon closing.
The
button on key fob and button
on dome console not only allows user
to completely open the power trunk
lid, but also to stop it at any
intermediate position by pressing the
button again whenever you wish to
stop and resume the opening process.
In addition to these commands, it is
possible open and close the power
trunk lid, or stop its movement, by
simply moving your foot under the
rear bumper, as specified in the
paragraph “Hands Free Power Trunk
Release and Closing”. In this latter
case, the power trunk lid will be
opened and closed only if the “Passive
Entry” system acknowledges the
presence of the key fob RKE
transmitter within 3.3 ft (1 m) of the
power trunk lid.
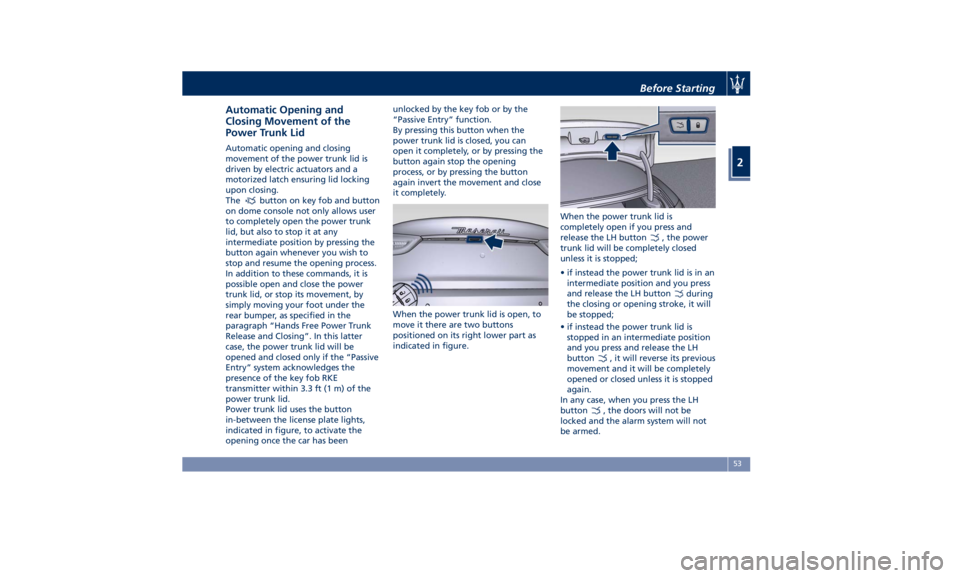
Power trunk lid uses the button
in-between the license plate lights,
indicated in figure, to activate the
opening once the car has been unlocked by the key fob or by the
“Passive Entry” function.
By pressing this button when the
power trunk lid is closed, you can
open it completely, or by pressing the
button again stop the opening
process, or by pressing the button
again invert the movement and close
it completely.
When the power trunk lid is open, to
move it there are two buttons
positioned on its right lower part as
indicated in figure. When the power trunk lid is
completely open if you press and
release the LH button
, the power
trunk lid will be completely closed
unless it is stopped;
• if instead the power trunk lid is in an
intermediate position and you press
and release the LH button
during
the closing or opening stroke, it will
be stopped;
• if instead the power trunk lid is
stopped in an intermediate position
and you press and release the LH
button
, it will reverse its previous
movement and it will be completely
opened or closed unless it is stopped
again.
In any case, when you press the LH
button
, the doors will not be
locked and the alarm system will not
be armed.Before Starting
2
53
Page 58 of 396
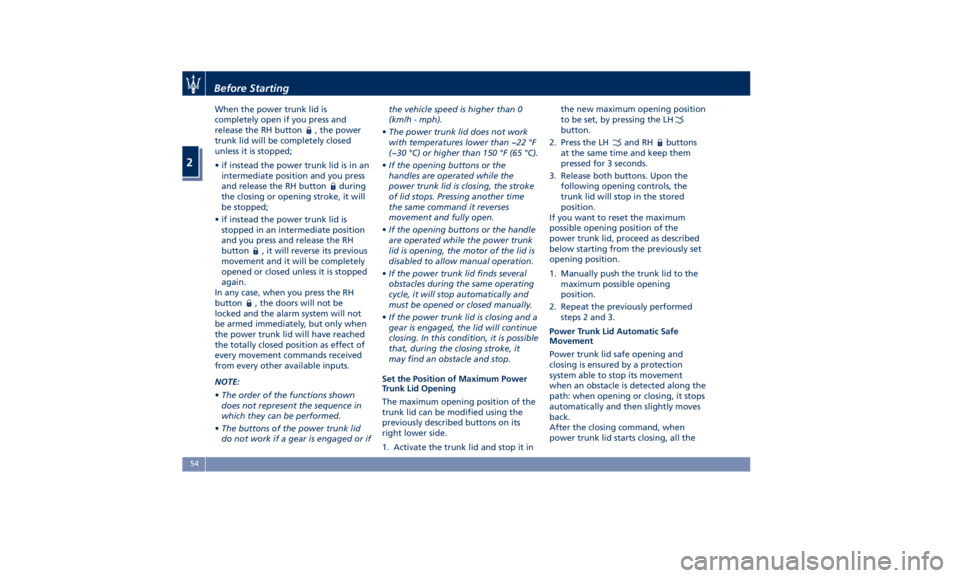
When the power trunk lid is
completely open if you press and
release the RH button
, the power
trunk lid will be completely closed
unless it is stopped;
• if instead the power trunk lid is in an
intermediate position and you press
and release the RH button
during
the closing or opening stroke, it will
be stopped;
• if instead the power trunk lid is
stopped in an intermediate position
and you press and release the RH
button
, it will reverse its previous
movement and it will be completely
opened or closed unless it is stopped
again.
In any case, when you press the RH
button
, the doors will not be
locked and the alarm system will not
be armed immediately, but only when
the power trunk lid will have reached
the totally closed position as effect of
every movement commands received
from every other available inputs.
NOTE:
• The order of the functions shown
does not represent the sequence in
which they can be performed.
• The buttons of the power trunk lid
do not work if a gear is engaged or if the vehicle speed is higher than 0
(km/h - mph).
• The power trunk lid does not work
with temperatures lower than −22 °F
(−30 °C) or higher than 150 °F (65 °C).
• If the opening buttons or the
handles are operated while the
power trunk lid is closing, the stroke
of lid stops. Pressing another time
the same command it reverses
movement and fully open.
• If the opening buttons or the handle
are operated while the power trunk
lid is opening, the motor of the lid is
disabled to allow manual operation.
• If the power trunk lid finds several
obstacles during the same operating
cycle, it will stop automatically and
must be opened or closed manually.
• If the power trunk lid is closing and a
gear is engaged, the lid will continue
closing. In this condition, it is possible
that, during the closing stroke, it
may find an obstacle and stop.
Set the Position of Maximum Power
Trunk Lid Opening
The maximum opening position of the
trunk lid can be modified using the
previously described buttons on its
right lower side.
1. Activate the trunk lid and stop it in the new maximum opening position
to be set, by pressing the LH
button.
2. Press the LH
and RH buttons
at the same time and keep them
pressed for 3 seconds.
3. Release both buttons. Upon the
following opening controls, the
trunk lid will stop in the stored
position.
If you want to reset the maximum
possible opening position of the
power trunk lid, proceed as described
below starting from the previously set
opening position.
1. Manually push the trunk lid to the
maximum possible opening
position.
2. Repeat the previously performed
steps 2 and 3.
Power Trunk Lid Automatic Safe
Movement
Power trunk lid safe opening and
closing is ensured by a protection
system able to stop its movement
when an obstacle is detected along the
path: when opening or closing, it stops
automatically and then slightly moves
back.
After the closing command, when
power trunk lid starts closing, all theBefore Starting
2
54
Page 99 of 396
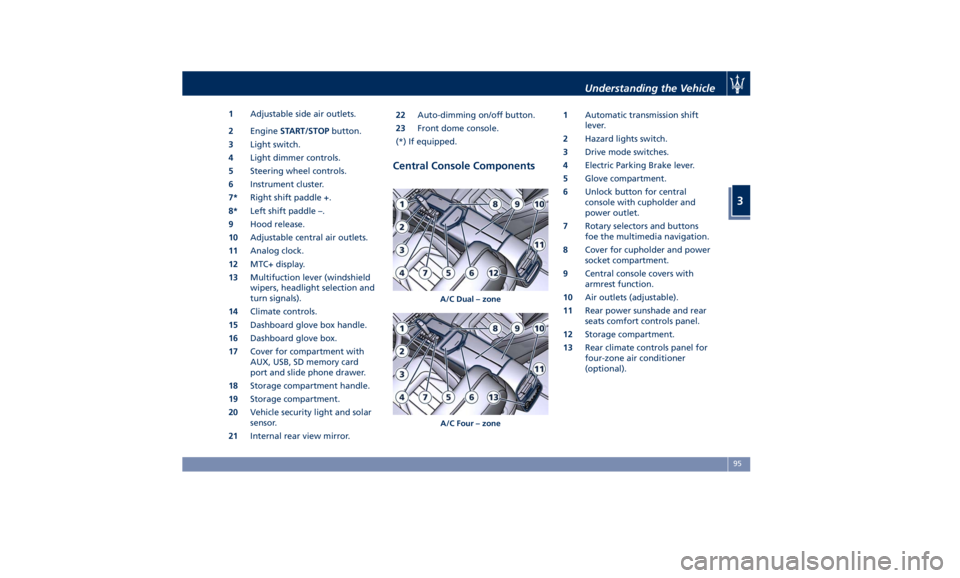
1 Adjustable side air outlets.
2 Engine START/STOP button.
3 Light switch.
4 Light dimmer controls.
5 Steering wheel controls.
6 Instrument cluster.
7* Right shift paddle +.
8* Left shift paddle –.
9 Hood release.
10 Adjustable central air outlets.
11 Analog clock.
12 MTC+ display.
13 Multifuction lever (windshield
wipers, headlight selection and
turn signals).
14 Climate controls.
15 Dashboard glove box handle.
16 Dashboard glove box.
17 Cover for compartment with
AUX, USB, SD memory card
port and slide phone drawer.
18 Storage compartment handle.
19 Storage compartment.
20 Vehicle security light and solar
sensor.
21 Internal rear view mirror. 22 Auto-dimming on/off button.
23 Front dome console.
(*) If equipped.
Central Console Components 1 Automatic transmission shift
lever.
2 Hazard lights switch.
3 Drive mode switches.
4 Electric Parking Brake lever.
5 Glove compartment.
6 Unlock button for central
console with cupholder and
power outlet.
7 Rotary selectors and buttons
foe the multimedia navigation.
8 Cover for cupholder and power
socket compartment.
9 Central console covers with
armrest function.
10 Air outlets (adjustable).
11 Rear power sunshade and rear
seats comfort controls panel.
12 Storage compartment.
13 Rear climate controls panel for
four-zone air conditioner
(optional).A/C Dual – zone
A/C Four – zone Understanding the Vehicle
3
95
Page 102 of 396
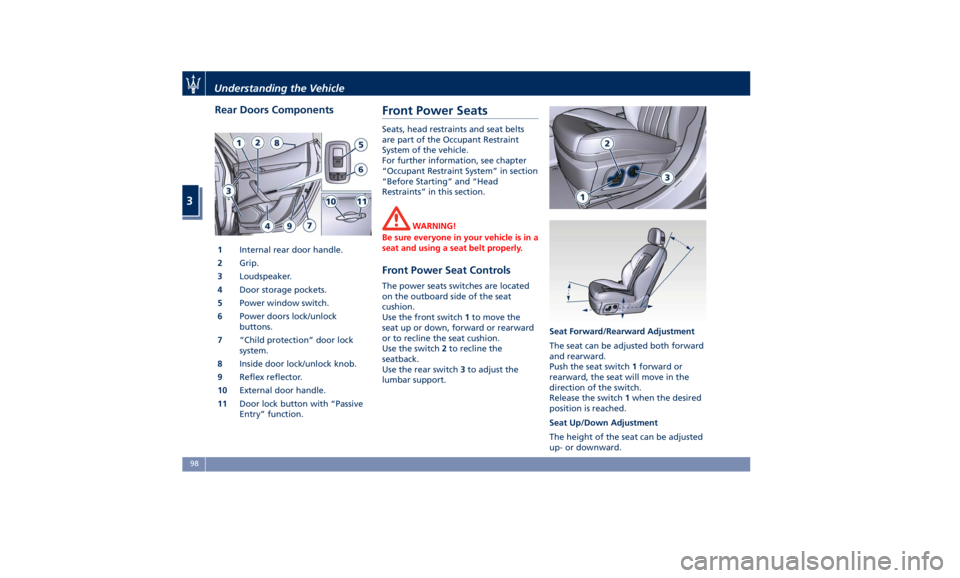
Rear Doors Components
1 Internal rear door handle.
2 Grip.
3 Loudspeaker.
4 Door storage pockets.
5 Power window switch.
6 Power doors lock/unlock
buttons.
7 “Child protection” door lock
system.
8 Inside door lock/unlock knob.
9 Reflex reflector.
10 External door handle.
11 Door lock button with “Passive
Entry” function. Front Power Seats Seats, head restraints and seat belts
are part of the Occupant Restraint
System of the vehicle.
For further information, see chapter
“Occupant Restraint System” in section
“Before Starting” and “Head
Restraints” in this section.
WARNING!
Be sure everyone in your vehicle is in a
seat and using a seat belt properly.
Front Power Seat Controls The power seats switches are located
on the outboard side of the seat
cushion.
Use the front switch 1 to move the
seat up or down, forward or rearward
or to recline the seat cushion.
Use the switch 2 to recline the
seatback.
Use the rear switch 3 to adjust the
lumbar support. Seat Forward/Rearward Adjustment
The seat can be adjusted both forward
and rearward.
Push the seat switch 1 forward or
rearward, the seat will move in the
direction of the switch.
Release the switch 1 when the desired
position is reached.
Seat Up/Down Adjustment
The height of the seat can be adjusted
up- or downward.Understanding the Vehicle
3
98
Page 105 of 396
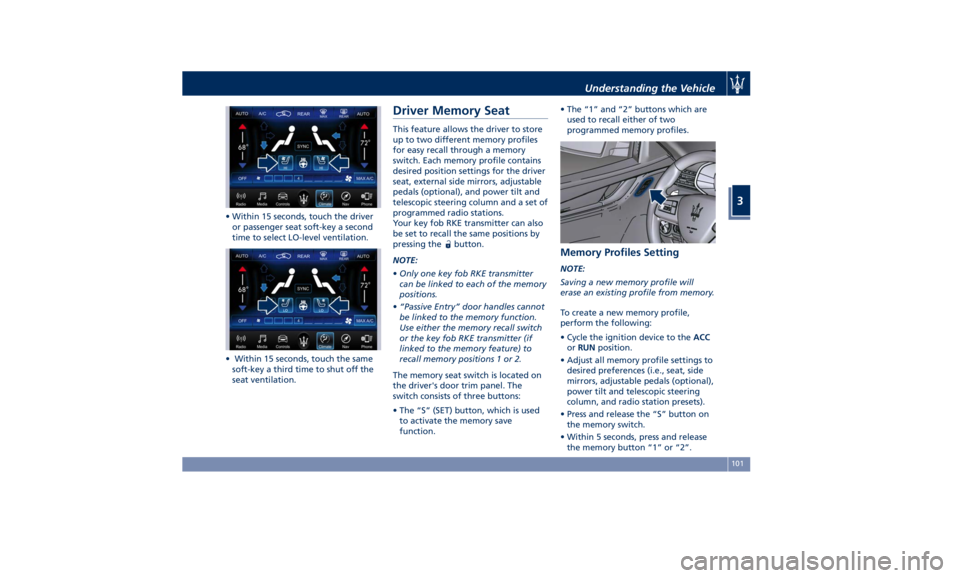
• Within 15 seconds, touch the driver
or passenger seat soft-key a second
time to select LO-level ventilation.
• Within 15 seconds, touch the same
soft-key a third time to shut off the
seat ventilation. Driver Memory Seat This feature allows the driver to store
up to two different memory profiles
for easy recall through a memory
switch. Each memory profile contains
desired position settings for the driver
seat, external side mirrors, adjustable
pedals (optional), and power tilt and
telescopic steering column and a set of
programmed radio stations.
Your key fob RKE transmitter can also
be set to recall the same positions by
pressing the
button.
NOTE:
• Only one key fob RKE transmitter
can be linked to each of the memory
positions.
• “Passive Entry” door handles cannot
be linked to the memory function.
Use either the memory recall switch
or the key fob RKE transmitter (if
linked to the memory feature) to
recall memory positions 1 or 2.
The memory seat switch is located on
the driver's door trim panel. The
switch consists of three buttons:
• The “S” (SET) button, which is used
to activate the memory save
function. • The “1” and “2” buttons which are
used to recall either of two
programmed memory profiles.
Memory Profiles Setting NOTE:
Saving a new memory profile will
erase an existing profile from memory.
To create a new memory profile,
perform the following:
• Cycle the ignition device to the ACC
or RUN position.
• Adjust all memory profile settings to
desired preferences (i.e., seat, side
mirrors, adjustable pedals (optional),
power tilt and telescopic steering
column, and radio station presets).
• Press and release the “S” button on
the memory switch.
• Within 5 seconds, press and release
the memory button “1” or “2”.Understanding the Vehicle
3
101