driver seat adjustment MASERATI QUATTROPORTE 2019 Owners Manual
[x] Cancel search | Manufacturer: MASERATI, Model Year: 2019, Model line: QUATTROPORTE, Model: MASERATI QUATTROPORTE 2019Pages: 396, PDF Size: 13.9 MB
Page 66 of 396
(Continued)
neck injury. A belt worn under the
arm can also cause internal injuries.
• Position the lap belt so that it is snug
and
lies low across your hips, below
your abdomen. To fasten the lap belt
pull slightly up the diagonal portion
of the shoulder belt. To loosen the
lap belt if too tight, tilt the latch
plate and pull on the lap belt. A snug
belt reduces the risk of sliding under
the belt in an accident.
WARNING!
• A lap belt worn too high can
increase the risk of internal injury in
an accident. The belt forces won't
impact on the strong hip and pelvic
bones, but across your abdomen.
Always wear the lap belt as low as
possible and keep it comfortable.
• A twisted belt will not protect you
properly. In a collision, it could even
cut into you. Be sure the belt is
straight. If you can't straighten a
belt in your vehicle, take it to a
Service Center immediately.
• Do not use devices (clips, fastenings
etc.) that prevent the seat belts from
laying close to the occupants bodies. • Never carry children on a passenger’s
lap.
• Position the shoulder belt on your
chest
so that
it is comfortable and
not resting on your neck. The
retractor will withdraw any slack in
the belt.
• To release the belt, push the red
button on the buckle. The belt will
automatically retract to its stowed
position. If necessary, guide the seat
belt with your hand while it is
rewinding, to prevent it from
twisting.
WARNING!
A frayed or torn belt could break in an
accident and leave you with no
protection. Inspect the belt system
periodically, checking for cuts, frays, or
loose parts. Damaged parts must be
replaced immediately.
Do not disassemble or modify the
system. Seat belt/retractor assemblies
must be replaced by an Authorized
Maserati Dealer after an accident if
they have been damaged (bent
retractor, torn belt, etc.). Three-Point Seat Belt Height
Adjustment
WARNING!
• Wearing your seat belt incorrectly
could make your injuries in a
collision much worse. You might
suffer internal injuries, or you could
even slide out of the seat belt.
Follow these instructions to wear
your seat belt safely and to keep
your passengers safe, too.
• Position the shoulder belt across the
shoulder and chest with minimal, if
any slack so that it is comfortable
and not resting on your neck. The
retractor will withdraw any slack in
the shoulder belt.
• Misadjustment of the seat belt could
reduce the effectiveness of the
safety belt in a crash.
• Always make all seat belt height
adjustments when the vehicle is
stationary.
The vehicle has a shoulder belt height
adjuster
for the driver and front
passenger seating positions.
Adjust the guide so that the shoulder
portion of the belt is on the shoulder
and not falling off of it. The beltBefore Starting
2
62
Page 97 of 396
3 – Understanding the Vehicle Interior Components ..................................... 94
Front Power Seats ....................................... 98
Driver Memory Seat ..................................... 101
Rear Seats ............................................ 103
“Comfort Luxury” Rear Seats (if equipped) ................... 105
Head Restraints ........................................ 108
Power Steering Wheel Adjustment .......................... 111
Adjustable Pedals (if equipped) ............................ 112
Rearview Mirrors ....................................... 113
Lights ................................................ 116
Windshield Wipers and Washers ........................... 127
Interior Features ....................................... 130
Cargo Area ........................................... 139
Power Sunroof with Sunshade ............................. 141
HomeLink (optional) .................................... 143
Air Conditioning Distribution ............................. 147
93
Page 110 of 396
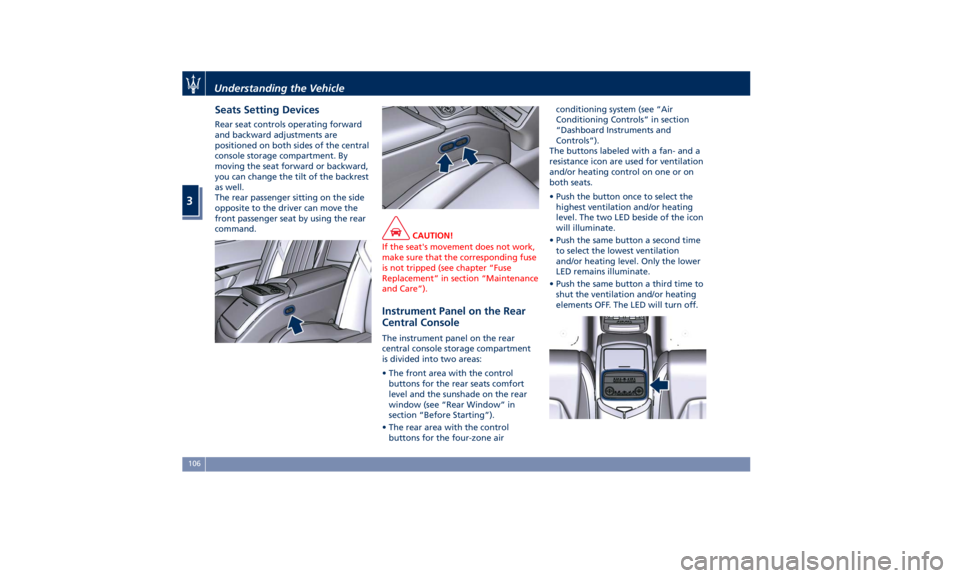
Seats Setting Devices Rear seat controls operating forward
and backward adjustments are
positioned on both sides of the central
console storage compartment. By
moving the seat forward or backward,
you can change the tilt of the backrest
as well.
The rear passenger sitting on the side
opposite to the driver can move the
front passenger seat by using the rear
command.
CAUTION!
If the seat's movement does not work,
make sure that the corresponding fuse
is not tripped (see chapter “Fuse
Replacement” in section “Maintenance
and Care”).
Instrument Panel on the Rear
Central Console The instrument panel on the rear
central console storage compartment
is divided into two areas:
• The front area with the control
buttons for the rear seats comfort
level and the sunshade on the rear
window (see “Rear Window” in
section “Before Starting”).
• The rear area with the control
buttons for the four-zone air conditioning system (see “Air
Conditioning Controls” in section
“Dashboard Instruments and
Controls”).
The buttons labeled with a fan- and a
resistance icon are used for ventilation
and/or heating control on one or on
both seats.
• Push the button once to select the
highest ventilation and/or heating
level. The two LED beside of the icon
will illuminate.
• Push the same button a second time
to select the lowest ventilation
and/or heating level. Only the lower
LED remains illuminate.
• Push the same button a third time to
shut the ventilation and/or heating
elements OFF. The LED will turn off.Understanding the Vehicle
3
106
Page 113 of 396
Front Head Restraints
Adjustment (for Comfort Seat
only) The front head restraints my be
height-adjustable. To adjust them,
operate as follows:
• Upward adjustment: raise the head
restraint until it clicks into place.
• Downward adjustment: push the
adjustment button and push
downward on the head restraint to
lower.
WARNING!
• All occupants, including the driver,
should not operate a vehicle or sit in
a vehicle’s seat until the head
restraints are placed in their proper
positions in order to minimize the risk of neck injury in the event of a
crash.
• Head restraints should never be
adjusted while the vehicle is in
motion. Driving a vehicle with the
head restraints improperly adjusted
could cause serious injury or death
in the event of a collision.
NOTE:
T
o allow
for maximum visibility for the
driver, if a seat is not occupied by a
passenger, the head restraint can be
lowered to the fully lowered position.
Front Head Restraints (for
Sport Seat only) The Sport seat is equipped with
non-adjustable head restraint on the
seat back. The non-adjustable head
restraints consist of a trimmed foam
covering over the upper structure of
the seat backs and are intended to
help protect occupants from neck
injury. Adjust the seat backs to their
upright, on-road positions so that the
head restraint is positioned as close as
possible to the back of the occupant’s
head. WARNING!
Be certain that the seat back is locked
securely into position. Otherwise the
seat will back is not will not provide
the proper stability for passengers. An
improperly latched seat back could
cause serious injury.
Rear Head Restraints Side seats are endowed with
not-adjustable head restraints.
The center seat head restraint can be
adjusted in two positions, up or down.
WARNING!
• All occupants, including the driver,
should not operate a vehicle or sit in
a vehicle’s seat until the head
restraints are placed in their proper
positions in order to minimize the
risk of neck injury in the event of a
crash.
• Head restraints should never be
adjusted while the vehicle is in
motion. Driving a vehicle with the
head restraints improperly adjusted
or removed could cause seriousUnderstanding the Vehicle
3
109
Page 114 of 396
(Continued)
injury or death in the event of a
collision.
Center Rear Head Restraint
Adjustment
When
the center seat is being
occupied the head restraint should be
in the raised position.
When there are no occupants in the
center seat the head restraint can be
lowered in order to provide the driver
for maximum visibility.
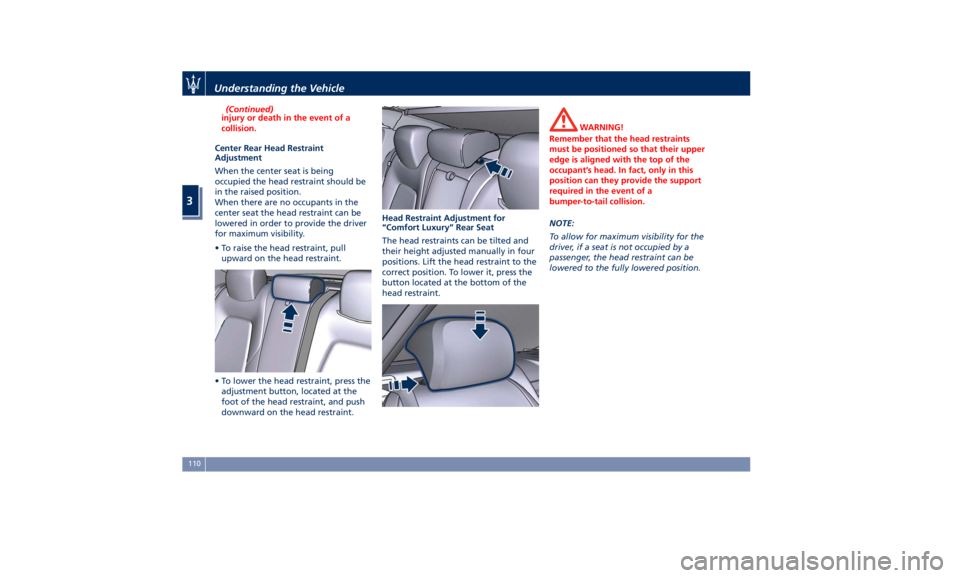
• To raise the head restraint, pull
upward on the head restraint.
• To lower the head restraint, press the
adjustment button, located at the
foot of the head restraint, and push
downward on the head restraint. Head Restraint Adjustment for
“Comfort Luxury” Rear Seat
The head restraints can be tilted and
their height adjusted manually in four
positions. Lift the head restraint to the
correct position. To lower it, press the
button located at the bottom of the
head restraint. WARNING!
Remember that the head restraints
must be positioned so that their upper
edge is aligned with the top of the
occupant’s head. In fact, only in this
position can they provide the support
required in the event of a
bumper-to-tail collision.
NOTE:
T
o allow
for maximum visibility for the
driver, if a seat is not occupied by a
passenger, the head restraint can be
lowered to the fully lowered position.Understanding the Vehicle
3
110
Page 115 of 396
Power Steering Wheel
Adjustment This feature allows you to tilt the
steering column upward or downward
or to lengthen or shorten it in order to
adjust the steering wheel to an
optimized position.
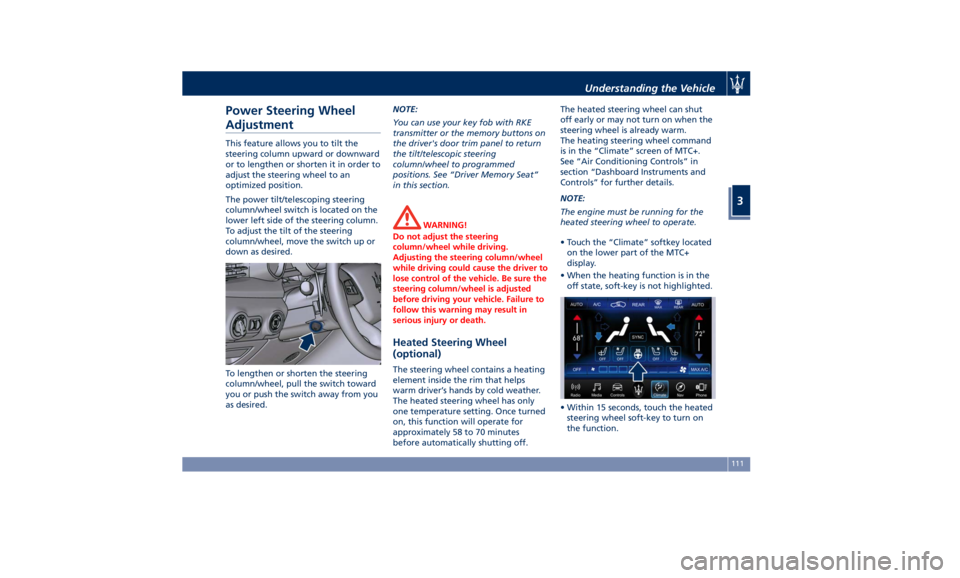
The power tilt/telescoping steering
column/wheel switch is located on the
lower left side of the steering column.
To adjust the tilt of the steering
column/wheel, move the switch up or
down as desired.
To lengthen or shorten the steering
column/wheel, pull the switch toward
you or push the switch away from you
as desired. NOTE:
You can use your key fob with RKE
transmitter or the memory buttons on
the driver's door trim panel to return
the tilt/telescopic steering
column/wheel to programmed
positions. See “Driver Memory Seat”
in this section.
WARNING!
Do not adjust the steering
column/wheel while driving.
Adjusting the steering column/wheel
while driving could cause the driver to
lose control of the vehicle. Be sure the
steering column/wheel is adjusted
before driving your vehicle. Failure to
follow this warning may result in
serious injury or death.
Heated Steering Wheel
(optional) The steering wheel contains a heating
element inside the rim that helps
warm driver’s hands by cold weather.
The heated steering wheel has only
one temperature setting. Once turned
on, this function will operate for
approximately 58 to 70 minutes
before automatically shutting off. The heated steering wheel can shut
off early or may not turn on when the
steering wheel is already warm.
The heating steering wheel command
is in the “Climate” screen of MTC+.
See “Air Conditioning Controls” in
section “Dashboard Instruments and
Controls” for further details.
NOTE:
The engine must be running for the
heated steering wheel to operate.
• Touch the “Climate” softkey located
on the lower part of the MTC+
display.
• When the heating function is in the
off state, soft-key is not highlighted.
• Within 15 seconds, touch the heated
steering wheel soft-key to turn on
the function.Understanding the Vehicle
3
111
Page 207 of 396
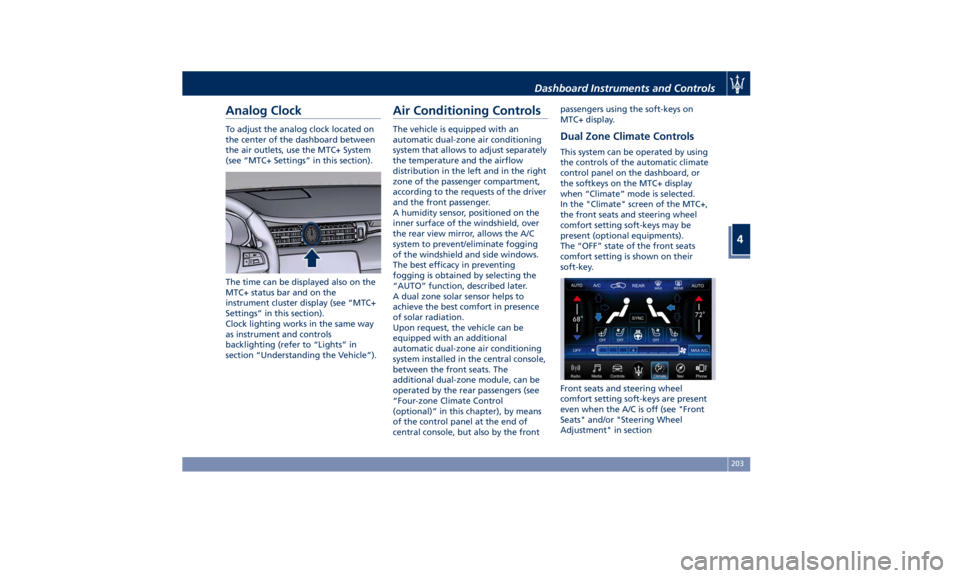
Analog Clock To adjust the analog clock located on
the center of the dashboard between
the air outlets, use the MTC+ System
(see “MTC+ Settings” in this section).
The time can be displayed also on the
MTC+ status bar and on the
instrument cluster display (see “MTC+
Settings” in this section).
Clock lighting works in the same way
as instrument and controls
backlighting (refer to “Lights” in
section “Understanding the Vehicle”). Air Conditioning Controls The vehicle is equipped with an
automatic dual-zone air conditioning
system that allows to adjust separately
the temperature and the airflow
distribution in the left and in the right
zone of the passenger compartment,
according to the requests of the driver
and the front passenger.
A humidity sensor, positioned on the
inner surface of the windshield, over
the rear view mirror, allows the A/C
system to prevent/eliminate fogging
of the windshield and side windows.
The best efficacy in preventing
fogging is obtained by selecting the
“AUTO” function, described later.
A dual zone solar sensor helps to
achieve the best comfort in presence
of solar radiation.
Upon request, the vehicle can be
equipped with an additional
automatic dual-zone air conditioning
system installed in the central console,
between the front seats. The
additional dual-zone module, can be
operated by the rear passengers (see
“Four-zone Climate Control
(optional)” in this chapter), by means
of the control panel at the end of
central console, but also by the front passengers using the soft-keys on
MTC+ display.
Dual Zone Climate Controls This system can be operated by using
the controls of the automatic climate
control panel on the dashboard, or
the softkeys on the MTC+ display
when “Climate” mode is selected.
In the "Climate" screen of the MTC+,
the front seats and steering wheel
comfort setting soft-keys may be
present (optional equipments).
The “OFF” state of the front seats
comfort setting is shown on their
soft-key.
Front seats and steering wheel
comfort setting soft-keys are present
even when the A/C is off (see "Front
Seats" and/or "Steering Wheel
Adjustment" in sectionDashboard Instruments and Controls
4
203
Page 391 of 396
Folding Mirrors ........... .114
Integrated External Rearview Mirror
Lights .................. .126
Internal Rearview Mirror ..... .115
Mirrors Positioning ......... .113
Rearview Mirrors .......... .113
Tilt Mirrors in Reverse ....... .114
MTC+ “Controls” Screen ....... .185
MTC+ Settings - Customer
Programmable Features ...... .189
Auto-On Comfort & Remote
Start ................... .196
Clear Personal Data ........ .199
Clock & Date ............. .192
Display ................. .190
Doors & Locks ............ .194
Engine Off Options ......... .196
Lights .................. .194
Restore Settings ........... .199
Safety and Driving Assistance . . .193
Voice Commands .......... .191
Occupant Restraint System .......58
On Board Diagnostics ......... .253
ORC (Occupant Restraint
Controller) .................69
Park Assist ..................80
Enabling and Disabling Park
Assist ....................83
Parking .................. .246
Parking Brake .............. .243
Passive Entry System ...........42 Pedals, adjustable ........... .112
Pedestrian Emergency Braking
(PEB) ................... .268
Pets, transporting .............79
Phone and Voice Controls on Steering
Wheel .................. .213
Phone Mode ............. .214
Phone/Bluetooth, Customer
settings ................. .198
Power Outlets .............. .130
Power Outlet Inside the Central
Console ................. .131
Power Outlet Inside the
Cupholder ............... .130
Power Outlet Inside the Trunk . .132
Rear
Power Outlets .........
.131
Rear Parking Camera ...........85
Refueling ................. .307
Fuel Filler Neck Access ....... .307
Remote Start System ...........37
Restarting the Vehicle ........ .365
Restraint System ..............66
Child Restraint Systems ........74
RKE (Remote Keyless Entry)
Transmitter .................24
Roadside Assistance Program .....16
Roll-Over Warning .............15
Safety
Child Restraint Systems ........74
Reporting Safety Defects .......12
Safety Tips ..................58 Scheduled Maintenance Service . . .328
Scheduled Service Plan
Scheduled Maintenance
Indicator ................ .328
Seat Belt ...................58
Automatic Locking Retractor (ALR)
Mode ....................64
Enhanced Seat Belt Use Reminder
System (SBR) ...............65
Passenger Seat Belts ..........63
Seat Belt Reminder Light ..... .157
Seat Belts and Pregnant Women .65
Seat Belts Pretensioners .......64
Three-Point Seat Belts .........60
Three-Point Seat Belts Height
Adjustment ................62
Three-Point Seat Belts Untwisting
Procedure .................63
Three-Point Seat Belts Use
Instructions ................61
Using the Seat Belt in Automatic
Locking Retractor Mode (ALR) . . .64
Seats ......................98
Comfort Luxury Rear Seats .... .105
Driver Memory Seat ........ .101
Easy Entry/Exit Seats ........ .103
Front Heated Seats ...........99
Front Power Seats ...........98
Front Ventilated Seats ....... .100
Power Lumbar Seats ..........99
Rear Armrest ............. .103
Rear Seats ............... .103
Rear Side Heated Seats ...... .104Index
9 387