reset MASERATI QUATTROPORTE 2019 Owners Manual
[x] Cancel search | Manufacturer: MASERATI, Model Year: 2019, Model line: QUATTROPORTE, Model: MASERATI QUATTROPORTE 2019Pages: 396, PDF Size: 13.9 MB
Page 41 of 396
Remote Start System This system enables the key fob RKE
transmitter to start the engine
conveniently from outside the vehicle
while still maintaining security. The
system has a range of approximately
300 ft (91 m). Obstructions between
the vehicle and the key fob may
reduce this range.
NOTE:
Changes or modifications not
expressly approved by the party
responsible for compliance could void
the user's authority to operate the
equipment.
If your RKE transmitter fails to operate
from a normal distance, check for
these conditions:
• A weak battery in the RKE
transmitter. The expected life of the
battery is a minimum of three years.
• Closeness to a radio transmitter such
as a radio station tower, airport
transmitter, and some mobile or CB
radio.
• Obstructions between the vehicle
and the Key Fob. How to use Remote Start All of the following conditions must
be met before the engine will remote
start:
• System not disabled from previous
remote start event.
• Vehicle theft alarm not active.
• Doors closed.
• Hood closed.
• Trunk lid closed.
• Hazard lights switched off.
• Brake pedal not pressed.
• Battery at an acceptable charge
level.
• The shift lever is in P (Park) position.
• The vehicle transmission is in
automatic mode.
• The remote start has not been
activated yet two consecutive times.
If EPB (Electric Parking Brake) is not
selected, at key-off in some conditions
the remote start system may not allow
engine to start. We suggest to set
“Auto Apply On” function through
the switch on the right-side of the
steering wheel (refer to “Instrument
Cluster” in section “Dashboard
Instrument and Controls”). WARNING!
• Do not start or run an engine in a
closed garage or confined area.
Exhaust gas contains Carbon
Monoxide (CO) which is odorless
and colorless
• Keep key fobs RKE transmitter away
from children. Operation of the
Remote Start System, windows,
door locks or other controls could
cause serious injury or death.
Engine Remote Start Abort
Message on Instrument Cluster The following messages will display on
the instrument cluster if the vehicle
fails to remote start or exits remote
start prematurely:
• “Remote Start Canceled Door
Open”.
• “Remote Start Canceled Trunk
Open”.
• “Remote Start Canceled Fuel Low”.
• “Remote Start Canceled Time
Expired”.
• “Remote Start Disabled Start Vehicle
to Reset”.Before Starting
2
37
Page 51 of 396
release it when you want the window
to stop.
NOTE:
• If the window runs into any obstacle
during auto-closure, it will reverse
direction and then go back down.
Remove the obstacle and use the
window switch again to close the
window.
• Any impact due to rough road
conditions may trigger the auto
reverse function unexpectedly
during auto-closure. If this happens,
pull the switch lightly to the first
detent and hold to close the window
manually.
• Frequent activations of the
anti-pinch function could disable the
auto-down and auto-up function of
the windows. In order to re-activate
this function proceed with a reset
cycle as described in the next
paragraph.
WARNING!
There is no anti-pinch protection
when the window is almost closed. Be
sure to clear all objects from the area
before closing the window. Reset Auto-Up/Down Should the auto-up/down feature stop
working, the window probably needs
to be reset.
To reset auto-up/down, pull the
window switch up to close the
window completely and push the
window switch down to open the
window completely.
Open the Windows with RKE
Transmitter and Ignition Off When the ignition switch is in OFF
position, windows can be opened by
pressing the
button on the RKE
transmitter.
• Press the button and release it;
• Press a second time the
button
and keep it pressed until complete
opening of the windows, if they
were closed.
Rear Window and Sunshade
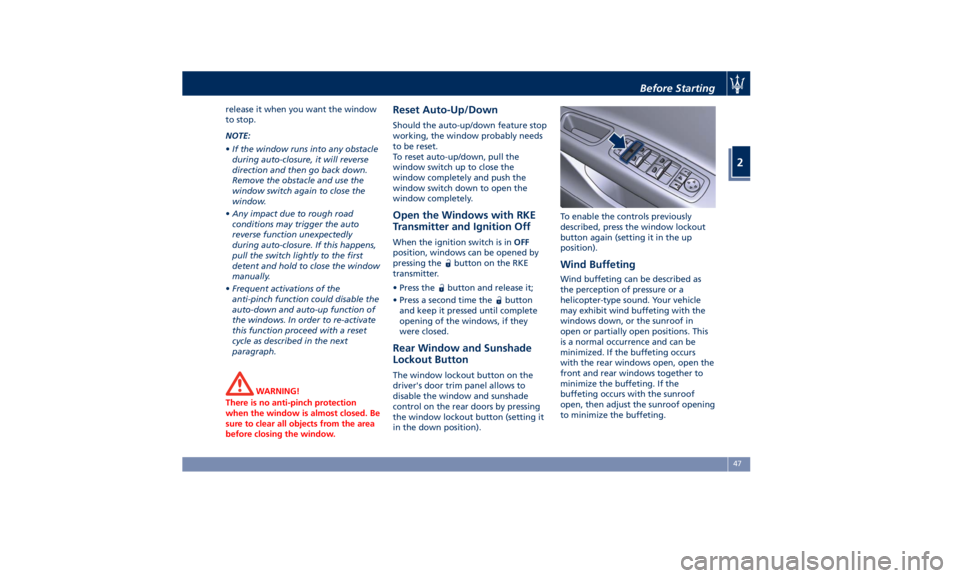
Lockout Button The window lockout button on the
driver's door trim panel allows to
disable the window and sunshade
control on the rear doors by pressing
the window lockout button (setting it
in the down position). To enable the controls previously
described, press the window lockout
button again (setting it in the up
position).
Wind Buffeting Wind buffeting can be described as
the perception of pressure or a
helicopter-type sound. Your vehicle
may exhibit wind buffeting with the
windows down, or the sunroof in
open or partially open positions. This
is a normal occurrence and can be
minimized. If the buffeting occurs
with the rear windows open, open the
front and rear windows together to
minimize the buffeting. If the
buffeting occurs with the sunroof
open, then adjust the sunroof opening
to minimize the buffeting.Before Starting
2
47
Page 58 of 396
When the power trunk lid is
completely open if you press and
release the RH button
, the power
trunk lid will be completely closed
unless it is stopped;
• if instead the power trunk lid is in an
intermediate position and you press
and release the RH button
during
the closing or opening stroke, it will
be stopped;
• if instead the power trunk lid is
stopped in an intermediate position
and you press and release the RH
button
, it will reverse its previous
movement and it will be completely
opened or closed unless it is stopped
again.
In any case, when you press the RH
button
, the doors will not be
locked and the alarm system will not
be armed immediately, but only when
the power trunk lid will have reached
the totally closed position as effect of
every movement commands received
from every other available inputs.
NOTE:
• The order of the functions shown
does not represent the sequence in
which they can be performed.
• The buttons of the power trunk lid
do not work if a gear is engaged or if the vehicle speed is higher than 0
(km/h - mph).
• The power trunk lid does not work
with temperatures lower than −22 °F
(−30 °C) or higher than 150 °F (65 °C).
• If the opening buttons or the
handles are operated while the
power trunk lid is closing, the stroke
of lid stops. Pressing another time
the same command it reverses
movement and fully open.
• If the opening buttons or the handle
are operated while the power trunk
lid is opening, the motor of the lid is
disabled to allow manual operation.
• If the power trunk lid finds several
obstacles during the same operating
cycle, it will stop automatically and
must be opened or closed manually.
• If the power trunk lid is closing and a
gear is engaged, the lid will continue
closing. In this condition, it is possible
that, during the closing stroke, it
may find an obstacle and stop.
Set the Position of Maximum Power
Trunk Lid Opening
The maximum opening position of the
trunk lid can be modified using the
previously described buttons on its
right lower side.
1. Activate the trunk lid and stop it in the new maximum opening position
to be set, by pressing the LH
button.
2. Press the LH
and RH buttons
at the same time and keep them
pressed for 3 seconds.
3. Release both buttons. Upon the
following opening controls, the
trunk lid will stop in the stored
position.
If you want to reset the maximum
possible opening position of the
power trunk lid, proceed as described
below starting from the previously set
opening position.
1. Manually push the trunk lid to the
maximum possible opening
position.
2. Repeat the previously performed
steps 2 and 3.
Power Trunk Lid Automatic Safe
Movement
Power trunk lid safe opening and
closing is ensured by a protection
system able to stop its movement
when an obstacle is detected along the
path: when opening or closing, it stops
automatically and then slightly moves
back.
After the closing command, when
power trunk lid starts closing, all theBefore Starting
2
54
Page 105 of 396
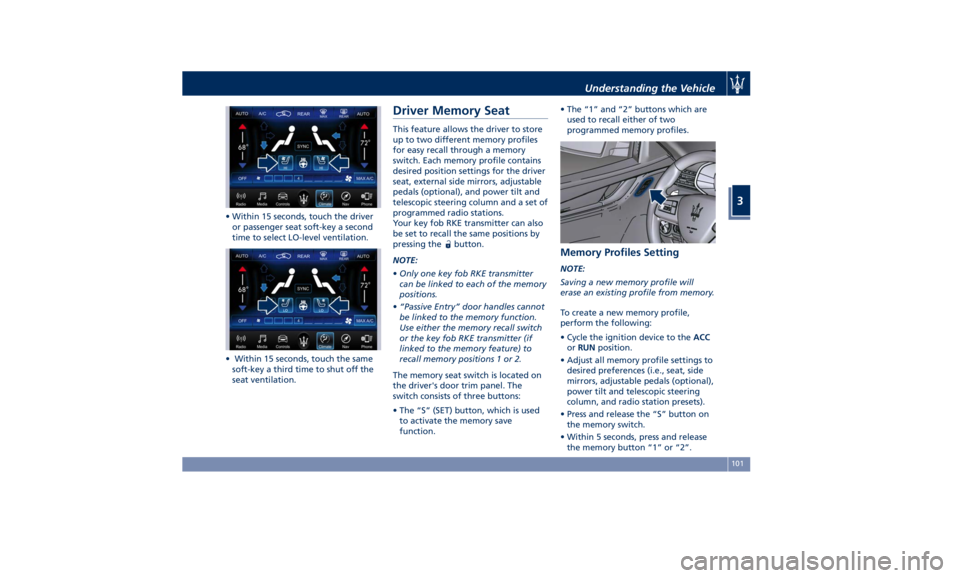
• Within 15 seconds, touch the driver
or passenger seat soft-key a second
time to select LO-level ventilation.
• Within 15 seconds, touch the same
soft-key a third time to shut off the
seat ventilation. Driver Memory Seat This feature allows the driver to store
up to two different memory profiles
for easy recall through a memory
switch. Each memory profile contains
desired position settings for the driver
seat, external side mirrors, adjustable
pedals (optional), and power tilt and
telescopic steering column and a set of
programmed radio stations.
Your key fob RKE transmitter can also
be set to recall the same positions by
pressing the
button.
NOTE:
• Only one key fob RKE transmitter
can be linked to each of the memory
positions.
• “Passive Entry” door handles cannot
be linked to the memory function.
Use either the memory recall switch
or the key fob RKE transmitter (if
linked to the memory feature) to
recall memory positions 1 or 2.
The memory seat switch is located on
the driver's door trim panel. The
switch consists of three buttons:
• The “S” (SET) button, which is used
to activate the memory save
function. • The “1” and “2” buttons which are
used to recall either of two
programmed memory profiles.
Memory Profiles Setting NOTE:
Saving a new memory profile will
erase an existing profile from memory.
To create a new memory profile,
perform the following:
• Cycle the ignition device to the ACC
or RUN position.
• Adjust all memory profile settings to
desired preferences (i.e., seat, side
mirrors, adjustable pedals (optional),
power tilt and telescopic steering
column, and radio station presets).
• Press and release the “S” button on
the memory switch.
• Within 5 seconds, press and release
the memory button “1” or “2”.Understanding the Vehicle
3
101
Page 118 of 396
the adjacent lane and get a partial
overlap with the visible image on the
inside rearview mirror.
Power mirror preselected positions can
be reset by operating the Memory
Driver Seat device. Check “Driver
Memory Seat” in this section for
further information.
WARNING!
Vehicles and other objects seen in the
external side convex mirror will look
smaller and farther away than they
really are. Relying too much on your
passenger side convex mirror could
cause you to collide with another
vehicle or object. Use the inside mirror
to judge the size or distance of a
vehicle seen in the external side
convex mirror.
Tilt Side Mirrors In Reverse
This
feature provides automatic
external rearview mirrors positioning,
allowing the driver to view the ground
area behind the front doors. The
external mirrors will move slightly
downward from the current position
when the shift lever is shifted into
reverse. The external mirrors will then
return to the original position when the lever is shifted out of the reverse
position. Each memory set of the
driver's seat (see "Driver Memory
Seat" chapter in section
“Understanding the Vehicle”)
corresponds to a mirror tilt position in
reverse.
NOTE:
The mirrors tilt in reverse can be
turned on and off using the MTC+
System, refer to “MTC+ Settings” in
section “Dashboard Instruments and
Controls”.
Folding Mirrors
By selecting this feature on MTC+ the
rear-view mirrors automatically fold
when the vehicle is locked by the key
fob and when the power trunk lid (if
equipped) is closed and locked by
pressing the
button on the right
lower parts of the lid.
When the vehicle and the trunk lid will
be unlocked and the ignition device is
set in RUN position, the rear-view
mirrors will automatically open in the
position they had before the lock.
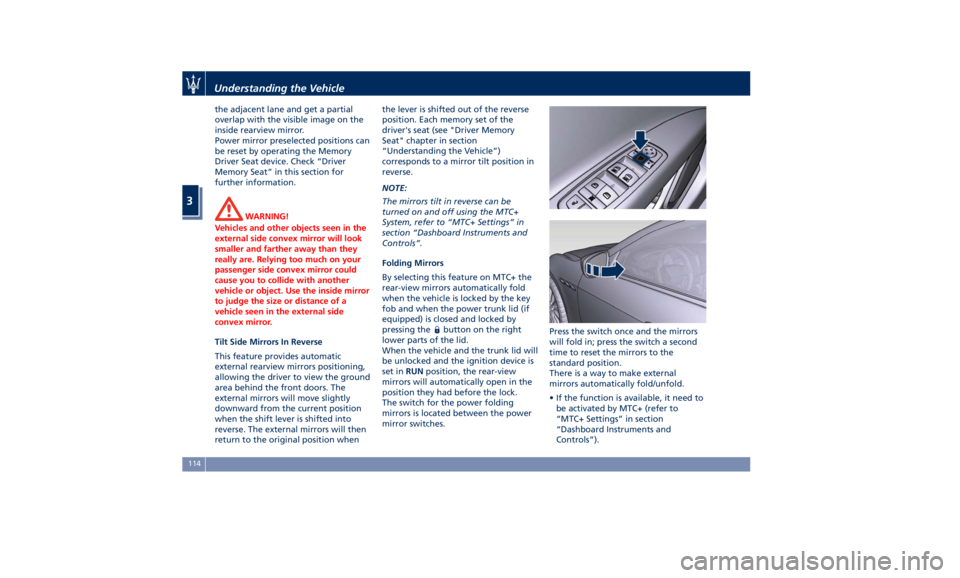
The switch for the power folding
mirrors is located between the power
mirror switches. Press the switch once and the mirrors
will fold in; press the switch a second
time to reset the mirrors to the
standard position.
There is a way to make external
mirrors automatically fold/unfold.
• If the function is available, it need to
be activated by MTC+ (refer to
“MTC+ Settings” in section
“Dashboard Instruments and
Controls”).Understanding the Vehicle
3
114
Page 156 of 396
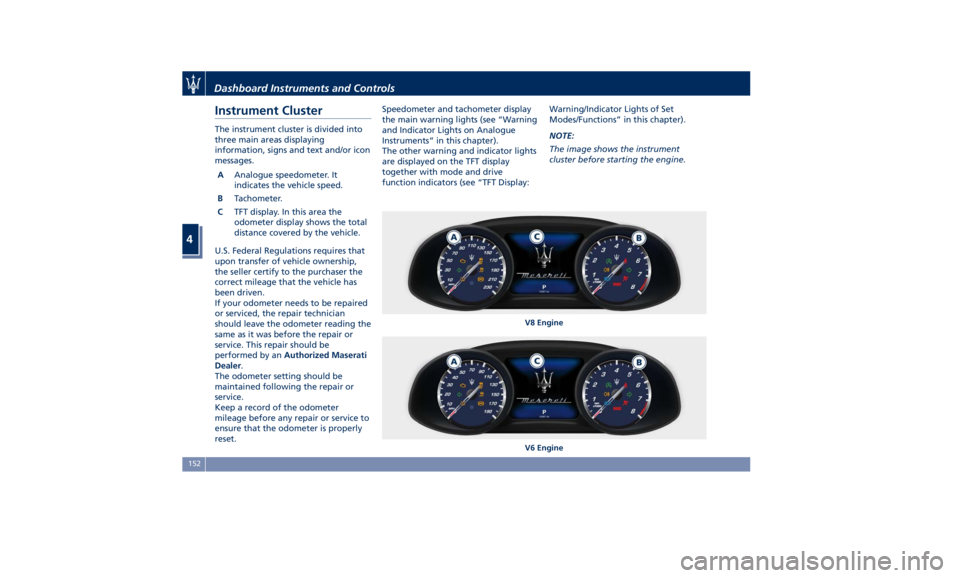
Instrument Cluster The instrument cluster is divided into
three main areas displaying
information, signs and text and/or icon
messages.
A Analogue speedometer. It
indicates the vehicle speed.
B Tachometer.
C TFT display. In this area the
odometer display shows the total
distance covered by the vehicle.
U.S. Federal Regulations requires that
upon transfer of vehicle ownership,
the seller certify to the purchaser the
correct mileage that the vehicle has
been driven.
If your odometer needs to be repaired
or serviced, the repair technician
should leave the odometer reading the
same as it was before the repair or
service. This repair should be
performed by an Authorized Maserati
Dealer .
The odometer setting should be
maintained following the repair or
service.
Keep a record of the odometer
mileage before any repair or service to
ensure that the odometer is properly
reset. Speedometer and tachometer display
the main warning lights (see “Warning
and Indicator Lights on Analogue
Instruments” in this chapter).
The other warning and indicator lights
are displayed on the TFT display
together with mode and drive
function indicators (see “TFT Display: Warning/Indicator Lights of Set
Modes/Functions” in this chapter).
NOTE:
The image shows the instrument
cluster before starting the engine.
V8 Engine
V6 EngineDashboard Instruments and Controls
4
152
Page 168 of 396
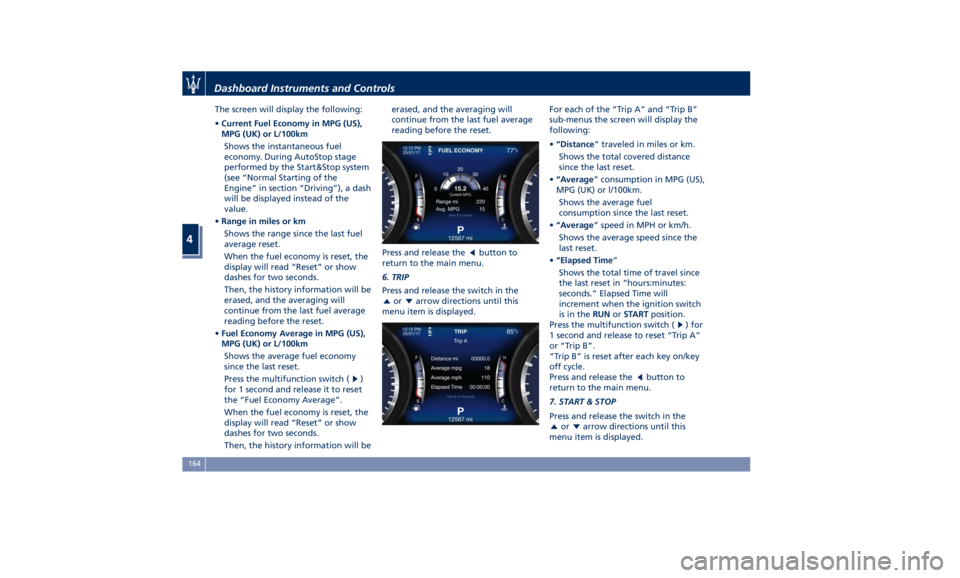
The screen will display the following:
• Current Fuel Economy in MPG (US),
MPG (UK) or L/100km
Shows the instantaneous fuel
economy. During AutoStop stage
performed by the Start&Stop system
(see “Normal Starting of the
Engine” in section “Driving”), a dash
will be displayed instead of the
value.
• Range in miles or km
Shows the range since the last fuel
average reset.
When the fuel economy is reset, the
display will read “Reset” or show
dashes for two seconds.
Then, the history information will be
erased, and the averaging will
continue from the last fuel average
reading before the reset.
• Fuel Economy Average in MPG (US),
MPG (UK) or L/100km
Shows the average fuel economy
since the last reset.
Press the multifunction switch (
)
for 1 second and release it to reset
the “Fuel Economy Average”.
When the fuel economy is reset, the
display will read “Reset” or show
dashes for two seconds.
Then, the history information will be erased, and the averaging will
continue from the last fuel average
reading before the reset.
Press and release the
button to
return to the main menu.
6. TRIP
Press and release the switch in the
or arrow directions until this
menu item is displayed. For each of the “Trip A” and “Trip B”
sub-menus the screen will display the
following:
• “Distance ” traveled in miles or km.
Shows the total covered distance
since the last reset.
• “Average ” consumption in MPG (US),
MPG (UK) or l/100km.
Shows the average fuel
consumption since the last reset.
• “Average ” speed in MPH or km/h.
Shows the average speed since the
last reset.
• “Elapsed Time ”
Shows the total time of travel since
the last reset in “hours:minutes:
seconds.” Elapsed Time will
increment when the ignition switch
is in the RUN or START position.
Press the multifunction switch (
) for
1 second and release to reset “Trip A”
or “Trip B”.
“Trip B” is reset after each key on/key
off cycle.
Press and release the
button to
return to the main menu.
7. START & STOP
Press and release the switch in the
or arrow directions until this
menu item is displayed.Dashboard Instruments and Controls
4
164
Page 174 of 396
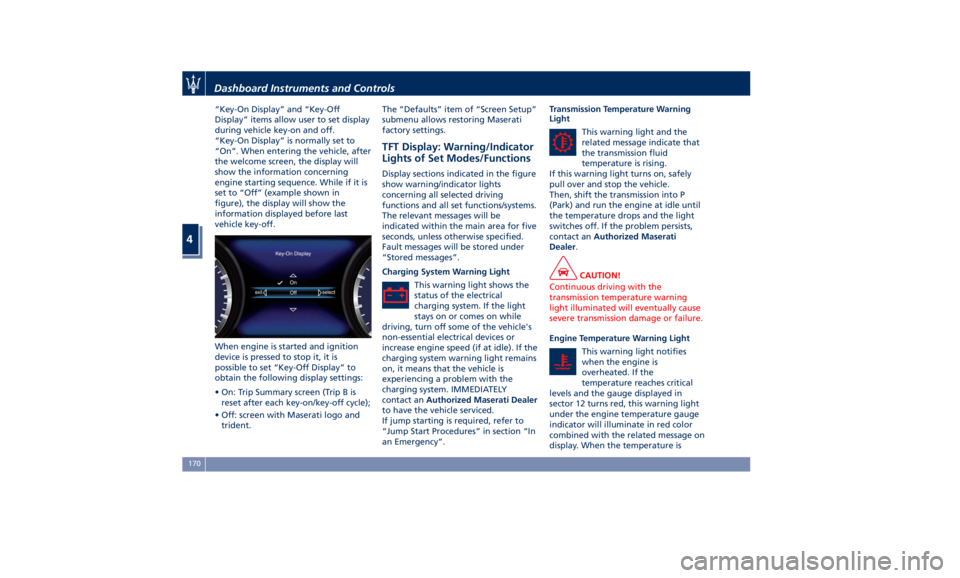
“Key-On Display” and “Key-Off
Display” items allow user to set display
during vehicle key-on and off.
“Key-On Display” is normally set to
“On”. When entering the vehicle, after
the welcome screen, the display will
show the information concerning
engine starting sequence. While if it is
set to “Off” (example shown in
figure), the display will show the
information displayed before last
vehicle key-off.
When engine is started and ignition
device is pressed to stop it, it is
possible to set “Key-Off Display” to
obtain the following display settings:
• On: Trip Summary screen (Trip B is
reset after each key-on/key-off cycle);
• Off: screen with Maserati logo and
trident. The “Defaults” item of “Screen Setup”
submenu allows restoring Maserati
factory settings.
TFT Display: Warning/Indicator
Lights of Set Modes/Functions Display sections indicated in the figure
show warning/indicator lights
concerning all selected driving
functions and all set functions/systems.
The relevant messages will be
indicated within the main area for five
seconds, unless otherwise specified.
Fault messages will be stored under
“Stored messages”.
Charging System Warning Light
This warning light shows the
status of the electrical
charging system. If the light
stays on or comes on while
driving, turn off some of the vehicle's
non-essential electrical devices or
increase engine speed (if at idle). If the
charging system warning light remains
on, it means that the vehicle is
experiencing a problem with the
charging system. IMMEDIATELY
contact an Authorized Maserati Dealer
to have the vehicle serviced.
If jump starting is required, refer to
“Jump Start Procedures” in section “In
an Emergency”. Transmission Temperature Warning
Light
This warning light and the
related message indicate that
the transmission fluid
temperature is rising.
If this warning light turns on, safely
pull over and stop the vehicle.
Then, shift the transmission into P
(Park) and run the engine at idle until
the temperature drops and the light
switches off. If the problem persists,
contact an Authorized Maserati
Dealer .
CAUTION!
Continuous driving with the
transmission temperature warning
light illuminated will eventually cause
severe transmission damage or failure.
Engine Temperature Warning Light
This
warning light
notifies
when the engine is
overheated. If the
temperature reaches critical
levels and the gauge displayed in
sector 12 turns red, this warning light
under the engine temperature gauge
indicator will illuminate in red color
combined with the related message on
display. When the temperature isDashboard Instruments and Controls
4
170
Page 178 of 396
steering wheel, or through the button
on the central console or through the
relevant soft-key of the MTC+. See
chapter “Automatic Start&Stop
System” of section “Driving” for
further information.
Start&Stop Failure Warning Light
This warning light illuminates
when there is a failure in the
Start&Stop system. Switch the
engine on or off using the
normal procedure with the ignition
device START/STOP and have the
vehicle checked at an Authorized
Maserati Dealer .
Scheduled Maintenance (Service)
Indicator
This indicator illuminates and
a message flashes on the
display for approximately 5
seconds after an acoustic
signal to indicate that the next
scheduled maintenance is due or is
already overdue.
Unless reset, the message will continue
to display each time you cycle the
ignition to the RUN position.
To turn off the message temporarily,
press and release the
button on the
steering wheel. To reset the service
indicator system, please visit an
Authorized Maserati Dealer . ADAS Status Indicators (if equipped)
When you are not viewing the
“Drive Assist” page, the
indicators at the top left-hand
side of the display indicate
status of individual ADAS system or
the combination of them (see
examples).
For further details, refer to
“Adaptive Cruise Control -
ACC”, “Lane Keeping Assist -
LKA” and “Highway Assist - HAS” in
section “Driving”.
Forward Collision Warning (FCW) Off
(if equipped)
This warning light informs the
driver that Forward Collision
Warning (FCW) is disabled.
This might occur when front
sensor and/or the ACC/FCW system
sensors are malfunctioning and need
cleaning or servicing and when
ACC/FCW system is not available due
to a system error (for further details,
refer to “Adaptive Cruise Control –
ACC” in section “Driving”). This
warning light will light even when the
activation of another driver assistance
feature or drive mode (such as “
-ESC
OFF”) disables the FCW. Forward Collision Warning (FCW) Fault
(if equipped)
This warning light informs that
FCW is in fault state. If this
light occurs together with
other specific messages, take
your vehicle to an Authorized Maserati
Dealer for service. It is nevertheless
possible to drive the vehicle without
using this function (for further details,
refer to “Forward Collision Warning -
FCW” in section “Driving”).
AWD Failure Warning Light (on AWD
version only)
This warning light turns on to
indicate a fault of the AWD
system otherwise a fault or
overheating due to excessive
wheel spin. Contact an Authorized
Maserati Dealer as soon as possible,
and avoid using the vehicle in heavy
duty conditions.
Set Passive Speed Limit
This indicator light indicates
the passive speed limit set via
the controls on the RH side of
the steering wheel (for further
details, refer to “TFT Display: Menus
and Settings” in this chapter).Dashboard Instruments and Controls
4
174
Page 182 of 396
Tune/Scroll Control
By working this knob in “Radio” or
“Media” mode, user can go through
the radio stations or scroll the tracks
inside connected external devices and
confirm the selection by pressing enter
button.
In any other mode of the MTC+, use
this knob to scroll the list of available
options or to manage the cursor
movement in the lower bar of the
main menus. Then press enter button
to confirm the function or setting
highlighted on MTC+ display.
Browse button
After selecting a function, using the
tune/scroll knob or softkeys on MTC+
display, press this button to see the
detail of the items/options of the
selected function. This button is also
used as shortcut to display the phone
book, when the “Phone” menu is selected, or the favorites when the
“Nav (Navigation)” menu is selected.
Back button
Press this button to go back to
previous menu or previous screen.
Press this button to shift the
navigation one level backwards on
MTC+ screen. If it is pressed and held
for at least 2 seconds, it brings the
cursor back in the lower bar of the
main menus.
Enter Button
To confirm the function or setting
highlighted on MTC+ display.
When in “Radio” mode and the
ignition switch in RUN position, you
can save your preset stations.
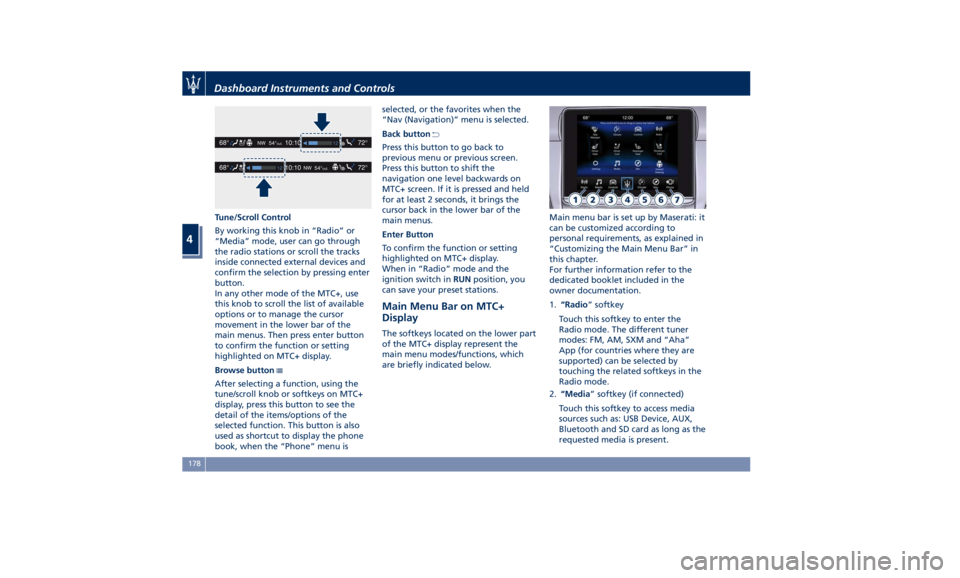
Main Menu Bar on MTC+
Display The softkeys located on the lower part
of the MTC+ display represent the
main menu modes/functions, which
are briefly indicated below. Main menu bar is set up by Maserati: it
can be customized according to
personal requirements, as explained in
“Customizing the Main Menu Bar” in
this chapter.
For further information refer to the
dedicated booklet included in the
owner documentation.
1. “Radio ” softkey
Touch this softkey to enter the
Radio mode. The different tuner
modes: FM, AM, SXM and “Aha”
App (for countries where they are
supported) can be selected by
touching the related softkeys in the
Radio mode.
2. “Media ” softkey (if connected)
Touch this softkey to access media
sources such as: USB Device, AUX,
Bluetooth and SD card as long as the
requested media is present.Dashboard Instruments and Controls
4
178