battery MAZDA MODEL 3 HATCHBACK 2008 (in English) User Guide
[x] Cancel search | Manufacturer: MAZDA, Model Year: 2008, Model line: MODEL 3 HATCHBACK, Model: MAZDA MODEL 3 HATCHBACK 2008Pages: 394, PDF Size: 5.68 MB
Page 126 of 394

Black plate (126,1)
WARNING
Do not rely on ABS as a substitute for
safe driving:
The ABS cannot compensate for
unsafe and reckless driving, excessive
speed, tailgating (following another
vehicle too closely), driving on ice and
snow, and hydroplaning (reduced tire
friction and road contact because of
water on the road surface). You can
still have an accident.
NOTE
lBraking distances may be longer on loose
surfaces (snow or gravel, for example)
which usually have a hard foundation. A
vehicle with a normal braking system may
require less distance to stop under these
conditions because the tires will build up a
wedge of surface layer when the wheels
skid.
lThe sound of the ABS operating may be
heard when starting the engine or
immediately after starting the vehicle.
However, it does not indicate a malfunction.
qABS Warning Lightí
The warning light stays on for a few
seconds when the ignition switch is turned
to the ON position.If the ABS warning light stays on while
you're driving, the ABS control unit has
detected a system malfunction. If this
occurs, your brakes will function normally
as if the vehicle had no ABS.
Should this happen, consult an Authorized
Mazda Dealer as soon as possible.
NOTE
When the engine is jump-started to charge the
battery, uneven rpm occurs and the ABS
warning light comes on. This is due to a weak
battery, not a malfunction.
Recharge the battery.
qElectronic Brake Force
Distribution System Warningí
If the electronic brake force distribution
control unit determines that some
components are operating incorrectly, the
control unit may turn the brake system
warning light and the ABS warning light
on at the same time. The problem is likely
to be the electronic brake force
distribution system.
5-8
Driving Your Mazda
íSome models.
Starting and Driving
Mazda3_8X41-EA-07F_Edition2 Page126
Monday, June 18 2007 1:28 PM
Form No.8X41-EA-07F
Page 152 of 394
Black plate (152,1)
Odometer
The odometer records the total distance
the vehicle has been driven.
Trip meter
The trip meter can record the total
distance of two trips. One is recorded in
trip meter A, and the other is recorded in
trip meter B.
For instance, trip meter A can record the
distance from the point of origin, and trip
meter B can record the distance from
where the fuel tank is filled.
When trip meter A is selected, pressing
the selector again within one second will
change to trip meter B mode.
When trip meter A is selected, TRIP A
will be displayed. When trip meter B is
selected, TRIP B will be displayed.
The trip meter records the total distance
the vehicle is driven until the meter is
again reset. Return it to“0.0”by holding
the selector depressed for more than 1
second. Use this meter to measure trip
distances and to compute fuel
consumption.
NOTE
lOnly the trip meters record tenths of
kilometers (miles).
lThe trip record will be erased when:lThe power supply is interrupted (blown
fuse or the battery is disconnected).
lThe vehicle is driven over 999.9 km
(mile).
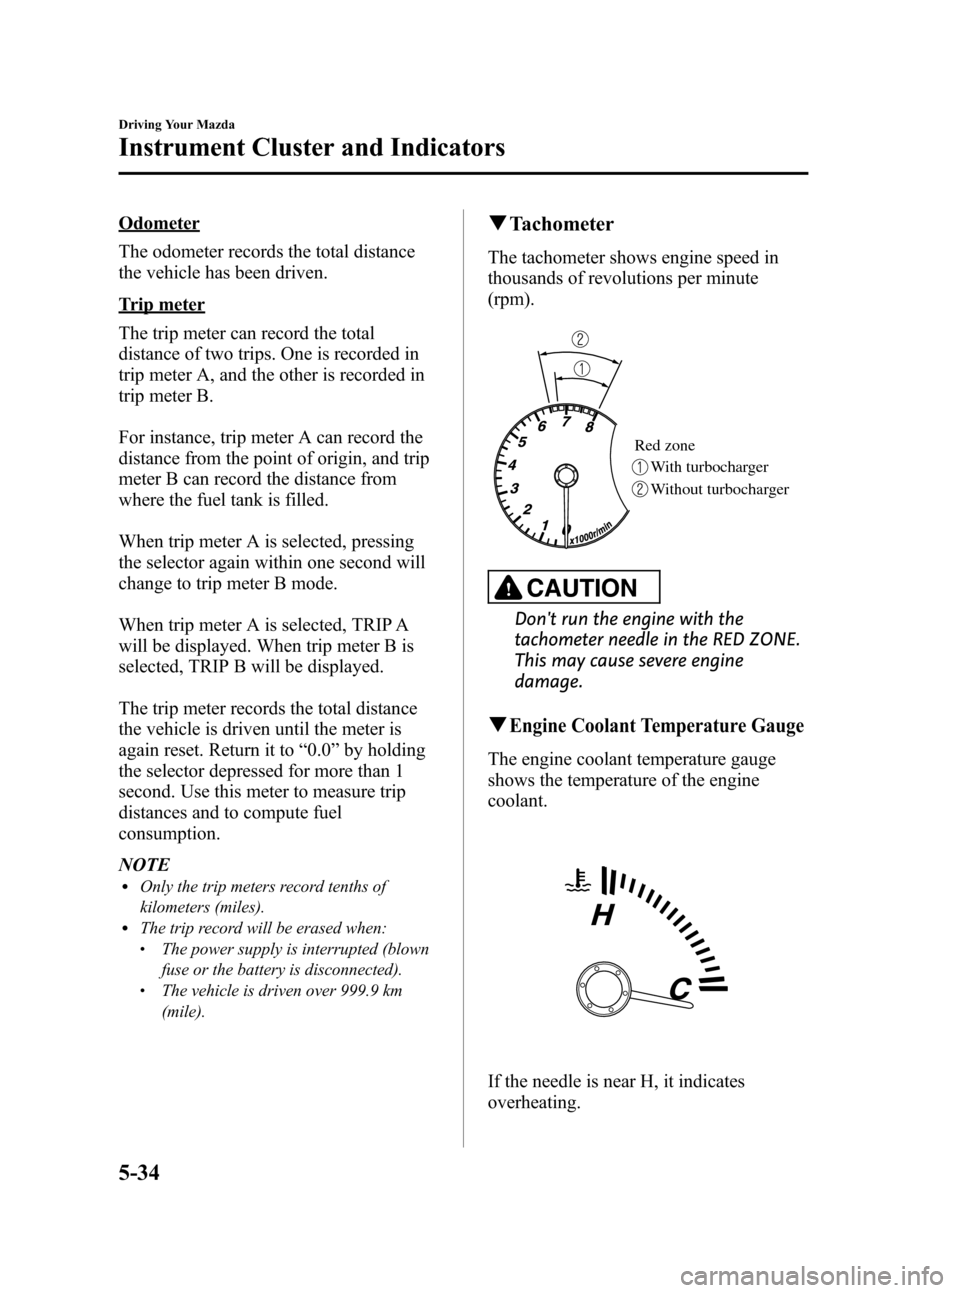
qTachometer
The tachometer shows engine speed in
thousands of revolutions per minute
(rpm).
Red zone
With turbocharger
Without turbocharger
CAUTION
Don't run the engine with the
tachometer needle in the RED ZONE.
This may cause severe engine
damage.
qEngine Coolant Temperature Gauge
The engine coolant temperature gauge
shows the temperature of the engine
coolant.
If the needle is near H, it indicates
overheating.
5-34
Driving Your Mazda
Instrument Cluster and Indicators
Mazda3_8X41-EA-07F_Edition2 Page152
Monday, June 18 2007 1:28 PM
Form No.8X41-EA-07F
Page 158 of 394
Black plate (158,1)
NOTE
When the engine is jump-started to charge the
battery, uneven rpm occurs and the ABS
warning light comes on. This is due to a weak
battery, not a malfunction.
Recharge the battery.
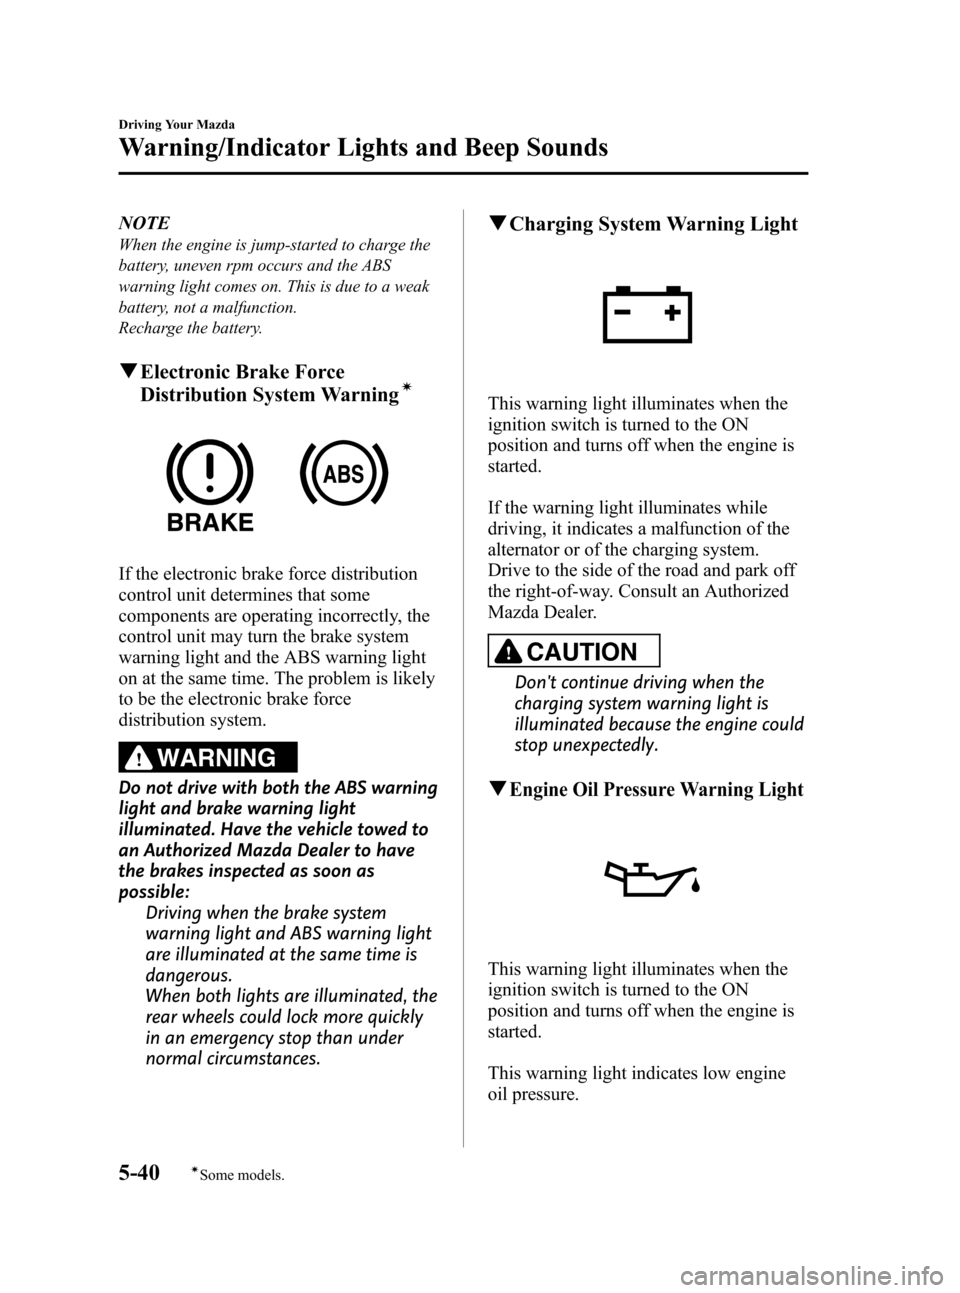
qElectronic Brake Force
Distribution System Warningí
If the electronic brake force distribution
control unit determines that some
components are operating incorrectly, the
control unit may turn the brake system
warning light and the ABS warning light
on at the same time. The problem is likely
to be the electronic brake force
distribution system.
WARNING
Do not drive with both the ABS warning
light and brake warning light
illuminated. Have the vehicle towed to
an Authorized Mazda Dealer to have
the brakes inspected as soon as
possible:
Driving when the brake system
warning light and ABS warning light
are illuminated at the same time is
dangerous.
When both lights are illuminated, the
rear wheels could lock more quickly
in an emergency stop than under
normal circumstances.
qCharging System Warning Light
This warning light illuminates when the
ignition switch is turned to the ON
position and turns off when the engine is
started.
If the warning light illuminates while
driving, it indicates a malfunction of the
alternator or of the charging system.
Drive to the side of the road and park off
the right-of-way. Consult an Authorized
Mazda Dealer.
CAUTION
Don't continue driving when the
charging system warning light is
illuminated because the engine could
stop unexpectedly.
qEngine Oil Pressure Warning Light
This warning light illuminates when the
ignition switch is turned to the ON
position and turns off when the engine is
started.
This warning light indicates low engine
oil pressure.
5-40
Driving Your Mazda
íSome models.
Warning/Indicator Lights and Beep Sounds
Mazda3_8X41-EA-07F_Edition2 Page158
Monday, June 18 2007 1:28 PM
Form No.8X41-EA-07F
Page 168 of 394
Black plate (168,1)
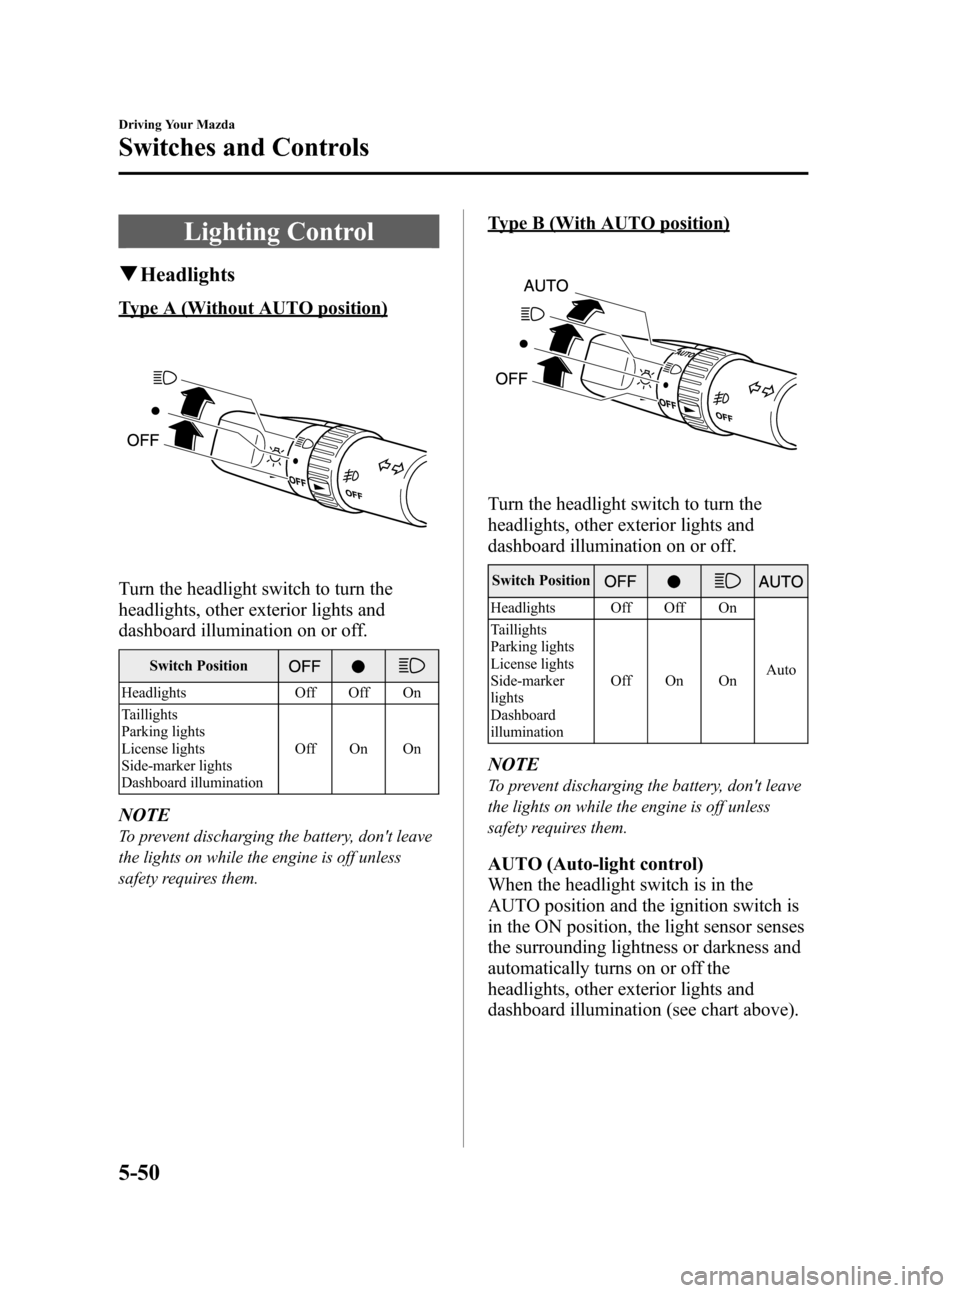
Lighting Control
qHeadlights
Type A (Without AUTO position)
Turn the headlight switch to turn the
headlights, other exterior lights and
dashboard illumination on or off.
Switch Position
Headlights Off Off On
Taillights
Parking lights
License lights
Side-marker lights
Dashboard illuminationOff On On
NOTE
To prevent discharging the battery, don't leave
the lights on while the engine is off unless
safety requires them.
Type B (With AUTO position)
Turn the headlight switch to turn the
headlights, other exterior lights and
dashboard illumination on or off.
Switch Position
Headlights Off Off On
Auto Taillights
Parking lights
License lights
Side-marker
lights
Dashboard
illuminationOff On On
NOTE
To prevent discharging the battery, don't leave
the lights on while the engine is off unless
safety requires them.
AUTO (Auto-light control)
When the headlight switch is in the
AUTO position and the ignition switch is
in the ON position, the light sensor senses
the surrounding lightness or darkness and
automatically turns on or off the
headlights, other exterior lights and
dashboard illumination (see chart above).
5-50
Driving Your Mazda
Switches and Controls
Mazda3_8X41-EA-07F_Edition2 Page168
Monday, June 18 2007 1:28 PM
Form No.8X41-EA-07F
Page 180 of 394
Black plate (180,1)
Operating Tips
qOperating the Climate Control
System
Operate the climate control system with
the engine running.
NOTE
To prevent the battery from being discharged,
do not leave the fan control dial on for a long
period of time with the ignition switch in the
ACC position when the engine is not running.
qClearing the Air Inlet
Clear all obstructions like leaves, snow
and ice from the hood and the air inlet in
the cowl grille to improve the system
efficiency.
qFoggy Windows
The windows may fog up easily in humid
weather. Use the climate control system to
defog the windows.
To help defog the windows, operate the
air conditioner to dehumidify the air.
NOTE
The air conditioner may be used along with the
heater to dehumidify the air.
qOutside/Recirculated Air Position
Use the outside air position in normal
conditions. The recirculated air position
should be used only when driving on
dusty roads or for quick cooling of the
interior.
qParking in Direct Sunlight
If the vehicle has been parked in direct
sunlight during hot weather, open the
windows to let warm air escape, then run
the climate control system.
qNot Using for a Long Period
Run the air conditioner about 10 minutes
at least once a month to keep internal
parts lubricated.
qCheck the Refrigerant before the
Weather Gets Hot
Have the air conditioner checked before
the weather gets hot. Lack of refrigerant
may make the air conditioner less
efficient. Consult an Authorized Mazda
Dealer for refrigerant inspection.
The air conditioner is filled with
HFC134a (R134a), a refrigerant that will
not damage the ozone layer.
If the air conditioner is low on refrigerant
or has a malfunction, consult an
Authorized Mazda Dealer.
qReplacement of the Cabin Air Filter
If your vehicle is equipped with an air
filter for the air conditioner, it is necessary
to change the filter periodically as
indicated in scheduled maintenance (page
8-3). Consult an Authorized Mazda
Dealer for replacement of the cabin air
filter.
6-2
Interior Comfort
Climate Control System
Mazda3_8X41-EA-07F_Edition2 Page180
Monday, June 18 2007 1:29 PM
Form No.8X41-EA-07F
Page 194 of 394
Black plate (194,1)
Operating Tips for Audio
System
WARNING
Do not adjust the audio control
switches while driving the vehicle:
Adjusting the audio while driving the
vehicle is dangerous as it could
distract your attention from the
vehicle operation which could lead to
a serious accident. Always adjust the
audio while the vehicle is stopped.
Even if the audio control switches are
equipped on the steering wheel, learn
to use the switches without looking
down at them so that you can keep
your maximum attention on the road
while driving the vehicle.
CAUTION
For the purposes of safe driving,
adjust the audio volume to a level
that allows you to hear sounds
outside of the vehicle.
NOTE
lDo not use the audio for long periods of
time while the engine is off. Otherwise the
battery could go dead.
lIf a cellular phone or CB radio is used in
or near the vehicle, it could cause noise to
occur from the audio system, however, this
does not indicate that the system has been
damaged.
qRadio Reception
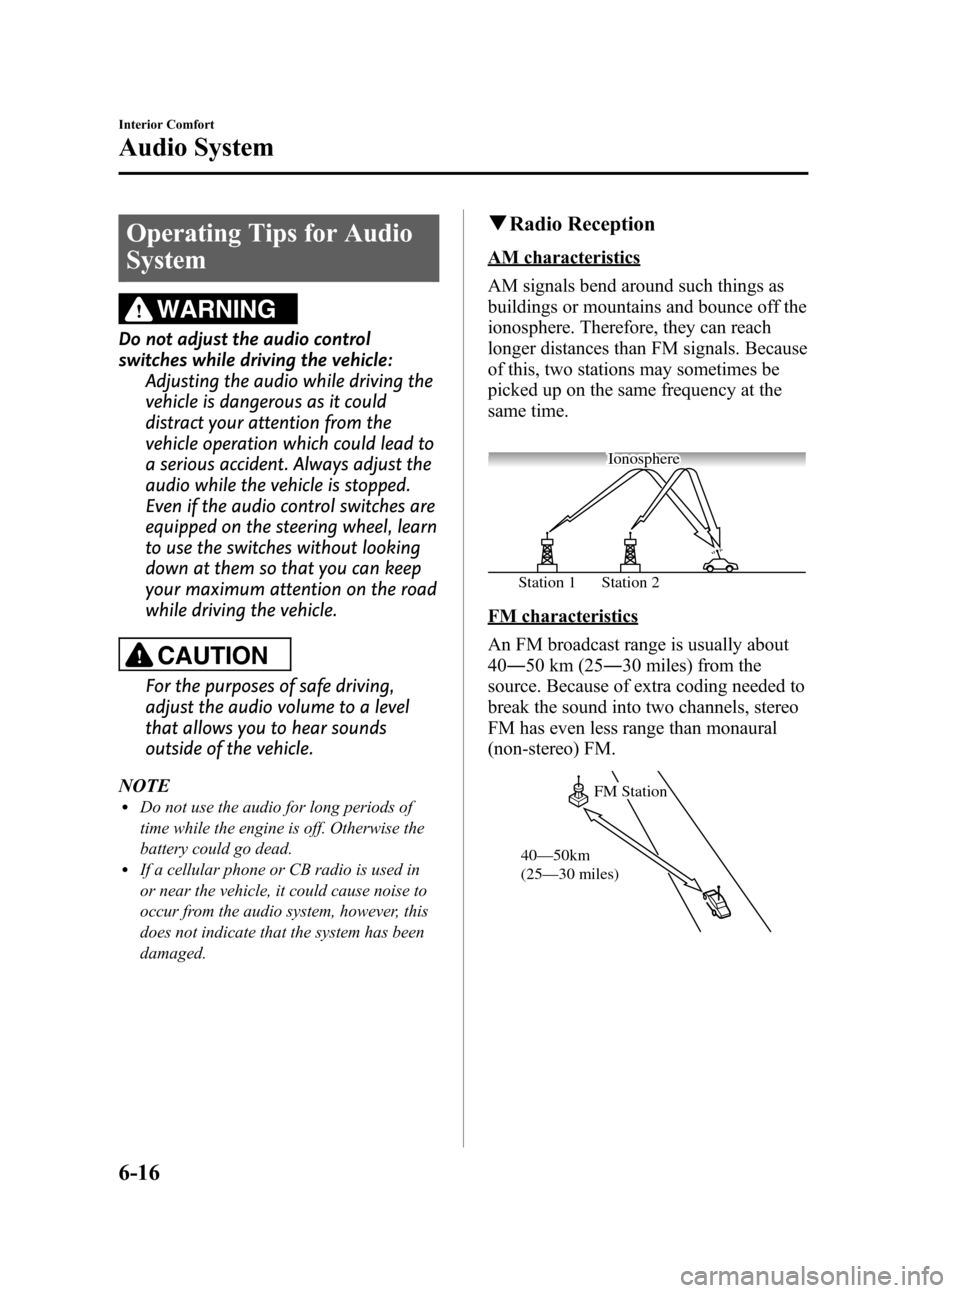
AM characteristics
AM signals bend around such things as
buildings or mountains and bounce off the
ionosphere. Therefore, they can reach
longer distances than FM signals. Because
of this, two stations may sometimes be
picked up on the same frequency at the
same time.
Station 2 Station 1Ionosphere
FM characteristics
An FM broadcast range is usually about
40―50 km (25―30 miles) from the
source. Because of extra coding needed to
break the sound into two channels, stereo
FM has even less range than monaural
(non-stereo) FM.
FM Station
40—50km
(25—30 miles)
6-16
Interior Comfort
Audio System
Mazda3_8X41-EA-07F_Edition2 Page194
Monday, June 18 2007 1:29 PM
Form No.8X41-EA-07F
Page 206 of 394

Black plate (206,1)
qPower/Volume/Sound Controls
Audio control dial Power/Volume dial
Power ON/OFF
Turn the ignition switch to the ACC or
ON position.
Press the power/volume dial to turn the
audio system on.
Press the power/volume dial again to turn
the audio system off.
NOTE
To prevent the battery from being discharged,
do not leave the audio system on for a long
period of time when the engine is not running.
Volume adjustment
To adjust the volume, turn the power/
volume dial.
Turn the power/volume dial to the right to
increase volume, to the left to decrease it.
Audio sound adjustment
1. Press the audio control dial to select the
function. The selected function will be
indicated.
Depending on the mode selected, the
indication changes.
6-28
Interior Comfort
Audio System
Mazda3_8X41-EA-07F_Edition2 Page206
Monday, June 18 2007 1:29 PM
Form No.8X41-EA-07F
Page 208 of 394

Black plate (208,1)
qOperating the Radio
Seek
tuning
buttonsChannel
preset
buttons
Manual tuning button/Auto memory
button/Electric serial number buttonScan buttonBand selector buttons
Satellite button
Radio ON
Press a band selector button (
)to
turn the radio on.
Band selection
Successively pressing the band selector
button (
) switches the bands as
follows: FM1→FM2→AM.
The selected mode will be indicated. If
FM stereo is being received,“ST”will be
displayed.
NOTE
If the FM broadcast signal becomes weak,
reception automatically changes from
STEREO to MONO for reduced noise, and the
“ST”indicator will go out.
Tuning
The radio has the following tuning
methods: Manual, Seek, Scan, Preset
channel, and Auto memory tuning. The
easiest way to tune stations is to set them
on preset channels.
NOTE
If the power supply is interrupted (fuse blows
or the battery is disconnected), the preset
channels will be canceled.
Manual tuning
Turning the manual tuning dial will
change the frequency higher or lower.
Seek tuning
Pressing the seek tuning button (
,)
will cause the tuner to seek a higher or
lower frequency automatically.
6-30
Interior Comfort
Audio System
Mazda3_8X41-EA-07F_Edition2 Page208
Monday, June 18 2007 1:29 PM
Form No.8X41-EA-07F
Page 209 of 394
Black plate (209,1)
NOTE
If you continue to press and hold the button,
the frequency will continue changing without
stopping.
Scan tuning
Press the scan button (
)to
automatically sample strong stations.
Scanning stops at each station for about 5
seconds. To hold a station, press the scan
button (
) again during this interval.
Preset channel tuning
The 6 preset channels can be used to store
6 AM and 12 FM stations.
1. To set a channel first select AM, FM1,
or FM2. Tune to the desired station.
2. Depress a channel preset button for
about 2 seconds until a beep sound is
heard. The preset channel number and
station frequency will be displayed.
The station is now held in the memory.
3. Repeat this operation for the other
stations and bands you want to store.
To tune one in the memory, select AM,
FM1, or FM2 and then press its
channel preset button. The station
frequency and the channel number will
be displayed.
NOTE
If the power supply is interrupted (fuse blows
or the battery is disconnected), the preset
channels will be canceled.
Auto memory tuning
This is especially useful when driving in
an area where the local stations are not
known. Additional AM/FM stations can
be stored without disturbing the
previously set channels.Press and hold the auto memory button
(
) for about 2 seconds until a beep
sound is heard; the system will
automatically scan and temporarily store
up to 6 stations with the strongest
frequencies in each selected band in that
area.
After scanning is completed, the station
with the strongest frequency will be tuned
and its frequency displayed.
Press and release the auto memory button
(
) to recall stations from the auto-
stored stations. One stored station will be
selected each time; its frequency and
channel number will be displayed.
NOTE
If no stations can be tuned after scanning
operations,“A”will be displayed.
SATELLITE RADIO (SAT)
Vehicles equipped with the separately
purchased SIRIUS digital satellite radio
unit have the ability to receive channels of
digital quality programming coast to coast
via satellite. For information on use, read
the Satellite Radio Kit manual
accompanying the SIRIUS digital satellite
radio unit. A subscription to SIRIUS
digital satellite radio service is required
(available in the U.S. - Except Alaska and
Hawaii) to enable this feature once the
separately purchased SIRIUS digital
satellite radio unit has been installed. For
subscription and channel information, or
for digital satellite radio technical issues,
contact SIRIUS directly at:
- Web: www.siriusradio.com
- Phone (24 hrs/day, 7 days/week): 888-
539-SIRI (7474)
- E-mail: [email protected]
- Mailing Address: Sirius Satellite Radio
Interior Comfort
Audio System
6-31
Mazda3_8X41-EA-07F_Edition2 Page209
Monday, June 18 2007 1:29 PM
Form No.8X41-EA-07F
Page 224 of 394
Black plate (224,1)
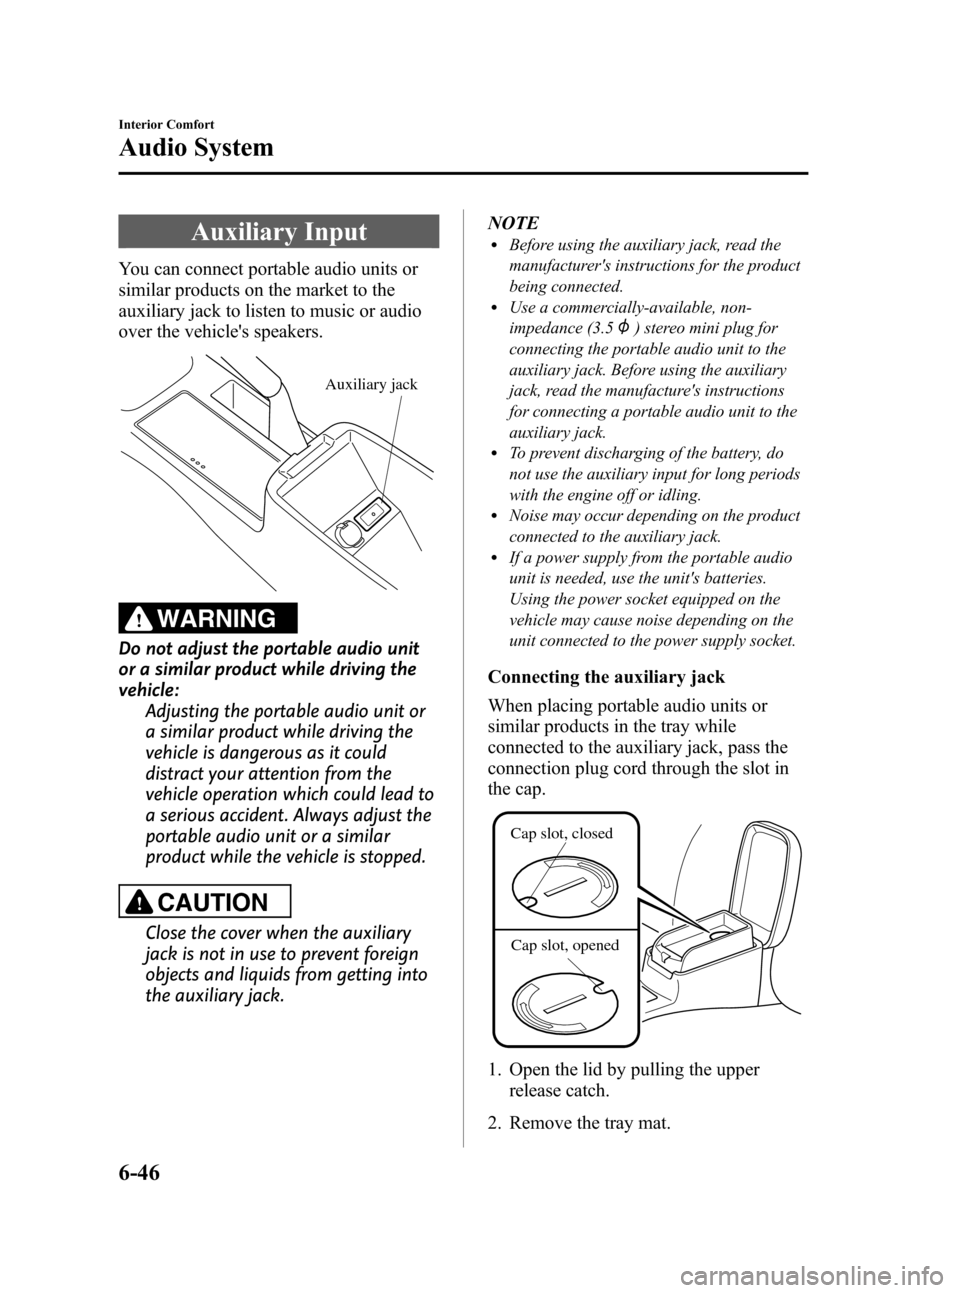
Auxiliary Input
You can connect portable audio units or
similar products on the market to the
auxiliary jack to listen to music or audio
over the vehicle's speakers.
Auxiliary jack
WARNING
Do not adjust the portable audio unit
or a similar product while driving the
vehicle:
Adjusting the portable audio unit or
a similar product while driving the
vehicle is dangerous as it could
distract your attention from the
vehicle operation which could lead to
a serious accident. Always adjust the
portable audio unit or a similar
product while the vehicle is stopped.
CAUTION
Close the cover when the auxiliary
jack is not in use to prevent foreign
objects and liquids from getting into
the auxiliary jack.NOTE
lBefore using the auxiliary jack, read the
manufacturer's instructions for the product
being connected.
lUse a commercially-available, non-
impedance (3.5
) stereo mini plug for
connecting the portable audio unit to the
auxiliary jack. Before using the auxiliary
jack, read the manufacture's instructions
for connecting a portable audio unit to the
auxiliary jack.
lTo prevent discharging of the battery, do
not use the auxiliary input for long periods
with the engine off or idling.
lNoise may occur depending on the product
connected to the auxiliary jack.
lIf a power supply from the portable audio
unit is needed, use the unit's batteries.
Using the power socket equipped on the
vehicle may cause noise depending on the
unit connected to the power supply socket.
Connecting the auxiliary jack
When placing portable audio units or
similar products in the tray while
connected to the auxiliary jack, pass the
connection plug cord through the slot in
the cap.
Cap slot, closed
Cap slot, opened
1. Open the lid by pulling the upper
release catch.
2. Remove the tray mat.
6-46
Interior Comfort
Audio System
Mazda3_8X41-EA-07F_Edition2 Page224
Monday, June 18 2007 1:29 PM
Form No.8X41-EA-07F