buttons MAZDA MODEL 3 HATCHBACK 2010 (in English) User Guide
[x] Cancel search | Manufacturer: MAZDA, Model Year: 2010, Model line: MODEL 3 HATCHBACK, Model: MAZDA MODEL 3 HATCHBACK 2010Pages: 488, PDF Size: 6.52 MB
Page 264 of 488
![MAZDA MODEL 3 HATCHBACK 2010 (in English) User Guide Black plate (266,1)
Initialization of ID code
If the registered ID code is forgotten,
return the ID code to the default [0000] by
performing the following steps:
Setting condition: SAT mode
NOTE
The s MAZDA MODEL 3 HATCHBACK 2010 (in English) User Guide Black plate (266,1)
Initialization of ID code
If the registered ID code is forgotten,
return the ID code to the default [0000] by
performing the following steps:
Setting condition: SAT mode
NOTE
The s](/img/28/13459/w960_13459-263.png)
Black plate (266,1)
Initialization of ID code
If the registered ID code is forgotten,
return the ID code to the default [0000] by
performing the following steps:
Setting condition: SAT mode
NOTE
The scan button refers to the operation for an
In-dash CD changer-equipped vehicle, and the
auto memory button refers to the operation for
a CD player-equipped vehicle.
(Master code input preparation)
1. Press and hold the auto memory button
(scan button), then press channel preset
button 4. Hold both buttons together
for 1.5 seconds.
2.“ENTER PIN”appears for three
seconds which indicates that it is in
code input mode.
3.“SR1 - - - -”appears, which indicates
that it is ready for code input.
(Master code input)
4. Input the master code using the channel
preset buttons 1-4.
(The master code is already set at the
time of factory shipment.)
(Master code input determination)
5. Determine the master code which has
been input by pressing the auto
memory button (scan button).
6.“PIN CLEARED”appears which
indicates that the master code input has
been completed.
7. The ID code is set to the default [0000]
and the initialization process is
completed.NOTE
Master code:
The Master Code is used to initialize or re-
initialize the ID code in the event that the code
is not set to [0000] and/or the personalized ID
code is not known. The initialization process
resets the ID code to [0000]. The master code
can potentially defeat the intent of the security
of the parental lock if it is located by persons
not authorized by the owner to access certain
channels.
SIRIUS Satellite Radio Master Code: [0913]
NOTElWhen a numeric value other than the
master code is input and the auto memory
button (scan button) is pressed,“SR1 Err”
is displayed and then it returns to the
“SR1----”display again.
lIf an ID code is not input for ten seconds,
“Err”is displayed and it returns to the
former display.
lChannel preset buttons 1, 2, 3, 4 and the
auto memory button (scan button) are used
for inputting the ID code. Buttons 5 and 6
cannot be used.
Change of ID code
Setting condition: SAT mode
When changing the ID code, the new ID
code is input after the previous one is
input first.
NOTE
The scan button refers to the operation for an
In-dash CD changer-equipped vehicle, and the
auto memory button refers to the operation for
a CD player-equipped vehicle.
6-42
Interior Comfort
Audio System
Mazda3_8AD6-EC-09A_Edition1 Page266
Tuesday, December 2 2008 2:27 PM
Form No.8AD6-EC-09A
Page 265 of 488
Black plate (267,1)
(Registered ID code input)
1. Press and hold the auto memory button
(scan button), then press channel preset
button 5. Hold both buttons together
for 1.5 seconds.
2.“ENTER PIN”appears for three
seconds which indicates that it is in
code input mode.
3.“SR1 - - - -”appears, which indicates
that it is ready for code input.
4. Input the registered ID code using
channel preset buttons 1-4.
Example: When the registered ID code
is“2323”, input“2323”. At this time
“SR1 2323”is displayed.
Press 1 for the first digit, 2 for the
second, 3 for the third, and 4 for the
last digit. For example, if your number
is 2323, press 1 three times (includes
0), 2 four times, 3 three times, and 4
four times. If the display goes off while
inputting, begin from Step 1.
NOTE
The registered ID code is the default [0000] at
the time of factory shipment. If [0000] results
in“Err”on the display, go to the
“INITIALIZATION OF ID CODE”section to
reset to [0000].
(Verification with the registered ID
code)
5. Determine the input code by pressing
the auto memory button (scan button).
6. If it does not match with the previously
registered code,“SR1 Err”is displayed
and then it returns to“SR1 - - - -”.
7. If it matches with the previously
registered code,“ENTER PIN”appears
again and it switches to code input
mode.8.“SR1 - - - -”appears, and it is ready for
input of the new ID code.
(New ID code input)
9. Input the new ID code using channel
preset buttons 1-4.
Example: If“1234”is input as the new
code,“SR1 1234”is displayed.
(New ID code input determination)
10. Determine the new ID code which
has been input by pressing the auto
memory button (scan button).
11.“PIN CHANGED”appears for three
seconds which indicates that the new
ID code input has been completed.
12. It returns to the former display.
NOTE
lIf an ID code is not input for ten seconds,
“Err”is displayed and it returns to the
former display.
lChannel preset buttons 1, 2, 3, 4 and the
auto memory button (scan button) are used
for input of the ID code. Buttons 5 and 6
cannot be used.
Individual channel locking
If a channel is locked, the channel is
muted.
NOTE
lIf the registered ID code is forgotten, return
the ID code to the default [0000]. (See
“INTIALIZATION OF ID CODE”section)
lThe scan button refers to the operation for
an In-dash CD changer-equipped vehicle,
and the auto memory button refers to the
operation for a CD player-equipped
vehicle.
Interior Comfort
Audio System
6-43
Mazda3_8AD6-EC-09A_Edition1 Page267
Tuesday, December 2 2008 2:27 PM
Form No.8AD6-EC-09A
Page 266 of 488
Black plate (268,1)
(Locking a channel)
1. Select a channel to be locked by
turning the manual tuning dial.
Example: Select channel 100
(Registered ID code input preparation)
2. Press and hold the auto memory button
(scan button), then press channel preset
button 6. Hold both buttons together
for 1.5 seconds.
3.“ENTER PIN”appears for three
seconds which indicates that it is in
code input mode.
4.“SR1 - - - -”appears which indicates
that it is ready for code input.
(Registered ID code input)
5. Input the registered ID code using
channel preset buttons 1-4. Example: If
the registered ID code is“2323”, input
“2323”. At this time“SR1 2323”is
displayed.
(Registered ID code input
determination)
6. Determine the code which has been
input by pressing the auto memory
button (scan button).
7. If it does not match the registered code,
“SR1 Err”is displayed and then it
returns to“SR1 - - - -”.
8. If it matches the registered code,
“SR1 LOCK”appears for three
seconds which indicates that the code
input has been completed.
9.“SR1 LOCK 100”appears which
indicates that the parental lock is
activated. At this time, mute is on and
no sound is heard.NOTElIf an ID code is not input for ten seconds,
“Err”is displayed and it returns to the
former display.
lChannel preset buttons 1, 2, 3, 4 and the
auto memory button (scan button) are used
for input of the ID code. Buttons 5 and 6
cannot be used.
Lock cancellation
Setting condition: SAT mode
NOTE
The scan button refers to the operation for an
In-dash CD changer-equipped vehicle, and the
auto memory button refers to the operation for
a CD player-equipped vehicle.
(Releasing a locked channel)
1. Select a channel to be released by
turning the manual tuning dial.
Example: Select the locked channel
(i.e. 100). At this time,
“SR1 LOCK 100”is displayed.
(Registered ID code input preparation)
2. Press and hold the auto memory button
(scan button), then press channel preset
button 6. Hold both buttons together
for 1.5 seconds.
3.“ENTER PIN”appears for three
seconds which indicates that it is in
code input mode.
4.“SR1 - - - -”appears, which indicates
that it is ready for code input.
(Registered ID code input)
5. Input the registered ID code using
channel preset buttons 1-4. Example:
When the registered ID code is“2323”,
input“2323”. At this time“SR1 2323”
is displayed.
6-44
Interior Comfort
Audio System
Mazda3_8AD6-EC-09A_Edition1 Page268
Tuesday, December 2 2008 2:27 PM
Form No.8AD6-EC-09A
Page 267 of 488
![MAZDA MODEL 3 HATCHBACK 2010 (in English) User Guide Black plate (269,1)
NOTE
If“Err”is displayed, go to the
“INITIALIZATION OF ID CODE”section to
reset the ID code to [0000].
(Registered ID code input
determination)
6. Determine the input code MAZDA MODEL 3 HATCHBACK 2010 (in English) User Guide Black plate (269,1)
NOTE
If“Err”is displayed, go to the
“INITIALIZATION OF ID CODE”section to
reset the ID code to [0000].
(Registered ID code input
determination)
6. Determine the input code](/img/28/13459/w960_13459-266.png)
Black plate (269,1)
NOTE
If“Err”is displayed, go to the
“INITIALIZATION OF ID CODE”section to
reset the ID code to [0000].
(Registered ID code input
determination)
6. Determine the input code by pressing
the auto memory button (scan button).
7. If it does not match the registered code,
“SR1 Err”is displayed and then it
returns to“SR1 - - - -”.
8. If it matches the registered code,
“SR1 UNLOCK”appears for three
seconds which indicates that the code
input has been completed.
9.“SR1 100”appears which indicates that
the parental lock is off. At this time,
sound is heard.
NOTE
lIf an ID code is not input for ten seconds,
“Err”is displayed and it returns to the
former display.
lChannel preset buttons 1, 2, 3, 4 and the
auto memory button (scan button) are used
for input of the ID code. Buttons 5 and 6
cannot be used.
Error signs
(1) Depending on the surrounding
conditions (such as large trees,
buildings, or tunnels) and special
weather conditions, the reception of
SIRIUS radio waves may be
decreased or temporarily interrupted.
“ACQUIRING”may appear.
(2) In case of an antenna malfunction,
“ANTENNA FAIL”is displayed.
Check the satellite radio antenna,
antenna cable and DLP antenna
connector.NOTE
If a broken DLP*unit is replaced with a new
unit, cancel the license for the broken unit and
make sure to carry out new registration for the
replaced unit. If the license for the broken unit
is not canceled, you will be charged a
reception fee for both units.
*DLP: Down Link Processor
(SATELLITE RADIO Module)
Interior Comfort
Audio System
6-45
Mazda3_8AD6-EC-09A_Edition1 Page269
Tuesday, December 2 2008 2:27 PM
Form No.8AD6-EC-09A
Page 268 of 488
Black plate (270,1)
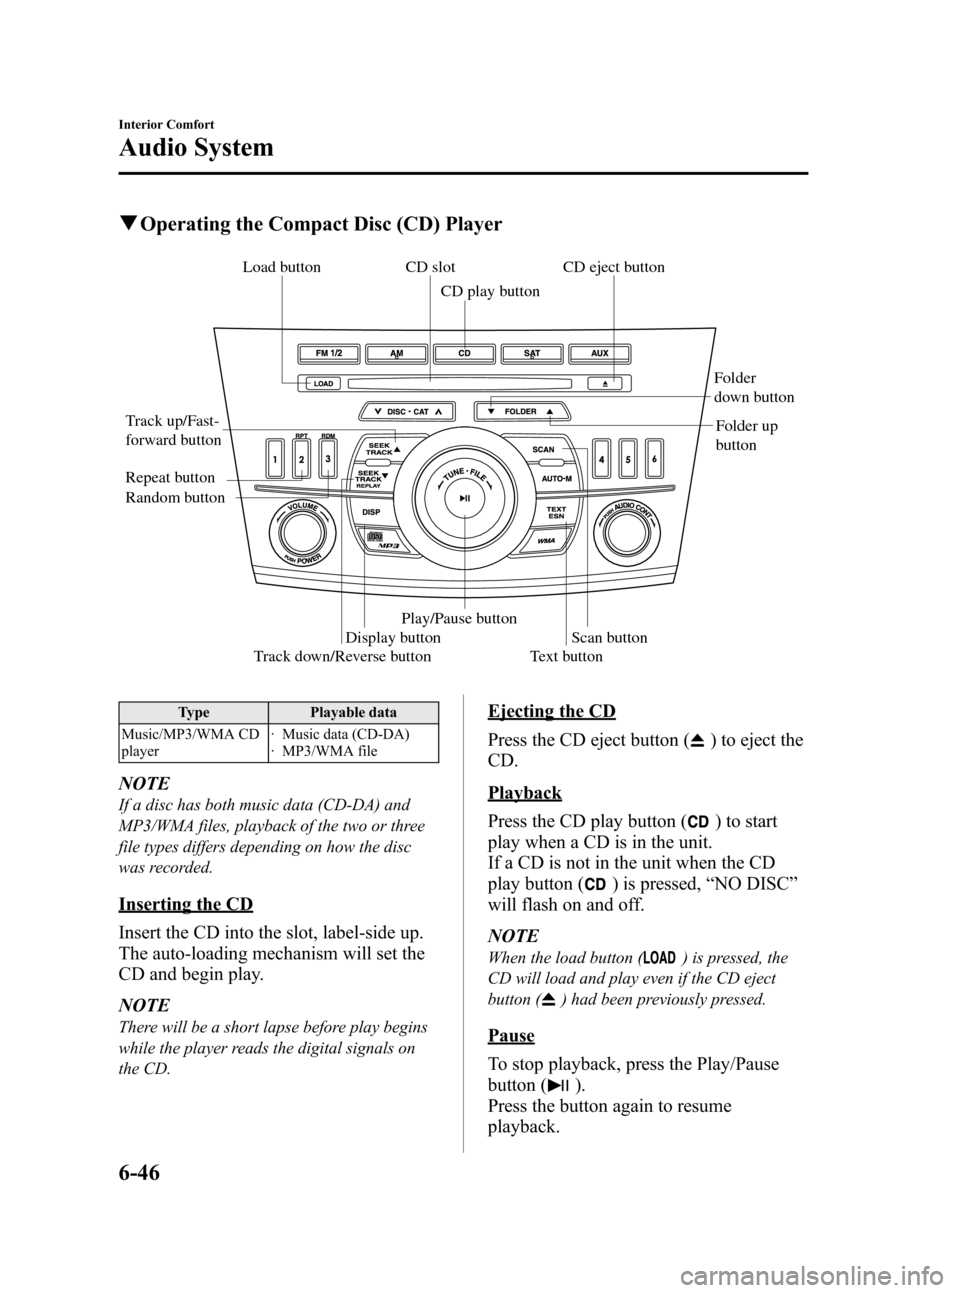
qOperating the Compact Disc (CD) Player
Track down/Reverse button Track up/Fast-
forward buttonCD eject button CD slot
CD play button
Display buttonFolder
down button
Folder up
button
Random button Repeat button
Text button Load buttonScan button
Play/Pause button
Type Playable data
Music/MP3/WMA CD
player· Music data (CD-DA)
· MP3/WMA file
NOTE
If a disc has both music data (CD-DA) and
MP3/WMA files, playback of the two or three
file types differs depending on how the disc
was recorded.
Inserting the CD
Insert the CD into the slot, label-side up.
The auto-loading mechanism will set the
CD and begin play.
NOTE
There will be a short lapse before play begins
while the player reads the digital signals on
the CD.
Ejecting the CD
Press the CD eject button (
) to eject the
CD.
Playback
Press the CD play button (
) to start
play when a CD is in the unit.
If a CD is not in the unit when the CD
play button (
) is pressed,“NO DISC”
will flash on and off.
NOTE
When the load button () is pressed, the
CD will load and play even if the CD eject
button (
) had been previously pressed.
Pause
To stop playback, press the Play/Pause
button (
).
Press the button again to resume
playback.
6-46
Interior Comfort
Audio System
Mazda3_8AD6-EC-09A_Edition1 Page270
Tuesday, December 2 2008 2:27 PM
Form No.8AD6-EC-09A
Page 272 of 488
Black plate (274,1)
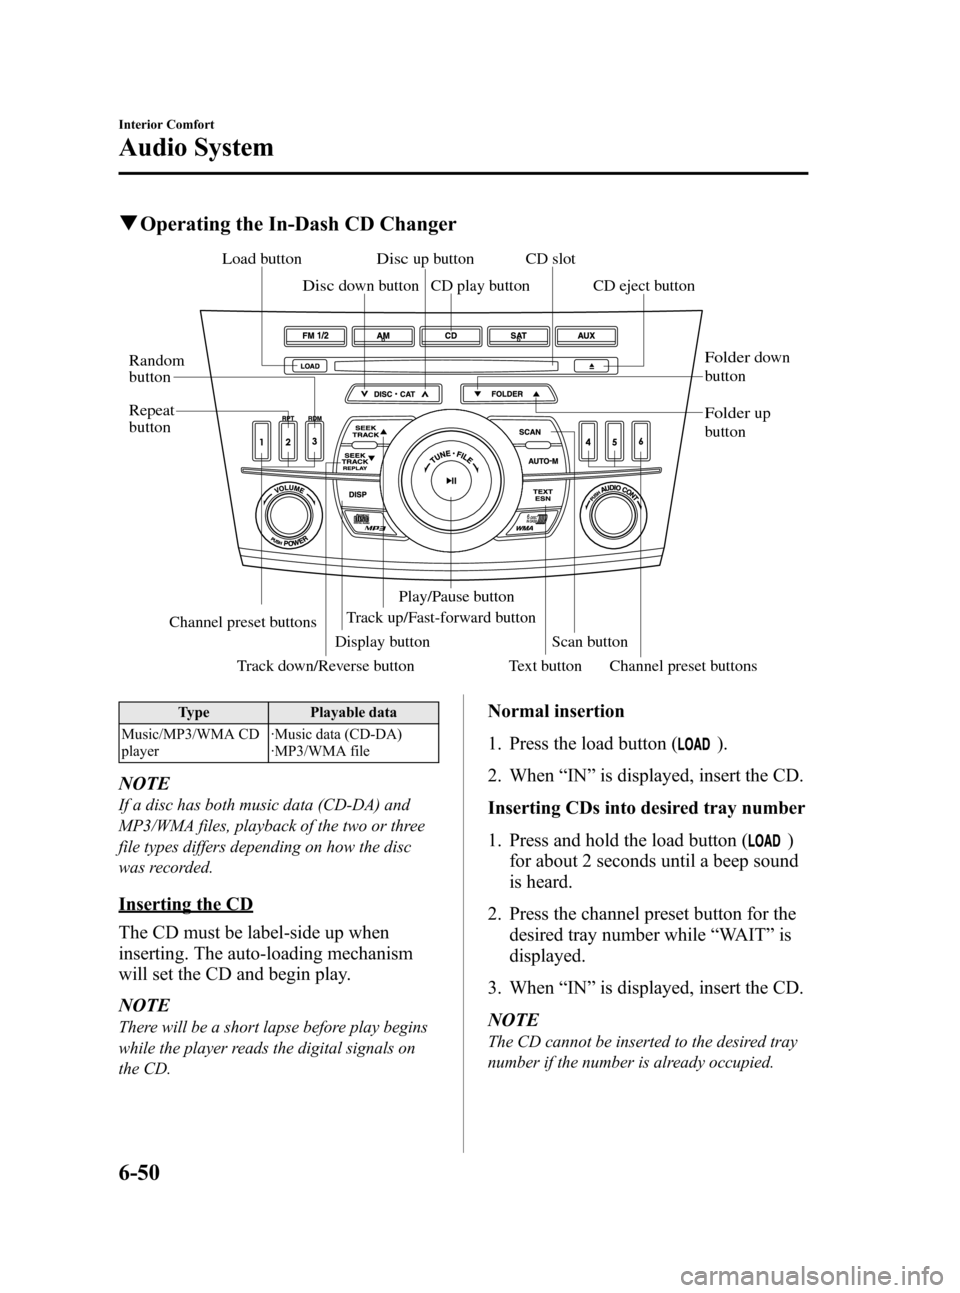
qOperating the In-Dash CD Changer
Track up/Fast-forward buttonCD eject button
Display button
Load button
Channel preset buttons Channel preset buttons
Track down/Reverse button
Text button
Disc down button
Folder down
button
Folder up
button
Disc up button
Random
button
Repeat
button
CD slot
CD play button
Scan button
Play/Pause button
Type Playable data
Music/MP3/WMA CD
player·Music data (CD-DA)
·MP3/WMA file
NOTE
If a disc has both music data (CD-DA) and
MP3/WMA files, playback of the two or three
file types differs depending on how the disc
was recorded.
Inserting the CD
The CD must be label-side up when
inserting. The auto-loading mechanism
will set the CD and begin play.
NOTE
There will be a short lapse before play begins
while the player reads the digital signals on
the CD.
Normal insertion
1. Press the load button (
).
2. When“IN”is displayed, insert the CD.
Inserting CDs into desired tray number
1. Press and hold the load button (
)
for about 2 seconds until a beep sound
is heard.
2. Press the channel preset button for the
desired tray number while“WAIT”is
displayed.
3. When“IN”is displayed, insert the CD.
NOTE
The CD cannot be inserted to the desired tray
number if the number is already occupied.
6-50
Interior Comfort
Audio System
Mazda3_8AD6-EC-09A_Edition1 Page274
Tuesday, December 2 2008 2:27 PM
Form No.8AD6-EC-09A
Page 287 of 488
Black plate (289,1)
NOTElAlways perform Bluetooth audio device
programming while the vehicle is stopped.
lIf a Bluetooth device has already been
programmed to the vehicle as a hands-free
mobile phone, it does not need to be
programmed again when using the device
as a Bluetooth audio device. Conversely, it
does not need to be programmed again as a
hands-free mobile phone if it has already
been programmed as a Bluetooth audio
device.
lLook around to be sure other likely
Bluetooth audio devices are not in range
when you start to program. If in doubt,
move your car to another location. The
transmission range of a Bluetooth audio
device is about 10 m (32 ft). Therefore, if
there is another Bluetooth audio device
within a 10 m (32 ft) radius of the vehicle,
the device may be identified and
programmed instead.
lDevice registration can also be done using
voice recognition (page 6-75).
Concerning the operation of a Bluetooth
audio device itself, refer to its instruction
manual.
Some Bluetooth audio devices have PIN
codes (four digits). Refer to the audio
device's instruction manual because the
programming procedure differs depending
on whether it has a PIN code or not.
Programming a Bluetooth audio device
which has a PIN code (4 digits)
1. Using the audio control dial, select the
pairing program mode
“PAIR DEVICE”in the“BT SETUP”
mode. (Refer to
“Bluetooth audio device set-up”for
details.)2. Press the audio control dial to
determine the mode.
After“ENTER PIN”is displayed on
the information display for 3 seconds,
“PIN 0000”is displayed and the PIN
code can be input.
3. Input the PIN code of your Bluetooth
audio device by pressing channel
preset buttons 1 to 4 while“PIN 0000”
is displayed.
Press channel preset button 1 to input
the first digit, 2 for the second, 3 for
the third, and 4 for the forth. For
example, if the PIN code were“4213”,
press channel preset button 1 four
times (1, 2, 3, 4), button 2 twice (1, 2),
button 3 once (1), and button 4 three
times (1, 2, 3). If the“PIN 0000”
display disappears before finishing the
PIN code input, repeat the procedure
from Step 1.
NOTE
Some devices accept only a particular pairing
code (Usually,“0000”or“1234”).
If pairing cannot be completed, refer to the
owner's manual of your mobile device, and try
those numbers if necessary.
4. Press the audio control dial while the
input PIN code is displayed.
“PAIRING”flashes on the display.
5. Operate the Bluetooth audio device and
set it to the program mode while
“PAIRING”is flashing.
6. When the programming is completed,
“
”and“PAIR SUCCESS”are
displayed after about 10-30 seconds,
after which“PAIR SUCCESS”
continues to be displayed for three
seconds, and then the unit returns to the
normal display.
Interior Comfort
Bluetooth Audio
6-65
Mazda3_8AD6-EC-09A_Edition1 Page289
Tuesday, December 2 2008 2:27 PM
Form No.8AD6-EC-09A
Page 317 of 488

Black plate (319,1)
Information Display
ClockAudio display
Audio display
Ambient temperature display Climate control display
Climate control displayHands-free display Without multi
information
display
With multi
information
display
Clock adjustment
buttons
qInformation Display Functions
The information display has the following functions:lClockí
lAmbient Temperature Display (Outside Temperature Display)í
lClimate Control DisplaylAudio DisplaylBluetooth Hands-Free DisplayíRefer to Bluetooth Hands-Free on page 6-71.
Interior Comfort
Interior Equipment
6-95íSome models. Mazda3_8AD6-EC-09A_Edition1 Page319
Tuesday, December 2 2008 2:28 PM
Form No.8AD6-EC-09A
Page 318 of 488
Black plate (320,1)
qClockí
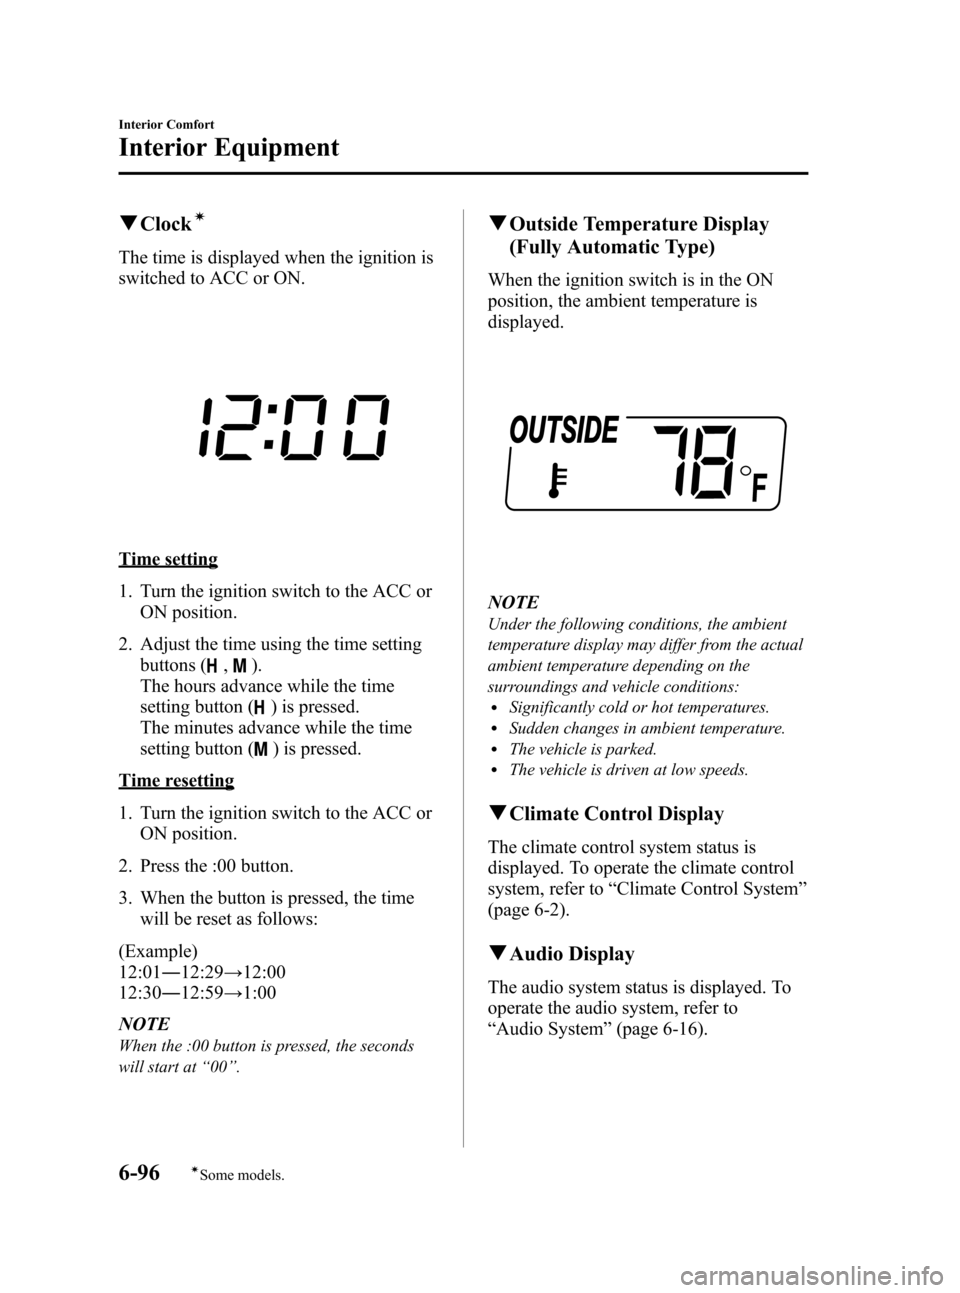
The time is displayed when the ignition is
switched to ACC or ON.
Time setting
1. Turn the ignition switch to the ACC or
ON position.
2. Adjust the time using the time setting
buttons (
,).
The hours advance while the time
setting button (
) is pressed.
The minutes advance while the time
setting button (
) is pressed.
Time resetting
1. Turn the ignition switch to the ACC or
ON position.
2. Press the :00 button.
3. When the button is pressed, the time
will be reset as follows:
(Example)
12:01―12:29→12:00
12:30―12:59→1:00
NOTE
When the :00 button is pressed, the seconds
will start at“00”.
qOutside Temperature Display
(Fully Automatic Type)
When the ignition switch is in the ON
position, the ambient temperature is
displayed.
NOTE
Under the following conditions, the ambient
temperature display may differ from the actual
ambient temperature depending on the
surroundings and vehicle conditions:
lSignificantly cold or hot temperatures.lSudden changes in ambient temperature.lThe vehicle is parked.lThe vehicle is driven at low speeds.
qClimate Control Display
The climate control system status is
displayed. To operate the climate control
system, refer to“Climate Control System”
(page 6-2).
qAudio Display
The audio system status is displayed. To
operate the audio system, refer to
“Audio System”(page 6-16).
6-96
Interior Comfort
íSome models.
Interior Equipment
Mazda3_8AD6-EC-09A_Edition1 Page320
Tuesday, December 2 2008 2:28 PM
Form No.8AD6-EC-09A
Page 319 of 488

Black plate (321,1)
Multi Information Displayí
Steering switch
Without navigation system With navigation system
Clock adjustment
buttons
Steering Switch
Left switch
Right switch
Navi switch
BACK switchINFO switch Enter (up/down) switch
Interior Comfort
Interior Equipment
6-97íSome models. Mazda3_8AD6-EC-09A_Edition1 Page321
Tuesday, December 2 2008 2:28 PM
Form No.8AD6-EC-09A