MAZDA MODEL 6 2011 Navigation Manual (in English)
Manufacturer: MAZDA, Model Year: 2011, Model line: MODEL 6, Model: MAZDA MODEL 6 2011Pages: 140, PDF Size: 1.75 MB
Page 111 of 140
111
Audio Operation
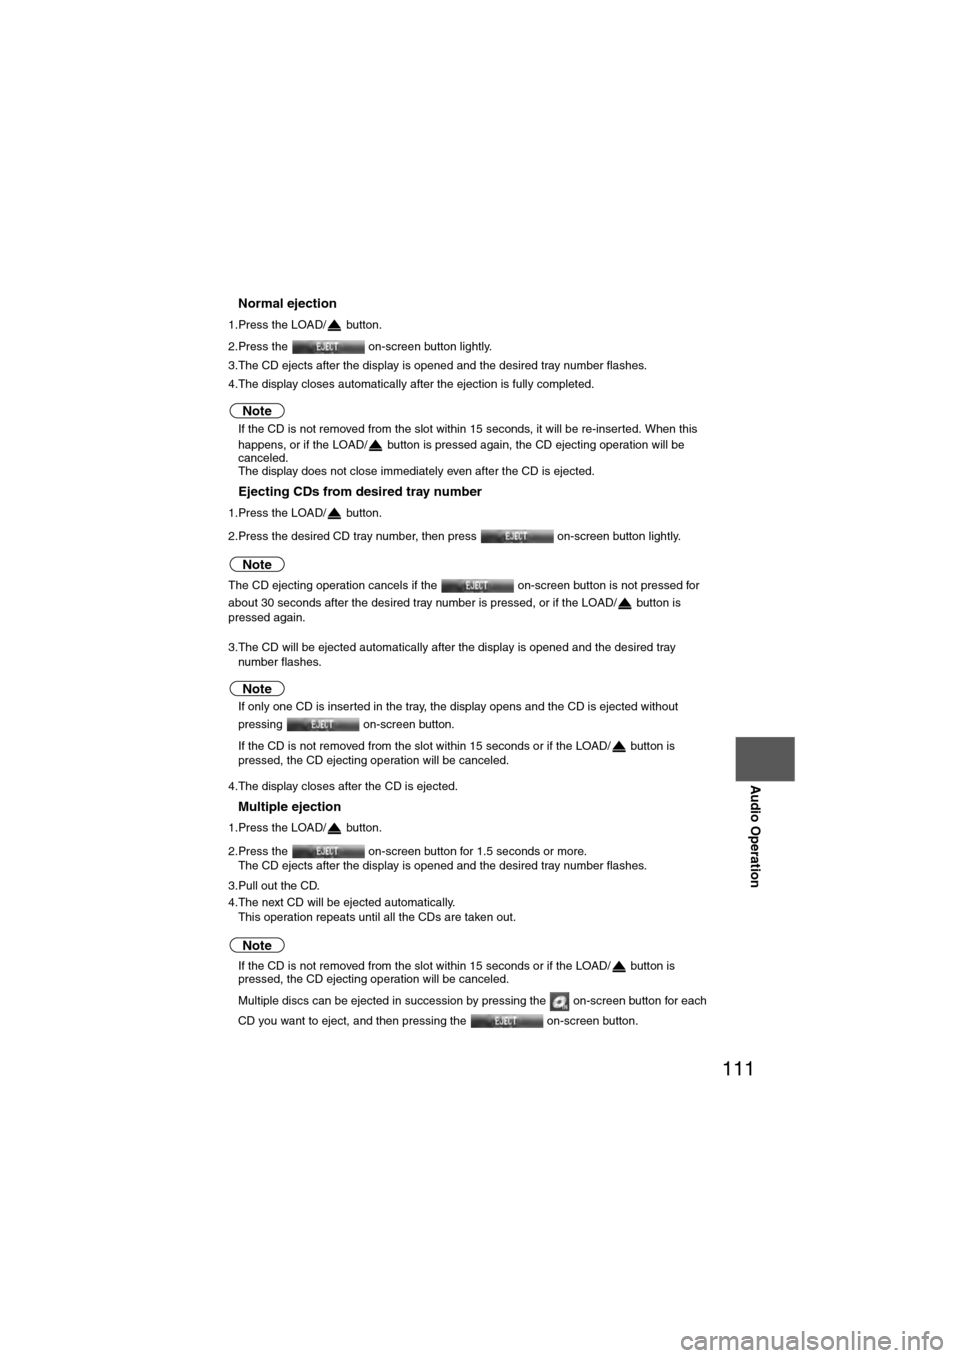
nNormal ejection
1.Press the LOAD/ button.
2.Press the on-screen button lightly.
3.The CD ejects after the display is opened and the desired tray number flashes.
4.The display closes automatically after the ejection is fully completed.
Note
l If the CD is not removed from the slot within 15 seconds, it will be re-inserted. When this
happens, or if the LOAD/ button is pressed again, the CD ejecting operation will be
canceled.
l The display does not close immediately even after the CD is ejected.
nEjecting CDs from desired tray number
1.Press the LOAD/ button.
2.Press the desired CD tray number, then press on-screen button lightly.
Note
The CD ejecting operation cancels if the on-screen button is not pressed for
about 30 seconds after the desired tray number is pressed, or if the LOAD/ button is
pressed again.
3.The CD will be ejected automatically after the display is opened and the desired tray number flashes.
Note
lIf only one CD is inserted in the tray, the display opens and the CD is ejected without
pressing on-screen button.
l If the CD is not removed from the slot within 15 seconds or if the LOAD/ button is
pressed, the CD ejecting operation will be canceled.
4.The display closes after the CD is ejected.
nMultiple ejection
1.Press the LOAD/ button.
2.Press the on-screen button for 1.5 seconds or more. The CD ejects after the display is opened and the desired tray number flashes.
3.Pull out the CD.
4.The next CD will be ejected automatically. This operation repeats until all the CDs are taken out.
Note
lIf the CD is not removed from the slot within 15 seconds or if the LOAD/ button is
pressed, the CD ejecting operation will be canceled.
l Multiple discs can be ejected in succession by pressing the on-screen button for each
CD you want to eject, and then pressing the on-screen button.
Page 112 of 140
112
Before
UseGetting
started
Routing Address
Book
Vo i c e Recognition
Navigation
Set Up
RDM-TMC
Audio Operation
Navigation
Set Up
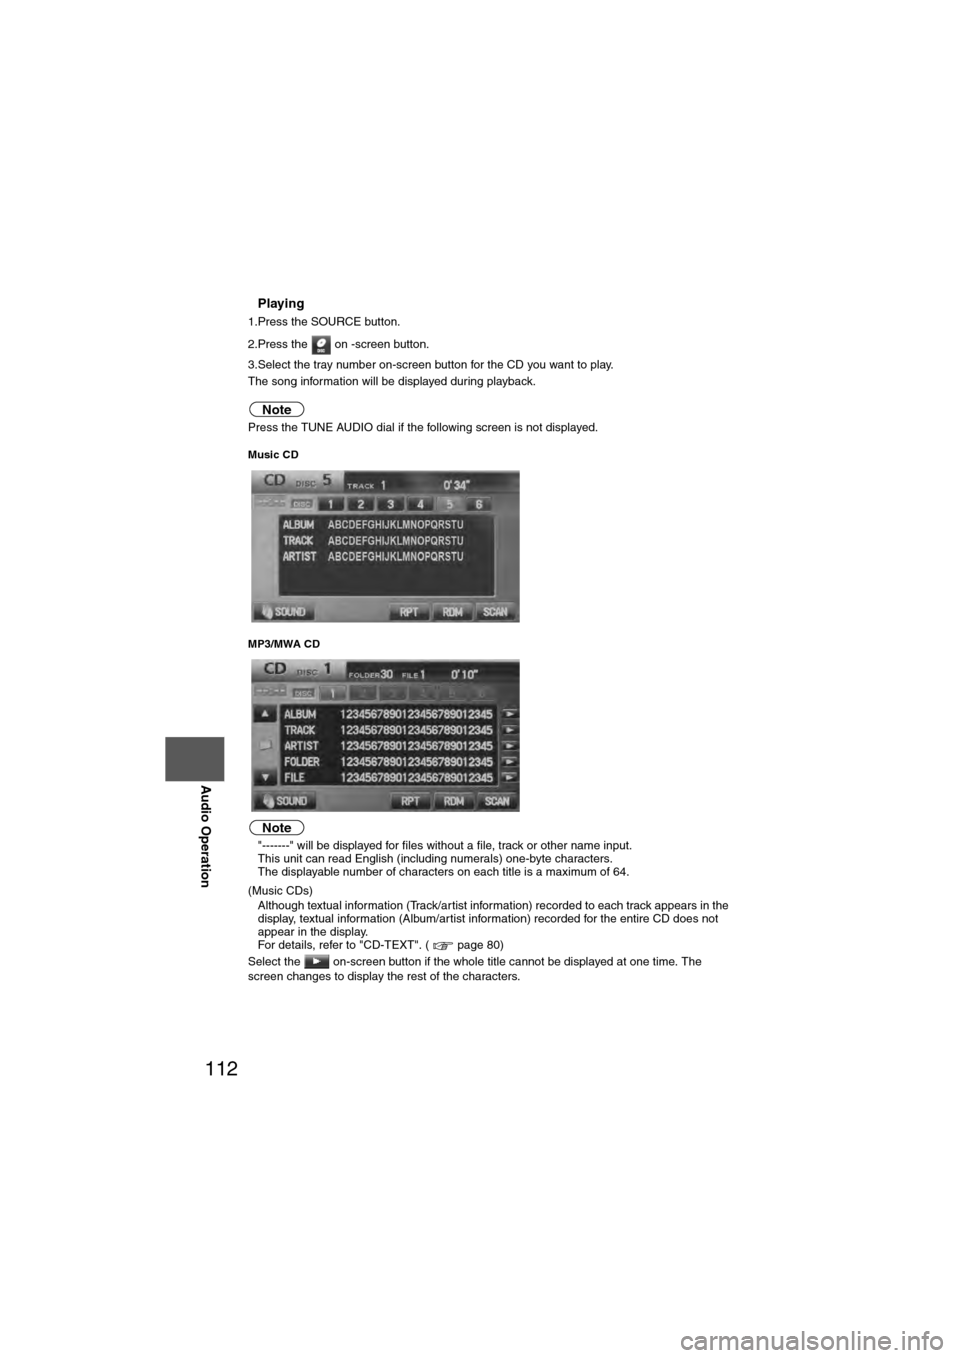
nPlaying
1.Press the SOURCE button.
2.Press the on -screen button.
3.Select the tray number on-screen button for the CD you want to play.
The song information will be displayed during playback.
Note
Press the TUNE AUDIO dial if the following screen is not displayed.
Music CD
MP3/MWA CD
Note
l
"-------" will be displayed for files without a file, track or other name input.
l This unit can read English (including numerals) one-byte characters.
l The displayable number of characters on each title is a maximum of 64.
(Music CDs)
l Although textual information (Track/artist information) recorded to each track appears in the
display, textual information (Album/artist information) recorded for the entire CD does not
appear in the display.
For details, refer to "CD-TEXT". ( page 80)
Select the on-screen button if the whole title cannot be displayed at one time. The
screen changes to display the rest of the characters.
Page 113 of 140
113
Audio Operation
nFast-forward/Reverse
Press and hold the SEEK/TRACK up button ( ) to advance through a track at high speed
until a beep sound is heard.
Press and hold the SEEK/TRACK down button ( ) to reverse through a track at high speed
until a beep sound is heard.
nTrack search
Press the SEEK/TRACK up button ( ) once to skip forward to the beginning of the next
track.
Press the SEEK/TRACK down button ( ) once to skip back to the beginning of the current
track.
Press the SEEK/TRACK down button ( ) during track search to skip back to the beginning
of the previous track.
nDisc search
To change the disc, press any DISC on-screen button during playback.
nFolder search (during MP3/WMA CD playback)
To change to the previous folder, select the on-screen button, or select the on-screen
button to advance to the next folder.
nMusic scan
This feature helps to find a program by playing about the first 10 seconds of each track.
Press the on-screen button or the SCAN button during play to start scan play operation
(the track number will flash).
Press the on-screen button or the SCAN button once again to cancel scan play.
Note
If the unit is left in scan, normal play will resume where scan was selected.
Page 114 of 140
114
Before
UseGetting
started
Routing Address
Book
Vo i c e Recognition
Navigation
Set Up
RDM-TMC
Audio Operation
Navigation
Set Up
nRepeat play
During music CD playback
1.Select the on-screen button during playback to play the current track repeatedly.
2.Select the button again to cancel the repeat play.
During MP3/WMA CD playback
(Track repeat)
1.Select the on-screen button during playback to play the current track repeatedly.
2.To cancel the repeat play, select the button again after 3 seconds.
(Folder repeat)
1.Select the on-screen button during playback, and then select the button again within 3 seconds to play the tracks in the current folder repeatedly.
2.Select the button again to cancel the repeat play.
nRandom play
Tracks are randomly selected and played.During music CD playback
1.Select the on-screen button during playback to play the tracks on the CD randomly.
2.Select the button again to cancel the random play.
During MP3/WMA CD playback
(Folder random)
1.Select the on-screen button during playback to play the tracks in the folder randomly.
2.To cancel the random play, press the button again after 3 seconds.
(DISC random)
1.Select the on-screen button during playback, and then select the button again within 3 seconds to play the tracks on the CD randomly.
2.Select the button again to cancel the random play.
nAudio sound adjustment
Refer to “Power/Volume/Sound Controls”. ( page 82)
Page 115 of 140
115
Rear View Monitor
Contents
Rear View Monitor
nRear View Monitor .......................................................................... 116
Page 116 of 140
116
Before
UseGetting
started
RoutingAddress
Book
Vo i c e Recognition
Navigation
Set Up
RDM-TMC
Rear View Monitor
Rear View Monitor
The rear view monitor is a visual assist system when reversing the vehicle that provides
images from the rear of the vehicle. For details, refer to the "Rear View Monitor" in the owner's
manual.
Page 117 of 140
117
Before
UseGetting
started
Routing Address
Book
Vo i c e Recognition
Navigation
Set Up
Bluetooth Hands-Free
Contents
Others use
nBluetooth Hands-FreelOperating the Bluetooth Hands-Free........................................... 118(What is Bluetooth Hands-Free?), (Mobile telephone pairing),
(Deleting the link to a Mobile telephone),
(Changing the registered mobile telephone),
(Making calls using a Bluetooth phone),
(Receiving call using a Bluetooth phone),
(Making phone calls using the outgoing call record),
(Making calls using the incoming call record),
(Making calls using the phonebook), (Voice tag registration),
(Deleting all registered devices), (Deleting all phonebooks),
(Deleting all outgoing call records),
(Deleting all incoming call records), (Setting the Passcode),
(Setting the PIN code), (Activating the confirmation prompts function),
(Activating the voice training function)
n
Steering SwitchlOperating the Steering Switch..................................................... 136(Adjusting the Volume), (Changing the Source), (Seek Switch)
nLicense ........................................................................................... 138(Safety Certification)
Page 118 of 140
118
Before
UseGetting
started
Routing Address
Book
Vo i c e Recognition
Navigation
Set Up
RDM-TMC
Bluetooth Hands-Free
Bluetooth Hands-Free
nWhat is Bluetooth Hands-Free?By connecting a Bluetooth equipped mobile telephone to the hands-free unit equipped on the
vehicle, making and receiving calls are possible using the voice recognition switch, Pick-up
button and Hang-up button located on the steering wheel, and saying the voice commands.
A Bluetooth equipped mobile telephone communicates with the hands-free unit equipped on
the vehicle using radio transmission (Bluetooth).
For example, if the mobile telephone is placed in a coat pocket, the phone calls can be made
through your mobile service without direct use of the mobile telephone.
Refer to the “Bluetooth Hands-Free” in the owner’s manual.
The types of mobile phones which can be connected to the hands-free unit are limited, so
before purchasing or changing your mobile phone model, consult an Authorized Mazda Dealer.
Mobile phones which can be connected to the hands-free system need to be compliant with
Bluetooth specifications and the appropriate profile, however, even among these Bluetooth
phones are some which will not connect with your Mazda or will have limited function.
Therefore, consult Mazda Bluetooth Hands-Free Customer Service for information regarding
mobile phone compatibility:
U.S.A.
• Phone : 800-430-0153
• Web : www.MazdaUSA.com/bluetooth
Canada
• Phone : 800-430-0153
• Web : www.mazdahandsfree.ca
Mexico
Center of Attention to Client (CAC)
• Phone : 01-800-01-MAZDA
• Web : www.MazdaUSA.com/bluetooth
Applicable Bluetooth specification: Ver. 2.0 or higher
Response profile
• HFP (Hands Free Profile) Ver. 1.5
• DUN (Dial-up Networking Profile) Ver. 1.1
• PBAP (Phone Book Access Profile) Ver. 1.0
• A2DP (Advanced Audio Distribution Profile) Ver. 1.0
• AVRCP (Audio/Video Remote Control Profile) Ver. 1.0/1.3
• OPP (Object Push Profile) Ver. 1.1
Bluetooth is the registered trademark of Bluetooth SIG. Inc.
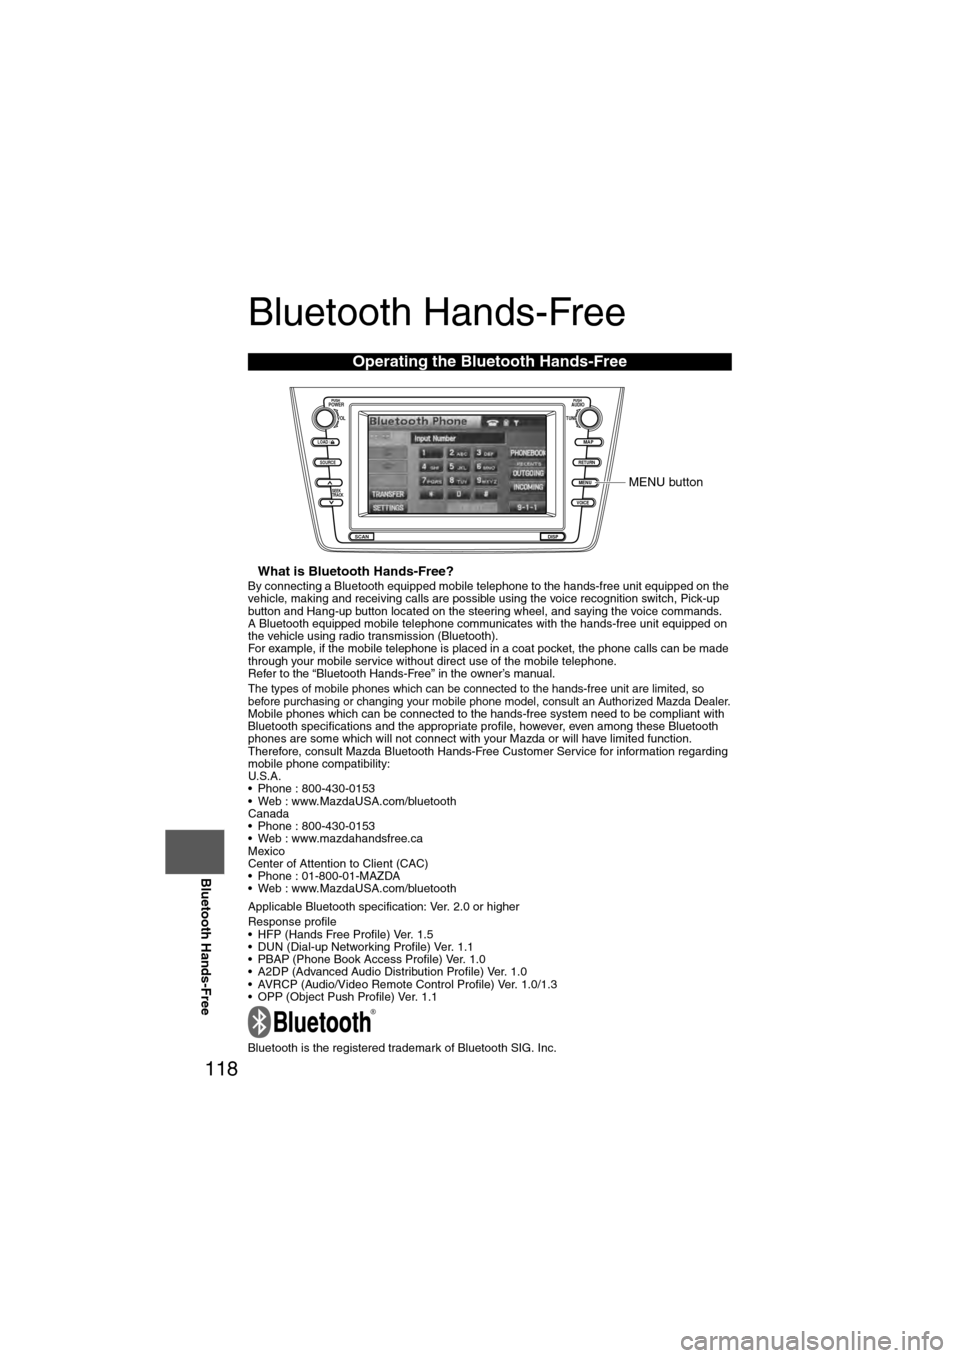
Operating the Bluetooth Hands-Free
LOAD /
PUSHPOWERPUSHAUDIO
VOL
SOURCE
SCAN
SEEK
TRACK
MAP
DISP
MENU
VOICE RETURN
TUNE
MENU button
Page 119 of 140
119
Before
UseGetting
started
Routing Address
Book
Vo i c e Recognition
Navigation
Set Up
Bluetooth Hands-Free
Note
l
If the ignition switch is turned off during a hands-free call, the line is transferred to the
mobile telephone automatically.
l If the mobile telephone is in a location where radio reception is difficult such as a metal
container or in the trunk, the call may not be connected using Bluetooth. If communication is
not possible, change the location of the mobile telephone.
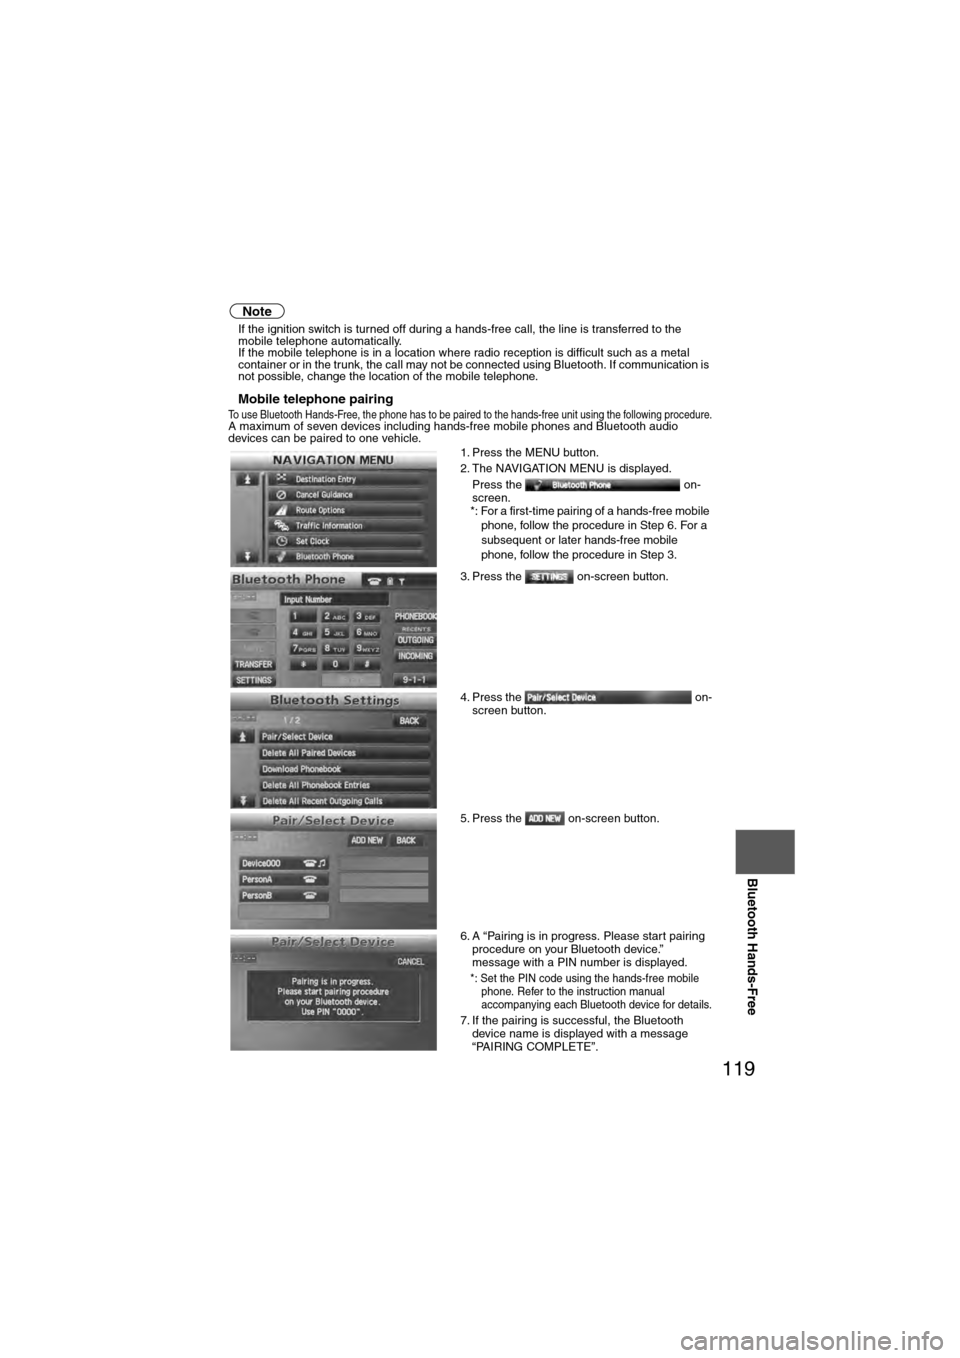
nMobile telephone pairingTo use Bluetooth Hands-Free, the phone has to be paired to the hands-free unit using the following procedure.A maximum of seven devices including hands-free mobile phones and Bluetooth audio
devices can be paired to one vehicle.
1. Press the MENU button.
2. The NAVIGATION MENU is displayed.
Press the on-
screen.
*: For a first-time pairing of a hands-free mobile phone, follow the procedure in Step 6. For a
subsequent or later hands-free mobile
phone, follow the procedure in Step 3.
3. Press the on-screen button.
4. Press the on- screen button.
5. Press the on-screen button.
6. A “Pairing is in progress. Please start pairing procedure on your Bluetooth device.”
message with a PIN number is displayed.
*: Set the PIN code using the hands-free mobile phone. Refer to the instruction manual
accompanying each Bluetooth device for details.
7. If the pairing is successful, the Bluetooth device name is displayed with a message
“PAIRING COMPLETE”.
Page 120 of 140
120
Before
UseGetting
started
Routing Address
Book
Vo i c e Recognition
Navigation
Set Up
RDM-TMC
Bluetooth Hands-Free
Note
l
A mobile telephone can be paired only when the vehicle is parked.
l If a Bluetooth device has already been paired to the vehicle as a Bluetooth audio device, it
does not need to be paired again when using the device as a hands-free mobile phone.
Conversely, it does not need to be paired again as a Bluetooth audio device if it has already
been paired as a hands-free mobile phone.
l Since the communication range of a Bluetooth equipped mobile telephone is about 10
meters (32 ft), if a mobile telephone is placed within a 10-meter (32 ft) radius of the vehicle,
it may be detected/paired unintentionally while another telephone is being paired.
nDeleting the link to a Mobile telephone
Refer to “Deleting the link to a Bluetooth audio device”. ( page 102)
nChanging the registered mobile telephone
Refer to “Changing Paired Bluetooth device”. ( page 104)
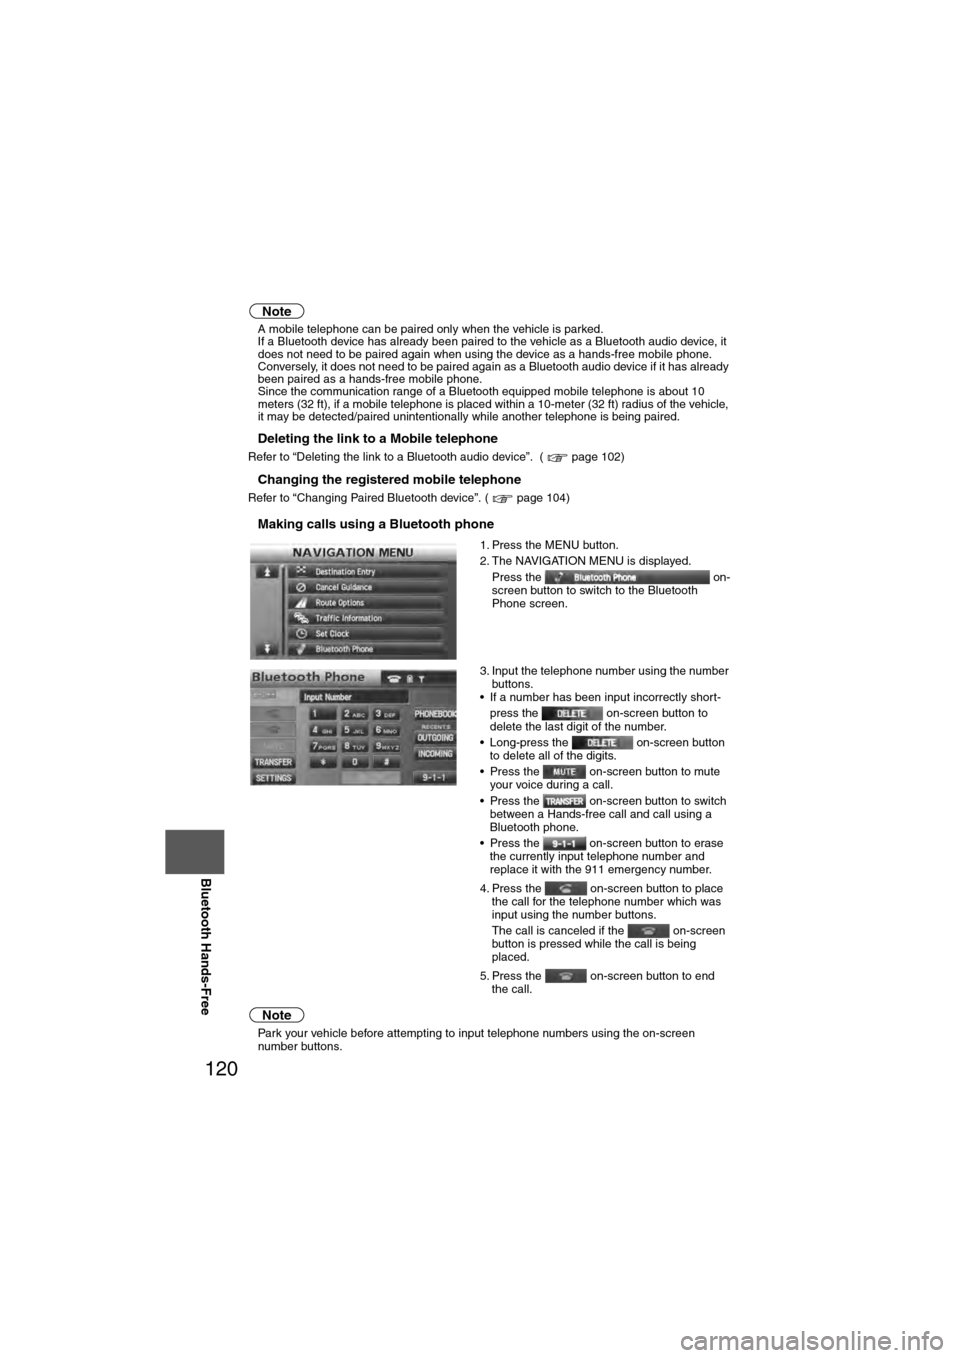
nMaking calls using a Bluetooth phone
Note
lPark your vehicle before attempting to input telephone numbers using the on-screen
number buttons. 1. Press the MENU button.
2. The NAVIGATION MENU is displayed.
Press the on-
screen button to switch to the Bluetooth
Phone screen.
3. Input the telephone number using the number buttons.
• If a number has been input incorrectly short-
press the on-screen button to
delete the last digit of the number.
• Long-press the on-screen button to delete all of the digits.
• Press the on-screen button to mute your voice during a call.
• Press the on-screen button to switch between a Hands-free call and call using a
Bluetooth phone.
• Press the on-screen button to erase the currently input telephone number and
replace it with the 911 emergency number.
4. Press the on-screen button to place the call for the telephone number which was
input using the number buttons.
The call is canceled if the on-screen
button is pressed while the call is being
placed.
5. Press the on-screen button to end the call.