climate control MAZDA MODEL 6 2013 Smart Start Guide (in English)
[x] Cancel search | Manufacturer: MAZDA, Model Year: 2013, Model line: MODEL 6, Model: MAZDA MODEL 6 2013Pages: 18, PDF Size: 5.1 MB
Page 9 of 18

Feature Highlights
1516
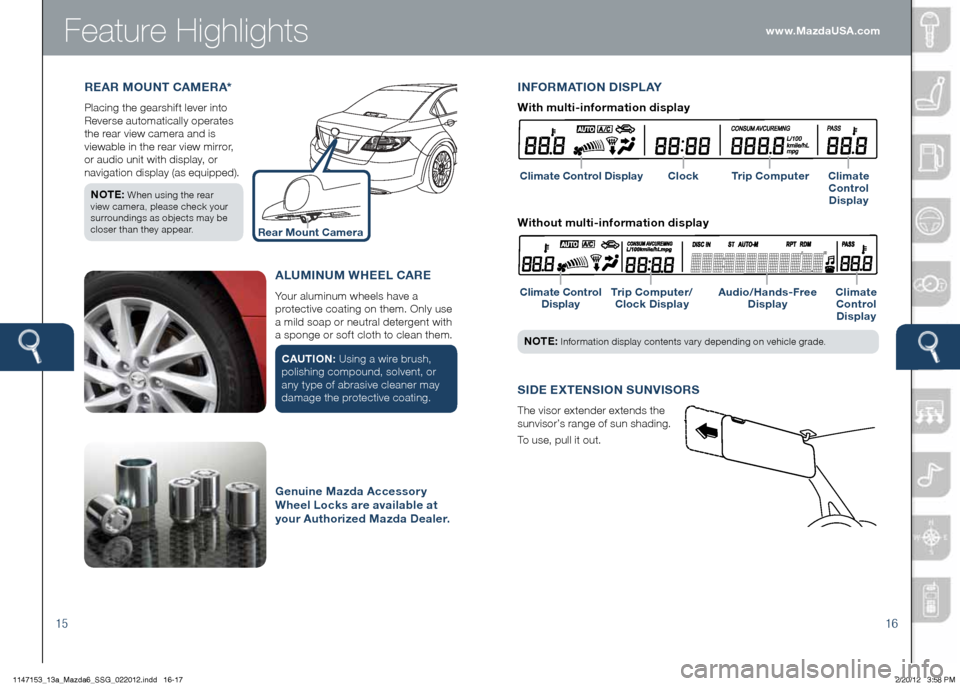
REAR MOUNT CAMERA*
Placing the gearshift lever into
Reverse automatically operates
the rear view camera and is
viewable in the rear view mirror,
or audio unit with display, or
navigation display (as equipped).
NOTE:
When using the rear
view camera, please check your
surroundings as objects may be
closer than they appear.
S IDE ExTENSION SUNVISORS
The visor extender extends the
sunvisor’s range of sun shading.
To use, pull it out. www.MazdaUSA.com
Rear Mount Camera
INFORMATION DISPLAY
Climate Control Display
Climate Control Display Trip Computer/
Clock Display Audio/Hands-Free
Display Climate
Control Display
NOTE: Information display contents vary depending on vehicle grade.
With multi-information display
Clock Trip Computer Climate
Control Display
Without multi-information display
ALUMINUM WHEEL CARE
Your aluminum wheels have a
protective coating on them. Only use
a mild soap or neutral detergent with
a sponge or soft cloth to clean them.
CAUTION: Using a wire brush,
polishing compound, solvent, or
any type of abrasive cleaner may
damage the protective coating.
Genuine Mazda Accessory
Wheel Locks are available at
your Authorized Mazda Dealer.
1147153_13a_Mazda6_SSG_022012.indd 16-172/20/12 3:58 PM
Page 11 of 18

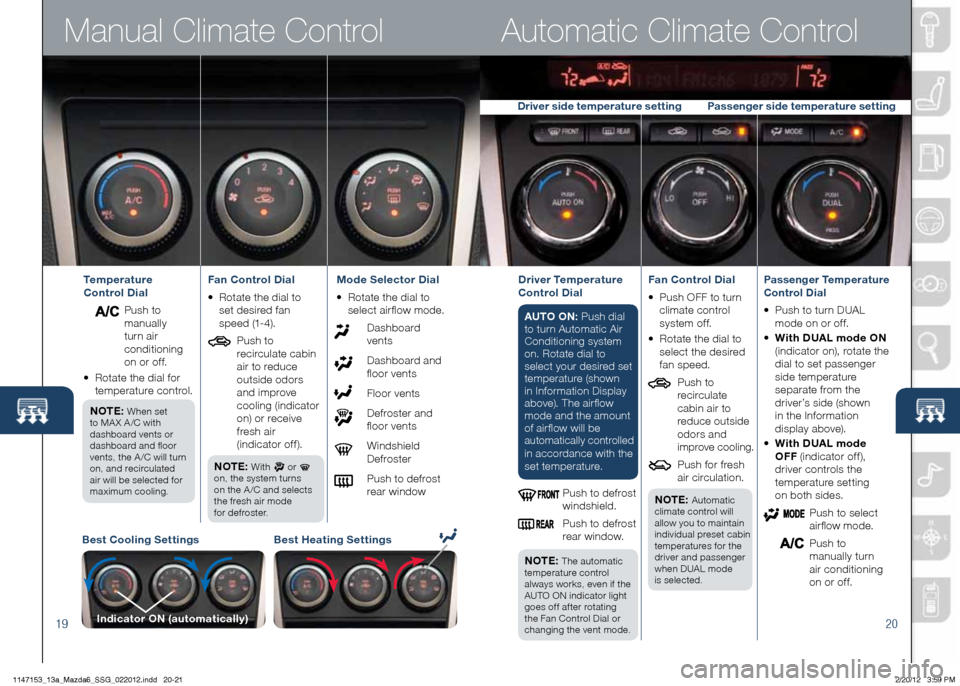
Manual Climate Control
19
Automatic Climate Control
20
Best Cooling SettingsBest Heating Settings
Indicator ON (automatically)
Temperature
Control Dial
Push to
manually
turn air
conditioning
on or off.
• Rotate the dial for
temperature control.
NOTE:
When set
to MA X A /C with
dashboard vents or
dashboard and floor
vents, the A /C will turn
on, and recirculated
air will be selected for
maximum cooling.
Fan Control Dial
• Rotate the dial to
set desired fan
speed (1-4).
Push to
recirculate cabin
air to reduce
outside odors
and improve
cooling (indicator
on) or receive
fresh air
(indicator off).
NOTE:
With or
on, the system turns
on the A /C and selects
the fresh air mode
for defroster.
Mode Selector Dial
• Rotate the dial to
select airflow mode.
Dashboard vents
Dashboard and
floor vents
Floor vents
Defroster and
floor vents
Windshield Defroster
Push to defrost
rear windowDriver Temperature
Control Dial
AUTO ON: Push dial
to turn Automatic Air
Conditioning system
on. Rotate dial to
select your desired set
temperature (shown
in Information Display
above). The airflow
mode and the amount
of airflow will be
automatically controlled
in accordance with th e
set temperature.
Push to defrost
windshield.
Push to defrost
rear window.
NOTE:
The automatic
temperature control
always works, even if the
AUTO ON indicator light
goes off after rotating
the Fan Control Dial or
changing the vent mode.
Fan Control Dial
• Push OFF to turn
climate control
system of f.
•
Rotate the dial to
select the desired
fan speed.
Push to
recirculate
cabin air to
reduce outside
odors and
improve cooling.
Push for fresh
air circulation.
NOTE:
Automatic
climate control will
allow you to maintain
individual preset cabin
temperatures for the
driver and passenger
when DUAL mode
is selected.
Passenger Temperature
Control Dial
• Push to turn DUAL
mode on or off.
•
With DUAL mode ON
(indicator on), rotate the
dial to set passenger
side temperature
separate from the
driver’s side (shown
in the Information
display above).
• With DUAL mode
OFF (indicator off),
driver controls the
temperature setting
on both sides.
Push to select
airflow mode.
Push to
manually turn
air conditioning
on or off.
Driver side temperature setting Passenger side temperature setting
1147153_13a_Mazda6_SSG_022012.indd 20-212/20/12 3:59 PM
Page 17 of 18

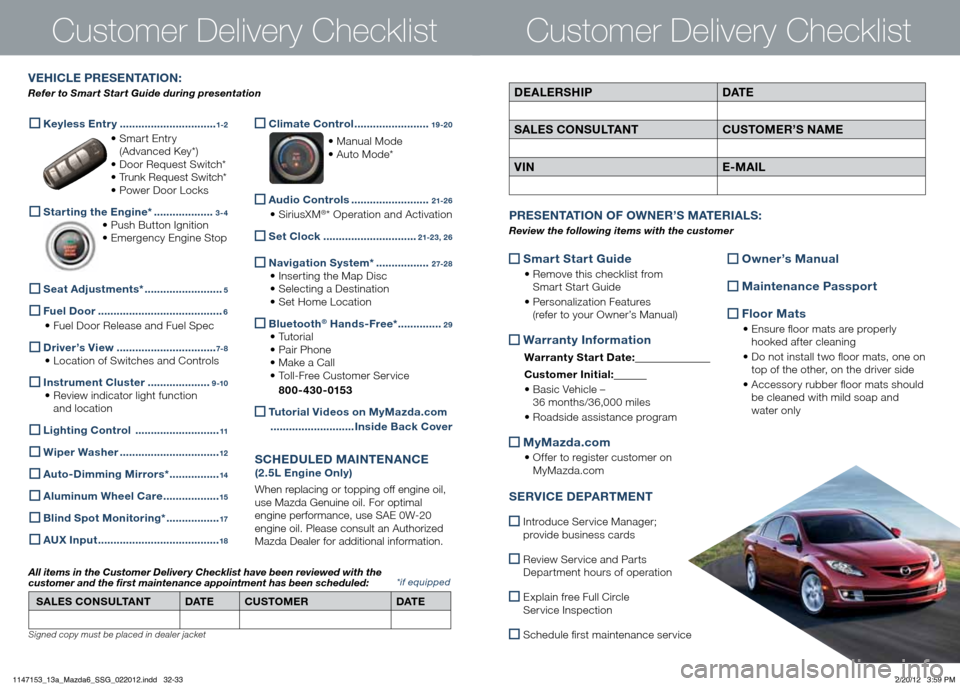
Customer Delivery Checklist
DEALERSHIPDAT E
SALES CONSULTANT CUSTOMER’S NAME
VIN E-MAIL
VEHICLE PRESENTATION :
Refer to Smart Start Guide during presentation
Customer Delivery Checklist
*if equipped
Keyless Entry
...............................1-2
• Smart Entry
(Advanced Key*)
• Door Request Switch*
• Trunk Request Switch*
• Power Door Locks
Starting the Engine* ...................3-4
• Push Button Ignition
• Emergency Engine Stop
Seat Adjustments*
.........................5
Fuel Door
........................................6
• Fuel Door Release and Fuel Spec
Driver’s View
................................7- 8
• Location of Switches and Controls
Instrument Cluster
....................9 -10
• Review indicator light function
and location
Lighting Control
...........................11
Wiper Washer
................................12
Auto-Dimming Mirrors*
................14
Aluminum Wheel Care
..................15
Blind Spot Monitoring*
.................17
A
Ux Input .......................................18
Climate Control
........................19 -20
• Manual Mode
• Auto Mode*
Audio Controls
.........................21-2 6
• SiriusXM®* Operation and Activation
Set Clock
..............................21-23, 2 6
Navigation System*
.................2 7-2 8
• Inserting the Map Disc
• Selecting a Destination
• Set Home Location
Bluetooth® Hands-Free*
..............29
• Tutorial
• Pair Phone
• Make a Call
• Toll-Free Customer Service
800-430-0153
Tutorial Videos on MyMazda.com
........................... Inside Back Cover
SCHEDULED MAINTENANCE
(2.5L Engine Only)
When replacing or topping off engine oil,
use Mazda Genuine oil. For optimal
engine performance, use SAE 0W-20
engine oil. Please consult an Authorized
Mazda Dealer for additional information.
SALES CONSULTANT DAT ECUSTOMER DAT E
All items in the Customer Deliver y Checklist have been reviewed with the
customer and the first maintenance appointment has been scheduled:
Signed copy must be placed in dealer jacket
Smart Start Guide
•
Remove this checklist from
Smart Start Guide
• Personalization Features
(refer to your Owner’s Manual)
Warranty Information
Warranty Start Date:
Customer Ini tial:
• Basic Vehicle –
36 months/36,000 miles
• Roadside assistance program
MyMazda.com
•
Offer to register customer on
MyMazda.com
Owner’s Manual
Maintenance Passport
Floor Mats
•
Ensure floor mats are properly
hooked after cleaning
• Do not install two floor mats, one on
top of the other, on the driver side
• Accessory rubber floor mats should
be cleaned with mild soap and
water only
P RESENTATION OF OWNER ’S M ATERIALS :
Review the following items with the customer
SERVICE DEPARTMENT
Introduce Service Manager;
provide business cards
Review Service and Parts
Department hours of operation
Explain free Full Circle
Service Inspection
Schedule first maintenance service
1147153_13a_Mazda6_SSG_022012.indd 32-332/20/12 3:59 PM