instrument cluster MAZDA MODEL B-SERIES 2002 (in English) User Guide
[x] Cancel search | Manufacturer: MAZDA, Model Year: 2002, Model line: MODEL B-SERIES, Model: MAZDA MODEL B-SERIES 2002Pages: 287, PDF Size: 2.47 MB
Page 20 of 287

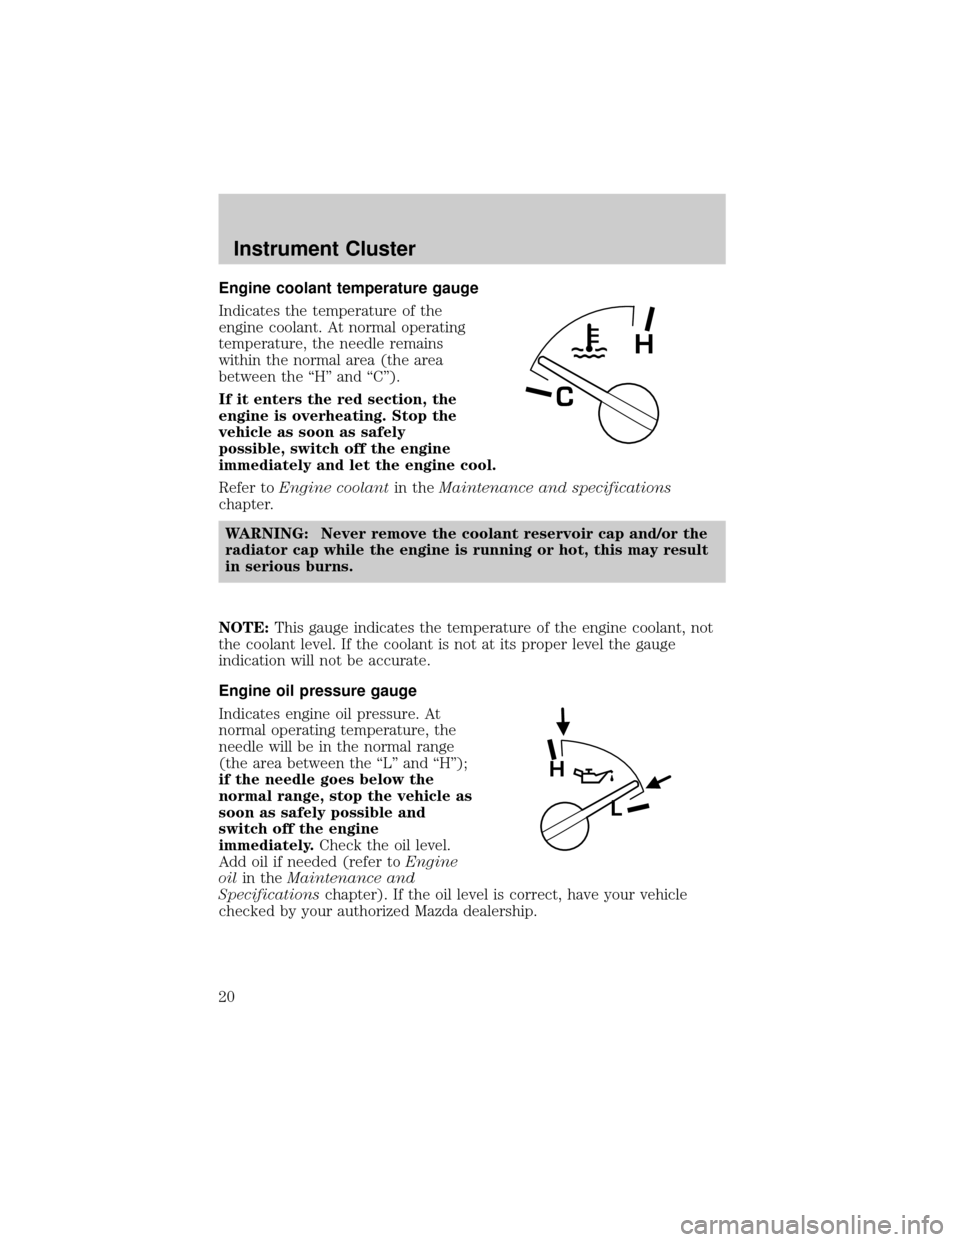
Engine coolant temperature gauge
Indicates the temperature of the
engine coolant. At normal operating
temperature, the needle remains
within the normal area (the area
between the ªHº and ªCº).
If it enters the red section, the
engine is overheating. Stop the
vehicle as soon as safely
possible, switch off the engine
immediately and let the engine cool.
Refer toEngine coolantin theMaintenance and specifications
chapter.
WARNING: Never remove the coolant reservoir cap and/or the
radiator cap while the engine is running or hot, this may result
in serious burns.
NOTE:This gauge indicates the temperature of the engine coolant, not
the coolant level. If the coolant is not at its proper level the gauge
indication will not be accurate.
Engine oil pressure gauge
Indicates engine oil pressure. At
normal operating temperature, the
needle will be in the normal range
(the area between the ªLº and ªHº);
if the needle goes below the
normal range, stop the vehicle as
soon as safely possible and
switch off the engine
immediately.Check the oil level.
Add oil if needed (refer toEngine
oilin theMaintenance and
Specificationschapter). If the oil level is correct, have your vehicle
checked by your authorized Mazda dealership.
C
H
H
L
Instrument Cluster
20
Page 21 of 287

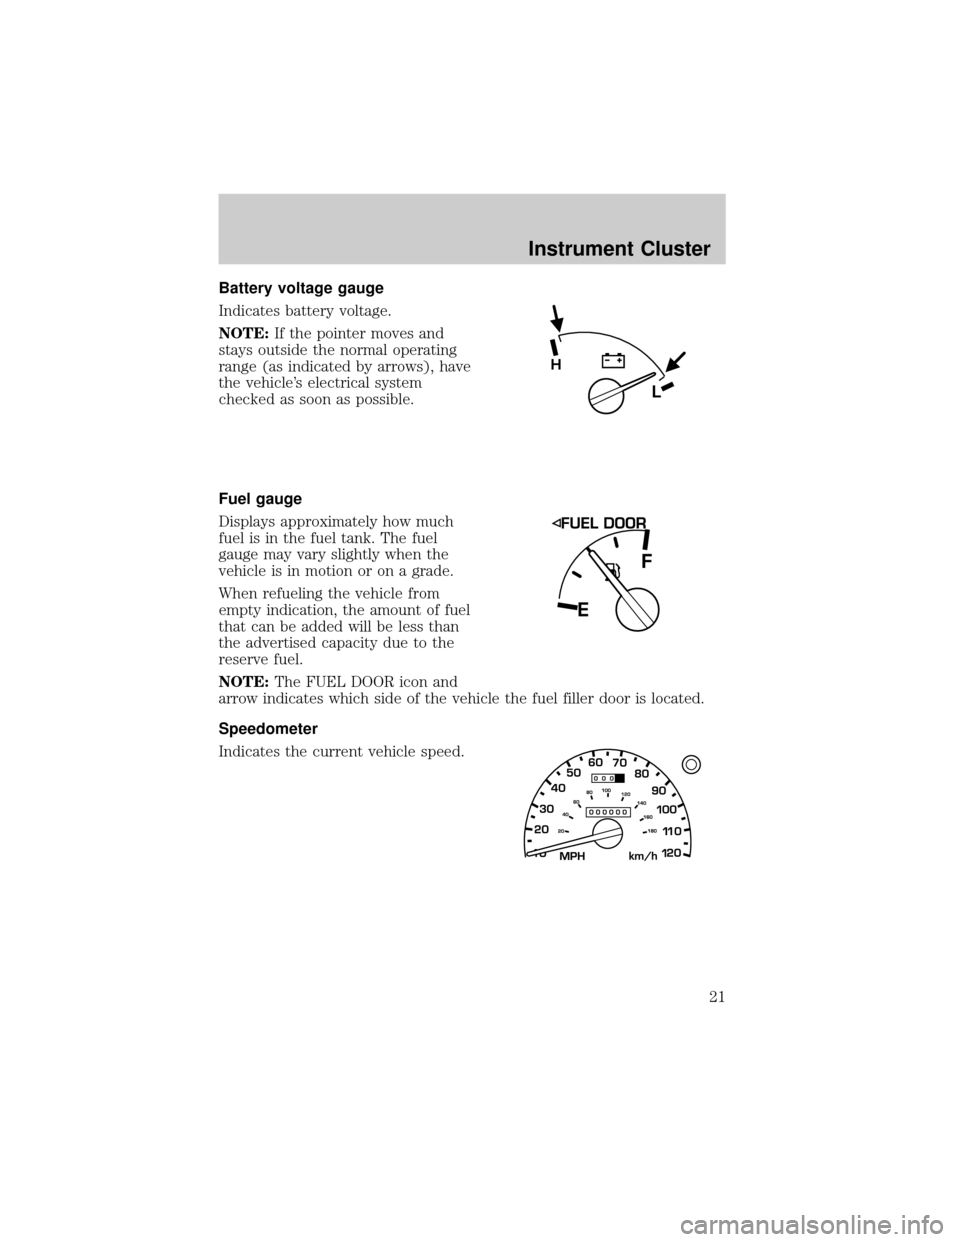
Battery voltage gauge
Indicates battery voltage.
NOTE:If the pointer moves and
stays outside the normal operating
range (as indicated by arrows), have
the vehicle's electrical system
checked as soon as possible.
Fuel gauge
Displays approximately how much
fuel is in the fuel tank. The fuel
gauge may vary slightly when the
vehicle is in motion or on a grade.
When refueling the vehicle from
empty indication, the amount of fuel
that can be added will be less than
the advertised capacity due to the
reserve fuel.
NOTE:The FUEL DOOR icon and
arrow indicates which side of the vehicle the fuel filler door is located.
Speedometer
Indicates the current vehicle speed.
L
H
Instrument Cluster
21
Page 22 of 287

Odometer
Registers the total kilometers
(miles) of the vehicle.
Trip odometer
Registers the kilometers (miles) of
individual journeys. To reset,
depress the control.
Tachometer
Indicates the engine speed in
revolutions per minute.
Driving with your tachometer
pointer continuously at the top
of the scale may damage the
engine.
10MPH 205060
70
304080
90
km/h
0 0 0
10 100
1
20
1
0 0 0 0 0 0406080100
120
140
160
180
20
Instrument Cluster
22
Page 97 of 287

To return to a previously set speed
²Press RSM. For RSM to operate,
the vehicle speed must be faster
than 48 km/h (30 mph).
Indicator light
This light comes on when either the
SET ACCEL or RES controls are
pressed. It turns off when the speed
control OFF control is pressed, the
brake or clutch is applied or the ignition is turned to the OFF position.
OVERDRIVE CONTROL (IF EQUIPPED)
Activating overdrive
(Overdrive) is the normal drive position for the best fuel economy.
The overdrive function allows automatic upshifts and downshifts through
all available gears.
Deactivating overdrive
Press the Transmission Control
Switch (TCS) located on the end of
the gearshift lever. The O/D Off
indicator light will illuminate on the
instrument cluster. The transmission
will operate in all gears except overdrive.
RSM
SET
ACC
COAST
SPEED
CONT
O/D
ON/OFF
Driver Controls
97
Page 107 of 287

Automatic arming
The vehicle is armed immediately
after switching the ignition to the 3
(OFF) position. The
THEFTlight in
the instrument cluster will flash
every two seconds when the vehicle
is armed.
Automatic disarming
Switching the ignition to the 4 (ON) position with acoded keydisarms
the vehicle. The
THEFTlight will illuminate for three seconds and then
go out. If the
THEFTlight stays on for an extended period of time or
flashes rapidly, have the system serviced by your authorized Mazda
dealership.
Key information
Your vehicle is supplied withtwo
coded keys.Only acoded keywill
start your vehicle. Spare coded keys
can be purchased from your
authorized Mazda dealership. Your
dealership can program your key or
you can ªdo it yourselfº, refer to
Programming spare keys.
3
2
1
5
4
Locks and Security
107
Page 120 of 287

Adjusting the rear center facing jump seat lap belt (if equipped)
The lap belt will adjust automatically. To fasten, grasp the tongue, and
with a continuous motion, pull out enough webbing to buckle the tongue
into the correct buckle. If you did not pull out enough webbing to reach
the buckle, allow the tongue to retract fully before trying to pull it out
again.
WARNING: The lap belts should fit snugly and as low as
possible around the hips, not around the waist. Failure to
position the lap belt correctly may cause serious injury in an
accident.
If you need to lengthen the belt, unfasten it and repeat the procedure
above.
To unfasten the belt, push in the release button prior to opening the rear
door.
Safety belt extension assembly
If the safety belt assembly is too short for you, even when fully
extended, 20 cm (8 inches) can be added to the safety belt assembly by
adding a safety belt extension assembly. Safety belt extension assemblies
can be obtained from your authorized Mazda dealership.
Use only extensions manufactured by the same supplier as the safety
belt. Manufacturer identification is located at the end of the webbing on
the label. Also, use the safety belt extension only if the safety belt is too
short for you when fully extended.
NOTE:Do not use extensions to change the fit of the shoulder belt
across the torso.
Safety belt warning light and indicator chime
The seat belt warning light illuminates in the instrument cluster and a
chime sounds to remind the occupants to fasten their safety belts.
Seating and Safety Restraints
120
Page 121 of 287

Conditions of operation
If... Then...
The driver's safety belt is not
buckled before the ignition switch
is turned to the ON position...
The safety belt warning light
illuminates 1-2 minutes and the
warning chime sounds 4-8 seconds.
The driver's safety belt is buckled
while the indicator light is
illuminated and the warning chime
is sounding...The safety belt warning light and
warning chime turn off.
The driver's safety belt is buckled
before the ignition switch is turned
to the ON position...The safety belt warning light and
indicator chime remain off.
BeltMinder
The BeltMinder feature is a supplemental warning to the safety belt
warning function. This feature provides additional reminders to the
driver that the driver's safety belt is unbuckled by intermittently
sounding a chime and illuminating the safety belt warning lamp in the
instrument cluster.
If... Then...
The driver's safety belt is not
buckled before the vehicle has
reached at least 5 km/h (3 mph)
and 1-2 minutes have elapsed
since the ignition switch has been
turned to ON...The BeltMinder feature is
activated - the safety belt warning
light illuminates and the warning
chime sounds for 6 seconds every
30 seconds, repeating for
approximately 5 minutes or until
driver's safety belt is buckled.
The driver's safety belt is buckled
while the safety belt indicator light
is illuminated and the safety belt
warning chime is sounding...The BeltMinder feature will not
activate.
The driver's safety belt is buckled
before the ignition switch is turned
to the ON position...The BeltMinder feature will not
activate.
The purpose of the Safety Belt Warning Chime/Light is to remind
occupants of the vehicle to wear safety belts all of the time.
Seating and Safety Restraints
121
Page 129 of 287

WARNING: Several air bag system components get hot after
inflation. Do not touch them after inflation or you may be
burned.
WARNING: If the air bag has deployed, the air bag will not
function again and must be replaced immediately. If the air bag
is not replaced, the unrepaired area will increase the risk of
injury in a collision.
The SRS consists of:
²driver and passenger air bag modules (which include the inflators and
air bags),
²passenger air bag deactivation switch and restraint control module
(RCM)
²a readiness light and tone,
²and the electrical wiring which connects the components.
The RCM (restraints control module) monitors its own internal circuits
and the supplemental air bag electrical system warning (including the
passenger air bag deactivation switch, the system wiring, the air bag
system readiness light, the air bag back up power and the air bag
ignitors).
Determining if the system is operational
The SRS uses readiness lights in the instrument cluster and the
passenger air bag deactivate switch or a tone to indicate the condition of
the system. Refer to theAir bag readinesssection in the
Instrumentationchapter orPassenger air bag deactivate switch
section in this chapter. Routine maintenance of the air bag is not
required.
A difficulty with the system is indicated by one or more of the following:
²The readiness lights will either
flash or stay lit.
²The readiness lights will not
illuminate immediately after
ignition is turned on.
Seating and Safety Restraints
129
Page 153 of 287

The ABS operates by detecting the
onset of wheel lockup during brake
applications and compensates for
this tendency. The wheels are
prevented from locking even when
the brakes are firmly applied. The
accompanying illustration depicts
the advantage of an ABS equipped
vehicle (on bottom) to a non-ABS
equipped vehicle (on top) during hard braking with loss of front braking
traction.
WARNING: The Anti-Lock system does not decrease the time
necessary to apply the brakes or always reduce stopping
distance. Always leave enough room between your vehicle and
the vehicle in front of you to stop.
Using four wheel ABS
²In an emergency or when maximum efficiency from the ABS is
required, apply continuous force on the brake. The ABS will be
activated immediately, thus allowing you to retain full steering control
of your vehicle and, providing there is sufficient space, will enable you
to avoid obstacles and bring the vehicle to a controlled stop.
WARNING: The Anti-Lock system does not decrease the time
necessary to apply the brakes or always reduce stopping
distance. Always leave enough room between your vehicle and
the vehicle in front of you to stop.
NOTE:We recommend that you familiarize yourself with this braking
technique. However, avoid taking any unnecessary risks.
ABS warning lamp
ABS
TheABSwarning lamp in the instrument cluster momentarily illuminates
when the ignition is turned to the ON position. If the light does not
illuminate momentarily at start up, remains on or continues to flash, the
ABS needs to be serviced.
Driving
153
Page 154 of 287

With the ABS light on, the anti-lock
brake system is disabled and normal
braking is still effective unless the
brake warning light also remains
illuminated with parking brake
released. (If your brake warning lamp illuminates, have your vehicle
serviced immediately by an authorized Mazda dealership.)
Parking brake
Apply the parking brake whenever
the vehicle is parked. To set the
parking brake, press the parking
brake pedal down until the pedal
stops.
The BRAKE warning lamp in the
instrument cluster illuminates and
remains illuminated (when the
ignition is turned ON) until the
parking brake is released.
WARNING: Always set the parking brake fully and make sure
that the gearshift is securely latched in P (Park) (automatic
transmission) or in 1 (First) (manual transmission).
NOTE:The parking brake is not recommended to stop a moving vehicle.
However, if the normal brakes fail, the parking brake can be used to stop
your vehicle in an emergency. Since the parking brake applies only the
rear brakes, the vehicle's stopping distance will increase greatly and the
handling of your vehicle will be adversely affected.
!
BRAKE
BRAKE
RELEASE
!
BRAKE
Driving
154