lock MAZDA MODEL B-SERIES 2002 (in English) Repair Manual
[x] Cancel search | Manufacturer: MAZDA, Model Year: 2002, Model line: MODEL B-SERIES, Model: MAZDA MODEL B-SERIES 2002Pages: 287, PDF Size: 2.47 MB
Page 196 of 287

Location of the spare tire and tools
The spare tire and tools for your vehicle are stowed in the following
locations:
Tool Location
Spare tire Under the vehicle, just forward of the rear bumper
Jack, jack handle,
wheel nut wrenchRegular Cab: behind seats and underneath the jack
and tools cover
SuperCab: stowed in the passenger side rear cab
compartment or behind the jump seat in a
separate tool bag
Four-door models: stowed behind the front seats,
between jump seats and underneath jack and tools
cover.
Key, spare tire
lock (if equipped)In the glove box
Removing the spare tire
1. Assemble the jack handle to the lug wrench as shown in the
illustrations.
When connecting the jack handle, assemble the following:
²one handle extension and one
typical extension. To assemble,
slide parts together. To
disconnect, depress button and
pull apart.
²one wheel nut wrench. Depress
button and slide together.
Roadside Emergencies
196
Page 197 of 287

2. If equipped, unlock and remove
the spare tire carrier lock from
the rear access hole located just
above the rear bumper and
below the tailgate.
3. Insert the straight end of the
jack handle into the rear access
hole located just above the rear
bumper and below the tailgate.
Forward motion will stop and
resistance to turning will be felt
when properly engaged.
4. Turn the handle
counterclockwise until tire is
lowered to the ground and the cable is slightly slack.
5. Remove the retainer from the spare tire.
Stowing the spare tire
1. Lay the tire on the ground with the valve stem facing up.
2. Install the retainer through the
wheel center and slide the
wheel under the vehicle.
3. Turn the spare handle clockwise
until the tire is raised to its
original position underneath the
vehicle. The spare handle
ratchets when the tire is raised
to the stowed position. It will
not allow you to overtighten.
4. If your vehicle is equipped with P265/75 R15 AT tires, do not stow a
flat or inflated full size spare tire in the spare tire carrier. The flat
Roadside Emergencies
197
Page 198 of 287

full size tire should be stowed and tied down in the pickup box bed
until it can be repaired.
5. If removed, install the spare tire carrier lock on the access hole
above the bumper.
Tire change procedure
WARNING:
When one of the front wheels is off the ground, the
transmission alone will not prevent the vehicle from moving or
slipping off the jack, even if the vehicle is in P (Park)
(automatic transmission) or R (Reverse) (manual transmission).
WARNING: To prevent the vehicle from moving when you
change a tire, be sure the parking brake is set, then block (in
both directions) the wheel that is diagonally opposite (other
side and end of the vehicle) to the tire being changed.
WARNING: If the vehicle slips off the jack, you or someone
else could be seriously injured.
1. Park on a level surface, activate
hazard flashers and place
gearshift lever in P (Park)
(automatic transmission) or 1
(First) (manual transmission).
2. Set the parking brake and turn
engine OFF.
3. Block the diagonally opposite
wheel.
Roadside Emergencies
198
Page 199 of 287

4. Insert tapered end of the lug
wrench behind hub caps and
twist them off.
5. Loosen each wheel lug nut
one-half turn counterclockwise
but do not remove them until
the wheel is raised off the
ground.
6. Position the jack according to
the following guides and turn
the jack handle clockwise until the tire is a maximum of 25 mm (1
inch) off the ground.
²Front
²Rear
Roadside Emergencies
199
Page 200 of 287

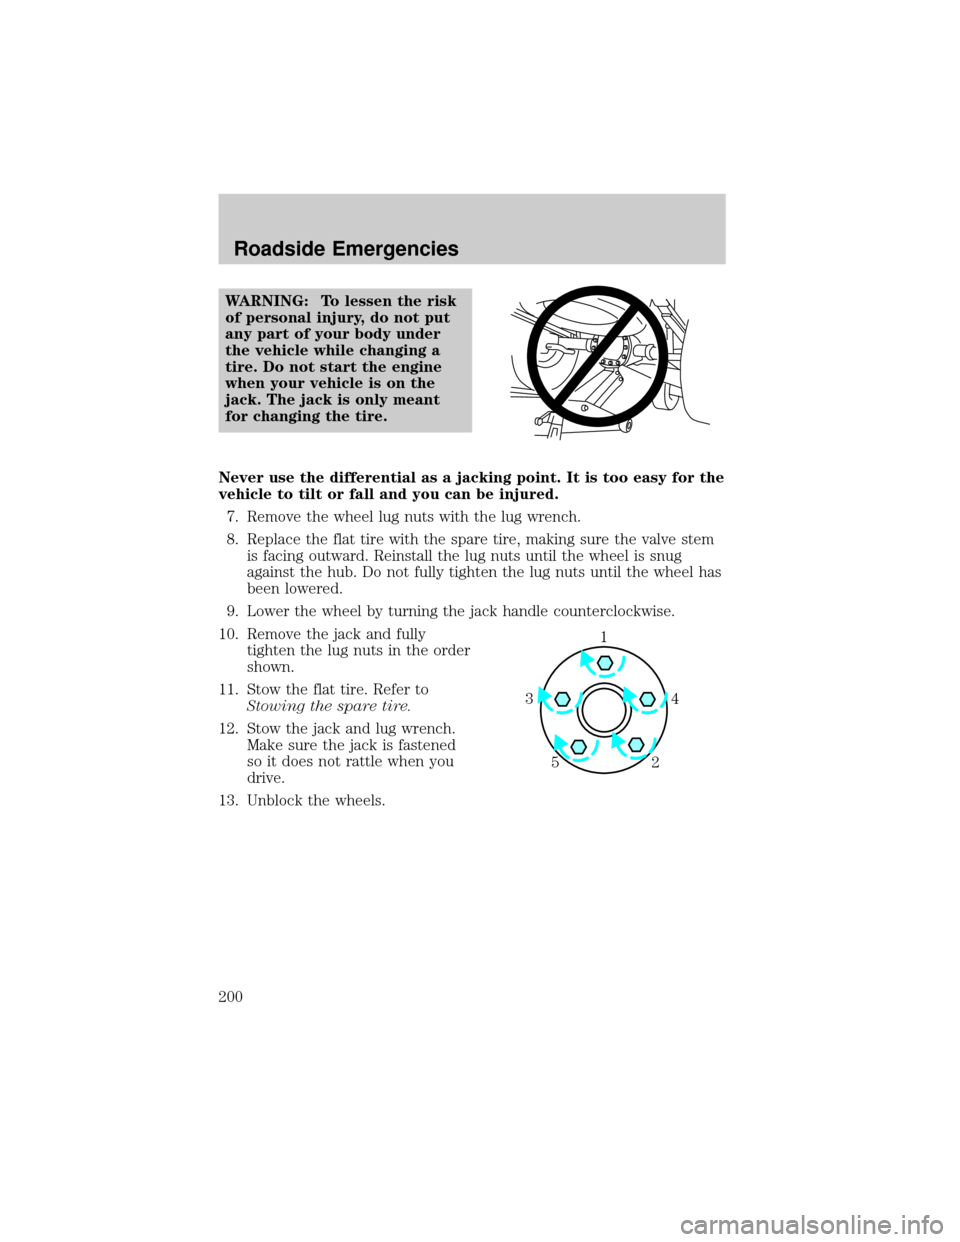
WARNING: To lessen the risk
of personal injury, do not put
any part of your body under
the vehicle while changing a
tire. Do not start the engine
when your vehicle is on the
jack. The jack is only meant
for changing the tire.
Never use the differential as a jacking point. It is too easy for the
vehicle to tilt or fall and you can be injured.
7. Remove the wheel lug nuts with the lug wrench.
8. Replace the flat tire with the spare tire, making sure the valve stem
is facing outward. Reinstall the lug nuts until the wheel is snug
against the hub. Do not fully tighten the lug nuts until the wheel has
been lowered.
9. Lower the wheel by turning the jack handle counterclockwise.
10. Remove the jack and fully
tighten the lug nuts in the order
shown.
11. Stow the flat tire. Refer to
Stowing the spare tire.
12. Stow the jack and lug wrench.
Make sure the jack is fastened
so it does not rattle when you
drive.
13. Unblock the wheels.
1
4 3
2 5
Roadside Emergencies
200
Page 219 of 287

REPAIRING PAINT CHIPS
Minor scratches or paint damage from road debris may be repaired with
Genuine Mazda Touch-Up Paint. Observe the application instructions on
the products.
Remove particles such as bird droppings, tree sap, insect remains, tar
spots, road salt and industrial fallout immediately.
CLEANING THE WHEELS
Wash with the same detergent as the body of your vehicle. Do not use
acid-based or alcohol-based wheel cleaners, steel wool, fuel or strong
detergents. Never use abrasives that will damage the finish of special
wheel surfaces. Use a tar remover to remove grease and tar.
The brushes used in some automatic car washes may damage the
finish on your wheels. Before going to a car wash, find out if the
brushes are abrasive.
CLEANING THE ENGINE
Engines are more efficient when they are clean because grease and dirt
buildup keep the engine warmer than normal. When washing:
²Take care when using a power washer to clean the engine. The high
pressure fluid could penetrate the sealed parts and cause damage.
²Do not spray with cold water to avoid cracking the engine block or
other engine components.
²Cover the highlighted areas to prevent water damage when cleaning
the engine.
Cleaning
219
Page 231 of 287

While operating your vehicle
²Note any changes in the sound of the exhaust or any smell or exhaust
fumes in the vehicle.
²Check for vibrations in the steering wheel. Notice any increased
steering effort or looseness in the steering wheel, or change in this
straight ahead position.
²Notice if your vehicle constantly turns slightly or ªpullsº to one side
when traveling on a smooth, level road.
²When stopping, listen and check for strange sounds, pulling to one
side, increased brake pedal travel or ªhard to pushº brake pedal.
²If any slipping or changes in the operation of your transmission occur,
check the transmission fluid level.
²Check automatic transmission Park function.
²Check parking brake.
At least monthly
²Check function of all interior and exterior lights.
²Check tires for wear and proper air pressure.
²Check engine oil level.
²Check coolant level in the coolant reservoir.
²Check washer fluid level.
At least twice a year (for example, every spring and fall)
²Check power steering fluid level.
²Check clutch fluid level (if equipped).
²Check and clean body and door drain holes.
²Check and lubricate all hinges, latches, and outside locks.
²Check and lubricate door rubber weather strips.
²Check parking brake for proper operation.
²Check lap/shoulder belts and seat latches for wear and function.
²Check air pressure in spare tire.
²Check windshield washer spray and wiper operation. Clean wiper
blades with clean cloth dampened with washer fluid.
²Check safety warning lamps (brake, ABS, air bag, safety belt) for
operation.
²Check cooling system fluid level and coolant strength.
²Check battery water level (non-maintenance free).
²Check battery connections and clean if necessary.
Maintenance and Specifications
231
Page 232 of 287

SERVICE RECOMMENDATIONS
To help you service your vehicle:
²We highlight do-it-yourself items in the engine compartment for easy
location.
²We provide a Scheduled Maintenance section which makes tracking
routine service easy.
If your vehicle requires professional service, your dealership can provide
necessary parts and service. Check your ªWarranty Informationº to find
out which parts and services are covered.
Use only recommended fuels, lubricants, fluids and service parts
conforming to specifications. Genuine Mazda parts are designed and built
to provide the best performance in your vehicle.
PRECAUTIONS WHEN SERVICING YOUR VEHICLE
Be especially careful when inspecting or servicing your vehicle.
²Do not work on a hot engine.
²When the engine is running, make sure that loose clothing, jewelry or
long hair does not get caught up in moving parts.
²Do not work on a vehicle with the engine running in an enclosed
space, unless you are sure you have enough ventilation.
²Keep all lit cigarettes, open flames and other lit material away from
the battery and all fuel related parts.
If you disconnect the battery, the engine must ªrelearnº its idle
conditions before your vehicle will drive properly, as explained inBattery
in this chapter.
Working with the engine off
²Automatic transmission:
1. Set the parking brake and ensure the gearshift is securely latched in
P (Park).
2. Turn off the engine and remove the key.
3. Block the wheels to prevent the vehicle from moving unexpectedly.
²Manual transmission:
1. Set the parking brake.
2. Depress the clutch and place the gearshift in 1 (First).
Maintenance and Specifications
232
Page 233 of 287

3. Turn off the engine and remove the key.
4. Block the wheels to prevent the vehicle from moving unexpectedly.
Working with the engine on
²Automatic transmission:
1. Set the parking brake and ensure the gearshift is securely latched in
P (Park).
2. Block the wheels to prevent the vehicle from moving unexpectedly.
Note:Do not start your engine with the air cleaner removed and do not
remove it while the engine is running.
²Manual transmission:
1. Set the parking brake, depress the clutch and place the gearshift in
neutral.
2. Block the wheels to prevent the vehicle from moving unexpectedly.
Note:Do not start your engine with the air cleaner removed and do not
remove it while the engine is running.
WARNING: The cooling fan is automatic and may come on at
any time. Always disconnect the negative terminal of the
battery before working near the fan.
OPENING THE HOOD
1. Inside the vehicle, pull the hood
release handle located under
the bottom of the instrument
panel near the steering column.
2. Go to the front of the vehicle
and release the auxiliary latch
that is located under the front
center of the hood.
3. Lift the hood and support it
with the prop rod.
Maintenance and Specifications
233
Page 241 of 287

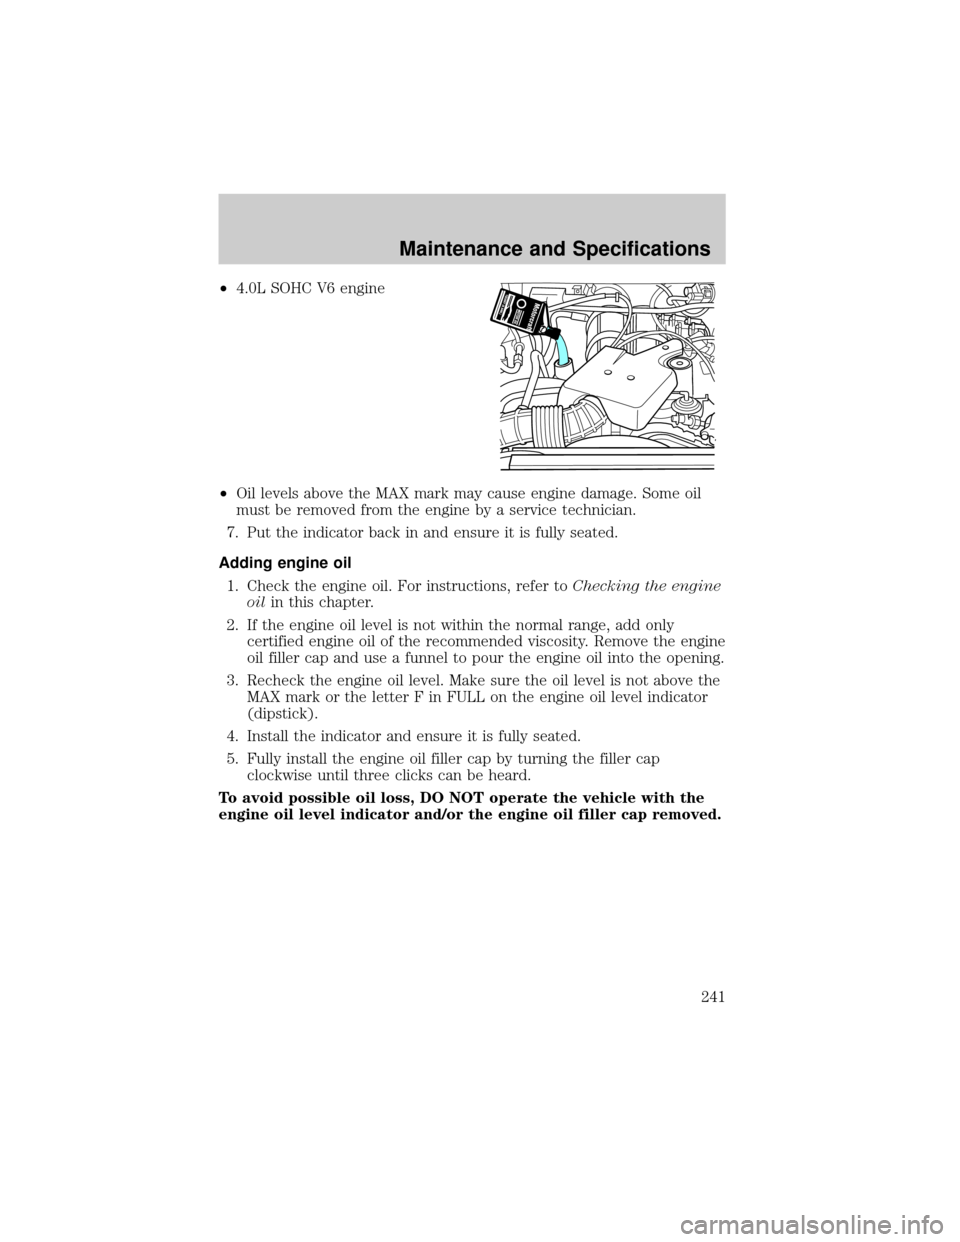
²4.0L SOHC V6 engine
²Oil levels above the MAX mark may cause engine damage. Some oil
must be removed from the engine by a service technician.
7. Put the indicator back in and ensure it is fully seated.
Adding engine oil
1. Check the engine oil. For instructions, refer toChecking the engine
oilin this chapter.
2. If the engine oil level is not within the normal range, add only
certified engine oil of the recommended viscosity. Remove the engine
oil filler cap and use a funnel to pour the engine oil into the opening.
3. Recheck the engine oil level. Make sure the oil level is not above the
MAX mark or the letter F in FULL on the engine oil level indicator
(dipstick).
4. Install the indicator and ensure it is fully seated.
5. Fully install the engine oil filler cap by turning the filler cap
clockwise until three clicks can be heard.
To avoid possible oil loss, DO NOT operate the vehicle with the
engine oil level indicator and/or the engine oil filler cap removed.
Maintenance and Specifications
241