child lock MAZDA MODEL B-SERIES 2002 Owners Manual (in English)
[x] Cancel search | Manufacturer: MAZDA, Model Year: 2002, Model line: MODEL B-SERIES, Model: MAZDA MODEL B-SERIES 2002Pages: 287, PDF Size: 2.47 MB
Page 8 of 287

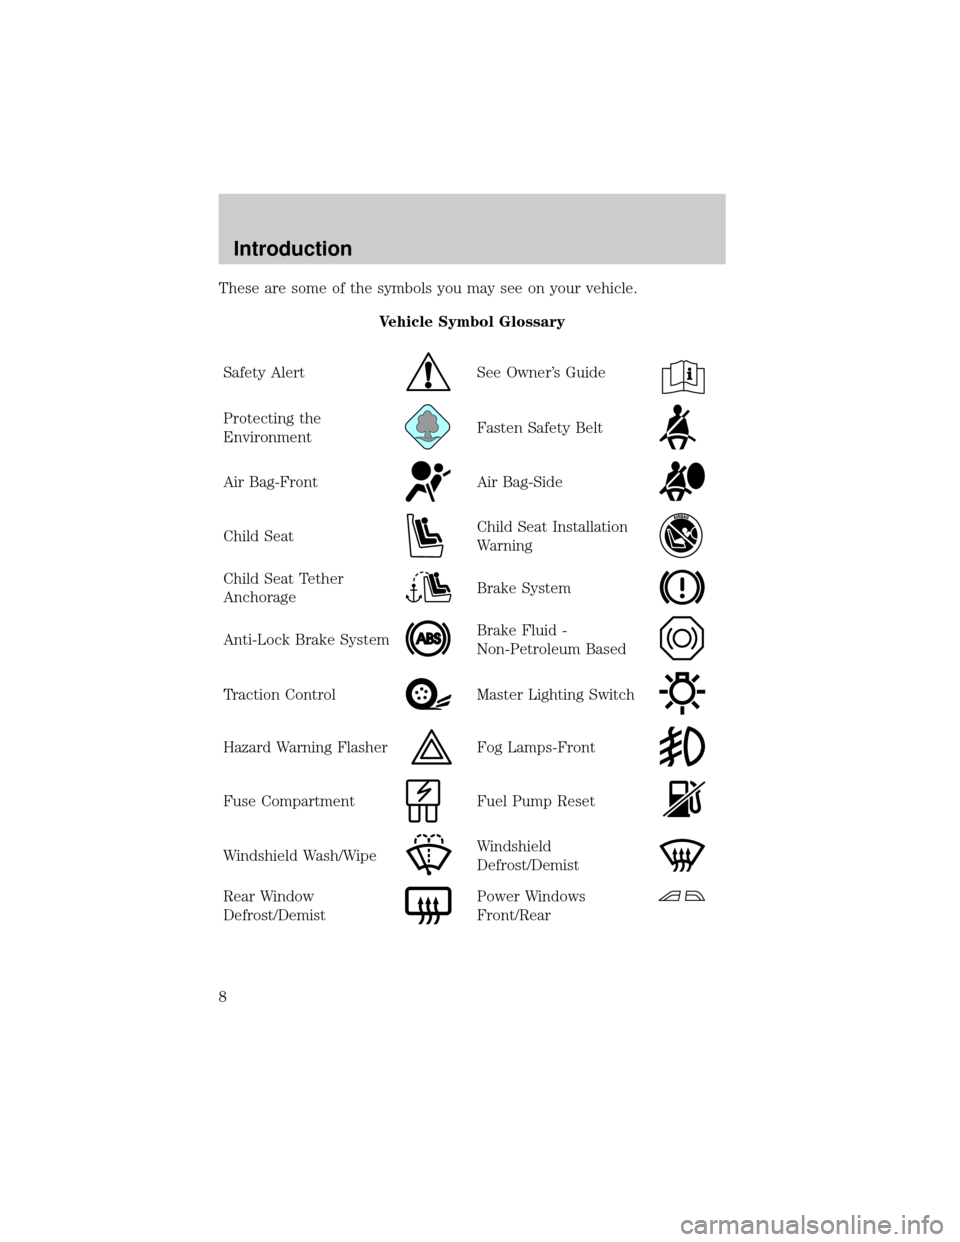
These are some of the symbols you may see on your vehicle.
Vehicle Symbol Glossary
Safety Alert
See Owner's Guide
Protecting the
EnvironmentFasten Safety Belt
Air Bag-FrontAir Bag-Side
Child SeatChild Seat Installation
Warning
Child Seat Tether
AnchorageBrake System
Anti-Lock Brake SystemBrake Fluid -
Non-Petroleum Based
Traction ControlMaster Lighting Switch
Hazard Warning FlasherFog Lamps-Front
Fuse CompartmentFuel Pump Reset
Windshield Wash/WipeWindshield
Defrost/Demist
Rear Window
Defrost/DemistPower Windows
Front/Rear
Introduction
8
Page 9 of 287

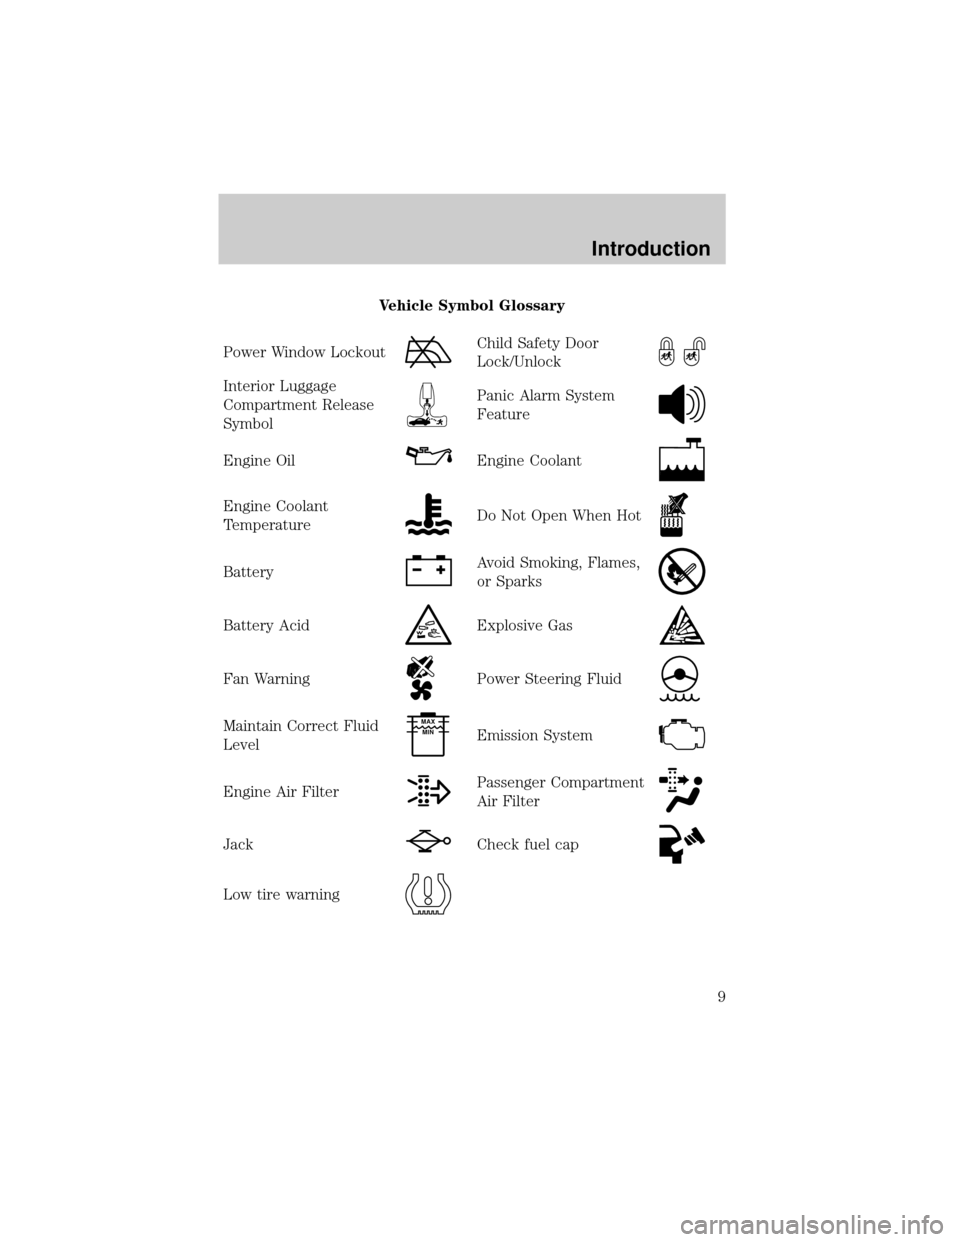
Vehicle Symbol Glossary
Power Window Lockout
Child Safety Door
Lock/Unlock
Interior Luggage
Compartment Release
SymbolPanic Alarm System
Feature
Engine OilEngine Coolant
Engine Coolant
TemperatureDo Not Open When Hot
BatteryAvoid Smoking, Flames,
or Sparks
Battery AcidExplosive Gas
Fan WarningPower Steering Fluid
Maintain Correct Fluid
LevelMAX
MIN
Emission System
Engine Air FilterPassenger Compartment
Air Filter
JackCheck fuel cap
Low tire warning
Introduction
9
Page 81 of 287

Replacing headlamp bulbs
To remove the headlamp bulb:
1. Make sure headlamp switch is in
OFF position, then open the
hood.
2. At the back of the headlamp,
pry up the two retainer pins to
release the headlamp assembly
from the vehicle and pull
headlamp forward.
3. Remove the bulb retaining ring
by rotating it counterclockwise
(when viewed from the rear) to
free it from the bulb socket, and
slide the ring off the plastic
base. Keep the ring to retain the
new bulb.
4. Without turning, remove the old
bulb by gently pulling it straight
back out of the lamp assembly.
To install the new bulb:
Handle a halogen headlamp bulb carefully and keep out of
children's reach. Grasp the bulb only by its plastic base and do
not touch the glass. The oil from your hands could cause the bulb
to break the next time the headlamps are operated.
NOTE: If the bulb is accidentally touched, it should be cleaned with
rubbing alcohol before being used.
1. With the flat side of the bulb's plastic base facing upward, insert the
glass end of the bulb into the lamp assembly. You may need to turn
the bulb left or right to align the grooves in the plastic base with the
tabs in the lamp assembly. When the grooves are aligned, push the
bulb into the lamp assembly until the plastic base contacts the rear
of the lamp assembly.
Lights
81
Page 112 of 287

Pull lever up to adjust seatback.
Using the manual lumbar support (if equipped)
Turn the lumbar support control
clockwise to increase firmness.
Turn the lumbar support control
counterclockwise to increase
softness.
REAR SEATS
Center facing jump seat (2 door SuperCab) (if equipped)
To open, pull inboard and down on the seat handle.
To stow the seat, pull seat bottom back to the fully upright position.
WARNING: Do not install a child seat in a center facing jump
seat.
Seating and Safety Restraints
112
Page 115 of 287

2. To unfasten, push the release
button and remove the tongue
from the buckle.
The front outboard safety restraints in the vehicle are combination lap
and shoulder belts. The front passenger outboard safety belt has two
types of locking modes described below:
Energy Management Feature
²This vehicle has a seat belt system with an energy management
feature at the front outboard seating positions to help further reduce
the risk of injury in the event of a head-on collision.
²This seat belt system has a retractor assembly that is designed to pay
out webbing in a controlled manner. This feature is designed to help
reduce the belt force acting on the occupant's chest.
Vehicle sensitive mode
The vehicle sensitive mode is the normal retractor mode, allowing free
shoulder belt length adjustment to your movements and locking in
response to vehicle movement. For example, if the driver brakes
suddenly or turns a corner sharply, or the vehicle receives an impact of
approximately 8 km/h (5 mph) or more, the combination safety belts will
lock to help reduce forward movement of the driver and passengers.
Automatic locking mode
In this mode, the shoulder belt is automatically pre-locked. The belt will
still retract to remove any slack in the shoulder belt.
The automatic locking mode is not available on the driver safety belt.
When to use the automatic locking mode
²Any timea child safety seat is installed in a passenger front seat.
Refer toSafety Restraints for Children,Safety Seats for Children,
orPassenger air bag On/Off switchlater in this chapter.
Seating and Safety Restraints
115
Page 117 of 287

WARNING: After any vehicle collision, the seat belt system at
all outboard seating positions (except driver, which has no
ªautomatic locking retractorº feature) must be checked by a
qualified technician to verify that the ªautomatic locking
retractorº feature for child seats is still functioning properly. In
addition, all seat belts should be checked for proper function.
WARNING: BELT AND RETRACTOR ASSEMBLY MUST BE
REPLACED if the seat belt assembly ªautomatic locking
retractorº feature or any other seat belt function is not
operating properly when checked according to the procedures in
Workshop Manual.
WARNING: Failure to replace the Belt and Retractor assembly
could increase the risk of injury in collisions.
Safety belt pretensioner
Your vehicle is equipped with safety belt pretensioners at the driver and
front outboard passenger seating positions.
The safety belt pretensioners are designed to activate during certain
frontal or near-frontal collisions with sufficient longitudinal deceleration.
A safety belt pretensioner is a device which tightens the webbing of the
lap and shoulder belts in such a way that they fit more snugly against
the body.
The driver and front outboard passenger safety belt system (including
retractors, buckle assembly, pretensioner assembly with seat and height
adjusters) must be replaced if the vehicle is involved in a collision that
results in the activation of the safety belt pretensioners. Refer to the
Safety belt maintenancesection in this chapter.
WARNING: Failure to replace the safety belt assembly under
the above conditions could result in severe personal injuries in
the event of a collision.
Seating and Safety Restraints
117
Page 138 of 287

When installing a child safety seat:
²Review and follow the information
presented in theAir Bag
Supplemental Restraint System
section in this chapter.
²Use the correct safety belt buckle
for that seating position (the
buckle closest to the direction the
tongue is coming from).
²Insert the belt tongue into the
proper buckle until you hear a
snap and feel it latch. Make sure
the tongue is securely fastened in
the buckle.
²Keep the buckle release button
pointing up and away from the
safety seat, with the tongue
between the child seat and the
release button, to prevent accidental unbuckling.
²Place seat back in upright position.
²Put the safety belt in the automatic locking mode. Refer toAutomatic
locking mode(passenger side front seat).
Mazda recommends the use of a child safety seat having a top tether
strap. Install the child safety seat in a seating position which is capable
of providing a tether anchorage. For more information on top tether
straps, refer toAttaching child safety seats with tether straps.
WARNING: Carefully follow all of the manufacturer's
instructions included with the safety seat you put in your
vehicle. If you do not install and use the safety seat properly,
the child may be injured in a sudden stop or collision.
Seating and Safety Restraints
138
Page 140 of 287

3. While holding the shoulder and
lap belt portions together, route
the tongue through the child
seat according to the child seat
manufacturer's instructions. Be
sure the belt webbing is not
twisted.
4. Insert the belt tongue into the
proper buckle (the buckle
closest to the direction the
tongue is coming from) for that
seating position until you hear
and feel the latch engage. Make
sure the tongue is latched
securely by pulling on it.
5. To put the retractor in the
automatic locking mode, grasp
the shoulder portion of the belt
and pull downward until all of
the belt is extracted and a click
is heard.
6. Allow the belt to retract. The belt will click as it retracts to indicate
it is in the automatic locking mode.
Seating and Safety Restraints
140
Page 141 of 287

7. Pull the lap belt portion across
the child seat toward the buckle
and pull up on the shoulder belt
while pushing down with knee
on the child seat.
8. Allow the safety belt to retract
to remove any slack in the belt.
9. Before placing the child in the
seat, forcibly tilt the seat
forward and back to make sure
the seat is securely held in
place. To check this, grab the
seat at the belt path and
attempt to move it side to side
and forward and back. There
should be no more than one
inch of movement for proper installation.
10. Try to pull the belt out of the retractor to make sure the retractor is
in the automatic locking mode (you should not be able to pull more
belt out). If the retractor is not locked, unbuckle the belt and repeat
steps two through nine.
Check to make sure the child seat is properly secured before each use.
Attaching child safety seats with tether straps
Most new forward-facing child safety seats include a tether strap which
goes over the back of the seat and hooks to an anchoring point. Tether
straps are available as an accessory for many older safety seats. Contact
the manufacturer of your child seat for information about ordering a
tether strap.
The tether anchors in your vehicle are located on the back of the front
seat cushion.
Seating and Safety Restraints
141
Page 281 of 287

A
ABS (see Brakes) .....................152
Air bag supplemental restraint
system ........................................125
and child safety seats ............127
description ..............................125
disposal ....................................130
driver air bag ..........................128
indicator light ...................16, 129
operation .................................128
passenger air bag ...................128
passenger deactivation
switch ......................................130
Air conditioning
manual heating and air
conditioning system .................74
Ambulance packages ....................7
Antifreeze
(see Engine coolant) ................246
Anti-lock brake system
(see Brakes) ......................152±153
Anti-theft system
warning light .............................18
Audio system
(see Radio) ......................23, 48, 57
Automatic transmission ............157
driving an automatic
overdrive .................................158
fluid, adding ............................263
fluid, checking ........................263
fluid, refill capacities ..............273
fluid, specification ..................277
Auxiliary power point ...........88, 98
Axle
lubricant specifications ..276±277
refill capacities ........................273
traction lok ..............................155B
Battery .......................................244
acid, treating emergencies .....244
charging system
warning light .............................17
jumping a disabled battery ....201
maintenance-free ....................244
servicing ..................................244
voltage gauge ............................21
Bed extender ..............................99
BeltMinder .................................121
Brakes ........................................152
anti-lock ...........................152±153
anti-lock brake system
(ABS) warning light .........16, 153
brake warning light ..................15
fluid, checking and adding ....262
fluid, refill capacities ..............273
fluid, specifications .........276±277
lubricant specifications ..276±277
parking ....................................154
shift interlock ..........................157
Break-in period .............................5
Bulbs ............................................79
C
Capacities for refilling fluids ....273
Cargo area shade ........................98
Cargo net .....................................98
CD-6 disc .....................................57
CD-single .....................................27
CD-single premium .....................48
Cell phone warning ...................280
Certification Label ....................278
Changing a tire .........................194
Index
281