tires MAZDA MODEL B-SERIES 2002 Owners Manual (in English)
[x] Cancel search | Manufacturer: MAZDA, Model Year: 2002, Model line: MODEL B-SERIES, Model: MAZDA MODEL B-SERIES 2002Pages: 287, PDF Size: 2.47 MB
Page 2 of 287

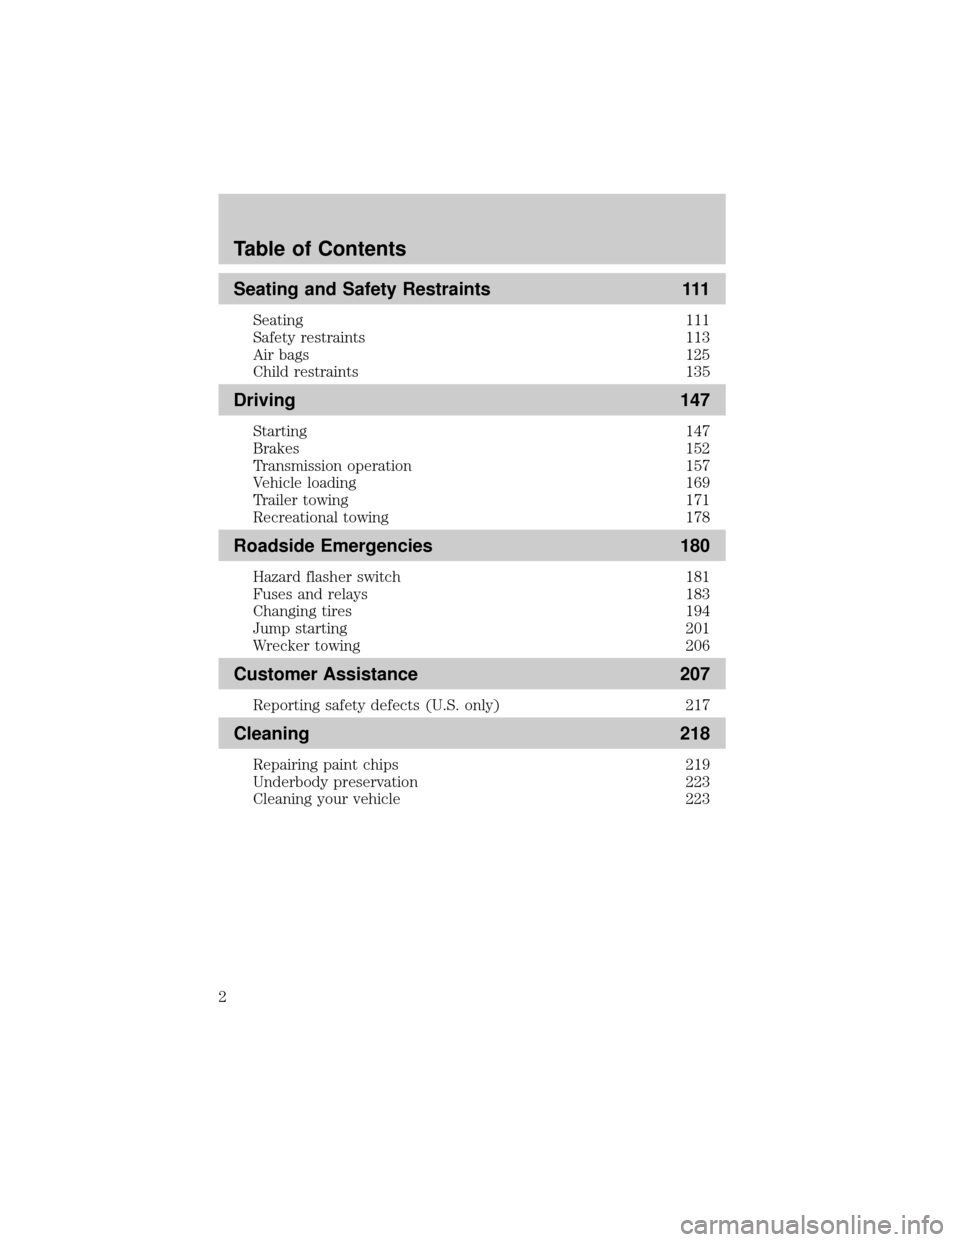
Seating and Safety Restraints 111
Seating 111
Safety restraints 113
Air bags 125
Child restraints 135
Driving 147
Starting 147
Brakes 152
Transmission operation 157
Vehicle loading 169
Trailer towing 171
Recreational towing 178
Roadside Emergencies 180
Hazard flasher switch 181
Fuses and relays 183
Changing tires 194
Jump starting 201
Wrecker towing 206
Customer Assistance 207
Reporting safety defects (U.S. only) 217
Cleaning 218
Repairing paint chips 219
Underbody preservation 223
Cleaning your vehicle 223
Table of Contents
2
Page 155 of 287

Pull the release lever to release the
brake.
Driving with the parking brake
on will cause the brakes to wear
out quickly and reduce fuel
economy.
STEERING
Your vehicle is equipped with power steering. Power steering uses energy
from the engine to help steer the vehicle.
To prevent damage to the power steering pump:
²Never hold the steering wheel to the extreme right or the extreme left
for more than a few seconds when the engine is running.
²Do not operate the vehicle with a low power steering pump fluid level
(below the MIN mark on the reservoir).
If the power steering system breaks down (or if the engine is turned
off), you can steer the vehicle manually, but it takes more effort.
If the steering wanders or pulls, the condition could be caused by any of
the following:
²underinflated tire(s) on any wheel(s)
²uneven vehicle loading
²high crown in center of road
²high crosswinds
²wheels out of alignment
²loose or worn suspension components
TRACTION-LOK AXLE (IF EQUIPPED)
This axle provides added traction on slippery surfaces, particularly when
one wheel is on a poor traction surface. Under normal conditions, the
Traction-Lok axle functions like a standard rear axle.
Extended use of other than the manufacturer's specified size tires on a
Traction-Lok rear axle could result in a permanent reduction inBRAKE
RELEASE
Driving
155
Page 156 of 287

effectiveness. This loss of effectiveness does not affect normal driving
and should not be noticeable to the driver.
WARNING: To reduce the risk of injury, never run the engine
with one wheel off the ground, such as when changing a tire.
PREPARING TO DRIVE YOUR VEHICLE
WARNING: Utility vehicles have a significantly higher rollover
rate than other types of vehicles.
WARNING: In a rollover crash, an unbelted person is
significantly more likely to die than a person wearing a seat
belt.
Your vehicle has special design and equipment features to make it
capable of performing in a wide variety of circumstances. These special
design features, such as larger tires and increased ground clearance, give
the vehicle a higher center of gravity than a passenger car.
WARNING: Vehicles with a higher center of gravity such as
utility and four-wheel drive vehicles handle differently than
vehicles with a lower center of gravity. Utility and four-wheel
drive vehicles are not designed for cornering at speeds as high
as passenger cars. Avoid sharp turns, excessive speed and
abrupt maneuvers in these vehicles. Failure to drive cautiously
could result in an increased risk of vehicle rollover, personal
injury and death.
WARNING: Loaded vehicles, with a higher center of gravity,
may handle differently than unloaded vehicles. Extra
precautions, such as slower speeds and increased stopping
distance, should be taken when driving a heavily loaded vehicle.
Your vehicle has the capability to haul more cargo and people than most
passenger cars. Depending upon the type and placement of the load,
hauling people and cargo may raise the center of gravity of the vehicle.
Use extra caution while becoming familiar with your vehicle. Know the
capabilities and limitations of both you as a driver and your vehicle.
Driving
156
Page 157 of 287

AUTOMATIC TRANSMISSION OPERATION (IF EQUIPPED)
Brake-shift interlock
This vehicle is equipped with a brake-shift interlock feature that prevents
the gearshift lever from being moved from P (Park) when the ignition is
in the ON position unless the brake pedal is depressed.
If you cannot move the gearshift lever out of P (Park) with ignition in
the ON position and the brake pedal depressed:
1. Apply the parking brake, turn ignition key to LOCK, then remove the
key.
2. Insert the key and turn it to OFF.Apply the brake pedal and shift
to N (Neutral).
3. Start the vehicle.
If it is necessary to use the above procedure to move the gearshift lever,
it is possible that a fuse has blown or the vehicle's brakelamps are not
operating properly. Refer toFuses and relaysin theRoadside
emergencieschapter.
WARNING: Do not drive your vehicle until you verify that the
brakelamps are working.
If your vehicle gets stuck in mud or snow it may be rocked out by
shifting from forward and reverse gears, stopping between shifts, in a
steady pattern. Press lightly on the accelerator in each gear.
Do not rock the vehicle if the engine is not at normal operating
temperature or damage to the transmission may occur.
Do not rock the vehicle for more than a few minutes or damage
to the transmission and tires may occur or the engine may
overheat.
WARNING: Always set the parking brake fully and make sure
the gearshift is latched in P (Park). Turn the ignition to the
LOCK position and remove the key whenever you leave your
vehicle.
Driving
157
Page 167 of 287

You should either know the terrain or examine maps of the area before
driving. Map out your route before driving in the area. For more
information on driving off-road, read the ªFour Wheelingº supplement in
your owner's portfolio.
If your vehicle gets stuck
If the vehicle is stuck it may be rocked out by shifting from forward and
reverse gears, stopping between shifts, in a steady pattern. Press lightly
on the accelerator in each gear.
Do not rock the vehicle if the engine is not at normal operating
temperature or damage to the transmission may occur.
Do not rock the vehicle for more than a few minutes or damage
to the transmission and tires may occur or the engine may
overheat.
WARNING: Do not spin the wheels at over 56 km/h (35 mph).
The tires may fail and injure a passenger or bystander.
Sand
When driving over sand, try to keep all four wheels on the most solid
area of the trail. Do not reduce the tire pressures but shift to a lower
gear and drive steadily through the terrain. Apply the accelerator slowly
and avoid spinning the wheels.
Mud and water
If you must drive through high water, drive slowly. Traction or brake
capability may be limited.
When driving through water, determine the depth; avoid water higher
than the bottom of the hubs (if possible) and proceed slowly. If the
ignition system gets wet, the vehicle may stall.
Once through water, always try the brakes. Wet brakes do not stop the
vehicle as effectively as dry brakes. Drying can be improved by moving
your vehicle slowly while applying light pressure on the brake pedal.
After driving through mud, clean off residue stuck to the driveshafts and
tires. Excess mud stuck on tires and rotating driveshafts causes an
imbalance that could damage drive components.
If the transmission, transfer case or front axle are submerged in water,
their fluids should be checked and changed, if necessary.
Driving
167
Page 170 of 287

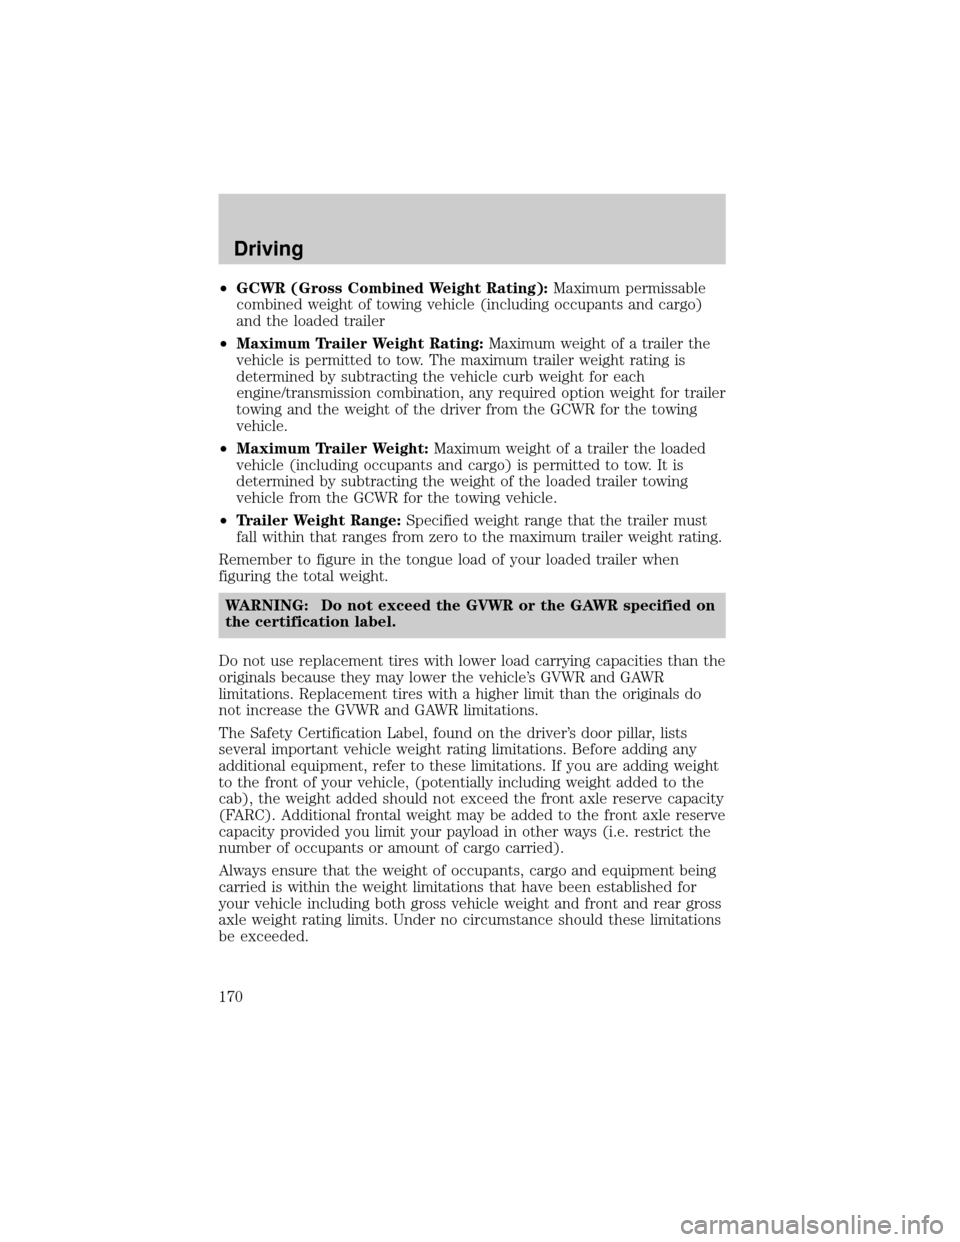
²GCWR (Gross Combined Weight Rating):Maximum permissable
combined weight of towing vehicle (including occupants and cargo)
and the loaded trailer
²Maximum Trailer Weight Rating:Maximum weight of a trailer the
vehicle is permitted to tow. The maximum trailer weight rating is
determined by subtracting the vehicle curb weight for each
engine/transmission combination, any required option weight for trailer
towing and the weight of the driver from the GCWR for the towing
vehicle.
²Maximum Trailer Weight:Maximum weight of a trailer the loaded
vehicle (including occupants and cargo) is permitted to tow. It is
determined by subtracting the weight of the loaded trailer towing
vehicle from the GCWR for the towing vehicle.
²Trailer Weight Range:Specified weight range that the trailer must
fall within that ranges from zero to the maximum trailer weight rating.
Remember to figure in the tongue load of your loaded trailer when
figuring the total weight.
WARNING: Do not exceed the GVWR or the GAWR specified on
the certification label.
Do not use replacement tires with lower load carrying capacities than the
originals because they may lower the vehicle's GVWR and GAWR
limitations. Replacement tires with a higher limit than the originals do
not increase the GVWR and GAWR limitations.
The Safety Certification Label, found on the driver's door pillar, lists
several important vehicle weight rating limitations. Before adding any
additional equipment, refer to these limitations. If you are adding weight
to the front of your vehicle, (potentially including weight added to the
cab), the weight added should not exceed the front axle reserve capacity
(FARC). Additional frontal weight may be added to the front axle reserve
capacity provided you limit your payload in other ways (i.e. restrict the
number of occupants or amount of cargo carried).
Always ensure that the weight of occupants, cargo and equipment being
carried is within the weight limitations that have been established for
your vehicle including both gross vehicle weight and front and rear gross
axle weight rating limits. Under no circumstance should these limitations
be exceeded.
Driving
170
Page 172 of 287

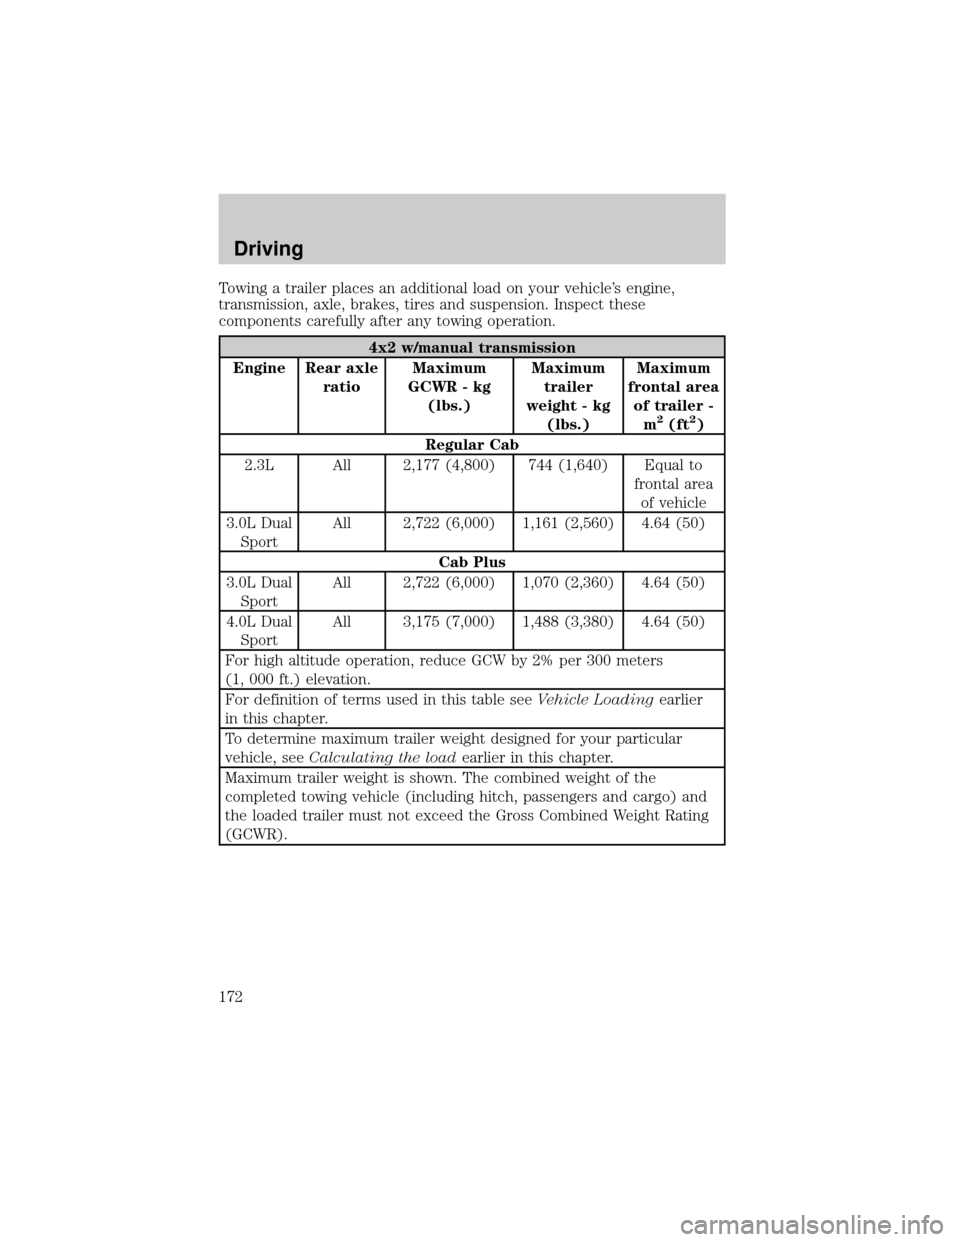
Towing a trailer places an additional load on your vehicle's engine,
transmission, axle, brakes, tires and suspension. Inspect these
components carefully after any towing operation.
4x2 w/manual transmission
Engine Rear axle
ratioMaximum
GCWR - kg
(lbs.)Maximum
trailer
weight - kg
(lbs.)Maximum
frontal area
of trailer -
m
2(ft2)
Regular Cab
2.3L All 2,177 (4,800) 744 (1,640) Equal to
frontal area
of vehicle
3.0L Dual
SportAll 2,722 (6,000) 1,161 (2,560) 4.64 (50)
Cab Plus
3.0L Dual
SportAll 2,722 (6,000) 1,070 (2,360) 4.64 (50)
4.0L Dual
SportAll 3,175 (7,000) 1,488 (3,380) 4.64 (50)
For high altitude operation, reduce GCW by 2% per 300 meters
(1, 000 ft.) elevation.
For definition of terms used in this table seeVehicle Loadingearlier
in this chapter.
To determine maximum trailer weight designed for your particular
vehicle, seeCalculating the loadearlier in this chapter.
Maximum trailer weight is shown. The combined weight of the
completed towing vehicle (including hitch, passengers and cargo) and
the loaded trailer must not exceed the Gross Combined Weight Rating
(GCWR).
Driving
172
Page 194 of 287

CHANGING THE TIRES
If you get a flat tire while driving, do not apply the brake heavily.
Instead, gradually decrease your speed. Hold the steering wheel firmly
and slowly move to a safe place on the side of the road.
Roadside Emergencies
194
Page 195 of 287

Temporary spare tire information
Your vehicle may have a temporary or conventional spare tire. The
temporary spare tire for your vehicle is labeled as such. It is smaller than
a regular tire and is designed for emergency use only. Replace this tire
with a full-size tire as soon as possible.
It is not recommended that the vehicle be operated in 4WD modes with
a temporary spare. If 4WD operation is necessary, do not operate above
speeds of 16 km/h (10 mph) or for distances above 80 km (50 miles).
WARNING: If you use the temporary spare tire continuously or
do not follow these precautions, the tire could fail, causing you
to lose control of the vehicle, possibly injuring yourself or
others.
When driving with the temporary spare tiredo not:
²exceed 80 km/h (50 mph) under any circumstances
²load the vehicle beyond maximum vehicle load rating listed on the
Safety Compliance Label
²tow a trailer
²use tire chains
²drive through an automatic car wash, because of the vehicle's reduced
ground clearance
²try to repair the temporary spare tire or remove it from its wheel rim
²use the wheel for any other type of vehicle
Conventional spare tire information
If you have the conventional spare tire, you can use it as a spare or a
regular tire. The spare is identical to the other tires on your vehicle,
although the wheel may not match.
Roadside Emergencies
195
Page 197 of 287

2. If equipped, unlock and remove
the spare tire carrier lock from
the rear access hole located just
above the rear bumper and
below the tailgate.
3. Insert the straight end of the
jack handle into the rear access
hole located just above the rear
bumper and below the tailgate.
Forward motion will stop and
resistance to turning will be felt
when properly engaged.
4. Turn the handle
counterclockwise until tire is
lowered to the ground and the cable is slightly slack.
5. Remove the retainer from the spare tire.
Stowing the spare tire
1. Lay the tire on the ground with the valve stem facing up.
2. Install the retainer through the
wheel center and slide the
wheel under the vehicle.
3. Turn the spare handle clockwise
until the tire is raised to its
original position underneath the
vehicle. The spare handle
ratchets when the tire is raised
to the stowed position. It will
not allow you to overtighten.
4. If your vehicle is equipped with P265/75 R15 AT tires, do not stow a
flat or inflated full size spare tire in the spare tire carrier. The flat
Roadside Emergencies
197