display MAZDA MODEL B-SERIES 2004 Owners Manual (in English)
[x] Cancel search | Manufacturer: MAZDA, Model Year: 2004, Model line: MODEL B-SERIES, Model: MAZDA MODEL B-SERIES 2004Pages: 256, PDF Size: 1.97 MB
Page 18 of 256

AM/FM STEREO (IF EQUIPPED)1. AM/FM: Press to select
AM/FM1/FM2 frequency bands.
2. CLK: Press until SELECT
HOUR / SELECT MINUTE
appears.
Press
AUDIOto adjust
the hours/minutes.
Press CLK to display the time when the ignition is off.
3. AUDIO: Press AUDIO to toggle
through the following modes
and use
/to make
adjustments in those modes.
Bass: Press
AUDIOto decrease/increase the bass setting.
Treble: Press
AUDIOto decrease/increase the treble setting.
Balance: Press
AUDIOto adjust the audio between the left and
right speakers.
2004 Mazda B Series (mbs)
Owners Guide (post-2002-fmt)
Canadian French (fr-can)
Entertainment Systems
Entertainment Systems
18
Page 20 of 256

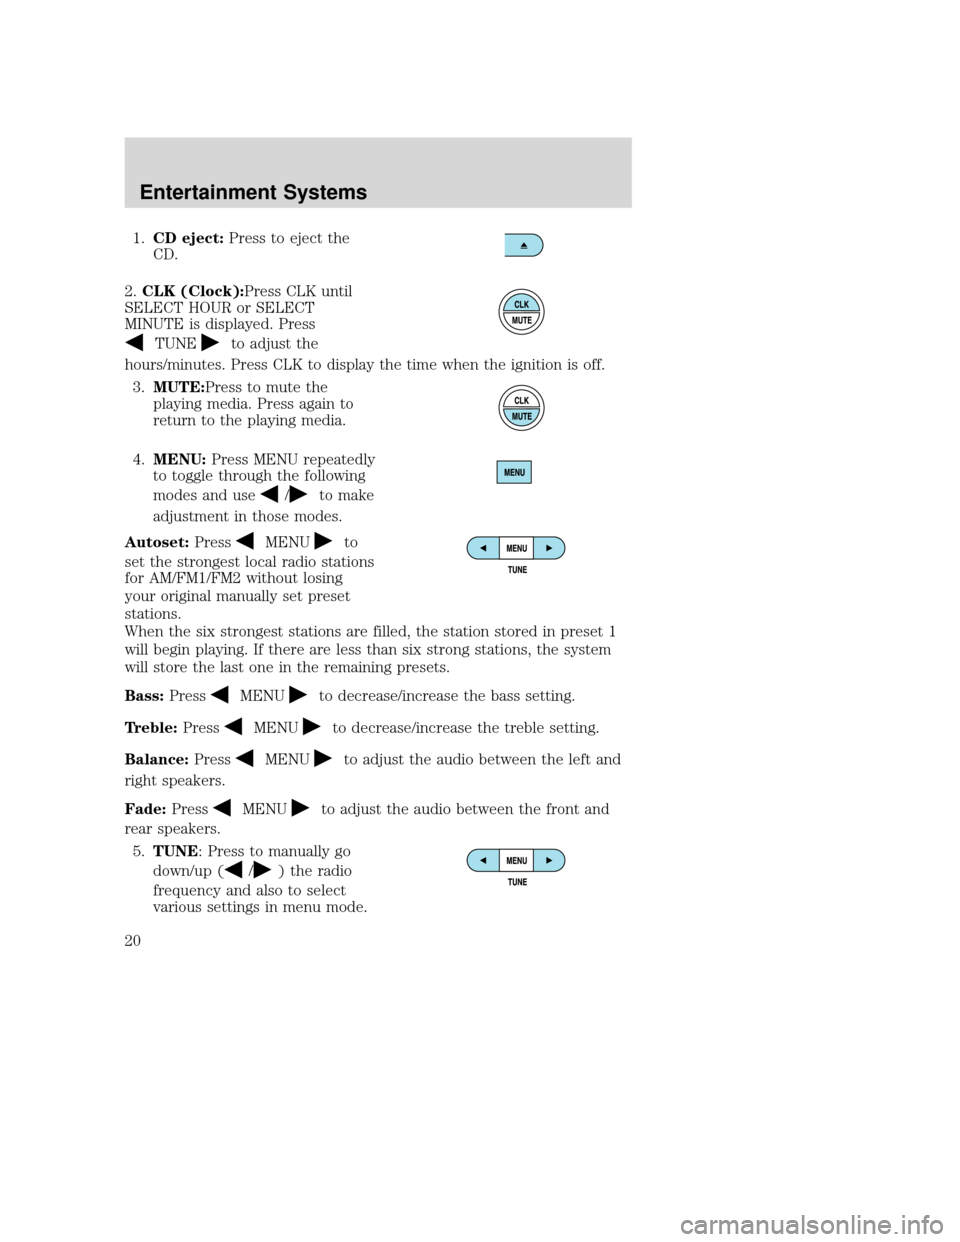
1.CD eject: Press to eject the
CD.
2. CLK (Clock):Press CLK until
SELECT HOUR or SELECT
MINUTE is displayed. Press
TUNEto adjust the
hours/minutes. Press CLK to display the time when the ignition is off.
3. MUTE:Press to mute the
playing media. Press again to
return to the playing media.
4. MENU: Press MENU repeatedly
to toggle through the following
modes and use
/to make
adjustment in those modes.
Autoset: Press
MENUto
set the strongest local radio stations
for AM/FM1/FM2 without losing
your original manually set preset
stations.
When the six strongest stations are filled, the station stored in preset 1
will begin playing. If there are less than six strong stations, the system
will store the last one in the remaining presets.
Bass: Press
MENUto decrease/increase the bass setting.
Treble: Press
MENUto decrease/increase the treble setting.
Balance: Press
MENUto adjust the audio between the left and
right speakers.
Fade: Press
MENUto adjust the audio between the front and
rear speakers.
5. TUNE: Press to manually go
down/up (
/) the radio
frequency and also to select
various settings in menu mode.
2004 Mazda B Series (mbs)
Owners Guide (post-2002-fmt)
Canadian French (fr-can)
Entertainment Systems
20
Page 23 of 256

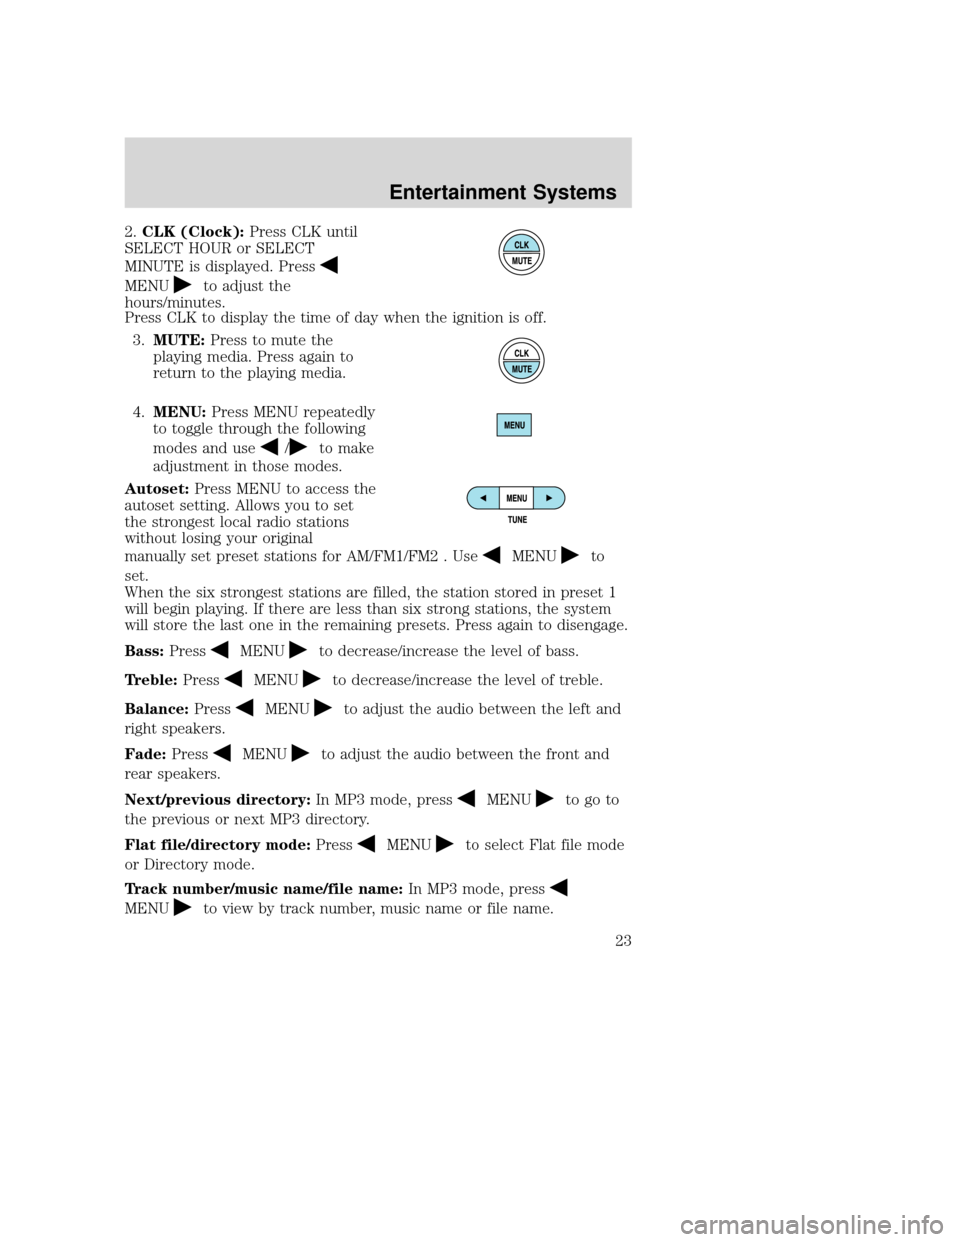
2.CLK (Clock): Press CLK until
SELECT HOUR or SELECT
MINUTE is displayed. Press
MENUto adjust the
hours/minutes.
Press CLK to display the time of day when the ignition is off.
3. MUTE: Press to mute the
playing media. Press again to
return to the playing media.
4. MENU: Press MENU repeatedly
to toggle through the following
modes and use
/to make
adjustment in those modes.
Autoset: Press MENU to access the
autoset setting. Allows you to set
the strongest local radio stations
without losing your original
manually set preset stations for AM/FM1/FM2 . Use
MENUto
set.
When the six strongest stations are filled, the station stored in preset 1
will begin playing. If there are less than six strong stations, the system
will store the last one in the remaining presets. Press again to disengage.
Bass: Press
MENUto decrease/increase the level of bass.
Treble: Press
MENUto decrease/increase the level of treble.
Balance: Press
MENUto adjust the audio between the left and
right speakers.
Fade: Press
MENUto adjust the audio between the front and
rear speakers.
Next/previous directory: In MP3 mode, press
MENUto go to
the previous or next MP3 directory.
Flat file/directory mode: Press
MENUto select Flat file mode
or Directory mode.
Track number/music name/file name: In MP3 mode, press
MENUto view by track number, music name or file name.
2004 Mazda B Series(mbs)
Owners Guide (post-2002-fmt)
Canadian French (fr-can)
Entertainment Systems
23
Page 26 of 256

labels. Ballpoint pens may damage CDs. Please contact your
dealer for further information.
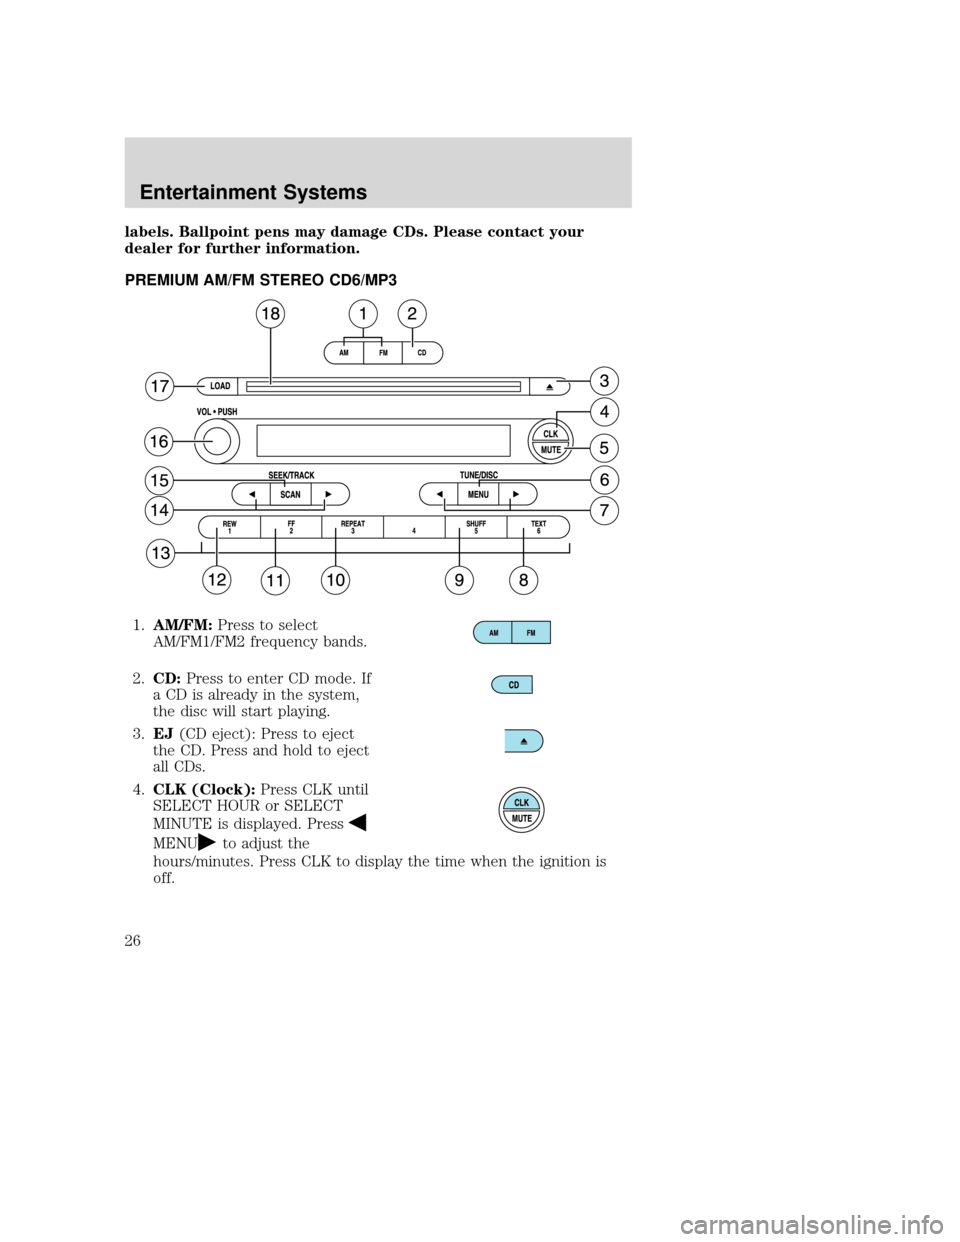
PREMIUM AM/FM STEREO CD6/MP31. AM/FM: Press to select
AM/FM1/FM2 frequency bands.
2. CD: Press to enter CD mode. If
a CD is already in the system,
the disc will start playing.
3. EJ (CD eject): Press to eject
the CD. Press and hold to eject
all CDs.
4. CLK (Clock): Press CLK until
SELECT HOUR or SELECT
MINUTE is displayed. Press
MENUto adjust the
hours/minutes. Press CLK to display the time when the ignition is
off.
2004 Mazda B Series (mbs)
Owners Guide (post-2002-fmt)
Canadian French (fr-can)
Entertainment Systems
26
Page 27 of 256

5.MUTE: Press to mute the
playing media. Press again to
return to the playing media.
6. MENU: Press MENU repeatedly
to toggle through the following
modes and use
/to make
adjustment in those modes.
Autoset: Allows you to set the
strongest local radio stations
without losing your original
manually set preset stations for
AM/FM1/FM2 . Press MENU to access. Use
MENUto set.
When the six strongest stations are filled, the station stored in preset 1
will begin playing. If there are less than six strong stations, the system
will store the last one in the remaining presets.
Bass: Press
MENUto decrease/increase the bass setting.
Treble: Press
MENUto decrease/increase the treble setting.
Balance: Press
MENUto adjust the audio between the left and
right speakers.
Fade: Press
MENUto adjust the audio between the front and
rear speakers.
Next/previous directory: In MP3 mode, press MENU
/to go to
the previous/next directory.
Flat file/directory mode: In MP3 mode, press MENU to access this
feature. Use
MENUto select flat file mode or directory mode.
Track #/normal music name/file name: Press MENU to access and
use
/to scroll through MP3 display options (track #, normal music
name or file name).
7. TUNE/DISC: Press to manually go down/up (
/) the radio
frequency, select the previous/next CD or to select various settings
in menu mode. In MP3 directory mode, press
/to access the
previous/next directory
8. TEXT: In MP3 normal music name/file name mode, press to view the
next 12 characters in the MP3 music name/filename of the current
MP3 track and directory.
2004 Mazda B Series (mbs)
Owners Guide (post-2002-fmt)
Canadian French (fr-can)
Entertainment Systems
27
Page 29 of 256

CD units are designed to play commercially pressed 12 cm (4.75
in) audio compact discs only. Due to technical incompatibility,
certain recordable and re-recordable compact discs may not
function correctly when used in Mazda CD players. Irregular
shaped CDs, CDs with a scratch protection film attached, and CDs
with homemade paper (adhesive) labels should not be inserted
into the CD player. The label may peel and cause the CD to
become jammed. It is recommended that homemade CDs be
identified with permanent felt tip marker rather than adhesive
labels. Ballpoint pens may damage CDs. Please contact your
dealer for further information.
RADIO FREQUENCIES
AM and FM frequencies are established by the Federal Communications
Commission (FCC) and the Canadian Radio and Telecommunications
Commission (CRTC). Those frequencies are:
AM - 530, 540–1700, 1710 kHz
FM- 87.7, 87.9–107.7, 107.9 MHz
RADIO RECEPTION FACTORS
There are three factors that can affect radio reception:
•Distance/strength: The further you travel from an FM station, the
weaker the signal and the weaker the reception.
• Terrain: Hills, mountains, tall buildings, power lines, electric fences,
traffic lights and thunderstorms can interfere with your reception.
• Station overload: When you pass a broadcast tower, a stronger signal
may overtake a weaker one and play while the weak station frequency
is displayed.
CASSETTE/PLAYER CARE
Do:
• Use only cassettes that are 90 minutes long or less.
• Tighten very loose tapes by inserting a finger or pencil into the hole
and turning the hub.
• Remove loose labels before inserting tapes.
• Allow tapes which have been subjected to extreme heat, humidity or
cold to reach a moderate temperature before playing.
• Clean the cassette player head with a cassette cleaning cartridge after
10–12 hours of play to maintain good sound/operation.
2004 Mazda B Series (mbs)
Owners Guide (post-2002-fmt)
Canadian French (fr-can)
Entertainment Systems
29
Page 46 of 256

One touch down
Allows the driver’s window to open
fully without holding the control
down. Press completely down on
AUTO and release quickly. Press
again to stop.
AUTOMATIC DIMMING REAR VIEW MIRRORS (IF EQUIPPED)
When the inside rear view mirror detects bright light from behind the
vehicle, the inside rear view mirror will automatically darken to minimize
glare.
Do not block the sensor on the backside of the inside rear view mirror
since this may impair proper system performance.
Press the left button on the mirror
to turn the auto dimming ON or
OFF. The green indicator light left
of the display will illuminate when
this feature is ON.
COMPASS/TEMPERATURE EC MIRROR (IF EQUIPPED)
The compass reading may be affected when you drive near large
buildings, bridges, power lines and powerful broadcast antennas.
Magnetic or metallic objects placed in, on or near the vehicle may also
affect compass accuracy.
Usually, when something affects the compass readings, the compass will
correct itself after a few days of operating your vehicle in normal
conditions. If the compass still appears to be inaccurate, a manual
calibration may be necessary. Refer to Compass calibration
adjustment.
Most geographic areas (zones) have a magnetic north compass point that
varies slightly from the northerly direction on maps. This variation is four
degrees between adjacent zones and will become noticeable as the
vehicle crosses multiple zones. A correct zone setting will eliminate this
error. Refer to Compass zone adjustment.
2004 Mazda B Series (mbs)
Owners Guide (post-2002-fmt)
Canadian French (fr-can)
Driver Controls
46
Page 47 of 256

Outside air temperature
Display operation of the mirror with
the compass feature:
•Press the right button to toggle
the display between the compass
direction and no display.
Display operation of mirror with
temperature and compass feature:
• Press the right button once to
display temperature °F and
compass.
• Press the right button twice to display temperature °C and compass.
• Press the right button three times to turn the display OFF.
WARNING: The outside temperature indicator is not designed
to serve as an ICE warning device and is therefore unsuitable
for that purpose. Indicated temperatures just above the
freezing point does not guarantee that the road surface is free
of ice.
Compass zone adjustment 1. Determine which compass zone you are in by referring to the
zone map.
2. Turn ignition to the ON position.
123
4
5
6 7 8 9 1011 12 13 14 15
2004 Mazda B Series
(mbs)
Owners Guide (post-2002-fmt)
Canadian French (fr-can)
Driver Controls
47
Page 48 of 256

3. To change the zone setting,push and hold the right button
until ZONE appears in the
display.
4. Press the right button repeatedly until desired
compass zone number is
displayed. The display will
change back to the compass
direction after 3 seconds when
the button is not activated.
Compass calibration adjustment
The compass calibrates itself under normal driving conditions. There is
not a need for manual compass calibration. If calibration is still desired,
follow these instructions: 1. Start the vehicle.
2. For optimum calibration, turn off all electrical accessories and make sure that all vehicle doors are shut.
3. Perform this adjustment in an open area free from steel structures and high voltage lines.
4. Press and hold the left button for approximately 3 seconds
until CAL appears in the display.
Release the left button to enter
the calibration mode.
5. Drive the vehicle slowly (less than 5 km/h [3 mph] in a circle
until CAL indicator disappears
in the display (about two or
three circles).
6. The compass is now calibrated.
2004 Mazda B Series (mbs)
Owners Guide (post-2002-fmt)
Canadian French (fr-can)
Driver Controls
48