lock MAZDA MODEL B-SERIES 2005 (in English) User Guide
[x] Cancel search | Manufacturer: MAZDA, Model Year: 2005, Model line: MODEL B-SERIES, Model: MAZDA MODEL B-SERIES 2005Pages: 254, PDF Size: 2.13 MB
Page 41 of 254
4. Turn the headlamps on and make sure they work properly. If the
headlamp was correctly aligned before you changed the bulb, you
should not need to align it again.
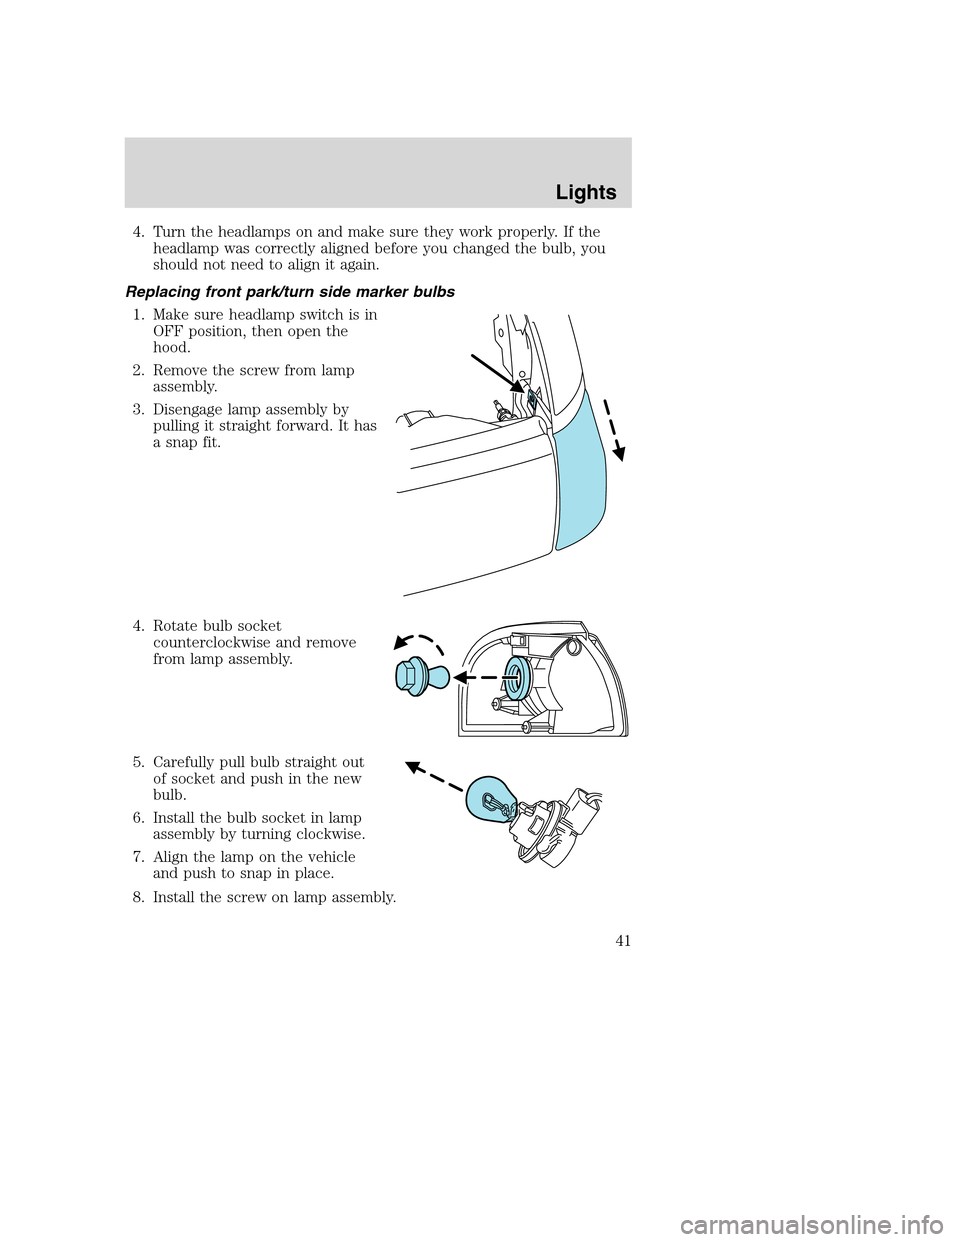
Replacing front park/turn side marker bulbs
1. Make sure headlamp switch is in
OFF position, then open the
hood.
2. Remove the screw from lamp
assembly.
3. Disengage lamp assembly by
pulling it straight forward. It has
a snap fit.
4. Rotate bulb socket
counterclockwise and remove
from lamp assembly.
5. Carefully pull bulb straight out
of socket and push in the new
bulb.
6. Install the bulb socket in lamp
assembly by turning clockwise.
7. Align the lamp on the vehicle
and push to snap in place.
8. Install the screw on lamp assembly.
REVIEW COPY
2005 Mazda B Series(mbs), Owners Guide (post-2002-fmt)(own2002),
Market:Canadian_French(fr_can)
Lights
41
Page 42 of 254
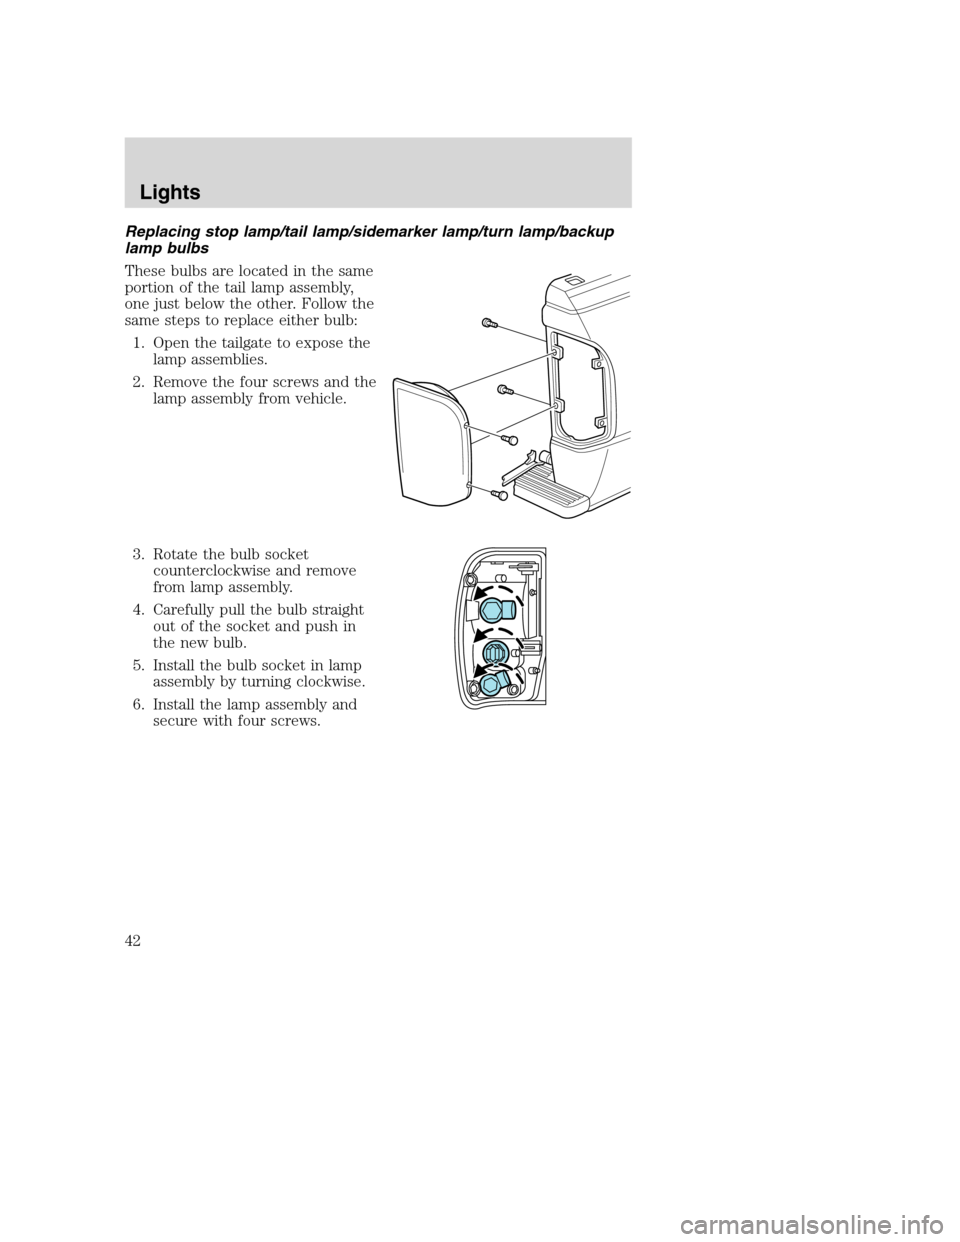
Replacing stop lamp/tail lamp/sidemarker lamp/turn lamp/backup
lamp bulbs
These bulbs are located in the same
portion of the tail lamp assembly,
one just below the other. Follow the
same steps to replace either bulb:
1. Open the tailgate to expose the
lamp assemblies.
2. Remove the four screws and the
lamp assembly from vehicle.
3. Rotate the bulb socket
counterclockwise and remove
from lamp assembly.
4. Carefully pull the bulb straight
out of the socket and push in
the new bulb.
5. Install the bulb socket in lamp
assembly by turning clockwise.
6. Install the lamp assembly and
secure with four screws.
REVIEW COPY
2005 Mazda B Series(mbs), Owners Guide (post-2002-fmt)(own2002),
Market:Canadian_French(fr_can)
Lights
42
Page 43 of 254
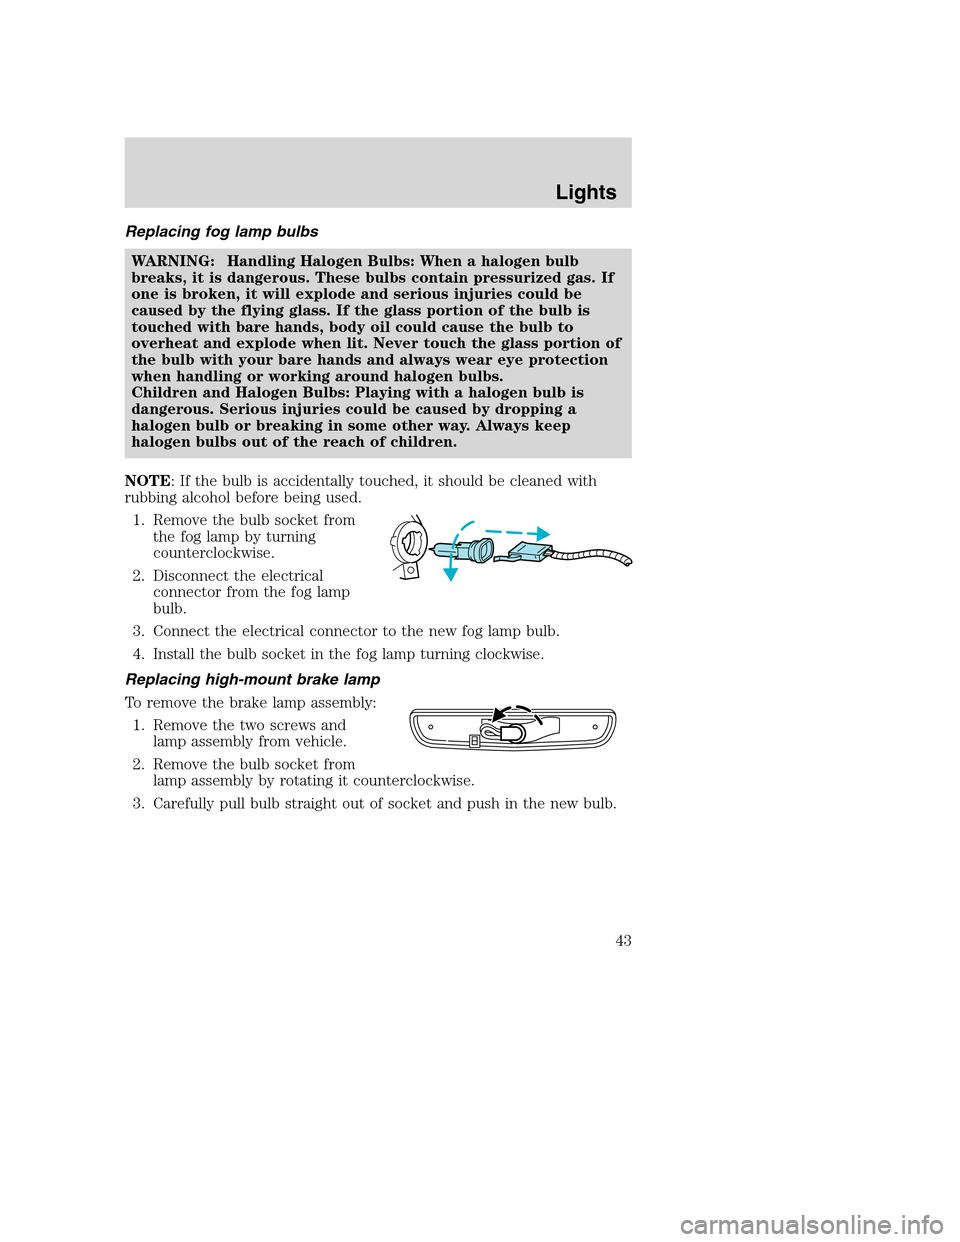
Replacing fog lamp bulbs
WARNING: Handling Halogen Bulbs: When a halogen bulb
breaks, it is dangerous. These bulbs contain pressurized gas. If
one is broken, it will explode and serious injuries could be
caused by the flying glass. If the glass portion of the bulb is
touched with bare hands, body oil could cause the bulb to
overheat and explode when lit. Never touch the glass portion of
the bulb with your bare hands and always wear eye protection
when handling or working around halogen bulbs.
Children and Halogen Bulbs: Playing with a halogen bulb is
dangerous. Serious injuries could be caused by dropping a
halogen bulb or breaking in some other way. Always keep
halogen bulbs out of the reach of children.
NOTE: If the bulb is accidentally touched, it should be cleaned with
rubbing alcohol before being used.
1. Remove the bulb socket from
the fog lamp by turning
counterclockwise.
2. Disconnect the electrical
connector from the fog lamp
bulb.
3. Connect the electrical connector to the new fog lamp bulb.
4. Install the bulb socket in the fog lamp turning clockwise.
Replacing high-mount brake lamp
To remove the brake lamp assembly:
1. Remove the two screws and
lamp assembly from vehicle.
2. Remove the bulb socket from
lamp assembly by rotating it counterclockwise.
3. Carefully pull bulb straight out of socket and push in the new bulb.
REVIEW COPY
2005 Mazda B Series(mbs), Owners Guide (post-2002-fmt)(own2002),
Market:Canadian_French(fr_can)
Lights
43
Page 44 of 254
To install the brake lamp assembly:
1. Install the bulb socket into the lamp assembly by rotating clockwise.
2. Install the lamp assembly on the vehicle and secure with two screws.
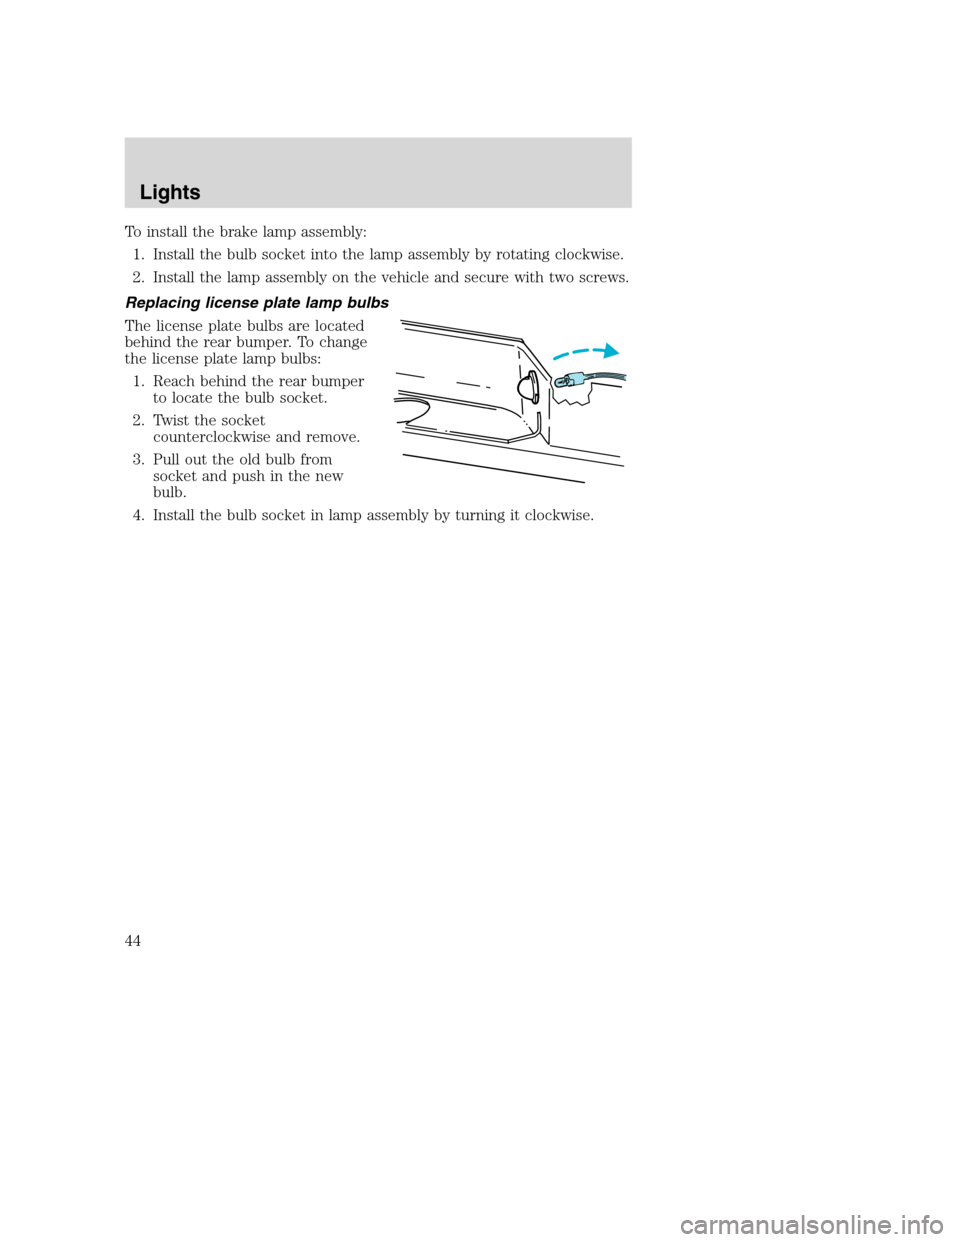
Replacing license plate lamp bulbs
The license plate bulbs are located
behind the rear bumper. To change
the license plate lamp bulbs:
1. Reach behind the rear bumper
to locate the bulb socket.
2. Twist the socket
counterclockwise and remove.
3. Pull out the old bulb from
socket and push in the new
bulb.
4. Install the bulb socket in lamp assembly by turning it clockwise.
REVIEW COPY
2005 Mazda B Series(mbs), Owners Guide (post-2002-fmt)(own2002),
Market:Canadian_French(fr_can)
Lights
44
Page 46 of 254
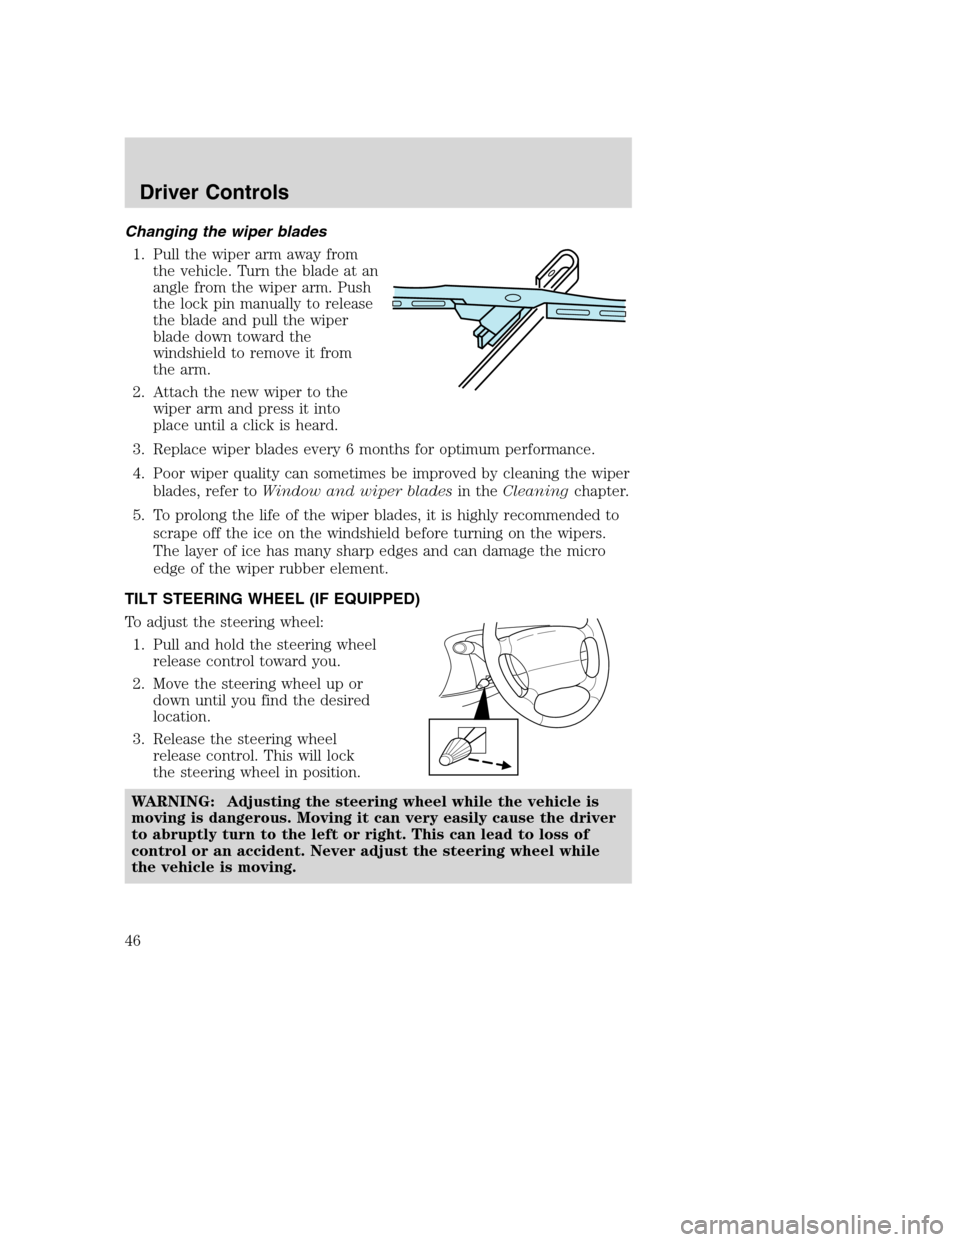
Changing the wiper blades
1. Pull the wiper arm away from
the vehicle. Turn the blade at an
angle from the wiper arm. Push
the lock pin manually to release
the blade and pull the wiper
blade down toward the
windshield to remove it from
the arm.
2. Attach the new wiper to the
wiper arm and press it into
place until a click is heard.
3. Replace wiper blades every 6 months for optimum performance.
4. Poor wiper quality can sometimes be improved by cleaning the wiper
blades, refer toWindow and wiper bladesin theCleaningchapter.
5. To prolong the life of the wiper blades, it is highly recommended to
scrape off the ice on the windshield before turning on the wipers.
The layer of ice has many sharp edges and can damage the micro
edge of the wiper rubber element.
TILT STEERING WHEEL (IF EQUIPPED)
To adjust the steering wheel:
1. Pull and hold the steering wheel
release control toward you.
2. Move the steering wheel up or
down until you find the desired
location.
3. Release the steering wheel
release control. This will lock
the steering wheel in position.
WARNING: Adjusting the steering wheel while the vehicle is
moving is dangerous. Moving it can very easily cause the driver
to abruptly turn to the left or right. This can lead to loss of
control or an accident. Never adjust the steering wheel while
the vehicle is moving.
REVIEW COPY
2005 Mazda B Series(mbs), Owners Guide (post-2002-fmt)(own2002),
Market:Canadian_French(fr_can)
Driver Controls
46
Page 48 of 254

One touch down
Allows the driver’s window to open
fully without holding the control
down. Press completely down on
AUTO and release quickly. Press
again to stop.
AUTOMATIC DIMMING REAR VIEW MIRRORS (IF EQUIPPED)
When the inside rear view mirror detects bright light from behind the
vehicle, the inside rear view mirror will automatically darken to minimize
glare.
Do not block the sensor on the backside of the inside rear view mirror
since this may impair proper system performance.
Press the left button on the mirror
to turn the auto dimming ON or
OFF. The green indicator light left
of the display will illuminate when
this feature is ON.
COMPASS/TEMPERATURE EC MIRROR (IF EQUIPPED)
The compass reading may be affected when you drive near large
buildings, bridges, power lines and powerful broadcast antennas.
Magnetic or metallic objects placed in, on or near the vehicle may also
affect compass accuracy.
Usually, when something affects the compass readings, the compass will
correct itself after a few days of operating your vehicle in normal
conditions. If the compass still appears to be inaccurate, a manual
calibration may be necessary. Refer toCompass calibration
adjustment.
Most geographic areas (zones) have a magnetic north compass point that
varies slightly from the northerly direction on maps. This variation is four
degrees between adjacent zones and will become noticeable as the
vehicle crosses multiple zones. A correct zone setting will eliminate this
error. Refer toCompass zone adjustment.
REVIEW COPY
2005 Mazda B Series(mbs), Owners Guide (post-2002-fmt)(own2002),
Market:Canadian_French(fr_can)
Driver Controls
48
Page 51 of 254

POWER MIRROR CONTROL (IF EQUIPPED)
To adjust your mirrors:
1. Select
to adjust the left
mirror or
to adjust the right
mirror.
2. Move the control in the
direction you wish to tilt the
mirror.
3. Return to the center position to
lock mirrors in place.
FOLD-AWAY MIRRORS
Pull the side mirrors in carefully
when driving through a narrow
space, like an automatic car wash.
SPEED CONTROL (IF EQUIPPED)
With speed control set, you can maintain a speed of 30 mph (48 km/h)
or more without keeping your foot on the accelerator pedal. Speed
control does not work at speeds below 30 mph (48 km/h).
WARNING: Do not use the speed control in heavy traffic or on
roads that are winding, slippery, or unpaved. You may lose
control of the vehicle.
WARNING: Do not shift the gearshift lever into N (Neutral)
with the speed control on. You may lose control of the vehicle
or cause engine system damage.
REVIEW COPY
2005 Mazda B Series(mbs), Owners Guide (post-2002-fmt)(own2002),
Market:Canadian_French(fr_can)
Driver Controls
51
Page 56 of 254
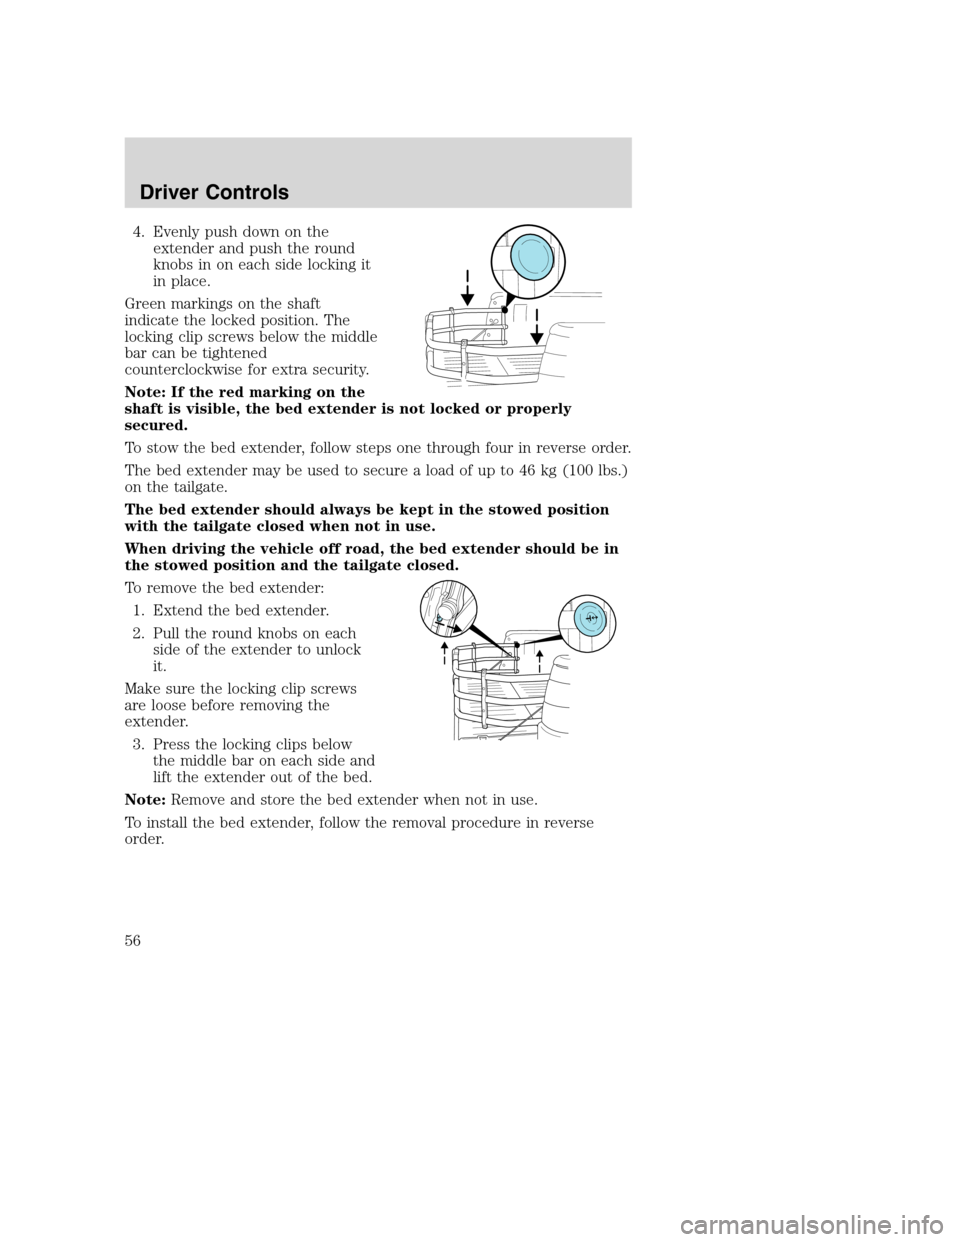
4. Evenly push down on the
extender and push the round
knobs in on each side locking it
in place.
Green markings on the shaft
indicate the locked position. The
locking clip screws below the middle
bar can be tightened
counterclockwise for extra security.
Note: If the red marking on the
shaft is visible, the bed extender is not locked or properly
secured.
To stow the bed extender, follow steps one through four in reverse order.
The bed extender may be used to secure a load of up to 46 kg (100 lbs.)
on the tailgate.
The bed extender should always be kept in the stowed position
with the tailgate closed when not in use.
When driving the vehicle off road, the bed extender should be in
the stowed position and the tailgate closed.
To remove the bed extender:
1. Extend the bed extender.
2. Pull the round knobs on each
side of the extender to unlock
it.
Make sure the locking clip screws
are loose before removing the
extender.
3. Press the locking clips below
the middle bar on each side and
lift the extender out of the bed.
Note:Remove and store the bed extender when not in use.
To install the bed extender, follow the removal procedure in reverse
order.
REVIEW COPY
2005 Mazda B Series(mbs), Owners Guide (post-2002-fmt)(own2002),
Market:Canadian_French(fr_can)
Driver Controls
56
Page 57 of 254
KEYS
The key operates all locks on your vehicle. In case of loss, replacement
keys are available from your dealer.
You should always carry a second key with you in a safe place in case
you require it in an emergency.
POWER DOOR LOCKS (IF EQUIPPED)
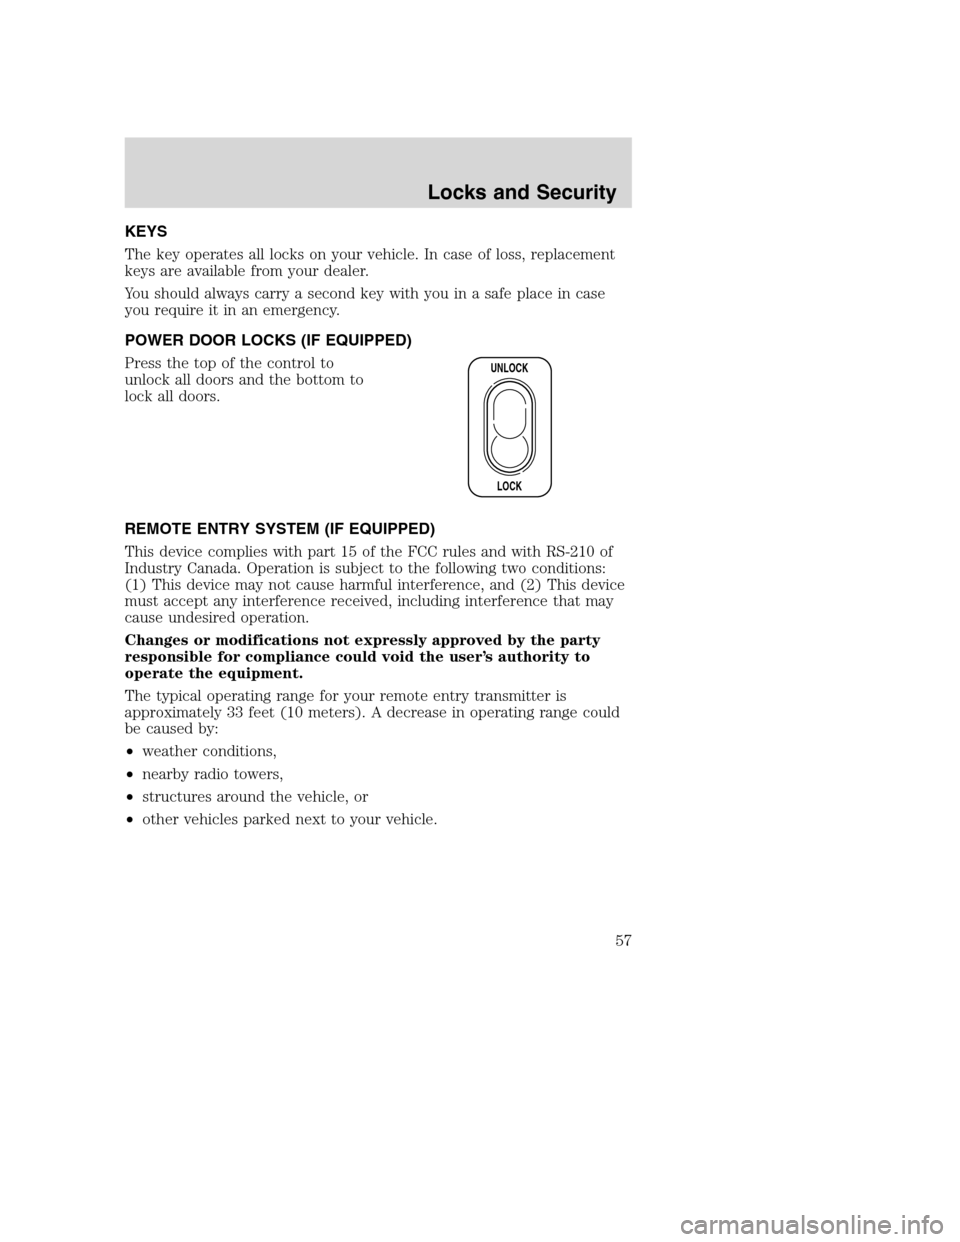
Press the top of the control to
unlock all doors and the bottom to
lock all doors.
REMOTE ENTRY SYSTEM (IF EQUIPPED)
This device complies with part 15 of the FCC rules and with RS-210 of
Industry Canada. Operation is subject to the following two conditions:
(1) This device may not cause harmful interference, and (2) This device
must accept any interference received, including interference that may
cause undesired operation.
Changes or modifications not expressly approved by the party
responsible for compliance could void the user’s authority to
operate the equipment.
The typical operating range for your remote entry transmitter is
approximately 33 feet (10 meters). A decrease in operating range could
be caused by:
•weather conditions,
•nearby radio towers,
•structures around the vehicle, or
•other vehicles parked next to your vehicle.
UNLOCK
LOCK
REVIEW COPY
2005 Mazda B Series(mbs), Owners Guide (post-2002-fmt)(own2002),
Market:Canadian_French(fr_can)
Locks and Security
Locks and Security
57
Page 58 of 254

Your vehicle is equipped with a remote entry system which allows you to:
•unlock the vehicle doors without
a key.
•lock all the vehicle doors without
a key.
•activate the personal alarm.
If there is any potential remote keyless entry problem with your vehicle,
ensureALL remote entry transmittersare taken to the dealership, to
aid in troubleshooting.
Unlocking the doors
1. Pressand release to unlock the driver’s door.Note:The interior
lamps will illuminate.
2. Press
and release again within three seconds to unlock all the
doors.
Locking the doors
•Pressand release to lock all the doors. The park lamps will flash
once to confirm lock; if any of the doors are not properly closed, the
lamps will not flash.
•If
is pressed a second time within three seconds, the lamps will
flash again and the horn will chirp to confirm all doors are locked and
closed. If either door is ajar the lamps will not flash and the horn will
chirp twice.
Sounding a panic alarm
Press
to activate the alarm. The horn will sound for a maximum of
30 seconds and the parklamps will flash for a maximum of 3 minutes.
Press again or turn the ignition to ON to deactivate, or wait for the alarm
to timeout in 3 minutes.
Note:The panic alarm will only operate when the ignition is in the OFF
or ACC position.
Replacing the battery
The remote entry transmitter uses one coin type three-volt lithium
battery CR2032 or equivalent.
REVIEW COPY
2005 Mazda B Series(mbs), Owners Guide (post-2002-fmt)(own2002),
Market:Canadian_French(fr_can)
Locks and Security
58