clock MAZDA MODEL B-SERIES 2005 Owners Manual (in English)
[x] Cancel search | Manufacturer: MAZDA, Model Year: 2005, Model line: MODEL B-SERIES, Model: MAZDA MODEL B-SERIES 2005Pages: 254, PDF Size: 2.13 MB
Page 20 of 254
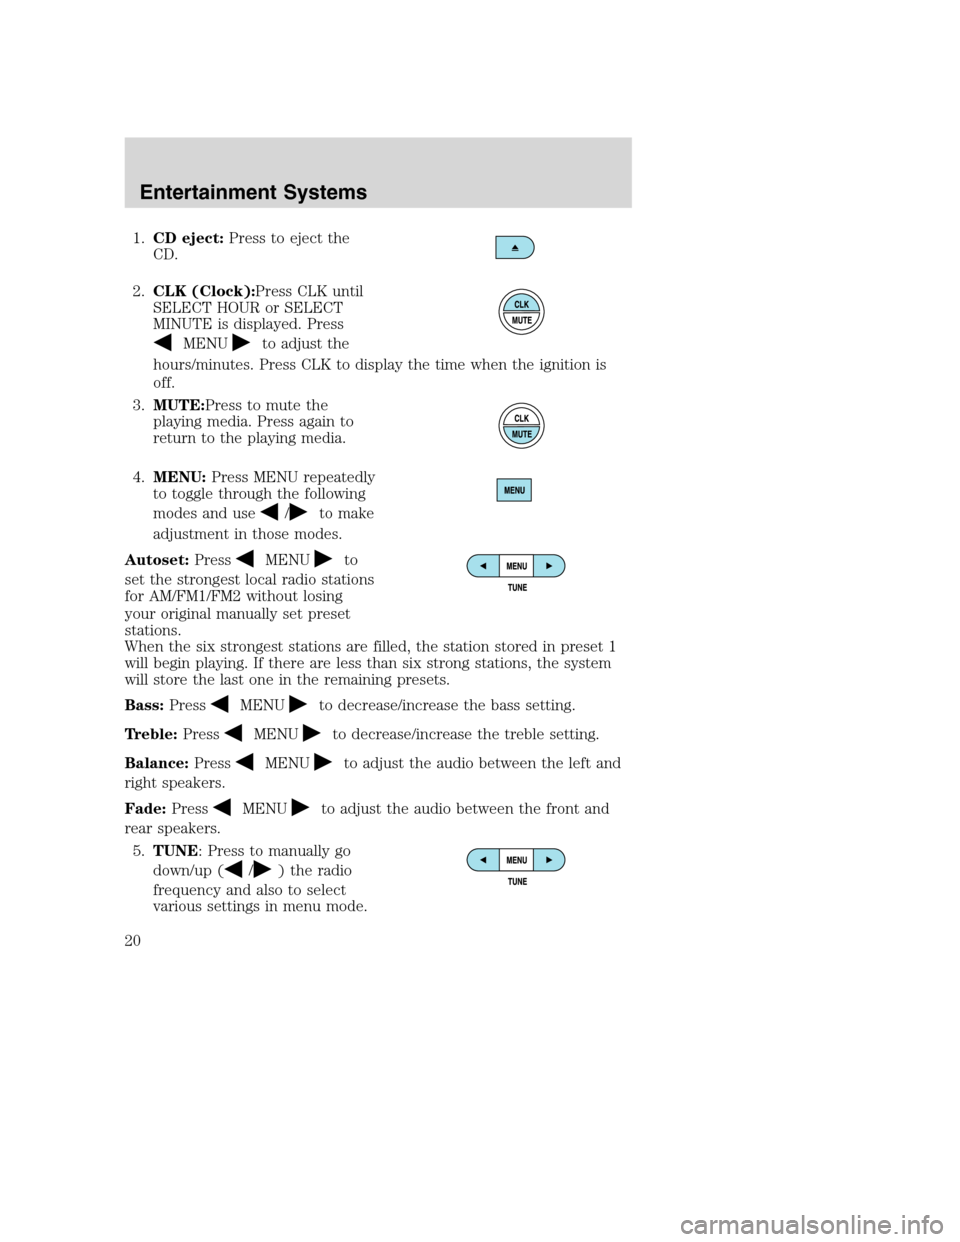
1.CD eject:Press to eject the
CD.
2.CLK (Clock):Press CLK until
SELECT HOUR or SELECT
MINUTE is displayed. Press
MENUto adjust the
hours/minutes. Press CLK to display the time when the ignition is
off.
3.MUTE:Press to mute the
playing media. Press again to
return to the playing media.
4.MENU:Press MENU repeatedly
to toggle through the following
modes and use
/to make
adjustment in those modes.
Autoset:Press
MENUto
set the strongest local radio stations
for AM/FM1/FM2 without losing
your original manually set preset
stations.
When the six strongest stations are filled, the station stored in preset 1
will begin playing. If there are less than six strong stations, the system
will store the last one in the remaining presets.
Bass:Press
MENUto decrease/increase the bass setting.
Treble:Press
MENUto decrease/increase the treble setting.
Balance:Press
MENUto adjust the audio between the left and
right speakers.
Fade:Press
MENUto adjust the audio between the front and
rear speakers.
5.TUNE: Press to manually go
down/up (
/) the radio
frequency and also to select
various settings in menu mode.
REVIEW COPY
2005 Mazda B Series(mbs), Owners Guide (post-2002-fmt)(own2002),
Market:Canadian_French(fr_can)
Entertainment Systems
20
Page 23 of 254
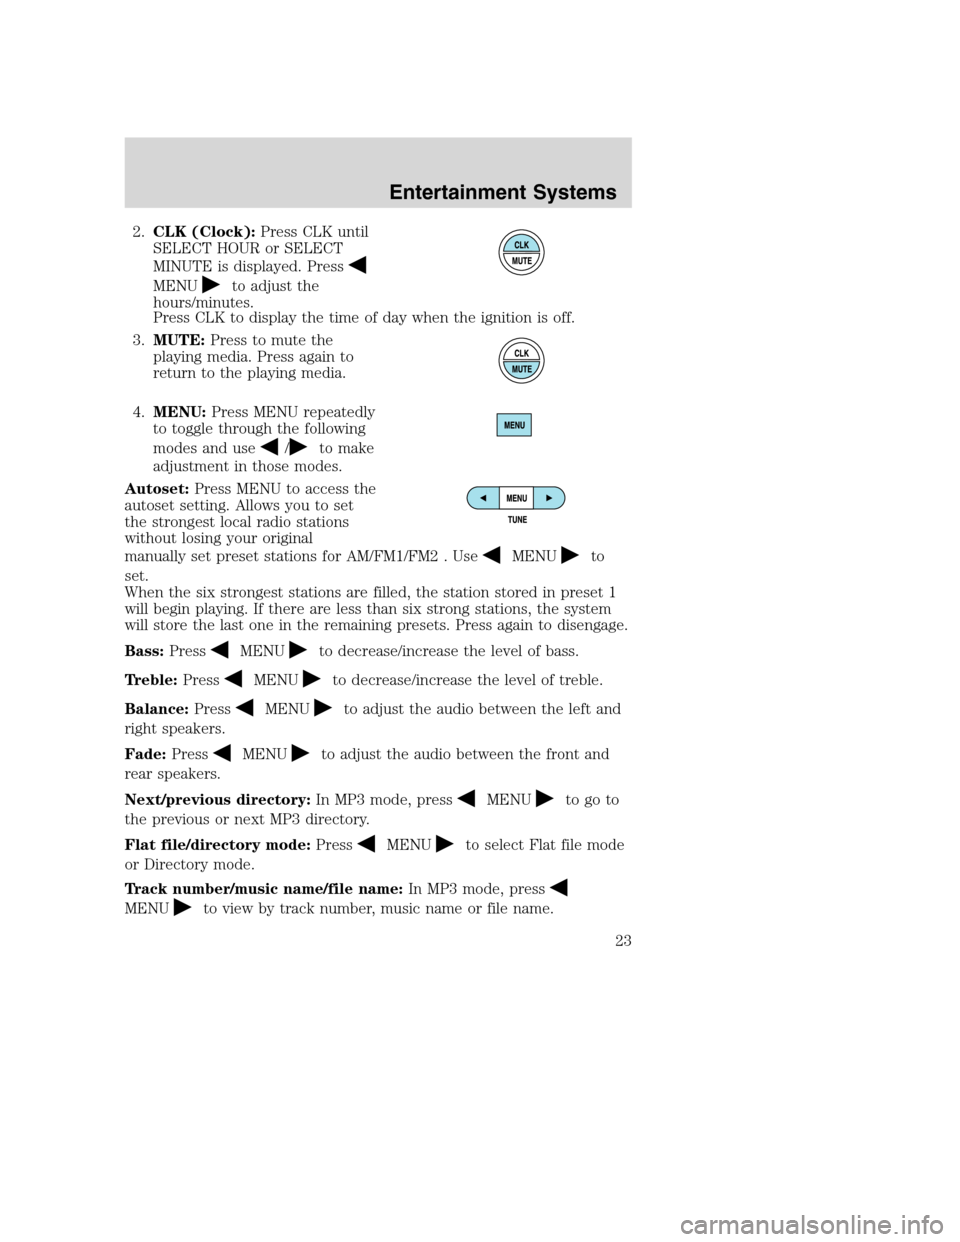
2.CLK (Clock):Press CLK until
SELECT HOUR or SELECT
MINUTE is displayed. Press
MENUto adjust the
hours/minutes.
Press CLK to display the time of day when the ignition is off.
3.MUTE:Press to mute the
playing media. Press again to
return to the playing media.
4.MENU:Press MENU repeatedly
to toggle through the following
modes and use
/to make
adjustment in those modes.
Autoset:Press MENU to access the
autoset setting. Allows you to set
the strongest local radio stations
without losing your original
manually set preset stations for AM/FM1/FM2 . Use
MENUto
set.
When the six strongest stations are filled, the station stored in preset 1
will begin playing. If there are less than six strong stations, the system
will store the last one in the remaining presets. Press again to disengage.
Bass:Press
MENUto decrease/increase the level of bass.
Treble:Press
MENUto decrease/increase the level of treble.
Balance:Press
MENUto adjust the audio between the left and
right speakers.
Fade:Press
MENUto adjust the audio between the front and
rear speakers.
Next/previous directory:In MP3 mode, press
MENUto go to
the previous or next MP3 directory.
Flat file/directory mode:Press
MENUto select Flat file mode
or Directory mode.
Track number/music name/file name:In MP3 mode, press
MENUto view by track number, music name or file name.
REVIEW COPY
2005 Mazda B Series(mbs), Owners Guide (post-2002-fmt)(own2002),
Market:Canadian_French(fr_can)
Entertainment Systems
23
Page 26 of 254
20.Cassette slot:Insert a cassette, facing to the right.
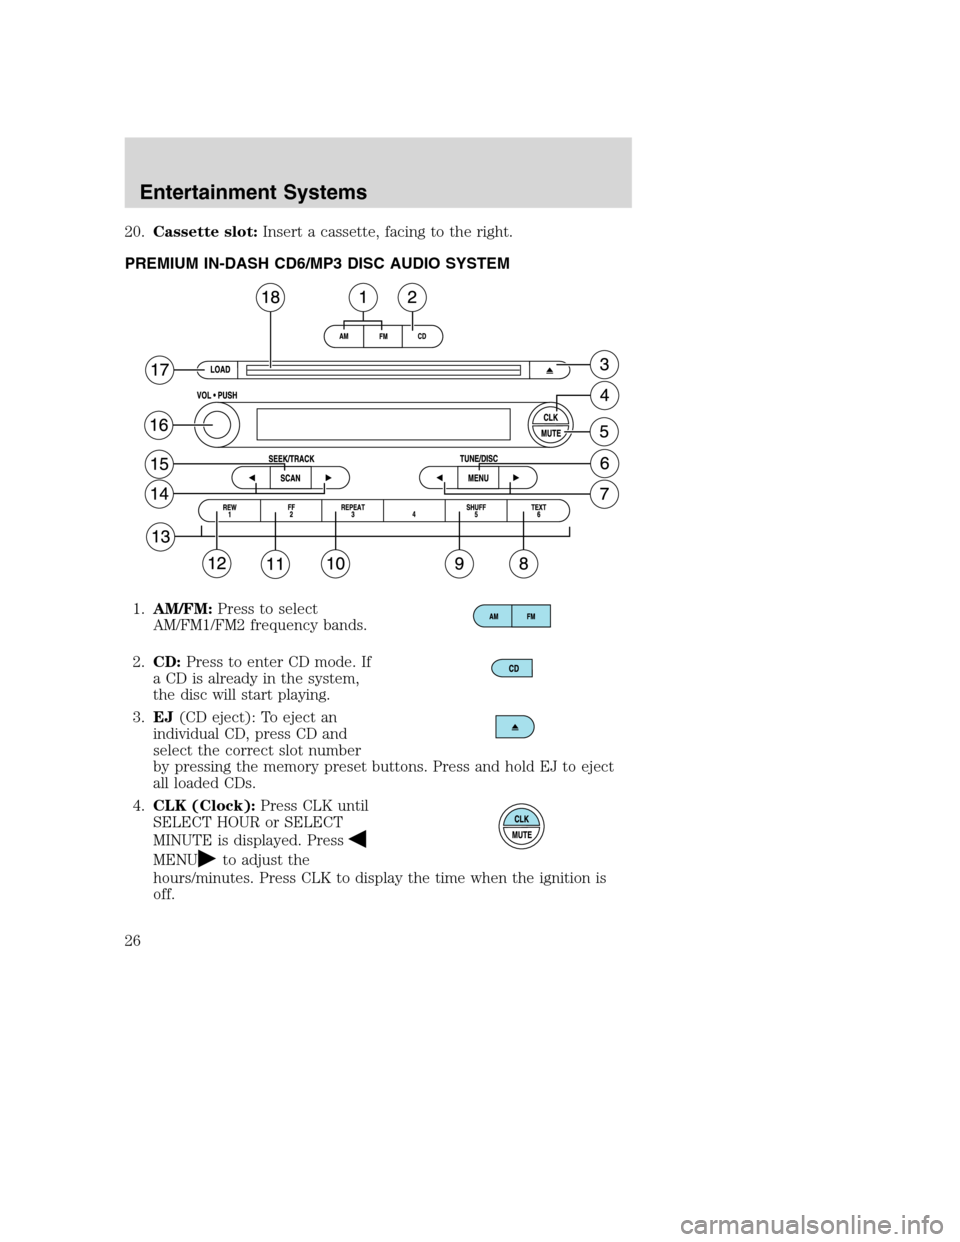
PREMIUM IN-DASH CD6/MP3 DISC AUDIO SYSTEM
1.AM/FM:Press to select
AM/FM1/FM2 frequency bands.
2.CD:Press to enter CD mode. If
a CD is already in the system,
the disc will start playing.
3.EJ(CD eject): To eject an
individual CD, press CD and
select the correct slot number
by pressing the memory preset buttons. Press and hold EJ to eject
all loaded CDs.
4.CLK (Clock):Press CLK until
SELECT HOUR or SELECT
MINUTE is displayed. Press
MENUto adjust the
hours/minutes. Press CLK to display the time when the ignition is
off.
REVIEW COPY
2005 Mazda B Series(mbs), Owners Guide (post-2002-fmt)(own2002),
Market:Canadian_French(fr_can)
Entertainment Systems
26
Page 37 of 254
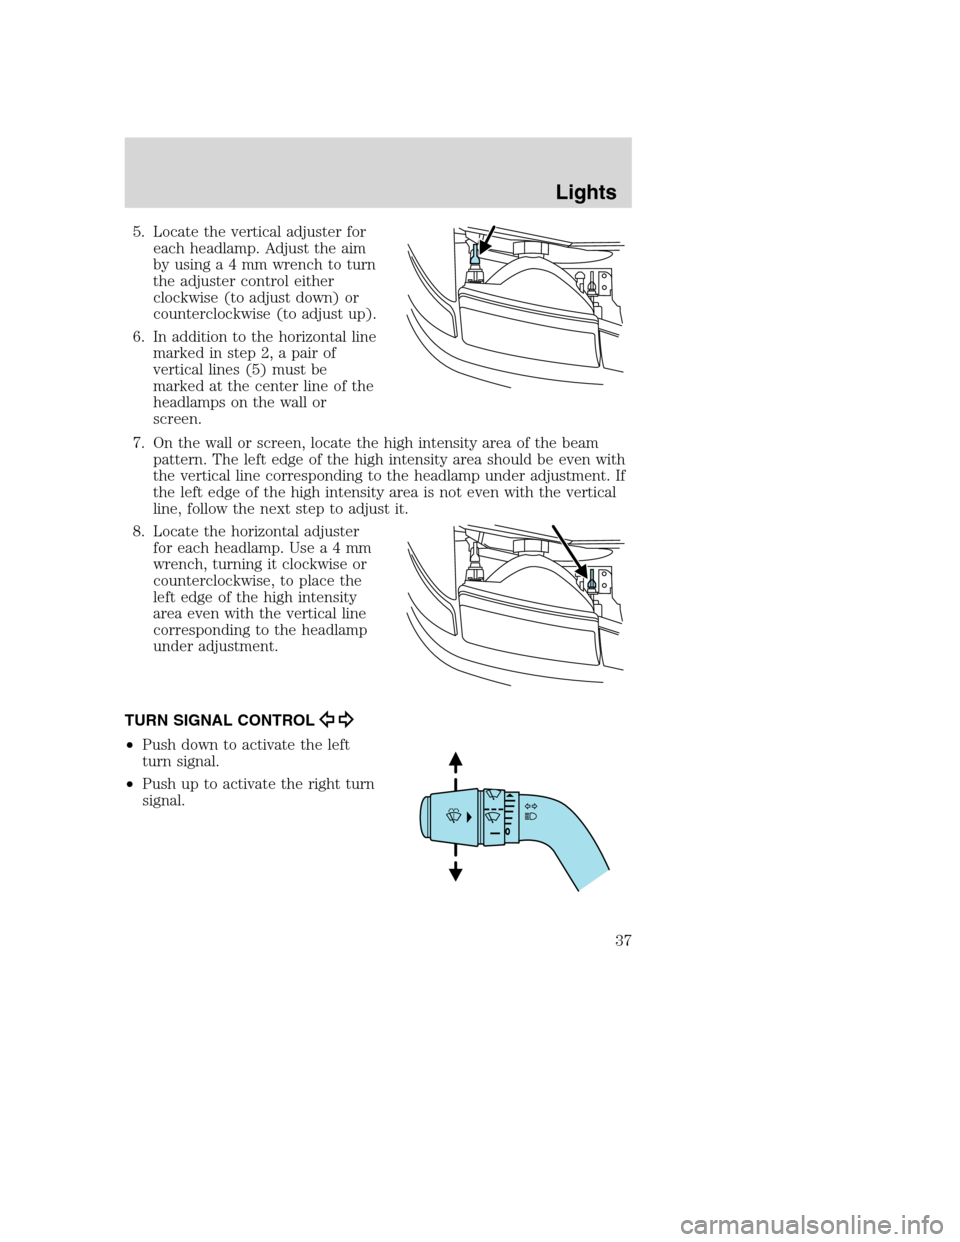
5. Locate the vertical adjuster for
each headlamp. Adjust the aim
byusinga4mmwrench to turn
the adjuster control either
clockwise (to adjust down) or
counterclockwise (to adjust up).
6. In addition to the horizontal line
marked in step 2, a pair of
vertical lines (5) must be
marked at the center line of the
headlamps on the wall or
screen.
7. On the wall or screen, locate the high intensity area of the beam
pattern. The left edge of the high intensity area should be even with
the vertical line corresponding to the headlamp under adjustment. If
the left edge of the high intensity area is not even with the vertical
line, follow the next step to adjust it.
8. Locate the horizontal adjuster
for each headlamp. Usea4mm
wrench, turning it clockwise or
counterclockwise, to place the
left edge of the high intensity
area even with the vertical line
corresponding to the headlamp
under adjustment.
TURN SIGNAL CONTROL
•Push down to activate the left
turn signal.
•Push up to activate the right turn
signal.
REVIEW COPY
2005 Mazda B Series(mbs), Owners Guide (post-2002-fmt)(own2002),
Market:Canadian_French(fr_can)
Lights
37
Page 40 of 254
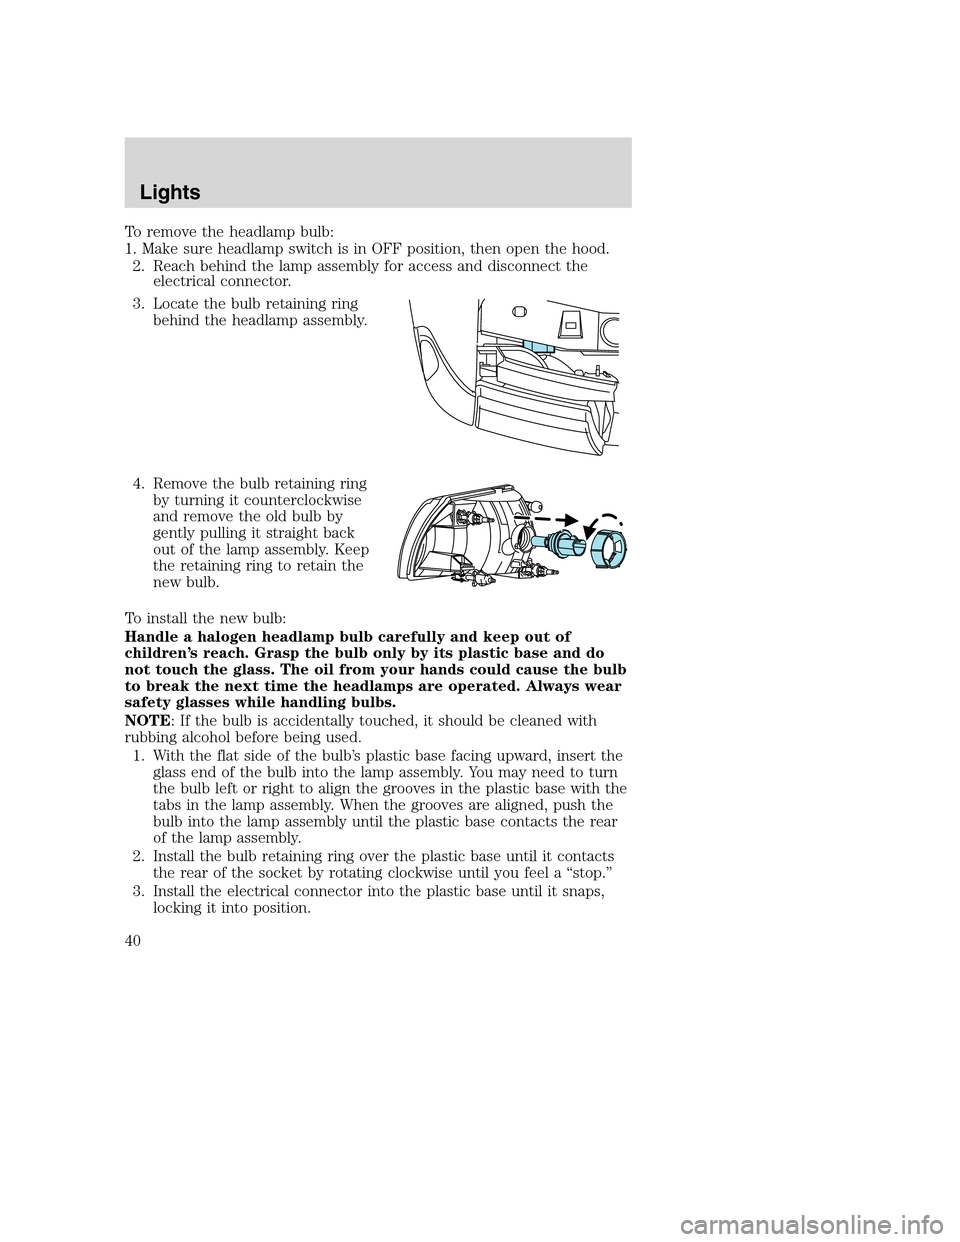
To remove the headlamp bulb:
1. Make sure headlamp switch is in OFF position, then open the hood.
2. Reach behind the lamp assembly for access and disconnect the
electrical connector.
3. Locate the bulb retaining ring
behind the headlamp assembly.
4. Remove the bulb retaining ring
by turning it counterclockwise
and remove the old bulb by
gently pulling it straight back
out of the lamp assembly. Keep
the retaining ring to retain the
new bulb.
To install the new bulb:
Handle a halogen headlamp bulb carefully and keep out of
children’s reach. Grasp the bulb only by its plastic base and do
not touch the glass. The oil from your hands could cause the bulb
to break the next time the headlamps are operated. Always wear
safety glasses while handling bulbs.
NOTE: If the bulb is accidentally touched, it should be cleaned with
rubbing alcohol before being used.
1. With the flat side of the bulb’s plastic base facing upward, insert the
glass end of the bulb into the lamp assembly. You may need to turn
the bulb left or right to align the grooves in the plastic base with the
tabs in the lamp assembly. When the grooves are aligned, push the
bulb into the lamp assembly until the plastic base contacts the rear
of the lamp assembly.
2. Install the bulb retaining ring over the plastic base until it contacts
the rear of the socket by rotating clockwise until you feel a “stop.”
3. Install the electrical connector into the plastic base until it snaps,
locking it into position.
REVIEW COPY
2005 Mazda B Series(mbs), Owners Guide (post-2002-fmt)(own2002),
Market:Canadian_French(fr_can)
Lights
40
Page 41 of 254
4. Turn the headlamps on and make sure they work properly. If the
headlamp was correctly aligned before you changed the bulb, you
should not need to align it again.
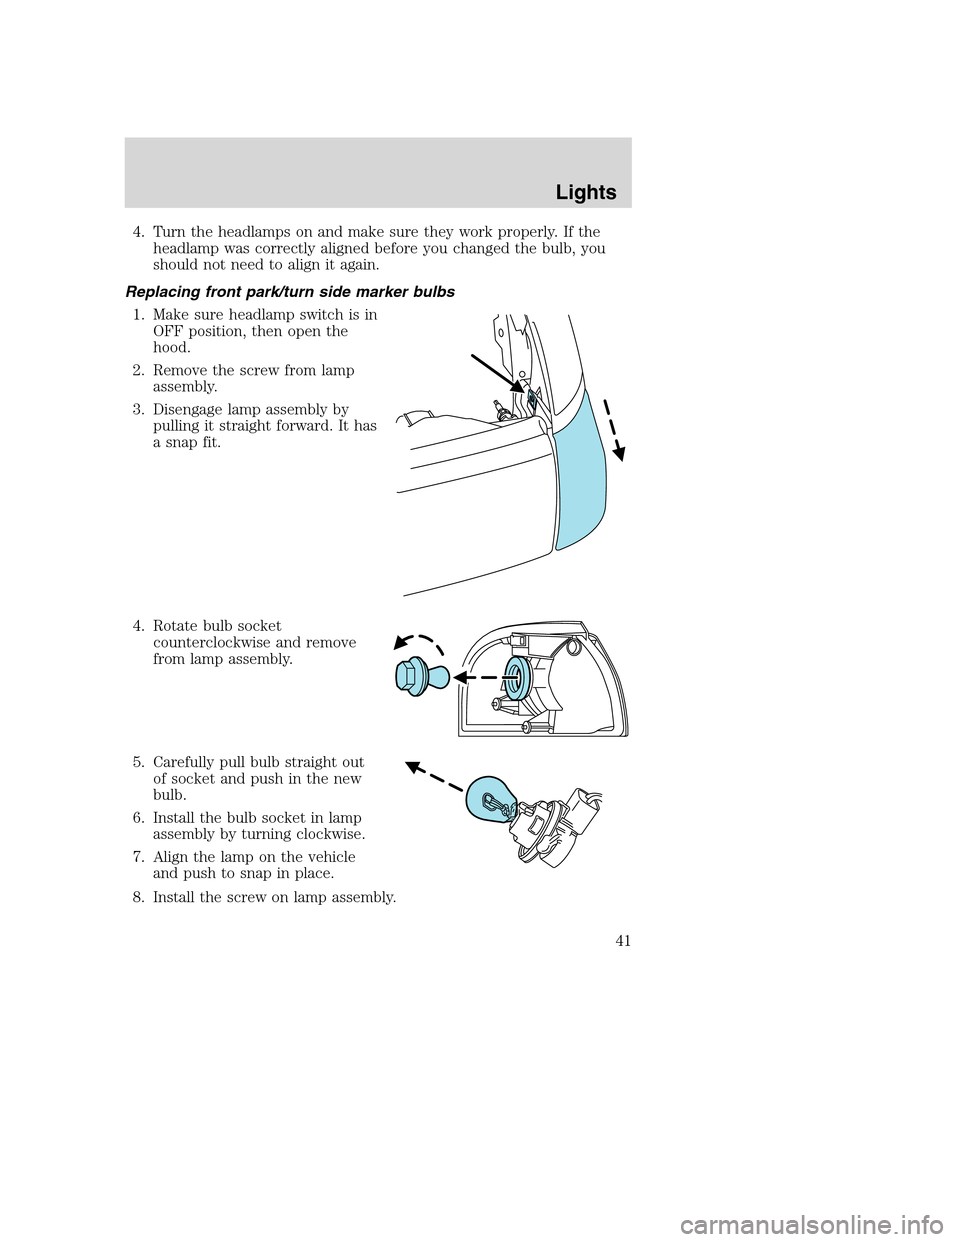
Replacing front park/turn side marker bulbs
1. Make sure headlamp switch is in
OFF position, then open the
hood.
2. Remove the screw from lamp
assembly.
3. Disengage lamp assembly by
pulling it straight forward. It has
a snap fit.
4. Rotate bulb socket
counterclockwise and remove
from lamp assembly.
5. Carefully pull bulb straight out
of socket and push in the new
bulb.
6. Install the bulb socket in lamp
assembly by turning clockwise.
7. Align the lamp on the vehicle
and push to snap in place.
8. Install the screw on lamp assembly.
REVIEW COPY
2005 Mazda B Series(mbs), Owners Guide (post-2002-fmt)(own2002),
Market:Canadian_French(fr_can)
Lights
41
Page 42 of 254
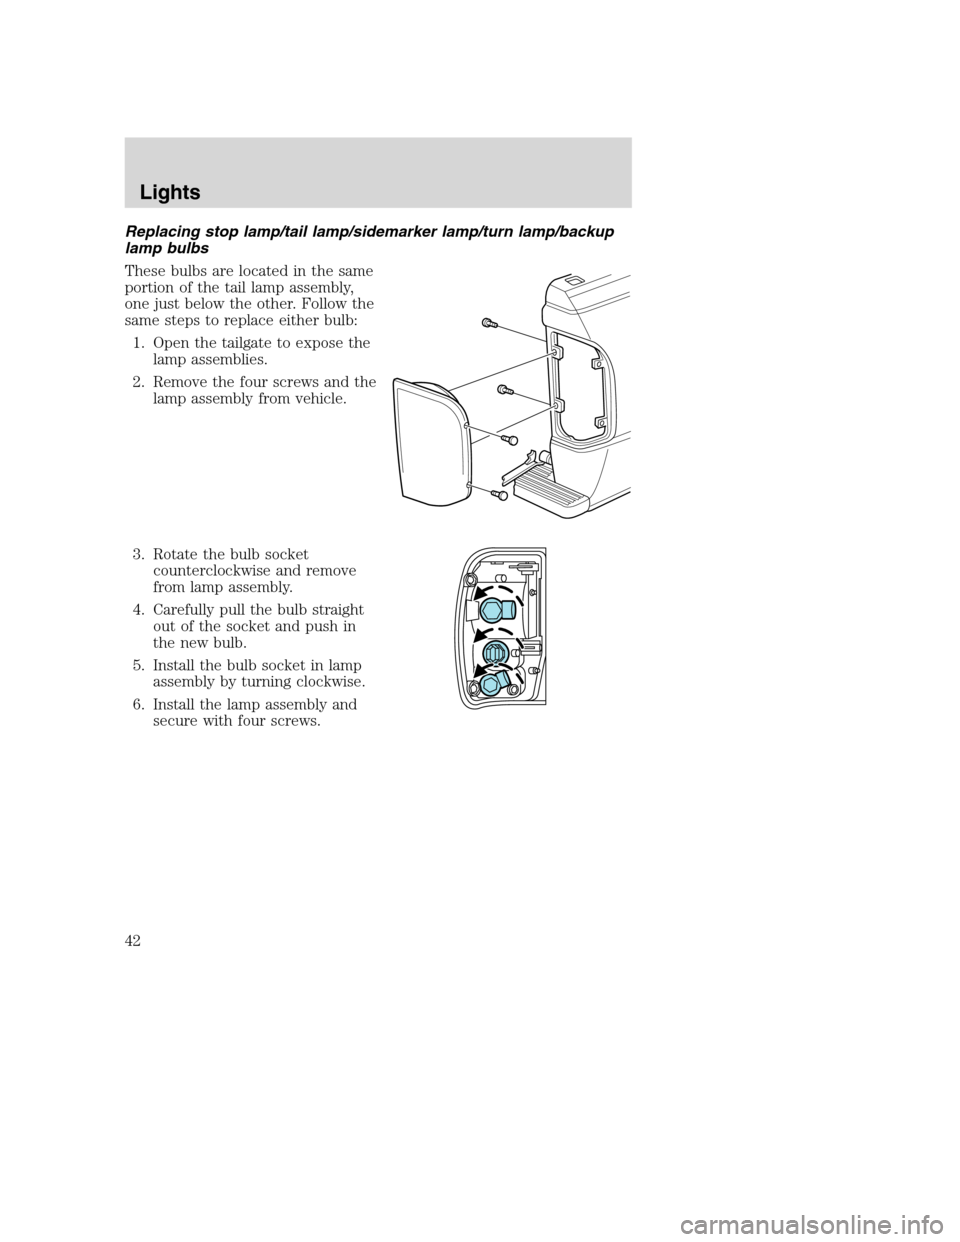
Replacing stop lamp/tail lamp/sidemarker lamp/turn lamp/backup
lamp bulbs
These bulbs are located in the same
portion of the tail lamp assembly,
one just below the other. Follow the
same steps to replace either bulb:
1. Open the tailgate to expose the
lamp assemblies.
2. Remove the four screws and the
lamp assembly from vehicle.
3. Rotate the bulb socket
counterclockwise and remove
from lamp assembly.
4. Carefully pull the bulb straight
out of the socket and push in
the new bulb.
5. Install the bulb socket in lamp
assembly by turning clockwise.
6. Install the lamp assembly and
secure with four screws.
REVIEW COPY
2005 Mazda B Series(mbs), Owners Guide (post-2002-fmt)(own2002),
Market:Canadian_French(fr_can)
Lights
42
Page 43 of 254
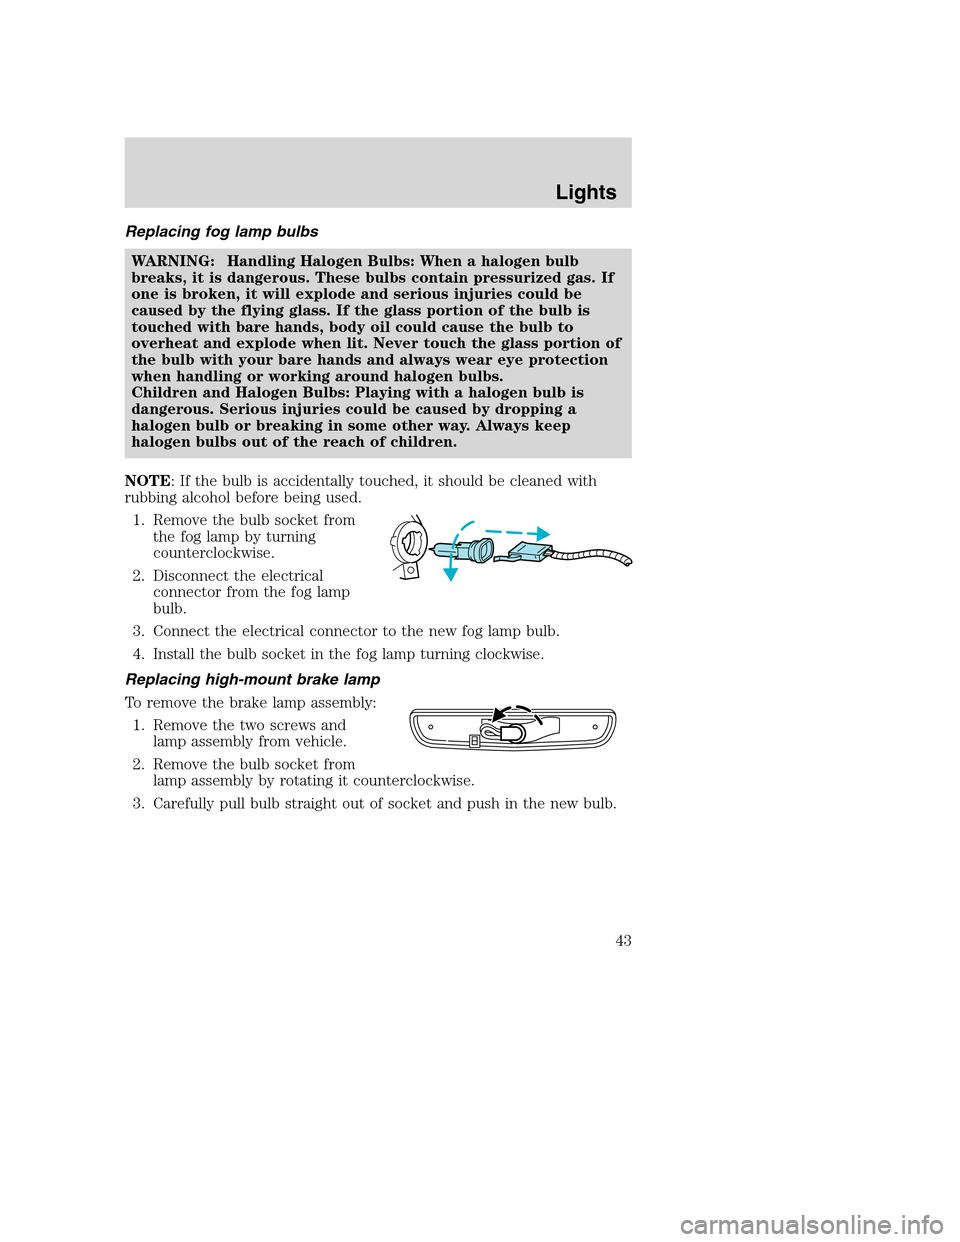
Replacing fog lamp bulbs
WARNING: Handling Halogen Bulbs: When a halogen bulb
breaks, it is dangerous. These bulbs contain pressurized gas. If
one is broken, it will explode and serious injuries could be
caused by the flying glass. If the glass portion of the bulb is
touched with bare hands, body oil could cause the bulb to
overheat and explode when lit. Never touch the glass portion of
the bulb with your bare hands and always wear eye protection
when handling or working around halogen bulbs.
Children and Halogen Bulbs: Playing with a halogen bulb is
dangerous. Serious injuries could be caused by dropping a
halogen bulb or breaking in some other way. Always keep
halogen bulbs out of the reach of children.
NOTE: If the bulb is accidentally touched, it should be cleaned with
rubbing alcohol before being used.
1. Remove the bulb socket from
the fog lamp by turning
counterclockwise.
2. Disconnect the electrical
connector from the fog lamp
bulb.
3. Connect the electrical connector to the new fog lamp bulb.
4. Install the bulb socket in the fog lamp turning clockwise.
Replacing high-mount brake lamp
To remove the brake lamp assembly:
1. Remove the two screws and
lamp assembly from vehicle.
2. Remove the bulb socket from
lamp assembly by rotating it counterclockwise.
3. Carefully pull bulb straight out of socket and push in the new bulb.
REVIEW COPY
2005 Mazda B Series(mbs), Owners Guide (post-2002-fmt)(own2002),
Market:Canadian_French(fr_can)
Lights
43
Page 44 of 254
To install the brake lamp assembly:
1. Install the bulb socket into the lamp assembly by rotating clockwise.
2. Install the lamp assembly on the vehicle and secure with two screws.
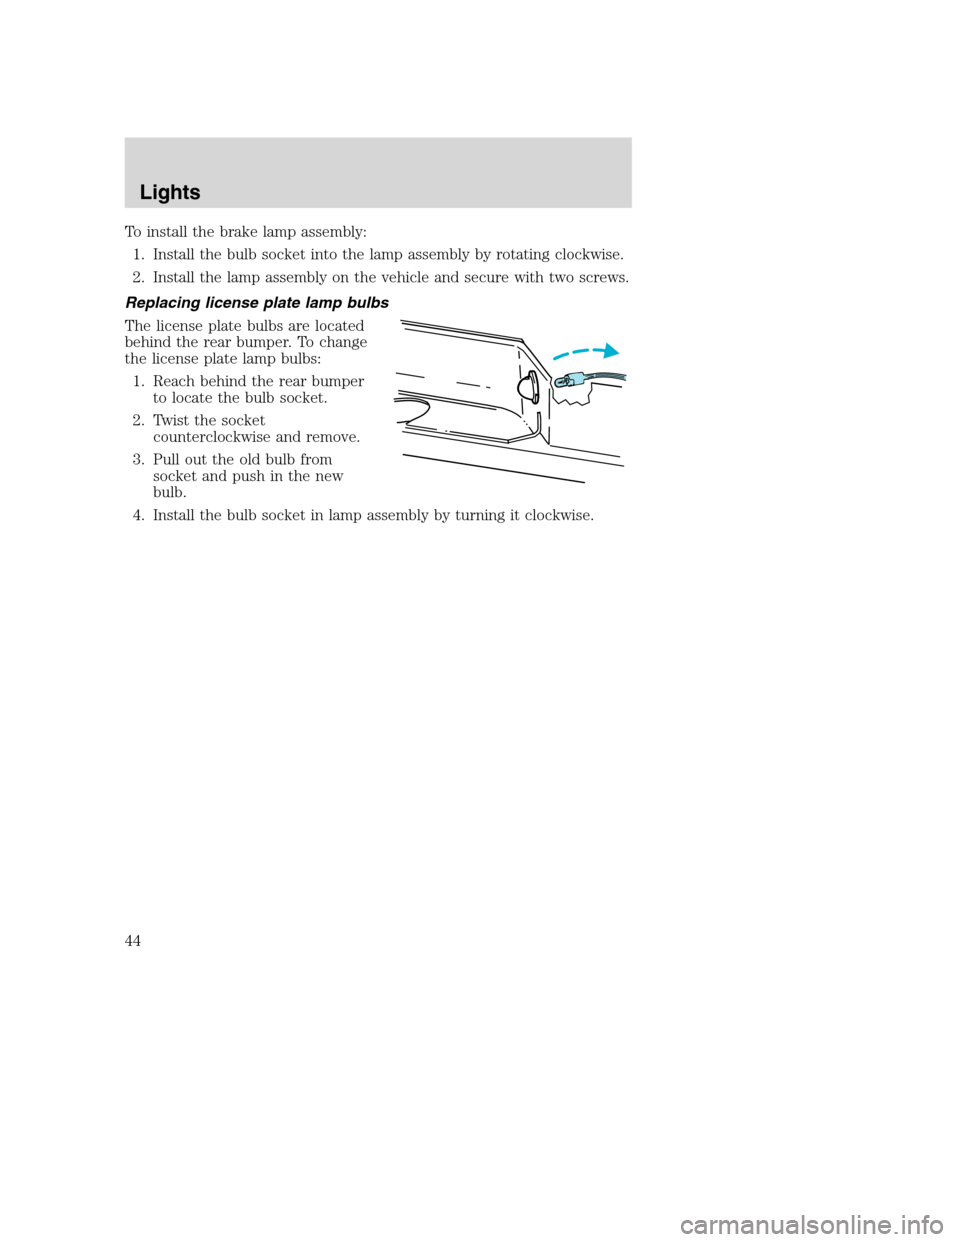
Replacing license plate lamp bulbs
The license plate bulbs are located
behind the rear bumper. To change
the license plate lamp bulbs:
1. Reach behind the rear bumper
to locate the bulb socket.
2. Twist the socket
counterclockwise and remove.
3. Pull out the old bulb from
socket and push in the new
bulb.
4. Install the bulb socket in lamp assembly by turning it clockwise.
REVIEW COPY
2005 Mazda B Series(mbs), Owners Guide (post-2002-fmt)(own2002),
Market:Canadian_French(fr_can)
Lights
44
Page 56 of 254
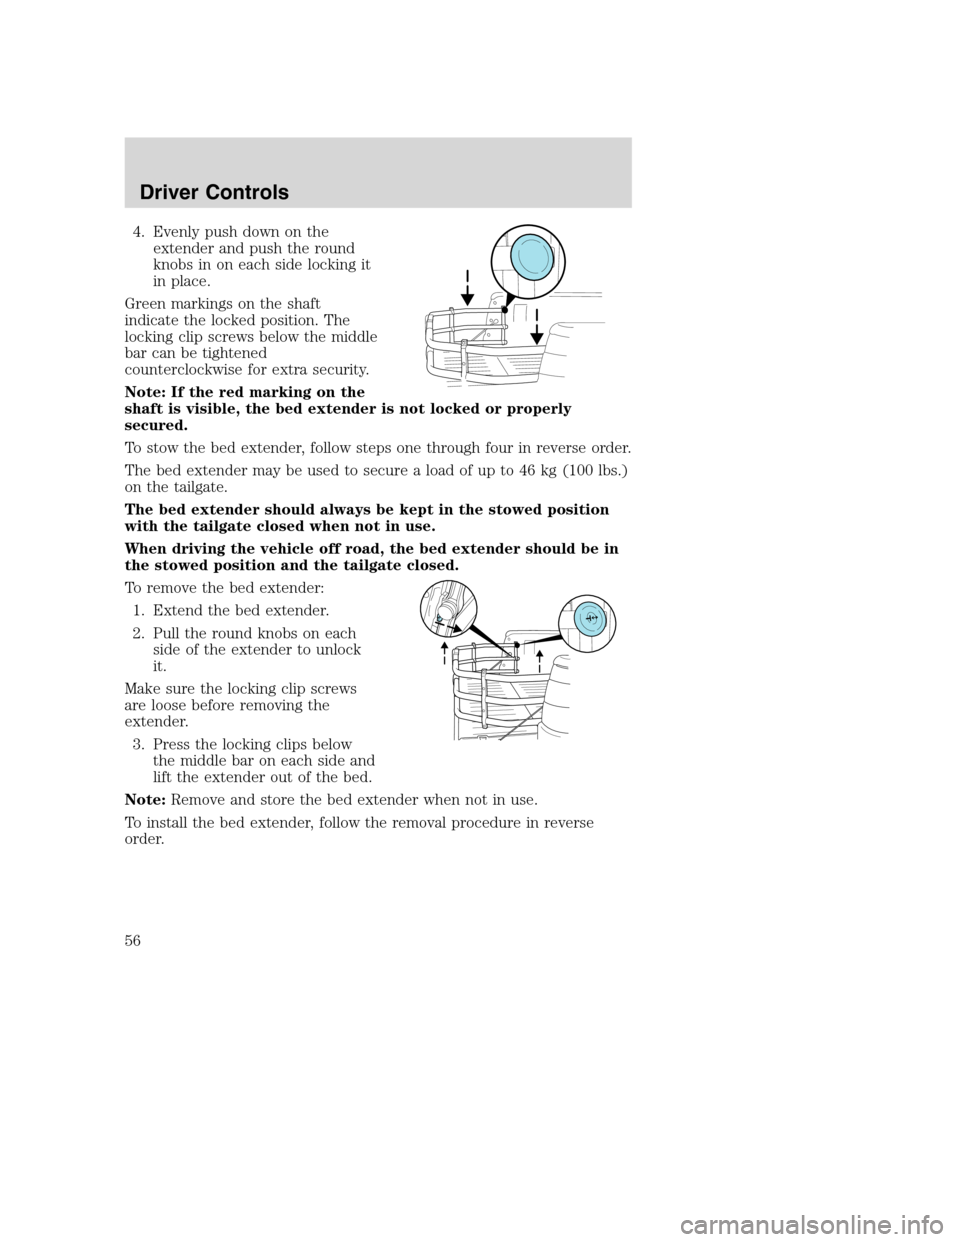
4. Evenly push down on the
extender and push the round
knobs in on each side locking it
in place.
Green markings on the shaft
indicate the locked position. The
locking clip screws below the middle
bar can be tightened
counterclockwise for extra security.
Note: If the red marking on the
shaft is visible, the bed extender is not locked or properly
secured.
To stow the bed extender, follow steps one through four in reverse order.
The bed extender may be used to secure a load of up to 46 kg (100 lbs.)
on the tailgate.
The bed extender should always be kept in the stowed position
with the tailgate closed when not in use.
When driving the vehicle off road, the bed extender should be in
the stowed position and the tailgate closed.
To remove the bed extender:
1. Extend the bed extender.
2. Pull the round knobs on each
side of the extender to unlock
it.
Make sure the locking clip screws
are loose before removing the
extender.
3. Press the locking clips below
the middle bar on each side and
lift the extender out of the bed.
Note:Remove and store the bed extender when not in use.
To install the bed extender, follow the removal procedure in reverse
order.
REVIEW COPY
2005 Mazda B Series(mbs), Owners Guide (post-2002-fmt)(own2002),
Market:Canadian_French(fr_can)
Driver Controls
56