key MAZDA MODEL B-SERIES 2006 (in English) Owner's Manual
[x] Cancel search | Manufacturer: MAZDA, Model Year: 2006, Model line: MODEL B-SERIES, Model: MAZDA MODEL B-SERIES 2006Pages: 262, PDF Size: 2.47 MB
Page 151 of 262

Drive (not shown)
Drive is activated when the transmission control switch is pressed.
•This position allows for all forward gears except overdrive.
•O/D OFF lamp is illuminated.
•Provides engine braking.
•Use when driving conditions cause excessive shifting from O/D to
other gears. Examples: city traffic, hilly terrain, heavy loads, trailer
towing and when engine braking is required.
•To return to O/D (overdrive mode), press the transmission control
switch. The O/D OFF lamp will not be illuminated.
•O/D (Overdrive) is automatically returned each time the key is turned
off.
2 (Second)
Use 2 (Second) to start-up on slippery roads or to provide additional
engine braking on downgrades.
1 (First)
•Provides maximum engine braking.
•Allows upshifts by moving gearshift lever.
•Will not downshift into 1 (First) at high speeds; allows for 1 (First)
when vehicle reaches slower speeds.
Forced downshifts
•Allowed in
(Overdrive) or Drive.
•Depress the accelerator to the floor.
•Allows transmission to select an appropriate gear.
MANUAL TRANSMISSION OPERATION (IF EQUIPPED)
Using the clutch
The manual transmission has a starter interlock that prevents cranking
the engine unless the clutch pedal is fully depressed.
135
24
R
2006 B-Series(mbs)
Owners Guide (post-2002-fmt)
Canadian_French(fr_can)
Driving
151
Page 153 of 262

2. Move the gearshift lever into the neutral position and wait at least
three seconds before shifting into R (Reverse).
•The gearshift lever can only be moved into R (Reverse) by moving it
from left of 3 (Third) and 4 (Fourth) before shifting into R (Reverse).
This is a lockout feature that protects the transmission from
accidentally being shifted into R (Reverse) from 5 (Overdrive).
Parking your vehicle
1. Apply the brake and shift into the neutral position.
2. Fully apply the parking brake, then shift into 1 (First).
3. Turn the ignition off.
WARNING: Do not park your vehicle in Neutral, it may move
unexpectedly and injure someone. Use 1 (First) gear and set
the parking brake fully.
Removing the key
Turn the ignition off, push the
release lever (located above the
ignition), then turn the key toward
you and remove the key.
If your vehicle gets stuck in mud or snow
If your vehicle gets stuck in mud or snow, it may be rocked out by
shifting between forward and reverse gears, stopping between shifts in a
steady pattern. Press lightly on the accelerator in each gear.
Do not rock the vehicle if the engine is not at normal operating
temperature or damage to the transmission may occur.
Do not rock the vehicle for more than a minute or damage to the
transmission and tires may occur, or the engine may overheat.
P
U
S
H
2006 B-Series(mbs)
Owners Guide (post-2002-fmt)
Canadian_French(fr_can)
Driving
153
Page 160 of 262
HAZARD FLASHER
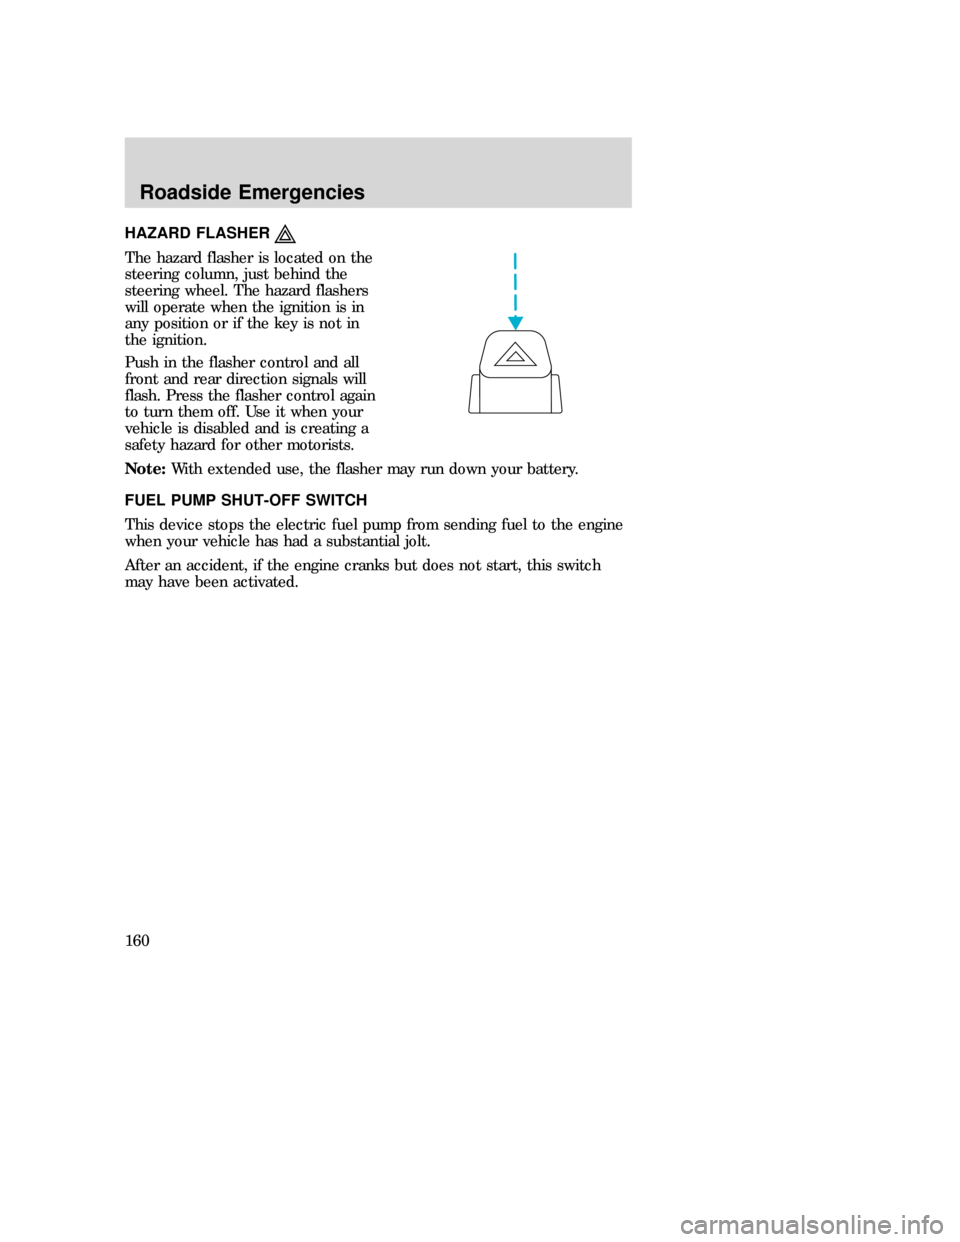
The hazard flasher is located on the
steering column, just behind the
steering wheel. The hazard flashers
will operate when the ignition is in
any position or if the key is not in
the ignition.
Push in the flasher control and all
front and rear direction signals will
flash. Press the flasher control again
to turn them off. Use it when your
vehicle is disabled and is creating a
safety hazard for other motorists.
Note:With extended use, the flasher may run down your battery.
FUEL PUMP SHUT-OFF SWITCH
This device stops the electric fuel pump from sending fuel to the engine
when your vehicle has had a substantial jolt.
After an accident, if the engine cranks but does not start, this switch
may have been activated.
2006 B-Series(mbs)
Owners Guide (post-2002-fmt)
Canadian_French(fr_can)
Roadside Emergencies
160
Page 161 of 262
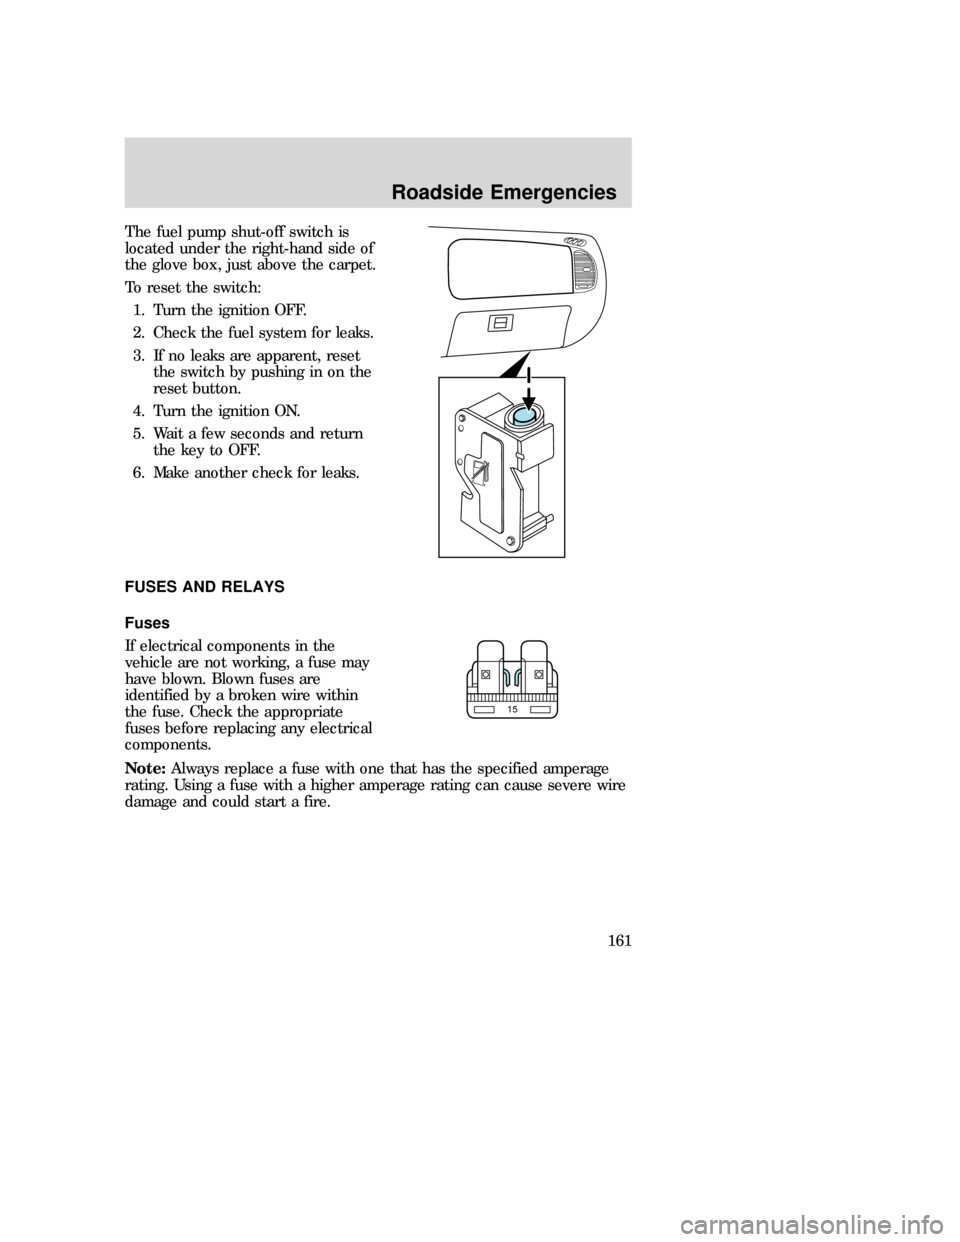
The fuel pump shut-off switch is
located under the right-hand side of
the glove box, just above the carpet.
To reset the switch:
1. Turn the ignition OFF.
2. Check the fuel system for leaks.
3. If no leaks are apparent, reset
the switch by pushing in on the
reset button.
4. Turn the ignition ON.
5. Wait a few seconds and return
the key to OFF.
6. Make another check for leaks.
FUSES AND RELAYS
Fuses
If electrical components in the
vehicle are not working, a fuse may
have blown. Blown fuses are
identified by a broken wire within
the fuse. Check the appropriate
fuses before replacing any electrical
components.
Note:Always replace a fuse with one that has the specified amperage
rating. Using a fuse with a higher amperage rating can cause severe wire
damage and could start a fire.
15
2006 B-Series(mbs)
Owners Guide (post-2002-fmt)
Canadian_French(fr_can)
Roadside Emergencies
161
Page 174 of 262

Location of the spare tire and tools
The spare tire and tools for your vehicle are stowed in the following
locations:
Tool Location
Spare tire Under the vehicle, just forward of the rear
bumper
Jack, jack handle,
wheel nut wrenchRegular Cab: behind seats and underneath the
jack and tools cover
Cab Plus: stowed in the passenger side rear cab
under the plastic tray inside the storage bin or
behind the jump seat in a separate tool bag
Cab Plus 4–Door: stowed behind the front seats,
between jump seats and underneath jack and
tools cover.
Key, spare tire lock
(if equipped)In the glove box
Removing the spare tire
1. Assemble the jack handle to the lug wrench as shown in the
illustrations.
When connecting the jack handle, assemble the following:
•one handle extension and one
typical extension. To assemble,
slide parts together. To
disconnect, depress button and
pull apart.
•one wheel nut wrench. Depress
button and slide together.
2006 B-Series(mbs)
Owners Guide (post-2002-fmt)
Canadian_French(fr_can)
Roadside Emergencies
174
Page 179 of 262

Stowing the flat/spare tire
Note:Failure to follow spare tire stowage instructions may result in
failure of cable or loss of spare tire.
1. Lay the tire on the ground with the valve stem facing up.
2. Slide the wheel partially under the vehicle and install the wire and
retainer through the center of the wheel.
3. Turn the jack handle clockwise until the tire is raised to its original
position underneath the vehicle. The effort to turn the jack handle
increases significantly as the tire contacts the frame. The spare tire
carrier will ratchet when the tire is in the fully stowed position. The
spare tire carrier has a built-in ratchet feature that will not allow you
to overtighten. If the spare tire carrier ratchets with very little effort,
take the vehicle to your authorized dealer for assistance at your
earliest convenience.
4. Check that the tire lies flat against the frame assembly. Push against
the tire to make sure it is tightly seated under the vehicle. Loosen
and retighten, if necessary. Failure to properly stow the spare tire
may result in failure of the winch cable and loss of the spare tire.
5. Repeat this tightness check procedure when servicing the spare tire
pressure (every six months, perService Maintenance Section),or
at any time that the spare tire is disturbed through service of other
components.
6. Install the spare tire lock (if equipped) into the access hole above
the rear bumper with the spare tire lock key (if equipped) and jack
handle.
WHEEL LUG NUT TORQUE SPECIFICATIONS
Retighten the lug nuts to the specified torque at 50–100 miles (80–160 km)
after any wheel disturbance (rotation, flat tire, wheel removal, etc.).
Lug nut socket
size/Bolt sizeWheel lug nut torque*
lb.ft. N•m
Lug nut socket size:
3�4” (19 mm) hex
Bolt size:1�2x20100 135
* Torque specifications are for nut and bolt threads free of dirt and
rust. Use only Mazda recommended replacement fasteners.
2006 B-Series(mbs)
Owners Guide (post-2002-fmt)
Canadian_French(fr_can)
Roadside Emergencies
179
Page 211 of 262
•Check cooling system fluid level and verify coolant specific gravity is
correct for summer or winter conditions.
•Check battery water level (non-maintenance free).
•Check battery connections and clean if necessary.
Retightening lug nuts
•Retighten the lug nuts to the specified torque at 500 miles (800 km)
after any wheel disturbance (tire rotation, changing a flat tire, wheel
removal, etc.).
•Refer toWheel Lug Nut Torque Specificationin theTires, Wheels
and Loadingchapter for the proper lug nut torque specification.
SERVICE RECOMMENDATIONS
To help you service your vehicle:
•We highlight do-it-yourself items in the engine compartment for easy
location.
•We provideservice maintenance sectionwhich makes tracking
routine service easy.
If your vehicle requires professional service, your authorized dealer can
provide necessary parts and service. Check your “Warranty Information”
to find out which parts and services are covered.
Use only recommended fuels, lubricants, fluids and service parts
conforming to specifications. Genuine Mazda parts are designed and built
to provide the best performance in your vehicle.
PRECAUTIONS WHEN SERVICING YOUR VEHICLE
•Do not work on a hot engine.
•Make sure that nothing gets caught in moving parts.
•Do not work on a vehicle with the engine running in an enclosed
space, unless you are sure you have enough ventilation.
•Keep all open flames and other lit material away from the battery and
all fuel related parts.
Working with the engine off
•Automatic transmission:
1. Set the parking brake and shift to P (Park).
2. Turn off the engine and remove the key.
3. Block the wheels.
2006 B-Series(mbs)
Owners Guide (post-2002-fmt)
Canadian_French(fr_can)
Maintenance and Specifications
211
Page 212 of 262
•Manual transmission:
1. Set the parking brake, depress the clutch and place the gearshift in 1
(First).
2. Turn off the engine and remove the key.
3. Block the wheels.
Working with the engine on
•Automatic transmission:
1. Set the parking brake and shift to P (Park).
2. Block the wheels.
•Manual transmission:
1. Set the parking brake, depress the clutch and place the gearshift in
N (Neutral).
2. Block the wheels.
Note:Do not start your engine with the air cleaner removed and do not
remove it while the engine is running.
OPENING THE HOOD
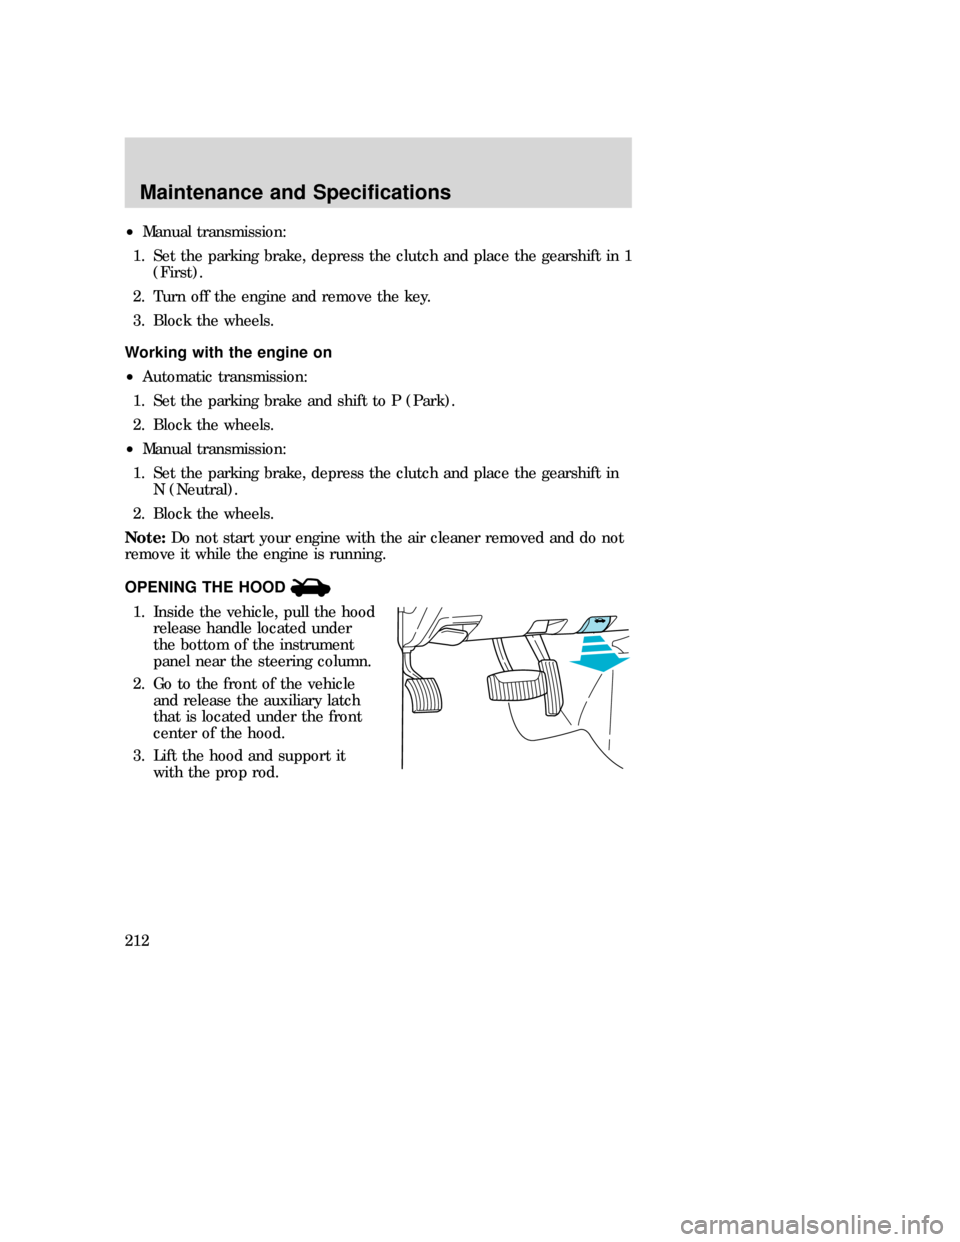
1. Inside the vehicle, pull the hood
release handle located under
the bottom of the instrument
panel near the steering column.
2. Go to the front of the vehicle
and release the auxiliary latch
that is located under the front
center of the hood.
3. Lift the hood and support it
with the prop rod.
2006 B-Series(mbs)
Owners Guide (post-2002-fmt)
Canadian_French(fr_can)
Maintenance and Specifications
212
Page 259 of 262
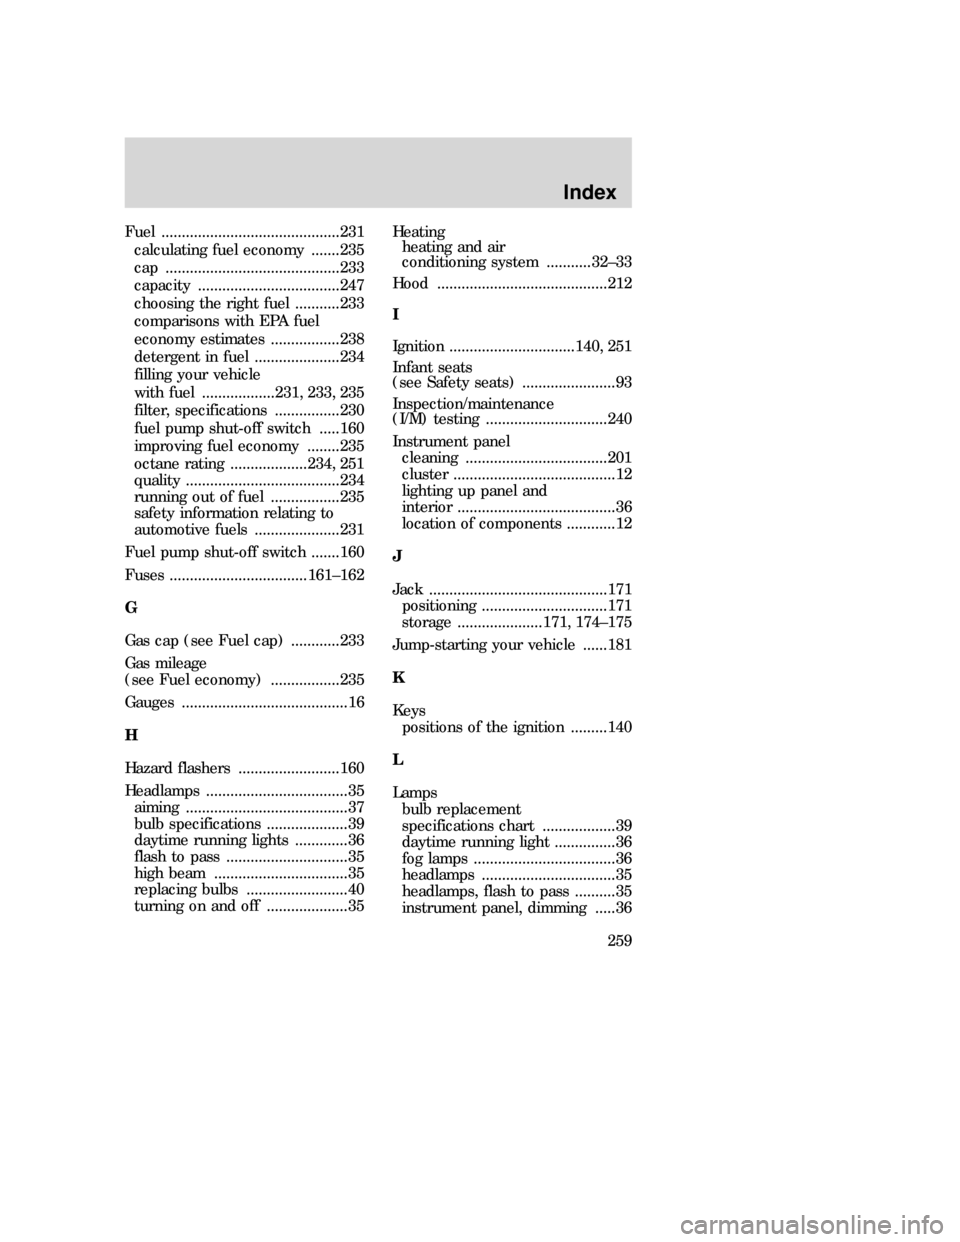
Fuel ............................................231
calculating fuel economy .......235
cap ...........................................233
capacity ...................................247
choosing the right fuel ...........233
comparisons with EPA fuel
economy estimates .................238
detergent in fuel .....................234
filling your vehicle
with fuel ..................231, 233, 235
filter, specifications ................230
fuel pump shut-off switch .....160
improving fuel economy ........235
octane rating ...................234, 251
quality ......................................234
running out of fuel .................235
safety information relating to
automotive fuels .....................231
Fuel pump shut-off switch .......160
Fuses ..................................161–162
G
Gas cap (see Fuel cap) ............233
Gas mileage
(see Fuel economy) .................235
Gauges .........................................16
H
Hazard flashers .........................160
Headlamps ...................................35
aiming ........................................37
bulb specifications ....................39
daytime running lights .............36
flash to pass ..............................35
high beam .................................35
replacing bulbs .........................40
turning on and off ....................35Heating
heating and air
conditioning system ...........32–33
Hood ..........................................212
I
Ignition ...............................140, 251
Infant seats
(see Safety seats) .......................93
Inspection/maintenance
(I/M) testing ..............................240
Instrument panel
cleaning ...................................201
cluster ........................................12
lighting up panel and
interior .......................................36
location of components ............12
J
Jack ............................................171
positioning ...............................171
storage .....................171, 174–175
Jump-starting your vehicle ......181
K
Keys
positions of the ignition .........140
L
Lamps
bulb replacement
specifications chart ..................39
daytime running light ...............36
fog lamps ...................................36
headlamps .................................35
headlamps, flash to pass ..........35
instrument panel, dimming .....36
2006 B-Series(mbs)
Owners Guide (post-2002-fmt)
Canadian_French(fr_can)
Index
259