stop start MAZDA MODEL B-SERIES 2006 Owners Manual (in English)
[x] Cancel search | Manufacturer: MAZDA, Model Year: 2006, Model line: MODEL B-SERIES, Model: MAZDA MODEL B-SERIES 2006Pages: 262, PDF Size: 2.47 MB
Page 13 of 262
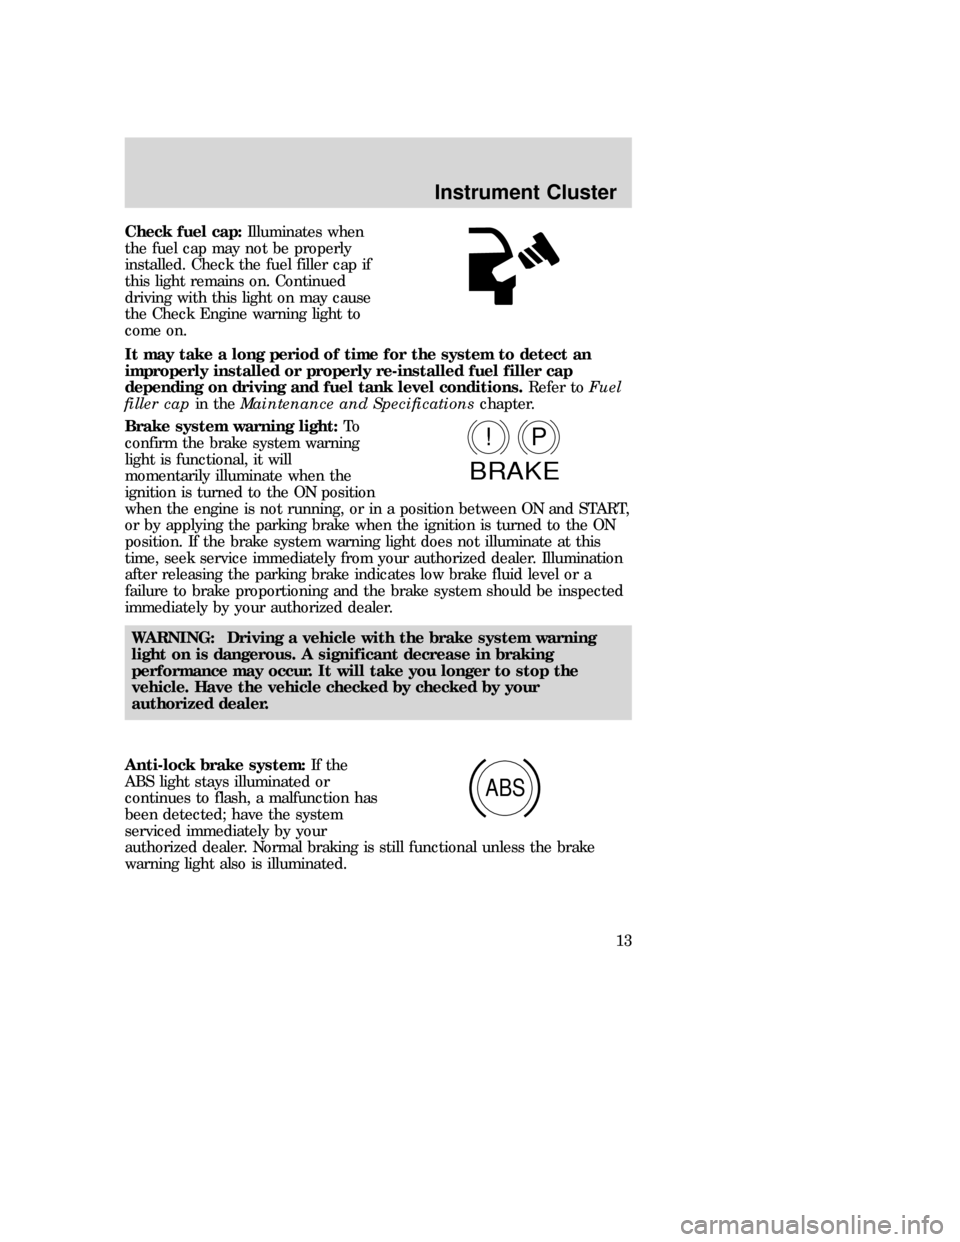
Check fuel cap:Illuminates when
the fuel cap may not be properly
installed. Check the fuel filler cap if
this light remains on. Continued
driving with this light on may cause
the Check Engine warning light to
come on.
It may take a long period of time for the system to detect an
improperly installed or properly re-installed fuel filler cap
depending on driving and fuel tank level conditions.Refer toFuel
filler capin theMaintenance and Specificationschapter.
Brake system warning light:To
confirm the brake system warning
light is functional, it will
momentarily illuminate when the
ignition is turned to the ON position
when the engine is not running, or in a position between ON and START,
or by applying the parking brake when the ignition is turned to the ON
position. If the brake system warning light does not illuminate at this
time, seek service immediately from your authorized dealer. Illumination
after releasing the parking brake indicates low brake fluid level or a
failure to brake proportioning and the brake system should be inspected
immediately by your authorized dealer.
WARNING: Driving a vehicle with the brake system warning
light on is dangerous. A significant decrease in braking
performance may occur. It will take you longer to stop the
vehicle. Have the vehicle checked by checked by your
authorized dealer.
Anti-lock brake system:If the
ABS light stays illuminated or
continues to flash, a malfunction has
been detected; have the system
serviced immediately by your
authorized dealer. Normal braking is still functional unless the brake
warning light also is illuminated.
P!
BRAKE
ABS
2006 B-Series(mbs)
Owners Guide (post-2002-fmt)
Canadian_French(fr_can)
Instrument Cluster
13
Page 113 of 262
This begins with the letters “DOT” and indicates that the tire meets all
federal standards. The next two numbers or letters are the plant code
designating where it was manufactured, the next two are the tire size
code and the last four numbers represent the week and year the tire was
built. For example, the numbers 317 mean the 31st week of 1997. After
2000 the numbers go to four digits. For example, 2501 means the 25th
week of 2001. The numbers in between are identification codes used for
traceability. This information is used to contact customers if a tire defect
requires a recall.
Tire Replacement Requirements
Your vehicle is equipped with tires designed to provide a safe ride and
handling capability.
WARNING: Only use replacement tires and wheels that are the
same size and type (such as P-metric versus LT-metric or
all-season versus all-terrain) as those originally provided by
Mazda. Use of any tire or wheel not recommended by Mazda can
affect the safety and performance of your vehicle, which could
result in an increased risk of loss of vehicle control, vehicle
rollover, personal injury and death. Additionally the use of
non-recommended tires and wheels could cause steering,
suspension, axle or transfer case/power transfer unit failure. If
you have questions regarding tire replacement, see an
authorized dealer.
Important:Remember to replace the wheel valve stems when the road
tires are replaced on your vehicle.
It is recommended that the two front tires or two rear tires generally be
replaced as a pair.
Safety practices
Driving habits have a great deal to do with your tire mileage and safety.
•Observe posted speed limits
•Avoid fast starts, stops and turns
•Avoid potholes and objects on the road
•Do not run over curbs or hit the tire against a curb when parking
2006 B-Series(mbs)
Owners Guide (post-2002-fmt)
Canadian_French(fr_can)
Tires, Wheels and Loading
113
Page 136 of 262
Trailer tow connector
Color Function Comment
3. Tan/White Tail lamp Relay controlled circuit
activated when the park
lamps/headlamps are on.
4. White Ground Matching vehicle circuit
returns to battery’s negative
ground.
Driving while you tow
When towing a trailer:
•Keep your speed no faster than 70 mph (112 km/h) during the first
500 miles (800 km) of towing a trailer, and don’t make full throttle
starts.
•Turn off the speed control. The speed control may shut off
automatically when you are towing on long, steep grades.
•Consult your local motor vehicle speed regulations for towing a trailer.
•To eliminate excessive shifting, use a lower gear. This will also assist
in transmission cooling. (For additional information, refer to the
Driving with a 5–speed automatic transmissionsection in the
Drivingchapter.)
•
Under extreme conditions with large frontal trailers, high outside
temperatures and highway speeds, the coolant gauge may indicate
higher than normal coolant temperatures. If this occurs, reduce speed
until the coolant temperature returns to the normal range. Refer to
Engine coolant temperature gaugein theInstrument Clusterchapter.
•Anticipate stops and brake gradually.
•Do not exceed the GCWR rating or transmission damage may occur.
Servicing after towing
If you tow a trailer for long distances, your vehicle will require more
frequent service intervals. Refer to yourservice maintenance section
for more information.
2006 B-Series(mbs)
Owners Guide (post-2002-fmt)
Canadian_French(fr_can)
Tires, Wheels and Loading
136
Page 137 of 262

Trailer towing tips
•Practice turning, stopping and backing up before starting on a trip to
get the feel of the vehicle trailer combination. When turning, make
wider turns so the trailer wheels will clear curbs and other obstacles.
•Allow more distance for stopping with a trailer attached.
•The trailer tongue weight should be 10–15% of the loaded trailer
weight.
•If you will be towing a trailer frequently in hot weather, hilly
conditions, at GCW, or any combination of these factors, consider
refilling your rear axle with synthetic gear lube if not already so
equipped. Refer to theMaintenance and specificationschapter for
the lubricant specification. Remember that regardless of the rear axle
lube used, do not tow a trailer for the first 500 miles (800 km) of a
new vehicle, and that the first 500 miles (800 km) of towing be done
at no faster than 70 mph (112 km/h) with no full throttle starts.
•After you have traveled 50 miles (80 km), thoroughly check your
hitch, electrical connections and trailer wheel lug nuts.
•To aid in engine/transmission cooling and A/C efficiency during hot
weather while stopped in traffic, place the gearshift lever in P (Park)
(automatic transmission) or N (Neutral) (manual transmissions).
•Vehicles with trailers should not be parked on a grade. If you must
park on a grade, place wheel chocks under the trailer’s wheels.
Launching or retrieving a boat
Disconnect the wiring to the trailer before backing the trailer
into the water. Reconnect the wiring to the trailer after the
trailer is removed from the water.
When backing down a ramp during boat launching or retrieval:
•do not allow the static water level to rise above the bottom edge of
the rear bumper.
•do not allow waves to break higher than 6 inches (15 cm) above the
bottom edge of the rear bumper.
Exceeding these limits may allow water to enter vehicle components:
•causing internal damage to the components.
•affecting driveability, emissions and reliability.
Replace the rear axle lubricant any time the axle has been submerged in
water. Rear axle lubricant quantities are not to be checked or changed
unless a leak is suspected or repair required.
2006 B-Series(mbs)
Owners Guide (post-2002-fmt)
Canadian_French(fr_can)
Tires, Wheels and Loading
137
Page 143 of 262

Starting the engine
Note:Whenever you start your vehicle, release the key as soon as the
engine starts. Excessive cranking could damage the starter.
1. Turn the key to 4 (ON) without
turning the key to 5 (START). If
there is difficulty in turning the
key, rotate the steering wheel
until the key turns freely. This
condition may occur when:
•the front wheels are turned
•a front wheel is against the curb
Turn the key to 5 (START), then
release the key as soon as the
engine starts. Excessive cranking could damage the starter.
Note:If the engine does not start within five seconds on the first try,
turn the key to OFF, wait 10 seconds and try again. If the engine still
fails to start, press the accelerator to the floor and try again; this will
allow the engine to crank with the fuel shut off in case the engine is
flooded with fuel.
If the engine fails to start using the preceding instructions (flexible
fuel vehicles only)
1. Press and hold down the accelerator 1/3 to 1/2 way to floor, then
crank the engine.
2. When the engine starts, release the key, then gradually release the
accelerator pedal as the engine speeds up. If the engine still fails to
start, repeat Step 1.
Guarding against exhaust fumes
Carbon monoxide is present in exhaust fumes. Take precautions to avoid
its dangerous effects.
WARNING: If you smell exhaust fumes inside your vehicle,
have your dealer inspect your vehicle immediately. Do not drive
if you smell exhaust fumes.
Important ventilating information
If the engine is idling while the vehicle is stopped for a long period of
time, open the windows at least one inch (2.5 cm) or adjust the heating
or air conditioning to bring in fresh air.
3
2
1
5
4
2006 B-Series(mbs)
Owners Guide (post-2002-fmt)
Canadian_French(fr_can)
Driving
143
Page 145 of 262
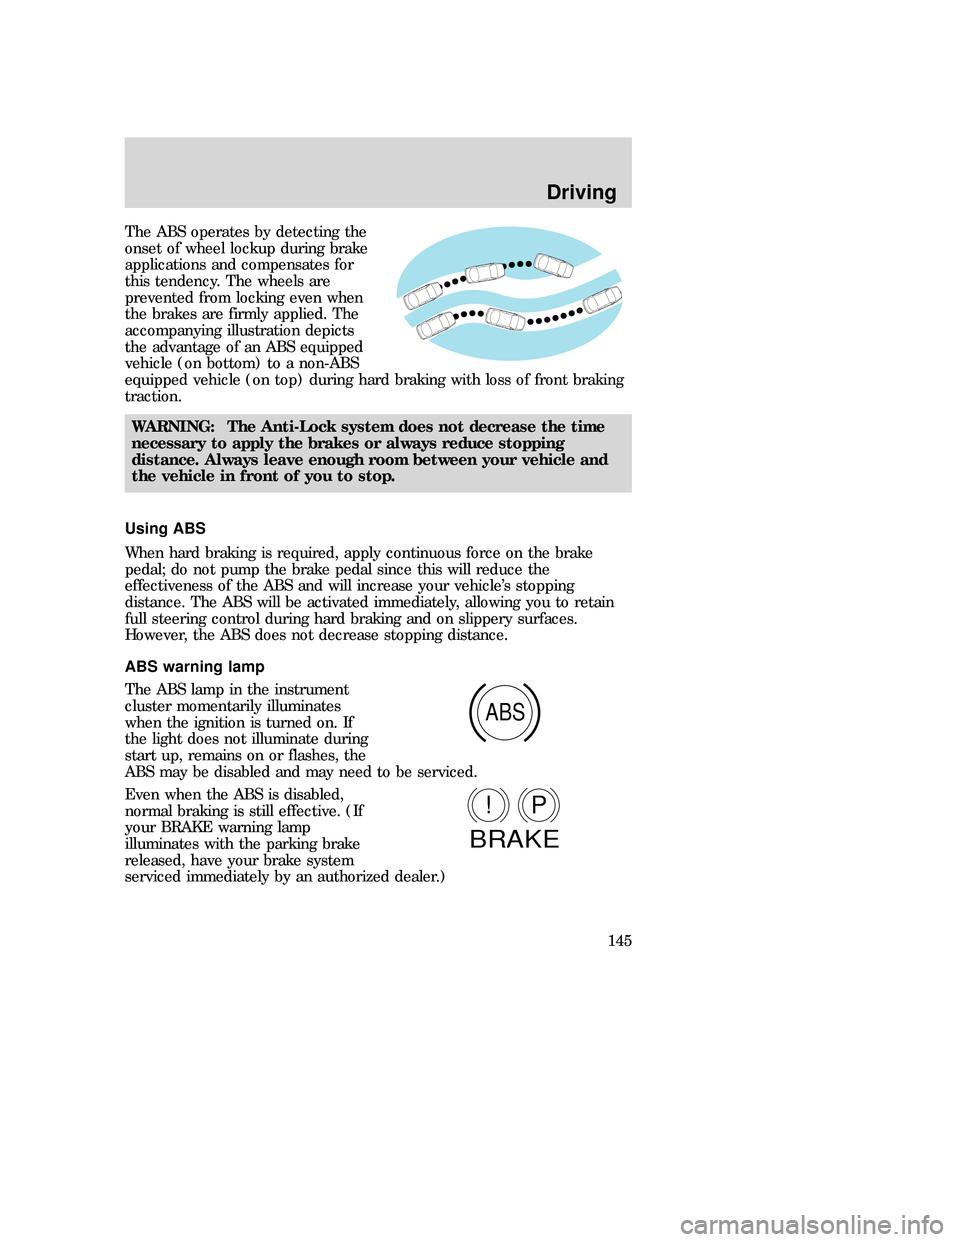
The ABS operates by detecting the
onset of wheel lockup during brake
applications and compensates for
this tendency. The wheels are
prevented from locking even when
the brakes are firmly applied. The
accompanying illustration depicts
the advantage of an ABS equipped
vehicle (on bottom) to a non-ABS
equipped vehicle (on top) during hard braking with loss of front braking
traction.
WARNING: The Anti-Lock system does not decrease the time
necessary to apply the brakes or always reduce stopping
distance. Always leave enough room between your vehicle and
the vehicle in front of you to stop.
Using ABS
When hard braking is required, apply continuous force on the brake
pedal; do not pump the brake pedal since this will reduce the
effectiveness of the ABS and will increase your vehicle’s stopping
distance. The ABS will be activated immediately, allowing you to retain
full steering control during hard braking and on slippery surfaces.
However, the ABS does not decrease stopping distance.
ABS warning lamp
The ABS lamp in the instrument
cluster momentarily illuminates
when the ignition is turned on. If
the light does not illuminate during
start up, remains on or flashes, the
ABS may be disabled and may need to be serviced.
Even when the ABS is disabled,
normal braking is still effective. (If
your BRAKE warning lamp
illuminates with the parking brake
released, have your brake system
serviced immediately by an authorized dealer.)
ABS
P!
BRAKE
2006 B-Series(mbs)
Owners Guide (post-2002-fmt)
Canadian_French(fr_can)
Driving
145
Page 150 of 262

P (Park)
This position locks the transmission and prevents the rear wheels from
turning.
To put your vehicle in gear:
•Start the engine
•Depress the brake pedal
•Move the gearshift lever into the desired gear
To put your vehicle in P (Park):
•Come to a complete stop
•Move the gearshift lever and securely latch it in P (Park)
WARNING: Always set the parking brake fully and make sure
the gearshift is latched in P (Park). Turn the ignition to the
LOCK position and remove the key whenever you leave your
vehicle.
R (Reverse)
With the gearshift lever in R (Reverse), the vehicle will move backward.
Always come to a complete stop before shifting into and out of R
(Reverse).
N (Neutral)
With the gearshift lever in N (Neutral), the vehicle can be started and is
free to roll. Hold the brake pedal down while in this position.
(Overdrive)
The normal driving position for the
best fuel economy. Transmission
operates in gears one through
five.
(Overdrive) can be
deactivated by pressing the
transmission control switch on the end of the gearshift lever.
This will illuminate the O/D OFF
lamp and activate Drive.
O/D
ON/OFF
O/D
OFF
2006 B-Series(mbs)
Owners Guide (post-2002-fmt)
Canadian_French(fr_can)
Driving
150
Page 152 of 262
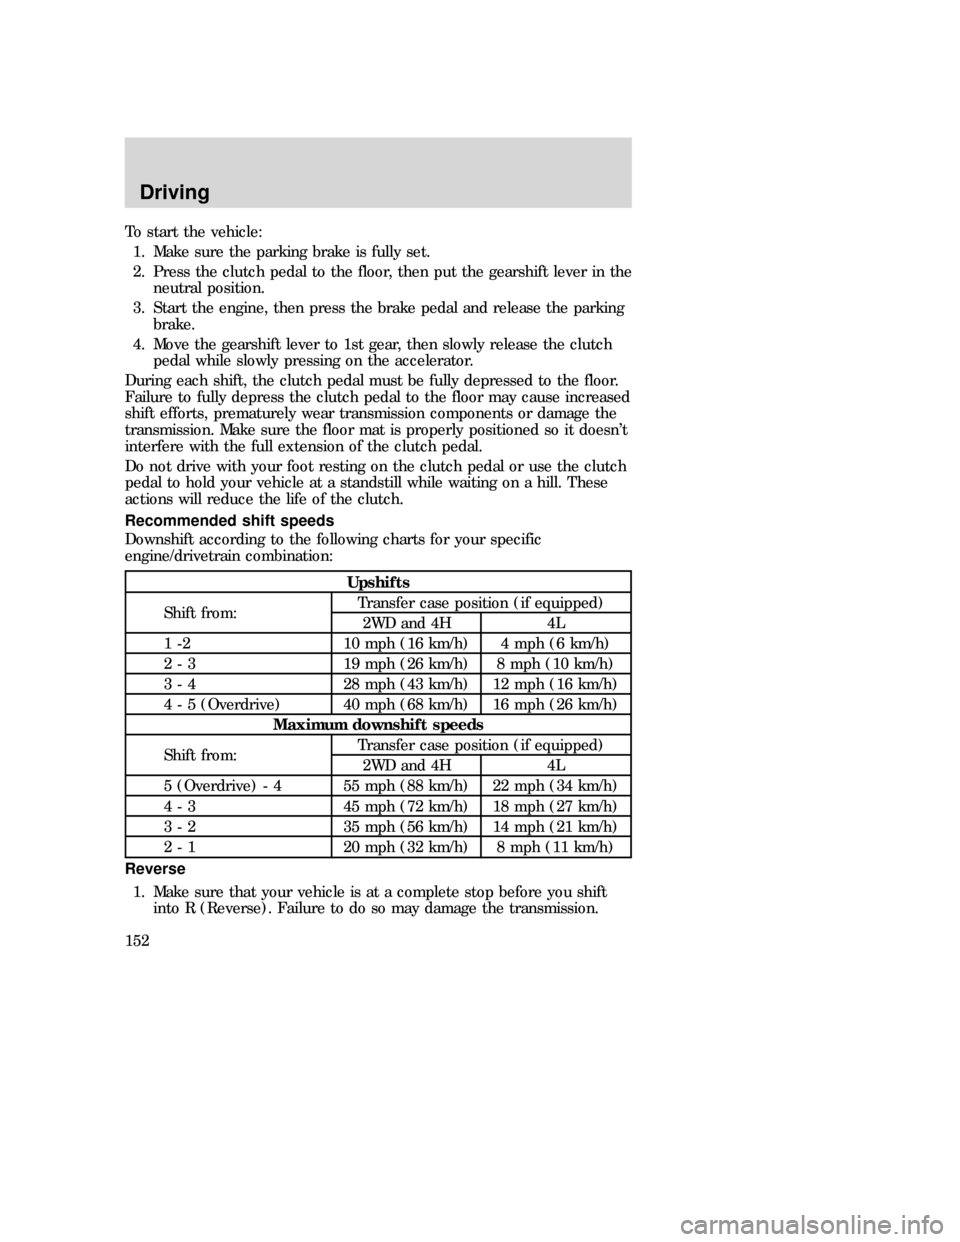
To start the vehicle:
1. Make sure the parking brake is fully set.
2. Press the clutch pedal to the floor, then put the gearshift lever in the
neutral position.
3. Start the engine, then press the brake pedal and release the parking
brake.
4. Move the gearshift lever to 1st gear, then slowly release the clutch
pedal while slowly pressing on the accelerator.
During each shift, the clutch pedal must be fully depressed to the floor.
Failure to fully depress the clutch pedal to the floor may cause increased
shift efforts, prematurely wear transmission components or damage the
transmission. Make sure the floor mat is properly positioned so it doesn’t
interfere with the full extension of the clutch pedal.
Do not drive with your foot resting on the clutch pedal or use the clutch
pedal to hold your vehicle at a standstill while waiting on a hill. These
actions will reduce the life of the clutch.
Recommended shift speeds
Downshift according to the following charts for your specific
engine/drivetrain combination:
Upshifts
Shift from:Transfer case position (if equipped)
2WD and 4H 4L
1 -2 10 mph (16 km/h) 4 mph (6 km/h)
2 - 3 19 mph (26 km/h) 8 mph (10 km/h)
3 - 4 28 mph (43 km/h) 12 mph (16 km/h)
4 - 5 (Overdrive) 40 mph (68 km/h) 16 mph (26 km/h)
Maximum downshift speeds
Shift from:Transfer case position (if equipped)
2WD and 4H 4L
5 (Overdrive) - 4 55 mph (88 km/h) 22 mph (34 km/h)
4 - 3 45 mph (72 km/h) 18 mph (27 km/h)
3 - 2 35 mph (56 km/h) 14 mph (21 km/h)
2 - 1 20 mph (32 km/h) 8 mph (11 km/h)
Reverse
1. Make sure that your vehicle is at a complete stop before you shift
into R (Reverse). Failure to do so may damage the transmission.
2006 B-Series(mbs)
Owners Guide (post-2002-fmt)
Canadian_French(fr_can)
Driving
152
Page 158 of 262

gear and drive steadily through the terrain. Apply the accelerator slowly
and avoid spinning the wheels.
Mud and water
If you must drive through high water, drive slowly. Traction or brake
capability may be limited.
When driving through water, determine the depth; avoid water higher
than the bottom of the hubs (if possible) and proceed slowly. If the
ignition system gets wet, the vehicle may stall.
Once through water, always try the brakes. Wet brakes do not stop the
vehicle as effectively as dry brakes. Drying can be improved by moving
your vehicle slowly while applying light pressure on the brake pedal.
After driving through mud, clean off residue stuck to the driveshafts and
tires. Excess mud stuck on tires and rotating driveshafts causes an
imbalance that could damage drive components.
If the transmission, transfer case or front axle are submerged in water,
their fluids should be checked and changed, if necessary.
Driving through deep water where the transmission vent tube is
submerged may allow water into the transmission and cause
internal transmission damage.
Replace rear axle lubricant any time the axle has been submerged in
water. The rear axle does not normally require a lubricant change for the
life of the vehicle. Rear axle lubricant quantities are not to be checked or
changed unless a leak is suspected or repair is required.
Driving on hilly or sloping terrain
When driving on a hill, avoid driving crosswise or turning on steep
slopes. You could lose traction and slip sideways. Drive straight up,
straight down or avoid the hill completely. Know the conditions on the
other side of a hill before driving over the crest.
When climbing a steep hill, start in a lower gear rather than downshifting
to a lower gear from a higher gear once the ascent has started. This
reduces strain on the engine and the possibility of stalling.
When descending a steep hill, avoid sudden braking. Shift to a lower gear
when added engine braking is desired.
When speed control is on and you are driving uphill, your vehicle speed
may drop considerably, especially if you are carrying a heavy load.
If vehicle speed drops more than 10 mph (16 km/h), the speed control
will cancel automatically. Resume speed with accelerator pedal.
2006 B-Series(mbs)
Owners Guide (post-2002-fmt)
Canadian_French(fr_can)
Driving
158
Page 159 of 262
![MAZDA MODEL B-SERIES 2006 Owners Manual (in English) If speed control cancels after climbing the hill, reset speed by pressing
and holding the SET ACCEL button (to resume speeds over 30 mph
[50 km/h]).
Automatic transmissions may shift frequently while MAZDA MODEL B-SERIES 2006 Owners Manual (in English) If speed control cancels after climbing the hill, reset speed by pressing
and holding the SET ACCEL button (to resume speeds over 30 mph
[50 km/h]).
Automatic transmissions may shift frequently while](/img/28/13729/w960_13729-158.png)
If speed control cancels after climbing the hill, reset speed by pressing
and holding the SET ACCEL button (to resume speeds over 30 mph
[50 km/h]).
Automatic transmissions may shift frequently while driving up steep
grades. Eliminate frequent shifting by shifting out of
(Overdrive) into
a lower gear.
Driving on snow and ice
A 4WD vehicle has advantages over 2WD vehicles in snow and ice but
can skid like any other vehicle.
Avoid sudden applications of power and quick changes of direction on
snow and ice. Apply the accelerator slowly and steadily when starting
from a full stop.
When braking, apply the brakes as you normally would. In order to allow
the anti-lock brake system (ABS) to operate properly, keep steady
pressure on the brake pedal.
Make sure you allow sufficient distance between you and other vehicles
for stopping. Drive slower than usual and consider using one of the lower
gears.
DRIVING THROUGH WATER
If driving through deep or standing
water is unavoidable, proceed very
slowly especially when the depth is
not known. Never drive through
water that is higher than the bottom
of the wheel rims (for cars) or the
bottom of the hubs (for trucks).
When driving through water, traction or brake capability may be limited.
Also, water may enter your engine’s air intake and severely damage your
engine or your vehicle may stall.Driving through deep water where
the transmission vent tube is submerged may allow water into the
transmission and cause internal transmission damage.
Once through the water, always dry the brakes by moving your
vehicle slowly while applying light pressure on the brake pedal.
Wet brakes do not stop the vehicle as quickly as dry brakes.
2006 B-Series(mbs)
Owners Guide (post-2002-fmt)
Canadian_French(fr_can)
Driving
159