ECO mode MAZDA MODEL B2300 TRUCK 2006 Owners Manual (in English)
[x] Cancel search | Manufacturer: MAZDA, Model Year: 2006, Model line: MODEL B2300 TRUCK, Model: MAZDA MODEL B2300 TRUCK 2006Pages: 268, PDF Size: 2.52 MB
Page 12 of 268
JOBNAME: No Job Name PAGE: 12 SESS: 1 OUTPUT: Tue Apr 12 14:52:56 2005
/ford_pdm/ford/own2002/mbs/mpdiff
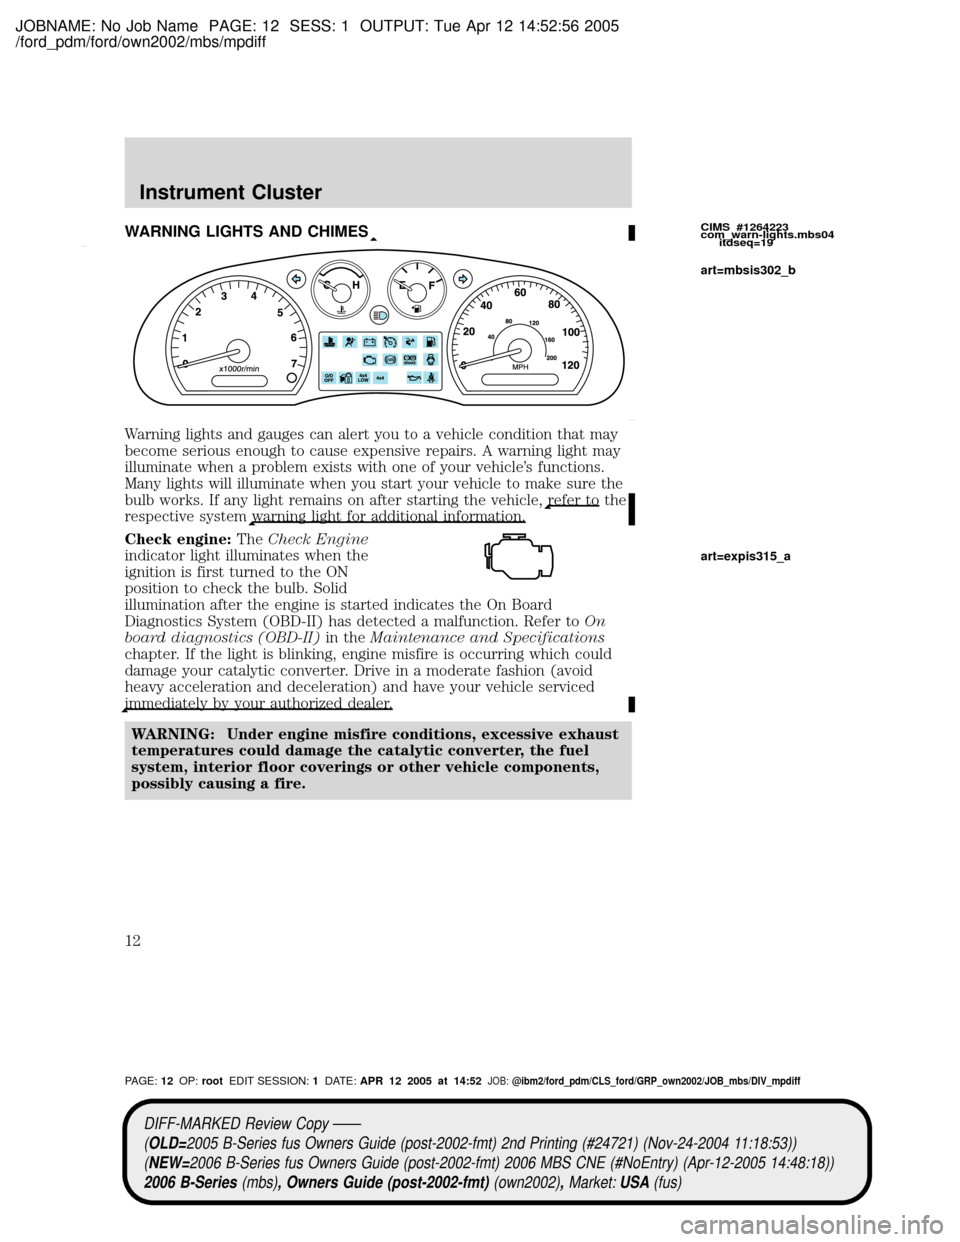
WARNING LIGHTS AND CHIMES
Warning lights and gauges can alert you to a vehicle condition that may
become serious enough to cause expensive repairs. A warning light may
illuminate when a problem exists with one of your vehicle's functions.
Many lights will illuminate when you start your vehicle to make sure the
bulb works. If any light remains on after starting the vehicle,
refer to the
respective systemwarning light for additional information.
Check engine:TheCheck Engine
indicator light illuminates when the
ignition is first turned to the ON
position to check the bulb. Solid
illumination after the engine is started indicates the On Board
Diagnostics System (OBD-II) has detected a malfunction. Refer toOn
board diagnostics (OBD-II)in theMaintenance and Specifications
chapter. If the light is blinking, engine misfire is occurring which could
damage your catalytic converter. Drive in a moderate fashion (avoid
heavy acceleration and deceleration) and have your vehicle serviced
immediately by your authorized dealer.
WARNING: Under engine misfire conditions, excessive exhaust
temperatures could damage the catalytic converter, the fuel
system, interior floor coverings or other vehicle components,
possibly causing a fire.
CIMS #1264223
com_warn-lights.mbs04
itdseq=19
art=mbsis302_b
art=expis315_a
DIFF-MARKED Review Copy ÐÐ
(OLD=2005 B-Series fus Owners Guide (post-2002-fmt) 2nd Printing (#24721) (Nov-24-2004 11:18:53))
(NEW=2006 B-Series fus Owners Guide (post-2002-fmt) 2006 MBS CNE (#NoEntry) (Apr-12-2005 14:48:18))
2006 B-Series(mbs), Owners Guide (post-2002-fmt)(own2002),Market:USA(fus)
PAGE:12OP:rootEDIT SESSION:1DATE:APR 12 2005 at 14:52JOB:@ibm2/ford_pdm/CLS_ford/GRP_own2002/JOB_mbs/DIV_mpdiff
Instrument Cluster
12
Page 17 of 268
JOBNAME: No Job Name PAGE: 17 SESS: 1 OUTPUT: Tue Apr 12 14:52:56 2005
/ford_pdm/ford/own2002/mbs/mpdiff
WARNING: Never remove the coolant reservoir cap and/or the
radiator cap while the engine is running or hot, this may result
in serious burns.
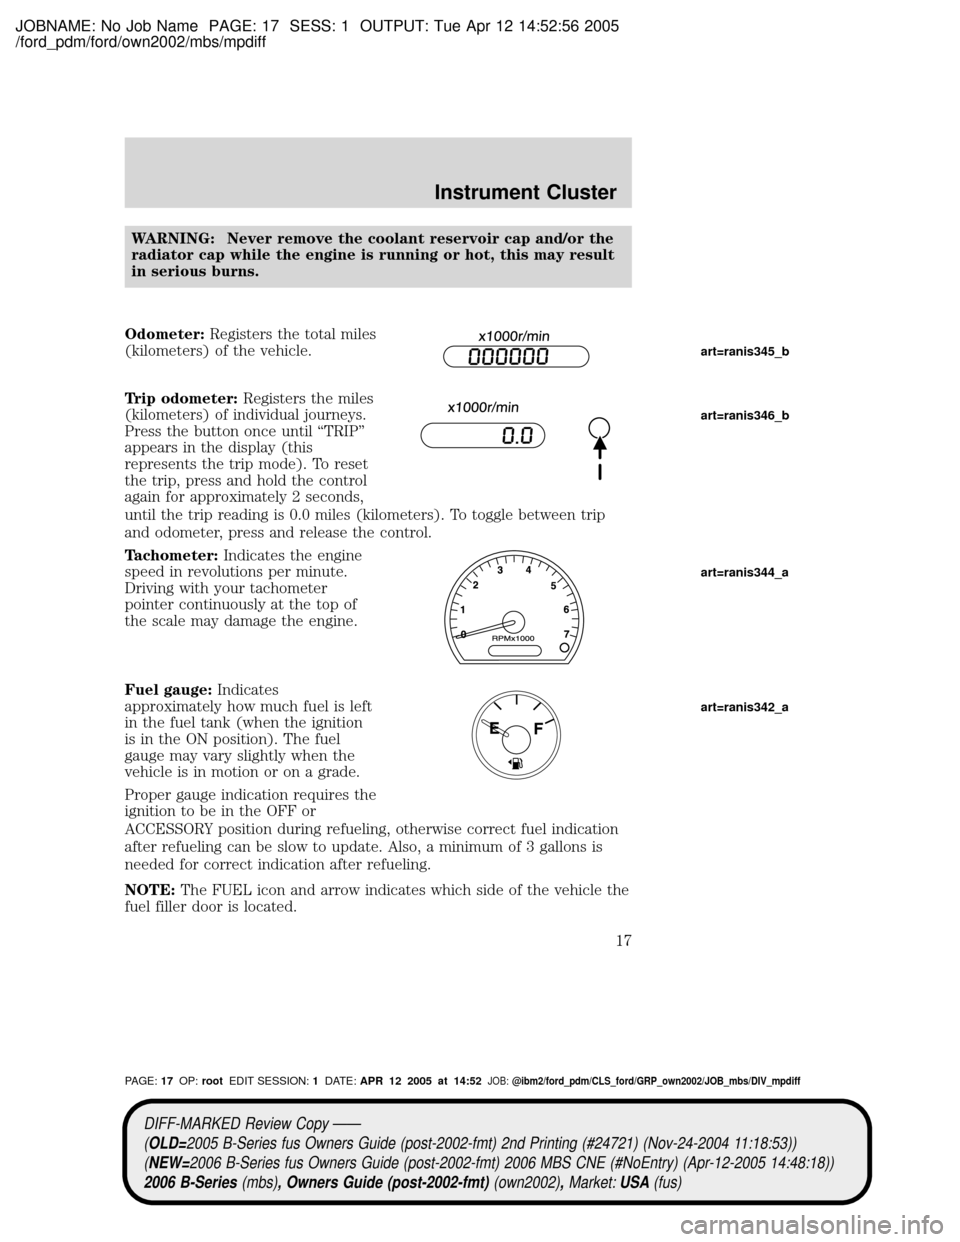
Odometer:Registers the total miles
(kilometers) of the vehicle.
Trip odometer:Registers the miles
(kilometers) of individual journeys.
Press the button once until ªTRIPº
appears in the display (this
represents the trip mode). To reset
the trip, press and hold the control
again for approximately 2 seconds,
until the trip reading is 0.0 miles (kilometers). To toggle between trip
and odometer, press and release the control.
Tachometer:Indicates the engine
speed in revolutions per minute.
Driving with your tachometer
pointer continuously at the top of
the scale may damage the engine.
Fuel gauge:Indicates
approximately how much fuel is left
in the fuel tank (when the ignition
is in the ON position). The fuel
gauge may vary slightly when the
vehicle is in motion or on a grade.
Proper gauge indication requires the
ignition to be in the OFF or
ACCESSORY position during refueling, otherwise correct fuel indication
after refueling can be slow to update. Also, a minimum of 3 gallons is
needed for correct indication after refueling.
NOTE:The FUEL icon and arrow indicates which side of the vehicle the
fuel filler door is located.
art=ranis345_b
art=ranis346_b
art=ranis344_a
art=ranis342_a
DIFF-MARKED Review Copy ÐÐ
(OLD=2005 B-Series fus Owners Guide (post-2002-fmt) 2nd Printing (#24721) (Nov-24-2004 11:18:53))
(NEW=2006 B-Series fus Owners Guide (post-2002-fmt) 2006 MBS CNE (#NoEntry) (Apr-12-2005 14:48:18))
2006 B-Series(mbs), Owners Guide (post-2002-fmt)(own2002),Market:USA(fus)
PAGE:17OP:rootEDIT SESSION:1DATE:APR 12 2005 at 14:52JOB:@ibm2/ford_pdm/CLS_ford/GRP_own2002/JOB_mbs/DIV_mpdiff
Instrument Cluster
17
Page 20 of 268
JOBNAME: No Job Name PAGE: 20 SESS: 1 OUTPUT: Tue Apr 12 14:52:56 2005
/ford_pdm/ford/own2002/mbs/mpdiff
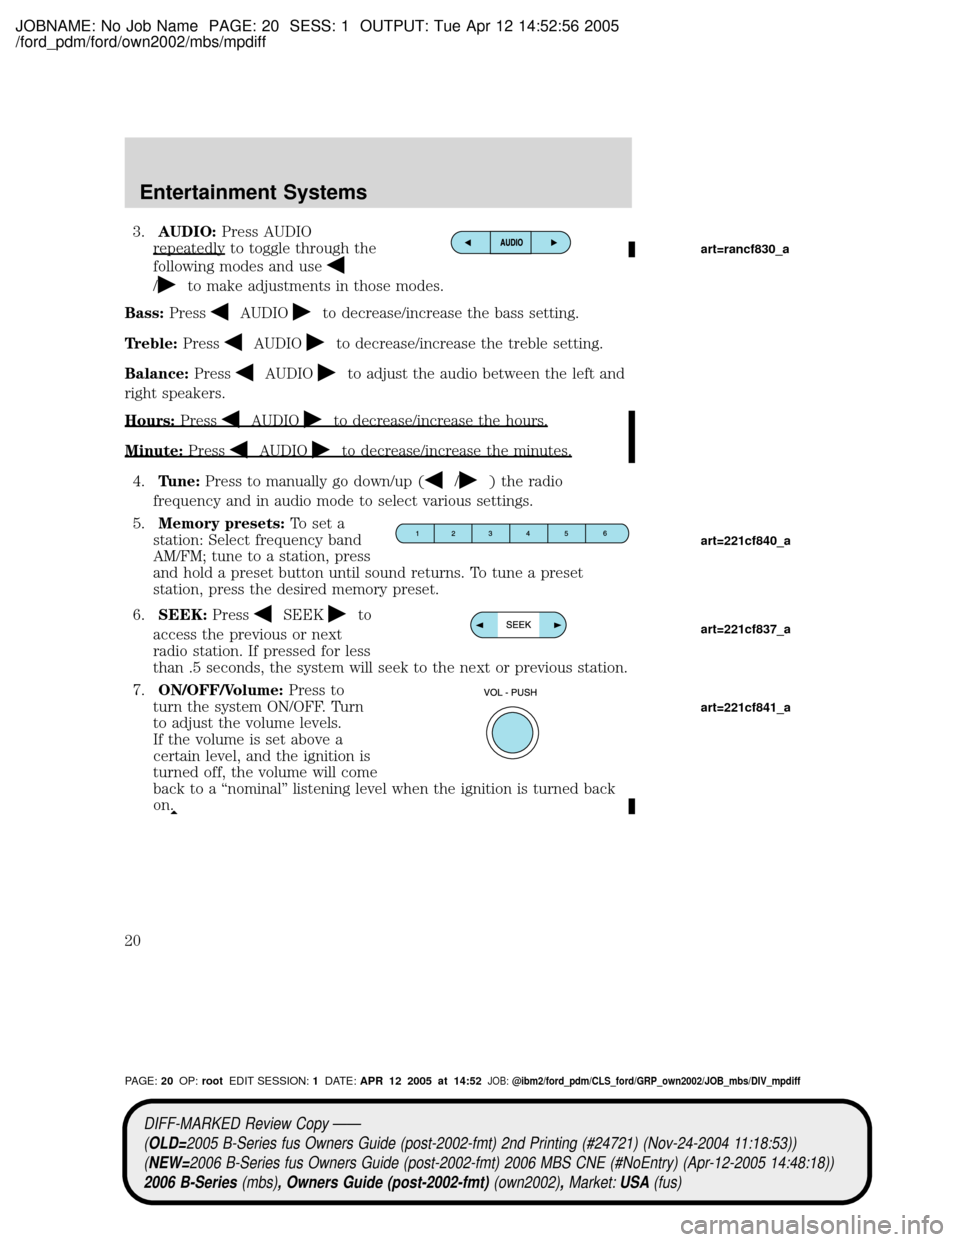
3.AUDIO:Press AUDIO
repeatedly to toggle through the
following modes and use
/to make adjustments in those modes.
Bass:Press
AUDIOto decrease/increase the bass setting.
Treble:Press
AUDIOto decrease/increase the treble setting.
Balance:Press
AUDIOto adjust the audio between the left and
right speakers.
Hours:Press
AUDIOto decrease/increase the hours.
Minute:PressAUDIOto decrease/increase the minutes.
4.Tune:Press to manually go down/up (/) the radio
frequency and in audio mode to select various settings.
5.Memory presets:To set a
station: Select frequency band
AM/FM; tune to a station, press
and hold a preset button until sound returns. To tune a preset
station, press the desired memory preset.
6.SEEK:Press
SEEKto
access the previous or next
radio station. If pressed for less
than .5 seconds, the system will seek to the next or previous station.
7.ON/OFF/Volume:Press to
turn the system ON/OFF. Turn
to adjust the volume levels.
If the volume is set above a
certain level, and the ignition is
turned off, the volume will come
back to a ªnominalº listening level when the ignition is turned back
on.
art=rancf830_a
art=221cf840_a
art=221cf837_a
art=221cf841_a
DIFF-MARKED Review Copy ÐÐ
(OLD=2005 B-Series fus Owners Guide (post-2002-fmt) 2nd Printing (#24721) (Nov-24-2004 11:18:53))
(NEW=2006 B-Series fus Owners Guide (post-2002-fmt) 2006 MBS CNE (#NoEntry) (Apr-12-2005 14:48:18))
2006 B-Series(mbs), Owners Guide (post-2002-fmt)(own2002),Market:USA(fus)
PAGE:20OP:rootEDIT SESSION:1DATE:APR 12 2005 at 14:52JOB:@ibm2/ford_pdm/CLS_ford/GRP_own2002/JOB_mbs/DIV_mpdiff
Entertainment Systems
20
Page 23 of 268
JOBNAME: No Job Name PAGE: 23 SESS: 1 OUTPUT: Tue Apr 12 14:52:56 2005
/ford_pdm/ford/own2002/mbs/mpdiff
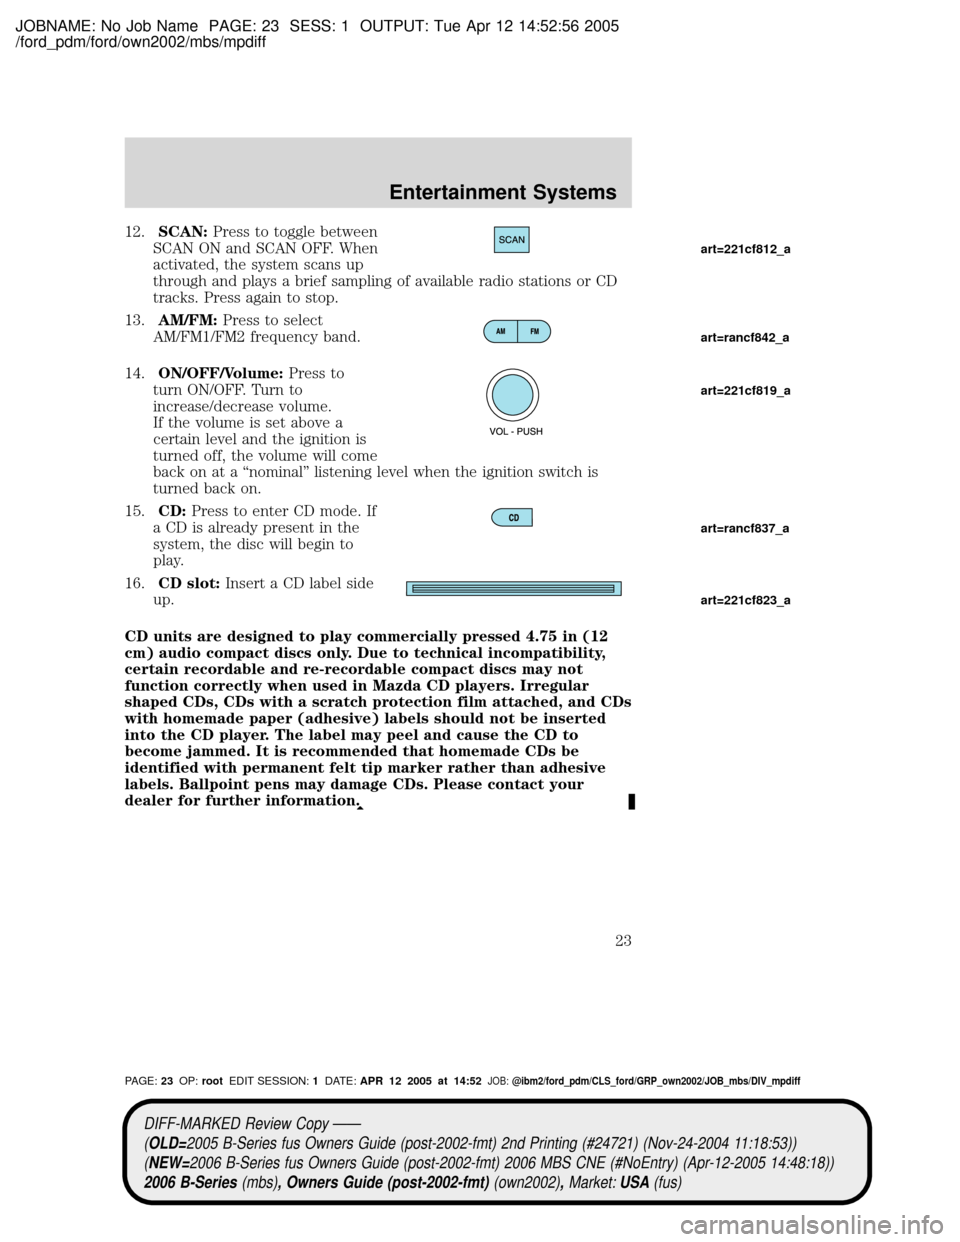
12.SCAN:Press to toggle between
SCAN ON and SCAN OFF. When
activated, the system scans up
through and plays a brief sampling of available radio stations or CD
tracks. Press again to stop.
13.AM/FM:Press to select
AM/FM1/FM2 frequency band.
14.ON/OFF/Volume:Press to
turn ON/OFF. Turn to
increase/decrease volume.
If the volume is set above a
certain level and the ignition is
turned off, the volume will come
back on at a ªnominalº listening level when the ignition switch is
turned back on.
15.CD:Press to enter CD mode. If
a CD is already present in the
system, the disc will begin to
play.
16.CD slot:Insert a CD label side
up.
CD units are designed to play commercially pressed 4.75 in (12
cm) audio compact discs only. Due to technical incompatibility,
certain recordable and re-recordable compact discs may not
function correctly when used in Mazda CD players. Irregular
shaped CDs, CDs with a scratch protection film attached, and CDs
with homemade paper (adhesive) labels should not be inserted
into the CD player. The label may peel and cause the CD to
become jammed. It is recommended that homemade CDs be
identified with permanent felt tip marker rather than adhesive
labels. Ballpoint pens may damage CDs. Please contact your
dealer for further information.
art=221cf812_a
art=rancf842_a
art=221cf819_a
art=rancf837_a
art=221cf823_a
DIFF-MARKED Review Copy ÐÐ
(OLD=2005 B-Series fus Owners Guide (post-2002-fmt) 2nd Printing (#24721) (Nov-24-2004 11:18:53))
(NEW=2006 B-Series fus Owners Guide (post-2002-fmt) 2006 MBS CNE (#NoEntry) (Apr-12-2005 14:48:18))
2006 B-Series(mbs), Owners Guide (post-2002-fmt)(own2002),Market:USA(fus)
PAGE:23OP:rootEDIT SESSION:1DATE:APR 12 2005 at 14:52JOB:@ibm2/ford_pdm/CLS_ford/GRP_own2002/JOB_mbs/DIV_mpdiff
Entertainment Systems
23
Page 27 of 268
JOBNAME: No Job Name PAGE: 27 SESS: 1 OUTPUT: Tue Apr 12 14:52:56 2005
/ford_pdm/ford/own2002/mbs/mpdiff
short Introduction of each song. In CD and MP3 flat file mode, you
may set the scan on or off. If activated, the system will scan through
each track. In MP3 directory mode, you may set scan on or off. If
activated, the system will scan in the current directory.
17.ON/OFF/Volume:Press to turn
ON/OFF. Turn to
increase/decrease volume.
If the volume is set above a
certain level and the ignition is
turned off, the volume will come
back on at a ªnominalº listening level when the ignition switch is
turned back on.
18.CD:Press to enter CD mode. If
a CD is already in the system,
the disc will begin play.
19.CD slot:Insert a CD, label side
up.
CD units are designed to play commercially pressed 4.75 in (12
cm) audio compact discs only. Due to technical incompatibility,
certain recordable and re-recordable compact discs may not
function correctly when used in Mazda CD players. Irregular
shaped CDs, CDs with a scratch protection film attached, and CDs
with homemade paper (adhesive) labels should not be inserted
into the CD player. The label may peel and cause the CD to
become jammed. It is recommended that homemade CDs be
identified with permanent felt tip marker rather than adhesive
labels. Ballpoint pens may damage CDs. Please contact your
dealer for further information.
20.Cassette slot:Insert a cassette, facing to the right.
art=221cf819_a
art=rancf837_a
art=221cf823_a
DIFF-MARKED Review Copy ÐÐ
(OLD=2005 B-Series fus Owners Guide (post-2002-fmt) 2nd Printing (#24721) (Nov-24-2004 11:18:53))
(NEW=2006 B-Series fus Owners Guide (post-2002-fmt) 2006 MBS CNE (#NoEntry) (Apr-12-2005 14:48:18))
2006 B-Series(mbs), Owners Guide (post-2002-fmt)(own2002),Market:USA(fus)
PAGE:27OP:rootEDIT SESSION:1DATE:APR 12 2005 at 14:52JOB:@ibm2/ford_pdm/CLS_ford/GRP_own2002/JOB_mbs/DIV_mpdiff
Entertainment Systems
27
Page 31 of 268
JOBNAME: No Job Name PAGE: 31 SESS: 1 OUTPUT: Tue Apr 12 14:52:56 2005
/ford_pdm/ford/own2002/mbs/mpdiff
18.CD slot:Insert a CD, label side up.
CD units are designed to play commercially pressed 4.75 in (12
cm) audio compact discs only. Due to technical incompatibility,
certain recordable and re-recordable compact discs may not
function correctly when used in Mazda CD players. Irregular
shaped CDs, CDs with a scratch protection film attached, and CDs
with homemade paper (adhesive) labels should not be inserted
into the CD player. The label may peel and cause the CD to
become jammed. It is recommended that homemade CDs be
identified with permanent felt tip marker rather than adhesive
labels. Ballpoint pens may damage CDs. Please contact your
dealer for further information.
GENERAL AUDIO INFORMATION
Radio frequencies:AM and FM frequencies are established by theFederal Communications Commission (FCC) and the Canadian Radio and
Telecommunications Commission (CRTC). Those frequencies are:
AM - 530, 540±1700, 1710 kHz
FM- 87.7, 87.9±107.7, 107.9 MHz
Radio receptionfactors:There are three factors that can affect radio
reception:
²Distance/strength: The further you travel from
a station, the weaker
the signal and the weaker the reception.
²Terrain: Hills, mountains, tall buildings, power lines, electric fences,
traffic lights and thunderstorms can interfere with your reception.
²Station overload: When you pass a broadcast tower, a stronger signal
may overtake a weaker one and play while the weak station frequency
is displayed.
Cassette/playercare:
Do:
²Use only cassettes that are 90 minutes long or less.
²Tighten very loose tapes by inserting a finger or pencil into the hole
and turning the hub.
²Remove loose labels before inserting tapes.
²Allow tapes which have been subjected to extreme heat, humidity or
cold to reach a moderate temperature before playing.
²Clean the cassette player head with a cassette cleaning cartridge after
10±12 hours of play to maintain good sound/operation.
CIMS #1010866
com_207cares.fly
itdseq=26
DIFF-MARKED Review Copy ÐÐ
(OLD=2005 B-Series fus Owners Guide (post-2002-fmt) 2nd Printing (#24721) (Nov-24-2004 11:18:53))
(NEW=2006 B-Series fus Owners Guide (post-2002-fmt) 2006 MBS CNE (#NoEntry) (Apr-12-2005 14:48:18))
2006 B-Series(mbs), Owners Guide (post-2002-fmt)(own2002),Market:USA(fus)
PAGE:31OP:rootEDIT SESSION:1DATE:APR 12 2005 at 14:52JOB:@ibm2/ford_pdm/CLS_ford/GRP_own2002/JOB_mbs/DIV_mpdiff
Entertainment Systems
31
Page 53 of 268
JOBNAME: No Job Name PAGE: 53 SESS: 1 OUTPUT: Tue Apr 12 14:52:56 2005
/ford_pdm/ford/own2002/mbs/mpdiff
²Depress the brake pedal or the
clutch pedal (if equipped) until
the desired vehicle speed is
reached, press the SET + control.
Turning off speed control
There are three ways to turn off the speed control:
²Depress the brake pedal or the clutch pedal (if equipped). This will
not erase your vehicle's previously set speed.
²Press the speed control OFF
control.
²Turn OFF the ignition.
Note:When you turn off the speed
control or the ignition, your speed
control set speed memory is erased.
Note:Fully depressing the clutch
pedal may cause a flare in engine RPM as the throttle is returned to idle.
This is normal.
OVERDRIVE CONTROL (IF EQUIPPED)
Activating overdrive
(Overdrive) is the normal drive position for the best fuel economy.
The overdrive function allows automatic upshifts and downshifts through
all available gears.
Deactivating overdrive
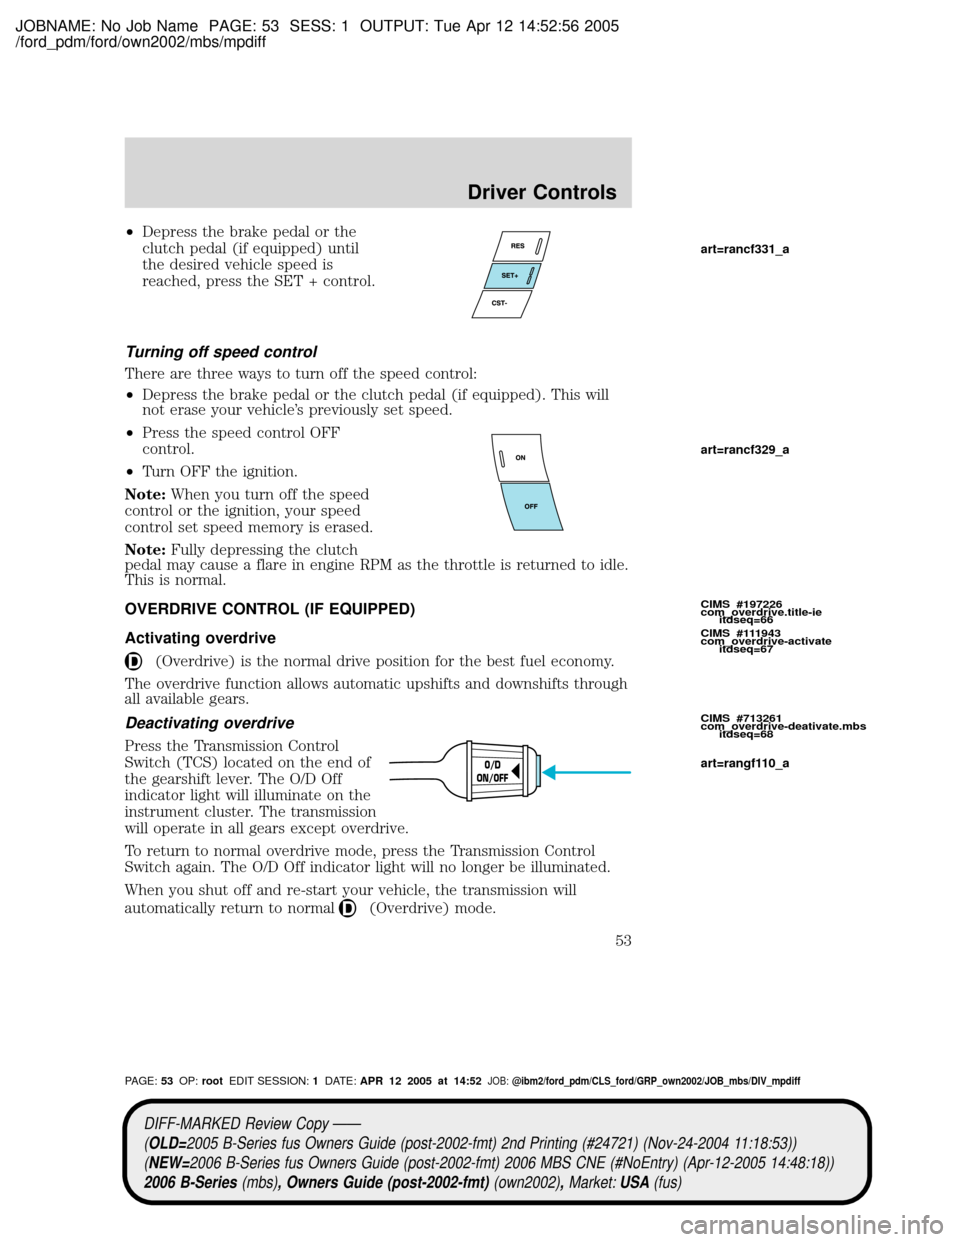
Press the Transmission Control
Switch (TCS) located on the end of
the gearshift lever. The O/D Off
indicator light will illuminate on the
instrument cluster. The transmission
will operate in all gears except overdrive.
To return to normal overdrive mode, press the Transmission Control
Switch again. The O/D Off indicator light will no longer be illuminated.
When you shut off and re-start your vehicle, the transmission will
automatically return to normal
(Overdrive) mode.
O/D
ON/OFF
CIMS #197226
com_overdrive.title-ie
itdseq=66
CIMS #111943
com_overdrive-activate
itdseq=67
CIMS #713261
com_overdrive-deativate.mbs
itdseq=68
art=rancf331_a
art=rancf329_a
art=rangf110_a
DIFF-MARKED Review Copy ÐÐ
(OLD=2005 B-Series fus Owners Guide (post-2002-fmt) 2nd Printing (#24721) (Nov-24-2004 11:18:53))
(NEW=2006 B-Series fus Owners Guide (post-2002-fmt) 2006 MBS CNE (#NoEntry) (Apr-12-2005 14:48:18))
2006 B-Series(mbs), Owners Guide (post-2002-fmt)(own2002),Market:USA(fus)
PAGE:53OP:rootEDIT SESSION:1DATE:APR 12 2005 at 14:52JOB:@ibm2/ford_pdm/CLS_ford/GRP_own2002/JOB_mbs/DIV_mpdiff
Driver Controls
53
Page 59 of 268
JOBNAME: No Job Name PAGE: 59 SESS: 1 OUTPUT: Tue Apr 12 14:52:56 2005
/ford_pdm/ford/own2002/mbs/mpdiff
To reprogram the remote entry
transmitters:
1. Ensure the vehicle is
electronically unlocked.
2. Put the key in the ignition.
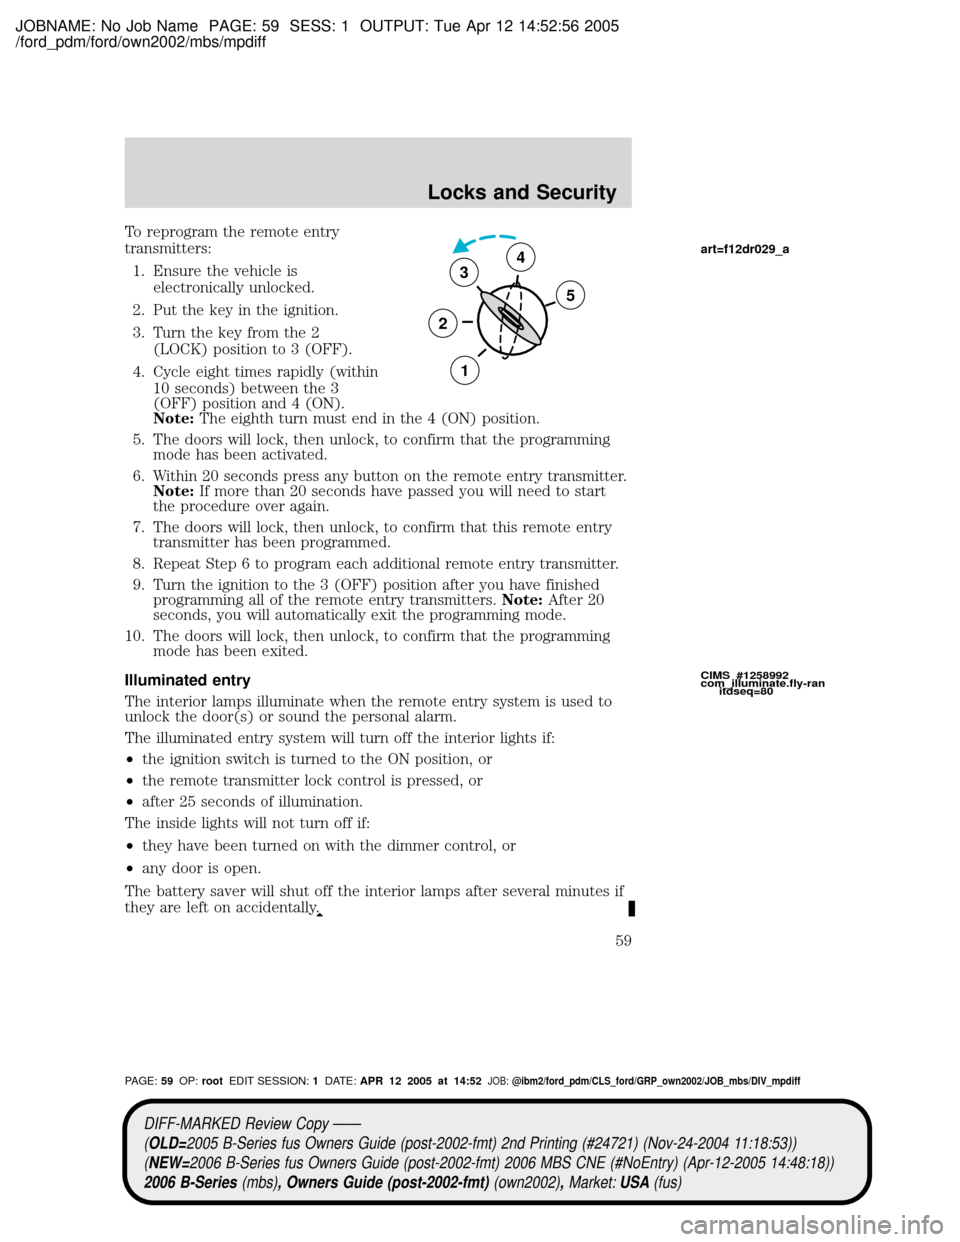
3. Turn the key from the 2
(LOCK) position to 3 (OFF).
4. Cycle eight times rapidly (within
10 seconds) between the 3
(OFF) position and 4 (ON).
Note:The eighth turn must end in the 4 (ON) position.
5. The doors will lock, then unlock, to confirm that the programming
mode has been activated.
6. Within 20 seconds press any button on the remote entry transmitter.
Note:If more than 20 seconds have passed you will need to start
the procedure over again.
7. The doors will lock, then unlock, to confirm that this remote entry
transmitter has been programmed.
8. Repeat Step 6 to program each additional remote entry transmitter.
9. Turn the ignition to the 3 (OFF) position after you have finished
programming all of the remote entry transmitters.Note:After 20
seconds, you will automatically exit the programming mode.
10. The doors will lock, then unlock, to confirm that the programming
mode has been exited.
Illuminated entry
The interior lamps illuminate when the remote entry system is used to
unlock the door(s) or sound the personal alarm.
The illuminated entry system will turn off the interior lights if:
²the ignition switch is turned to the ON position, or
²the remote transmitter lock control is pressed, or
²after 25 seconds of illumination.
The inside lights will not turn off if:
²they have been turned on with the dimmer control, or
²any door is open.
The battery saver will shut off the interior lamps after several minutes if
they are left on accidentally.
3
2
1
5
4
CIMS #1258992
com_illuminate.fly-ran
itdseq=80
art=f12dr029_a
DIFF-MARKED Review Copy ÐÐ
(OLD=2005 B-Series fus Owners Guide (post-2002-fmt) 2nd Printing (#24721) (Nov-24-2004 11:18:53))
(NEW=2006 B-Series fus Owners Guide (post-2002-fmt) 2006 MBS CNE (#NoEntry) (Apr-12-2005 14:48:18))
2006 B-Series(mbs), Owners Guide (post-2002-fmt)(own2002),Market:USA(fus)
PAGE:59OP:rootEDIT SESSION:1DATE:APR 12 2005 at 14:52JOB:@ibm2/ford_pdm/CLS_ford/GRP_own2002/JOB_mbs/DIV_mpdiff
Locks and Security
59
Page 75 of 268
JOBNAME: No Job Name PAGE: 75 SESS: 1 OUTPUT: Tue Apr 12 14:52:56 2005
/ford_pdm/ford/own2002/mbs/mpdiff
One time disable
Any time the safety belt is buckled and then unbuckled during an
ignition ON cycle, the BeltMinderywill be disabled for that ignition
cycle only.
Deactivating/activating the BeltMinderYfeature
Read Steps1-9thoroughly before proceeding with the
deactivation/activation programming procedure.
The BeltMinderyfeature can be deactivated/activated by performing the
following procedure:
Before following the procedure, ensure that the following conditions are
met:
²The parking brake is set.
²The gearshift is in P (Park) (automatic transmission) or the neutral
position (manual transmission).
²The ignition switch is in the OFF position.
²All vehicle doors are closed.
²The driver's safety belt is unbuckled.
²The parklamps/headlamps are in OFF position (If vehicle is equipped
with Autolamps, this will not affect the procedure).
WARNING: To reduce the risk of injury, do not
deactivate/activate the BeltMinderyfeature while driving the
vehicle.
BeltMinderyactivation and deactivation procedure
1. Turn the ignition switch to the RUN (or ON) position. (DO NOT
START THE ENGINE.)
2. Wait until the safety belt warning light turns off. (Approximately 1±2
minutes.)
²Steps 3±5 must be completed within 60 seconds or the procedure will
have to be repeated.
3. At a moderate speed, buckle then unbuckle the safety belt three
times, ending with the safety belt unbuckled. This can be done
before or during BeltMinderywarning activation.
4. Turn on the parklamps/headlamps, turn off the
parklamps/headlamps.
CIMS #519736
com_one-time_disable
itdseq=112
CIMS #444324
com_minder_on-off
itdseq=113
DIFF-MARKED Review Copy ÐÐ
(OLD=2005 B-Series fus Owners Guide (post-2002-fmt) 2nd Printing (#24721) (Nov-24-2004 11:18:53))
(NEW=2006 B-Series fus Owners Guide (post-2002-fmt) 2006 MBS CNE (#NoEntry) (Apr-12-2005 14:48:18))
2006 B-Series(mbs), Owners Guide (post-2002-fmt)(own2002),Market:USA(fus)
PAGE:75OP:rootEDIT SESSION:1DATE:APR 12 2005 at 14:52JOB:@ibm2/ford_pdm/CLS_ford/GRP_own2002/JOB_mbs/DIV_mpdiff
Seating and Safety Restraints
75
Page 76 of 268
JOBNAME: No Job Name PAGE: 76 SESS: 1 OUTPUT: Tue Apr 12 14:52:56 2005
/ford_pdm/ford/own2002/mbs/mpdiff
5. At a moderate speed, buckle then unbuckle the safety belt three
times, ending with the safety belt unbuckled.
²After Step 5 the safety belt warning light will be turned on for three
seconds.
6. Within seven seconds of the safety belt warning light turning off, at a
moderate speed, buckle then unbuckle the safety belt.
²This will disable BeltMinderyif it is currently enabled, or enable
BeltMinderyif it is currently disabled.
7. Confirmation of disabling BeltMinderyis provided by the safety belt
warning light flashing four times per second for three seconds.
8. Confirmation of enabling BeltMinderyis provided by:
²The safety belt warning light flashing four times per second for three
seconds.
²Followed by three seconds with the safety belt warning light off.
²Once again, the safety belt warning light will flash four times per
second for three seconds.
9. After receiving confirmation, the deactivation/activation procedure is
complete.
Safety belt maintenance
Inspect the safety belt systems periodically to make sure they work
properly and are not damaged.
NOTE:If unsure about the proper procedures, bring your vehicle to an
authorized Mazda dealership for inspection. Inspect the safety belts to
make sure there are no nicks, tears or cuts, replacing if necessary. Check
all automatic locking retractors on all outboard seating positions as well
as the automatic locking mode for child safety seats on the passenger
front belt. All safety belt assemblies, including retractors, buckles, front
seat belt buckle assemblies, buckle support assemblies (slide bar-if
equipped), shoulder belt height adjusters (if equipped), shoulder belt
guide on seatback (if equipped), child safety seat tether bracket
assemblies (if equipped), LATCH child seat tether anchors and lower
anchors (if equipped), and attaching hardware, should be inspected after
a collision. Mazda recommends that all safety belt assemblies used in
vehicles involved in a collision be replaced. However, if the collision was
minor and an authorized Mazda technician finds that the belts do not
show damage and continue to operate properly, they do not need to be
replaced. Safety belt assemblies not in use during a collision should also
be inspected and replaced if either damage or improper operation is
noted.
CIMS #1112659
com_belt-maint.mbs
itdseq=114
DIFF-MARKED Review Copy ÐÐ
(OLD=2005 B-Series fus Owners Guide (post-2002-fmt) 2nd Printing (#24721) (Nov-24-2004 11:18:53))
(NEW=2006 B-Series fus Owners Guide (post-2002-fmt) 2006 MBS CNE (#NoEntry) (Apr-12-2005 14:48:18))
2006 B-Series(mbs), Owners Guide (post-2002-fmt)(own2002),Market:USA(fus)
PAGE:76OP:rootEDIT SESSION:1DATE:APR 12 2005 at 14:52JOB:@ibm2/ford_pdm/CLS_ford/GRP_own2002/JOB_mbs/DIV_mpdiff
Seating and Safety Restraints
76