lock MAZDA MODEL B4000 2002 (in English) Owner's Manual
[x] Cancel search | Manufacturer: MAZDA, Model Year: 2002, Model line: MODEL B4000, Model: MAZDA MODEL B4000 2002Pages: 288, PDF Size: 2.94 MB
Page 83 of 288

Changing the wiper blades
To replace the wiper blades:
1. Pull the wiper arm away from
the windshield and lock into the
service position.
2. Turn the blade at an angle from
the wiper arm. Push the lock
pin manually to release the
blade and pull the wiper blade
down toward the windshield to
remove it from the arm.
3. Attach the new wiper to the
wiper arm and press it into
place until a click is heard.
TILT STEERING WHEEL (IF EQUIPPED)
Pull the tilt steering control toward
you to move the steering wheel up
or down. Hold the control while
adjusting the wheel to the desired
position, then release the control to
lock the steering wheel in position.
Driver Controls
83
Page 86 of 288

AUTOMATIC DIMMING REAR VIEW MIRRORS (IF EQUIPPED)
Your vehicle is equipped with an inside rear view mirror with an
auto-dimming function. The electronic day/night mirror will change from
the normal state to the non-glare state when bright lights (glare) reach
the inside rear view mirror. When the inside rear view mirror detects
bright light from behind the vehicle, the inside rear view mirror will
automatically adjust (darken) to minimize glare.
Do not block the sensor on the backside of the inside rear view mirror
since this may impair proper system performance.
Press the left button on the mirror
to turn the auto dimming ON or
OFF. The green indicator light left
of the display will illuminate when
this feature is ON.
The mirror will automatically return
to the normal state whenever the
vehicle is placed in R
(Reverse)(when the mirror is on) to
ensure a bright clear view when
backing up.
COMPASS/TEMPERATURE EC MIRROR (IF EQUIPPED)
The compass reading may be affected when you drive near large
buildings, bridges, power lines and powerful broadcast antennas.
Magnetic or metallic objects placed in, on or near the vehicle may also
affect compass accuracy.
Usually, when something affects the compass readings, the compass will
correct itself after a few days of operating your vehicle in normal
conditions. If the compass still appears to be inaccurate, a manual
calibration may be necessary. Refer toCompass calibration
adjustment.
Most geographic areas (zones) have a magnetic north compass point that
varies slightly from the northerly direction on maps. This variation is four
degrees between adjacent zones and will become noticeable as the
vehicle crosses multiple zones. A correct zone setting will eliminate this
error. Refer toCompass zone adjustment.
Driver Controls
86
Page 89 of 288

POWER MIRROR CONTROL (IF EQUIPPED)
To adjust your mirrors:
1. Select
to adjust the left
mirror or
to adjust the right
mirror.
2. Move the control in the
direction you wish to tilt the
mirror.
3. Return to the center position to
lock mirrors in place.
SPEED CONTROL (IF EQUIPPED)
To turn speed control on
²Press ON.
NOTE:Vehicle speed cannot be
controlled until the vehicle is
traveling at or above 48 km/h (30
mph).
WARNING: Do not use the
speed control in heavy traffic
or on roads that are winding,
slippery, or unpaved. You may
lose control of the vehicle.
WARNING: Do not shift the gearshift lever into N (Neutral)
with the speed control on. You may lose control of the vehicle
or cause engine system damage.
OFF ON
Driver Controls
89
Page 96 of 288

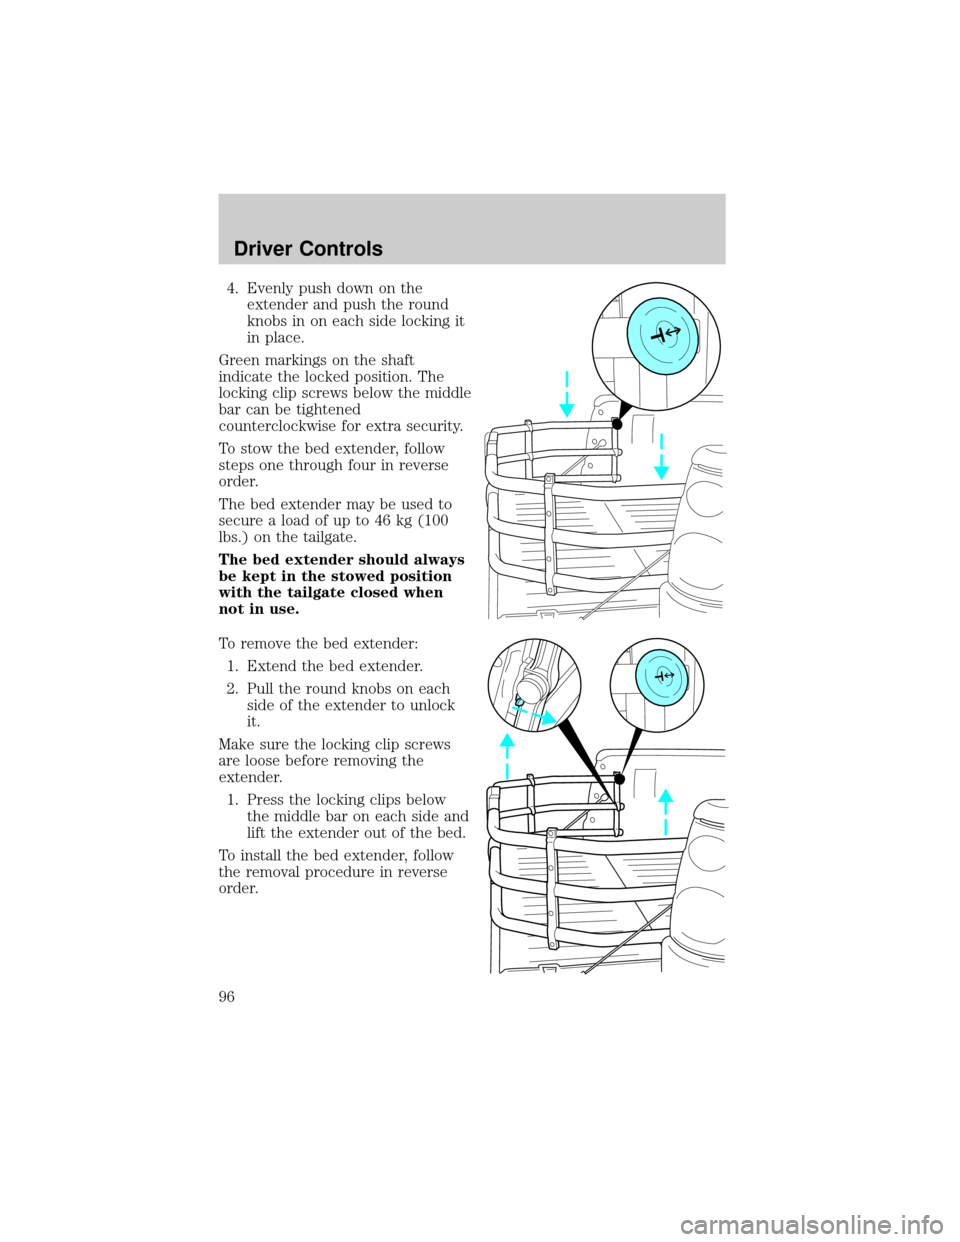
4. Evenly push down on the
extender and push the round
knobs in on each side locking it
in place.
Green markings on the shaft
indicate the locked position. The
locking clip screws below the middle
bar can be tightened
counterclockwise for extra security.
To stow the bed extender, follow
steps one through four in reverse
order.
The bed extender may be used to
secure a load of up to 46 kg (100
lbs.) on the tailgate.
The bed extender should always
be kept in the stowed position
with the tailgate closed when
not in use.
To remove the bed extender:
1. Extend the bed extender.
2. Pull the round knobs on each
side of the extender to unlock
it.
Make sure the locking clip screws
are loose before removing the
extender.
1. Press the locking clips below
the middle bar on each side and
lift the extender out of the bed.
To install the bed extender, follow
the removal procedure in reverse
order.
Driver Controls
96
Page 97 of 288

KEYS
The key operates all locks on your vehicle. In case of loss, replacement
keys are available from your dealer.
You should always carry a second key with you in a safe place in case
you require it in an emergency.
Refer toSecuriLockyPassive Anti-Theft Systemfor more information.
POWER DOOR LOCKS (IF EQUIPPED)
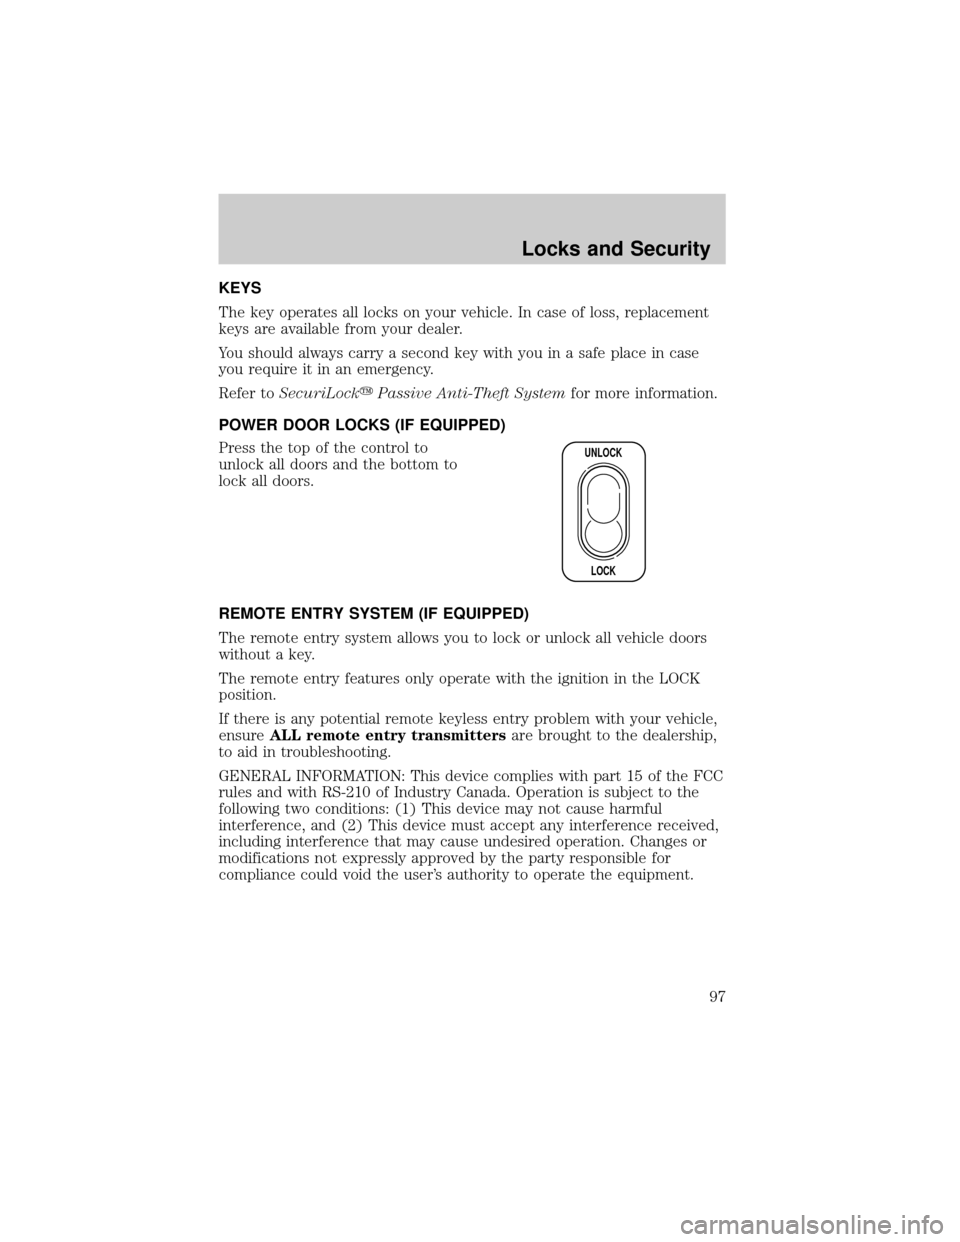
Press the top of the control to
unlock all doors and the bottom to
lock all doors.
REMOTE ENTRY SYSTEM (IF EQUIPPED)
The remote entry system allows you to lock or unlock all vehicle doors
without a key.
The remote entry features only operate with the ignition in the LOCK
position.
If there is any potential remote keyless entry problem with your vehicle,
ensureALL remote entry transmittersare brought to the dealership,
to aid in troubleshooting.
GENERAL INFORMATION: This device complies with part 15 of the FCC
rules and with RS-210 of Industry Canada. Operation is subject to the
following two conditions: (1) This device may not cause harmful
interference, and (2) This device must accept any interference received,
including interference that may cause undesired operation. Changes or
modifications not expressly approved by the party responsible for
compliance could void the user's authority to operate the equipment.
UNLOCK
LOCK
Locks and Security
97
Page 98 of 288

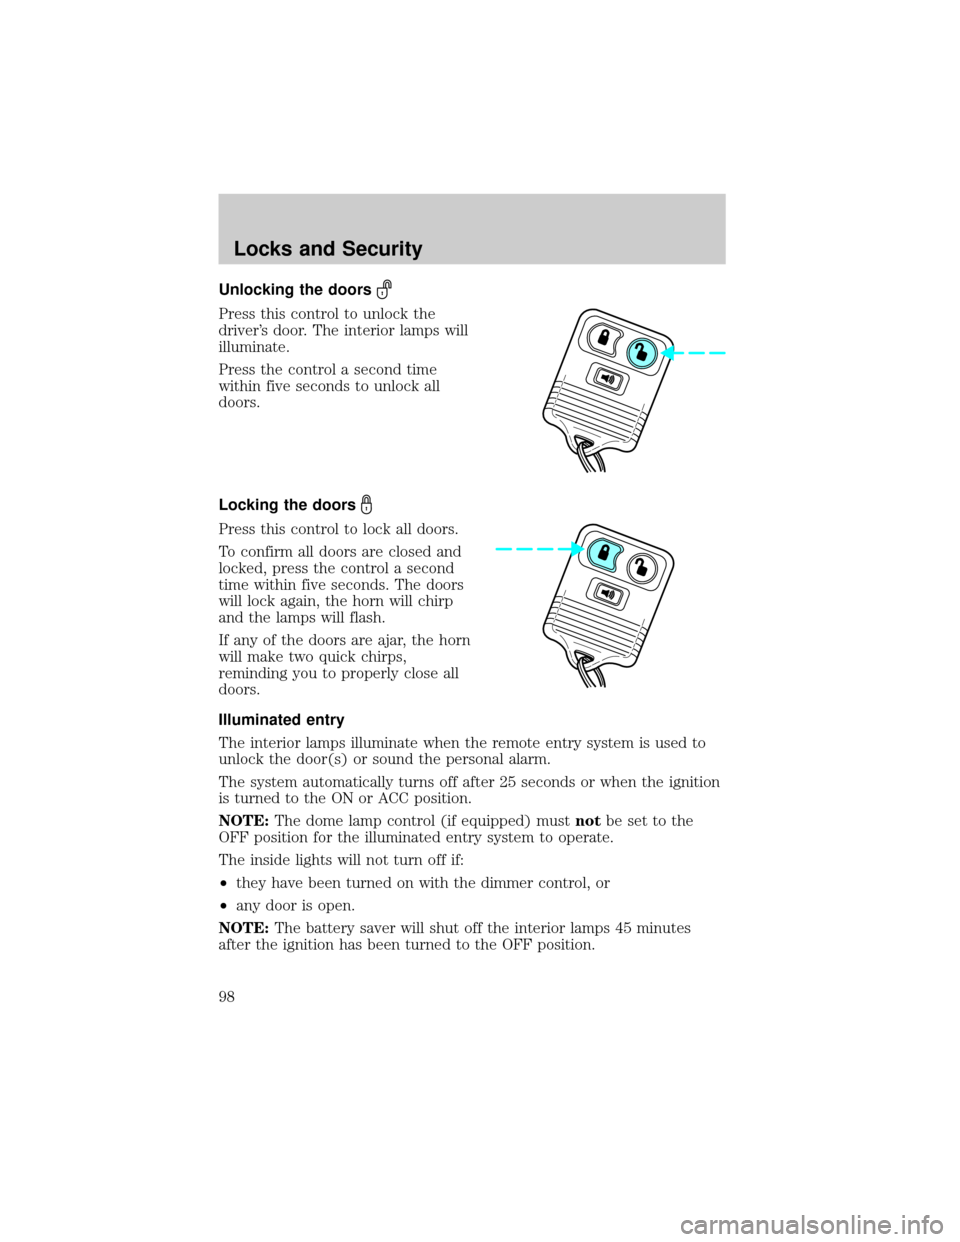
Unlocking the doors
Press this control to unlock the
driver's door. The interior lamps will
illuminate.
Press the control a second time
within five seconds to unlock all
doors.
Locking the doors
Press this control to lock all doors.
To confirm all doors are closed and
locked, press the control a second
time within five seconds. The doors
will lock again, the horn will chirp
and the lamps will flash.
If any of the doors are ajar, the horn
will make two quick chirps,
reminding you to properly close all
doors.
Illuminated entry
The interior lamps illuminate when the remote entry system is used to
unlock the door(s) or sound the personal alarm.
The system automatically turns off after 25 seconds or when the ignition
is turned to the ON or ACC position.
NOTE:The dome lamp control (if equipped) mustnotbe set to the
OFF position for the illuminated entry system to operate.
The inside lights will not turn off if:
²they have been turned on with the dimmer control, or
²any door is open.
NOTE:The battery saver will shut off the interior lamps 45 minutes
after the ignition has been turned to the OFF position.
Locks and Security
98
Page 99 of 288

Power door lock disable feature
This feature will help protect your vehicle from unauthorized entry.
The UNLOCK function on the power door control will not operate with
the ignition OFF and twenty seconds after the doors are closed and
electronically locked by the remote entry transmitter, key pad, or power
door control (if pressed while the door was open).
The UNLOCK function will operate again after you unlock the vehicle
using the remote entry transmitter or key pad, turn the ignition to ON,
or open the door from inside of the vehicle.
Deactivating/activating power door lock disable feature
1. Turn the ignition key to ON,
then press the UNLOCK button
3 times.
2. Turn the ignition key to OFF,
then press the UNLOCK button
3 times.
3. Turn the ignition key to ON,
within five seconds press the
UNLOCK button 2 times then
LOCK once.
The user should receive 2 horn chirps to indicate the system has been
disabled or 2 chirps followed by a honk to indicate the system has been
enabled.
Pressing the power door LOCK button two times again will turn the
feature ON if it was previously OFF, or OFF if it was previously ON.
Every two consecutive presses of the LOCK button after successfully
entering the configuration mode will change the enable/disable condition
of the feature.
Turn ignition to OFF to exit programming.
UL
Locks and Security
99
Page 100 of 288

Sounding a panic alarm
Press this control to activate the
alarm.
To deactivate the alarm, press the
control again or turn the ignition to
ACC or ON.
Panic alarm will only operate with
the ignition in the OFF position.
Replacing the battery
The transmitter is powered by one coin type three-volt lithium battery
CR2032 or equivalent. Typical operating range will allow you to be up to
10 meters (33 feet) away from your vehicle. A decrease in operating
range can be caused by:
²Weather conditions
²Nearby radio towers
²Structures around the vehicle
²Other vehicles parked next to the vehicle
To replace the battery:
1. Twist a thin coin between the
two halves of the transmitter
near the key ring.
DO NOT TAKE THE FRONT
PART OF THE TRANSMITTER
APART. Damage to the
transmitter may result in
operation failure.
2. Place the positive (+) side of
new battery in the same
orientation. Refer to the
diagram inside the transmitter
unit.
3. Snap the two halves back
together.
Locks and Security
100
Page 101 of 288

Replacing lost transmitters
If a remote transmitter has been lost
and you would like to remove it
from the vehicle's memory, or you
would like to purchase additional
remote transmitters and have them
programmed to your vehicle:
²Takeallyour vehicle's
transmitters to your dealer for
programming, or
²Perform the programming
procedure yourself.
Programming remote transmitters
It is necessary to haveall(maximum of four Ð original and/or new) of
your remote transmitters available prior to beginning this procedure.
NOTE:This procedure must be completed within the specified times. If
not completed within the specified time period, reprogramming
procedures must be restarted from the beginning.
To program the transmitters yourself:
²Place the key in the ignition and
turn from 2 (LOCK) to 3 (OFF)
and cycle between 3 (OFF) and
4(ON) eight times in rapid
succession (within 10 seconds)
with the eighth turn ending in the
4 (ON) position. The doors will
lock/unlock to confirm that
programming mode has been
entered.
²Within 20 seconds, program a
remote transmitter by pressing any button on a transmitter. The doors
will lock/unlock to confirm that the remote transmitter has been
programmed. (If more than 20 seconds pass before pressing a remote
transmitter button, the programming mode will exit and the procedure
will have to be repeated.)
²Repeat the previous step to program additional remote transmitters.
The doors will lock/unlock to confirm that each remote transmitter has
been programmed.
3
2
1
5
4
Locks and Security
101
Page 102 of 288

²When you have completed programming the remote transmitters, turn
the ignition to 3 (OFF). Again the doors will lock/unlock to confirm
programming has been completed.
SECURILOCKYPASSIVE ANTI-THEFT SYSTEM
SecuriLockypassive anti-theft system is an engine immobilization
system. This system is designed to prevent the engine from being started
unless acoded keyis used.
NOTE:The SecuriLockypassive anti-theft system is not compatible
with non-Mazda aftermarket remote start systems. Use of these systems
may result in vehicle starting problems and a loss of security protection.
THEFT INDICATOR
The theft indicator is the flashing red indicator located on top of the
instrument panel.
²When the ignition is in the OFF position, the indicator will flash once
every 2 seconds to indicate the SecuriLockysystem is functioning as
a theft deterrent.
²When the ignition is in the ON position, the indicator will glow for 3
seconds to indicate normal system functionality.
If a problem occurs with the SecuriLockysystem, the indicator will flash
rapidly or glow steadily when the ignition is in the ON position. If this
occurs, the vehicle should be taken to an authorized dealer for service.
Automatic arming
The vehicle is armed immediately
after switching the ignition to the 3
(OFF) position. The
THEFT
indicator in the instrument cluster
will flash every two seconds when
the vehicle is armed.
Automatic disarming
Switching the ignition to the 4 (ON) position with acoded keydisarms
the vehicle. The
THEFTindicator will illuminate for three seconds and
then go out. If the
THEFTindicator stays on for an extended period of
time or flashes rapidly, have the system serviced by your authorized
Mazda dealership.
3
2
1
5
4
Locks and Security
102