height MAZDA MODEL CX-30 2022 Owners Manual
[x] Cancel search | Manufacturer: MAZDA, Model Year: 2022, Model line: MODEL CX-30, Model: MAZDA MODEL CX-30 2022Pages: 595, PDF Size: 84.02 MB
Page 21 of 595

NOTE
When returning a rear seat to its
original position, place the seat belt
in its normal position. Verify that the
seat belt pulls out and retracts.
(Power Seat)
The seat-bottom power adjustment
is operated by motors. Avoid
extended operation because
excessive use can damage the
motors.
To prevent the battery from
running down, avoid using the
power adjustment when the
engine is stopped. The adjuster
uses a large amount of electrical
power.
Do not use the switch to make
more than one adjustment at a
time.
Front Seat
▼Adjusting the Driver's Seat
Using the driving position set up
procedure recommended by Mazda
allows you to maintain a relaxed
posture, drive the vehicle for longer
periods without feeling tired, and
make quick operations naturally.
Also, you can be assured of a clear
view in the forward direction to help
you drive more safely and comfortably.
The adjustments for the driving
position recommended by Mazda are
done using the following procedures.
1. Moving the steering wheel and seat
to their default positions.
2. Adjusting the seatback angle.
3. Adjusting the seat position forward and back.
4. Adjusting the seat height.
5. Adjusting the height on the front edge of the seat bottom.
6. Adjusting the steering wheel position.
7. Adjusting the head restraint position.
Essential Safety Equipment
Seats
2-4
CX-30_8KN2-EA-21L_Edition1_new 2021-9-15 19:39:56
Page 22 of 595

Manual seat
1.Seat Slide
To move a seat forward or
backward, raise the lever and slide
the seat to the desired position and
release the lever.
Make sure the lever returns to its
original position and the seat is
locked in place by attempting to
push it forward and backward.
2. Height Adjustment
To adjust the seat height, move the
lever up or down.
3. Height Adjustment for Front Edge
of Seat Bottom
To adjust the height for front edge
of the seat bottom, rotate the dial
to the desired position.
4.Seat Recline
To change the seatback angle, lean
forward slightly while raising the
lever. Then lean back to the desired
position and release the lever.
Make sure the lever returns to its
original position and the seatback is
locked in place by attempting to
push it forward and backward.
Po we r s eat
1. Seat Slide
To slide the seat, move the slide
lifter switch on the outside of the
seat to the front or back and hold
it. Release the switch at the desired
position.
2. Height Adjustment
To adjust the seat height, move the
slide lifter switch up or down.
Essential Safety Equipment
Seats
2-5
CX-30_8KN2-EA-21L_Edition1_new 2021-9-15 19:39:56
Page 23 of 595
3.Height Adjustment for Front Edge
of Seat Bottom
To adjust the front height of the
seat bottom, raise or lower the
front of the slide lifter switch.
4. Seat Recline
To change the seatback angle, press
the front or rear side of the reclining
switch. Release the switch at the
desired position.
5. Lumbar Support Adjustment
To increase the seat firmness, press
and hold the front part of the
switch to the desired position, then
release it.
Press the rear part of the switch to
decrease firmness.
Before making adjustments to the
driving position recommended by
Mazda
Before making adjustments, move the
steering wheel and seat to their default
positions.
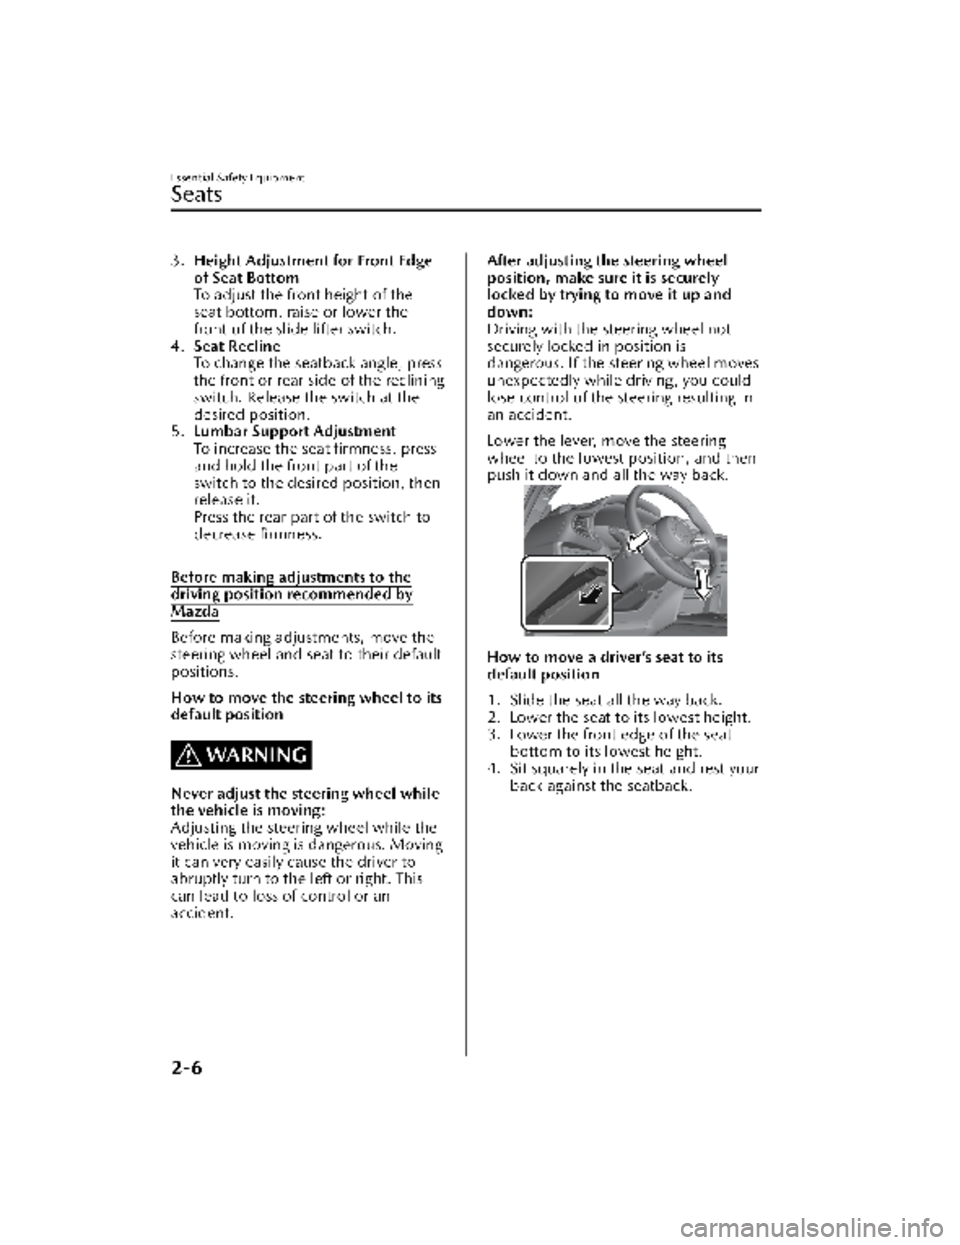
How to move the steering wheel to its
default position
WARNING
Never adjust the steering wheel while
the vehicle is moving:
Adjusting the steering wheel while the
vehicle is moving is dangerous. Moving
it can very easily cause the driver to
abruptly turn to the left or right. This
can lead to loss of control or an
accident.
After adjusting the steering wheel
position, make sure it is securely
locked by trying to move it up and
down:
Driving with the steering wheel not
securely locked in position is
dangerous. If the steering wheel moves
unexpectedly while driving , you could
lose control of the steering resulting in
an accident.
Lower the lever, move the steering
wheel to the lowest position, and then
push it down and all the way back.
How to move a driver’s seat to its
default position
1. Slide the seat all the way back.
2. Lower the seat to its lowest height.
3. Lower the front edge of the seat bottom to its lowest height.
4. Sit squarely in the seat and rest your back against the seatback.
Essential Safety Equipment
Seats
2-6
CX-30_8KN2-EA-21L_Edition1_new 2021-9-15 19:39:56
Page 26 of 595
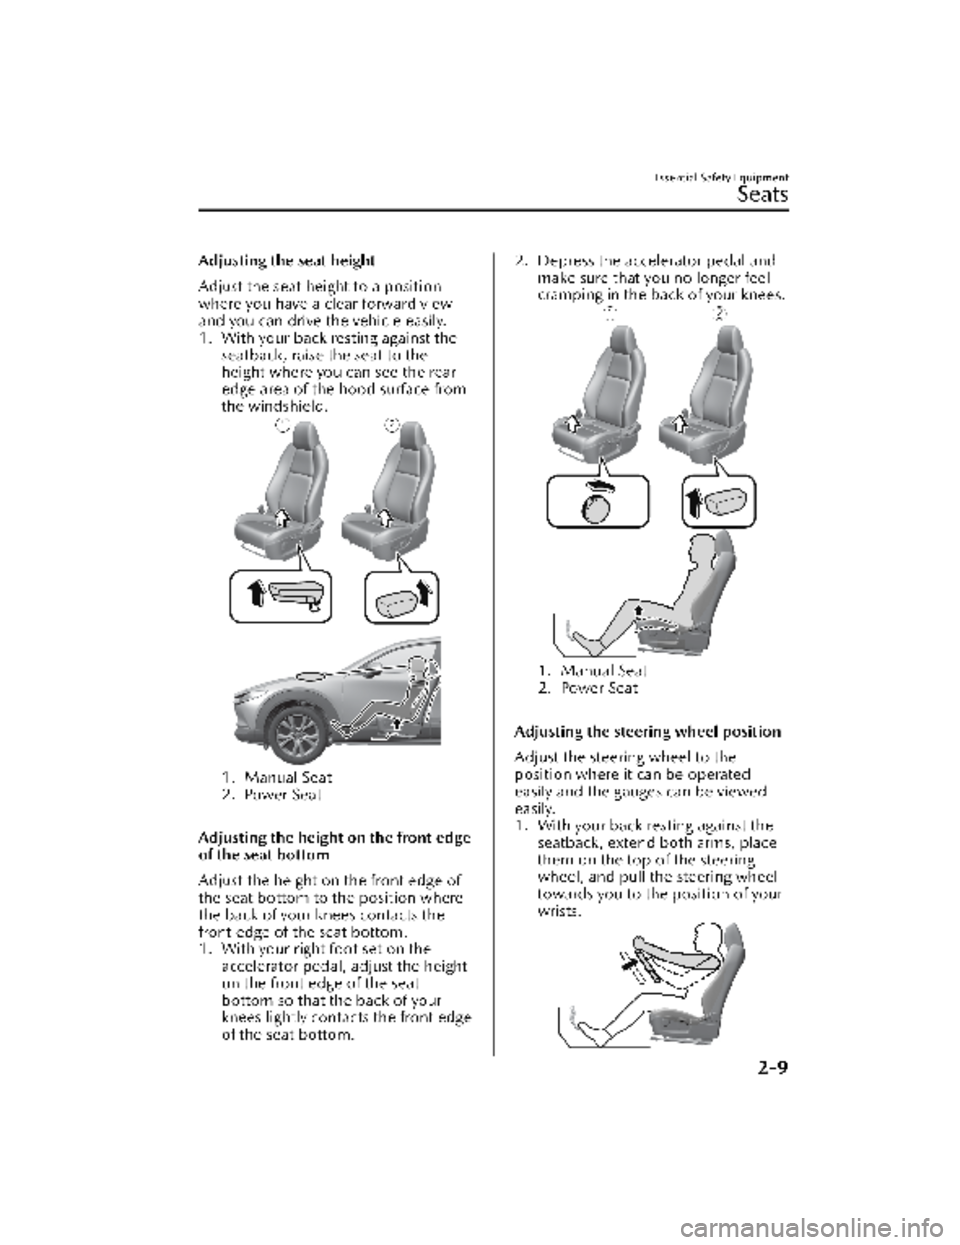
Adjusting the seat height
Adjust the seat height to a position
where you have a clear forward view
and you can drive the vehicle easily.
1. With your back resting against theseatback, raise the seat to the
height where you can see the rear
edge area of the hood surface from
the windshield.
1. Manual Seat
2. Power Seat
Adjusting the height on the front edge
of the seat bottom
Adjust the height on the front edge of
the seat bottom to the position where
the back of your knees contacts the
front edge of the seat bottom.
1. With your right foot set on the accelerator pedal, adjust the height
on the front edge of the seat
bottom so that the back of your
knees lightly contacts the front edge
of the seat bottom.
2. Depress the accelerator pedal andmake sure that you no longer feel
cramping in the back of your knees.
1. Manual Seat
2. Power Seat
Adjusting the steering wheel position
Adjust the steering wheel to the
position where it can be operated
easily and the gauges can be viewed
easily.
1. With your back resting against the seatback, extend both arms, place
them on the top of the steering
wheel, and pull the steering wheel
towards you to the position of your
wrists.
Essential Safety Equipment
Seats
2-9
CX-30_8KN2-EA-21L_Edition1_new 2021-9-15 19:39:56
Page 27 of 595
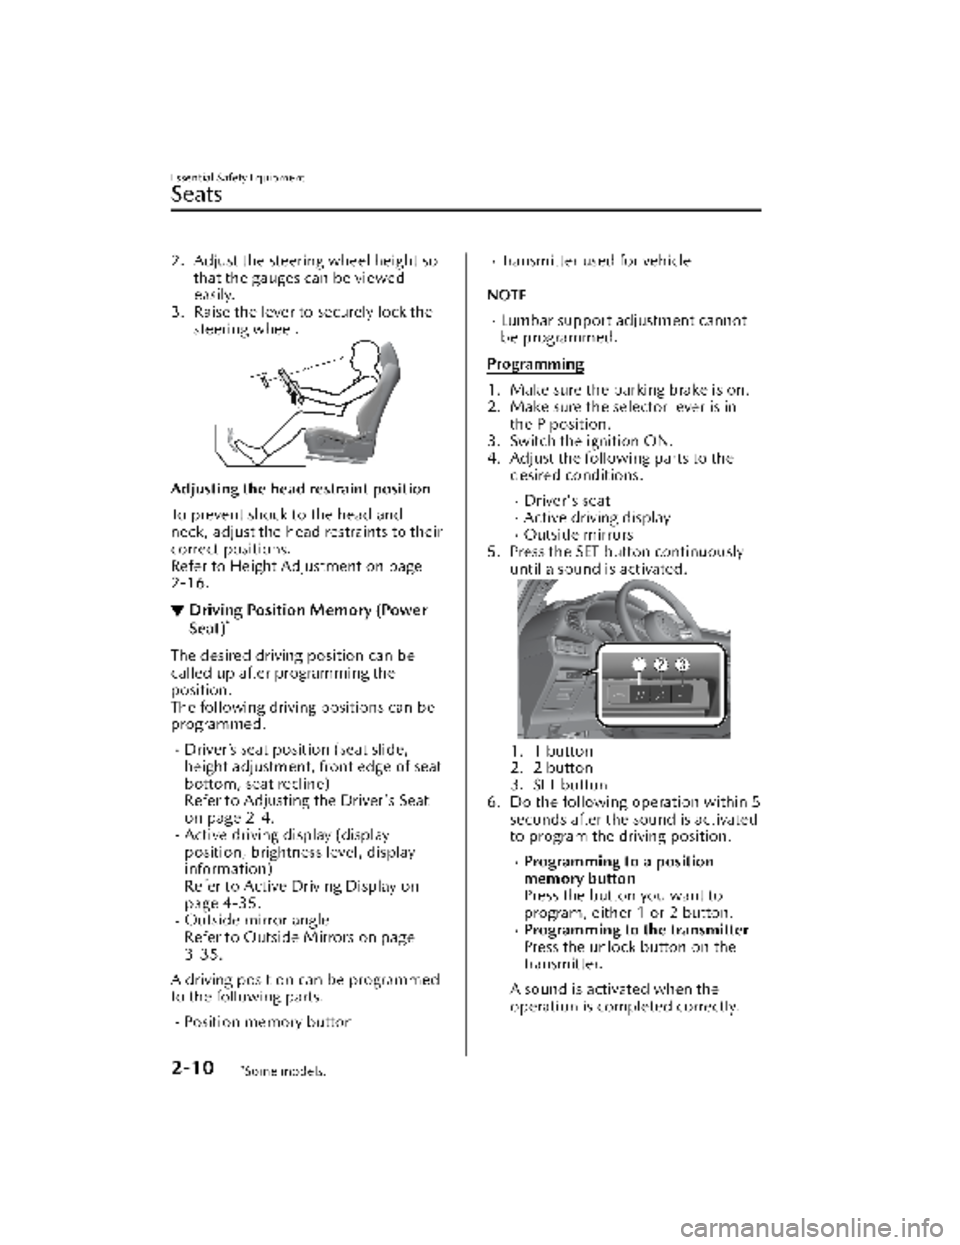
2. Adjust the steering wheel height sothat the gauges can be viewed
easily.
3. Raise the lever to securely lock the steering wheel.
Adjusting the head restraint position
To prevent shock to the head and
neck, adjust the head restraints to their
correct positions.
Refer to Height Adjustment on page
2-16.
▼Driving Position Memory (Power
Seat)*
The desired driving position can be
called up after programming the
position.
The following driving positions can be
programmed.
Driver’s seat position (seat slide,
height adjustment, front edge of seat
bottom, seat recline)
Refer to Adjusting the Driver's Seat
on page 2-4.
Active driving display (display
position, brightness level, display
information)
Refer to Active
Driving Display on
page 4-35.
Outside mirror angle
Refer to Outside Mirrors on page
3-35.
A driving position can be programmed
to the following parts.
Position memory button
Transmitter used for vehicle
NOTE
Lumbar support adjustment cannot
be programmed.
Programming
1. Make sure the parking brake is on.
2. Make sure the selector lever is in the P position.
3. Switch the ignition ON.
4. Adjust the following parts to the desired conditions.
Driver's seatActive driving displayOutside mirrors
5. Press the SET button continuously until a sound is activated.
1. 1 button
2. 2 button
3. SET button
6. Do the following operation within 5 seconds after the sound is activated
to program the driving position.
Programming to a position
memory button
Press the button you want to
program, either 1 or 2 button.
Programming to the transmitter
Press the unlock button on the
transmitter.
A sound is activated when the
operation is completed correctly.
Essential Safety Equipment
Seats
2-10*Some models.
CX-30_8KN2-EA-21L_Edition1_new 2021-9-15 19:39:56
Page 30 of 595
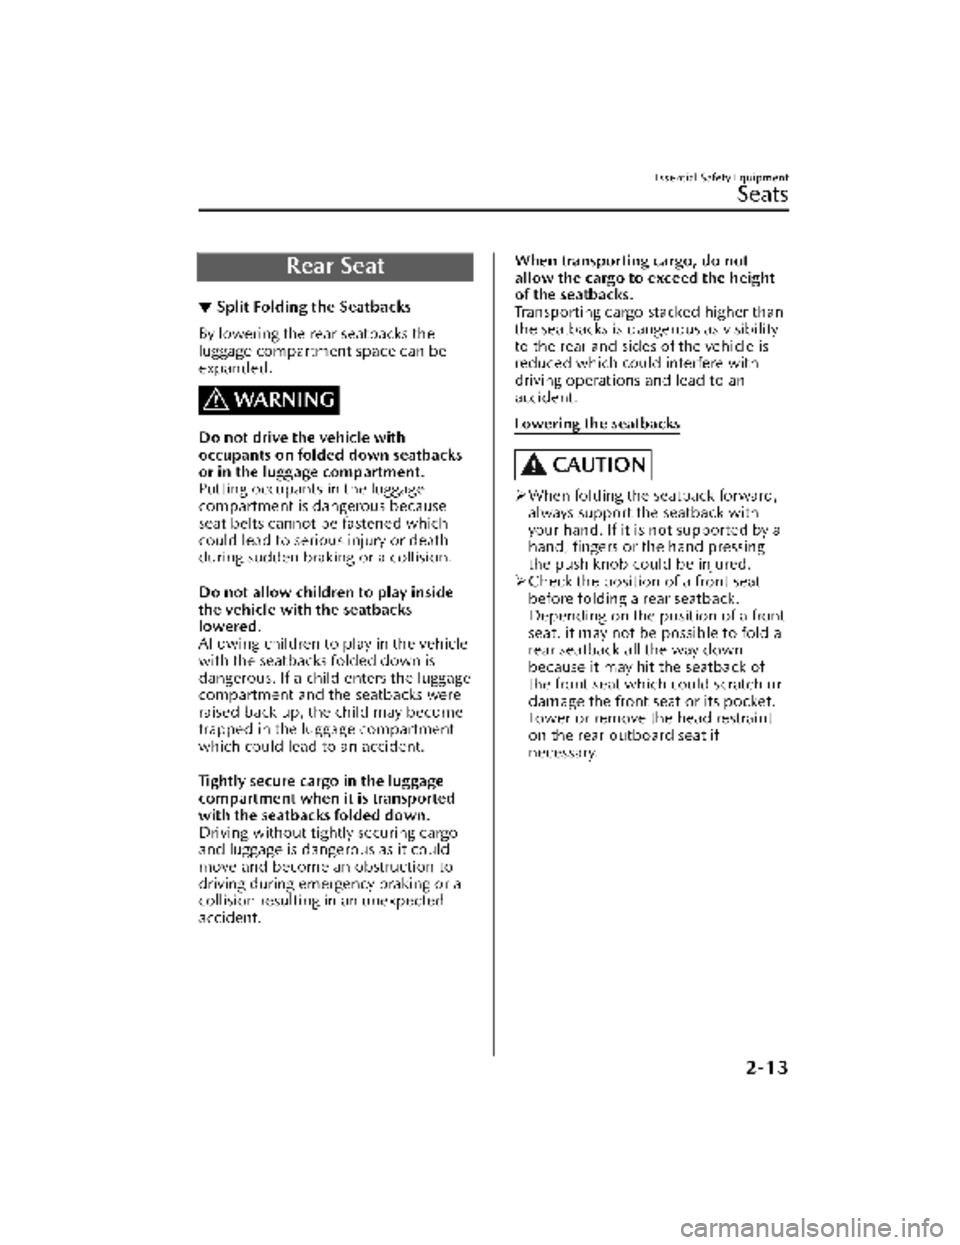
Rear Seat
▼Split Folding the Seatbacks
By lowering the rear seatbacks the
luggage compartment space can be
expanded.
WARNING
Do not drive the vehicle with
occupants on folded down seatbacks
or in the luggage compartment.
Putting occupants in the luggage
compartment is dangerous because
seat belts cannot be fastened which
could lead to serious injury or death
during sudden braking or a collision.
Do not allow children to play inside
the vehicle with the seatbacks
lowered.
Allowing children to play in the vehicle
with the seatbacks folded down is
dangerous. If a child enters the luggage
compartment and the seatbacks were
raised back up, the child may become
trapped in the luggage compartment
which could lead to an accident.
Tightly secure cargo in the luggage
compartment when it is transported
with the seatbacks folded down.
Driving without tightly securing cargo
and luggage is dangerous as it could
move and become an obstruction to
driving during emergency braking or a
collision resulting in an unexpected
accident.
When transporting cargo, do not
allow the cargo to exceed the height
of the seatbacks.
Transporting cargo stacked higher than
the seatbacks is dangerous as visibility
to the rear and sides of the vehicle is
reduced which could interfere with
driving operations and lead to an
accident.
Lowering the seatbacks
CAUTION
When folding the seatback forward,
always support the seatback with
your hand. If it is not supported by a
hand, fingers or the hand pressing
the push knob could be injured.
Check the position of a front seat
before folding a rear seatback.
Depending on the position of a front
seat, it may not be possible to fold a
rear seatback all the way down
because it may hit the seatback of
the front seat which could scratch or
damage the front seat or its pocket.
Lower or remove the head restraint
on the rear outboard seat if
necessary.
Essential Safety Equipment
Seats
2-13
CX-30_8KN2-EA-21L_Edition1_new 2021-9-15 19:39:56
Page 33 of 595

Head Restraints
▼Head Restraints
Your vehicle is equipped with head
restraints on all outboard seats and the
rear center seat. The head restraints are
intended to help protect you and the
passengers from neck injury.
WARNING
Always drive with the head restraints
installed when seats are being used
and make sure they are properly
adjusted:
Driving with the head restraints
adjusted too low or removed is
dangerous. With no support behind
your head, your neck could be
seriously injured in a collision.
▼
Height Adjustment
Adjust the head restraint so that the
center is even with the top of the
passenger's ears.
To raise a head restraint, pull it up to
the desired position.
To lower the head restraint, press the
stop-catch release, then push the head
restraint down.
Front seats
Rear outboard seats
Rear center seat
Essential Safety Equipment
Seats
2-16
CX-30_8KN2-EA-21L_Edition1_new
2021-9-15 19:39:56
Page 42 of 595
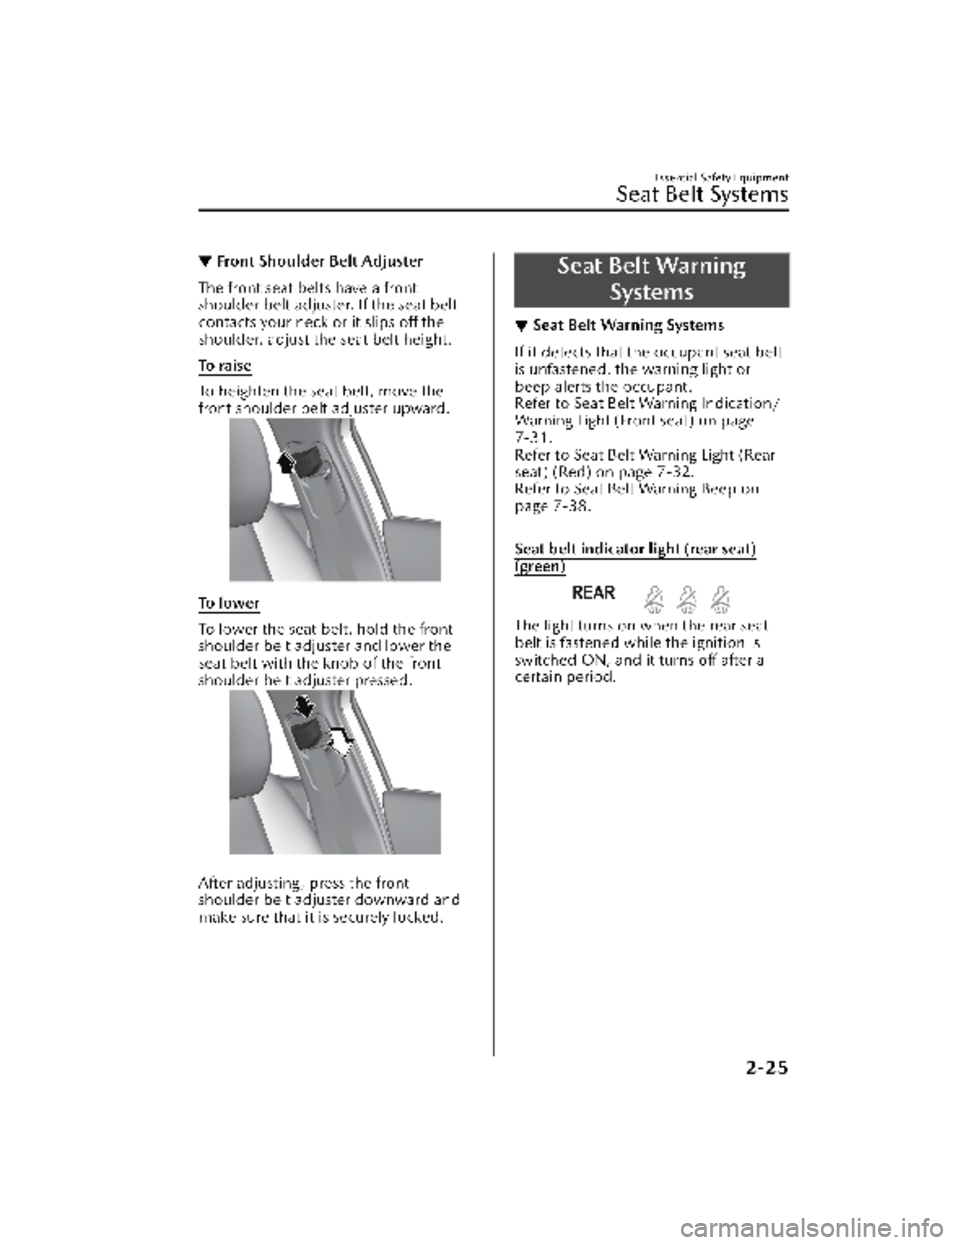
▼Front Shoulder Belt Adjuster
The front seat belts have a front
shoulder belt adjuster. If the seat belt
contacts your neck or it slips off the
shoulder, adjust the seat belt height.
To ra i s e
To heighten the seat belt, move the
front shoulder belt adjuster upward.
To l o w e r
To lower the seat belt, hold the front
shoulder belt adjuster and lower the
seat belt with the knob of the front
shoulder belt adjuster pressed.
After adjusting , press the front
shoulder belt adjuster downward and
make sure that it is securely locked.
Seat Belt Warning
Systems
▼Seat Belt Warning Systems
If it detects that the occupant seat belt
is unfastened, the warning light or
beep alerts the occupant.
Refer to Seat Belt Warning Indication/
Warning Light (Front seat) on page
7-31.
Refer to Seat Belt Warning Light (Rear
seat) (Red) on page 7-32.
Refer to Seat Belt Warning Beep on
page 7-38.
Seat belt indicator light (rear seat)
(green)
The light turns on when the rear seat
belt is fastened while the ignition is
switched ON, and it turns off after a
certain period.
Essential Safety Equipment
Seat Belt Systems
2-25
CX-30_8KN2-EA-21L_Edition1_new
2021-9-15 19:39:56
Page 72 of 595

Do not hang any backpacks, bags or
pouches that cover the sides of the
seats that block the side air bags.
Do not place any objects on the
assist grips. Only hang clothes
directly on the coat hooks.
Do not touch the components of the
supplemental restraint system after
the air bags have inflated:
Touching the components of the
supplemental restraint system after the
air bags have inflated is dangerous.
Immediately after inflation, they are
very hot. You could get burned.
Never install any front-end equipment
to your vehicle:
Installation of front-end equipment,
such as frontal protection bar
(kangaroo bar, bull bar, push bar, or
other similar devices), snowplow, or
winches, is dangerous. The air bag
crash sensor system could be affected.
This could cause air bags to inflate
unexpectedly, or it could prevent the
air bags from inflating during an
accident. Front occupants could be
seriously injured.
Do not modify the suspension:
Modifying the vehicle suspension is
dangerous. If the vehicle's height or
the suspension is modified, the vehicle
will be unable to accurately detect a
collision or roll-over accident resulting
in incorrect or unexpected air bag
deployment and the possibility of
serious injuries.To prevent false detection by the air
bag sensor system, heed the
following:
Do not use tires or wheels other than
those specified for your Mazda:
Use of any tire or wheel other than
those
specified for your Mazda (page
9-8) is dangerous. Use of such
wheels will prevent the vehicle's
accident detections system from
accurately detecting a collision or
roll-over accident resulting in
incorrect or unexpected air bag
deployment and the possibility of
serious injuries.
Do not overload your vehicle:
Overloading your vehicle is
dangerous as it could prevent the air
bag crash sensor system from
accurately detecting a collision or
roll-over accident resulting in
incorrect or unexpected air bag
deployment and the possibility of
serious injuries. The gross axle
weight rating (GAWR) and the gross
vehicle weight rating (GVWR) for
your vehicle are on the Motor
Vehicle Safety Standard Label on the
driver's door frame. Do not exceed
these ratings.
Essential Safety Equipment
SRS Air Bags
2-55
CX-30_8KN2-EA-21L_Edition1_new 2021-9-15 19:39:56
Page 116 of 595

(With the advanced keyless function)
When the door-lock switch on the
liftgate is pressed, the liftgate
automatically closes.
Changing the power liftgate fully
open position
The power liftgate fully-open position
can be changed according to the
height of a garage.
When changing the position
1. Stop the liftgate at the desiredposition.
2. Press the power liftgate close switch for about three seconds.
A beep sound is activated two
times to indicate that the position
change has been completed.
NOTE
Set the desired fully-open position of
the liftgate at the position where it is
open more than halfway. The position
where it is less than halfway open
cannot be set.
To r e s e t
1. Open the liftgate.
2. Press the power liftgate close switch
for about seven seconds.
A beep sound is activated three
times to indicated that the reset has
been completed.
NOTE
After about 3 seconds have elapsed
since the switch was pressed, a beep
sound is activated 2 times to indicate
that the liftgate fully-open position has
changed. Continuously press the
switch for about 7 seconds to
complete the reset.
Jam-safe equipment
While the power liftgate is opening/
closing electrically and the system
detects a person or an object in the
liftgate's path, the liftgate will move in
the reverse direction automatically and
stops.
WARNING
Always check the area around the
power liftgate before opening/closing
it:
Not checking for occupants and
objects around the power liftgate
before opening/closing it is
dangerous. The jam-safe equipment is
designed to prevent jamming in the
event an obstruction is in the liftgate's
path. The system may not detect
certain objects obstructing the liftgate
depending on the way they are
positioned and their shape. However,
if the jam-safe function detects an
obstruction and moves the liftgate in
the reverse direction, an occupant in
the liftgate's path could be seriously
injured.
Before Driving
Doors and Locks
3-27
CX-30_8KN2-EA-21L_Edition1_new 2021-9-15 19:39:56