light MAZDA MODEL CX-5 2015 Smart Start Guide (in English)
[x] Cancel search | Manufacturer: MAZDA, Model Year: 2015, Model line: MODEL CX-5, Model: MAZDA MODEL CX-5 2015Pages: 42, PDF Size: 5.02 MB
Page 14 of 42
Lights
(cont’d on pg. 19)
NOTE: The DRL (Daytime Running Lights) automatically turn on when the ignition
is switched ON. To disable/enable this feature see your Authorized Mazda Dealer.
NOTE: • You can adjust the timing of the Auto Headlights OFF and the sensitivity of the
Auto Light Control.13
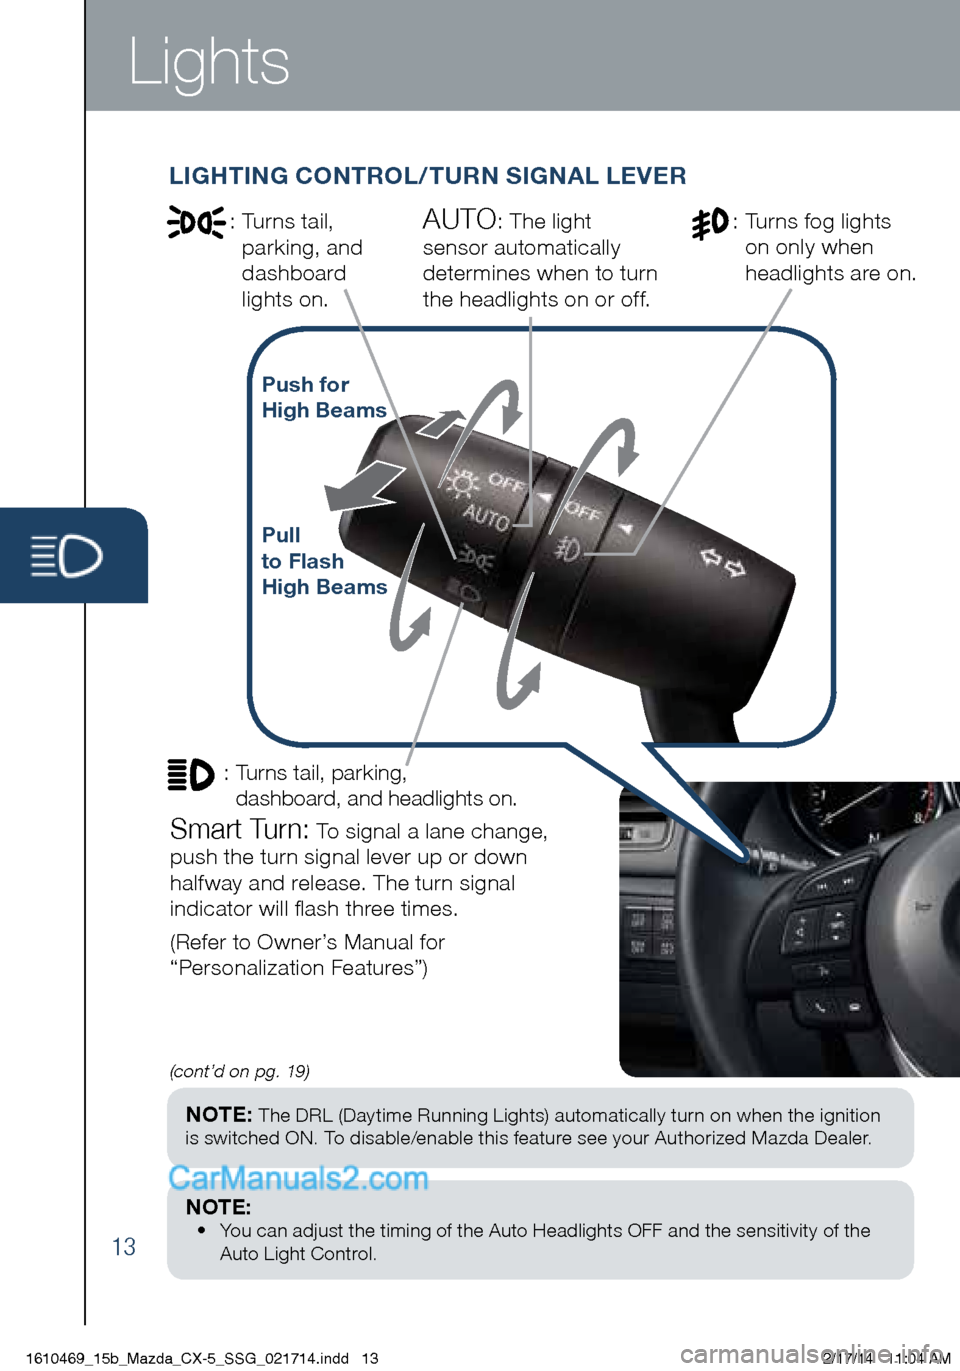
LIGHTING CONTROL/TURN SIGNAL LEVER
: Turns tail,
parking, and
dashboard
lights on.
Pull
to Flash
High Beams
AUTO: The light
sensor automatically
determines when to turn
the headlights on or off.: Turns fog lights
on only when
headlights are on.
Push for
High Beams
: Turns tail, parking,
dashboard, and headlights on.
Smart Turn: To signal a lane change,
push the turn signal lever up or down
halfway and release. The turn signal
indicator will flash three times.
(Refer to Owner’s Manual for
“Personalization Features”)
1610469_15b_Mazda_CX-5_SSG_021714.indd 132/17/14 11:04 AM
Page 20 of 42

Headlights (cont’d from pg.13)
19
With AFS
Without AFS
NOTE:
• With AFS, it is normal to see the headlights move and hear the sound of the
headlight leveling motors at the front of the vehicle when the ignition is ON.
• The system will need to be reset if the vehicle battery has been disconnected
or the system fuse has been replaced. Please refer to your Owner’s Manual for
easy to follow resetting instructions.
ADAPTIVE FRONT-LIGHTING SYSTEM (AFS) (if equipped)
The adaptive front-lighting system (AFS) automatically turns the
headlight beam to the right or left in conjunction with the direction of
the steering wheel.
The AFS improves the direction of headlight illumination while cornering, and
only works when the vehicle is moving.
Push AFS OFF to turn
system off or on. When off,
AFS OFF illuminates in the
instrument panel.
1610469_15b_Mazda_CX-5_SSG_021714.indd 192/17/14 11:04 AM
Page 21 of 42

Tires
CAUTION: Using a wire brush, polishing
compound, solvent, or any type of abrasive
cleaner may damage the protective coating.
TIRE PRESSURE MONITORING SYSTEM (TPMS)
Your vehicle is equipped with a Tire Pressure Monitoring System (TPMS)
that detects low tire pressure in one or more tires. In the following cases,
the TPMS must be “initialized” so the system can operate normally.
• The tire pressure is adjusted (up or down) in one or more tires.
• A tire rotation is performed.
• Any tire or wheel is replaced.
• The vehicle’s battery is disconnected, replaced or completely dead.
Initialization Process (TPMS Warning Light is Illuminated):
1 Park the vehicle in a safe place and firmly apply the parking brake.
2 Let the tires cool, then adjust the tire pressure to the specified
pressure (See tire label located on the driver’s side B-pillar or edge
of driver’s door frame for specification) on all four (4) tires.
3 Switch the ignition ON, but leave the vehicle parked.
4 Push and hold the TPMS “Set Switch” (left side of dash)
until the TPMS warning light
in the
instrument cluster flashes twice and a
beep sound is heard once.
NOTE: See Page 9 for TPMS switch location.
CAUTION: If the TPMS “Set Switch” is pushed without adjusting the tire
pressure, the system cannot detect the normal tire pressure. The TPMS
warning light may not illuminate, even if the tire pressure is low, or it may
illuminate if the tire pressure is normal.
20
ALUMINUM WHEEL CARE
Your aluminum wheels have a protective
coating on them. Only use a mild soap or
neutral detergent with a sponge or soft cloth
to clean them.
1610469_15b_Mazda_CX-5_SSG_021714.indd 202/17/14 11:04 AM
Page 22 of 42
Mirrors
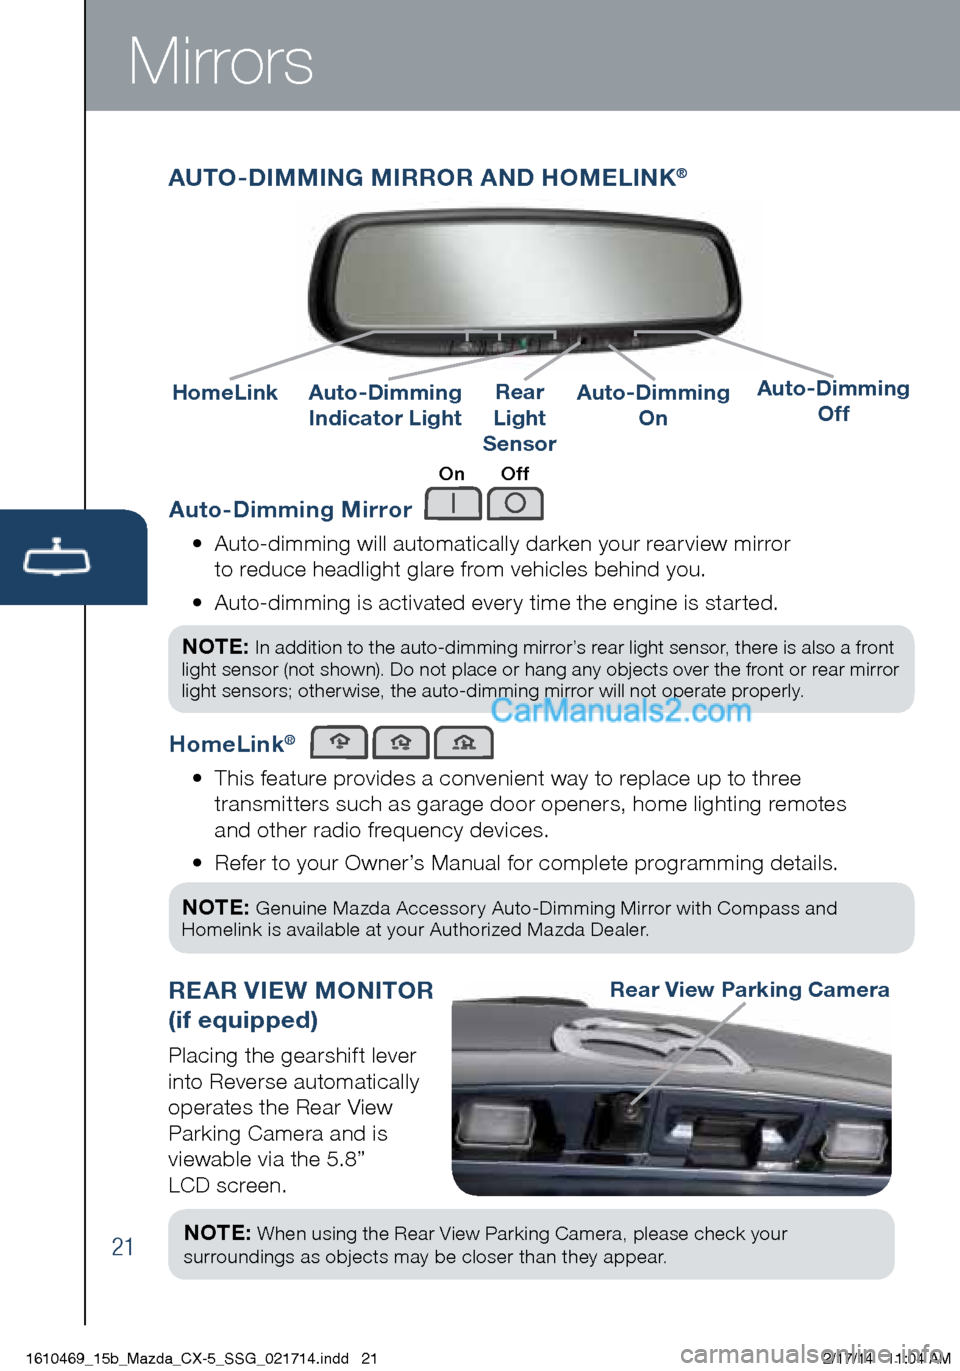
Auto-Dimming Mirror
• Auto-dimming will automatically darken your rearview mirror
to reduce headlight glare from vehicles behind you.
• Auto-dimming is activated every time the engine is started.
NOTE:
In addition to the auto-dimming mirror’s rear light sensor, there is also a front
light sensor (not shown). Do not place or hang any objects over the front or rear mirror
light sensors; otherwise, the auto-dimming mirror will not operate properly.
HomeLink®
• This feature provides a convenient way to replace up to three
transmitters such as garage door openers, home lighting remotes
and other radio frequency devices.
• Refer to your Owner’s Manual for complete programming details.
NOTE:
Genuine Mazda Accessory Auto-Dimming Mirror with Compass and
Homelink is available at your Authorized Mazda Dealer.
AUTO-DIMMING MIRROR AND HOMELINK®
Auto-Dimming
Indicator LightAuto-Dimming
On
HomeLinkRear
Light
SensorAuto-Dimming
Off
On Off
REAR VIEW MONITOR
(if equipped)
Placing the gearshift lever
into Reverse automatically
operates the Rear View
Parking Camera and is
viewable via the 5.8”
LCD screen.
Rear View Parking Camera
NOTE: When using the Rear View Parking Camera, please check your
surroundings as objects may be closer than they appear.21
1610469_15b_Mazda_CX-5_SSG_021714.indd 212/17/14 11:04 AM
Page 23 of 42
Blind Spot Monitoring
NOTE: Do not rely completely on the BSM system and be sure to look over
your shoulder before changing lanes:
• The BSM system can assist the driver in confirming the safety of the
surroundings, but is not a complete substitute.
• The driver is responsible for ensuring safe lane changes and other maneuvers.
• Always pay attention to the direction in which the vehicle is traveling and the
vehicle’s surroundings.
• The BSM system does not operate when the vehicle speed is lower than about
20 mph (32 km/h).
Turning BSM System Off
Turning the BSM system off will turn off both the light and sound
indicators. To manually turn the BSM system off, push the BSM
OFF switch on the dash. The BSM OFF indicator will illuminate
in the instrument cluster when the BSM system is off. The BSM
system will automatically turn on the next time the vehicle is started.
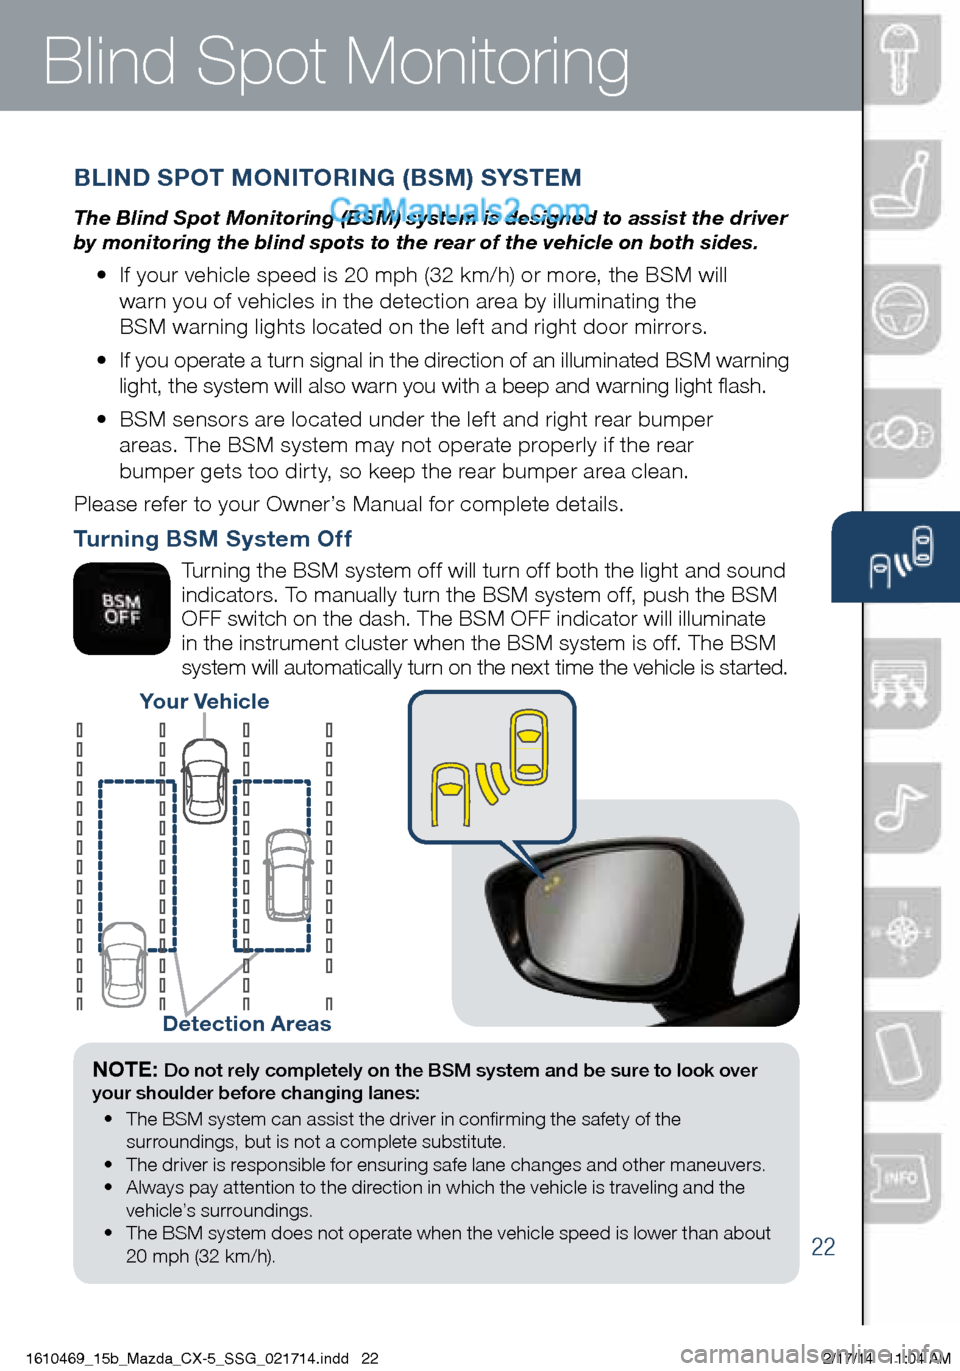
Your Vehicle
Detection Areas
BLIND SPOT MONITORING (BSM) SYSTEM
The Blind Spot Monitoring (BSM) system is designed to assist the driver
by monitoring the blind spots to the rear of the vehicle on both sides.
• If your vehicle speed is 20 mph (32 km/h) or more, the BSM will
warn you of vehicles in the detection area by illuminating the
BSM warning lights located on the left and right door mirrors.
• If you operate a turn signal in the direction of an illuminated BSM warning
light, the system will also warn you with a beep and warning light flash.
• BSM sensors are located under the left and right rear bumper
areas. The BSM system may not operate properly if the rear
bumper gets too dirty, so keep the rear bumper area clean.
Please refer to your Owner’s Manual for complete details.
22
1610469_15b_Mazda_CX-5_SSG_021714.indd 222/17/14 11:04 AM
Page 27 of 42
Automatic Climate Control
26
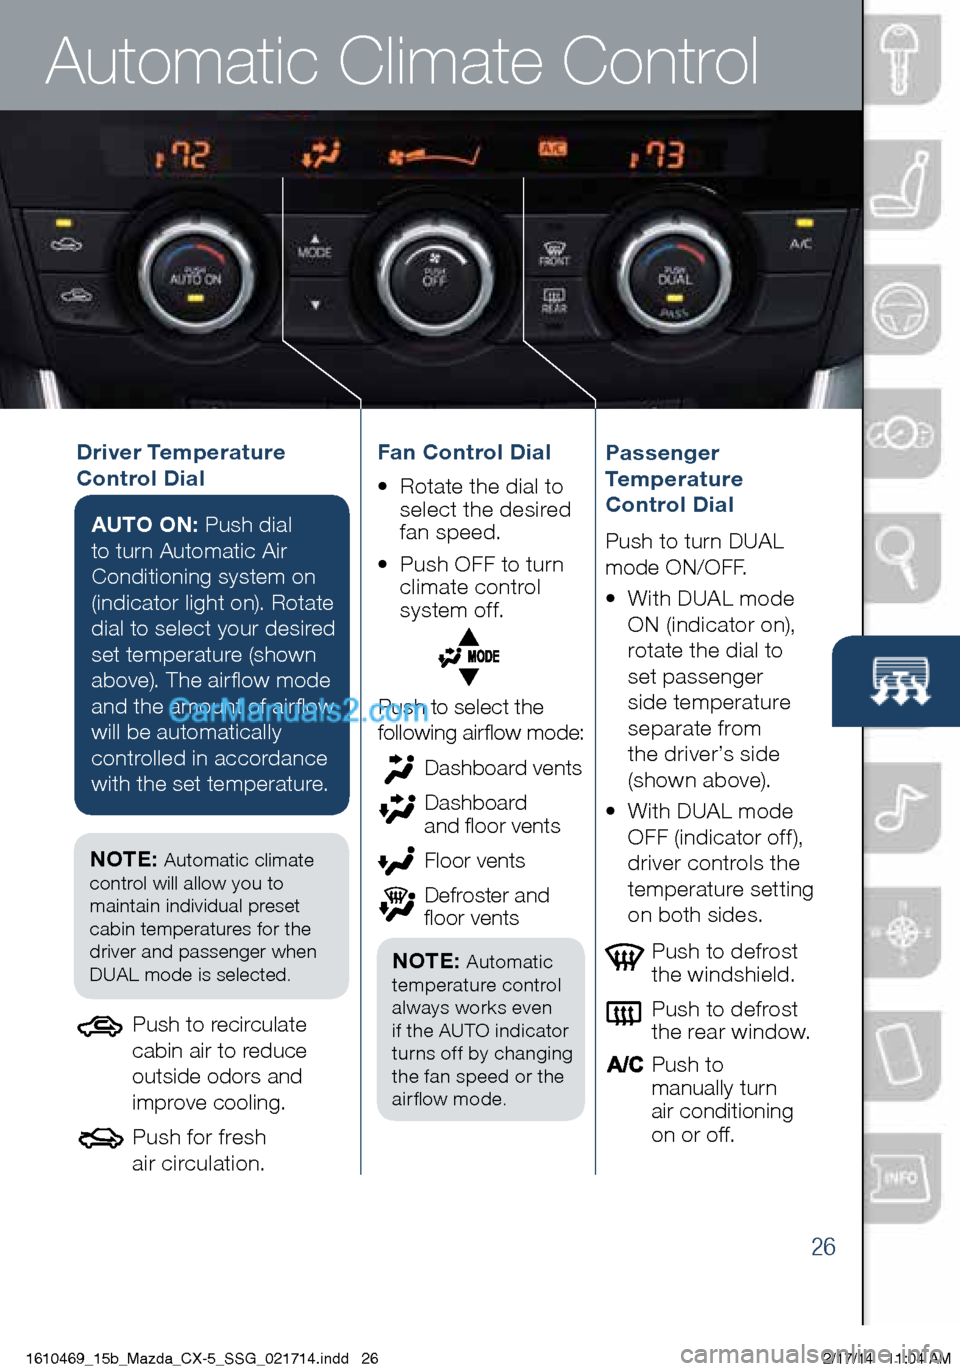
Driver Temperature
Control DialAUTO ON: Push dial
to turn Automatic Air
Conditioning system on
(indicator light on). Rotate
dial to select your desired
set temperature (shown
above). The airflow mode
and the amount of airflow
will be automatically
controlled in accordance
with the set temperature.
Push to defrost
the windshield.
Push to defrost
the rear window.
Push to
manually turn
air conditioning
on or off.Passenger
Temperature
Control Dial
Push to turn DUAL
mode ON/OFF.
• With DUAL mode ON (indicator on),
rotate the dial to
set passenger
side temperature
separate from
the driver’s side
(shown above).
• With DUAL mode
OFF (indicator off),
driver controls the
temperature setting
on both sides.
Push to select the
following airflow mode:
NOTE: Automatic climate
control will allow you to
maintain individual preset
cabin temperatures for the
driver and passenger when
DUAL mode is selected.
Push to recirculate
cabin air to reduce
outside odors and
improve cooling.
Push for fresh
air circulation. Dashboard vents
Dashboard
and floor vents
Floor vents
Defroster and
floor vents
NOTE: Automatic
temperature control
always works even
if the AUTO indicator
turns off by changing
the fan speed or the
airflow mode.
Fan Control Dial
• Rotate the dial to
select the desired
fan speed.
• Push OFF to turn
climate control
system of f.
1610469_15b_Mazda_CX-5_SSG_021714.indd 262/17/14 11:04 AM
Page 40 of 42
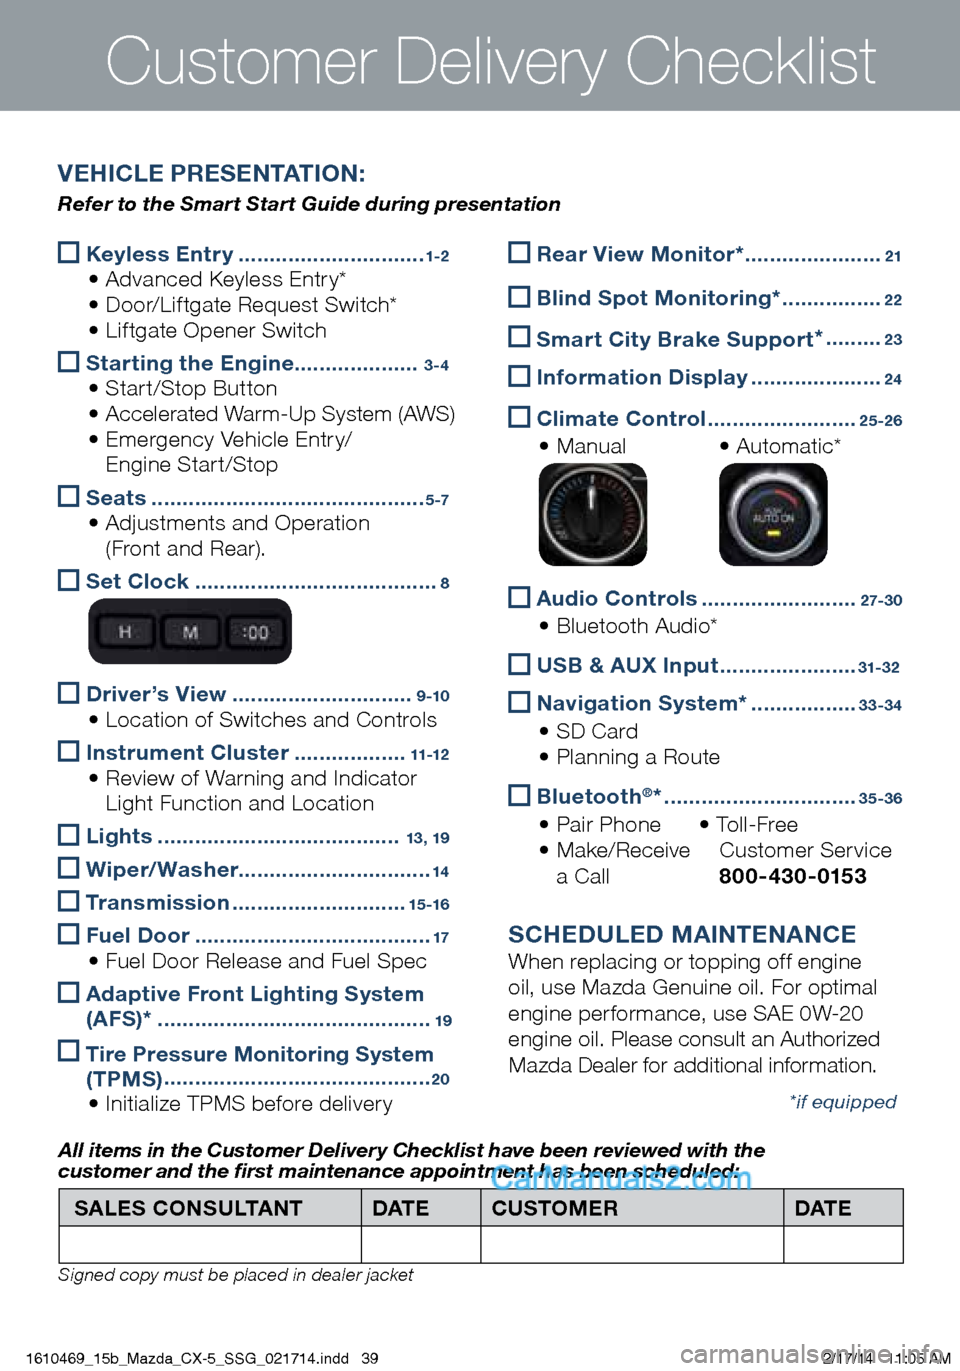
Keyless Entry
..............................1-2 • Advanced Keyless Entry*
• Door/Liftgate Request Switch*
• Liftgate Opener Switch
Starting the Engine
....................3-4 • Start/Stop Button
• Accelerated Warm-Up System (AWS)
• Emergency Vehicle Entry/
Engine Start/Stop
Seats
............................................5 -7 • Adjustments and Operation
(Front and Rear).
Set Clock
.......................................8
Driver’s View
.............................9 -10 • Location of Switches and Controls
Instrument Cluster
..................11-12 • Review of Warning and Indicator
Light Function and Location
Lights
.......................................13, 19
Wiper/Washer
...............................14
Transmission
............................15 -16
Fuel Door
......................................17 • Fuel Door Release and Fuel Spec
Adaptive Front Lighting System
(AFS)*
............................................19
Tire Pressure Monitoring System
(TPMS) ...........................................20
• Initialize TPMS before delivery
Customer Delivery Checklist
Rear View Monitor* ......................21
Blind Spot Monitoring*
................22
Smart City Brake Support *
.........23
Information Display
.....................24
Climate Control
........................25-26
• Manual • Automatic*
Audio Controls
.........................2 7- 3 0
• Bluetooth Audio*
USB & AUX Input ......................31-32
Navigation System*
.................33-34
• SD Card
• Planning a Route
Bluetooth®*
...............................35-36
• Pair Phone • To l l - F r e e
• Make/Receive Customer Service
a Call 800-430-0153
SCHEDULED MAINTENANCE
When replacing or topping off engine
oil, use Mazda Genuine oil. For optimal
engine performance, use SAE 0W-20
engine oil. Please consult an Authorized
Mazda Dealer for additional information.
*if equipped
SALES CONSULTANT DAT ECUSTOMER DAT E
All items in the Customer Deliver y Checklist have been reviewed with the
customer and the first maintenance appointment has been scheduled:
Signed copy must be placed in dealer jacket
VEHICLE PRESENTATION:
Refer to the Smart Start Guide during presentation
1610469_15b_Mazda_CX-5_SSG_021714.indd 392/17/14 11:05 AM
Page 41 of 42
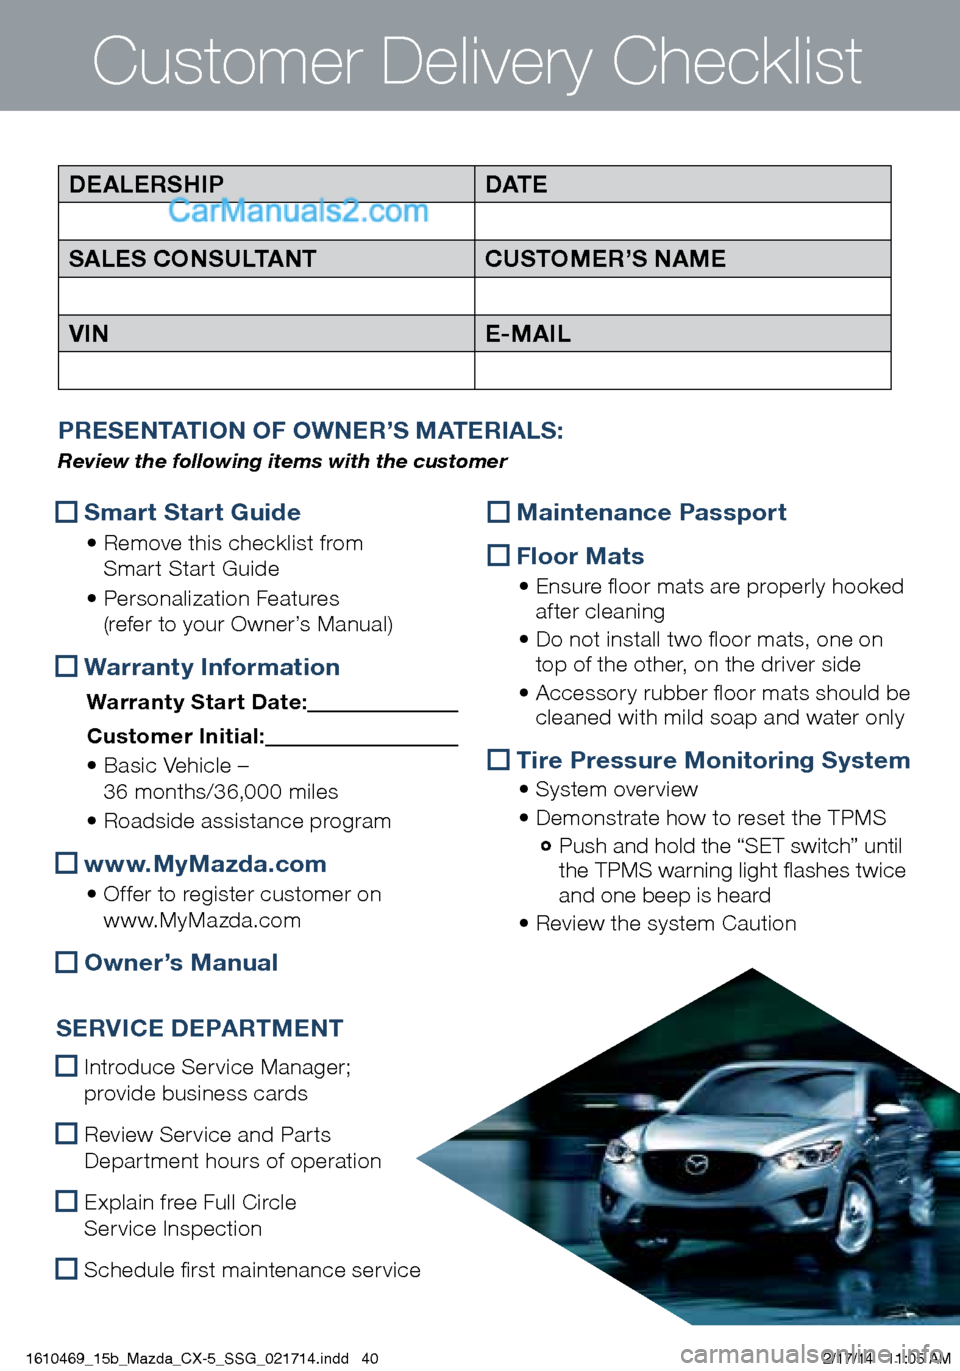
Customer Delivery Checklist
PRESENTATION OF OWNER’S MATERIALS:
Review the following items with the customer
DEALERSHIPDAT E
SALES CONSULTANT CUSTOMER’S NAME
VIN E-MAIL
Smart Start Guide
• Remove this checklist from
Smart Start Guide
• Personalization Features
(refer to your Owner’s Manual)
Warranty Information
Warranty Start Date:
Customer Ini tial:
• Basic Vehicle –
36 months/36,000 miles
• Roadside assistance program
www.MyMazda.com
• Offer to register customer on
www.MyMazda.com
Owner’s Manual
SERVICE DEPARTMENT
Introduce Service Manager;
provide business cards
Review Service and Parts
Department hours of operation
Explain free Full Circle
Service Inspection
Schedule first maintenance service
Maintenance Passport
Floor Mats
• Ensure floor mats are properly hooked
after cleaning
• Do not install two floor mats, one on
top of the other, on the driver side
• Accessory rubber floor mats should be
cleaned with mild soap and water only
Tire Pressure Monitoring System
• System overview
• Demonstrate how to reset the TPMS
Push and hold the “SET switch” until
the TPMS warning light flashes twice
and one beep is heard
• Review the system Caution
1610469_15b_Mazda_CX-5_SSG_021714.indd 402/17/14 11:05 AM