lumbar support MAZDA MODEL CX-5 2020 Owners Manual (in English)
[x] Cancel search | Manufacturer: MAZDA, Model Year: 2020, Model line: MODEL CX-5, Model: MAZDA MODEL CX-5 2020Pages: 714
Page 20 of 714

Make sure the lever returns to its original position and the seat is locked in place by
attempting to push it forward and backward.
(Power Seat)
To slide the seat, move the slide lifter switch on the outside of the seat to the front or back
and hold it. Release the switch at the desired position.
Height Adjustment
(Manual Seat)
To adjust the seat height, move the lever up or down.
(Power Seat)
To adjust the seat height, move the slide lifter switch up or down.
Height Adjustment for Front Edge of Seat Bottom (Power Seat)*
To adjust the front hei ght of the seat bottom, raise or lower the front of the slide lifter
switch.
Seat Recline
(Manual Seat)
To change the seatback angle, lean forward sl ightly while raising the lever. Then lean back
to the desired position and release the lever.
Make sure the lever returns to its original po sition and the seatback is locked in place by
attempting to push it forward and backward.
(Power Seat)
To change the seatback angle, press the front or rear side of the reclining switch. Release the
switch at the desired position.
Lumbar Support Adjustment*
(Manual Seat)
To increase the seat firmness, move the lever downward. Move the lever upward to decrease
firmness.
(Power Seat)
To increase the seat firmness, press and hold the front part of the switch to the desired
position, then release it.
Press the rear part of the switch to decrease firmness.
Before making adjustments to the driving position recommended by Mazda
Before making adjustments, move the steerin g wheel and seat to their default positions.
Essential Safety Equipment
Seats
2-6*Some models.
CX-5_8HX6-EA-19I_Edition2_old 2019-9-19 9:26:07
Page 25 of 714

Refer to Height Adjustment on page 2-20.
â–¼Driving Position Memory*
The desired driving position can be called
up after programming the position.
The following driving positions can be
programmed.
Driver’s seat position (seat slide, height
adjustment, front edge of seat bottom,
seat recline)
Refer to Adjusting the Driver's Seat on
page 2-5.
ï‚·Active driving display (display position,
brightness level, display information)
Refer to Active Driving Display on page
4-58.
CAUTION
Do not place fingers or hands around the
bottom of the seat while the seat memory
function is operatin
g. The seat moves
automatically while the seat memory
function is operating and fingers or hands
could get pinched and injured.
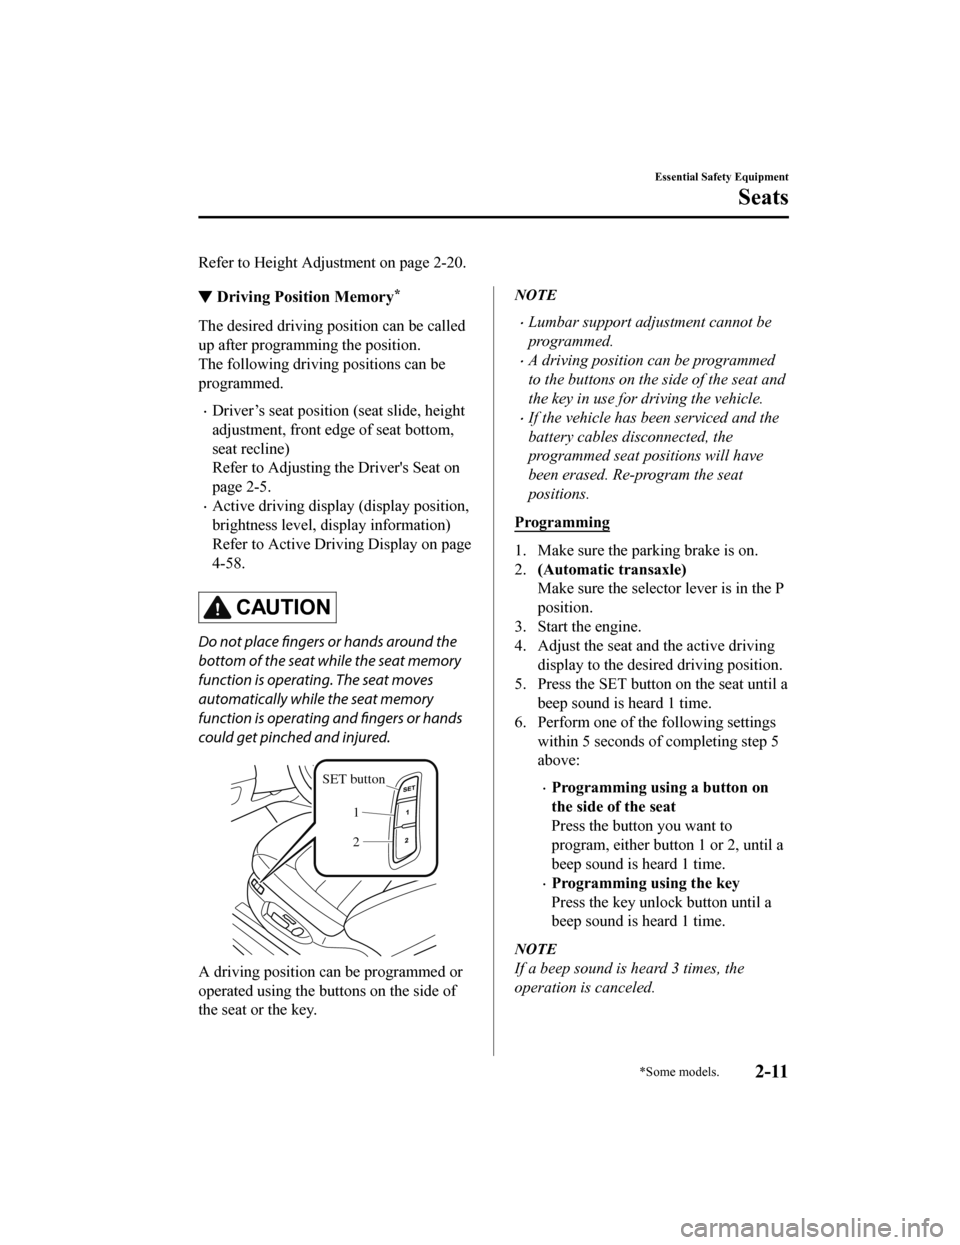
SET button
1
2
A driving position can be programmed or
operated using the buttons on the side of
the seat or the key.
NOTE
ï‚·Lumbar support adjustment cannot be
programmed.
ï‚·A driving position can be programmed
to the buttons on the side of the seat and
the key in use for driving the vehicle.
ï‚·If the vehicle has been serviced and the
battery cables disconnected, the
programmed seat positions will have
been erased. Re-program the seat
positions.
Programming
1. Make sure the parking brake is on.
2. (Automatic transaxle)
Make sure the selector lever is in the P
position.
3. Start the engine.
4. Adjust the seat and the active driving display to the desired driving position.
5. Press the SET button on the seat until a beep sound is heard 1 time.
6. Perform one of the following settings within 5 seconds of completing step 5
above:
ï‚·Programming using a button on
the side of the seat
Press the button you want to
program, either button 1 or 2, until a
beep sound is heard 1 time.
ï‚·Programming using the key
Press the key unlock button until a
beep sound is heard 1 time.
NOTE
If a beep sound is heard 3 times, the
operation is canceled.
Essential Safety Equipment
Seats
*Some models.2-11
CX-5_8HX6-EA-19I_Edition2_old 2019-9-19 9:26:07