ECO mode MAZDA MODEL CX-7 2009 Owners Manual (in English)
[x] Cancel search | Manufacturer: MAZDA, Model Year: 2009, Model line: MODEL CX-7, Model: MAZDA MODEL CX-7 2009Pages: 454, PDF Size: 6.24 MB
Page 3 of 454

Black plate (3,1)
Thank you for choosing a Mazda. We at Mazda design and build vehicles with complete
customer satisfaction in mind.
To help ensure enjoyable and trouble-free operation of your Mazda, read this manual
carefully and follow its recommendations.
An Authorized Mazda Dealer knows your vehicle best. So when maintenance or service is
necessary, that's the place to go.
Our nationwide network of Mazda professionals is dedicated to providing you with the best
possible service.
We assure you that all of us at Mazda have an ongoing interest in your motoring pleasure
and in your full satisfaction with your Mazda product.
Mazda Motor Corporation
HIROSHIMA, JAPAN
Important Notes About This Manual
Keep this manual in the glove box as a handy reference for the safe and enjoyable use of your Mazda. Should you
resell the vehicle, leave this manual with it for the next owner.
All specifications and descriptions are accurate at the time of printing. Because improvement is a constant goal at
Mazda, we reserve the right to make changes in specifications at any time without notice and without obligation.
Event Data Recorder
This vehicle is equipped with an event data recorder. In the event of a crash, this device records data related to
vehicle dynamics and safety systems for a short period of time. These data can help provide a better
understanding of the circumstances in which crashes and injuries occur and lead to the designing of safer
vehicles.
Air Conditioning and the Environment
Your Mazda's genuine air conditioner is filled with HFC134a (R134a), a refrigerant that has been found not to
damage the earth's ozone layer. If the air conditioner does not operate properly, consult an Authorized Mazda
Dealer.
Perchlorate
Certain components of this vehicle such as [air bag modules, seat belt pretensioners, lithium batteries, ...] may
contain Perchlorate Material–Special handling may apply for service or vehicle end of life disposal. See
www.dtsc.ca.gov/hazardouswaste/perchlorate.
Please be aware that this manual applies to all models, equipment and options. As a result, you may find
some explanations for equipment not installed on your vehicle.
©2008 Mazda Motor Corporation
Printed in Japan June 2008(Print2)
A Word to Mazda Owners
CX-7_8Z60-EA-08D_Edition2 Page3
Friday, May 30 2008 5:26 PM
Form No.8Z60-EA-08D
Page 25 of 454

Black plate (25,1)
Seat Belt Precautions
Seat belts help to decrease the possibility of severe injury during accidents and sudden
stops. Mazda recommends that the driver and all passengers always wear seat belts.
All of the seat belt retractors are designed to keep the lap/shoulder belts out of the way
when not in use.
The driver's seat belt has no provisions for child-restraint systems and has only an
emergency locking mode. The driver may wear it comfortably, and it will lock during a
collision.
However, the front passenger's seat and all rear lap/shoulder belt retractors operate in two
modes: emergency locking mode, and for child-restraint systems, automatic locking mode.
While we recommend you put all children in the rear seats, if you must use the front
passenger seat for a child, slide the front passenger seat as far back as possible and make
sure any child-restraint system is secured properly.
Essential Safety Equipment
Seat Belt Systems
2-13
CX-7_8Z60-EA-08D_Edition2 Page25
Friday, May 30 2008 5:26 PM
Form No.8Z60-EA-08D
Page 27 of 454

Black plate (27,1)
CAUTION
Belt retraction may become difficult if the belts and rings are soiled, so try to keep
them clean. For more details about cleaning the seat belts, refer to“Cleaning the
Lap/Shoulder Belt Webbing”(page 8-56).
qPregnant Women and Persons with Serious Medical Conditions
Pregnant women should always wear seat belts. Ask your doctor for specific
recommendations.
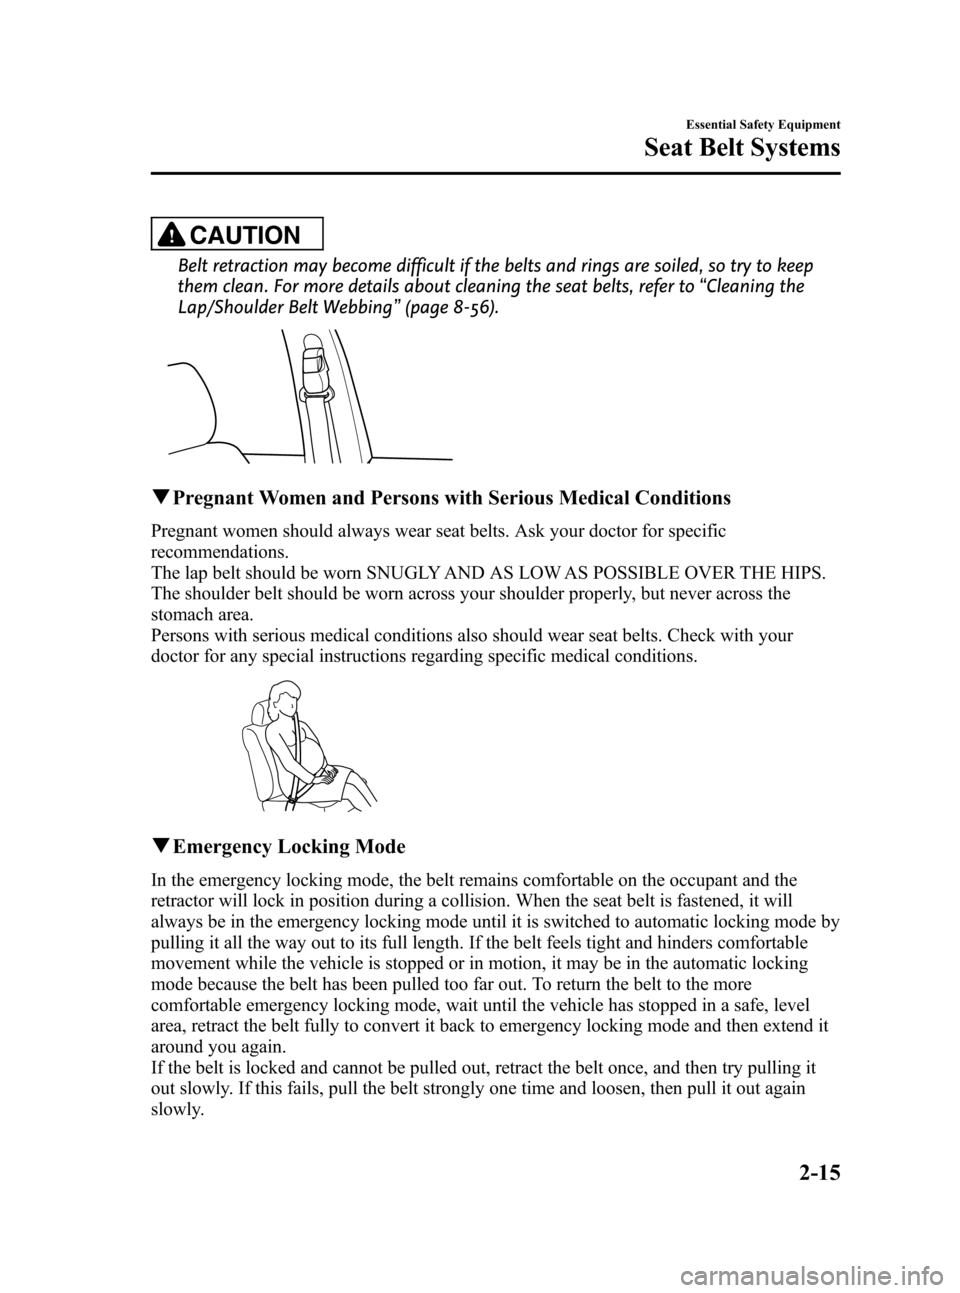
The lap belt should be worn SNUGLY AND AS LOW AS POSSIBLE OVER THE HIPS.
The shoulder belt should be worn across your shoulder properly, but never across the
stomach area.
Persons with serious medical conditions also should wear seat belts. Check with your
doctor for any special instructions regarding specific medical conditions.
qEmergency Locking Mode
In the emergency locking mode, the belt remains comfortable on the occupant and the
retractor will lock in position during a collision. When the seat belt is fastened, it will
always be in the emergency locking mode until it is switched to automatic locking mode by
pulling it all the way out to its full length. If the belt feels tight and hinders comfortable
movement while the vehicle is stopped or in motion, it may be in the automatic locking
mode because the belt has been pulled too far out. To return the belt to the more
comfortable emergency locking mode, wait until the vehicle has stopped in a safe, level
area, retract the belt fully to convert it back to emergency locking mode and then extend it
around you again.
If the belt is locked and cannot be pulled out, retract the belt once, and then try pulling it
out slowly. If this fails, pull the belt strongly one time and loosen, then pull it out again
slowly.
Essential Safety Equipment
Seat Belt Systems
2-15
CX-7_8Z60-EA-08D_Edition2 Page27
Friday, May 30 2008 5:26 PM
Form No.8Z60-EA-08D
Page 31 of 454

Black plate (31,1)
Front Seat Belt Pretensioner
and Load Limiting Systems
For optimum protection, the driver and
front passenger seat belts are equipped
with pretensioner and load limiting
systems. For both these systems to work
properly you must wear the seat belt
properly.
Pretensioners:
The front seat belt retractors remove slack
quickly as the air bags are expanding.
For deployment details, refer to the SRS
Air Bag Deployment Criteria (page 2-57).
In addition, the pretensioner system for
the front passenger, like the front
passenger air bag, is designed to only
deploy in accordance with the total seated
weight on the front passenger seat. Any
time the air bags and seat belt
pretensioners have fired they must be
replaced. For details, refer to the driver
and front passenger occupant
classification system (page 2-60).
Load limiter:
The load limiting system releases belt
webbing in a controlled manner to reduce
belt force on the occupant's chest. While
the most severe load on a seat belt occurs
in frontal collisions, the load limiter has
an automatic mechanical function and can
activate in any accident mode with
sufficient occupant movement.
Even if the pretensioners have not fired,
the load limiting function must be
checked by an Authorized Mazda Dealer.
WARNING
Wear seat belts only as recommended
in this owner's manual:
Incorrect positioning of the driver and
front passenger seat belts is
dangerous. Without proper
positioning, the pretensioner and
load limiting systems cannot provide
adequate protection in an accident
and this could result in serious injury.
For more details about wearing seat
belts, refer to“Fastening the seat
belts”(page 2-17).
Essential Safety Equipment
Seat Belt Systems
2-19
CX-7_8Z60-EA-08D_Edition2 Page31
Friday, May 30 2008 5:26 PM
Form No.8Z60-EA-08D
Page 110 of 454

Black plate (110,1)
qLuggage Compartment
WARNING
Do not place luggage or other cargo on
top of the luggage compartment cover:
Placing luggage or other cargo on
top of the luggage compartment
cover is dangerous. During sudden
braking or a collision, the cargo
could become a projectile that could
hit and injure someone. The vehicle
has a light weight luggage
compartment cover to keep the
contents of your luggage area out of
sight; it will not retain heavy objects
that are not tied down in an accident
such as a rollover. Tie down all heavy
objects, whether luggage or cargo,
using the tie down hooks.
Make sure luggage and cargo is
secured before driving:
Not securing cargo while driving is
dangerous as it could move or be
crushed during sudden braking or a
collision and cause injury.
CAUTION
Make sure the luggage compartment
cover is firmly secured. If it is not
firmly secured, it could unexpectedly
disengage resulting in injury.
Luggage compartment coverí
Installing the cover
1. Insert the left end of the retractor bar
into the notch.
2. Squeeze the spring holder on right end
of the retractor bar inward, then insert
it into the notch.
3-32
Knowing Your Mazda
íSome models.
Doors and Locks
CX-7_8Z60-EA-08D_Edition2 Page110
Friday, May 30 2008 5:27 PM
Form No.8Z60-EA-08D
Page 132 of 454

Black plate (132,1)
Theft-Deterrent Systemí
If the theft deterrent system detects an
inappropriate entry into the vehicle, which
could result in the vehicle or its contents
being stolen, the alarm alerts the
surrounding area of an abnormality by
sounding the horn and flashing the hazard
warning lights.
Refer to Operation on page 3-54.
NOTE
lThe theft-deterrent system operates with the
key or the keyless entry system transmitter.
l(With advanced key)
The theft-deterrent system can also be
operated using the advanced keyless
function.
The system operates only when the driver is
in the vehicle or within operational range
while the advanced key is being carried.
lThe system will not function unless it is
properly armed. To properly secure the
vehicle, always make sure all windows are
completely closed and all doors and the
liftgate are locked before leaving the
vehicle. Remember to take your key and
transmitter.
qOperation
System triggering conditions
The horn sounds intermittently and the
hazard warning lights flash for about 30
seconds when the system is triggered by
any one of the following:
lForcing open a door, the hood or the
liftgate.
lUnlocking a door with the inside door-
lock knob.
lUnlocking a door with the door lock
switch.
lOpening a door by operating an inside
door-lock knob.
lOpening the hood by operating the
hood release handle.
If the system is triggered again, the lights
and horn will activate until a door or the
liftgate is unlocked with the key or with
the transmitter.
(With advanced key)
The lights and horn can also be
deactivated by pressing the request
switch.
qHow to Arm the System
1. Remove the key from the ignition
switch.
(With advanced key)
Turn the start knob to the LOCK
position.
2. Make sure the hood is closed. Close
and lock all doors and the liftgate from
the outside using the key or press the
lock button on your keyless entry
system transmitter.
(With advanced key)
Press a request switch or the lock
button on the transmitter.
(Without advanced key)
The following method will also arm the
theft-deterrent system:
Close the hood and the liftgate . Press
the area on the door-lock switch
marked“
”once. Close all doors.
The hazard warning lights will flash once.
The theft deterrent system can also be
armed by activating the auto re-lock
function with all the doors, the liftgate and
the hood closed.
NOTE
Locking the doors with the inside door-lock
knob will not arm the system.
3-54
Knowing Your Mazda
íSome models.
Security System
CX-7_8Z60-EA-08D_Edition2 Page132
Friday, May 30 2008 5:27 PM
Form No.8Z60-EA-08D
Page 172 of 454

Black plate (172,1)
Manually Shifting down
(M6→M5→M4→M3→M2→M1)
To shift down to a lower gear, tap the shift
lever forward (
) once.
WARNING
Do not use engine braking on slippery
road surfaces or at high speeds:
Shifting down while driving on wet,
snowy, or frozen roads, or while
driving at high speeds causes sudden
engine braking, which is dangerous.
The sudden change in tire speed
could cause the tires to skid. This
could lead to loss of vehicle control
and an accident.
NOTE
lWhen driving at high speeds, the gear may
not shift down depending on vehicle speed.
lDuring deceleration, the gear may
automatically shift down depending on
vehicle speed.
lWhen depressing the accelerator fully, the
transaxle will shift to a lower gear,
depending on vehicle speed.
Second gear fixed mode
When the shift lever is tapped back (
)
while the vehicle is stopped, the transaxle
is set in the second gear fixed mode. The
gear is fixed in second while in this mode
for easier starting and driving on slippery
roads. If the shift lever is tapped back (
)
or forward (
) while in the second gear
fixed mode, the mode will be canceled.
Shifting specification
Shifting up
If the vehicle speed is lower than the
speed specified for each gear, the gear
cannot be shifted up to a higher gear.
Gear Vehicle speed
M1→M2You can shift up to M2 whether the
vehicle is stopped or moving.
M2→M3 9 km/h (6 mph)
M3→M4 26 km/h (16 mph)
M4→M5 36 km/h (22 mph)
M5→M6 53 km/h (33 mph)
Shifting down
If the vehicle speed is higher than the
speed specified for each gear, the gear
cannot be shifted down to a lower gear.
Gear Vehicle speed
M6→M5 230 km/h (143 mph)
M5→M4 182 km/h (113 mph)
M4→M3 135 km/h (83 mph)
M3→M2 86 km/h (53 mph)
M2→M1 44 km/h (27 mph)
During deceleration, the gears shift down
automatically when speed is reduced to
the following:
Gear Vehicle speed
M6→M5 52 km/h (32 mph)
M5→M4 34 km/h (21 mph)
M4→M3 25 km/h (15 mph)
M3 or M2→M1 8 km/h (5 mph)
5-14
Driving Your Mazda
Starting and Driving
CX-7_8Z60-EA-08D_Edition2 Page172
Friday, May 30 2008 5:27 PM
Form No.8Z60-EA-08D
Page 173 of 454

Black plate (173,1)
NOTE
The gear does not shift down to M1
automatically while in the second gear fixed
mode.
If the vehicle is kicked down at the
following speeds or lower, the gears shift
down automatically:
Gear Vehicle speed
M6→M5 220 km/h (136 mph)
M5→M4 50 km/h (31 mph)
M4→M3 30 km/h (18 mph)
M3 or M2→M1 8 km/h (5 mph)
Recommendations for shifting
Upshifting
For normal acceleration and cruising, we
recommend these shift points.
Gear Vehicle speed
M1 to M2 24 km/h (15 mph)
M2 to M3 40 km/h (25 mph)
M3 to M4 65 km/h (40 mph)
M4 to M5 73 km/h (45 mph)
M5 to M6 80 km/h (50 mph)
Downshifting
When you must slow down in heavy
traffic or on a steepupgrade, downshift
before the engine starts to overwork. This
gives better acceleration when you need
more speed.
On a steepdowngrade, downshifting
helps maintain safe speed and prolongs
brake life.
qDriving Tips
Passing
For extra power when passing another
vehicle or climbing steep grades, depress
the accelerator fully. The transaxle will
shift to a lower gear, depending on vehicle
speed.
Climbing steep grades from a stop
To climb a steep grade from a stopped
position:
1. Depress the brake pedal.
2. Shift to D or M1, depending on the
load weight and grade steepness.
3. Release the brake pedal while
gradually accelerating.
Descending steep grades
When descending a steep grade, shift to
lower gears, depending on load weight
and grade steepness. Descend slowly,
using the brakes only occasionally to
prevent them from overheating.
Driving Your Mazda
Starting and Driving
5-15
CX-7_8Z60-EA-08D_Edition2 Page173
Friday, May 30 2008 5:27 PM
Form No.8Z60-EA-08D
Page 174 of 454

Black plate (174,1)
Power Steering
Power steering is only operable when the
engine is running. If the engine is off or if
the power steering system is inoperable,
you can still steer, but it requires more
physical effort.
If the steering feels stiffer than usual
during normal driving, consult an
Authorized Mazda Dealer.
CAUTION
Never hold the steering wheel to the
extreme left or right for more than 5
seconds with the engine running.
This could damage the power
steering system.
All-Wheel Drive (AWD)
Operation
í
AWD provides excellent driveability on
snow-covered and ice-packed roads, sand
and mud, as well as on steep slopes and
other slippery surfaces.
5-16
Driving Your Mazda
íSome models.
Starting and Driving
CX-7_8Z60-EA-08D_Edition2 Page174
Friday, May 30 2008 5:27 PM
Form No.8Z60-EA-08D
Page 185 of 454

Black plate (185,1)
Tire Pressure Monitoring Systemí
The tire pressure monitoring system (TPMS) monitors the pressure for each tire.
If tire pressure is too low in one or more tires, the system will inform the driver via the
warning light in the instrument panel and by the warning beep sound.
The tire pressure sensors installed on each wheel send tire pressure data by radio signal to
the receiver unit in the vehicle.
Tire pressure sensors
NOTE
When the ambient temperature is low due to seasonal changes, tire temperatures are also lower.
When the tire temperature decreases, the air pressure decreases as well. The TPMS warning light
may illuminate more frequently. Visually inspect the tires daily before driving, and check tire
pressures monthly with a tire pressure gauge. When checking tire pressures, use of a digital tire
pressure gauge is recommended.
TPMS does not alleviate your need to check the pressure and condition of all four tires
regularly.
Driving Your Mazda
Starting and Driving
5-27íSome models. CX-7_8Z60-EA-08D_Edition2 Page185
Friday, May 30 2008 5:27 PM
Form No.8Z60-EA-08D