climate control MAZDA MODEL CX-9 2011 Smart Start Guide (in English)
[x] Cancel search | Manufacturer: MAZDA, Model Year: 2011, Model line: MODEL CX-9, Model: MAZDA MODEL CX-9 2011Pages: 16, PDF Size: 3.94 MB
Page 8 of 16

Feature Highlights
1314
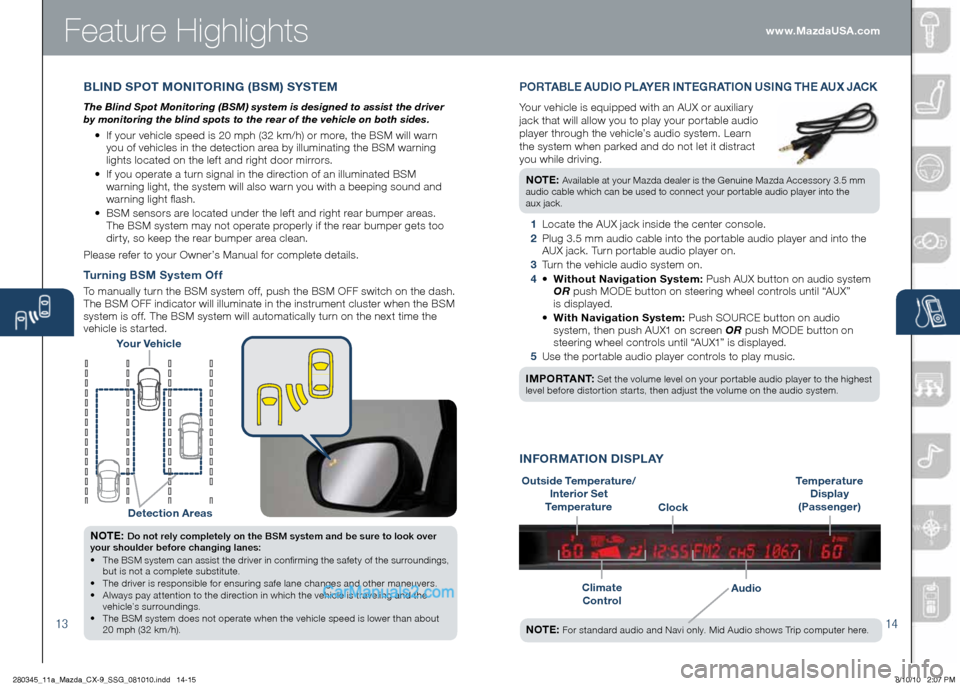
BLInD SPOT MO nITORI nG (BSM) S ySTEM
The Blind Spot Monitoring (BSM) system is designed to assist the driver
by monitoring the blind spots to the rear of the vehicle on both sides.
• If your vehicle speed is 20 mph (32 km/h) or more, the BSM will warn
you of vehicles in the detection area by illuminating the BSM warning
lights located on the lef t and right door mirrors.
•
If you operate a turn signal in the direction of an illuminated BSM
warning light, the system will also warn you with a beeping sound and
warning light flash.
•
BSM sensors are located under the lef t and right rear bumper areas.
The BSM system may not operate properly if the rear bumper gets too
dir ty, so keep the rear bumper area clean.
Please refer to your Owner’s Manual for complete details.
y our Vehicle
Detection Areas
n OTE: Do not rely completely on the BSM system and be sure to look over
your shoulder before changing lanes:
•
The BSM system can assist the driver in confirming the safety of the surroundings,
but is not a complete substitute.
• The driver is responsible for ensuring safe lane changes and other maneuvers.
• Always pay attention to the direction in which the vehicle is traveling and the
vehicle’s surroundings.
• The BSM system does not operate when the vehicle speed is lower than about
20 mph (32 km/h).
Turning BSM System Of f
To manually turn the BSM system of f, push the BSM OFF switch on the dash.
The BSM OFF indicator will illuminate in the instrument cluster when the BSM
system is of f. The BSM system will automatically turn on the next time the
vehicle is star ted.
Outside Temperature/
Interior Set
Temperature
Climate Control
Audio
I n FORMATIO n DISPL A y
Temperature
Display
(Passenger)
Clock
n OTE: For standard audio and Navi only. Mid Audio shows Trip computer here.
PORTABLE AUDIO PLA yER In TEGRATIO n USInG Th E AUX JACK
Your vehicle is equipped with an AUX or auxiliar y
jack that will allow you to play your por table audio
player through the vehicle’s audio system. Learn
the system when parked and do not let it distract
you while driving.
n OTE:
Available at your Mazda dealer is the Genuine Mazda Accessory 3.5 mm
audio cable which can be used to connect your portable audio player into the
aux jack.
1 Locate the AUX jack inside the center console.
2 Plug 3.5 mm audio cable into the por table audio player and into the
AUX jack. Turn por table audio player on.
3 Turn the vehicle audio system on.
4 • Without navigation System: Push AUX button on audio system
OR push MODE button on steering wheel controls until “AUX”
is displayed.
• With navigation System: Push SOURCE button on audio
system, then push AUX1 on screen OR push MODE button on
steering wheel controls until “AUX1” is displayed.
5 Use the por table audio player controls to play music.
IMPORTA nT:
Set the volume level on your por table audio player to the highest
level before distor tion star ts, then adjust the volume on the audio system.
www.MazdaUSA.com
280345_11a_Mazda_CX-9_SSG_081010.indd 14-158/10/10 2:07 PM
Page 9 of 16

1516
nOTE: If the rear AUTO button is pushed while the front A /C button is of f, the rear
air conditioning operates only to circulate air. Setting the temperature to the ma ximum
high or low will not provide the desired temperature at a faster rate.
Automatic Climate Control
The driver and front passenger
seats can be warmed by pushing
the applicable seat warmer button
while the ignition is ON.
•
Seat temperature increases as
the number of indicator lights
increases. Two lights equal
high, one light equals low.
•
When the seat warmers are
not needed, push button until
indicator lights are of f.
F RO nT S EAT WARMERS
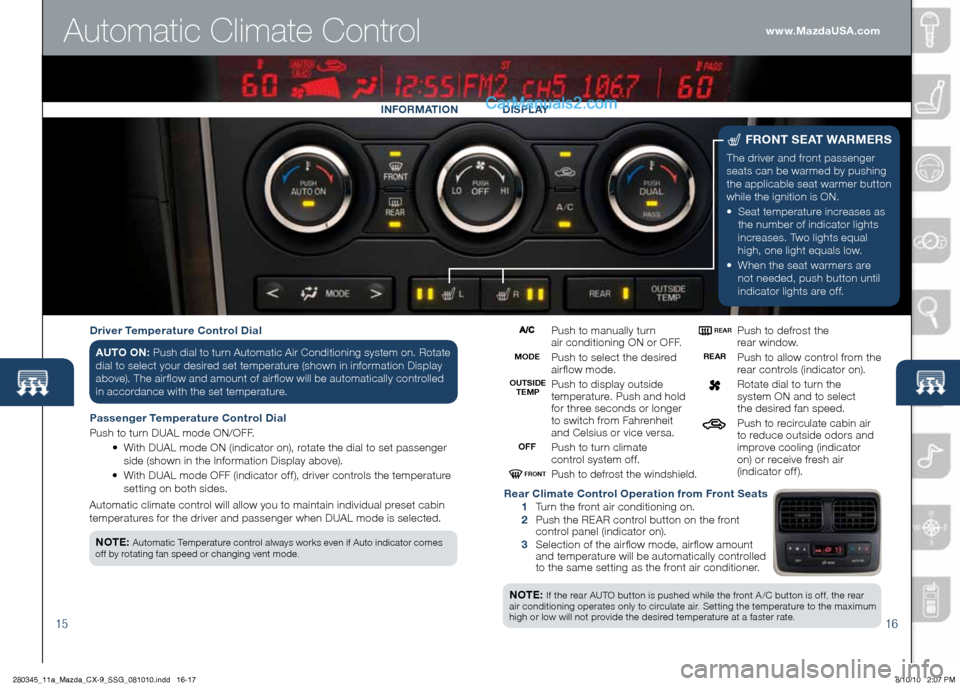
Push to manually turn
air conditioning ON or OFF.
Push to select the desired
air flow mode.
Push to display outside
temperature. Push and hold
for three seconds or longer
to switch from Fahrenheit
and Celsius or vice versa.
Push to turn climate
control system of f.
Push to defrost the windshield.
Push to defrost the
rear window.
Push to allow control from the
rear controls (indicator on).
Rotate dial to turn the
system ON and to select
the desired fan speed.
Push to recirculate cabin air
to reduce outside odors and
improve cooling (indicator
on) or receive fresh air
(indicator of f ).
Driver Temperature Control Dial
A UTO On: Push dial to turn Automatic Air Conditioning system on. Rotate
dial to select your desired set temperature (shown in information Display
above). The air flow and amount of air flow will be automatically controlled
in accordance with the set temperature.
Passenger Temperature Control Dial
Push to turn DUAL mode ON/OFF.
•
With DUAL mode ON (indicator on), rotate the dial to set passenger
side (shown in the Information Display above).
•
With DUAL mode OFF (indicator of f ), driver controls the temperature
setting on both sides.
Automatic climate control will allow you to maintain individual preset cabin
temperatures for the driver and passenger when DUAL mode is selected. Rear Climate Control Operation from Front Seats
1 Turn the front air conditioning on.
2 Push the REAR control button on the front
control panel (indicator on).
3 Selection of the air flow mode, air flow amount
and temperature will be automatically controlled
to the same setting as the front air conditioner.
In
FORMATIO n D ISPLAy
MODE
OFF
REAR
OUTSIDE
TEMP REAR
FROnT
n
OTE: Automatic Temperature control always works even if Auto indicator comes
off by rotating fan speed or changing vent mode.
www.MazdaUSA.com
280345_11a_Mazda_CX-9_SSG_081010.indd 16-178/10/10 2:07 PM
Page 15 of 16

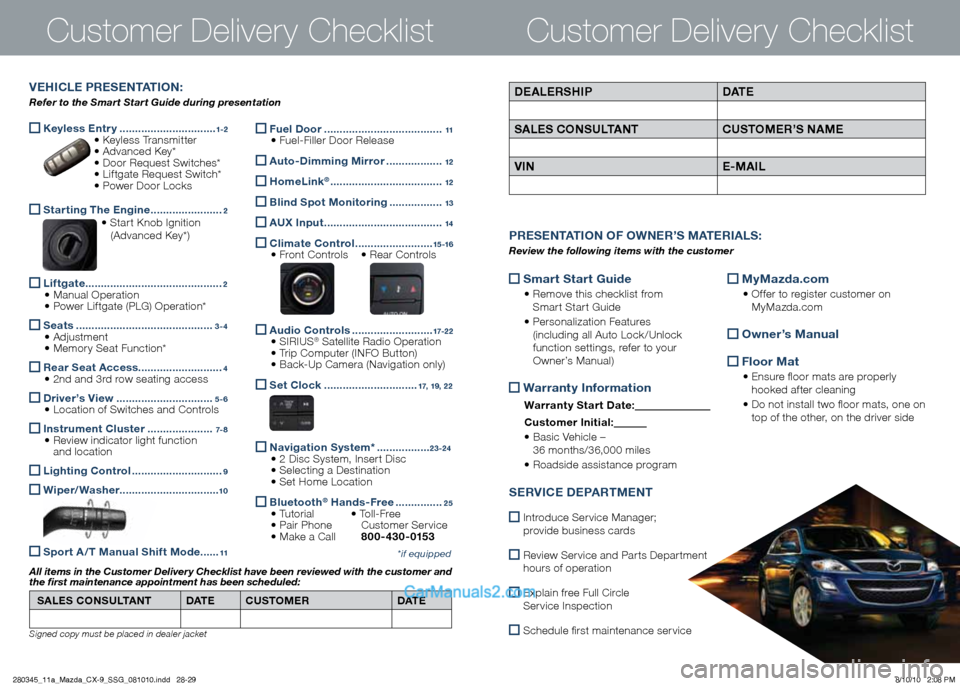
Keyless Entr y
...............................1-2 • Keyless Transmitter
• Advanced Key*
• Door Request Switches*
• Lif tgate Request Switch*
• Power Door Locks
Star ting The Engine
.......................2 • Star t Knob Ignition
(Advanced Key*)
Lif tgate
............................................2
• Manual Operation
• Power Lif tgate (PLG) Operation*
Seats
............................................3 - 4 • Adjustment
• Memor y Seat Function*
Rear Seat Access
...........................4 • 2nd and 3rd row seating access
Driver’s View
...............................5 - 6 • Location of Switches and Controls
Instrument Cluster
.....................7- 8 • Review indicator light function
and location
Lighting Control
.............................9
Wiper/ Washer
................................10
Spor t A / T Manual Shif t Mode ......11
Customer Delivery ChecklistCustomer Delivery Checklist
*if equipped
DEALERS hIP DATE
SALES CO nSULTA nT CUSTOMER’S nAME
VI n E-MAIL
PRESE nTATIO n OF O WnER ’S M ATERIALS :
Review the following items with the customer
VE h ICLE PRESE nTATIO n:
Refer to the Smart Start Guide during presentation
Fuel Door
......................................11 • Fuel-Filler Door Release
Auto-Dimming Mirror ..................12
h omeLink® ....................................12
Blind Spot Monitoring
.................13
AUX Input
......................................14
Climate Control
.........................15 -16 • Front Controls • Rear Controls
Audio Controls
..........................17-2 2 • SIRIUS® Satellite Radio Operation
• Trip Computer (INFO Button)
• Back-Up Camera (Navigation only)
Set Clock ..............................17, 19, 2 2
n avigation System* .................23 -24
• 2 Disc System, Inser t Disc
• Selecting a Destination
• Set Home Location
Bluetooth®
h ands-Free ...............25 • Tutorial • Toll-Free
• Pair Phone Customer Ser vice
• Make a Call 80 0 - 430 - 0153
Smar t Star t Guide
•
Remove this checklist from
Smar t Star t Guide
• Personalization Features
(including all Auto Lock /Unlock
function settings, refer to your
Owner’s Manual)
Warrant y Information
Warrant y Star t Date:
Customer Ini tial:
• Basic Vehicle –
36 months/36,000 miles
• Roadside assistance program
MyMazda.com
•
Of fer to register customer on
MyMazda.com
Owner’s Manual
Floor Mat
•
Ensure floor mats are properly
hooked af ter cleaning
• Do not install two floor mats, one on
top of the other, on the driver side
S ERVICE DEPARTME nT
Introduce Ser vice Manager;
provide business cards
Review Ser vice and Par ts Depar tment
hours of operation
Explain free Full Circle
Ser vice Inspection
Schedule first maintenance ser vice
SALES CO nSULTA nT DATE CUSTOMER DATE
All items in the Customer Delivery Checklist have been reviewed with the customer and
the first maintenance appointment has been scheduled:
Signed copy must be placed in dealer jacket
280345_11a_Mazda_CX-9_SSG_081010.indd 28-298/10/10 2:08 PM