warning lights MAZDA MODEL CX-9 2020 (in English) User Guide
[x] Cancel search | Manufacturer: MAZDA, Model Year: 2020, Model line: MODEL CX-9, Model: MAZDA MODEL CX-9 2020Pages: 706
Page 125 of 706

(With the advanced keyless function)
A locked liftgate can also be opened while
the key is being carried.
Electric liftgate
opener
Operation from outside (To close)
Press the power liftgate close switch while
the liftgate is fully opened. The hazard
warning lights flash twice and the liftgate
closes automatically after the beep sound
is heard.
Power liftgate
close switch
NOTE
If the power liftgate switch/power liftgate
close switch is pressed or the electric
liftgate opener is operated while the
liftgate is opening/closing electrically, the
beep sound is heard and the liftgate stops.
Then, it reverses when any of the switches
are pressed again.
Hands-free liftgate*
When the hands-free liftgate sensor on the
center bottom of the rear bumper detects
foot movement (kick-activated liftgate),
the liftgate opens/closes automatically.
The liftgate can be opened/closed even
with both hands full, such as when
carrying baggage.
Operation conditions
Do the kicking motion with your foot
when all of the following conditions are
met while the vehicle is stopped.
(When ignition is switched OFF)
You are carrying the transmitter.
The hands-free liftgate is on.
(When ignition is switched ON)
You are carrying the transmitter.
The hands-free liftgate is on.
The selector lever is in the P position.
How to do the kicking motion
A: About 30 cm (12 in)
B: About 10 cm (3.9 in)
A
B
Before Driving
Doors and Locks
*Some models.3-25
CX-9_8HT8-EA-19I_Edition2_old 2019-9-24 13:14:55
Page 126 of 706

1. Stand at the position about 30 cm (12in) behind the center of the rear
bumper.
2. Move your foot to the position about 10 cm (3.9 in) from the center bottom
of the rear bumper.
3. Move your foot away from under the bumper within about 1 second after
moving it under the bumper.
When the kicking motion is done
correctly, the hazard warning lights flash 2
times, a beep sound is activated, and the
liftgate opens/closes automatically. Be
careful not to contact the liftgate.
If the kicking motion is done while the
liftgate is opening/closing automatically,
the liftgate will stop. If the kicking motion
is done again, the liftgate moves in the
direction opposite to the direction it was
moving before it stopped.
CAUTION
Do not do the kicking motion while
wearing footwear such as sandals, or
with your bare foot. If your foot contacts
the hot exhaust pipe, it could cause
serious burns.
Do not do the kicking motion while the
area where you are standing is unstable
such as a slope or icy road. Otherwise,
you could fall down, resulting in injury.
Do not paint the rear bumper or install
any add-on equipment to it. Otherwise,
the hands-free liftga te sensor may not
operate normally.
If you are carrying the transmitter
around the liftgate or there is another
person around the liftgate who is
carrying a transmitter, do not allow the
following to occur. Otherwise, the
hands-free liftgate sensor will operate
and the liftgate may open/close
unexpectedly resulting in an accident.
A person not carrying a transmitter
does the kicking motion.
While the liftgate is open, a person
sitting on the edge of the luggage
compartment swings his or her legs.
Installing/removing the body cover or
removing snow around the rear
bumper.
Picking up something which was
dropped under the rear bumper.
Spraying water on the rear bumper
using a high water pressure car
washer.
Pushing a shopping cart close to the
rear bumper.
A moving object such as an animal or
a ball approaches the rear bumper.
To prevent an unintended operation,
place the transmitter outside of its
operation range or turn off the
hands-free liftgate.
NOTE
The hands-free liftgate sensor detects in
a range of about 30 cm (12 in) on both
the left and right sides from the center of
the rear bumper.
Before Driving
Doors and Locks
3-26
CX-9_8HT8-EA-19I_Edition2_old 2019-9-24 13:14:55
Page 147 of 706

Theft-Deterrent System*
If the theft-deterrent system detects an
inappropriate entry into the vehicle, which
could result in the vehicle or its contents
being stolen, the alarm alerts the
surrounding area of an abnormality by
sounding the horn and flashing the hazard
warning lights.
The system will not function unless it's
properly armed. So when you leave the
vehicle, follow the arming procedure
correctly.
▼Operation
System triggering conditions
The horn sounds intermittently and the
hazard warning lights flash for about 30
seconds when the system is triggered by
any one of the following:
Unlocking a door with the auxiliary key,
door lock switch, or an inside door-lock
knob.
Forcing open a door, the hood or the
liftgate.
Opening the hood by operating the hood
release handle.
Switching the ignition ON without using
the push button start.
If the system is triggered again, the lights
and horn will activate until the driver's
door or the liftgate is unlocked with the
transmitter.
(With the advanced keyless function)
The lights and horn can also be
deactivated by pressing the request switch
on a door.
NOTE
The liftgate does not open while the
theft-deterrent system is operating.
For vehicles equipped with the power
liftgate, the liftgate can be opened even
while the theft-deterrent system is
operating by pressing the power liftgate
button on the transmitter or the electric
liftgate opener switch while carrying the
key.
If the battery goes dead while the
theft-deterrent system is armed, the horn
will activate and the hazard warning
lights will flash when the battery is
charged or replaced.
▼ How to Arm the System
1. Close the windows and the moonroof*
securely.
2. Switch the ignition OFF.
3. Make sure the hood, the doors, and the
liftgate are closed.
4. Press the lock butt on on the transmitter
or lock the driver's door from the
outside with the auxiliary key.
The hazard warning lights will flash
once.
The following method will also arm
the theft-deterrent system:
Press the door-lock switch “
” while
any door is open and then close all of
the doors.
(With the advanced keyless function)
Press a request switch.
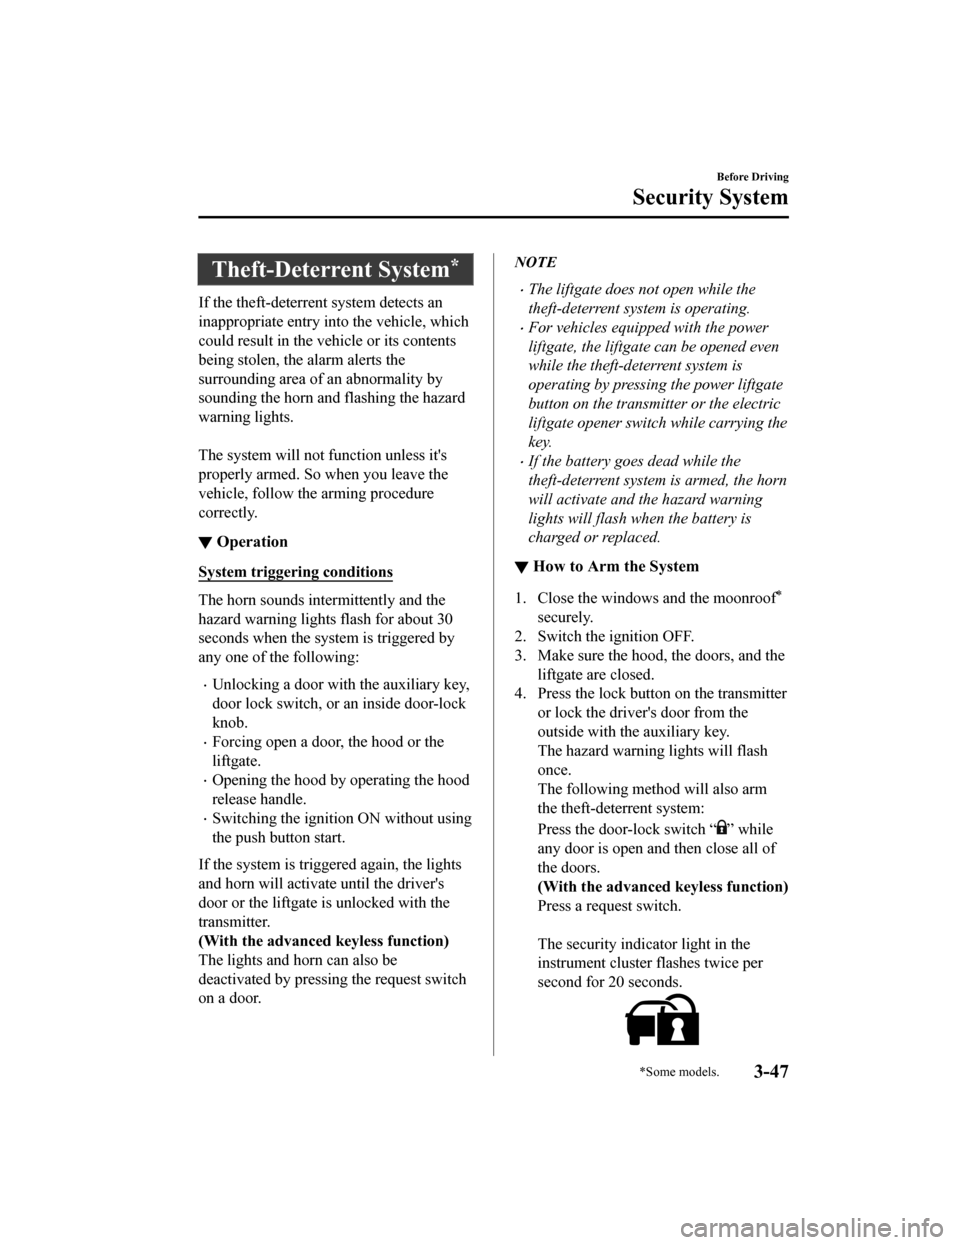
The security indicator light in the
instrument cluster flashes twice per
second for 20 seconds.
Before Driving
Security System
*Some models.3-47
CX-9_8HT8-EA-19I_Edition2_old 2019-9-24 13:14:55
Page 148 of 706

5. After 20 seconds, the system is fullyarmed.
NOTE
The theft-deterrent system can also be
armed by activating the auto relock
function with all the doors, the liftgate
and the hood closed.
Refer to Transmitter on page 3-5.
The system will disarm if one of the
following operations takes place within
20 seconds after pressing the lock
button:
Unlocking any door.
Opening any door.
Opening the hood.
Switching the ignition ON.
To rearm the system, do the arming
procedure again.
When the doors are locked by pressing
the lock button on the transmitter or
using the auxiliary key while the
theft-deterrent system is armed, the
hazard warning lights will flash once to
indicate that the system is armed.
▼ To Tu r n O f f a n A r m e d S y s t e m
An armed system can be turned off using
any one of the following methods:
Pressing the unlock button on the
transmitter.
Starting the engine with the push button
start.
(With the advanced keyless function)
Pressing a request switch on the
doors.
The hazard warning lights will flash twice.
NOTE
When the doors are unlocked by pressing
the unlock button on the transmitter while
the theft-deterrent system is turned off, the
hazard warning lights will flash twice to
indicate that the system is turned off.
▼ To Stop the Alarm
A triggered alarm can be turned off using
any one of the following methods:
Pressing the unlock button on the
transmitter.
Starting the engine with the push button
start.
(With the advanced keyless function)
Pressing a request switch on the
doors.
Pressing the electric liftgate opener
while the key is being carried.
Pressing the power liftgate button on
the transmitter.
The hazard warning lights will flash twice.
Before Driving
Security System
3-48
CX-9_8HT8-EA-19I_Edition2_old 2019-9-24 13:14:55
Page 167 of 706

4When Driving
Information concerning safe driving and stopping.
Start/Stop Engine.............................. 4-4 Ignition Switch........ ..................... 4-4
Starting the Engine....................... 4-6
Turning the Engine Off...............4-10
Instrument Cluster and Display ............
........................................................... 4-12 Instrument Cluster and
Display........................................4-12
Instrument Cluster (Type A)....... 4-13
Instrument Cluster (Type B)....... 4-30
Instrument Cluster (Type C)....... 4-45
Active Driving Display
*............. 4-56
Automatic Transaxle....................... 4-59 Automatic Transaxle
Controls...................................... 4-59
Shift-Lock System...................... 4-60
Transaxle Ranges........................4-60
Manual Shift Mode..................... 4-62
Driving Tips................................4-67
Switches and Controls..................... 4-68
Lighting Control......................... 4-68
Fog Lights
*................................. 4-73
Turn and Lane-Change
Signals........................................ 4-73
Windshield Wipers and
Washer........................................ 4-74
Rear Window Wiper and
Washer........................................ 4-78
Rear Window Defogg er.............. 4-78
Horn............................................ 4-80
Hazard Warning Flasher............. 4-80
HomeLink Wireless Control System
(Type A)
*.................................... 4-81
HomeLink Wireless Control System
(Type B)...................................... 4-84
Brake................................................ 4-89 Brake System.............................. 4-89
AUTOHOLD.............................. 4-93
Hill Launch Assist (HLA).......... 4-97
ABS/TCS/DSC/Trailer Stability
Control (TSC)/Off-Road Traction
Assist................................................. 4-99 Antilock Brake System
(ABS)..........................................4-99
Traction Control System
(TCS)........................................ 4-100
Dynamic Stability Control
(DSC)........................................4-102
Trailer Stability Control
(TSC)........................................ 4-103
Off-Road Traction Assist
*........ 4-104
*Some models.4-1
CX-9_8HT8-EA-19I_Edition2_old 2019-9-24 13:14:55
Page 170 of 706

Ignition Switch
▼Push Button Start Positions
The system operates only when the key is
within operational range.
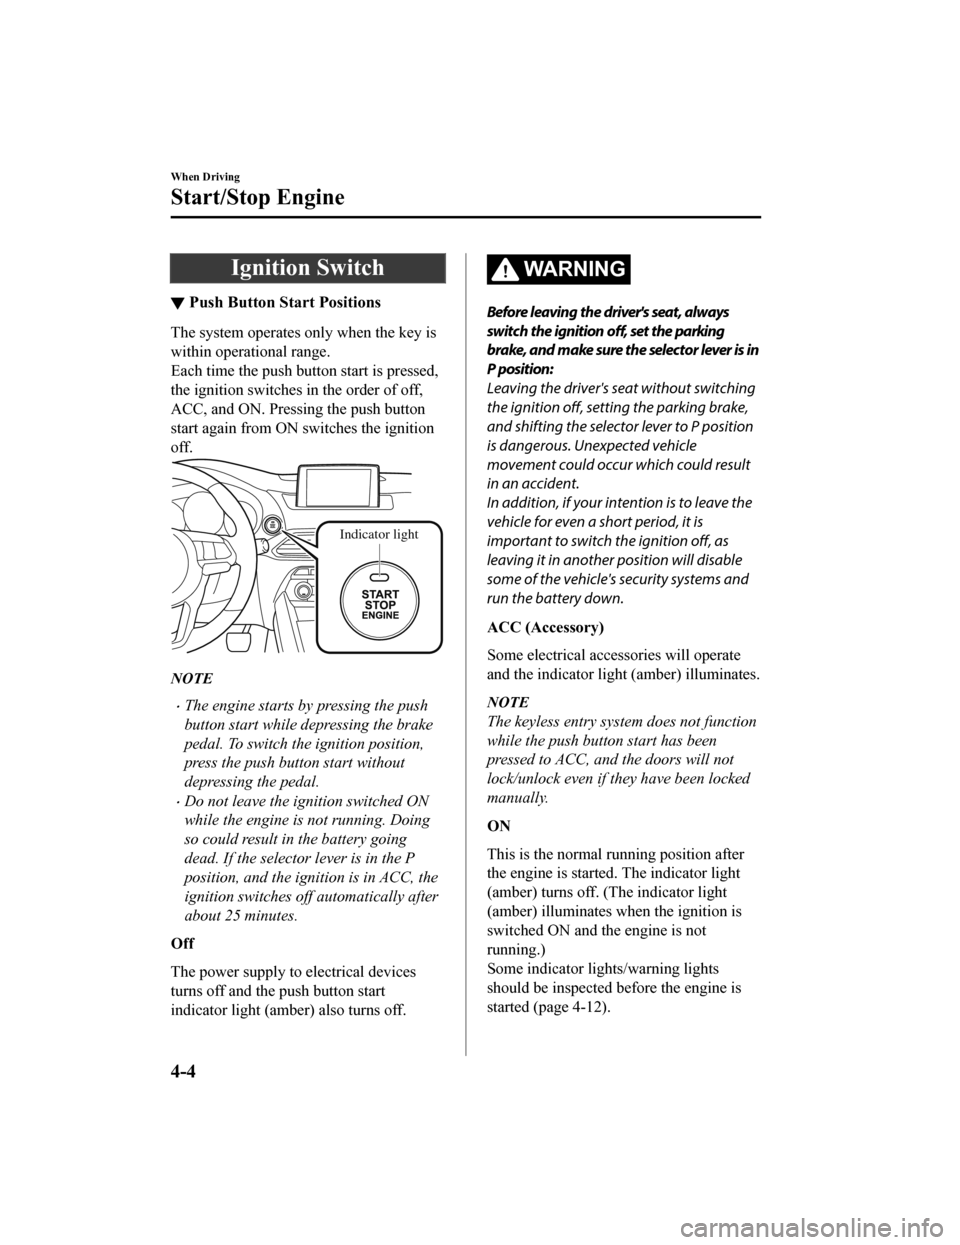
Each time the push button start is pressed,
the ignition switches in the order of off,
ACC, and ON. Pressing the push button
start again from ON switches the ignition
off.
Indicator light
NOTE
The engine starts by pressing the push
button start while depressing the brake
pedal. To switch the ignition position,
press the push button start without
depressing the pedal.
Do not leave the ignition switched ON
while the engine is not running. Doing
so could result in the battery going
dead. If the selector lever is in the P
position, and the ignition is in ACC, the
ignition switches off automatically after
about 25 minutes.
Off
The power supply to electrical devices
turns off and the push button start
indicator light (amber) also turns off.
WA R N I N G
Before leaving the driver's seat, always
switch the ignition off, set the parking
brake, and make sure the selector lever is in
P position:
Leaving the driver's seat without switching
the ignition off, setting the parking brake,
and shifting the selector lever to P position
is dangerous. Unexpected vehicle
movement could occur which could result
in an accident.
In addition, if your intention is to leave the
vehicle for even a short period, it is
important to switch the ignition off, as
leaving it in another position will disable
some of the vehicle's security systems and
run the battery down.
ACC (Accessory)
Some electrical accessories will operate
and the indicator light (amber) illuminates.
NOTE
The keyless entry system does not function
while the push button start has been
pressed to ACC, and the doors will not
lock/unlock even if they have been locked
manually.
ON
This is the normal running position after
the engine is started. The indicator light
(amber) turns off. (The indicator light
(amber) illuminates wh en the ignition is
switched ON and the engine is not
running.)
Some indicator lights/warning lights
should be inspected before the engine is
started (page 4-12).
When Driving
Start/Stop Engine
4-4
CX-9_8HT8-EA-19I_Edition2_old 2019-9-24 13:14:55
Page 189 of 706

DisplayDirection
NN orth
S South
EE ast
WW est
NE Northeast
NW Northwest
SE Southeast
SW Southwest
▼Message Display
A message such as the system operation
status, a malfunction, or an abnormality is
indicated.
Warning/indicator light in instrument
cluster turns on/flashes or symbol is
indicated on display at same time as
message
Check the information regarding the
warning/indicator light or indicated
symbol.
Refer to If a Warning Indication/Warning
Lights on page 4-24.
Refer to If a Indication/Indicator Lights on
page 4-26.
Message only is i
ndicated on display
Follow the instructio ns indicated on the
display. For the display content, refer to
the next page.
Refer to If a Message Indicated on
Multi-information Display on page 7-45.
When Driving
Instrument Cluster and Display
4-23
CX-9_8HT8-EA-19I_Edition2_old 2019-9-24 13:14:55
Page 190 of 706

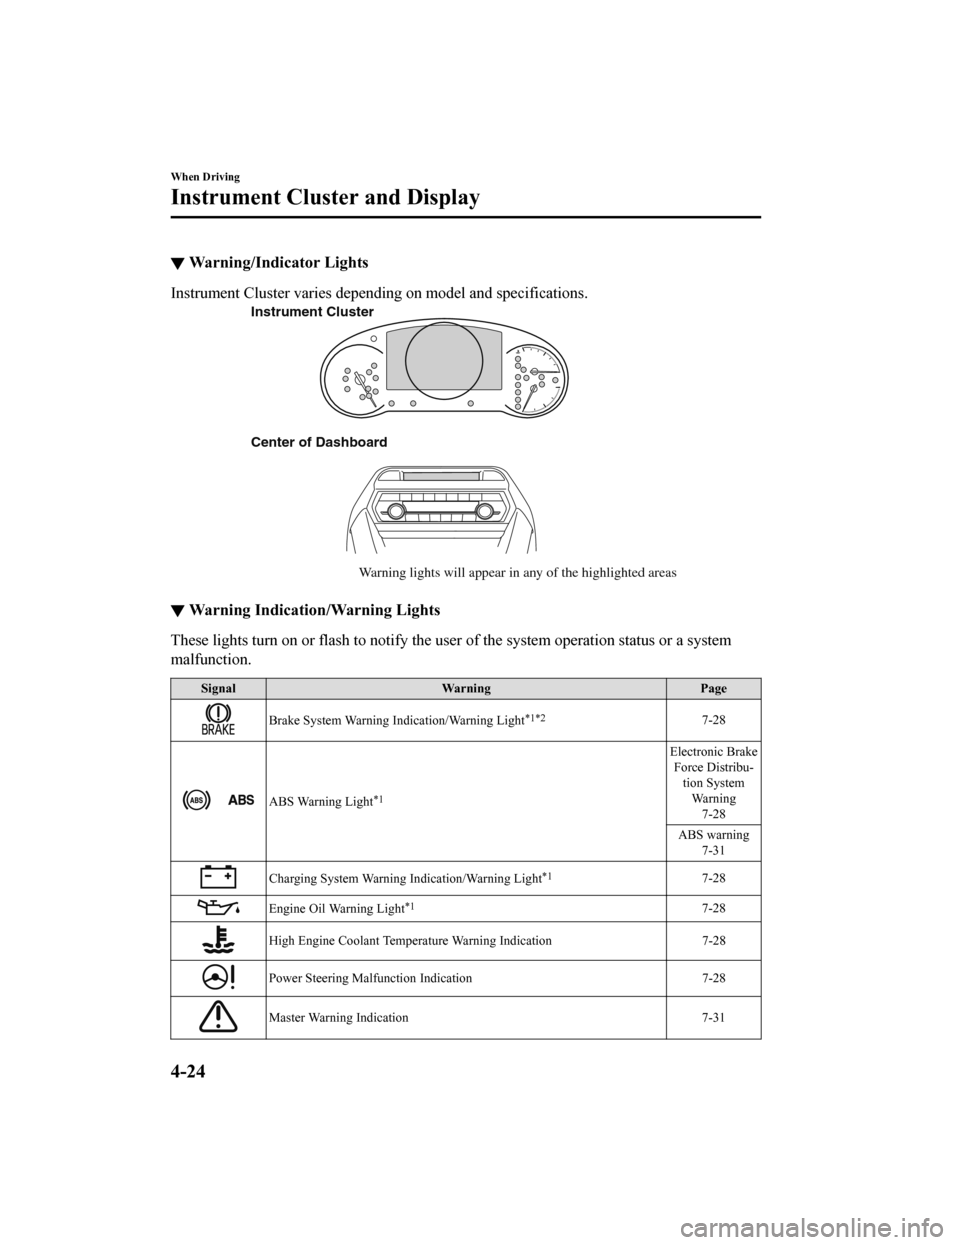
▼Warning/Indicator Lights
Instrument Cluster varies depending on model and specifications.
Center of Dashboard
Warning lights will appear in any of the highlighted areas
Instrument Cluster
▼
Warning Indication/Warning Lights
These lights turn on or flash to notify the user of the system operation status or a system
malfunction.
Signal
Warning Page
Brake System Warning Indication/Warning Light*1*27-28
ABS Warning Light*1
Electronic Brake
Force Distribu- tion SystemWa r n i n g 7-28
ABS warning 7-31
Charging System Warning Indication/Warning Light*17-28
Engine Oil Warning Light*17-28
High Engine Coolant Temperature Warning Indication 7-28
Power Steering Malfunction Indication 7-28
Master Warning Indication7-31
When Driving
Instrument Cluster and Display
4-24
CX-9_8HT8-EA-19I_Edition2_old 2019-9-24 13:14:55
Page 192 of 706

SignalWarning Page
(Red)Seat Belt Warning Light (Rear seat)
7-37
*Low Washer Fluid Level Warning Indication7-37
Door-Ajar Warning Indication
7-37
Liftgate-Ajar Warning Indication 7-37
Door-Ajar Warning Light7-37
*1 The light turns on when the ignition is switched on for an operation check, and turns off a few seconds later or
when the engine is started. If the light does not turn on or remains turned on, have the vehicle inspected at an
Authorized Mazda Dealer.
*2 The light turns on continuously when the parking brake is applied.
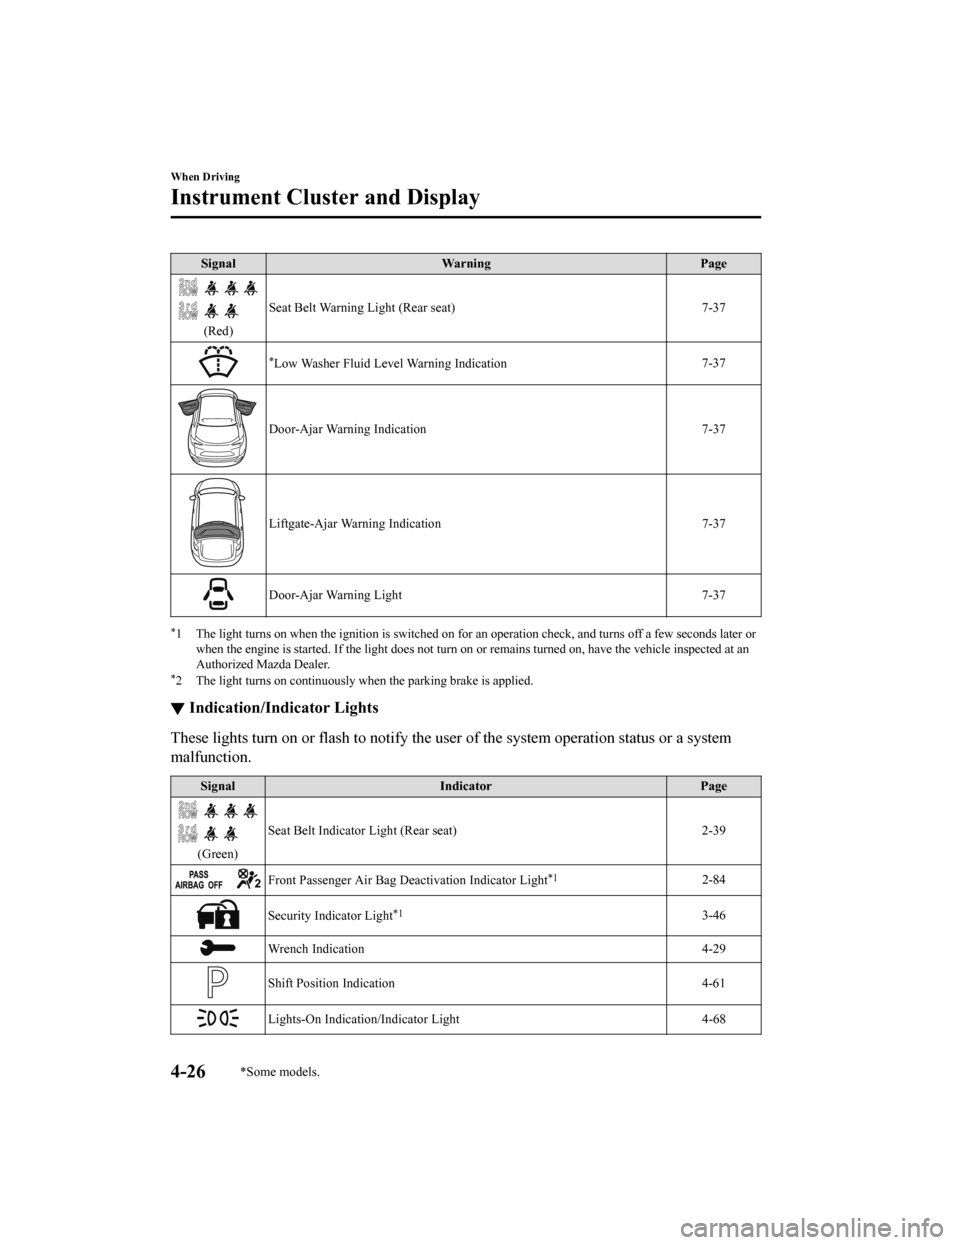
▼ Indication/Indicator Lights
These lights turn on or flash to notify the user of the system operation status or a system
malfunction.
Signal
Indicator Page
(Green)Seat Belt Indicator Light (Rear seat)
2-39
Front Passenger Air Bag Deactivation Indicator Light*12-84
Security Indicator Light*13-46
Wrench Indication 4-29
Shift Position Indication 4-61
Lights-On Indication/Indicator Light 4-68
When Driving
Instrument Cluster and Display
4-26*Some models.
CX-9_8HT8-EA-19I_Edition2_old 2019-9-24 13:14:55
Page 193 of 706

SignalIndicator Page
Headlight High-Beam Indicator Light Headlight
High-Low Beam 4-71
Flashing the Headlights 4-71
Turn Signal/Hazard Warning Indicator Lights Turn and
Lane-Change Signals4-73
Hazard Warning Flasher4-80
AUTOHOLD Active Indicator Light*14-95
*Mazda Radar Cruise Control with Stop & Go function (MRCC with Stop
& Go function) indicator Light*14-152
TCS/DSC Indicator Light*1
Traction Control System (TCS) 4-100
Dynamic Stabil- ity Control(DSC)4-102
Turns on 7-31
TCS OFF Indicator Light (FWD) *14-101
Off-Road Traction Assist Indicator Light (AWD) *14-104
Select Mode Indication 4-109
(Green)High Beam Control System
(HBC) Indicator Light 4-119
When Driving
Instrument Cluster and Display
*Some models.4-27
CX-9_8HT8-EA-19I_Edition2_old 2019-9-24 13:14:55